With Geo-restrictions you can restrict access to your content based on the viewer’s country.
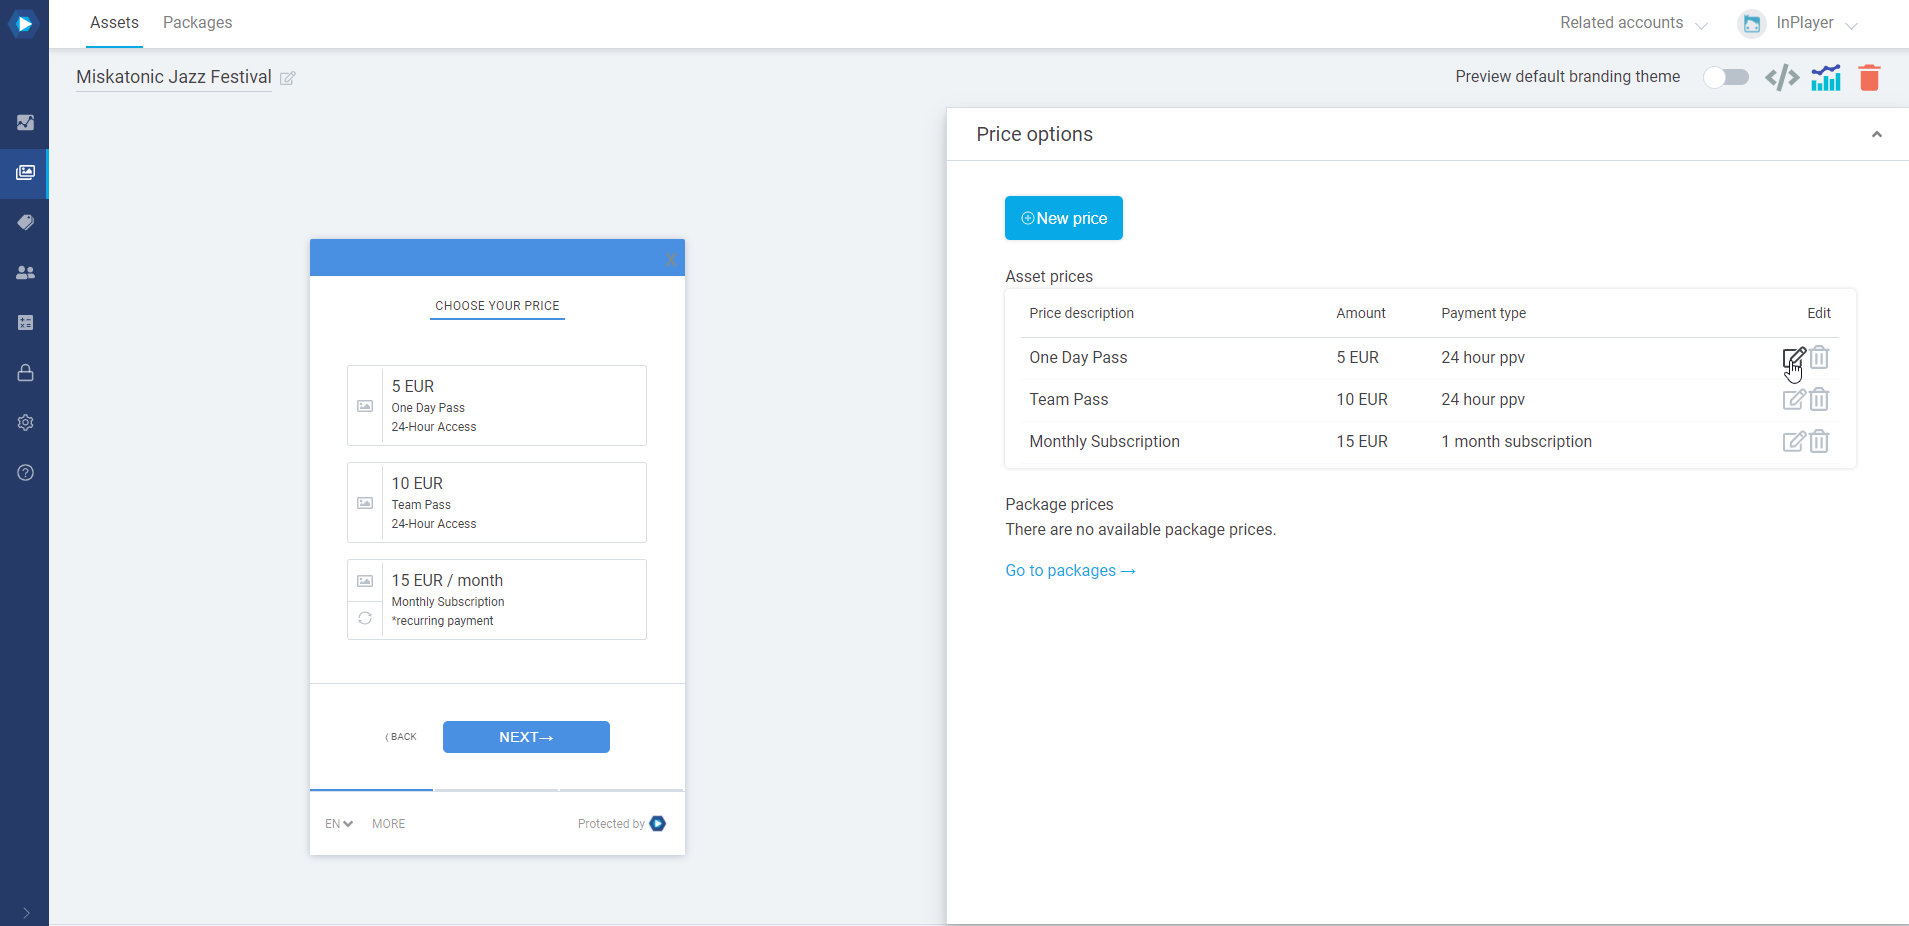
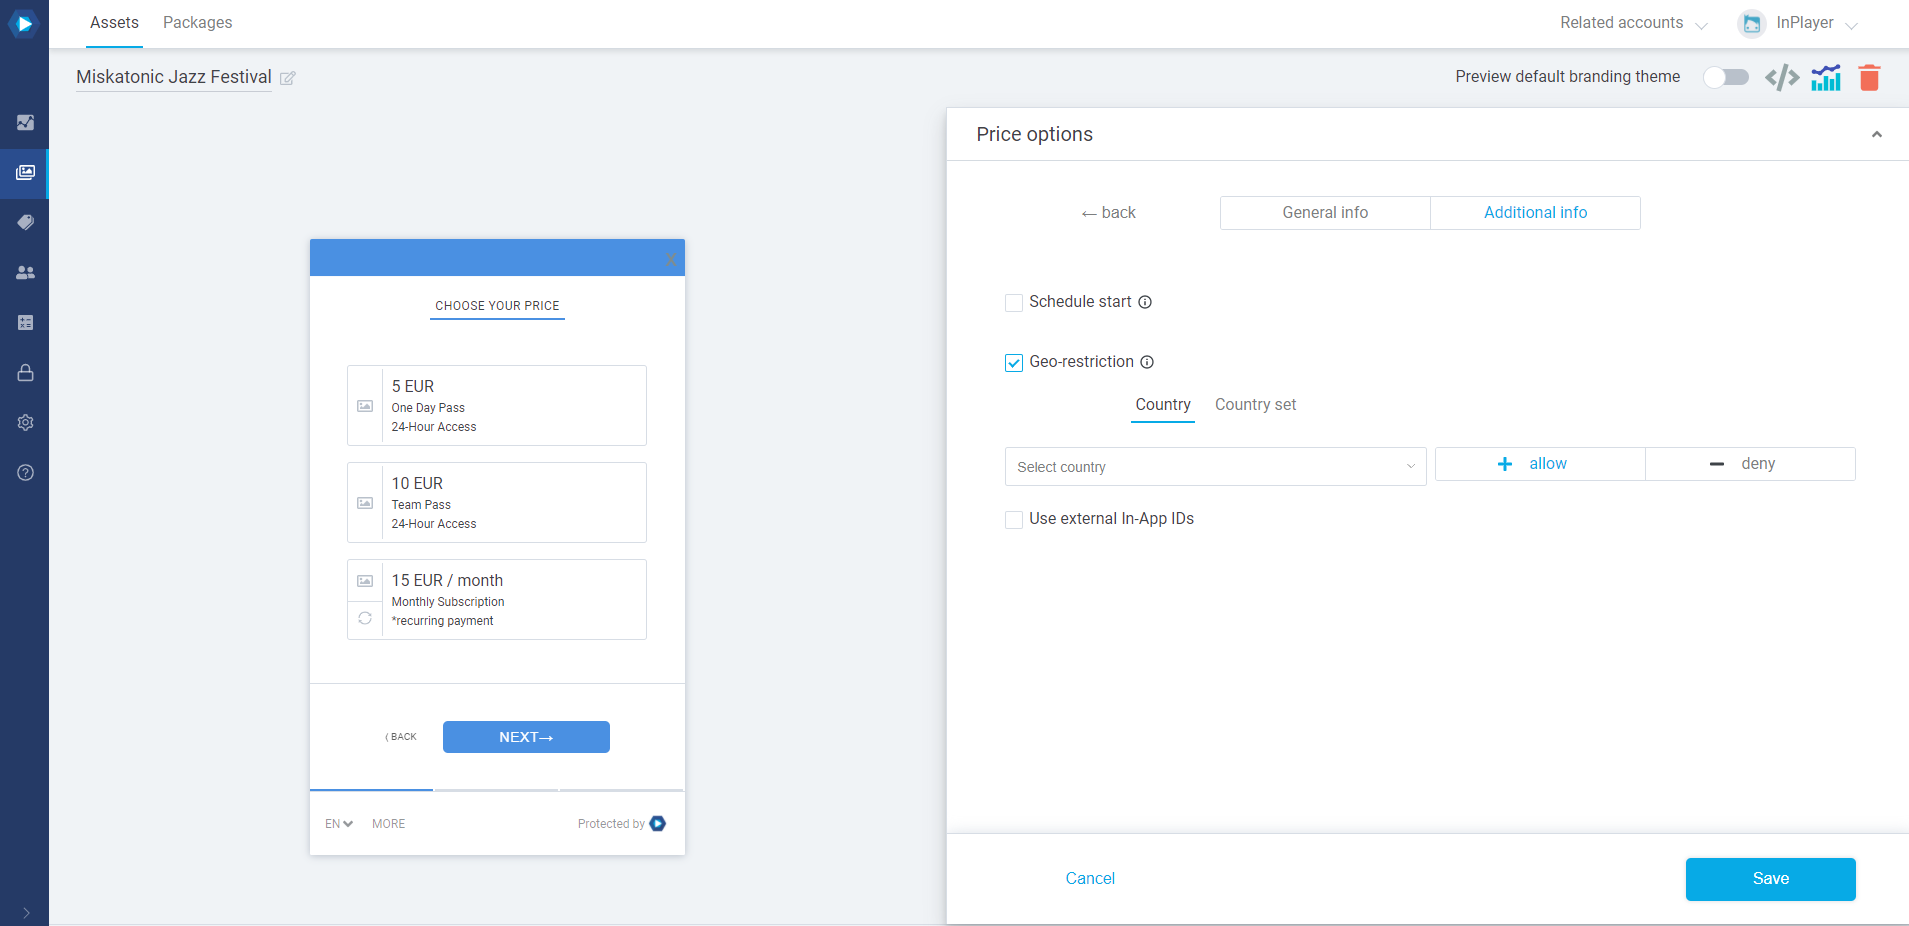
You can either set it up as a default restriction that will affect your entire content, or an asset-specific restriction, which affects a single asset. Note that the asset-specific restrictions will always override the default restrictions. In addition, you can also set up geo-restrictions for individual asset prices, making them available in certain countries.
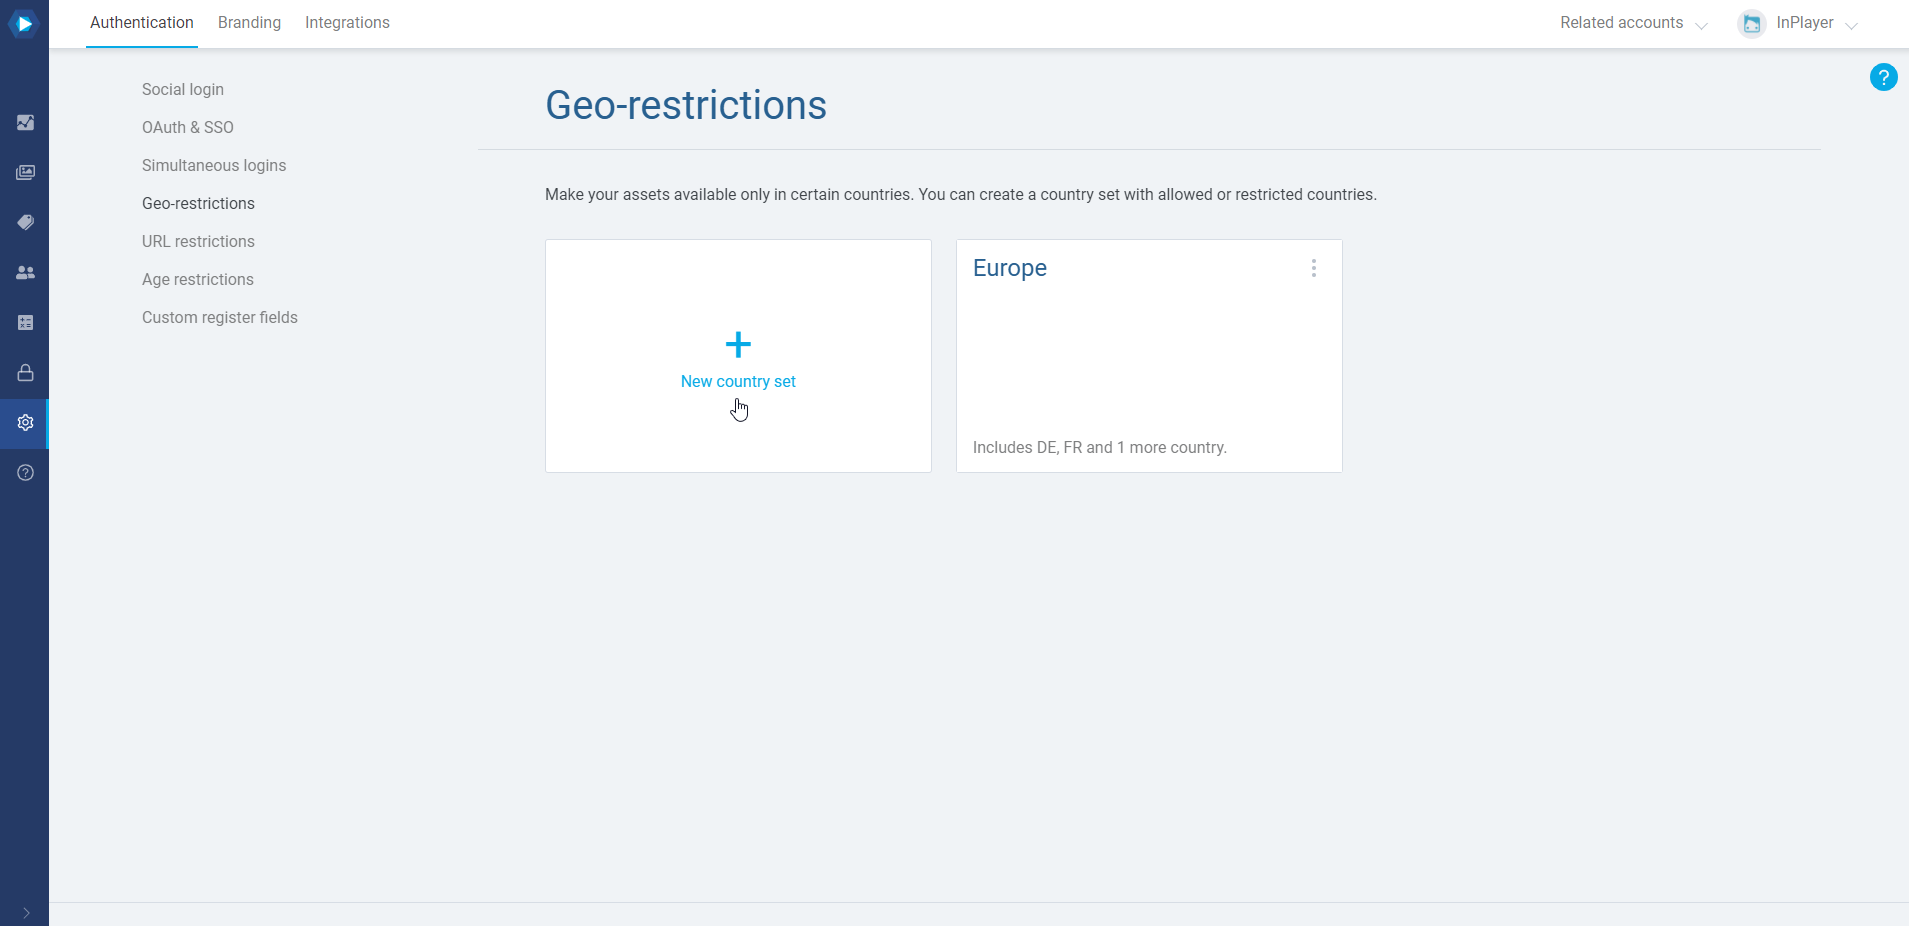
You will find the Geo-restrictions feature in the Authentication tab of the Dashboard settings.
To restrict the content, you first need to create a country set, which you can then use as the default geo-restriction set, or use it on a single asset only.
To create a new country set, click on New country set.
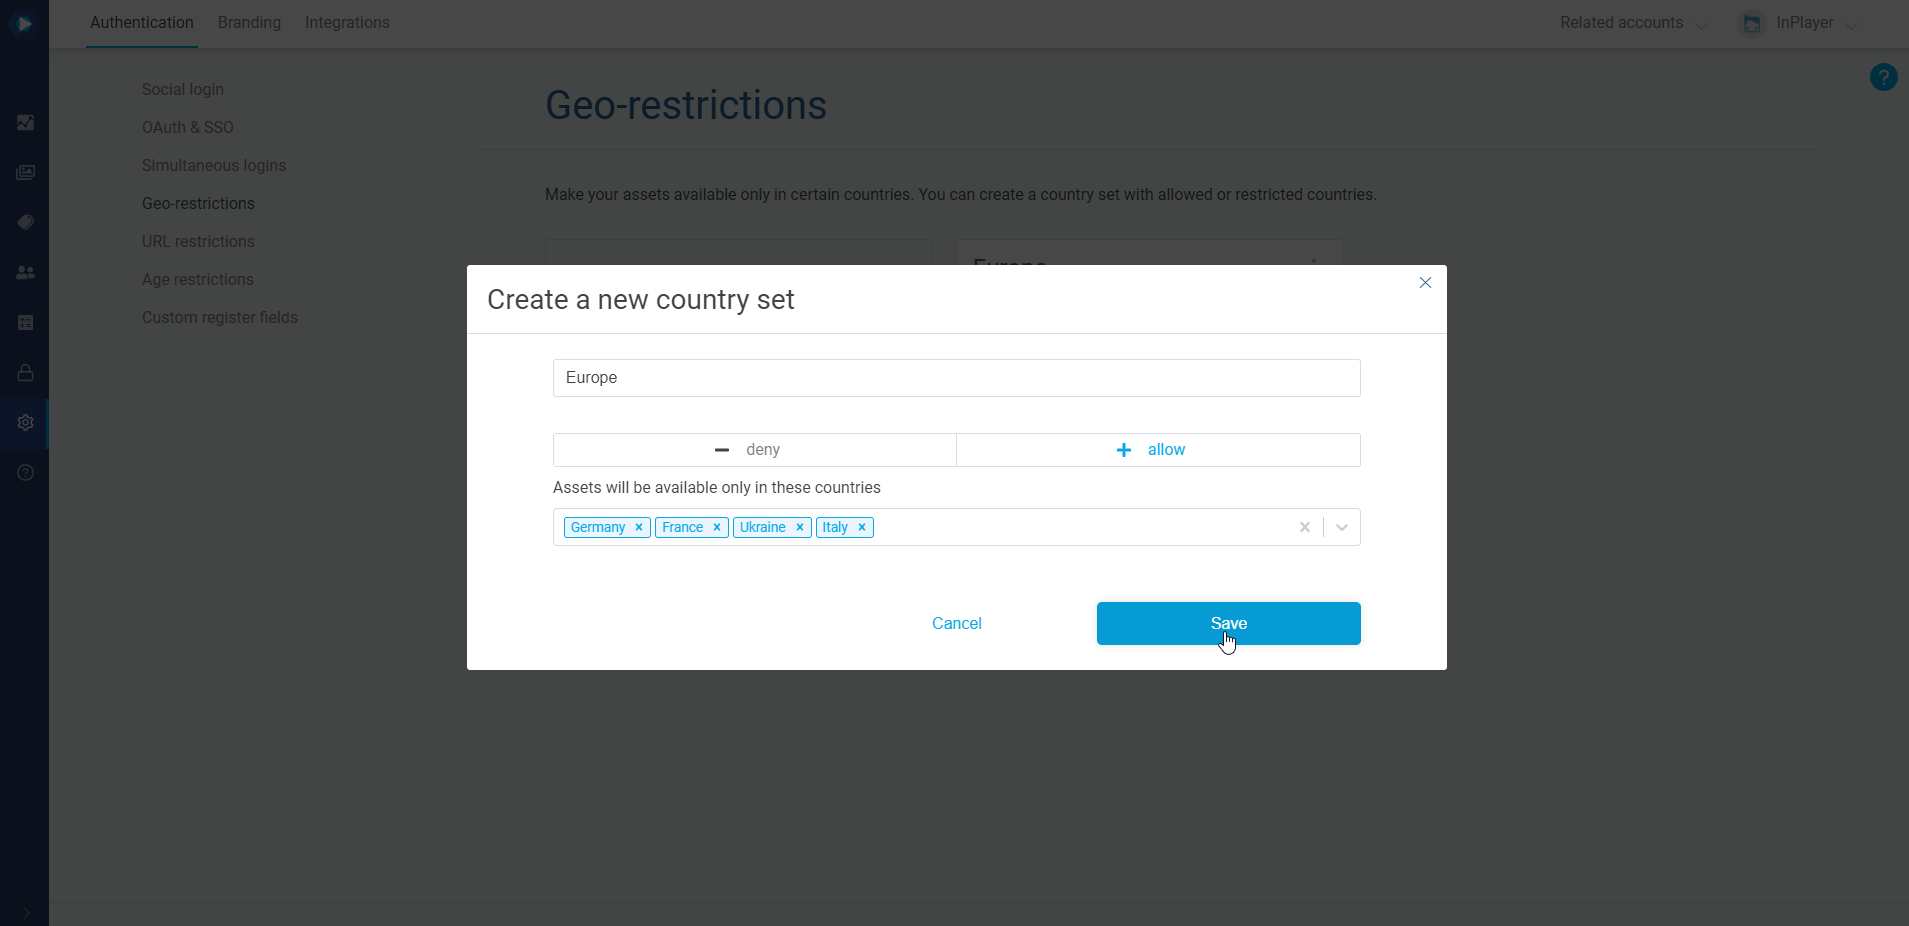
You can either allow a set of countries, thereby making the assets only available there, or deny a set of countries thereby making the asset available everywhere but there. Set everything up and click Save.
With Simultaneous logins, you can limit how many simultaneous logins your viewers can have when using a single account, thereby preventing the sharing of credentials.
Although the most common way to market this to viewers is as a “device limitation”, the limit is actually browser tab-based, meaning one browser tab counts as one log in. This means a viewer cannot surpass the limit even on a single device, and even on the same browser (by using multiple tabs.)
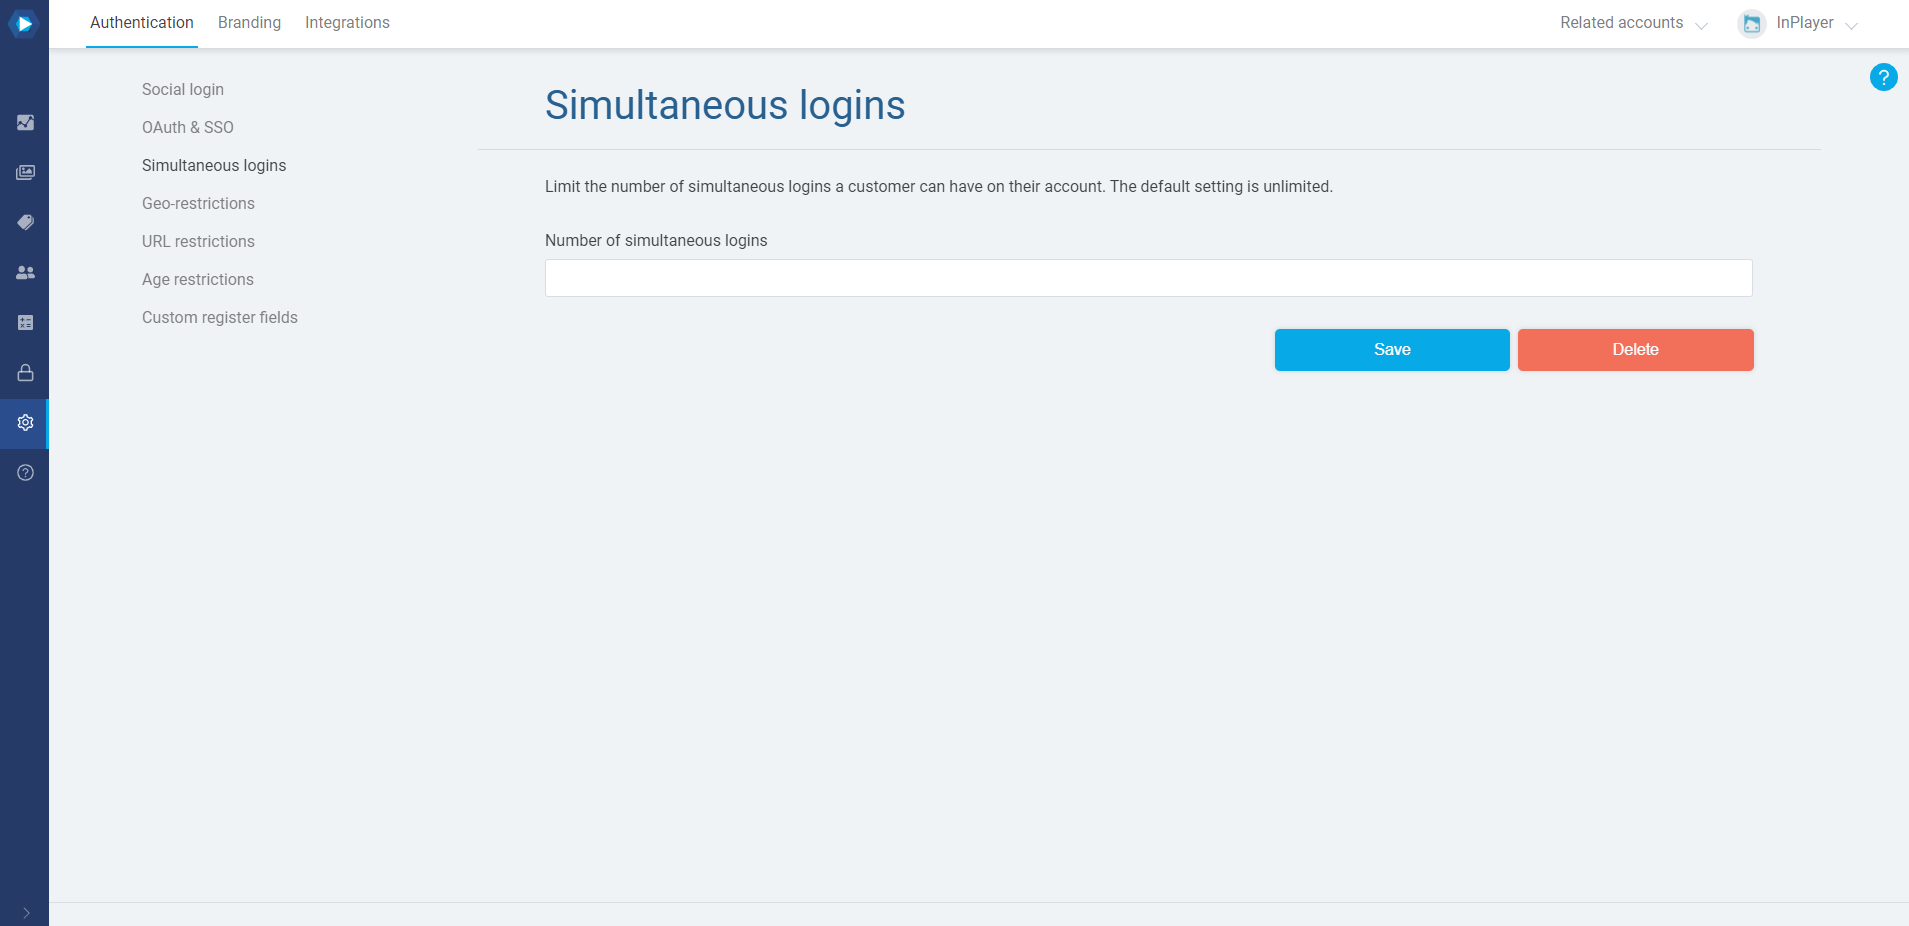
You will find the Simultaneous logins feature in the Authentication tab of the Dashboard settings.
To limit the logins, just enter the maximum number of active sessions in the field.
As soon as a viewer surpasses that number, they will be logged out of the first session they’ve logged into. The log out will happen immediately, without the need for the viewer to refresh their page.
The default setting is blank, which means there are no restrictions on the number of simultaneous logins.
Note that if you are using multiple OAuth apps, the concurrent session setting will work per single OAuth app.
This concludes our guide.
If you have any questions, don’t hesitate to contact us at clients@inplayer.com.
OAuth and SSO are two features of our platform that can be very useful if you have content across multiple domains.
With OAuth, you can group the viewers into separate user groups (called OAuth apps or applications), based on on which asset they have registered their account or made their purchase. This can be very useful when making reports because you will have an easy way of separating registrations and payments into groups (OAuth apps).
With SSO (Single-Sign-On), you can make it so whenever a viewer logs in to one of the websites you’ve specified, they will automatically be logged into the other websites as well, and will not have to log in again if they go there. This greatly streamlines the viewer experience.
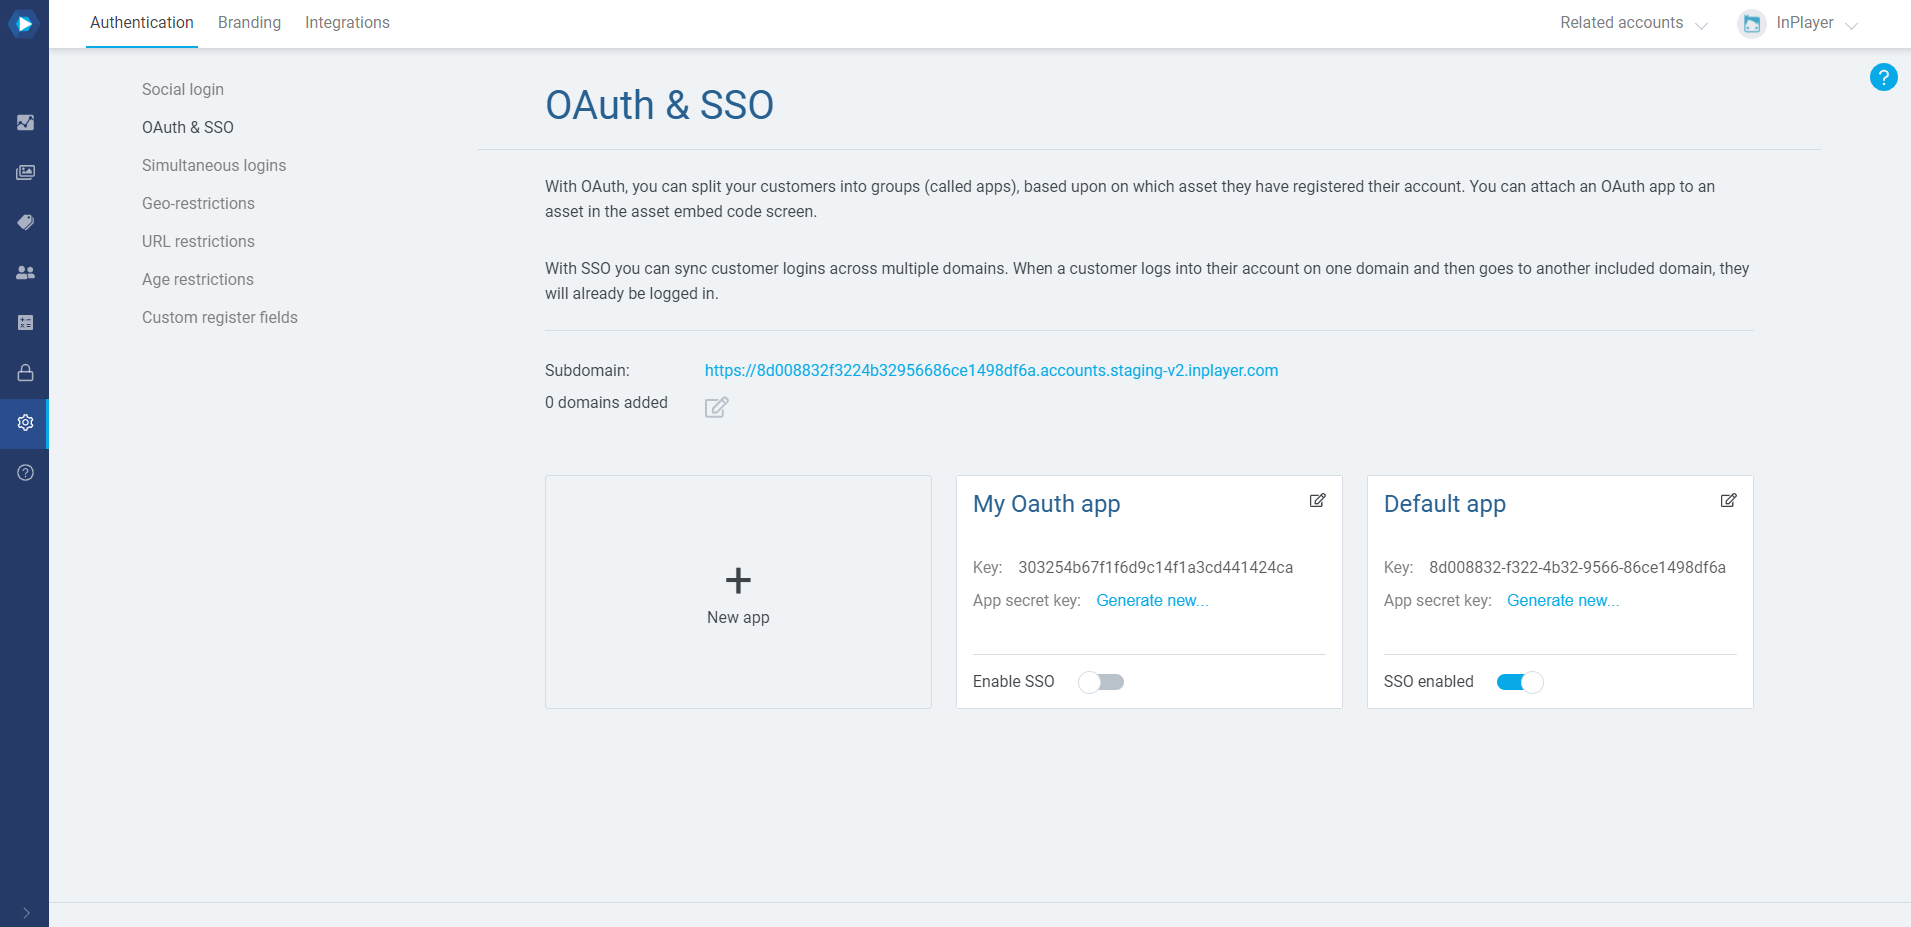
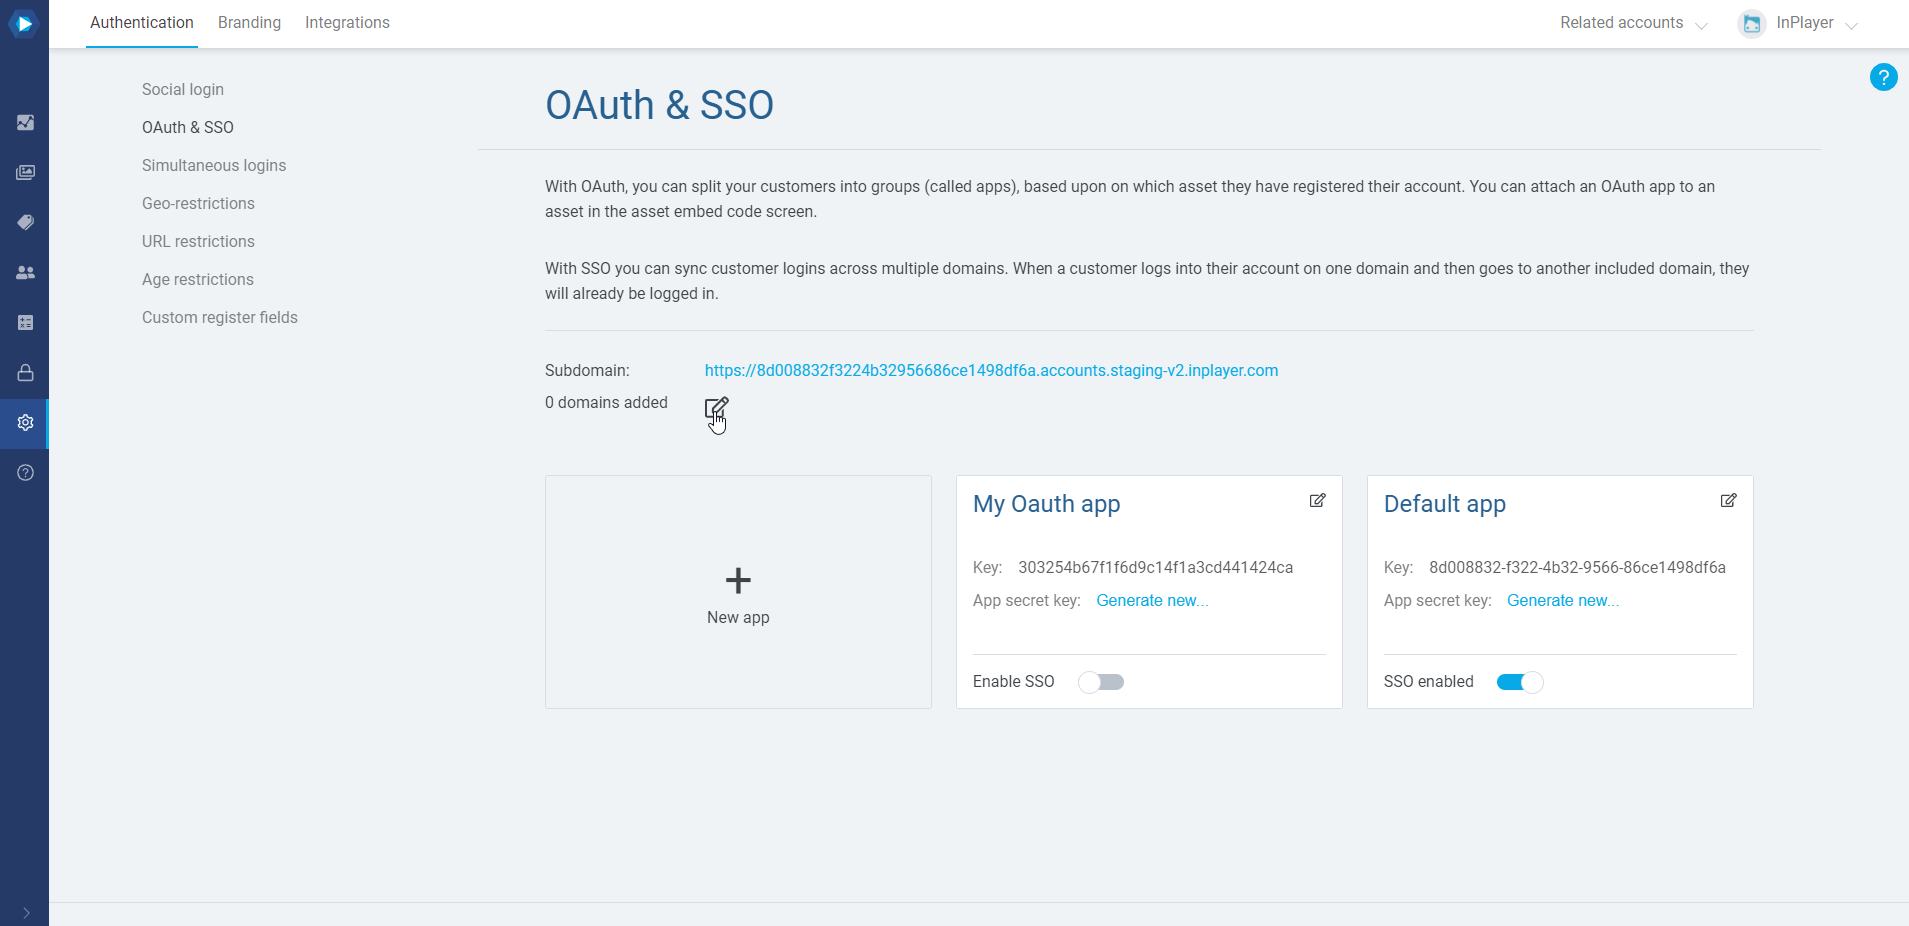
You will find the OAuth & SSO features in the Authentication tab of the Dashboard settings.
To use the OAuth feature, you first need to create the user groups into which your viewers will be divided. We call these user groups OAuth apps. You can then attach an OAuth app to each of your assets, so whenever a viewer registers an account on that asset, they would become a part of that user group.
You will notice that you already have one OAuth app, i.e. the Default app. This is the default group to which all the viewer registrations and login records will go to.
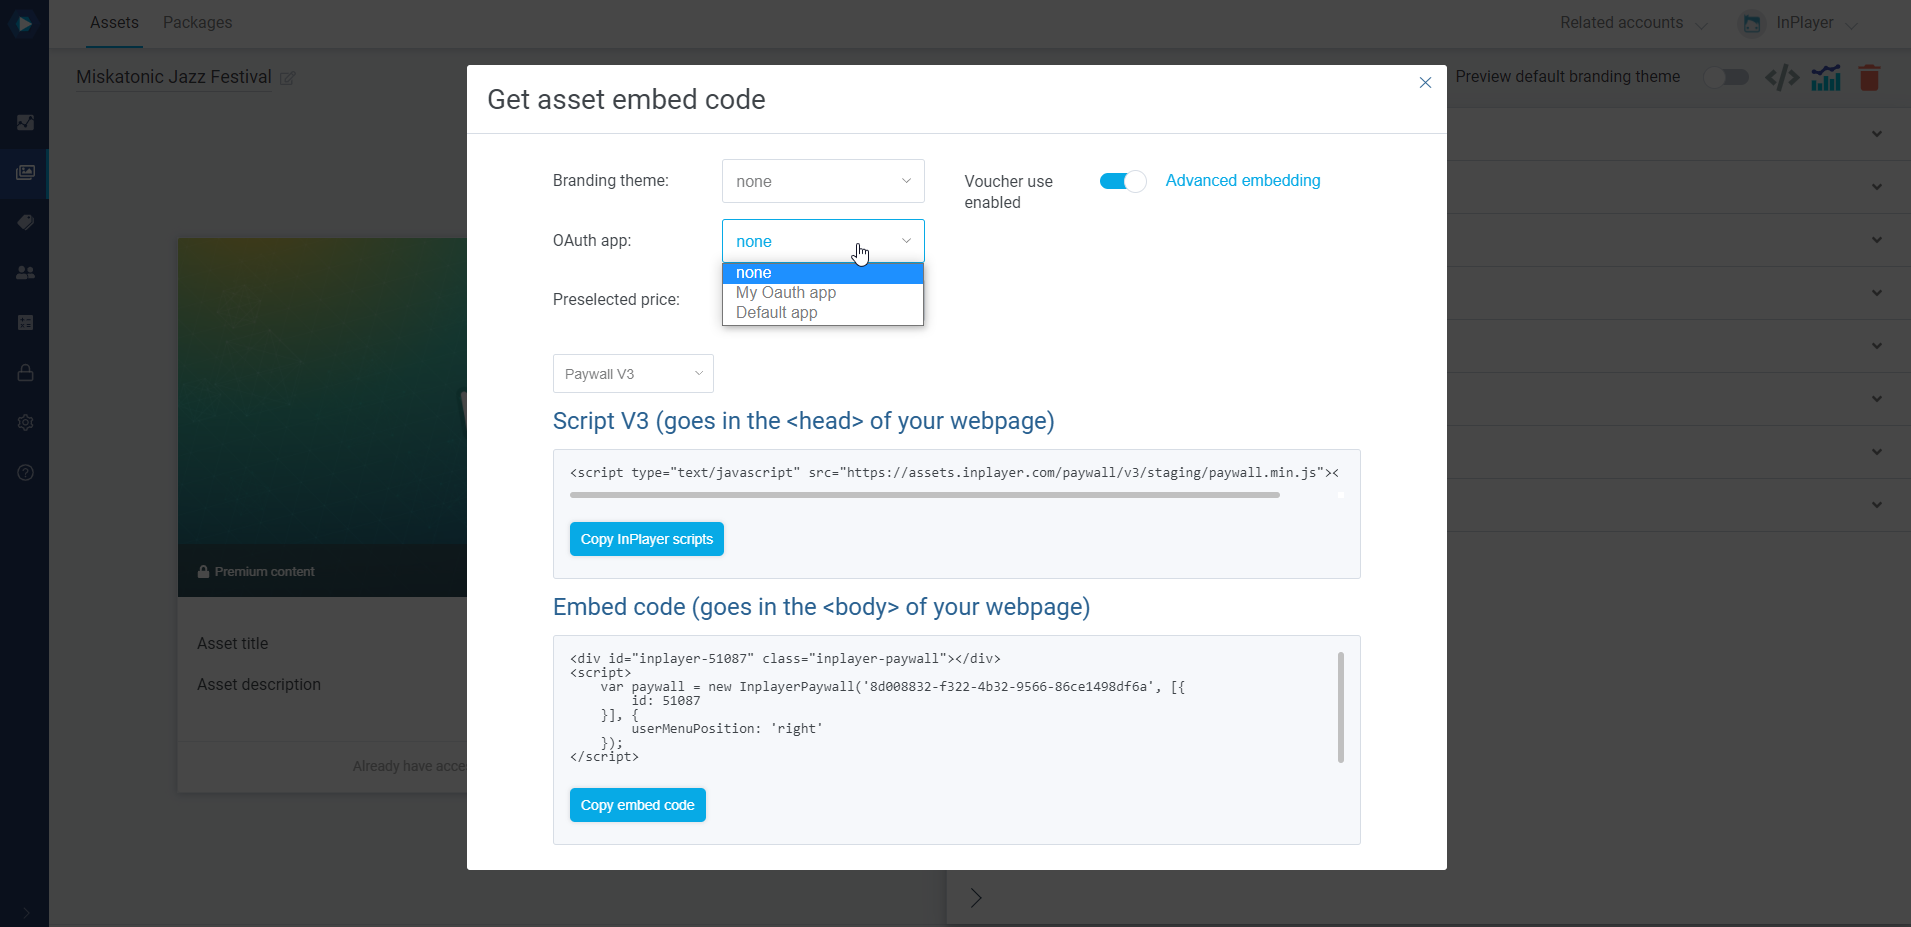
Using the OAuth feature is very simple. All you have to do is choose the OAuth app you want to use for an asset, while you are getting the embed code for that asset.
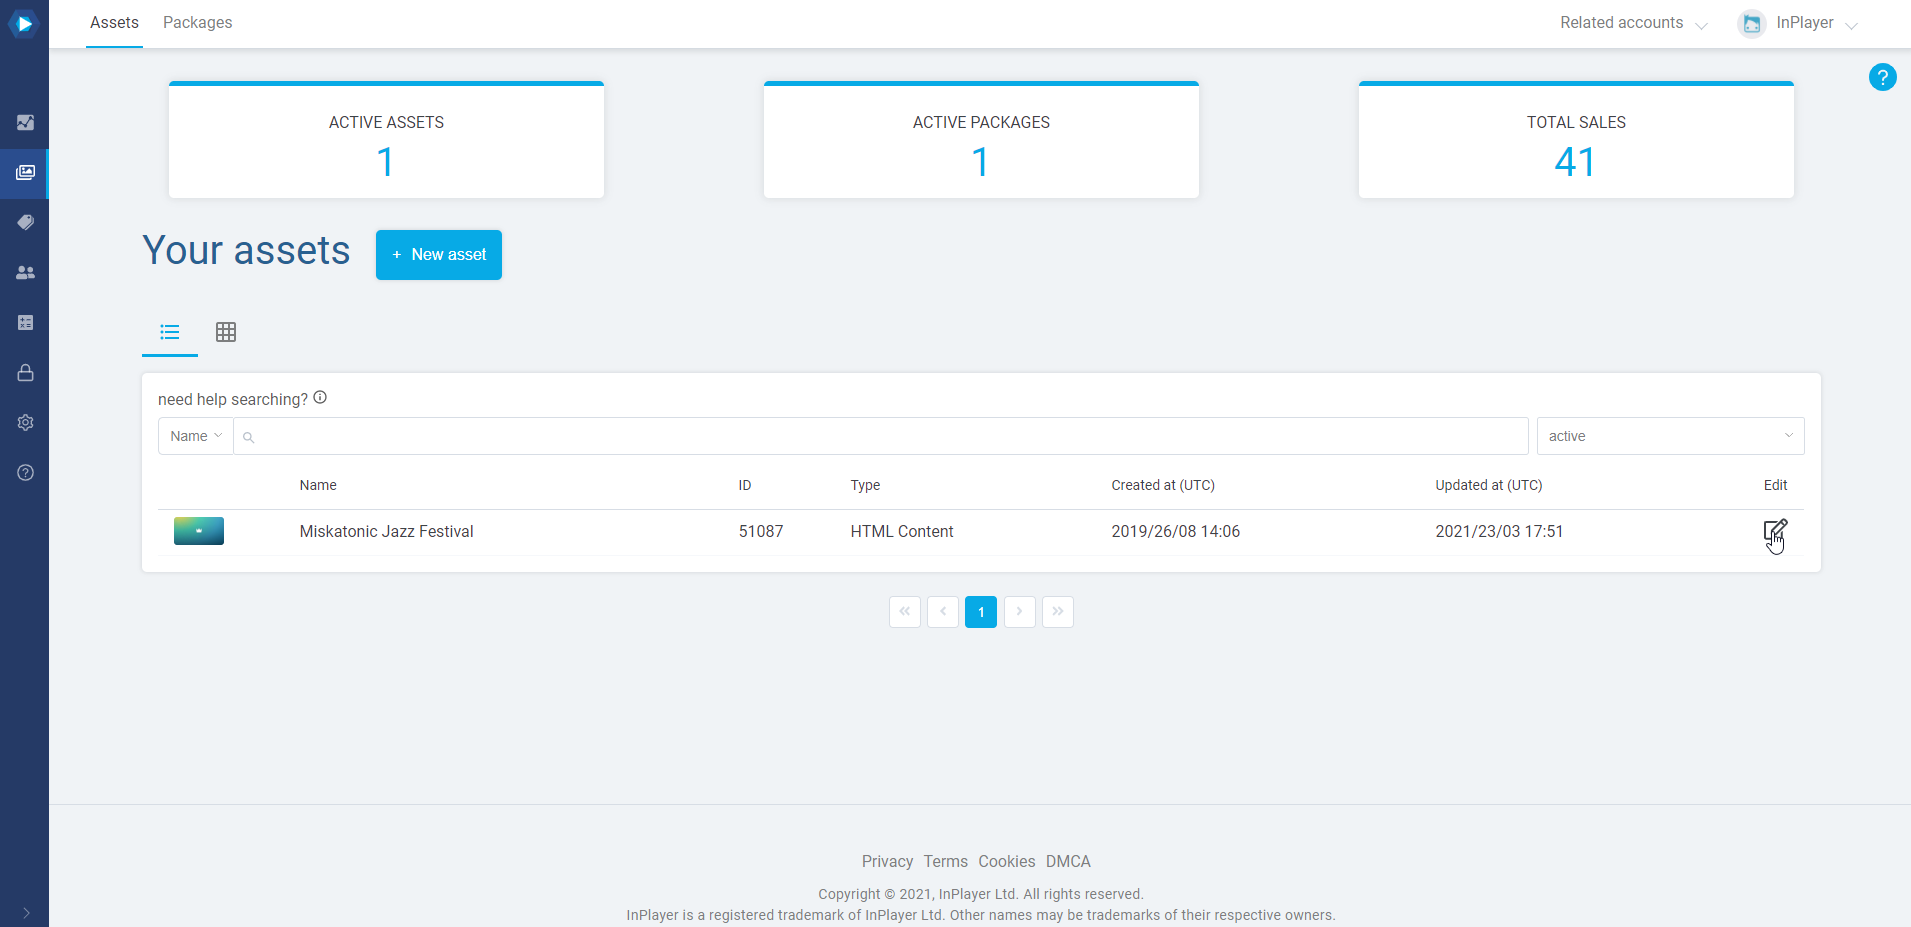
In the Assets tab of your InPlayer Dashboard, go to the asset to which you wish to attach an OAuth app, and open it by clicking .
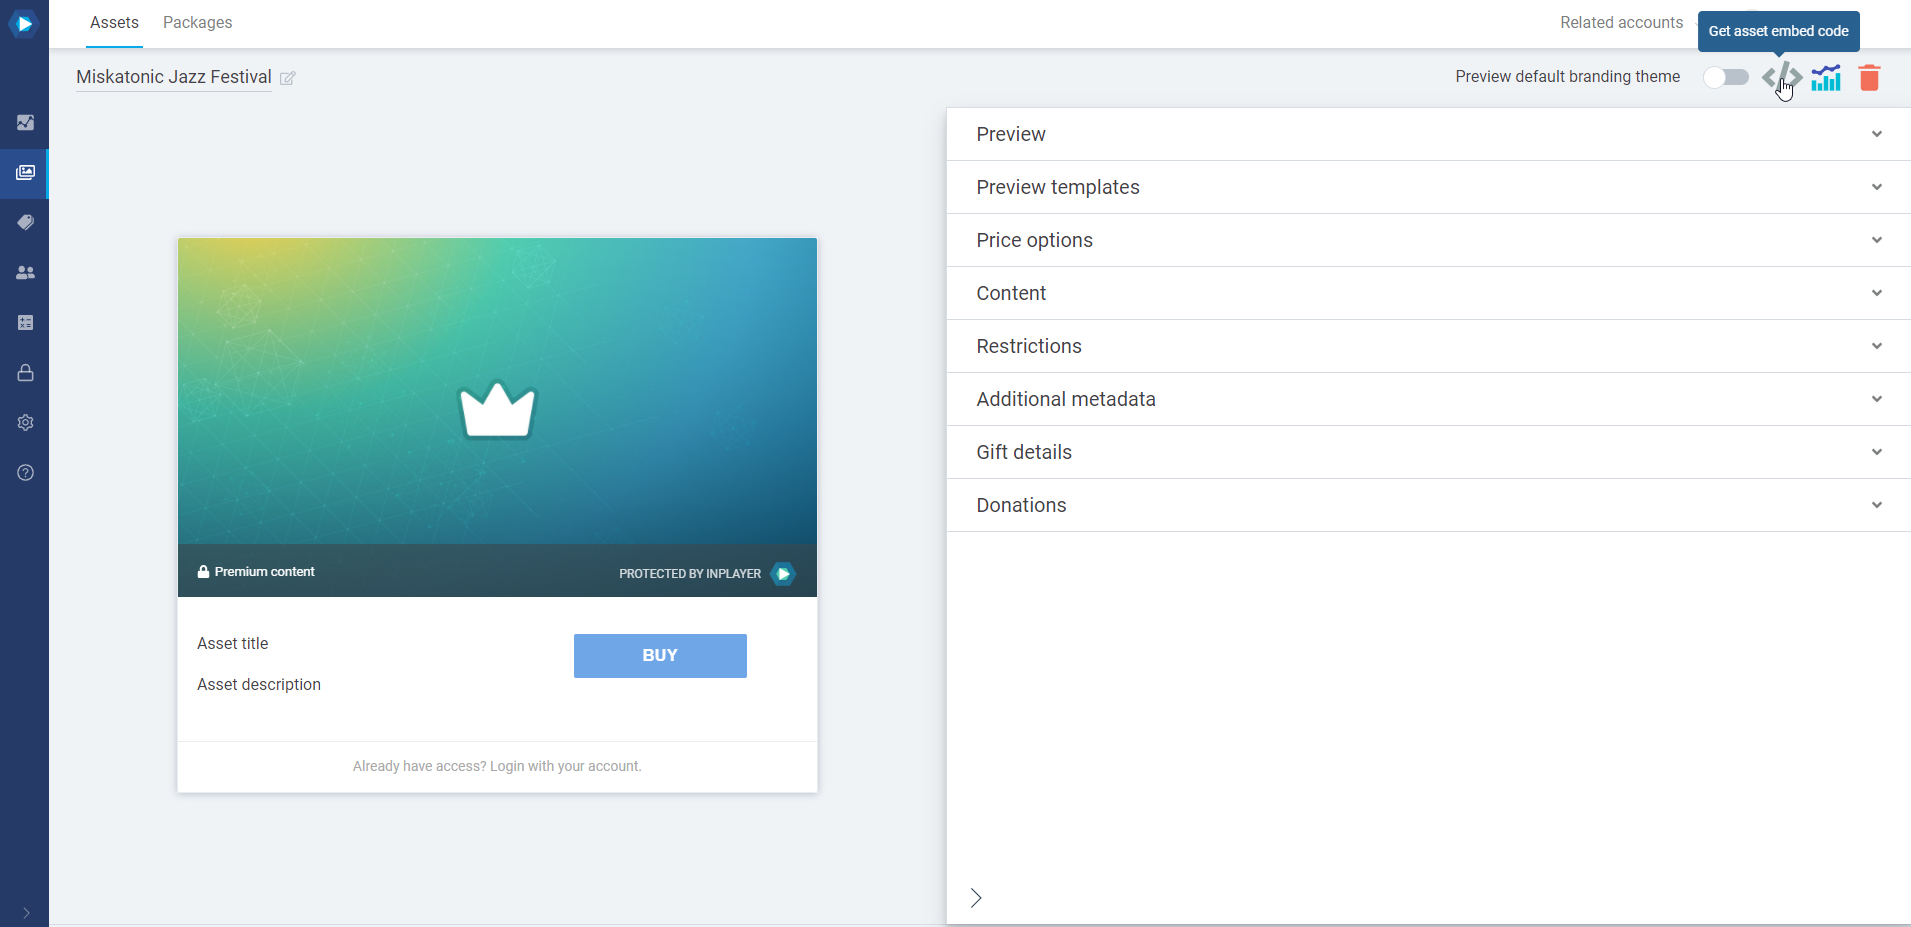
Click on the Get asset embed code button at the top right.
Select the OAuth app you wish to use.
Get the embed codes for the asset and put it up on your webpage like you normally would.
With that, every time a viewer registers their account on that asset, they will be grouped into the user group of the selected OAuth app.
The SSO works as an extension of the OAuth feature, which means you have to attach an OAuth group on an asset to be able to use the SSO for it as well.
Note that the SSO only works within the OAuth app that has been selected for that group of assets, and not with assets that have been set up with different OAuth apps.
To enable the SSO feature, first click on SSO Enable.
You can now enable the SSO feature for all your OAuth apps.
To do this, just click the Enable SSO toggle on the OAuth app.
With that, the SSO is activated for that OAuth app. Every time you set up an asset to use that OAuth app, you will have the option to enable the SSO feature for it as well. We will see how to do this further down in this article.
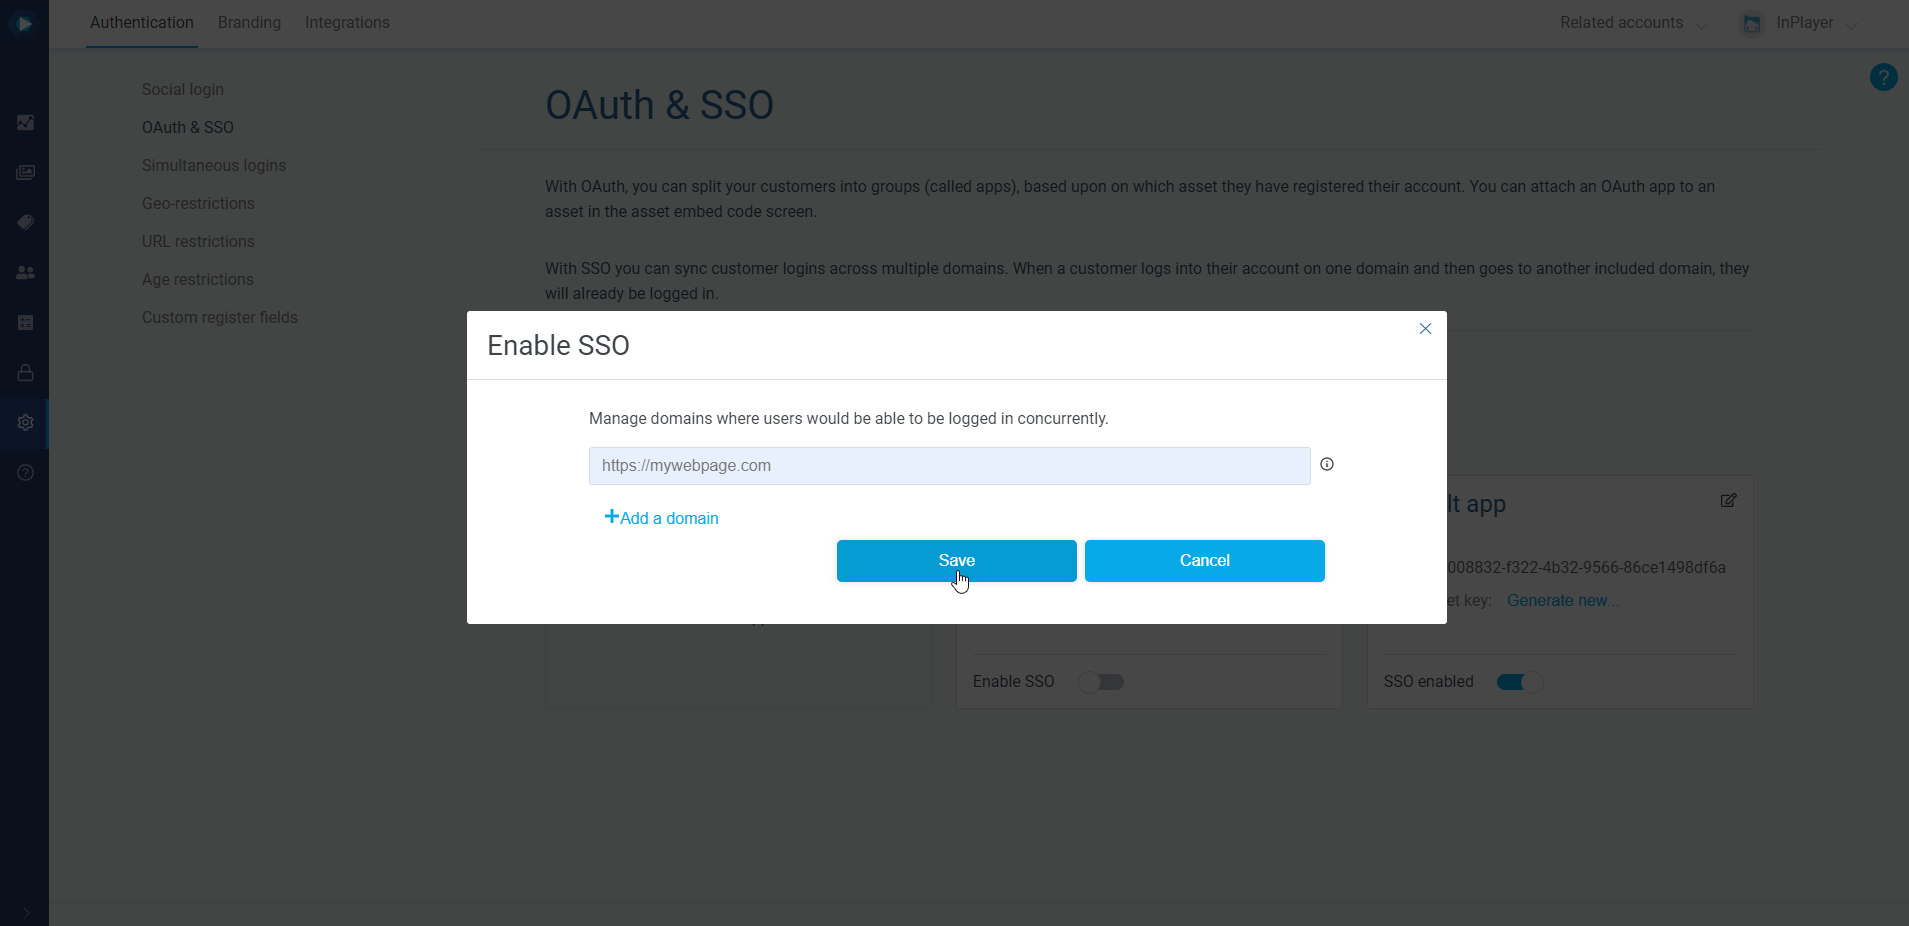
But first, you need to add the domains on which your viewers will be automatically logged in as soon as they log into just one. To do that, click on the button.
Click on Add domain, type in your domain and click Save.
Make sure you do not add a / at the end of the domain, nor any other special characters.
You can add as many domains as you wish. If you ever wish to remove a domain, just click the button next to it.
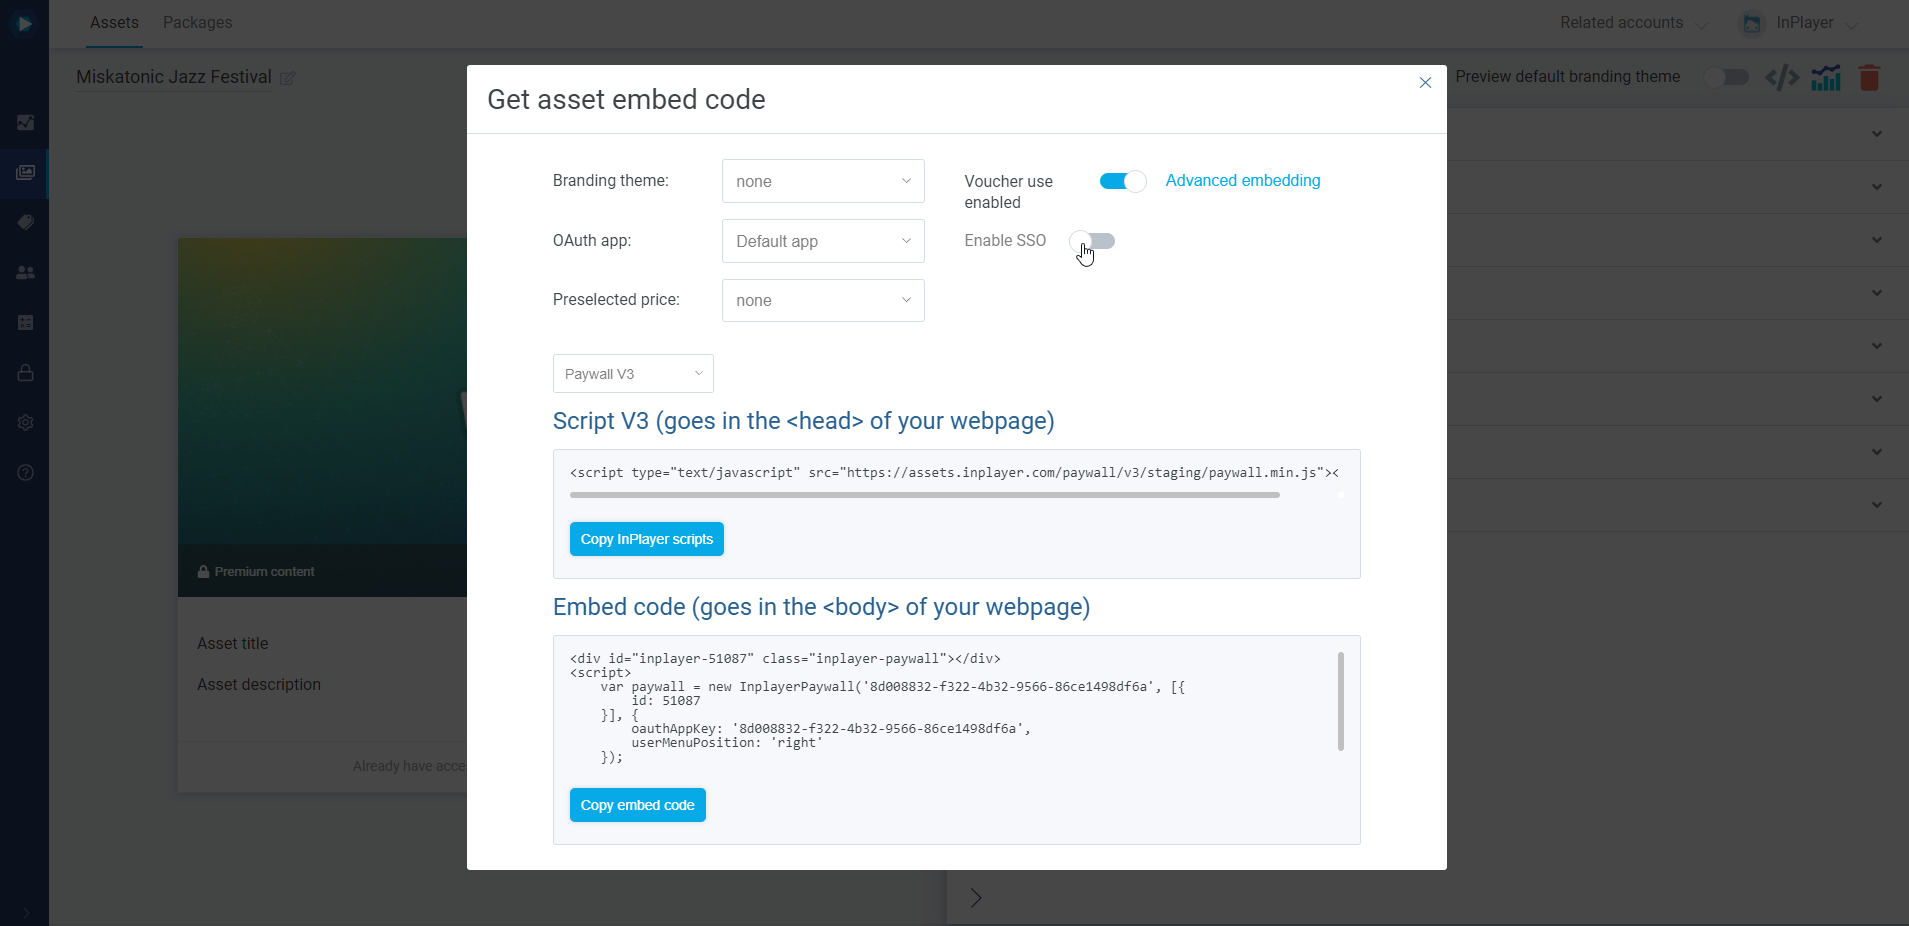
Using the SSO feature is very simple. All you have to do is enable it in an asset when you are getting the embed code for it.
In the Assets tab of your InPlayer Dashboard, go to the asset to which you wish to attach an OAuth app, and open it by clicking .
Click on the Get asset embed code button at the top right.
Select the OAuth app you wish to use.
Once you select the OAuth app, you will see an Enable SSO toggle right next to it. To enable or disable the SSO, just click on the toggle.
If you don’t see the toggle, go back to the OAuth & SSO tab and make sure the SSO feature for the OAuth you are using is enabled.
With that, every time a viewer registers or logs into that asset, they will be logged into all domains (websites) that you’ve added in the SSO settings.
Once you set up the SSO, you can embed the asset on your webpage like you normally would.
You can disable the SSO feature at any time by going to the OAuth & SSO tab and clicking on the SSO toggle.
This concludes our guide.
If you have any questions, don’t hesitate to contact us at clients@inplayer.com.
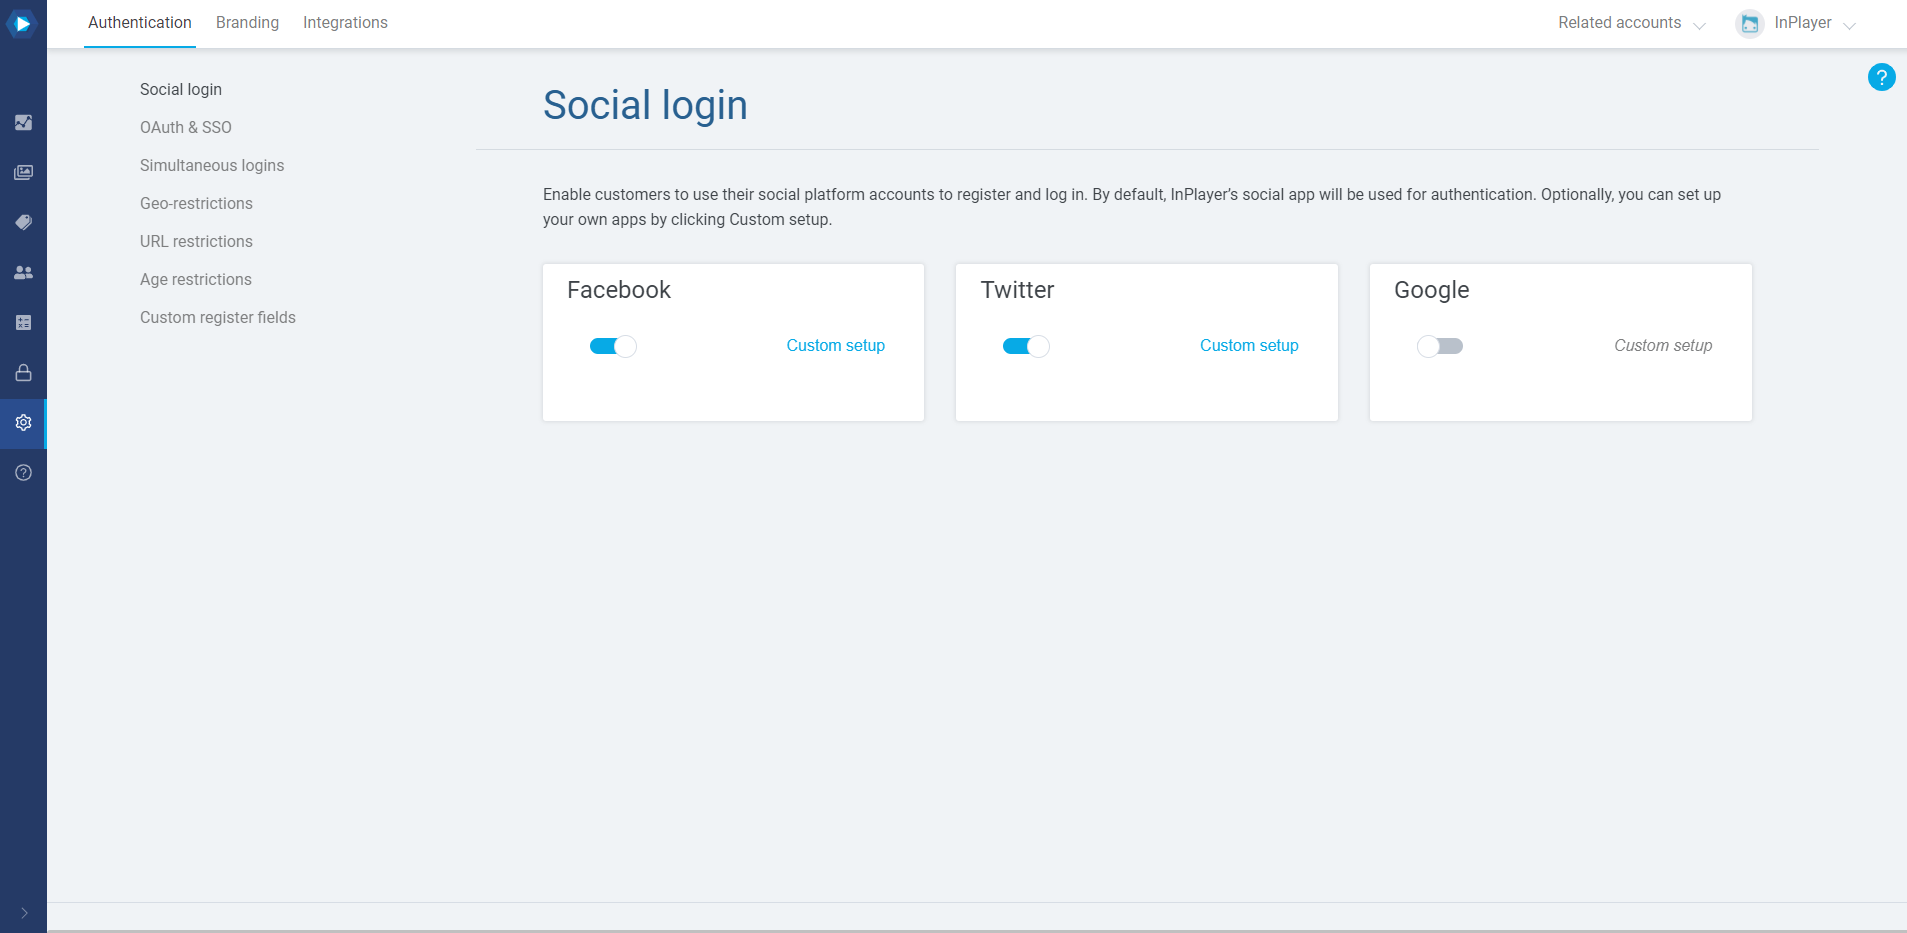
With Social login, you can let your viewers use their Facebook, Twitter, or Google accounts to register and log into your platform, instead of them using the standard paywall register and login forms.
You will find the Social login feature in the Authentication tab of the Dashboard settings.
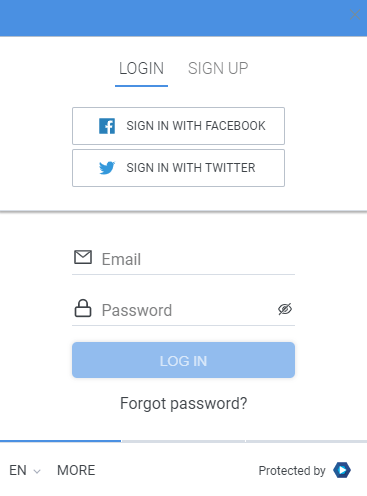
To enable or disable a social login, just click on its respective toggle.
Once enabled, the social login buttons will appear on the paywall.
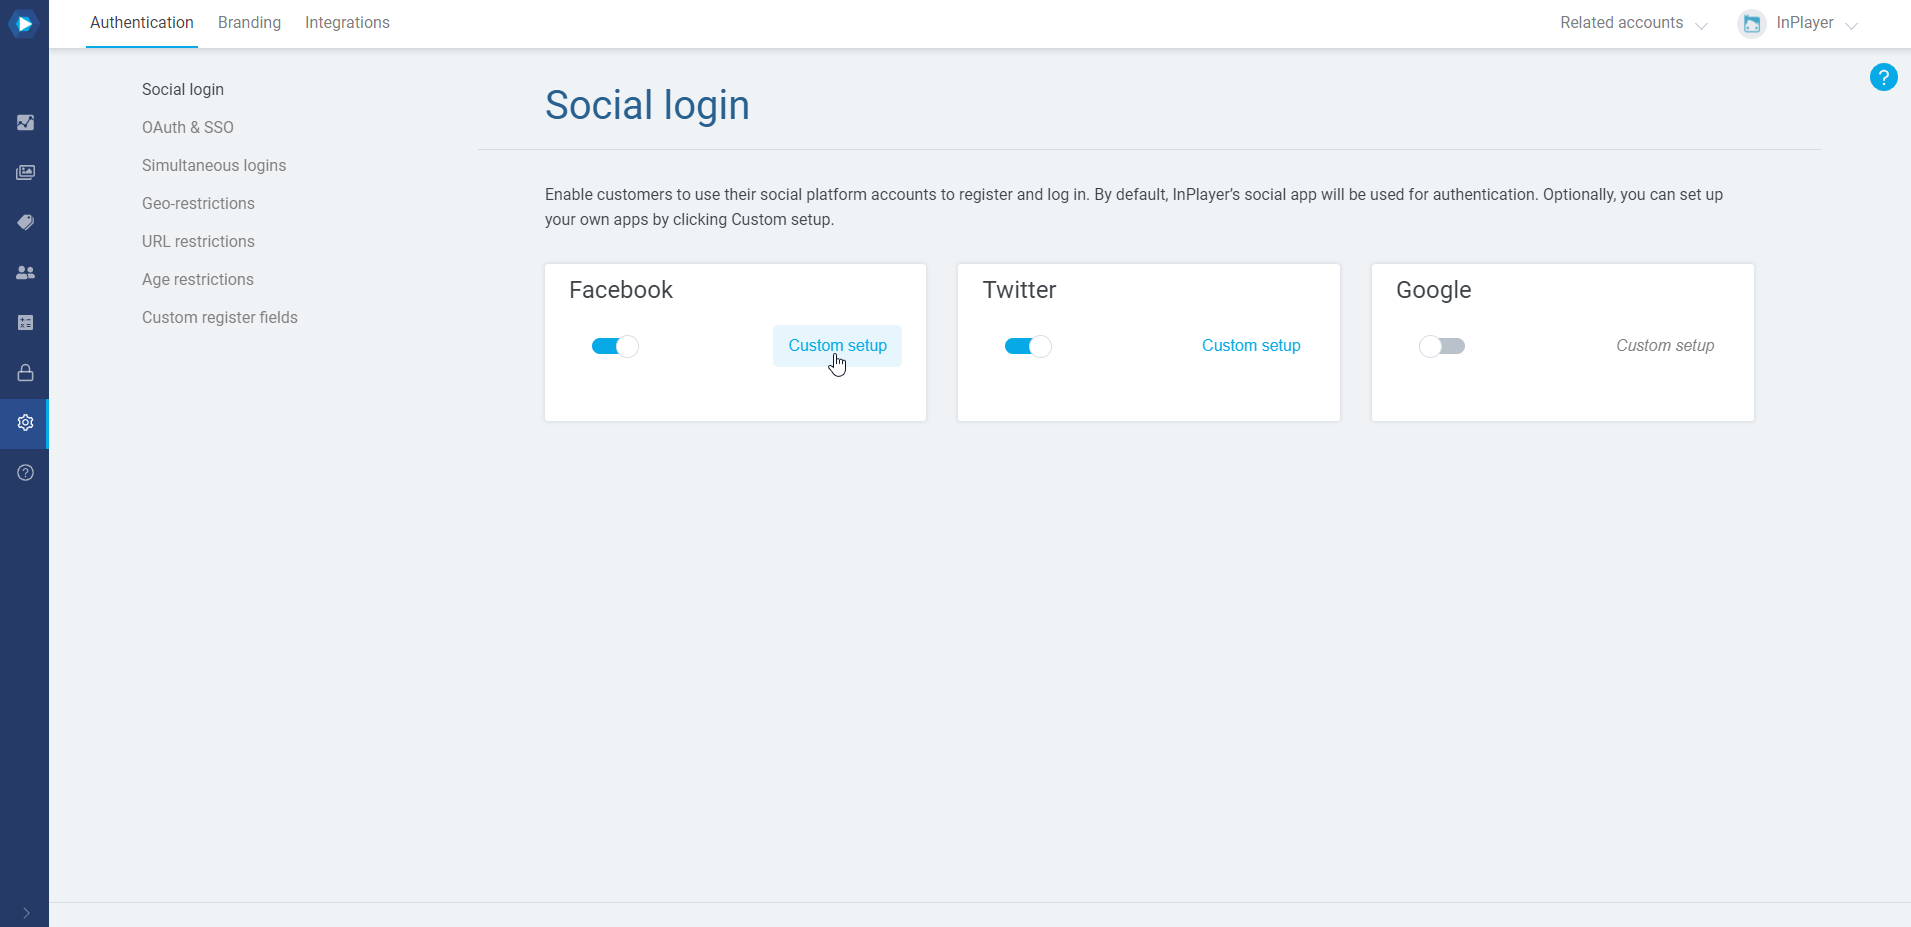
By default, our platform will use our own social apps to manage the viewer logins, but you can also use your own apps by clicking on Custom setup and setting them up.
When setting up the apps in their respecting social dashboards, make sure to use the following URLs:
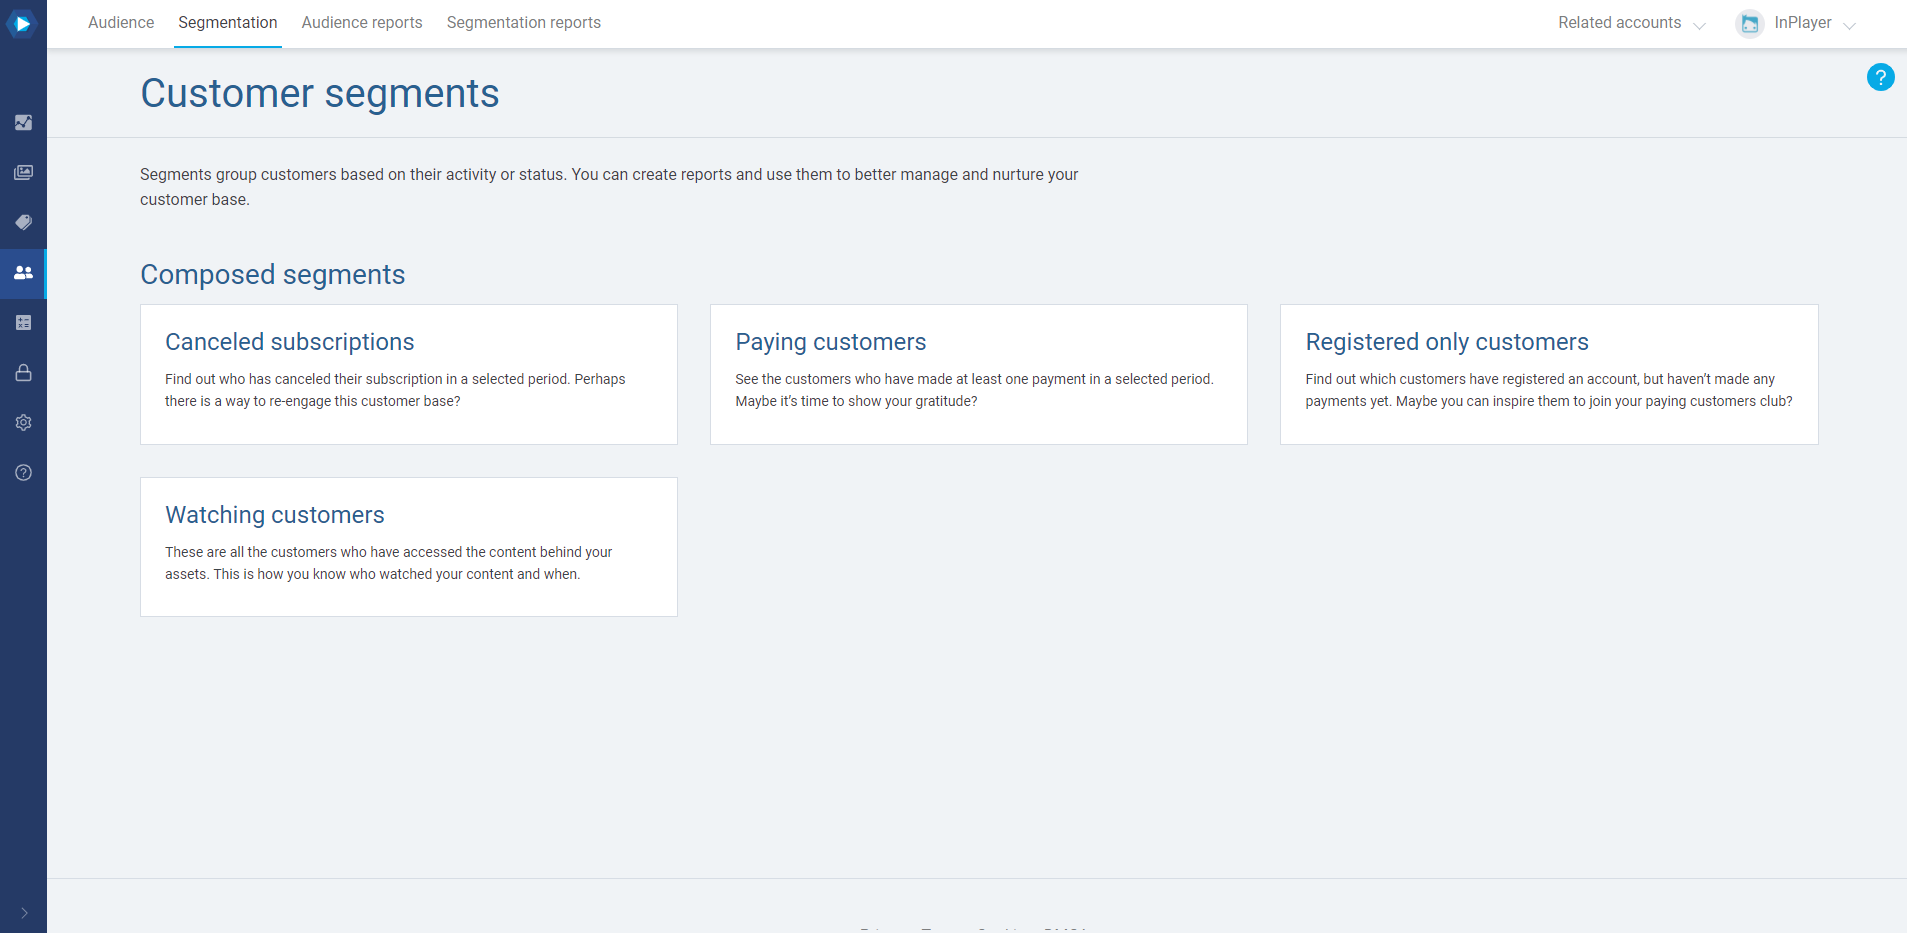
With Segmentation, you can see lists and create audience reports based upon various characteristics. This way of segmenting viewers is mainly aimed at providing useful data for reducing churn and increasing retention, thereby eliminating the need for creating reports for this purpose manually.
You will find the Segmentationtab in the Audience section of the InPlayer Dashboard.
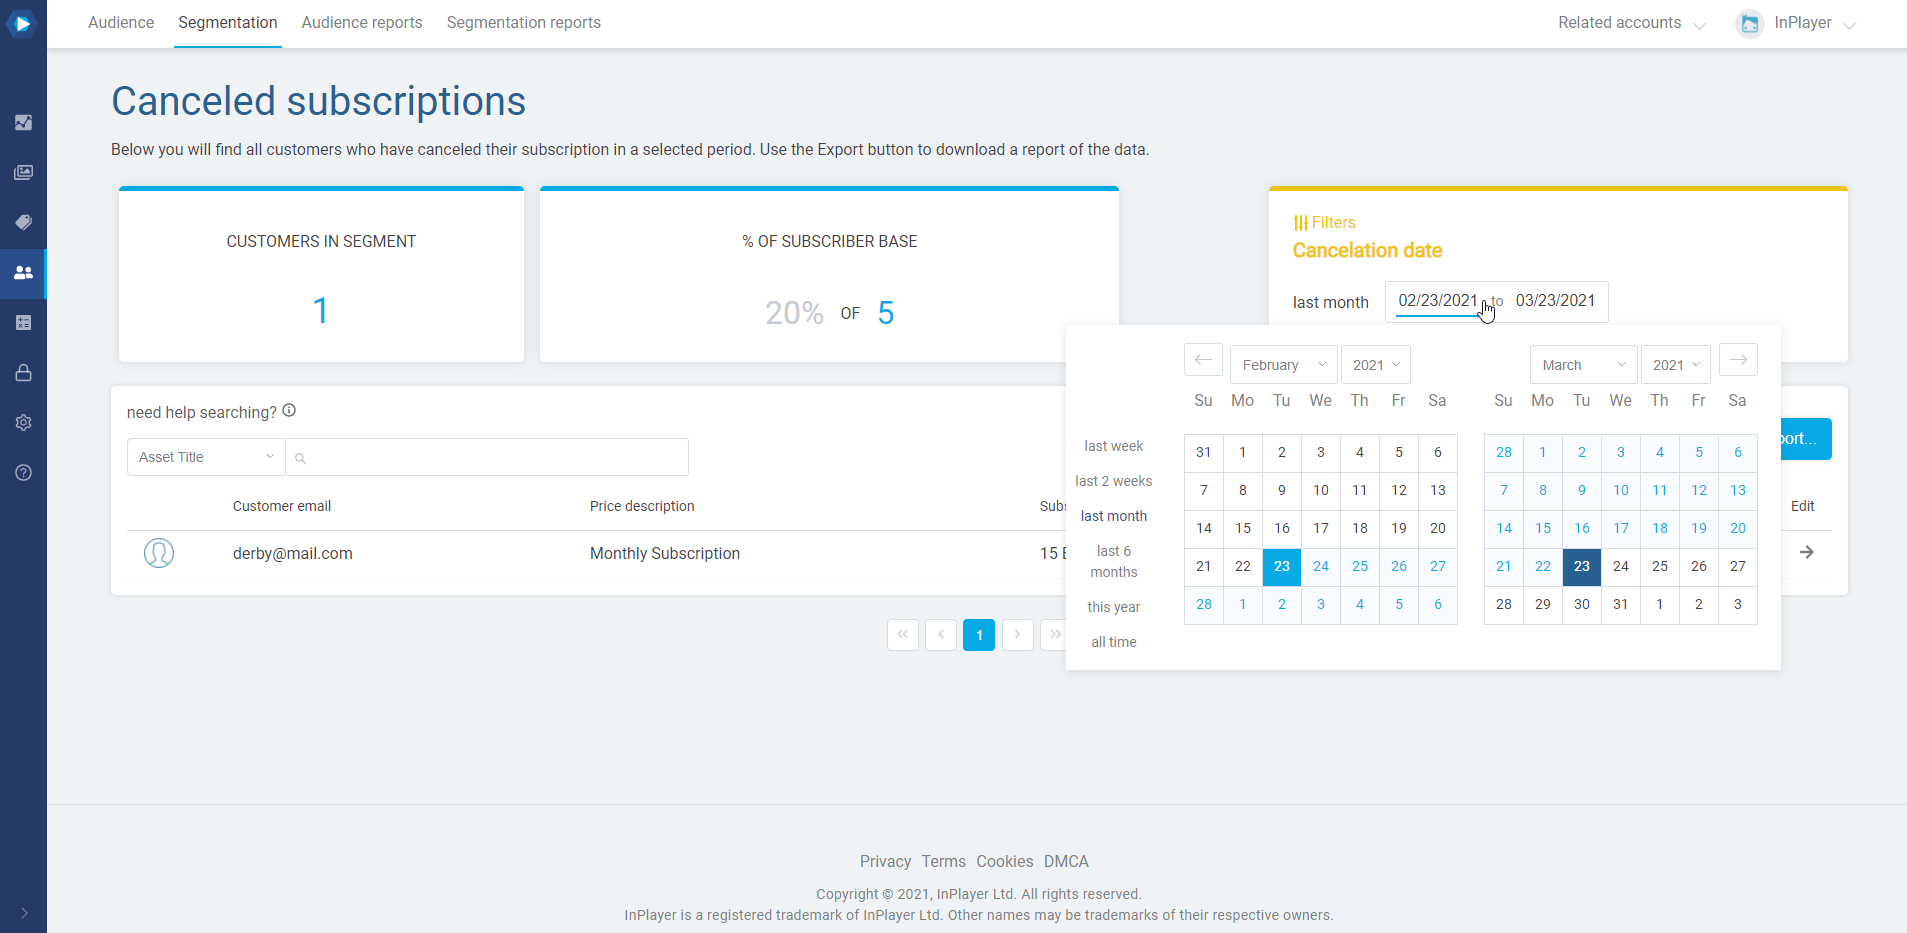
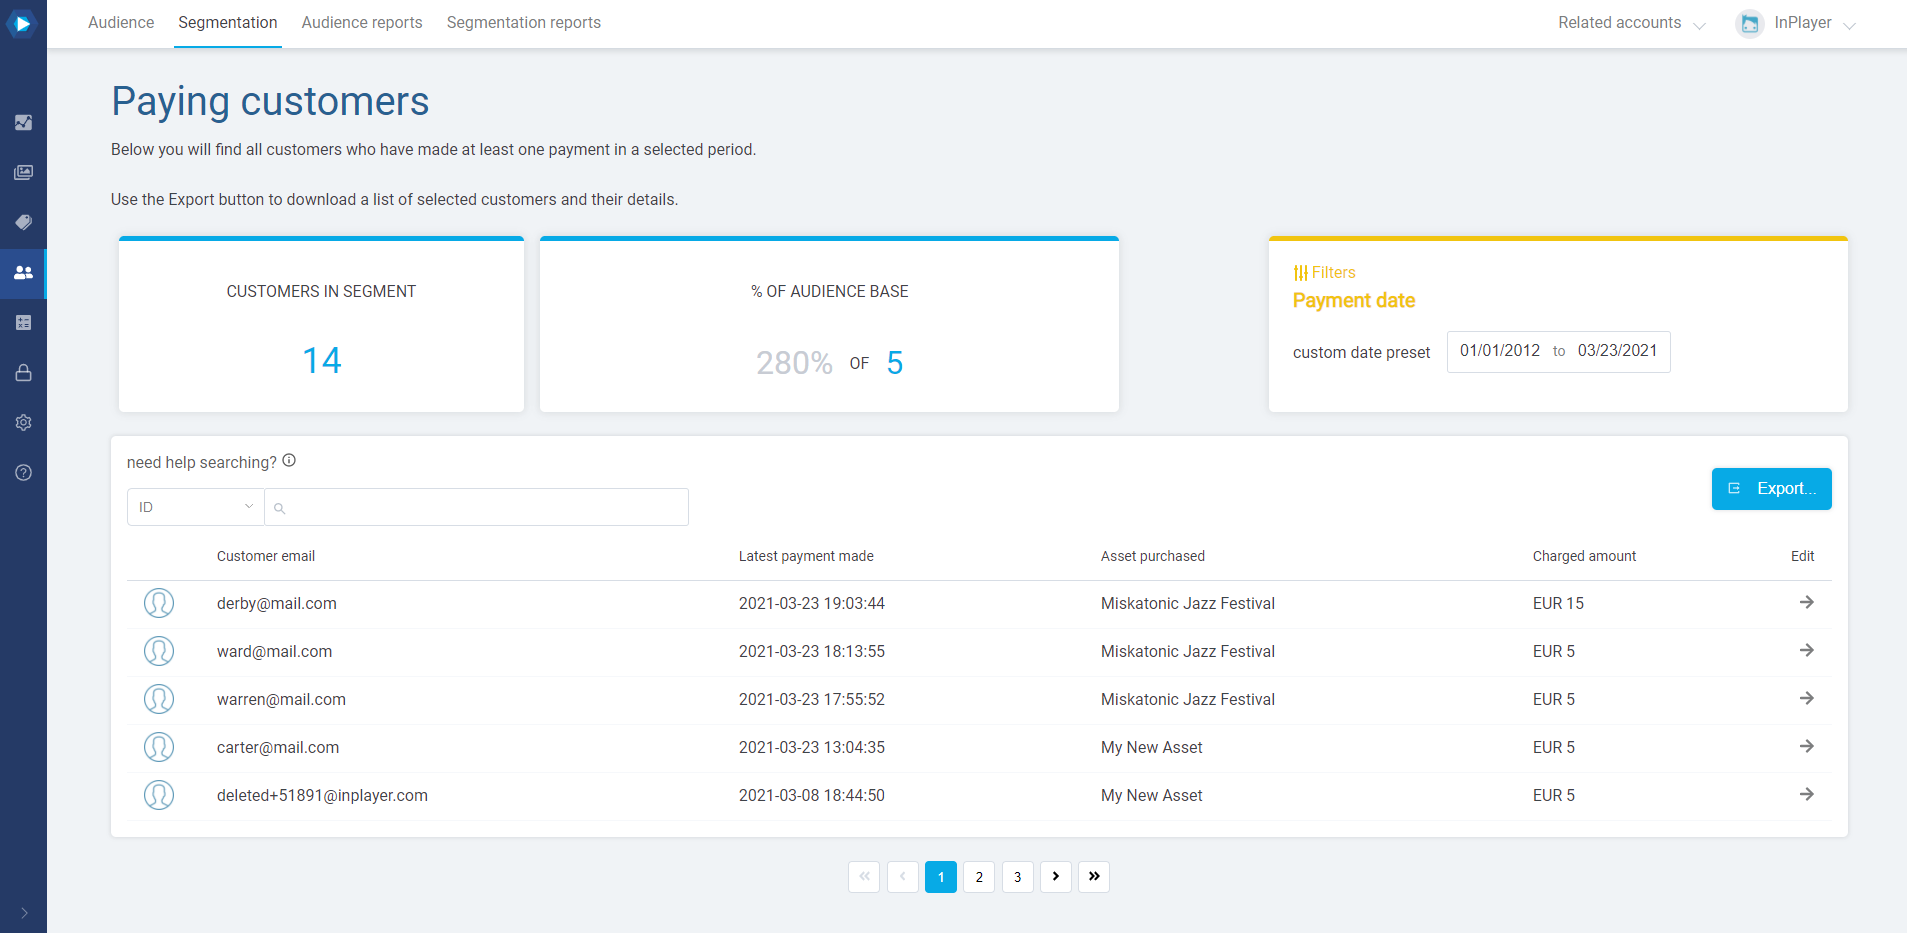
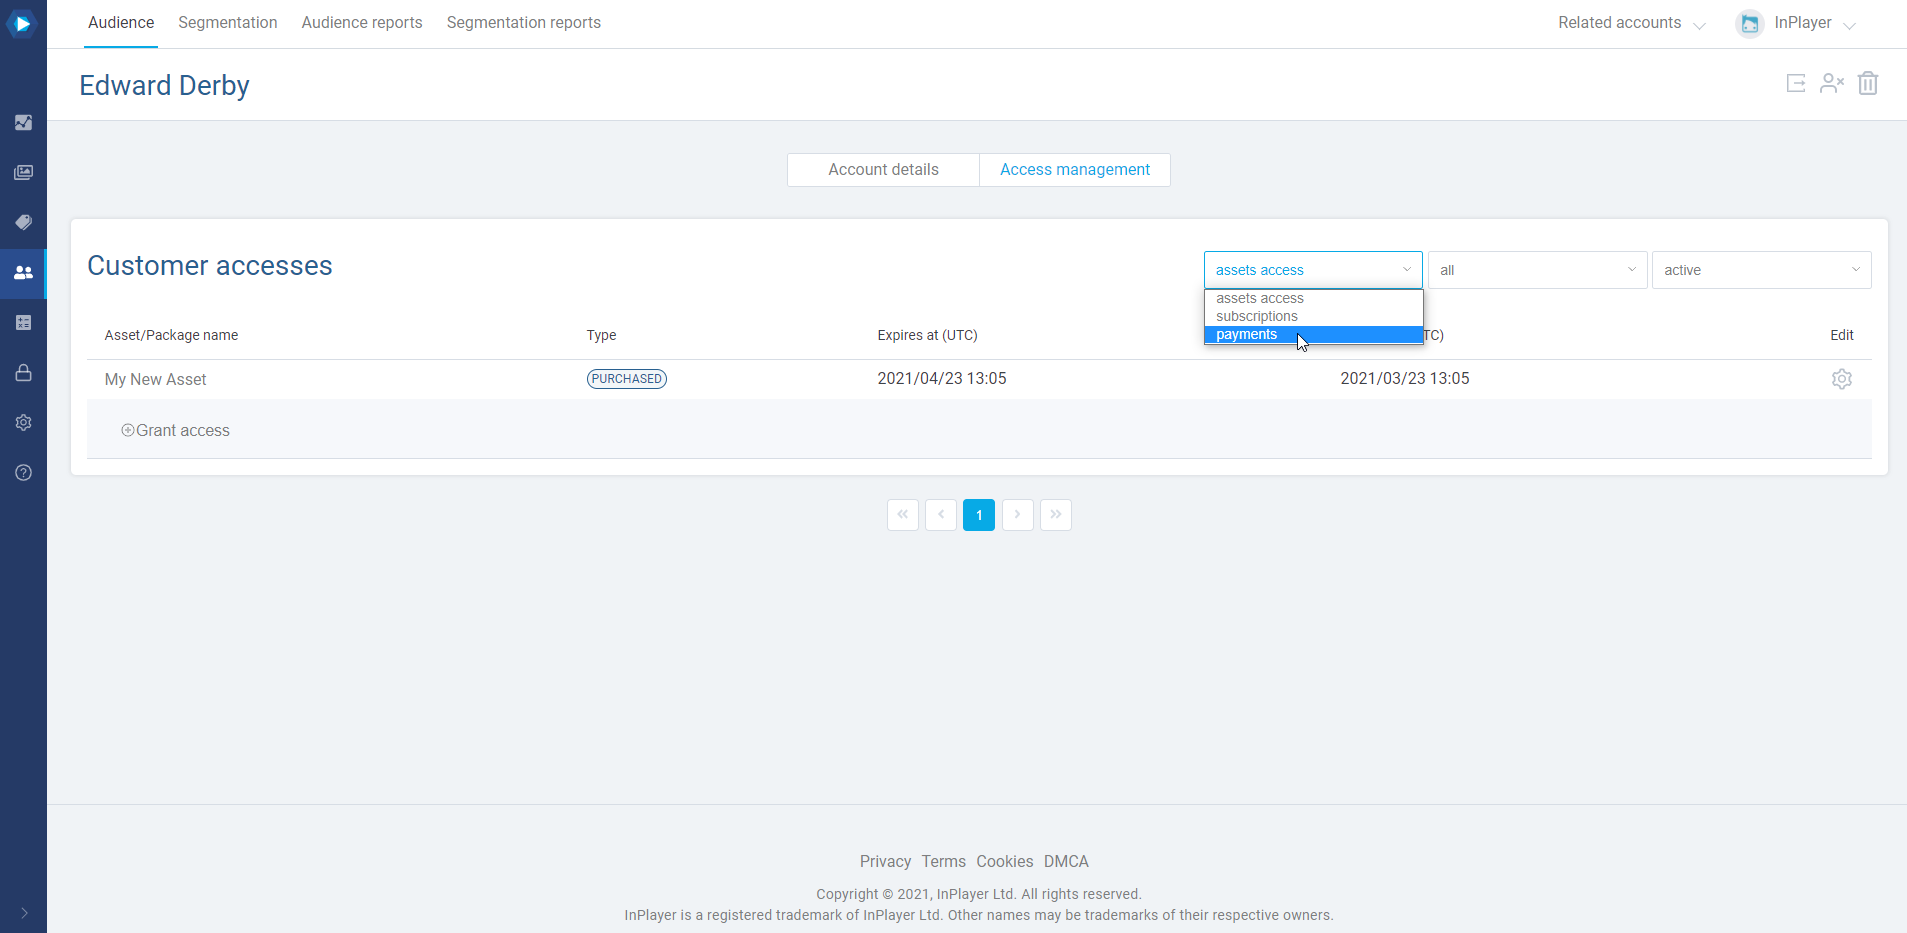
The Paying customers segment provides insight into how many and which viewers have made a payment in a given time period.
It works exactly the same as the Canceled subscriptions segment, i.e. you can either view the info by selecting the period in the filters section, or generate a report via the Export button which you can then download in the Segmentation reports tab.
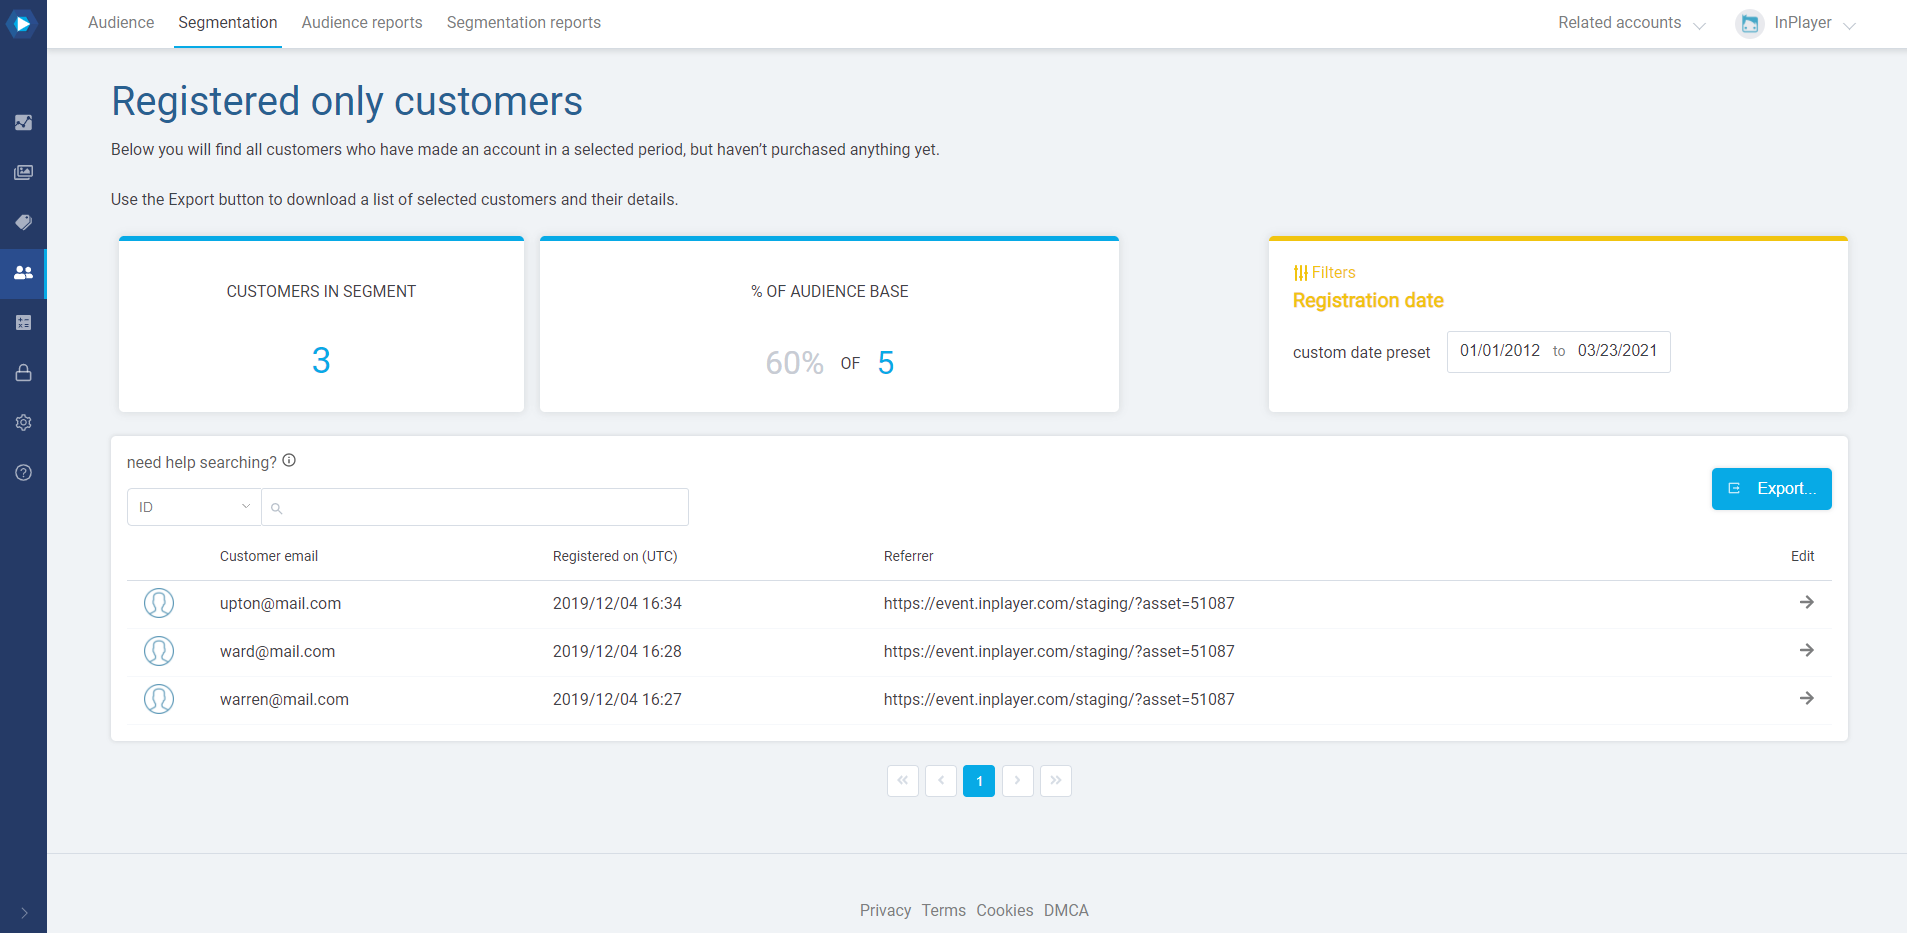
The Registered only customers segment provides insight into how many and which viewers have registered an account, but haven’t made a payment yet.
It works exactly the same as the other segments, i.e. you can either view the info by selecting the period in the filters section, or generate a report via the Export button which you can then download in the Segmentation reports tab.
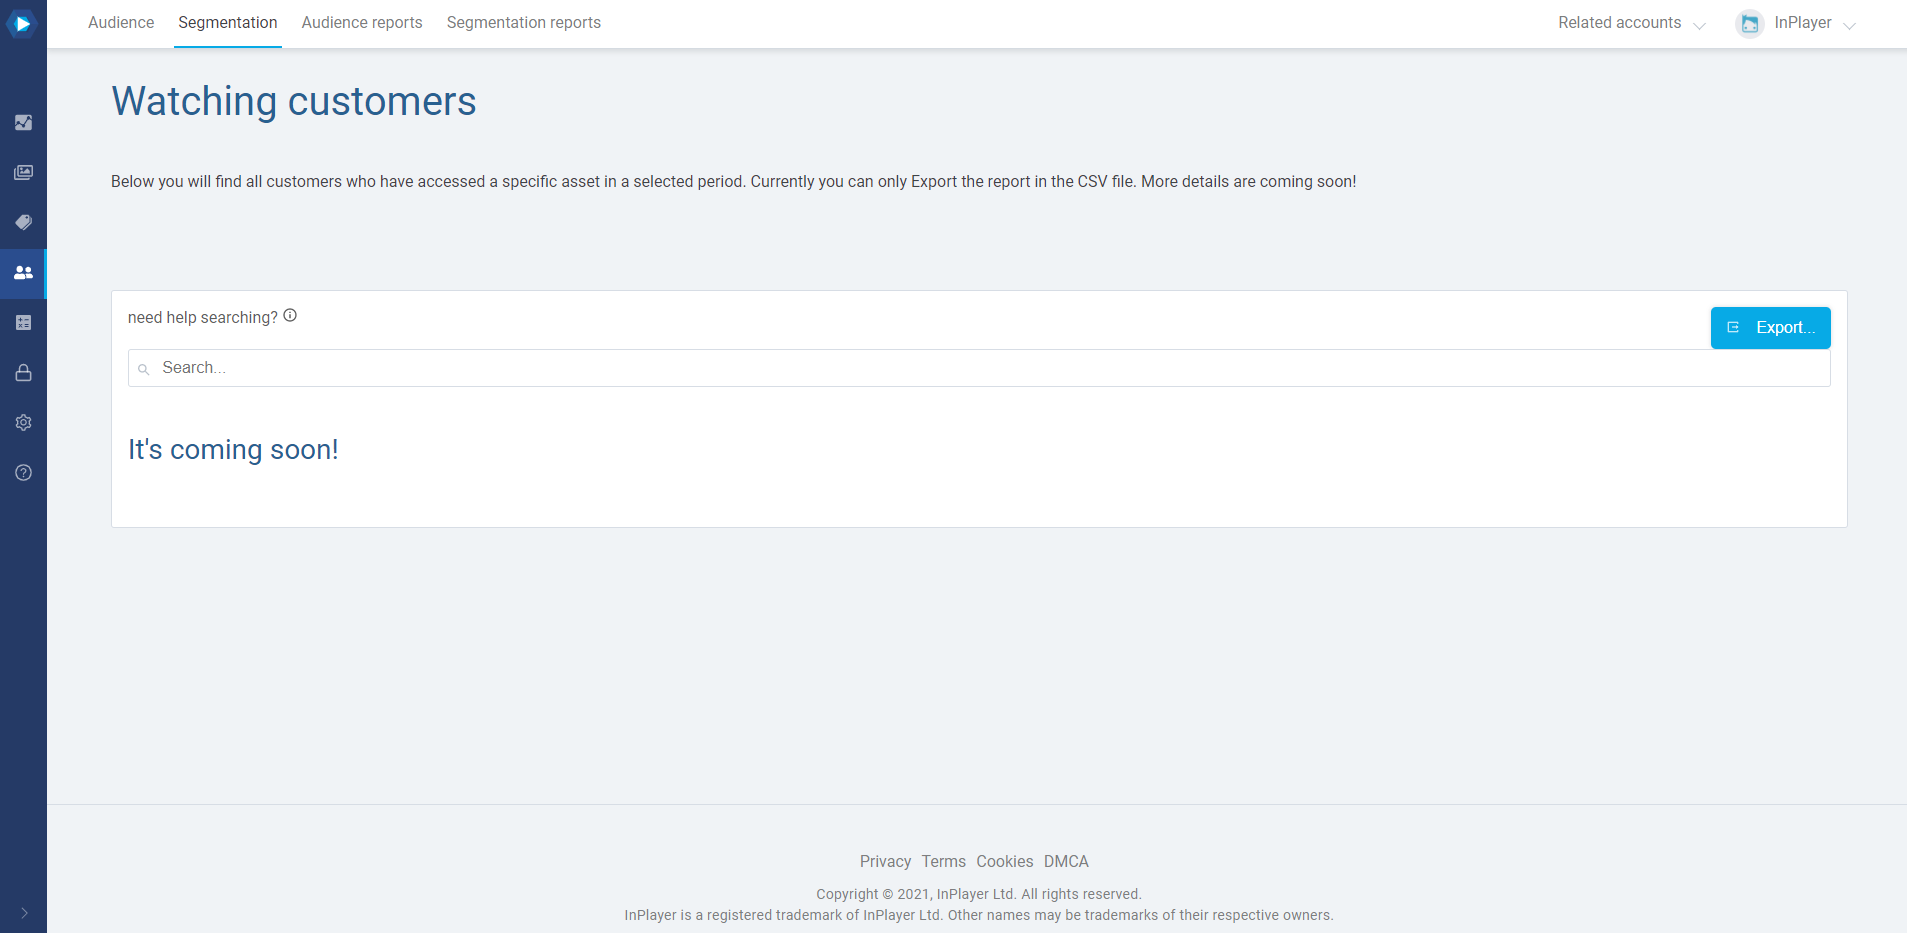
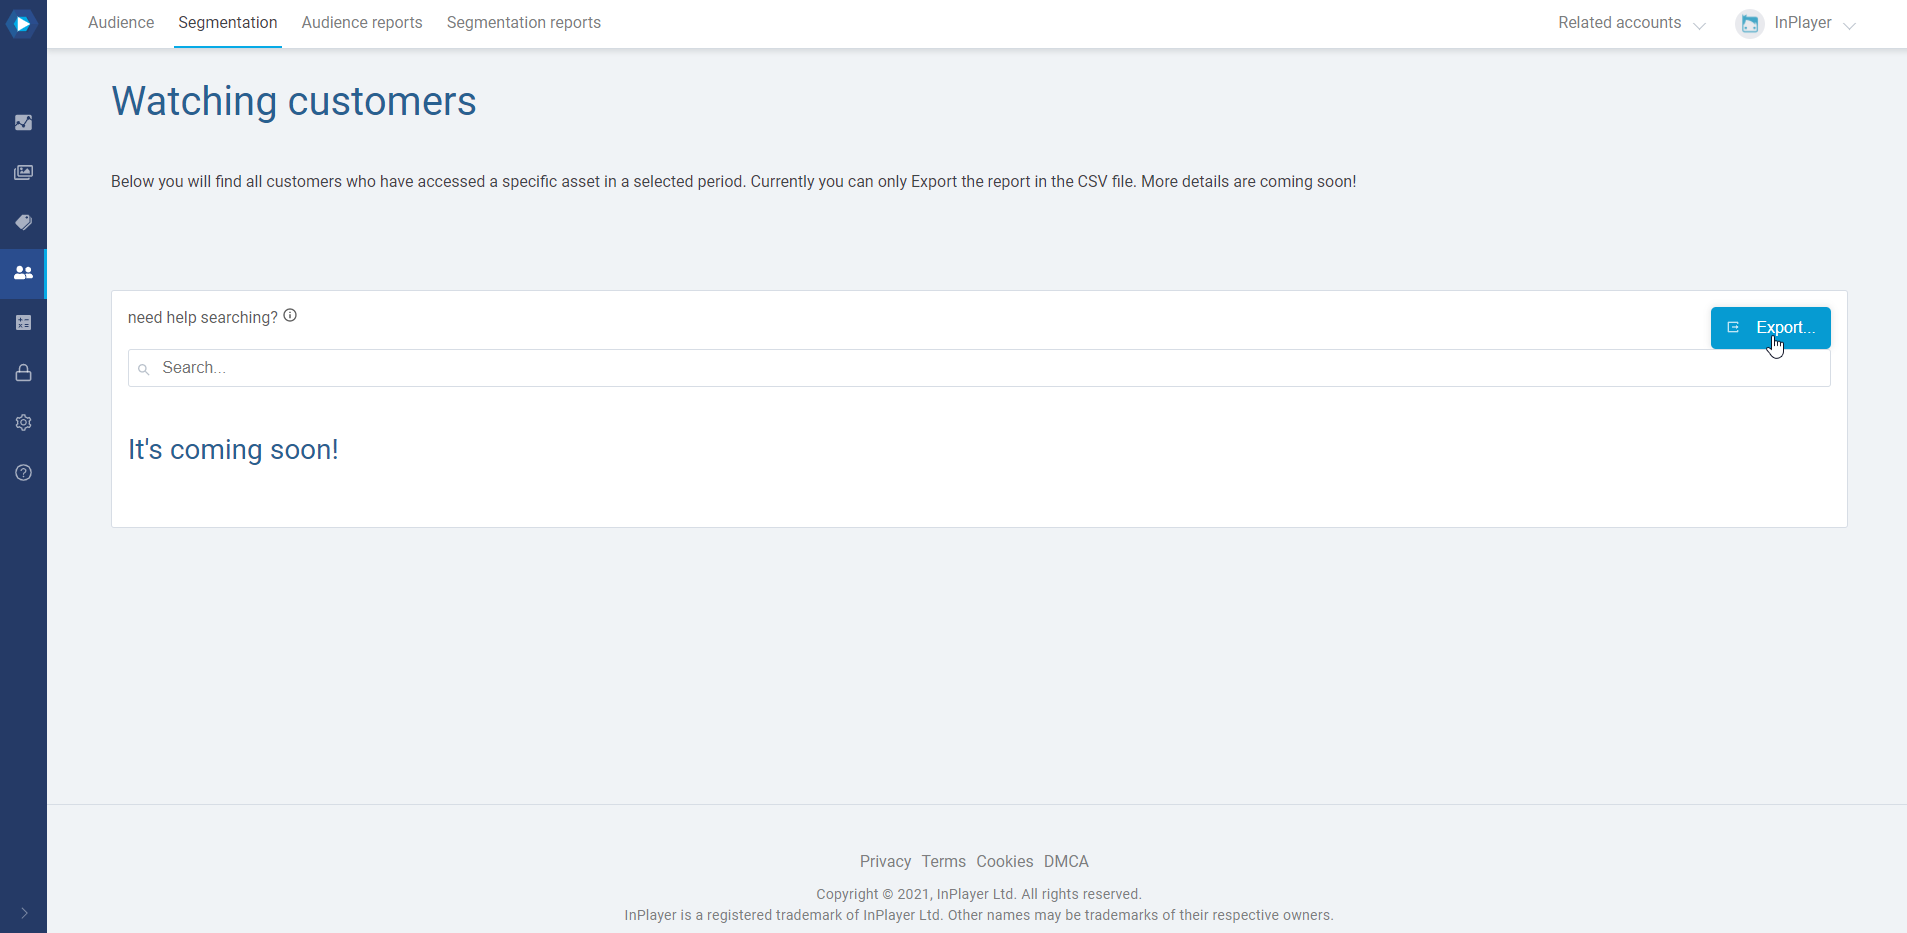
The Watching customers segment provides insight into how many and which viewers have accessed a particular asset, in a given time period.
To get the report, just click on Export.
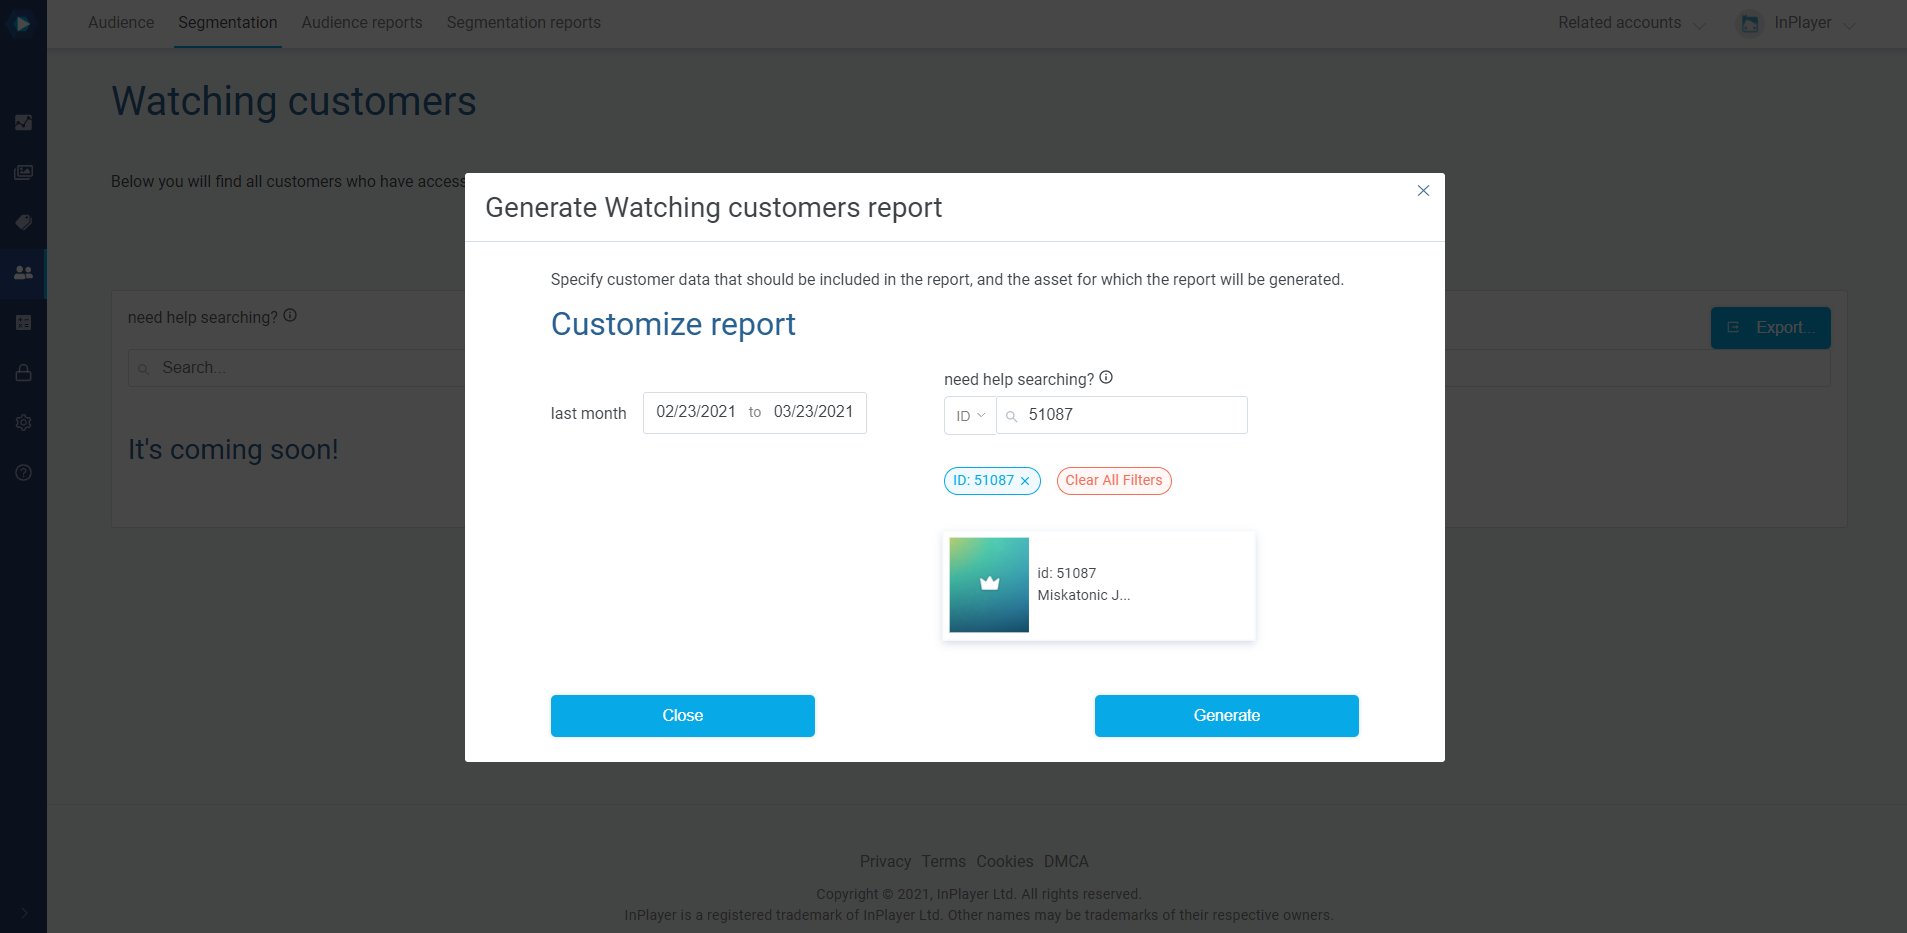
In the new screen, select the time period, and in the search field on the right enter the asset ID of the asset for which you wish to get the access info.
Note that when you insert the asset ID in the field, you need to press Enter, and then click on the asset.
Finally, click Generate.
To download the generated report, just go to the Segmentation reports tab, and select the segment from the dropdown menu.
This concludes our guide.
If you have any questions, don’t hesitate to contact us at clients@inplayer.com.
With Access reports you can get the data on which viewer has access to which asset or package.
Note that for viewers who have access to packages, the report will show their package access only and not individual accesses for the individual assets that have been included in the package.
To get an Access report, do the following:
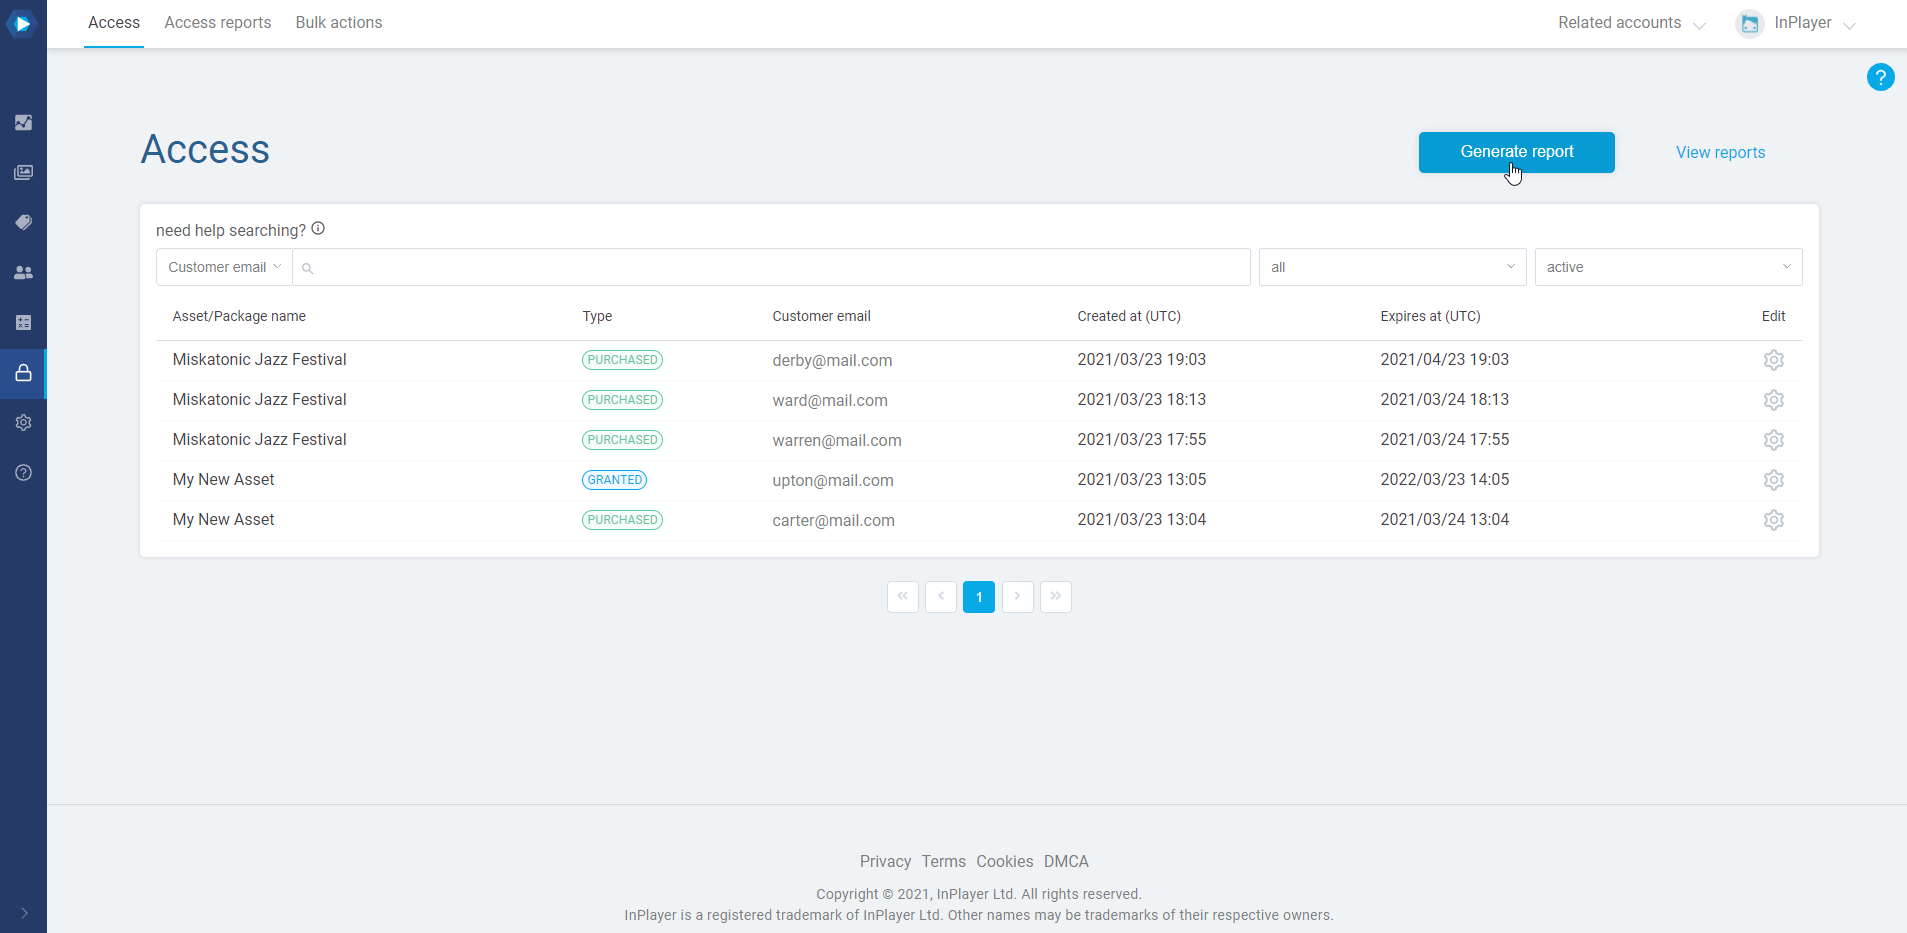
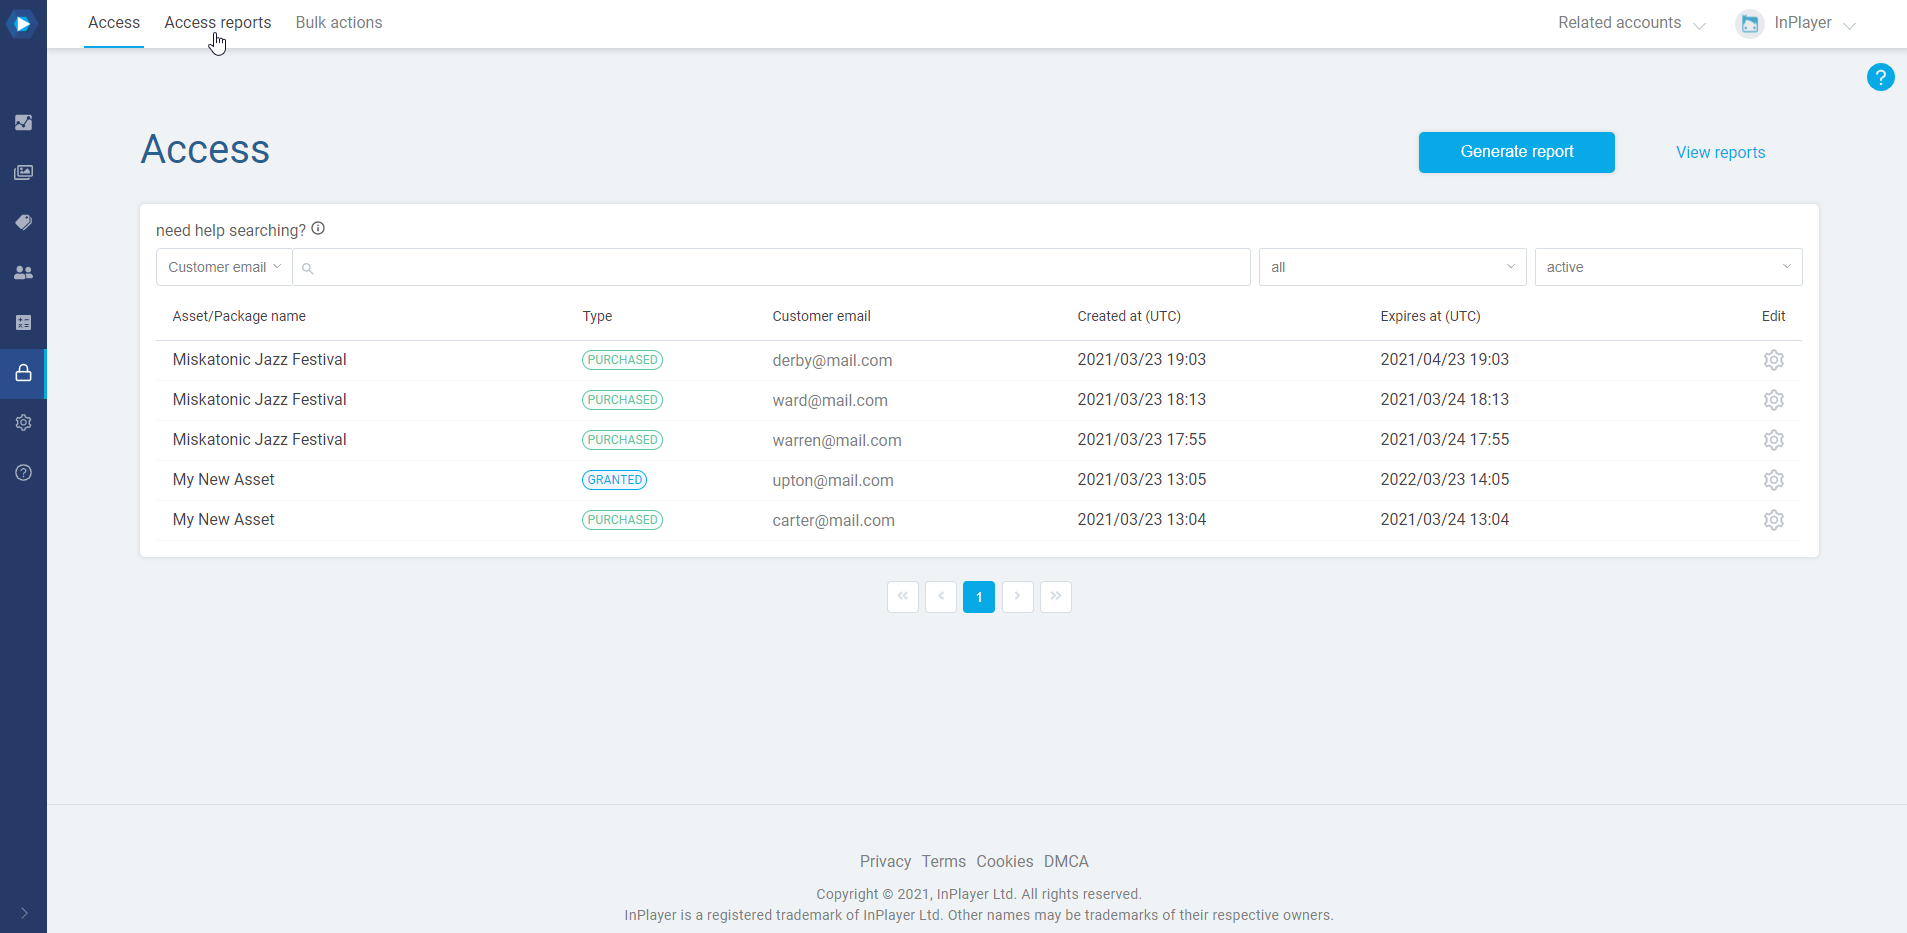
In the InPlayer Dashboard, go to the Access section.
Click on Generate report.
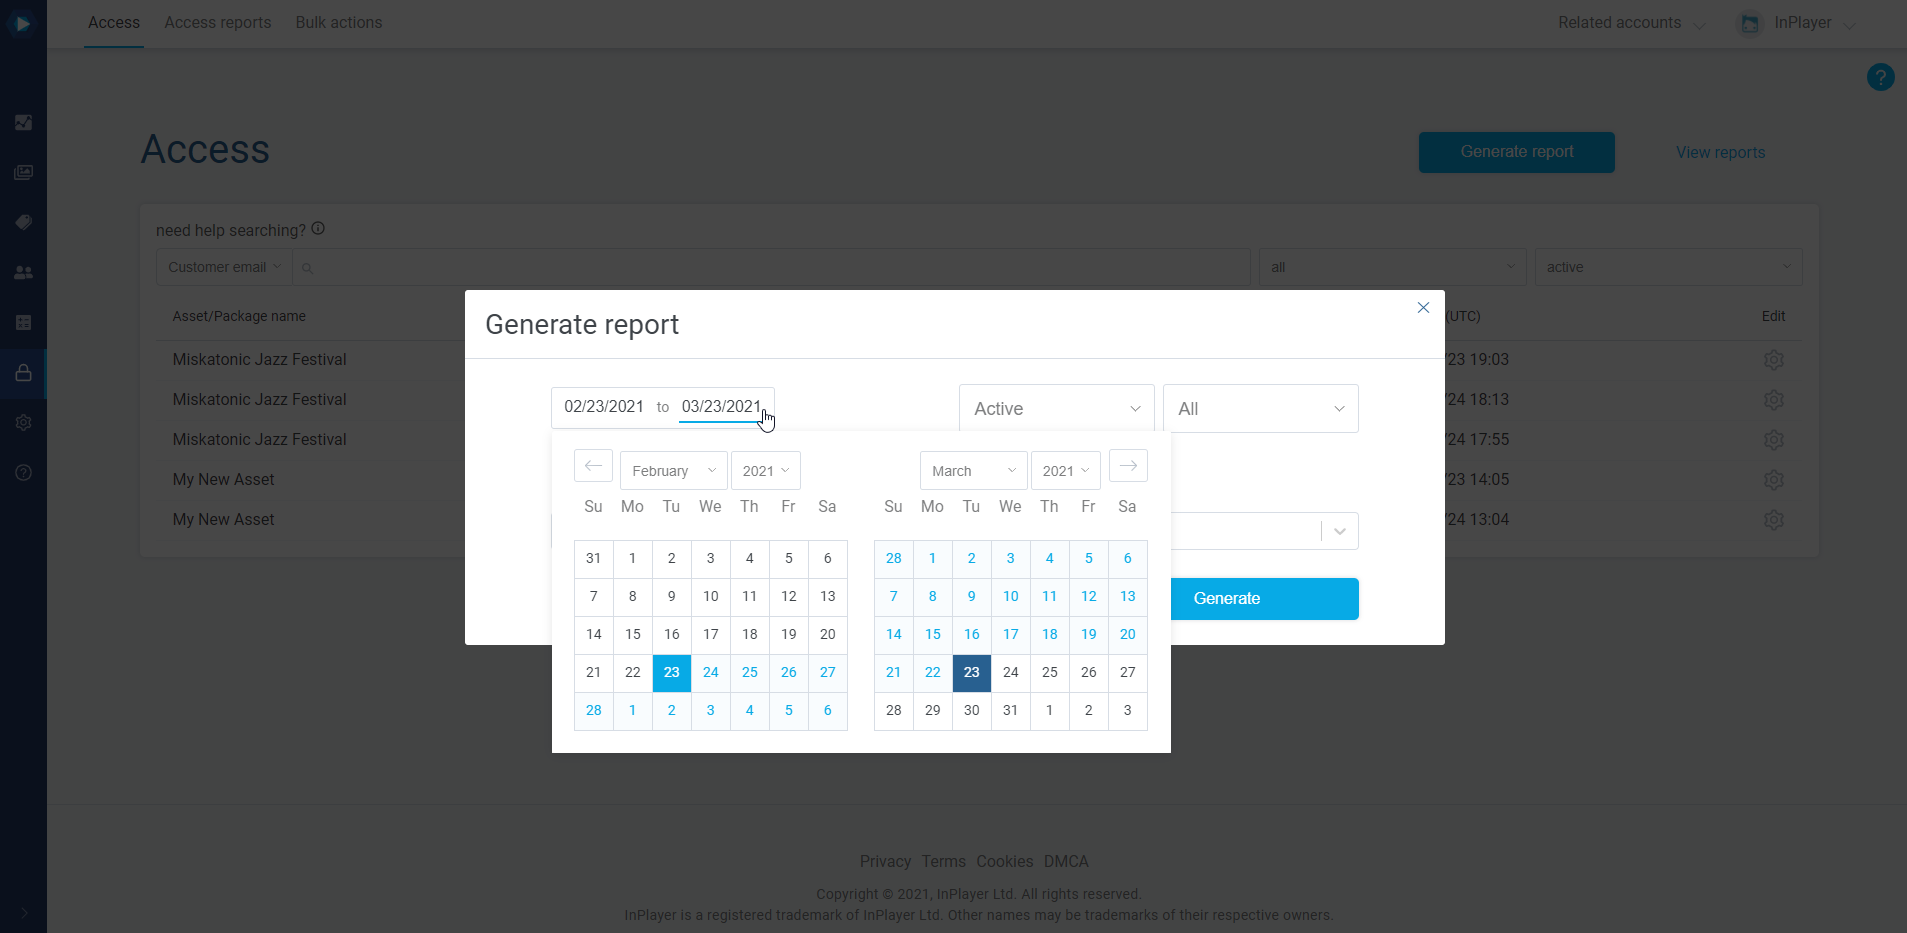
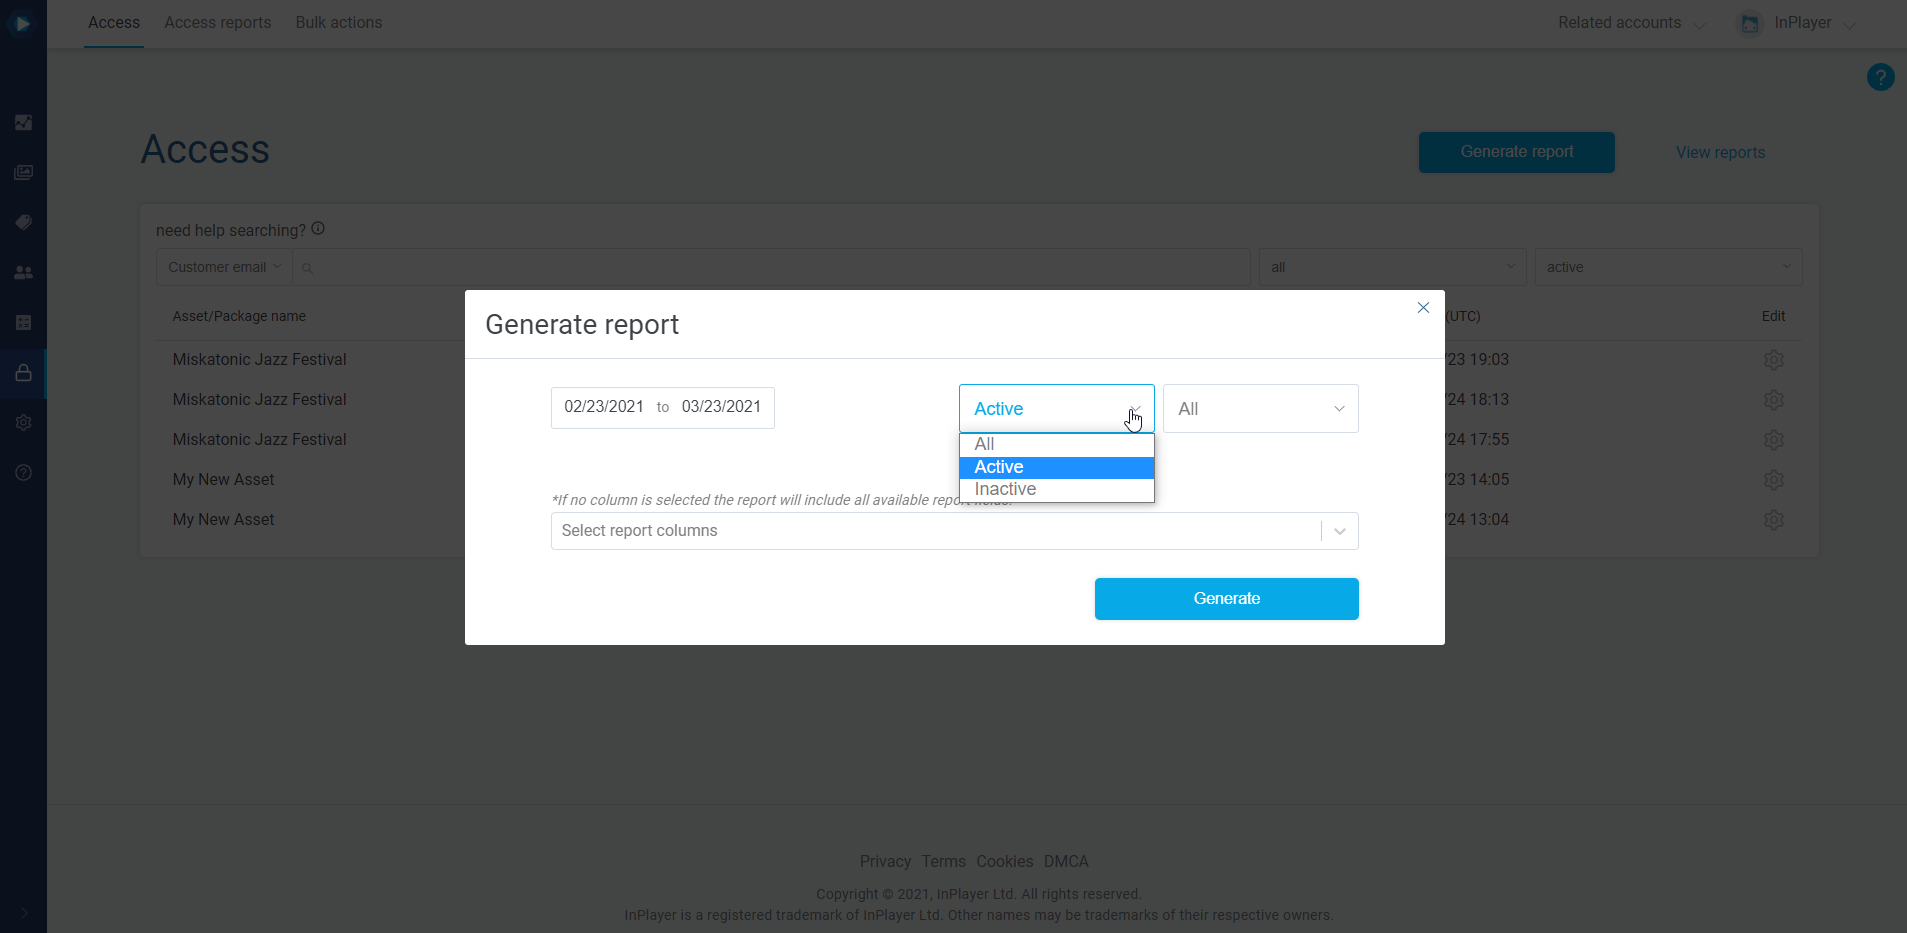
Choose the time period. The report will include all access records that were created within the selected period.
Choose whether you want to include only active records, all, or inactive records only.
If you’ve selected active or inactive, you can further specify the type of records you want to include.
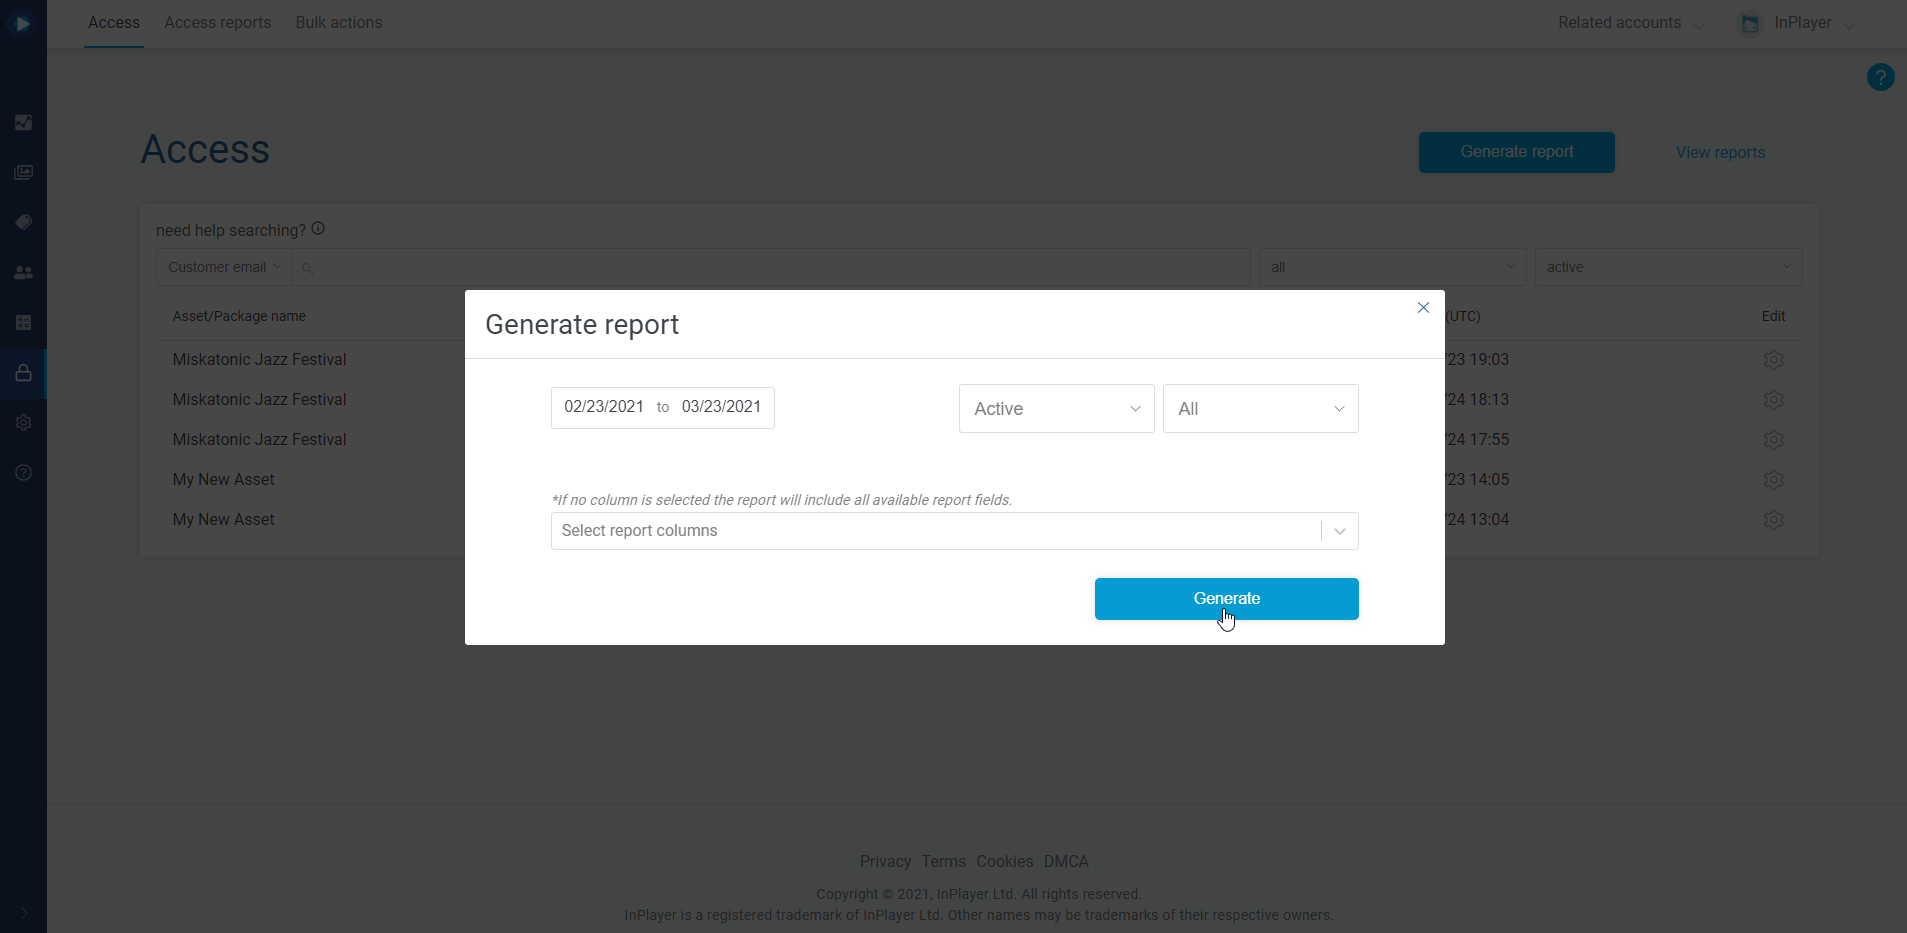
In the Select report columns field you can choose what data you want the report to include. If you leave this field blank, all data will be included.
Finally, click Generate.
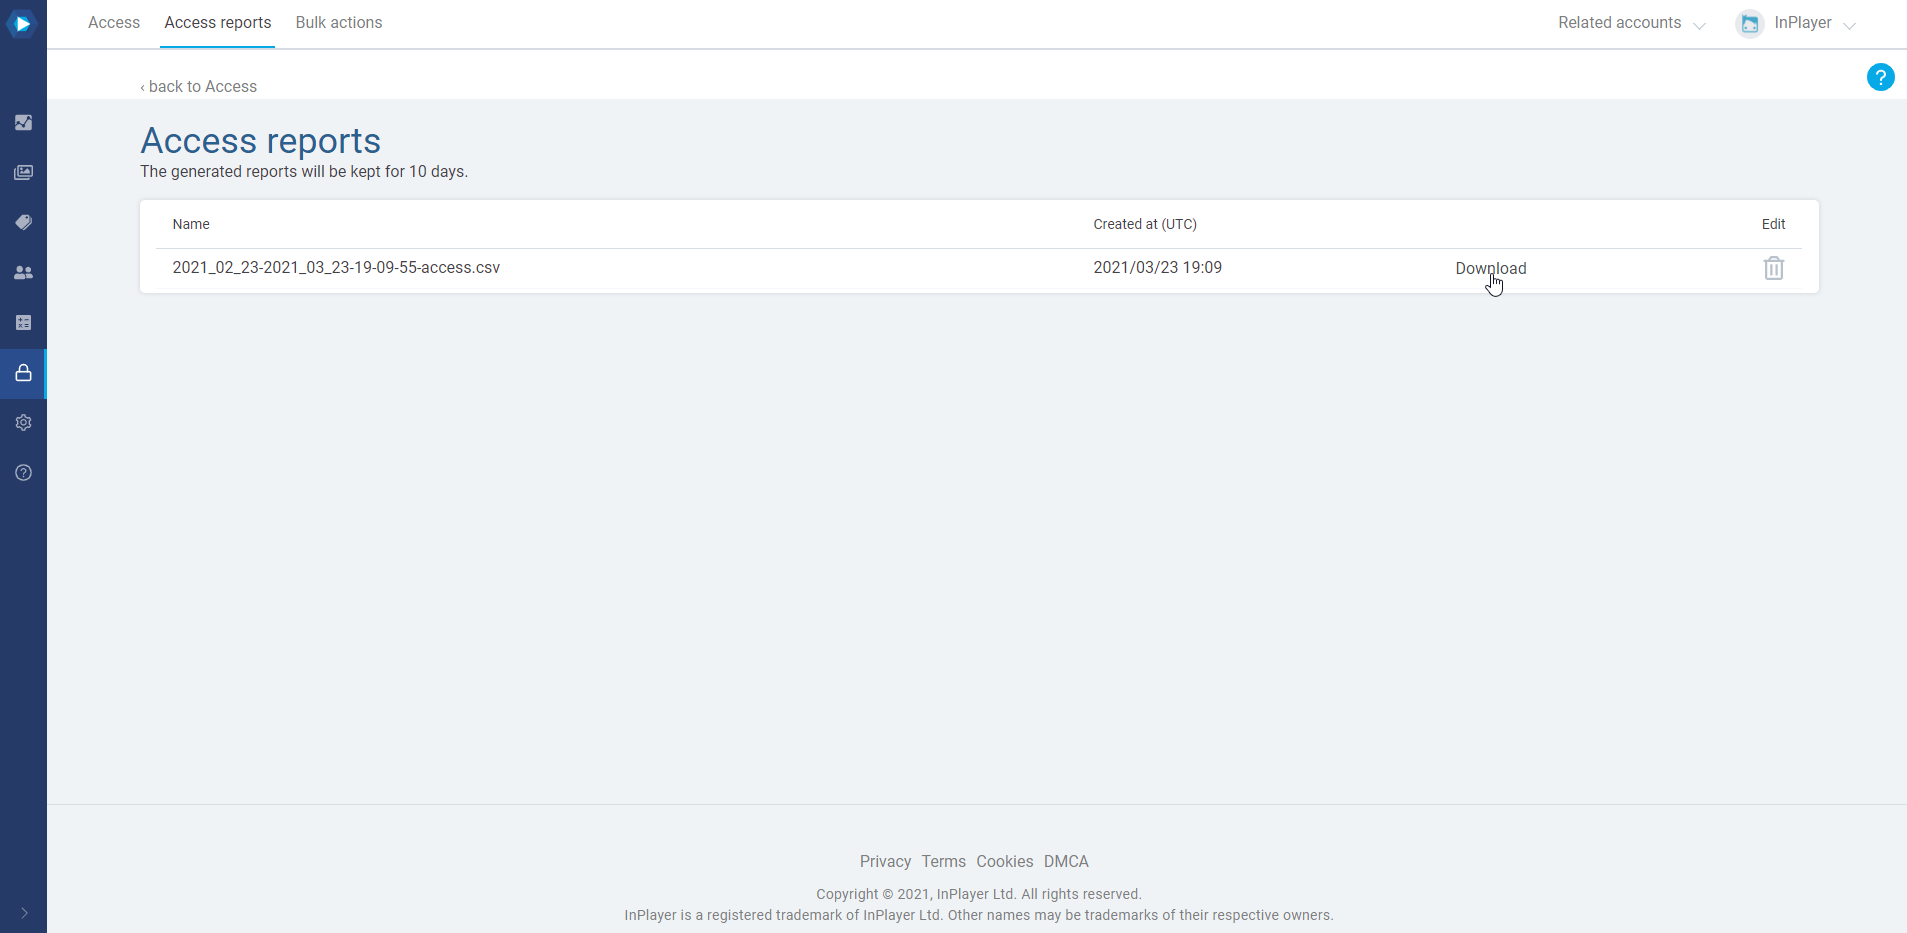
To get your report, click on View reports or go to the Access reports tab.
Here, you can download the report as a CSV file.
All generated reports will be kept for 10 days and then automatically deleted.
With report scheduling, you can automatically generate reports at a certain time & date, eliminating the need to do this manually. This can be quite useful for recuring reports you do on a regular basis.
To schedule the automatic creation of a report, do the following:
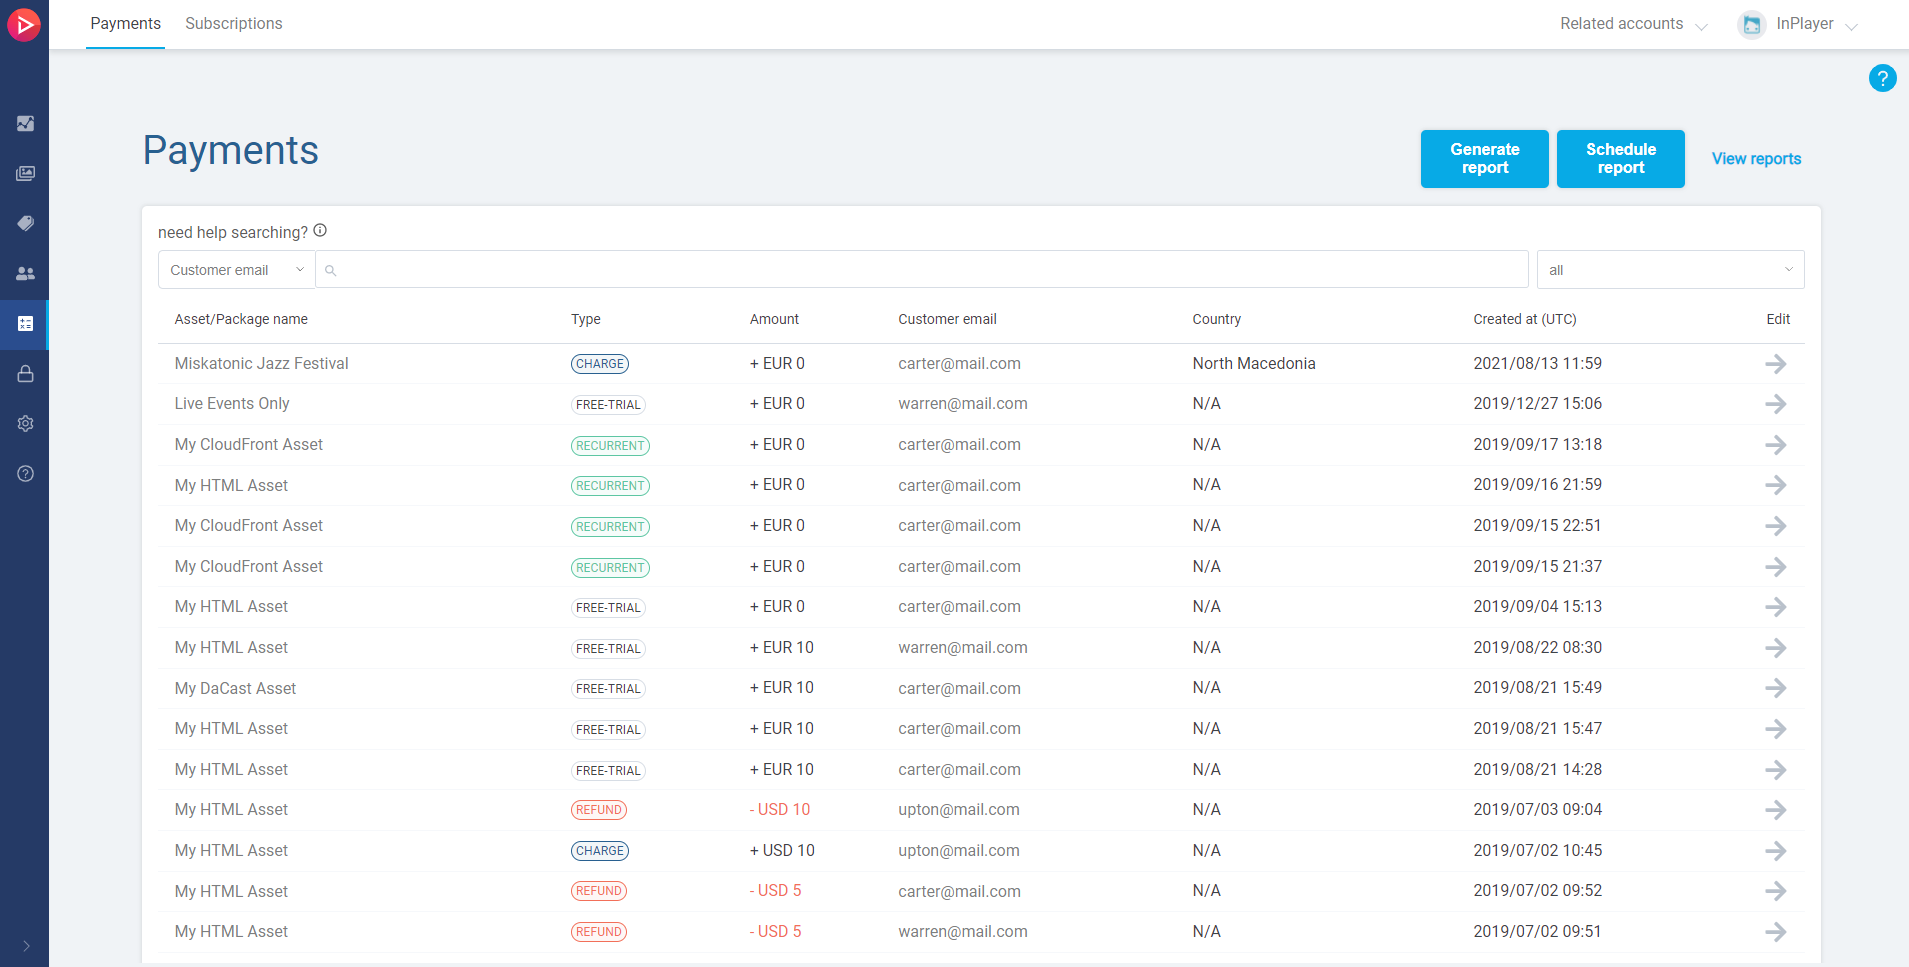
In the InPlayer Dashboard, go to the Transactions section and then to either the Payments or Subscriptions tab.
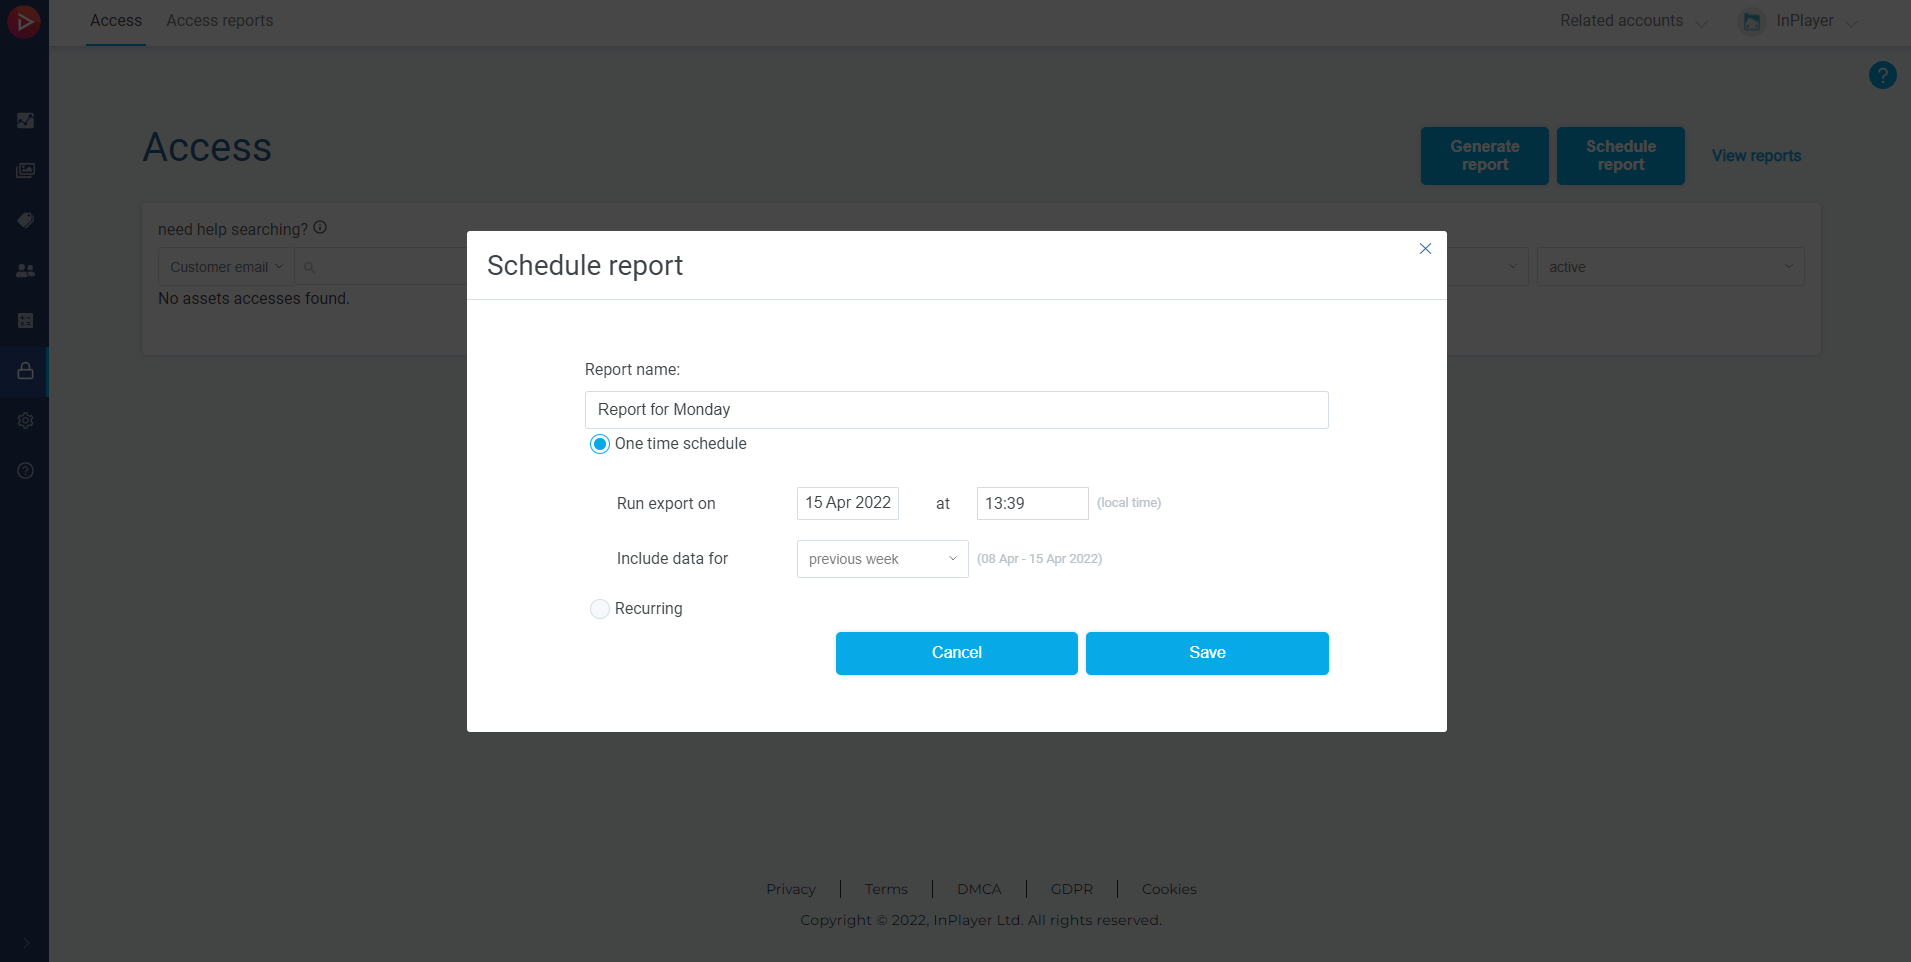
Click Schedule report.
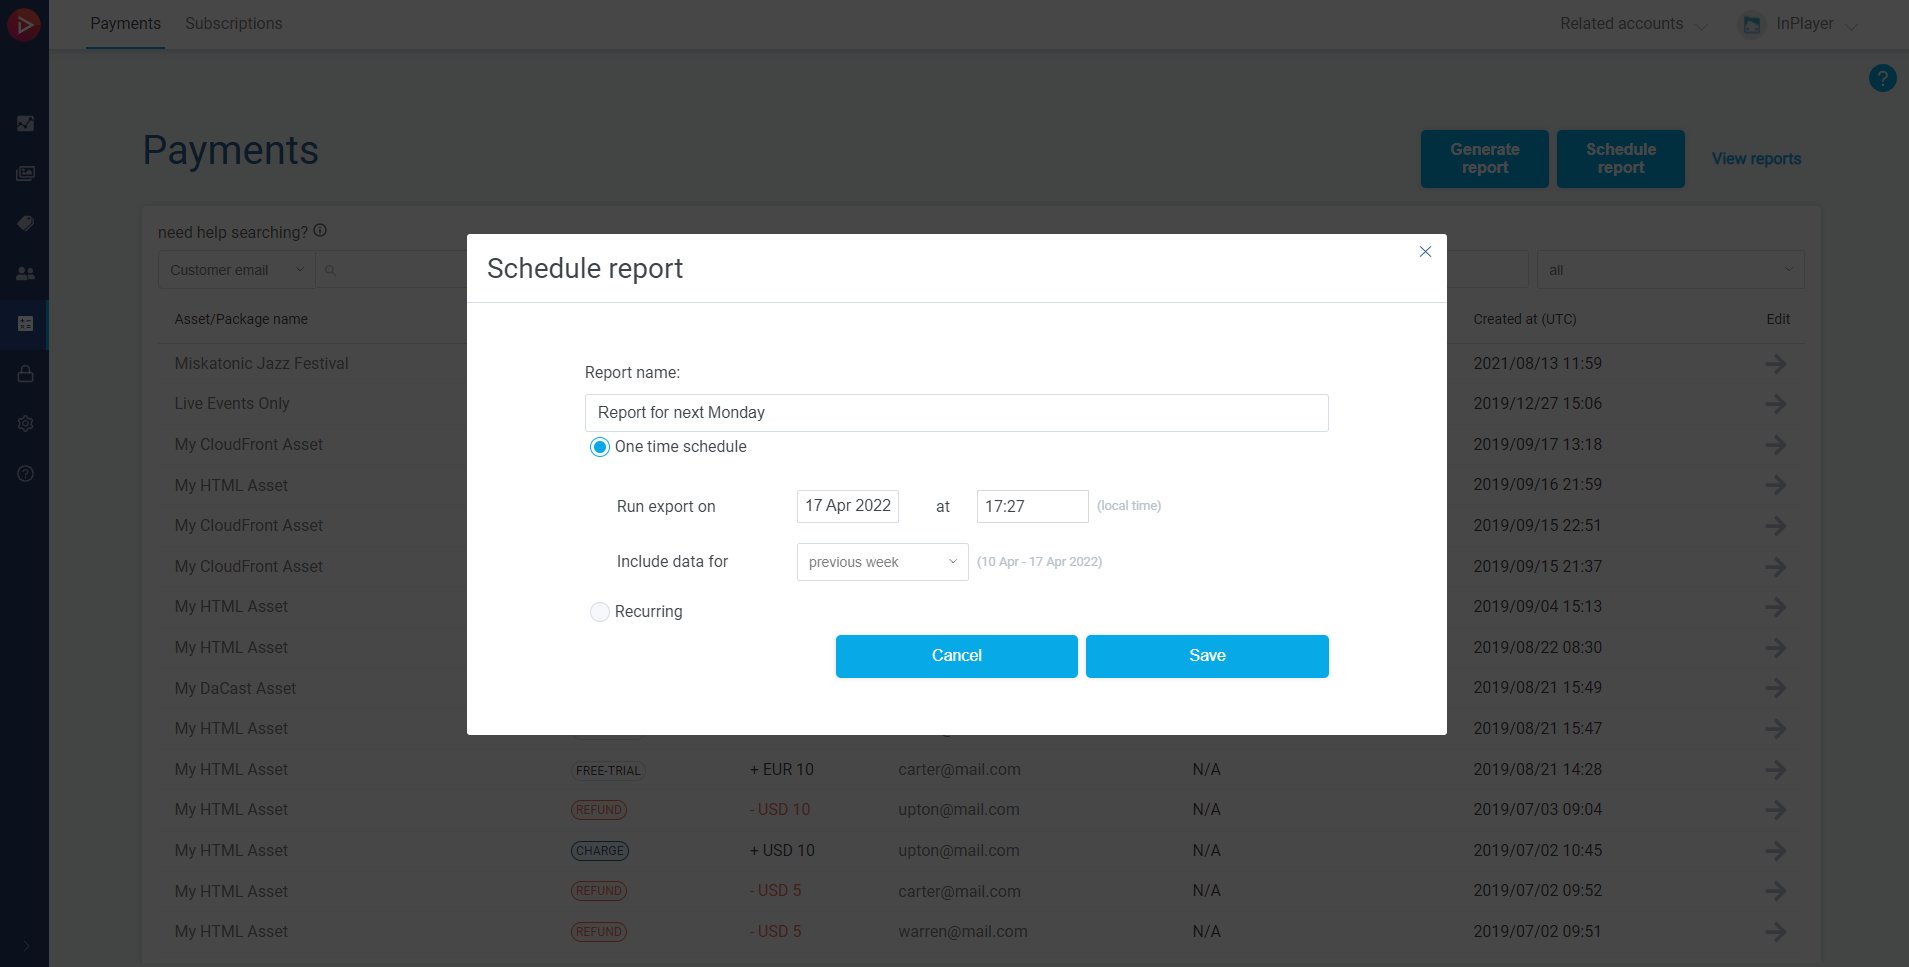
Name your report.
Next, choose between One time schedule and Recurring.
One time scheduled will generate just one report on the date and time you set under Run export on, and will include the data for the date range you set up under Include data for.
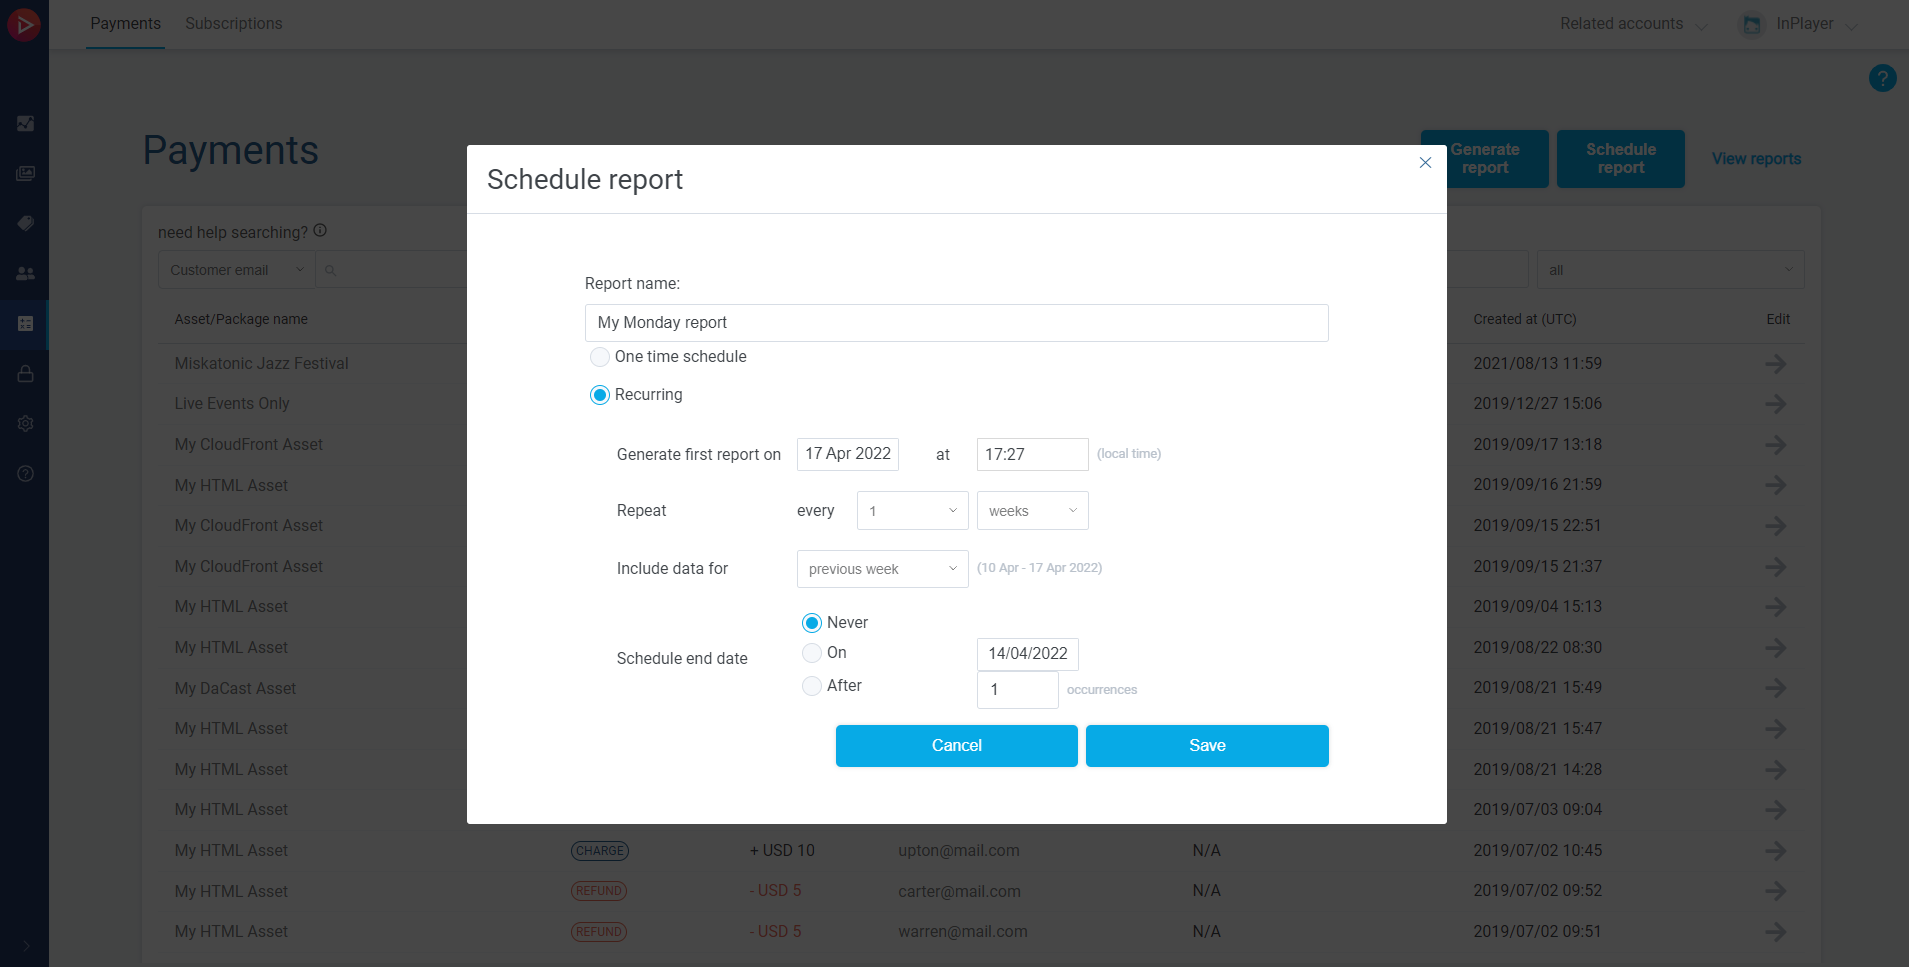
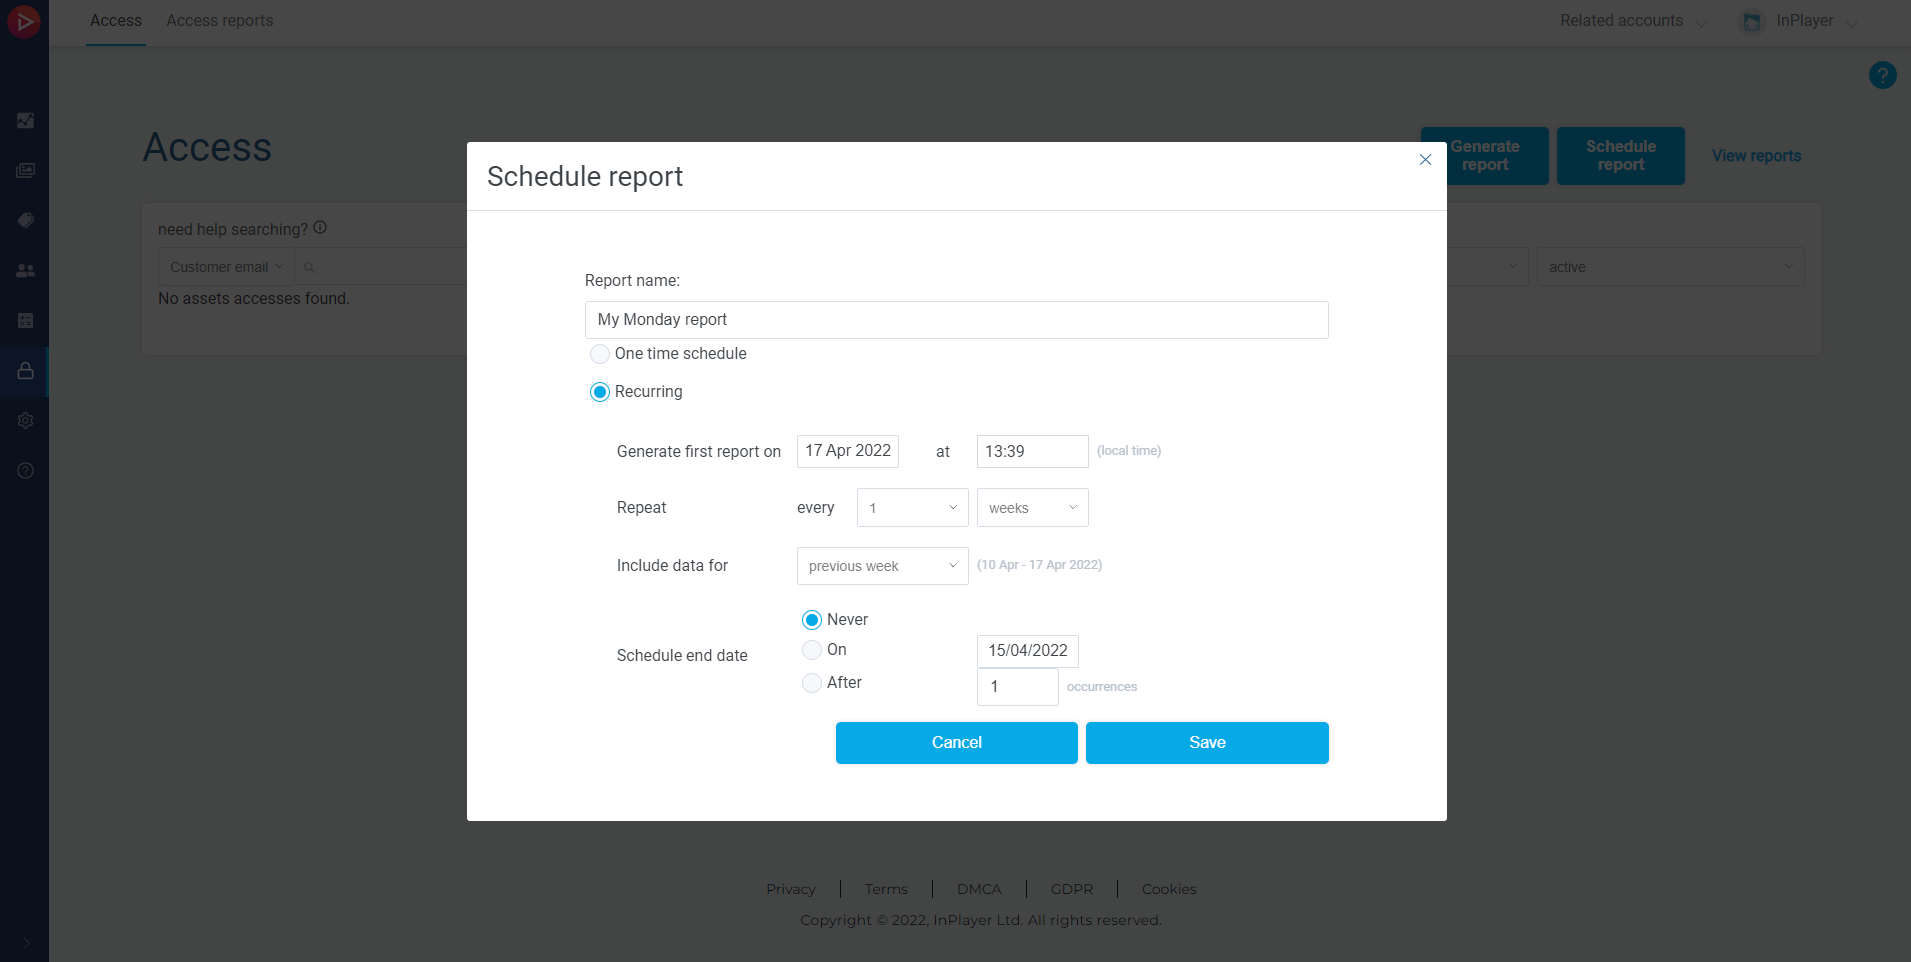
Recurring will schedule the generation of recurring reports at regular intervals.
The first report will be generated on the date and time you set under Generate first report on, will continue to repeat according to the interval you set under Repeat, will include the data for the date range you set up under Include data for, and will end according to your selection under Scheduled end date.
Once you set everything up, click Save.
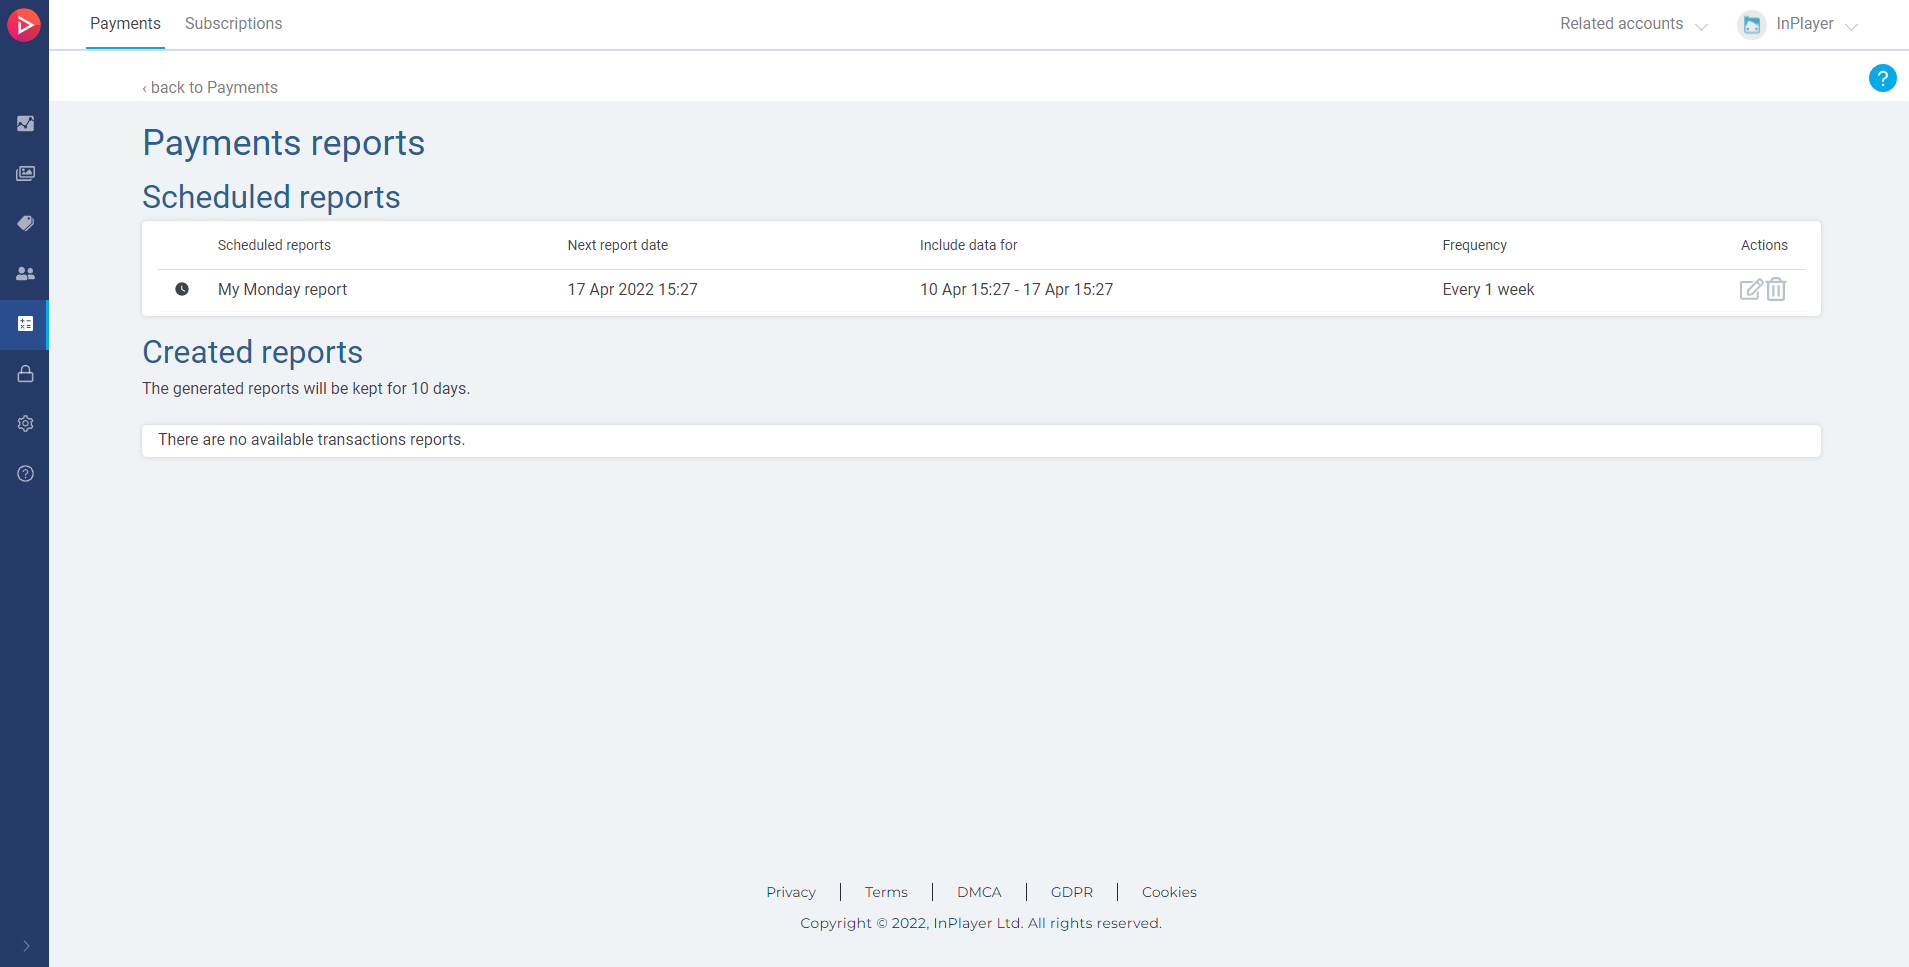
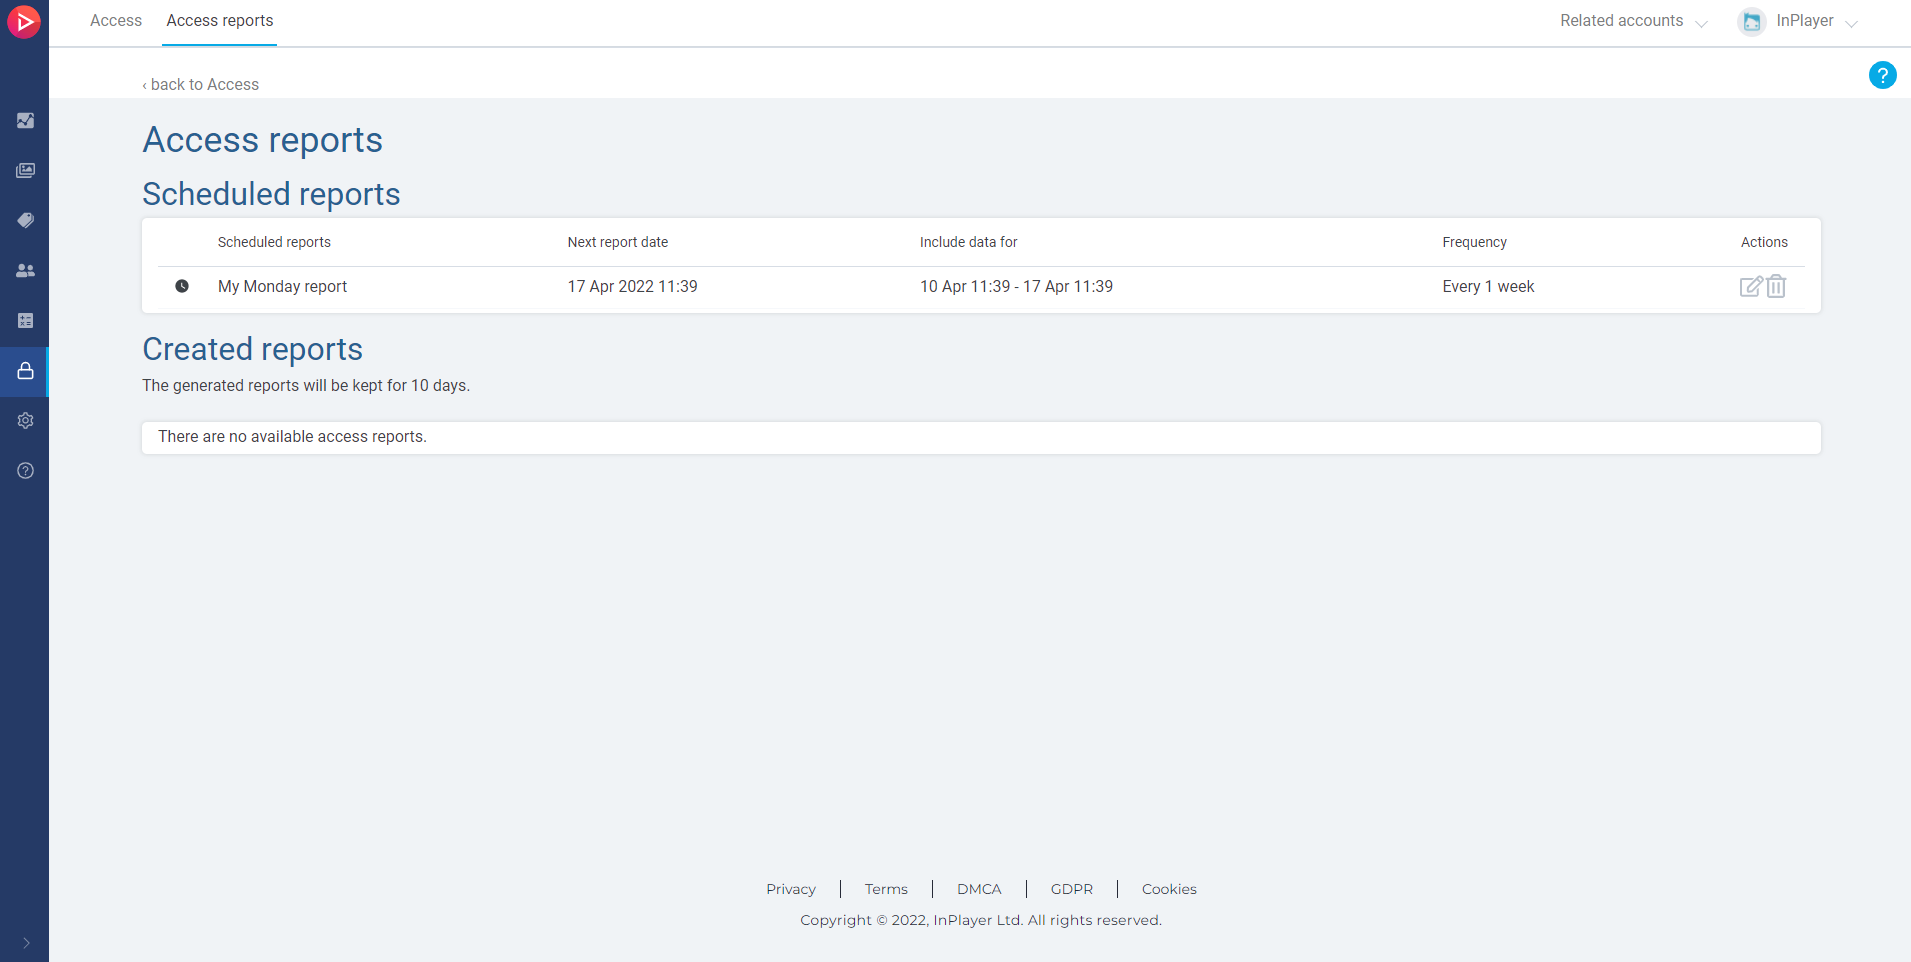
To get your report, click on View reports.
You will find your report under Scheduled reports.
Here, you can download the report as a CSV file once it’s generated, or edit it.
All generated reports will be kept for 10 days and then automatically deleted.
This concludes our guide.
If you have any questions, don’t hesitate to contact us at clients@inplayer.com.
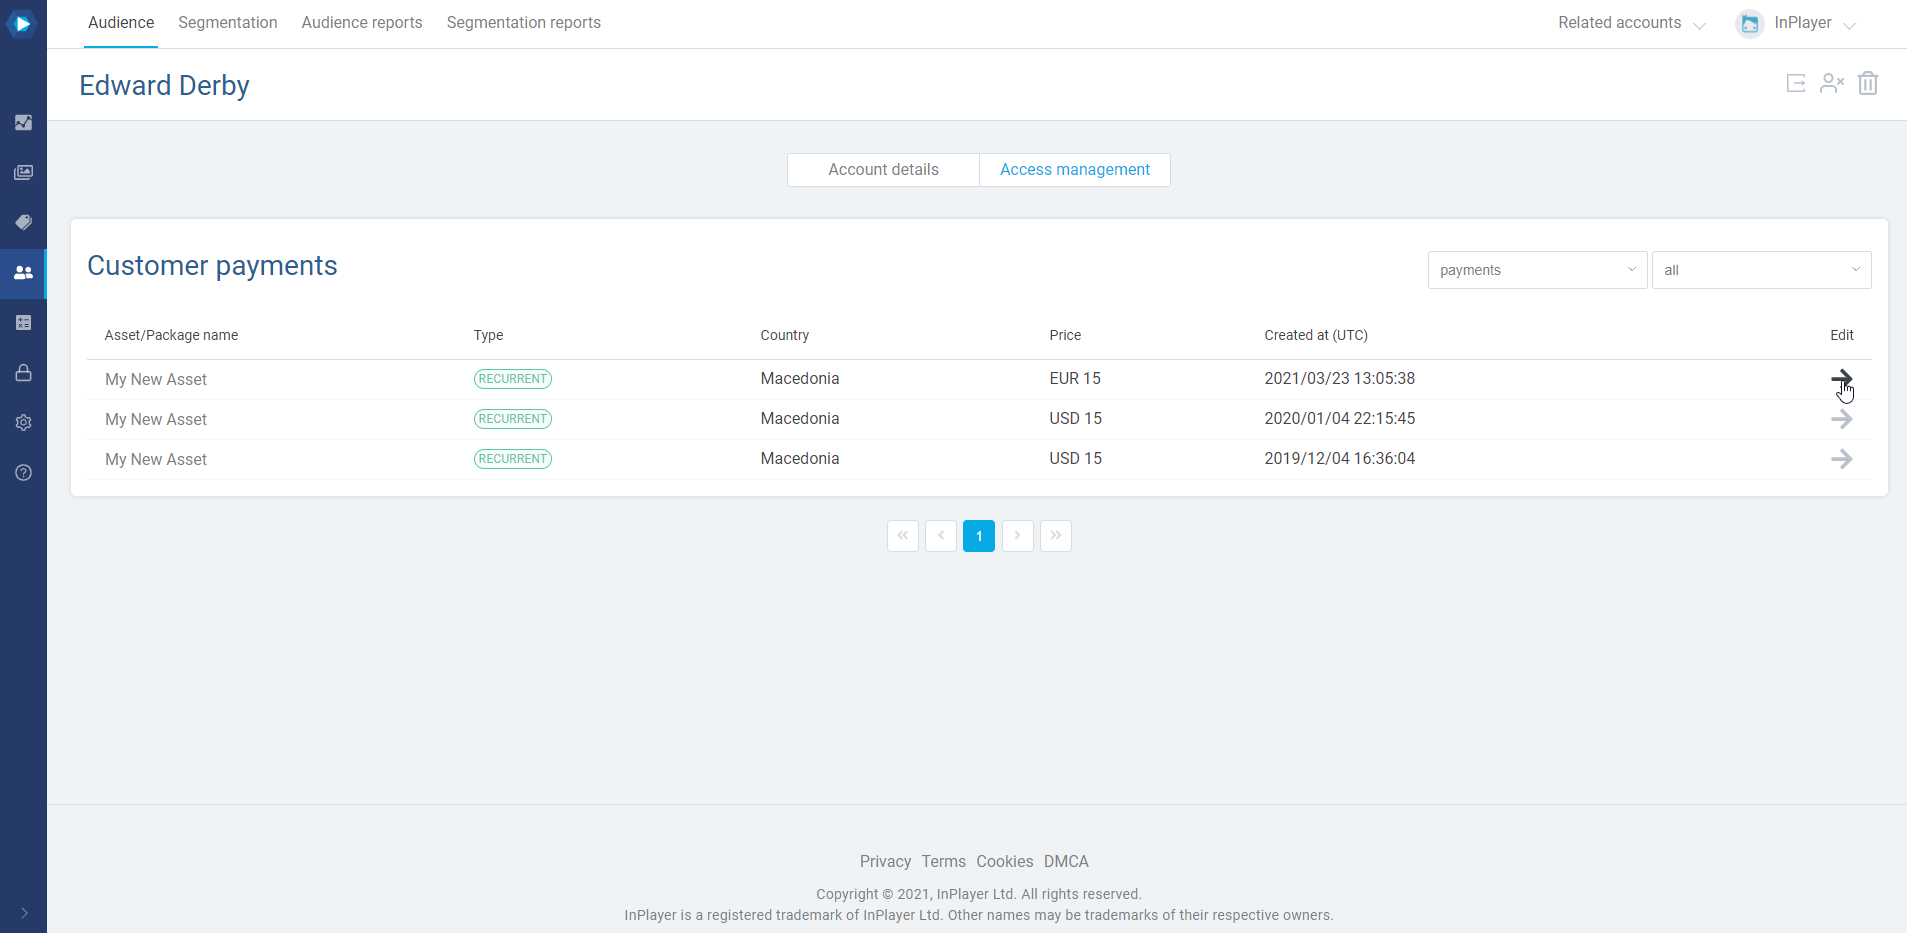
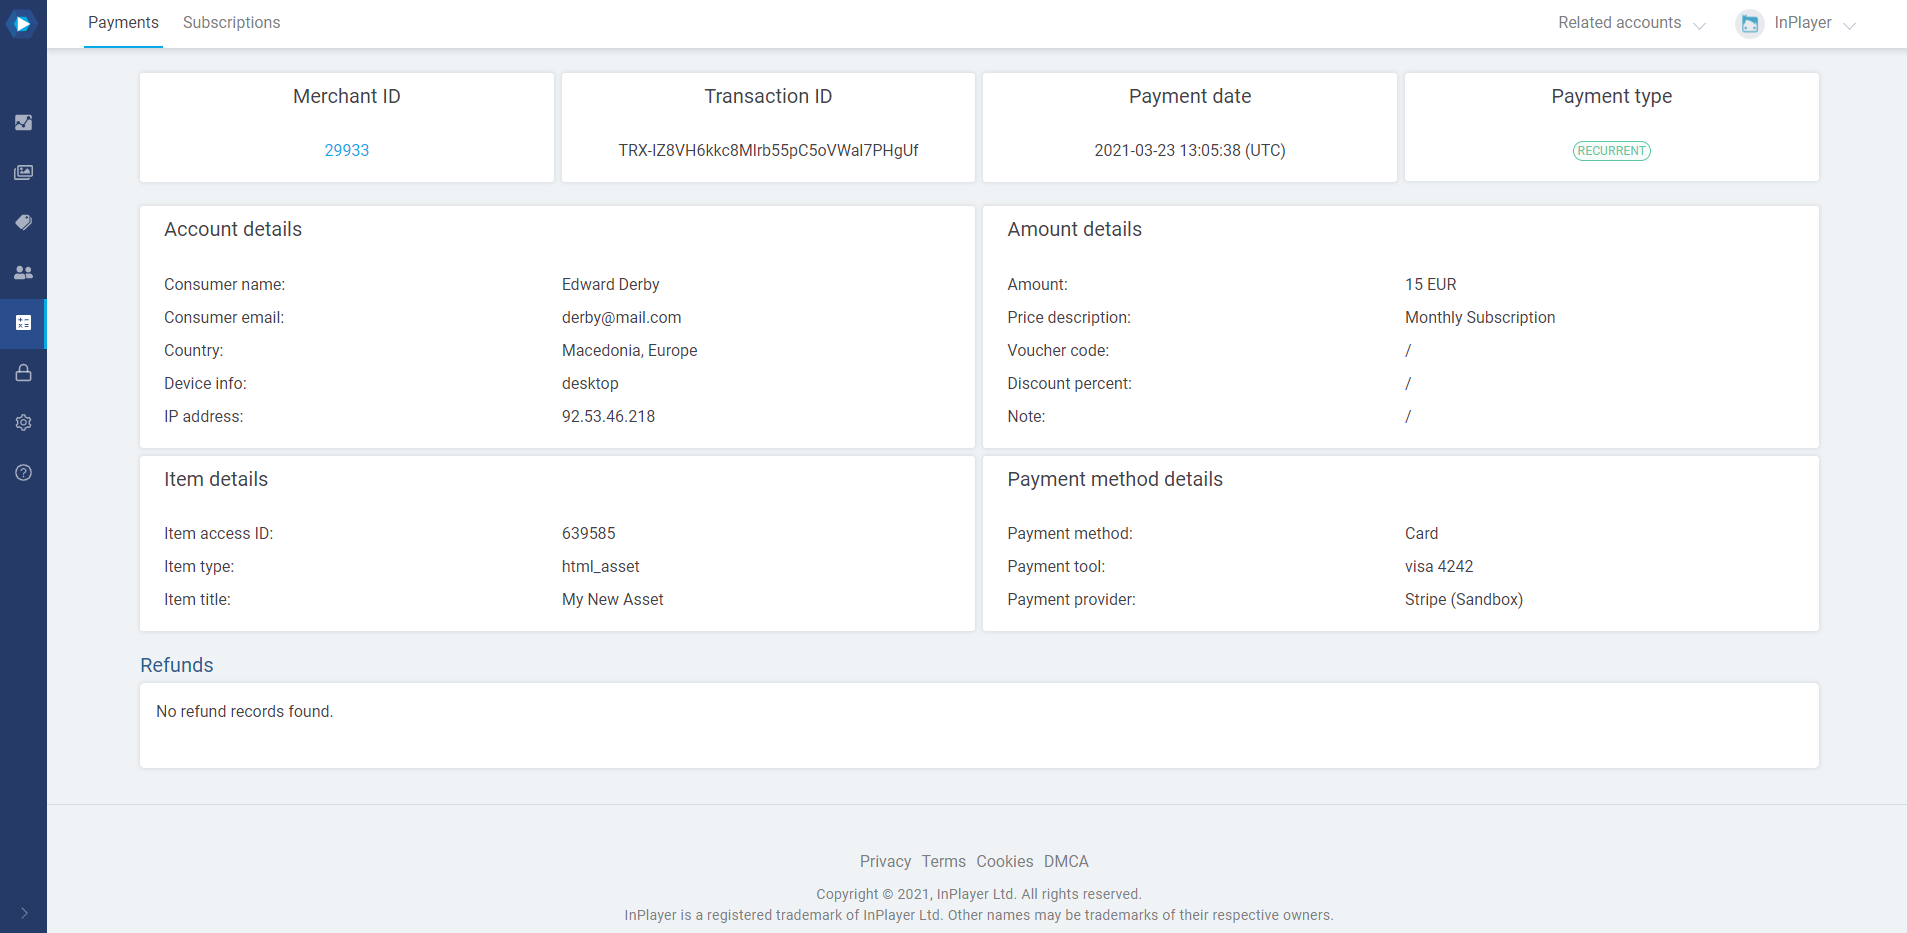
With Payment reports, you can get all the data related to every payment that was made on your account. How the payment was made, whether a voucher was used, and all other details are included.
To get a Payment report, do the following:
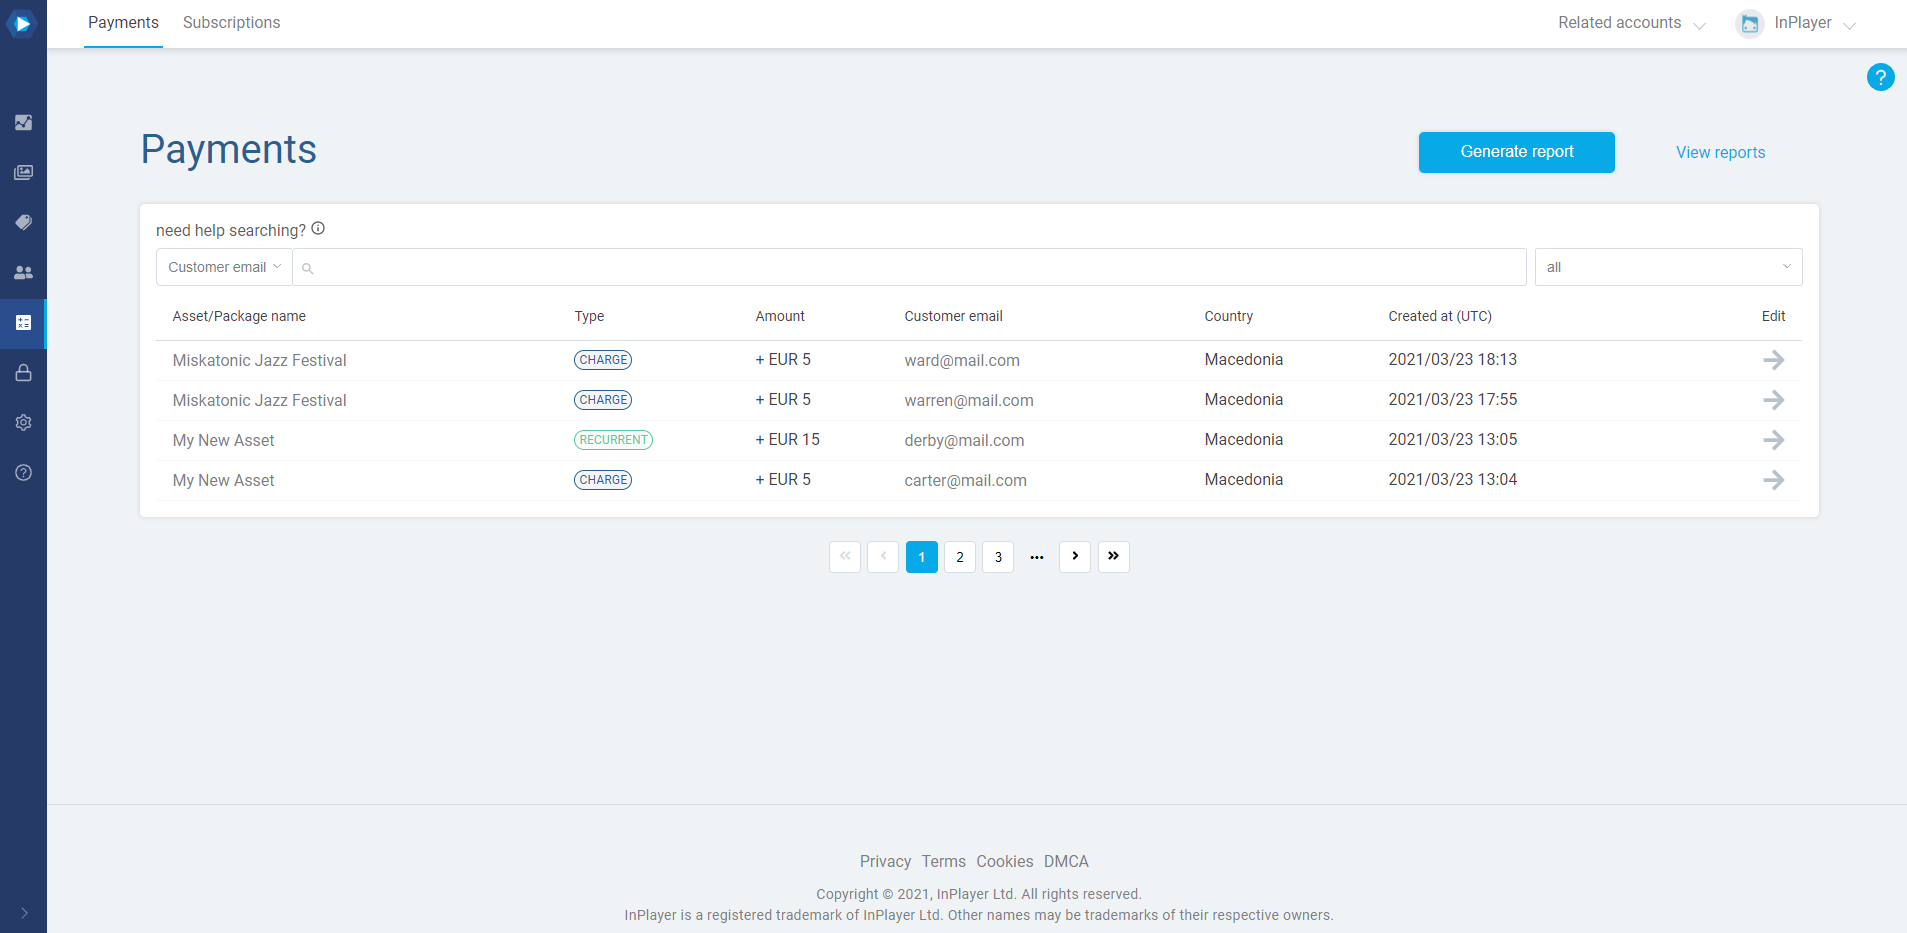
In the InPlayer Dashboard, go to the Transactionssection.
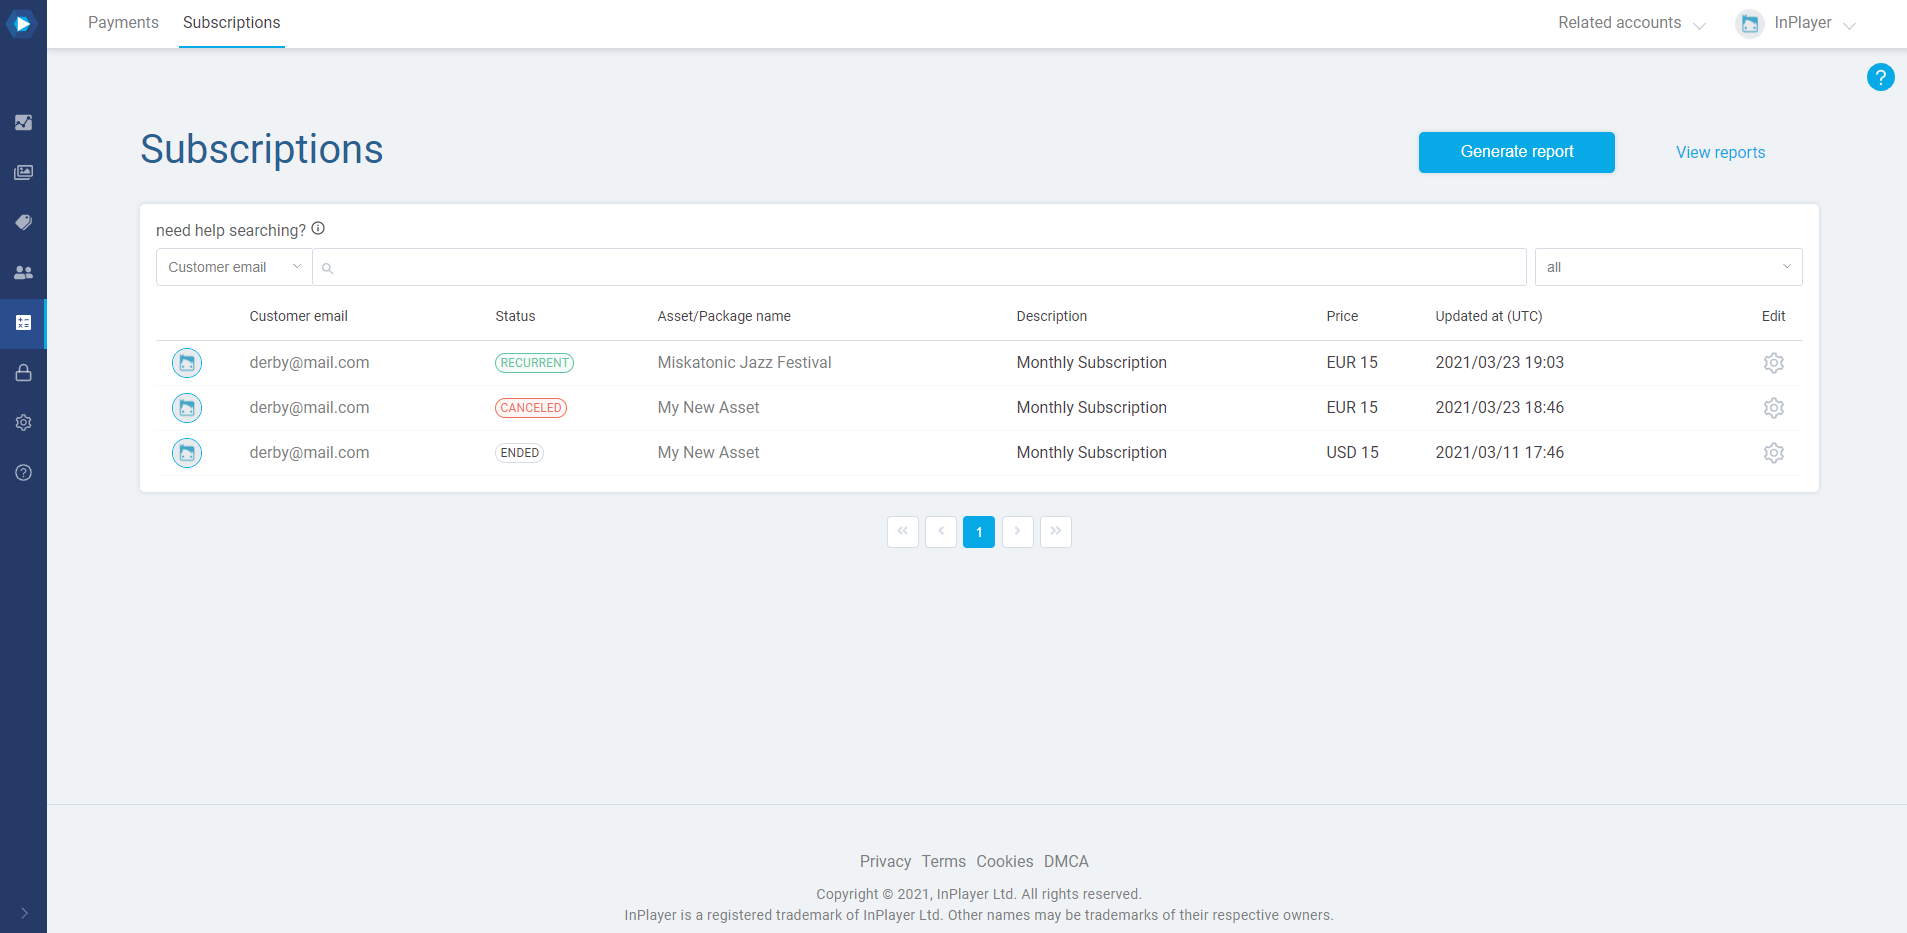
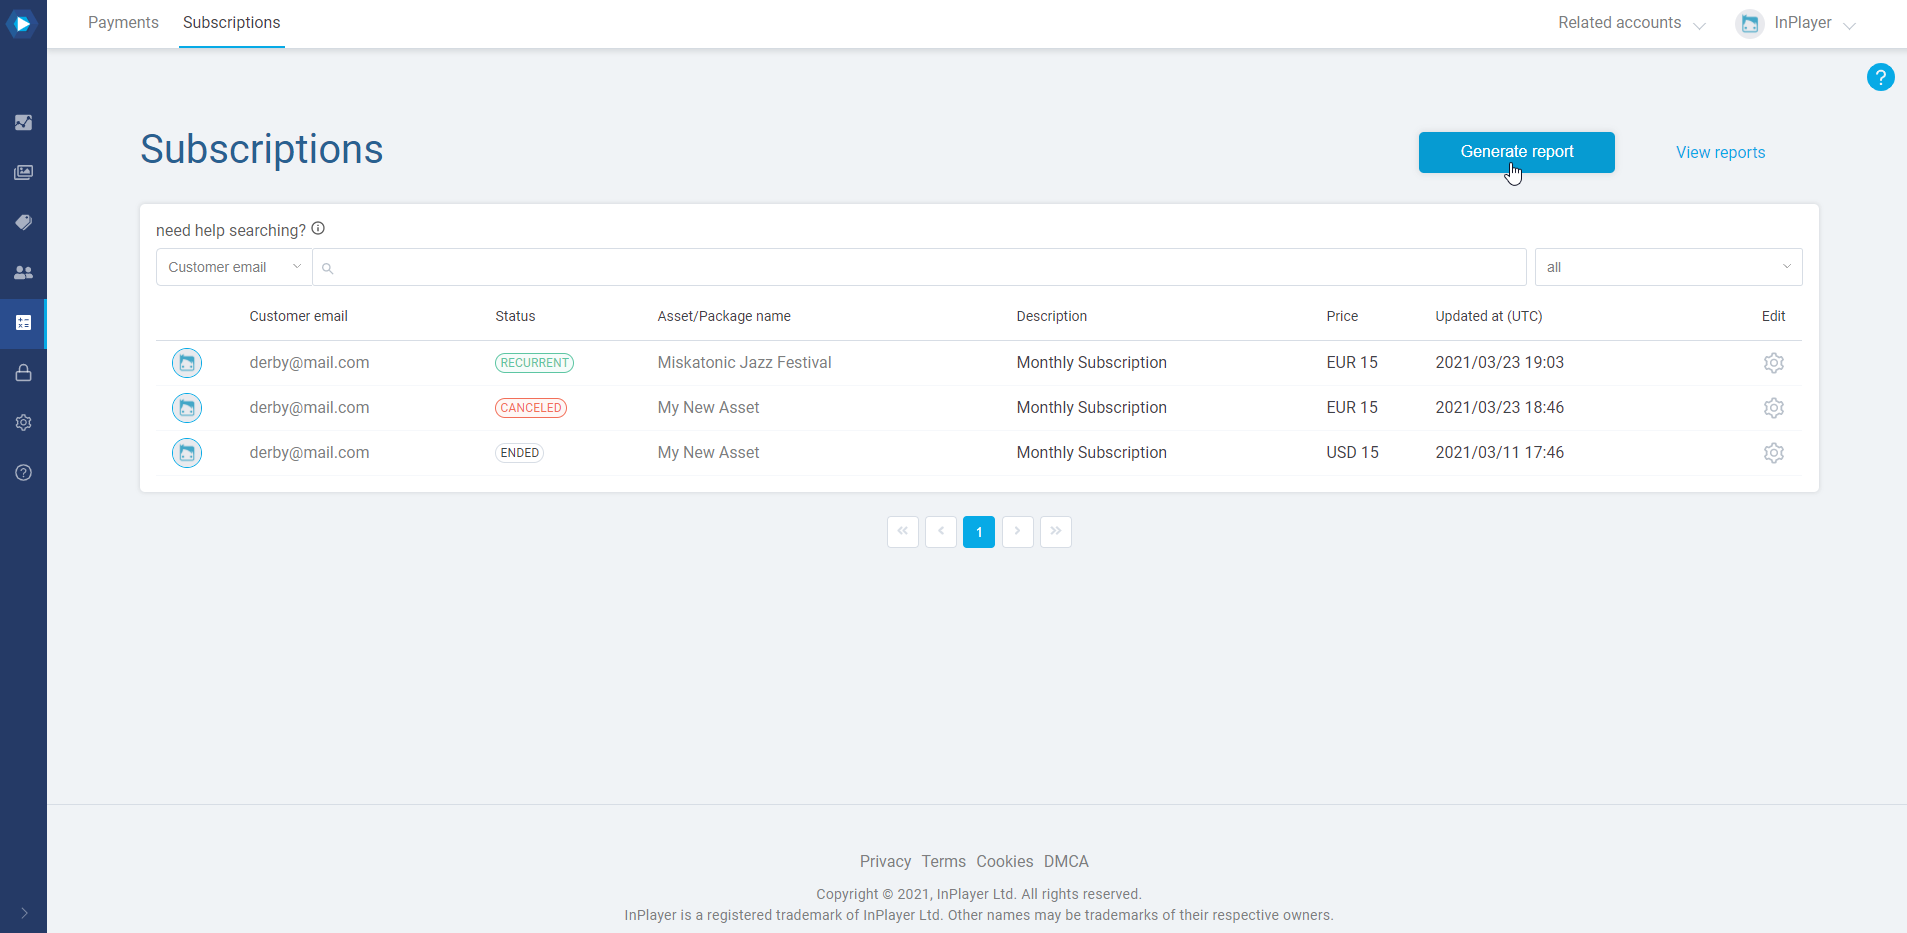
In the Payments tab click Generate report.
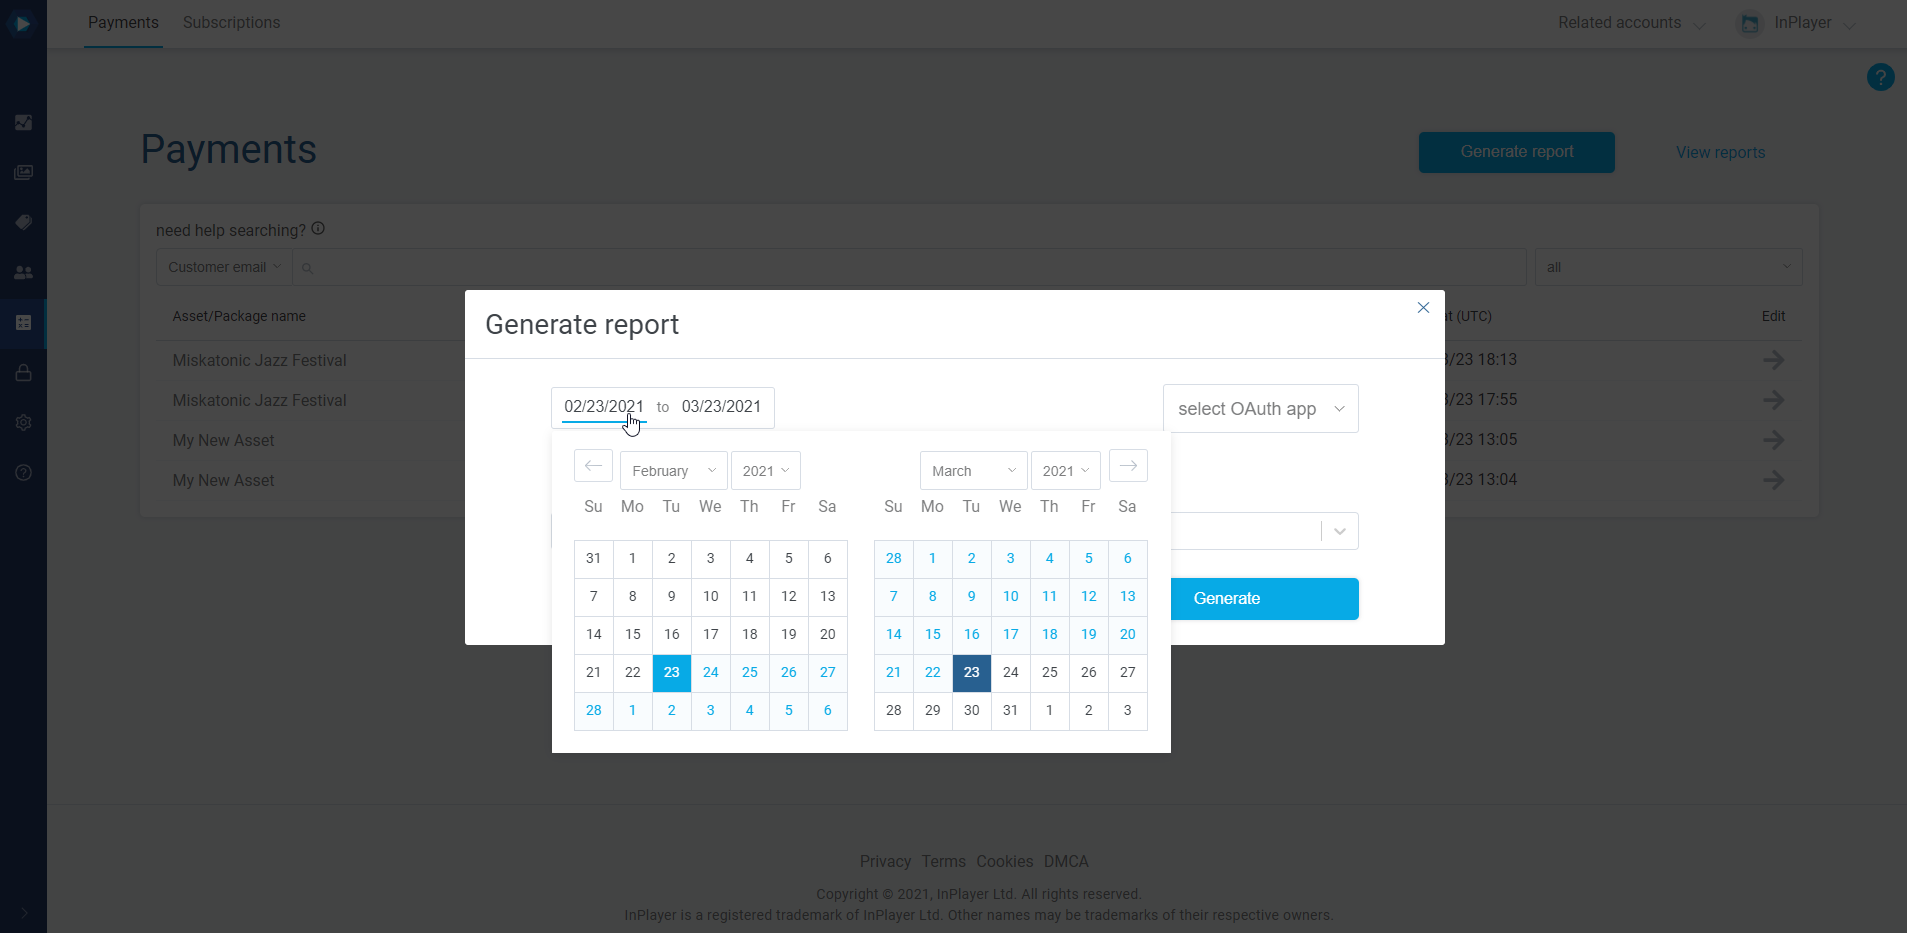
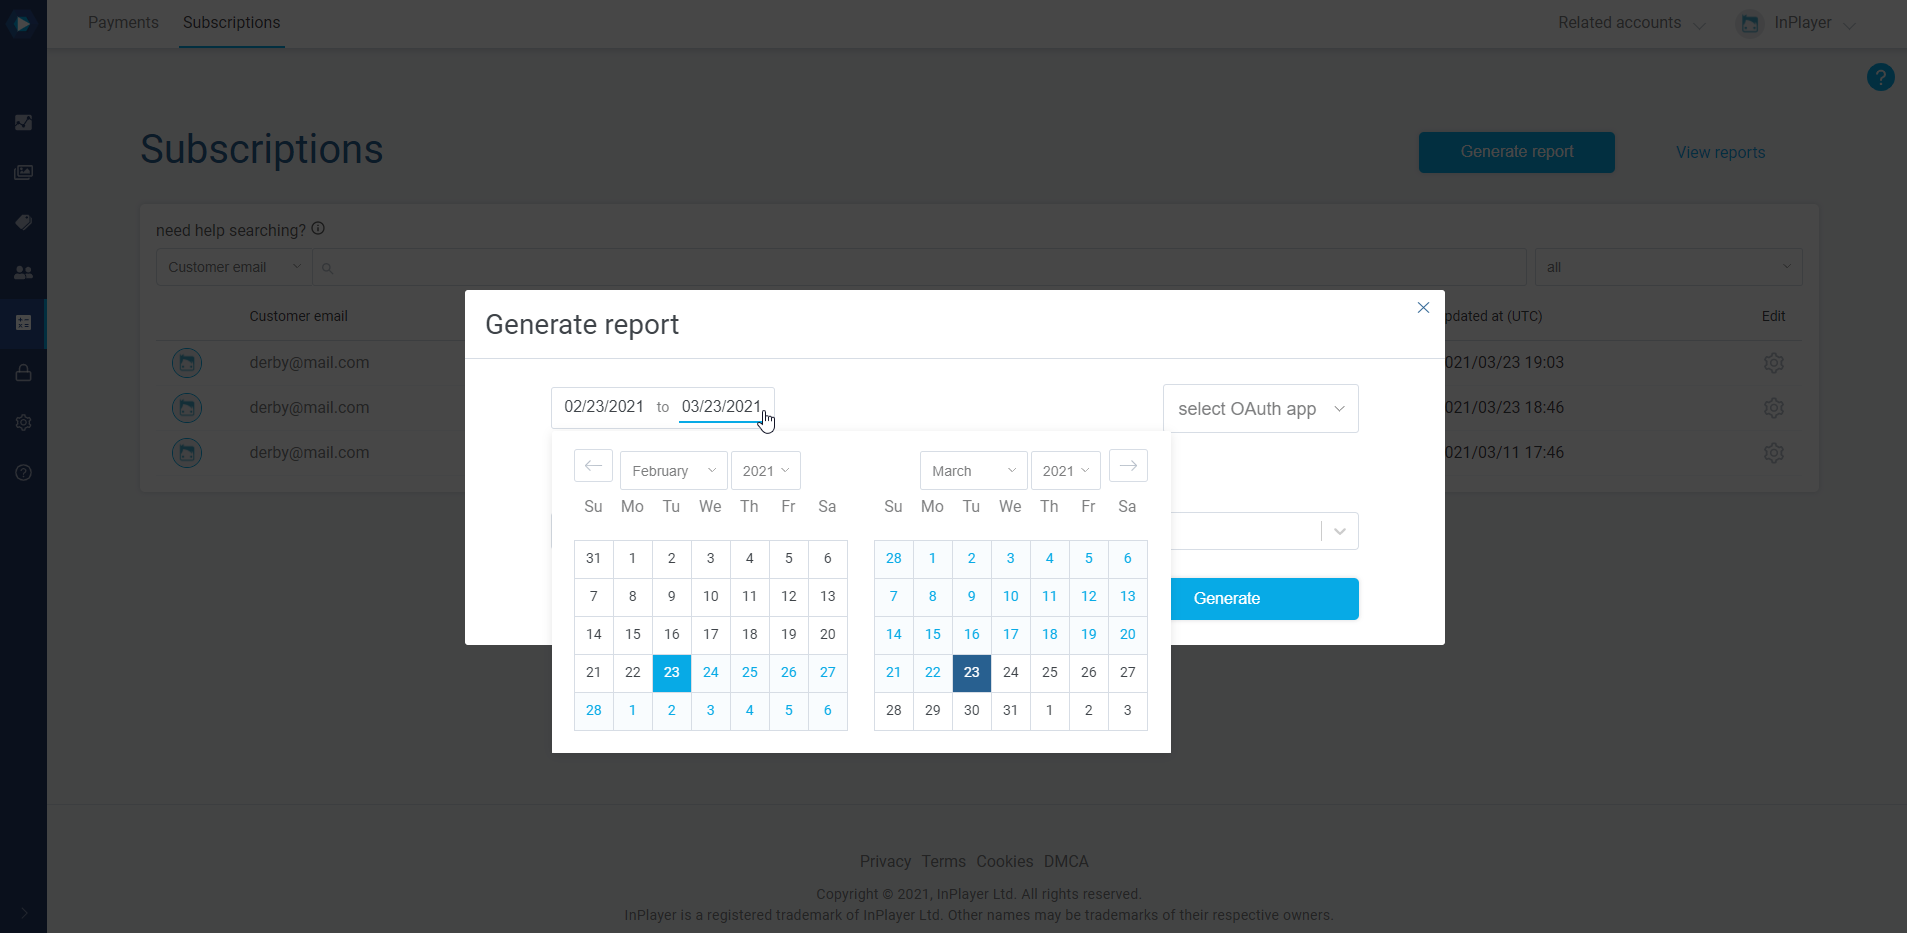
Choose the time period. The report will include all payments that were made within the selected period.
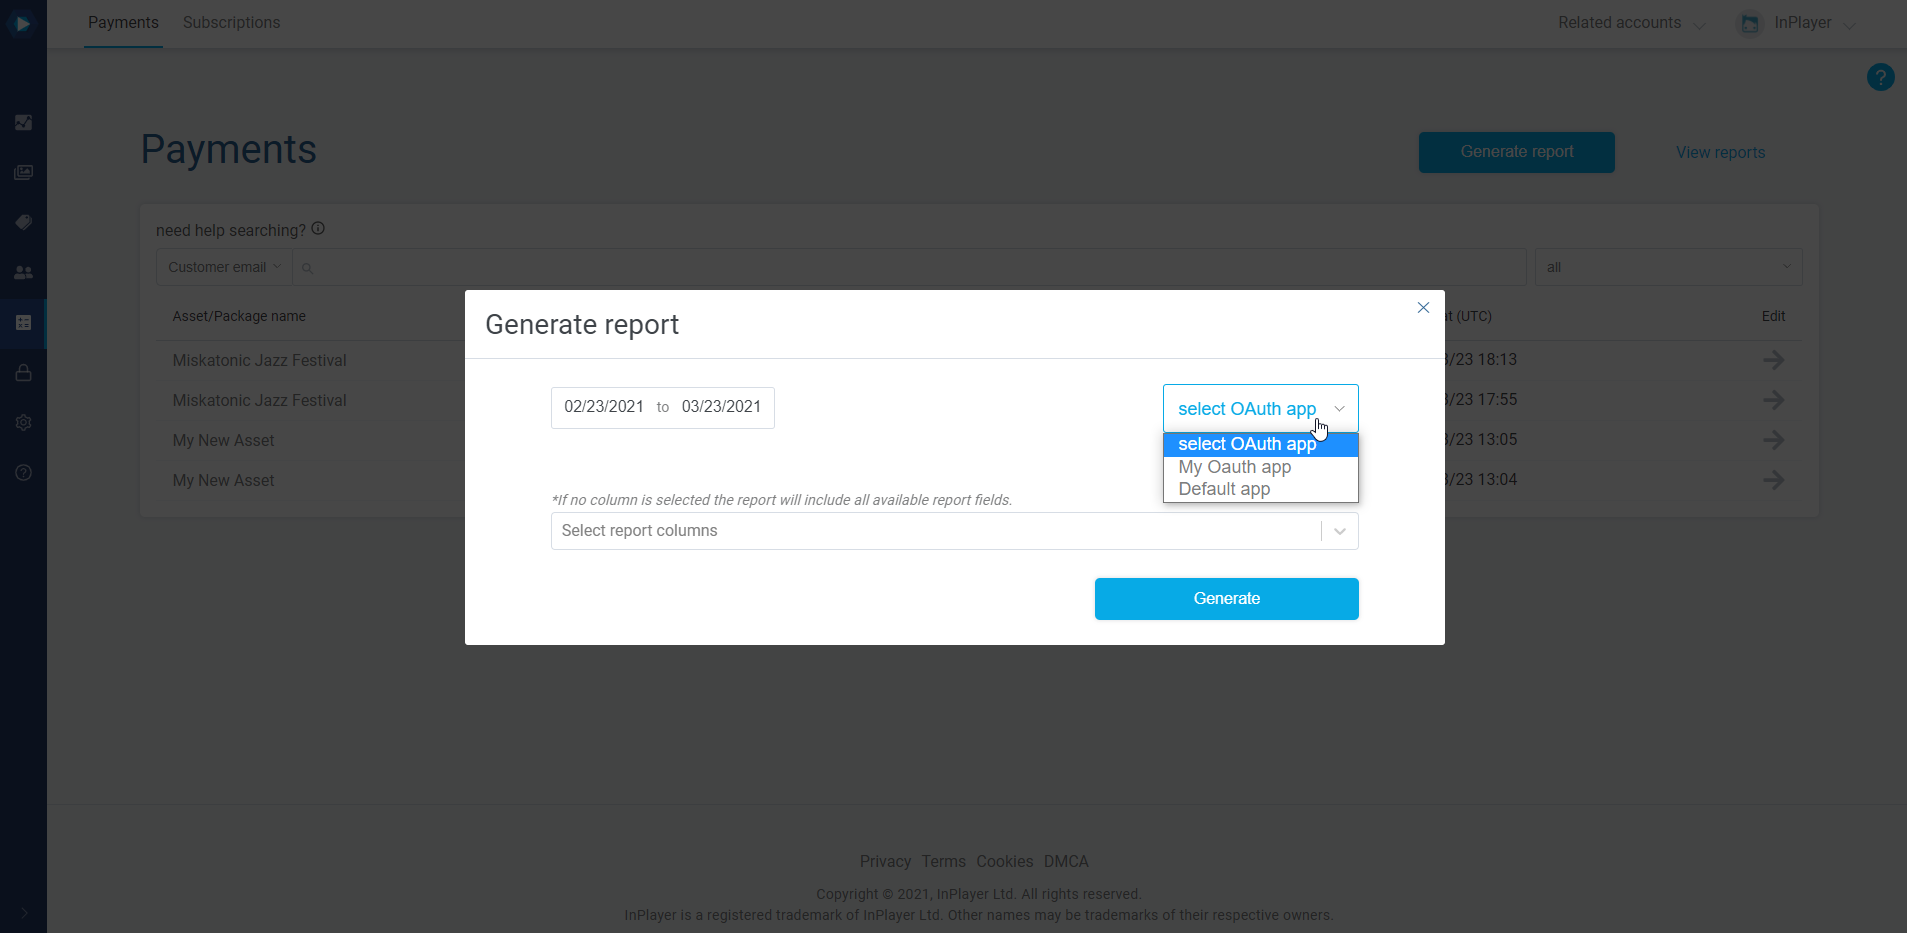
Next, select whether you want to get the data for payments from all OAuth apps, or a specific one. Choosing select OAuth app will include all payments from all OAuth apps. To learn more about OAuth, click here.
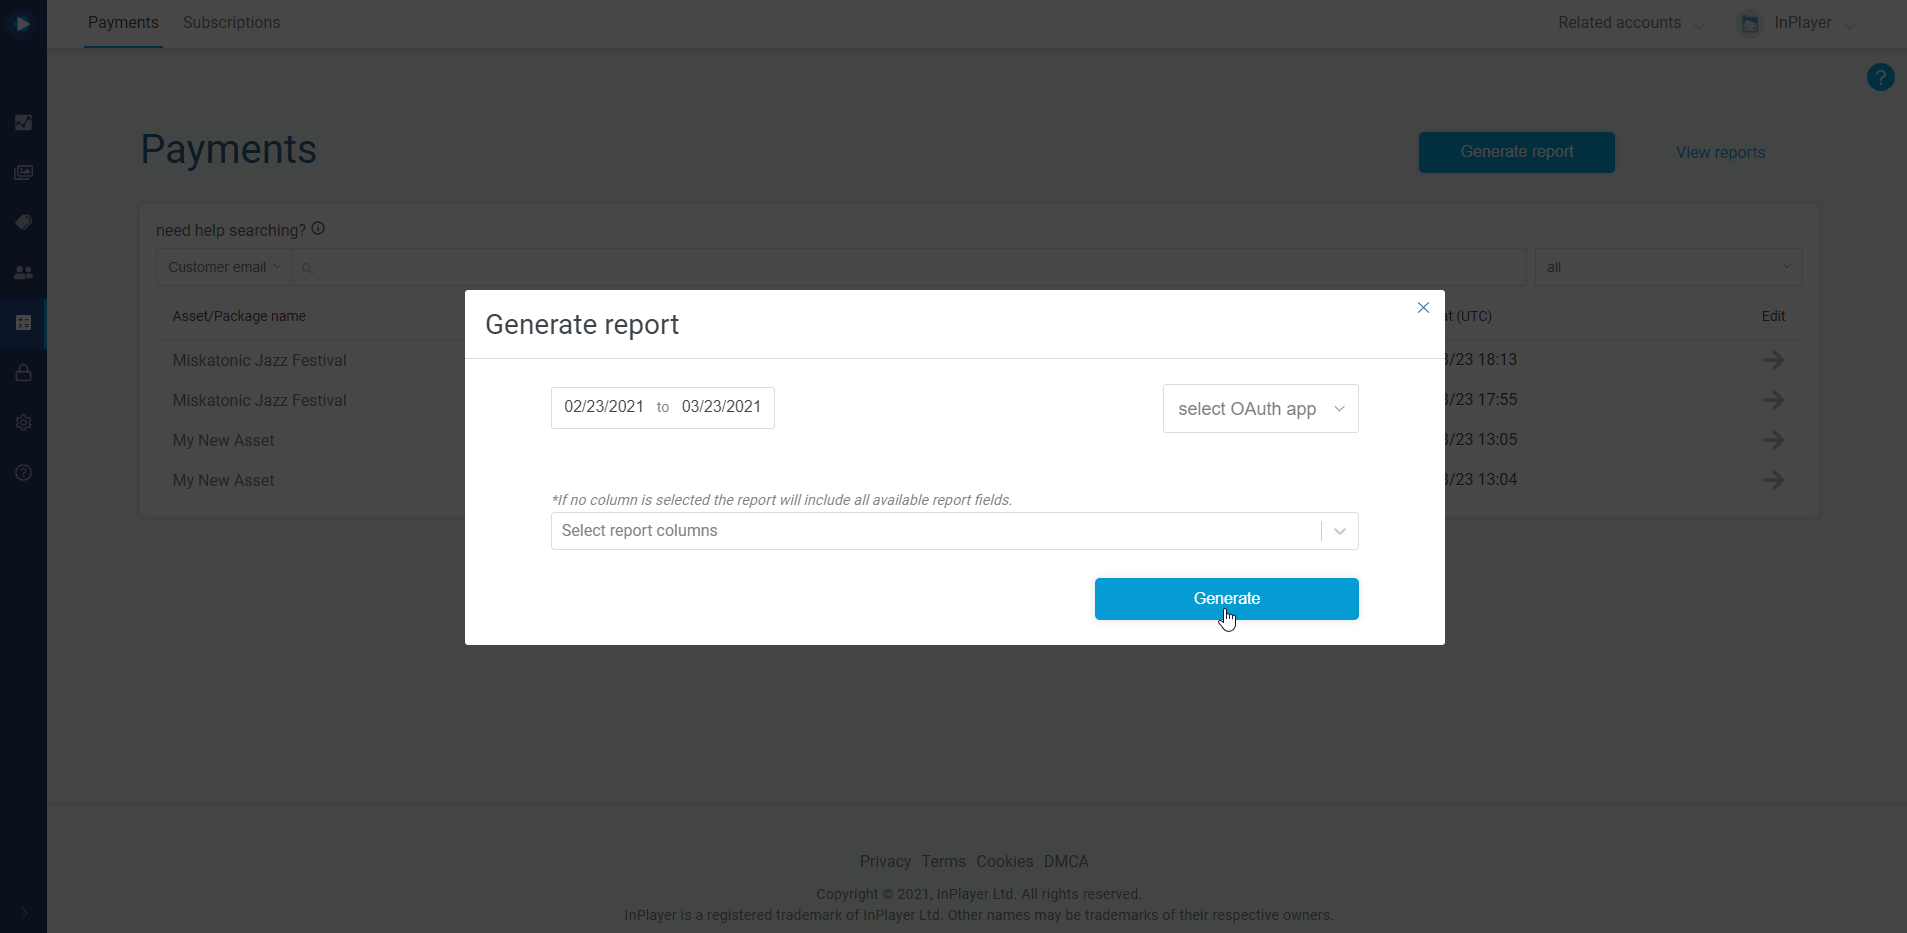
In the Select report columns field you can choose what data you want the report to include. If you leave this field blank, all data will be included.
Finally, click Generate.
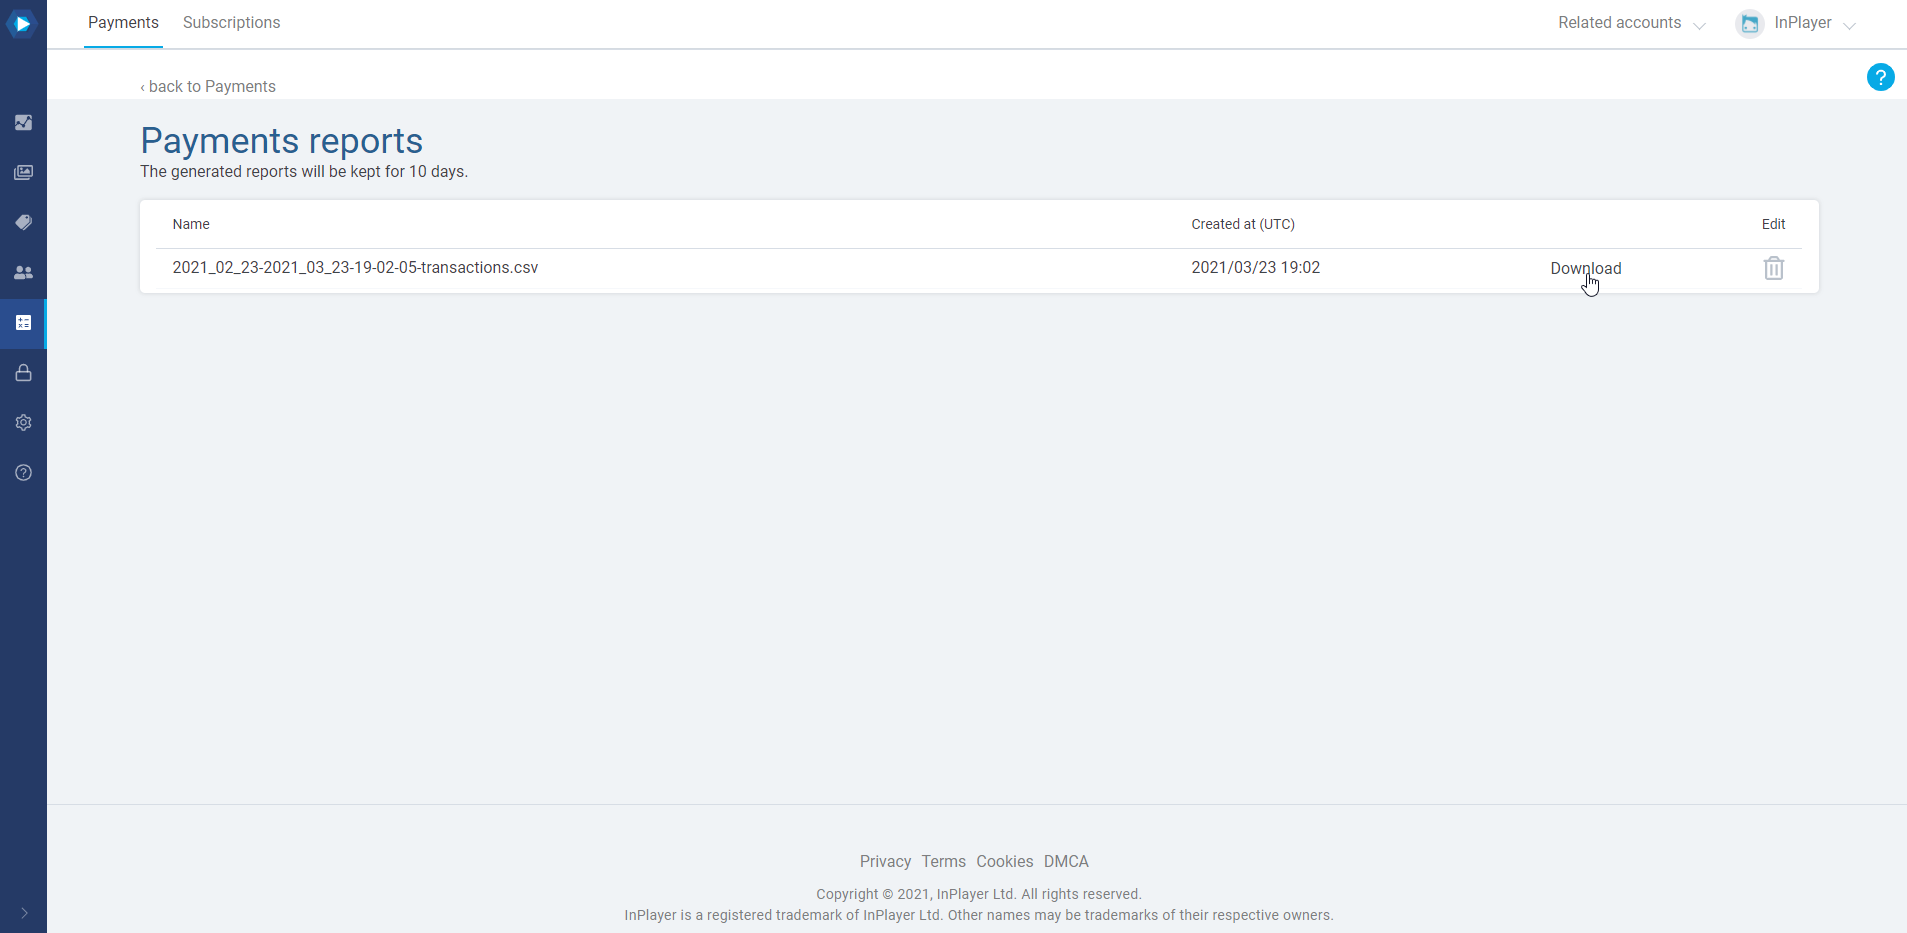
To get your report click on View reports.
Here, you can download the report as a CSV file.
All generated reports will be kept for 10 days and then automatically deleted.
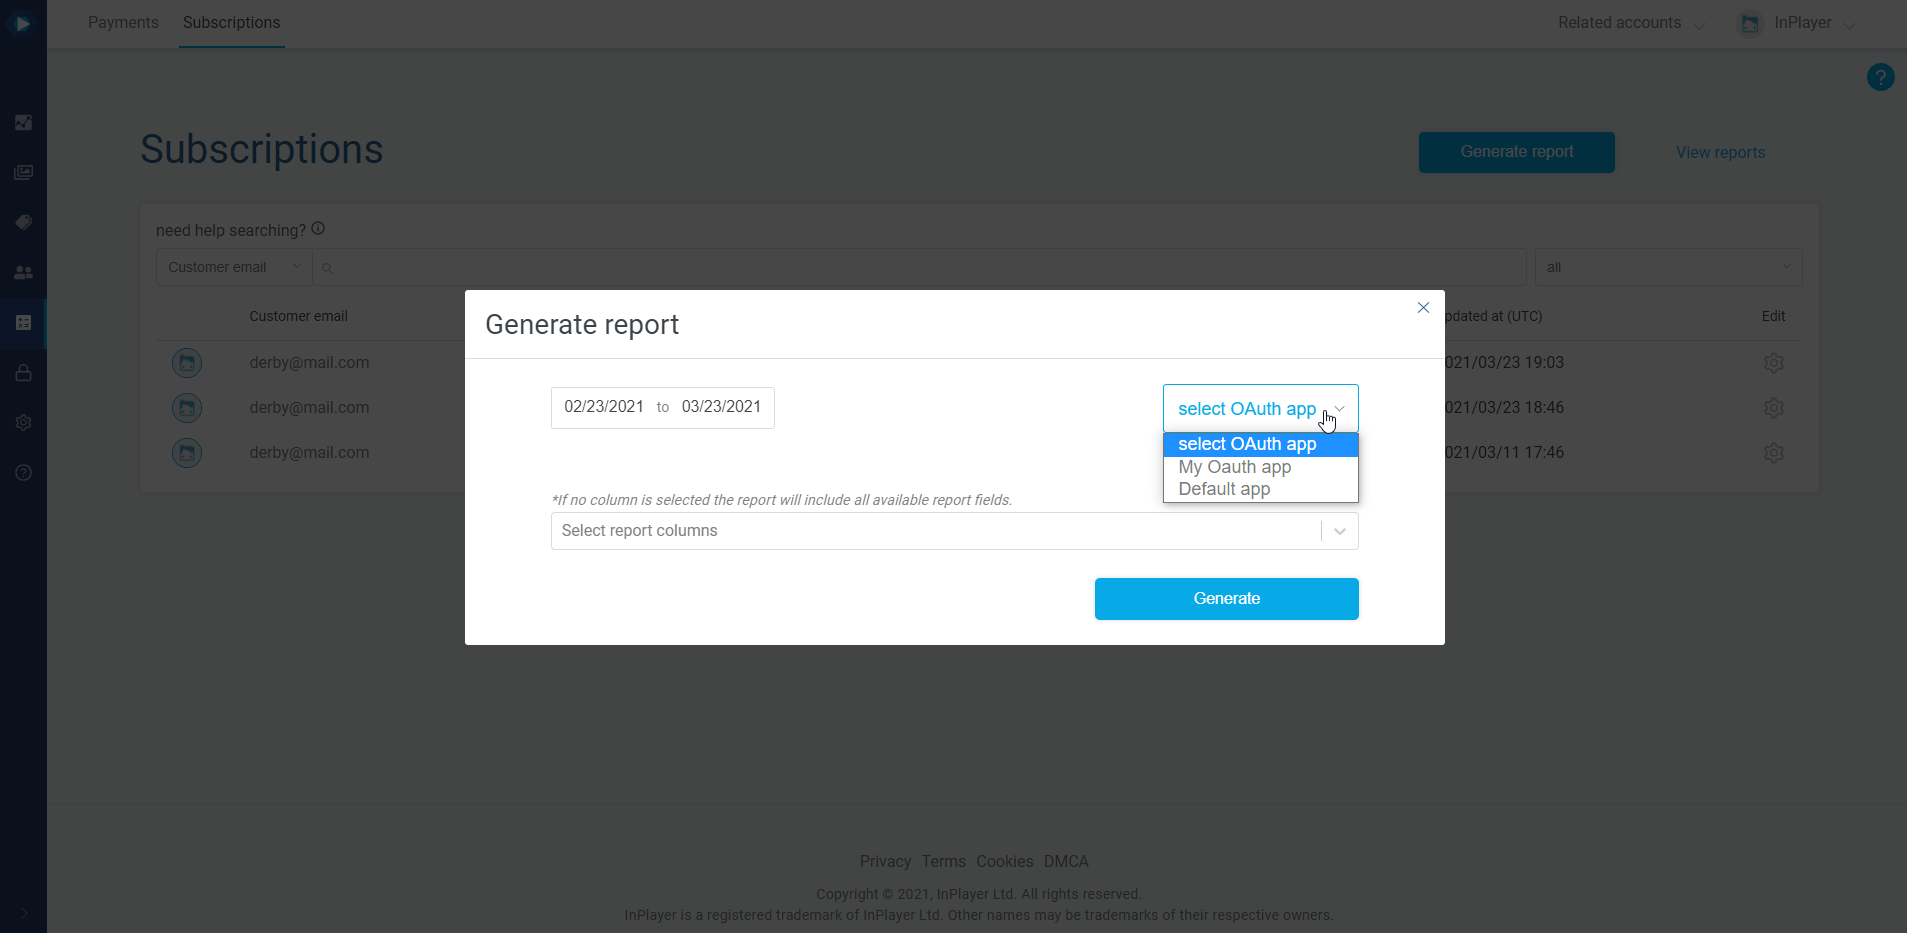
Choose the time period. The report will include all subscriptions that were created within the selected period. Note that if you need a report with the individual subscription payments, you would need to make a Payment report, as described in the Payment reports section above.
Next, select whether you want to get the data for subscriptions from all OAuth apps, or a specific one. Choosing select OAuth app will include all subscriptions from all OAuth apps. To learn more about OAuth, click here.
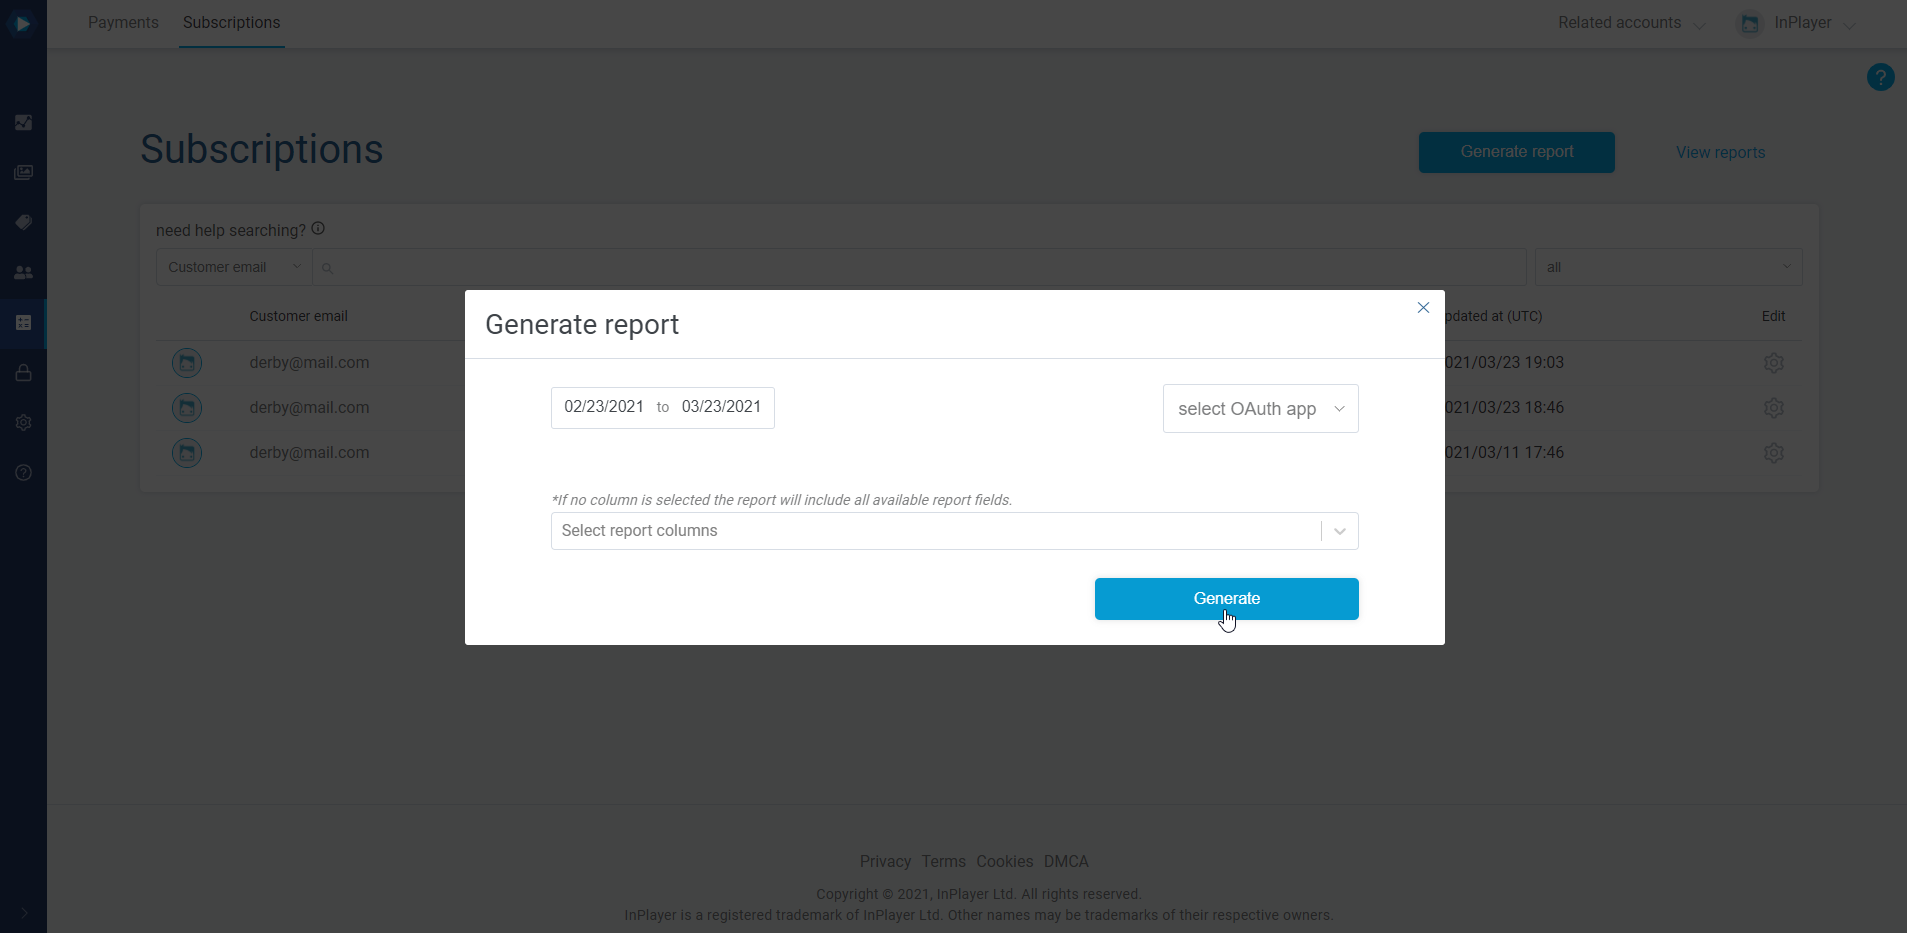
In the Select report columns field you can choose what data you want the report to include. If you leave this field blank, all data will be included.
Finally, click Generate.
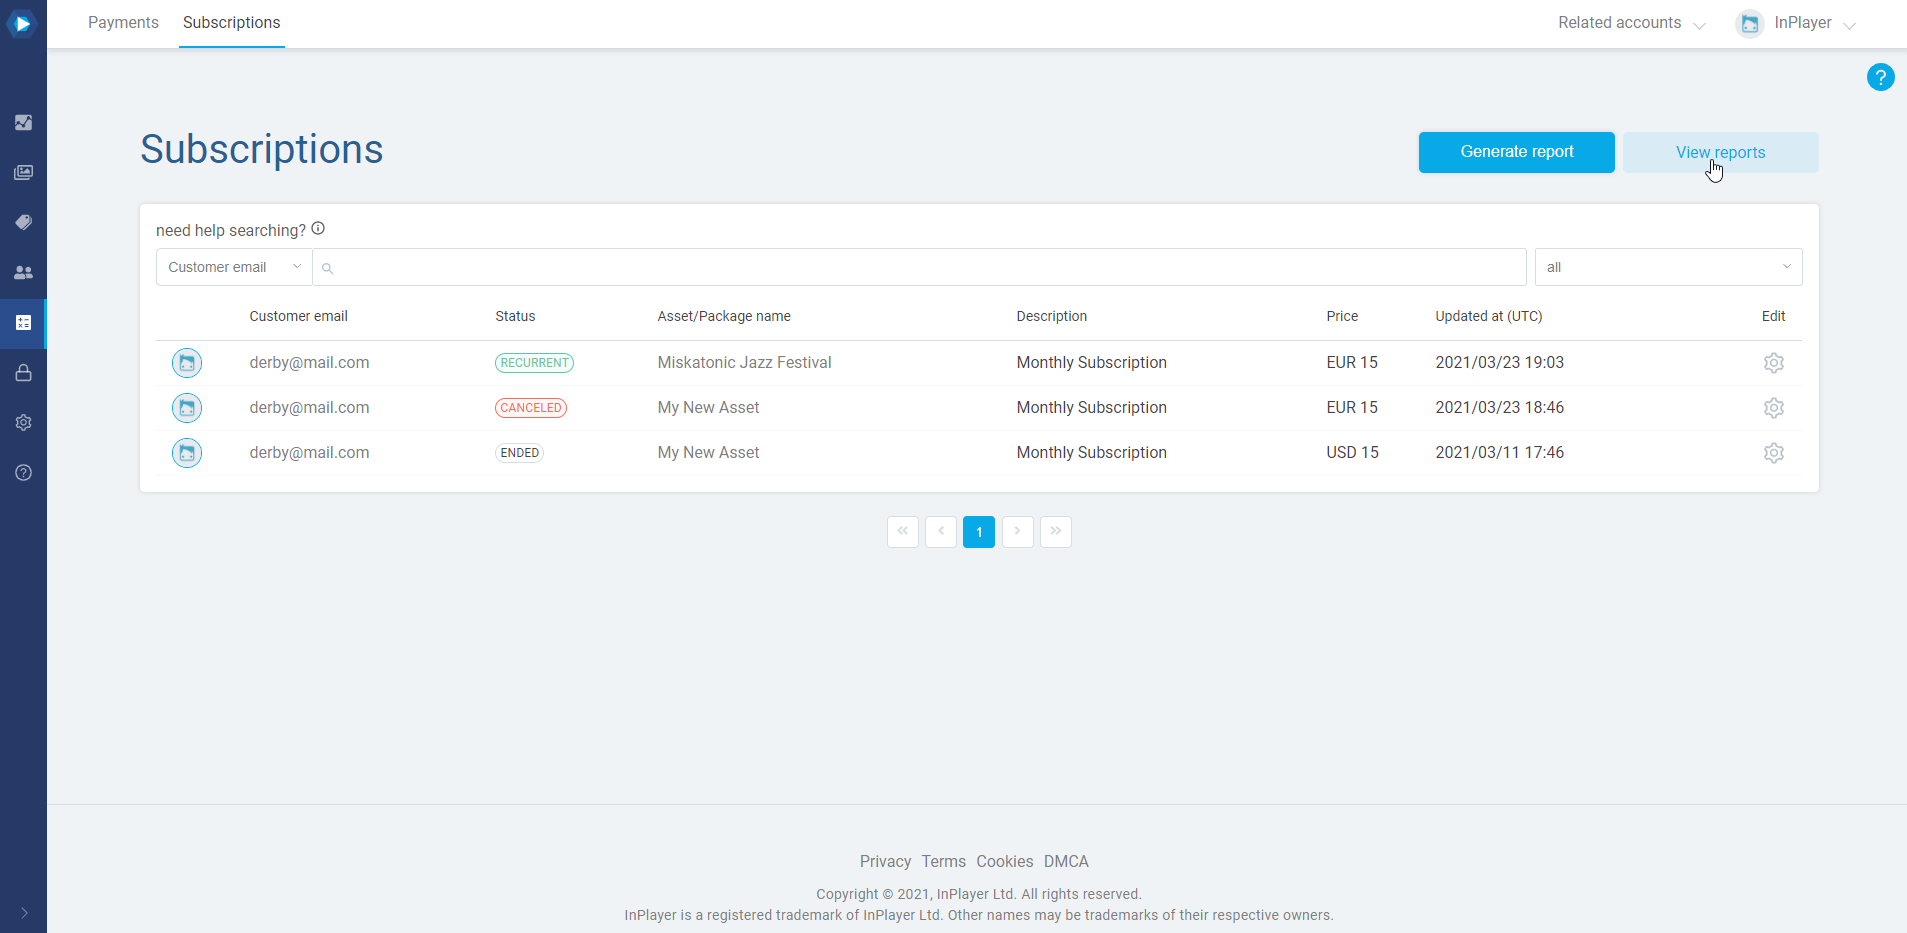
To get your report click on View reports.
Here, you can download the report as a CSV file.
All generated reports will be kept for 10 days and then automatically deleted.
With report scheduling, you can automatically generate reports at a certain time & date, eliminating the need to do this manually. This can be quite useful for recuring reports you do on a regular basis.
To schedule the automatic creation of a report, do the following:
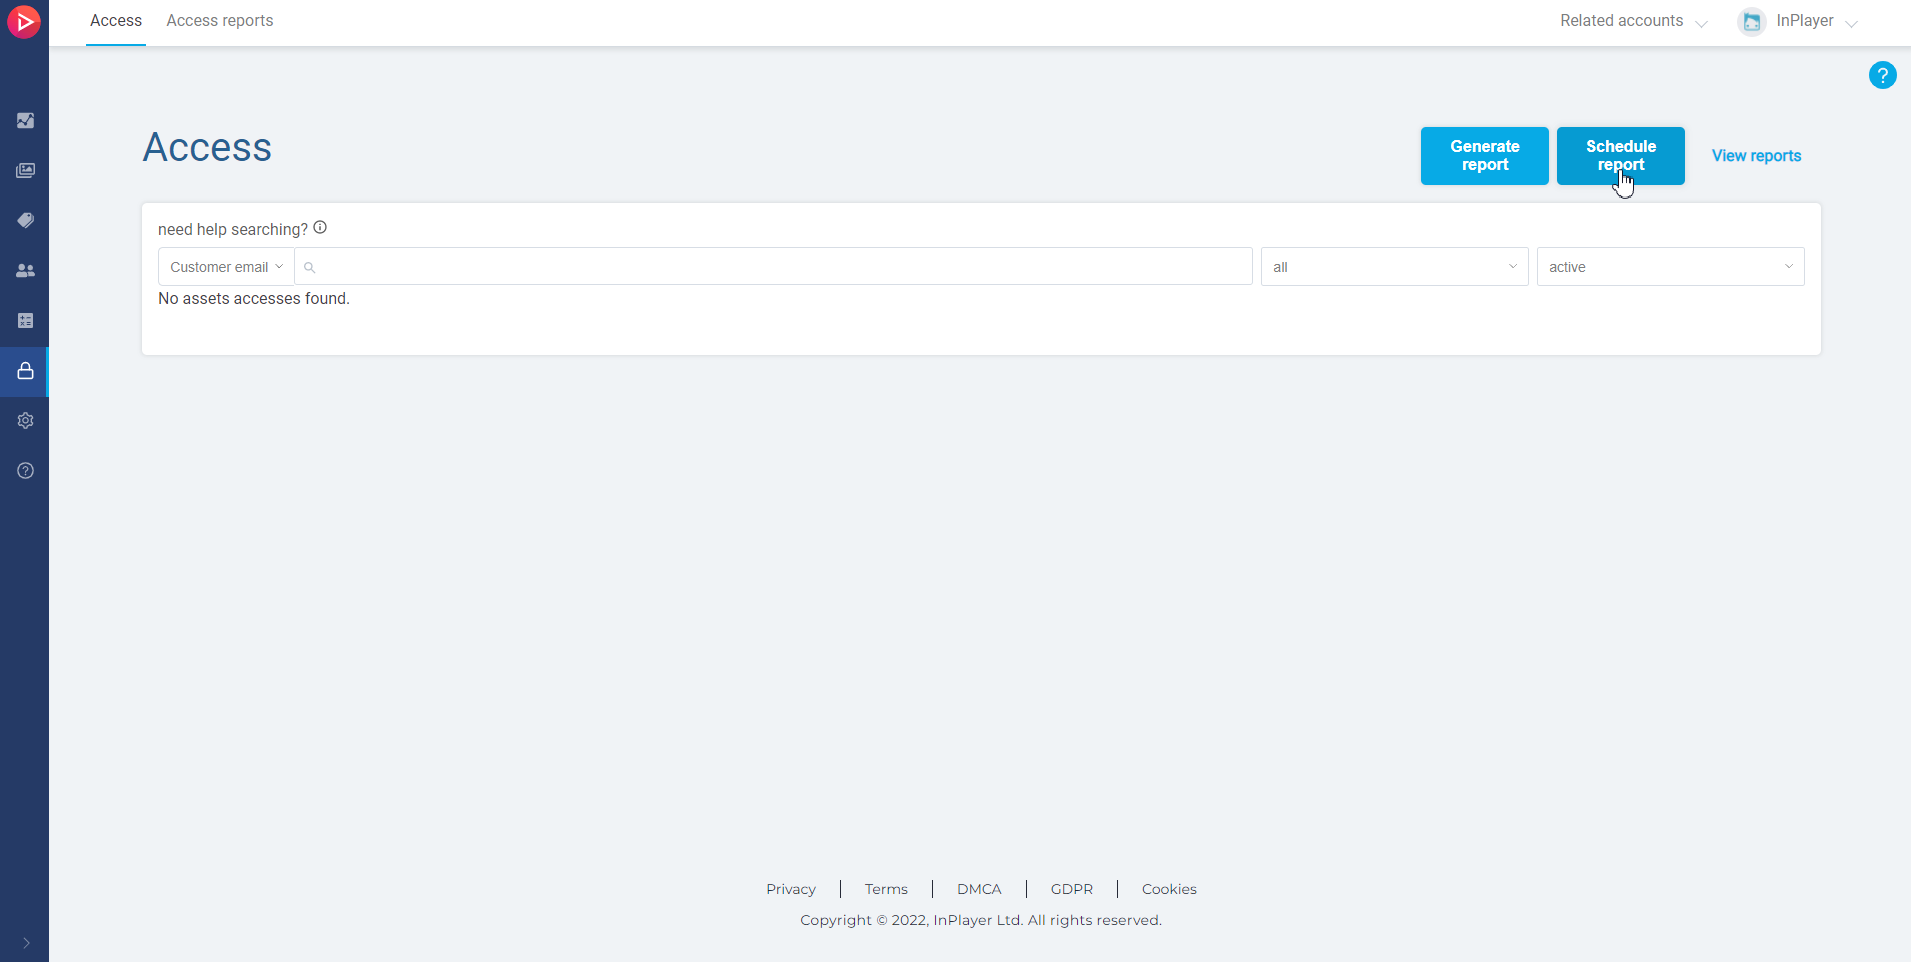
In the InPlayer Dashboard, go to the Access section.
Click Schedule report.
Name your report.
Next, choose between One time schedule and Recurring.
One time scheduled will generate just one report on the date and time you set under Run export on, and will include the data for the date range you set up under Include data for.
Recurring will schedule the generation of recurring reports at regular intervals.
The first report will be generated on the date and time you set under Generate first report on, will continue to repeat according to the interval you set under Repeat, will include the data for the date range you set up under Include data for, and will end according to your selection under Scheduled end date.
Once you set everything up, click Save.
To get your report, click on View reports, or go to the Access reports tab.
You will find your report under Scheduled reports.
Here, you can download the report as a CSV file once it’s generated, or edit it.
All generated reports will be kept for 10 days and then automatically deleted.
This concludes our guide.
If you have any questions, don’t hesitate to contact us at clients@inplayer.com.
With Audience reports you can get all the personal information and metadata gathered from the viewers upon their registration.
To get an Audience report, do the following:
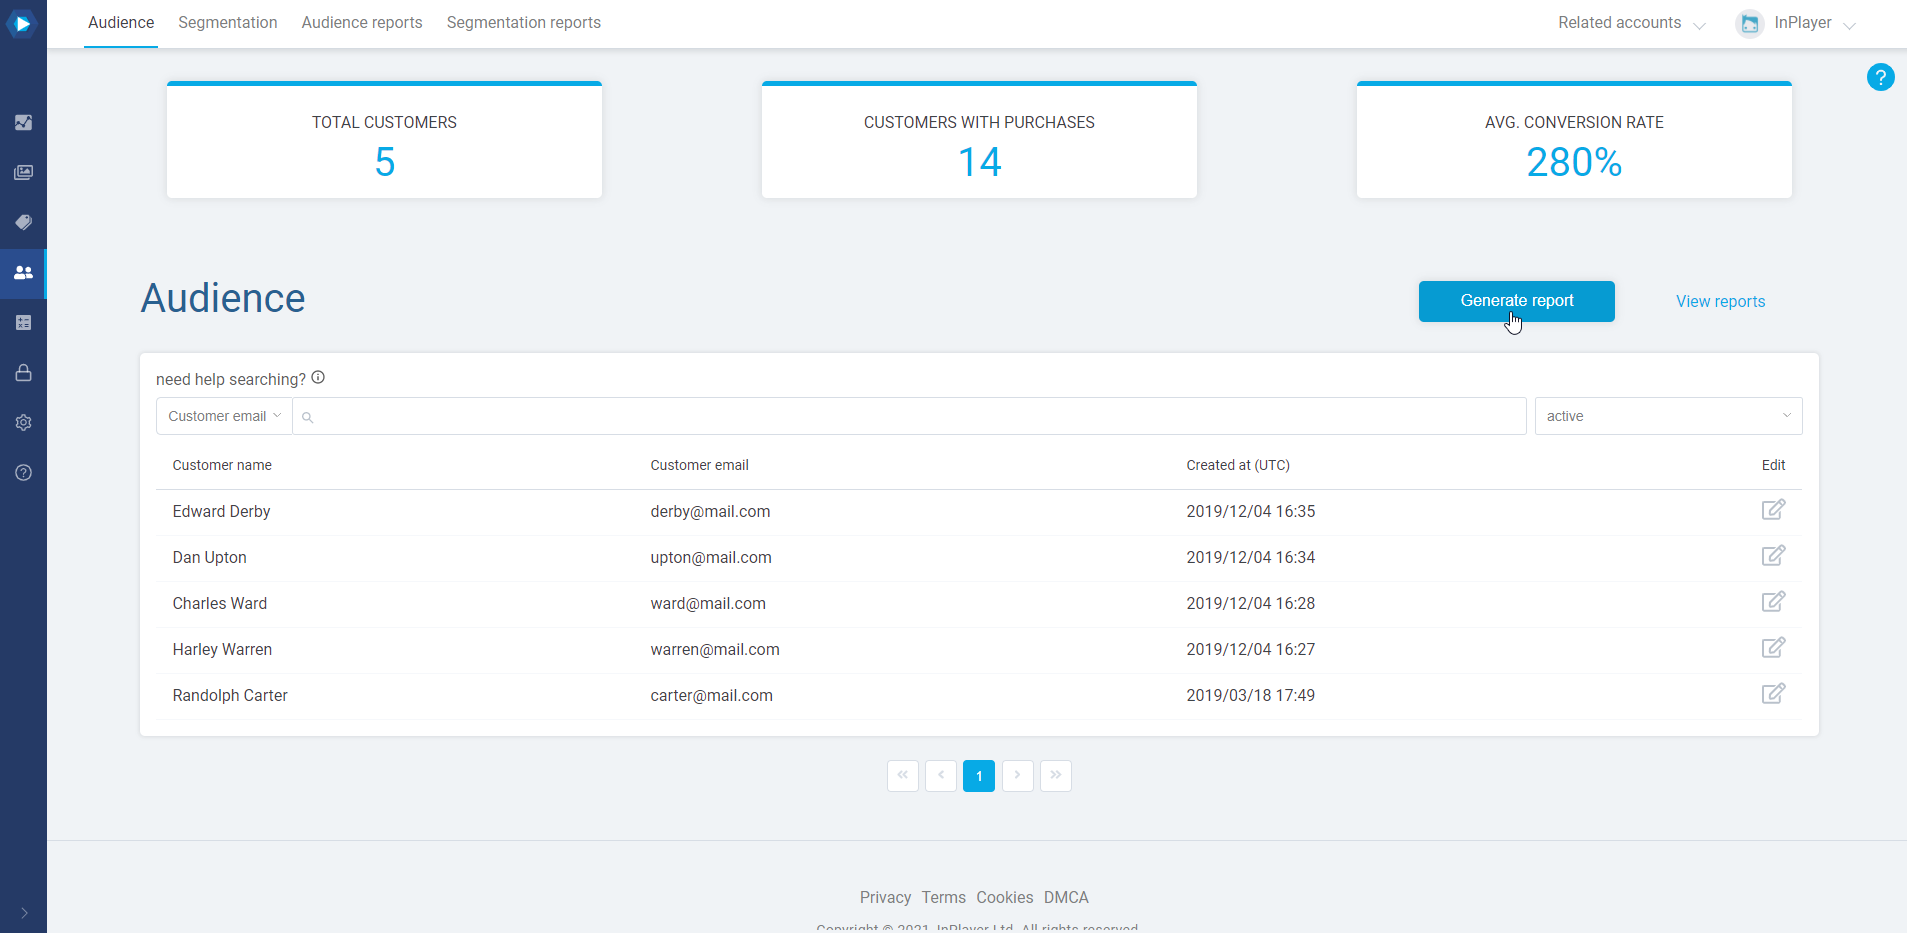
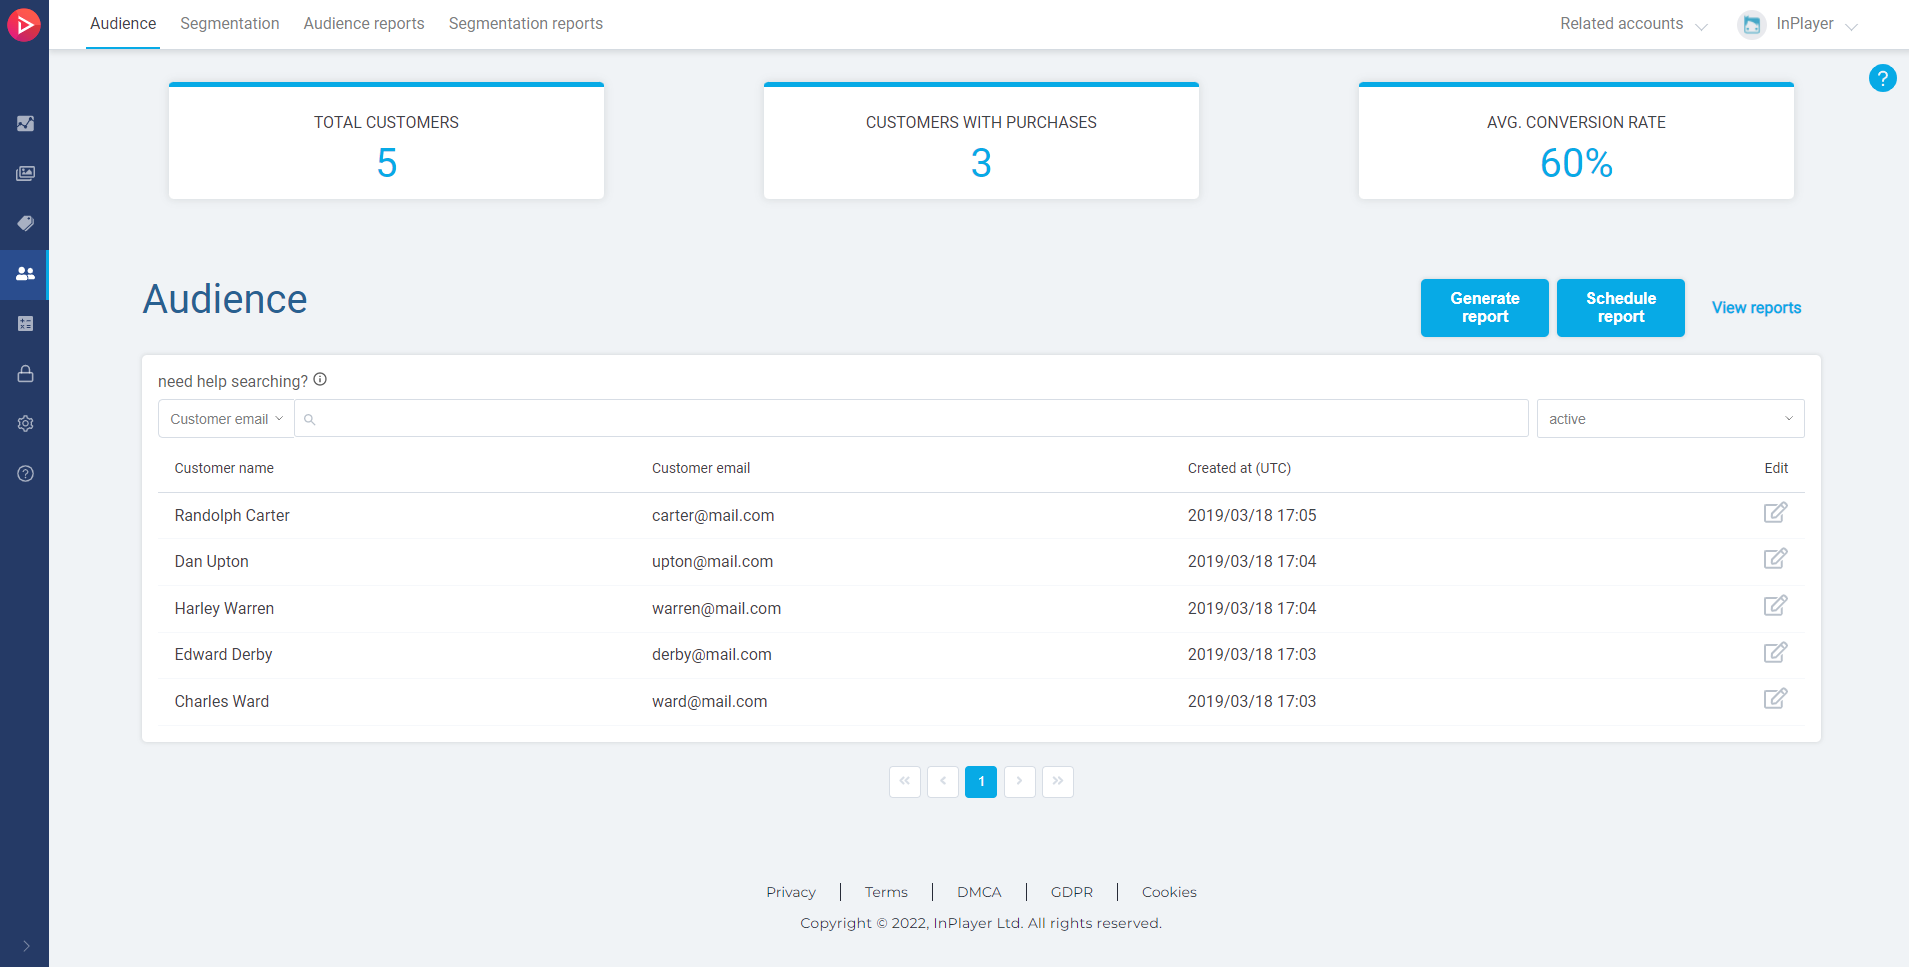
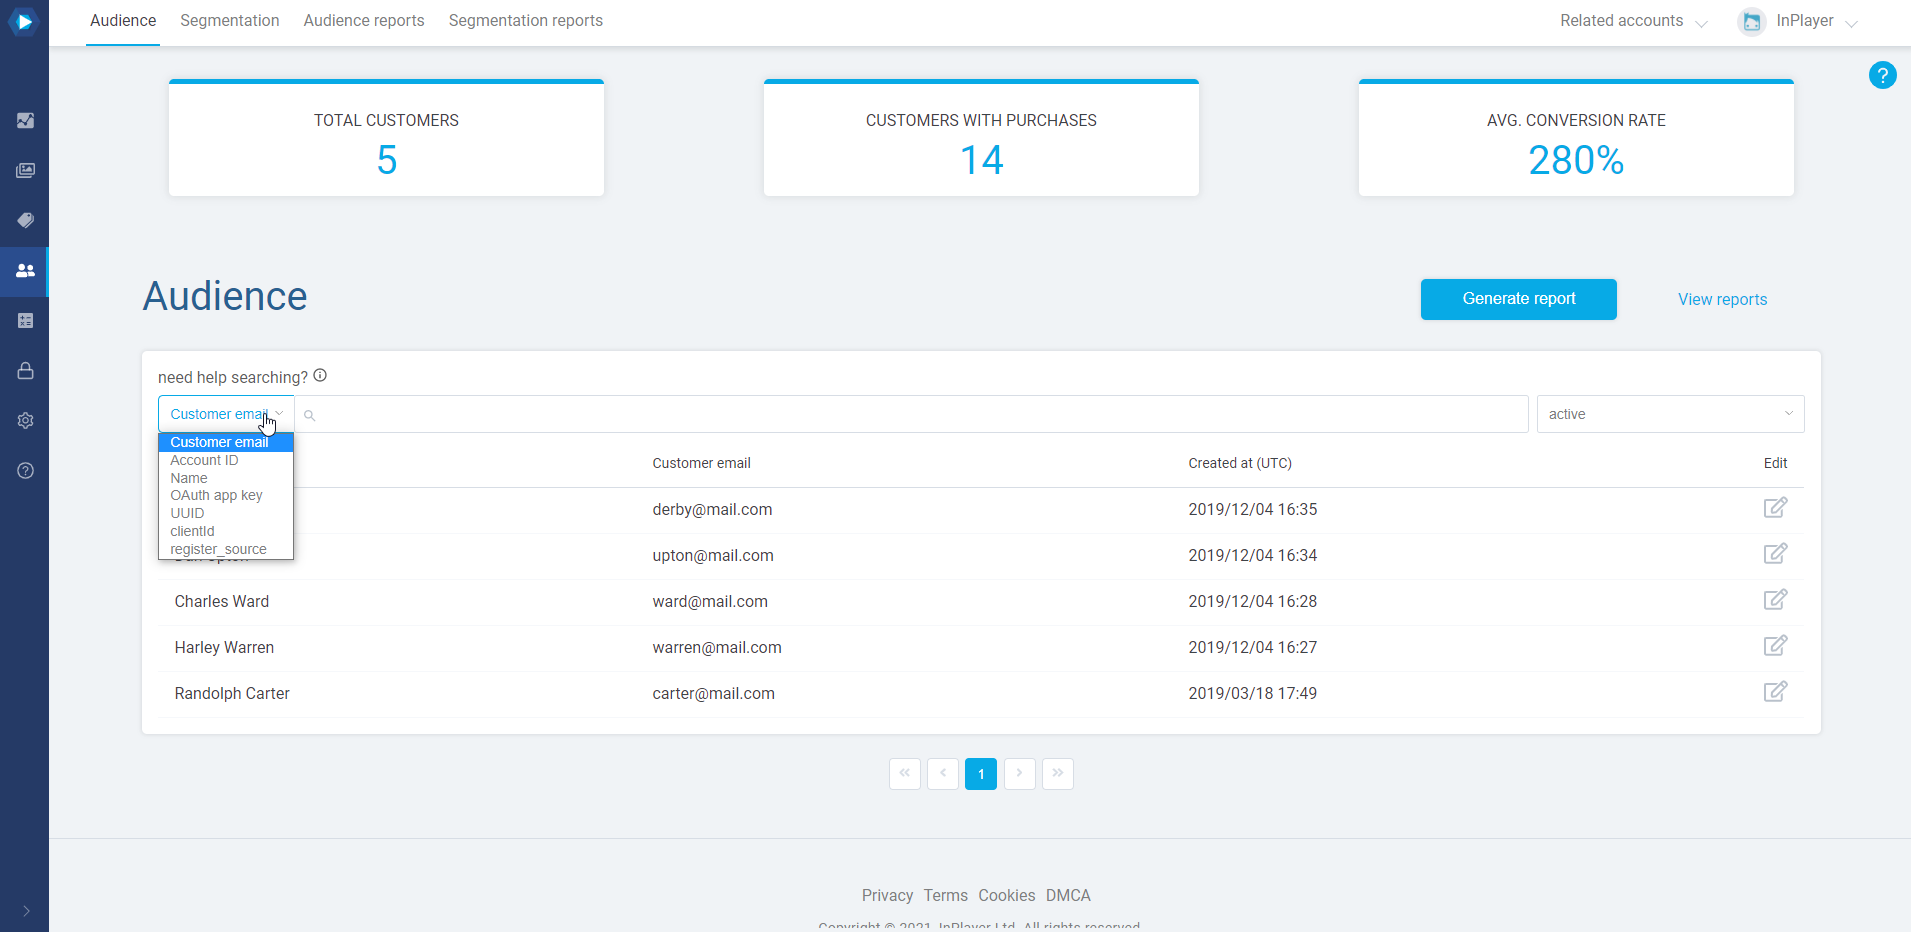
In the InPlayer Dashboard, go to the Audience tab.
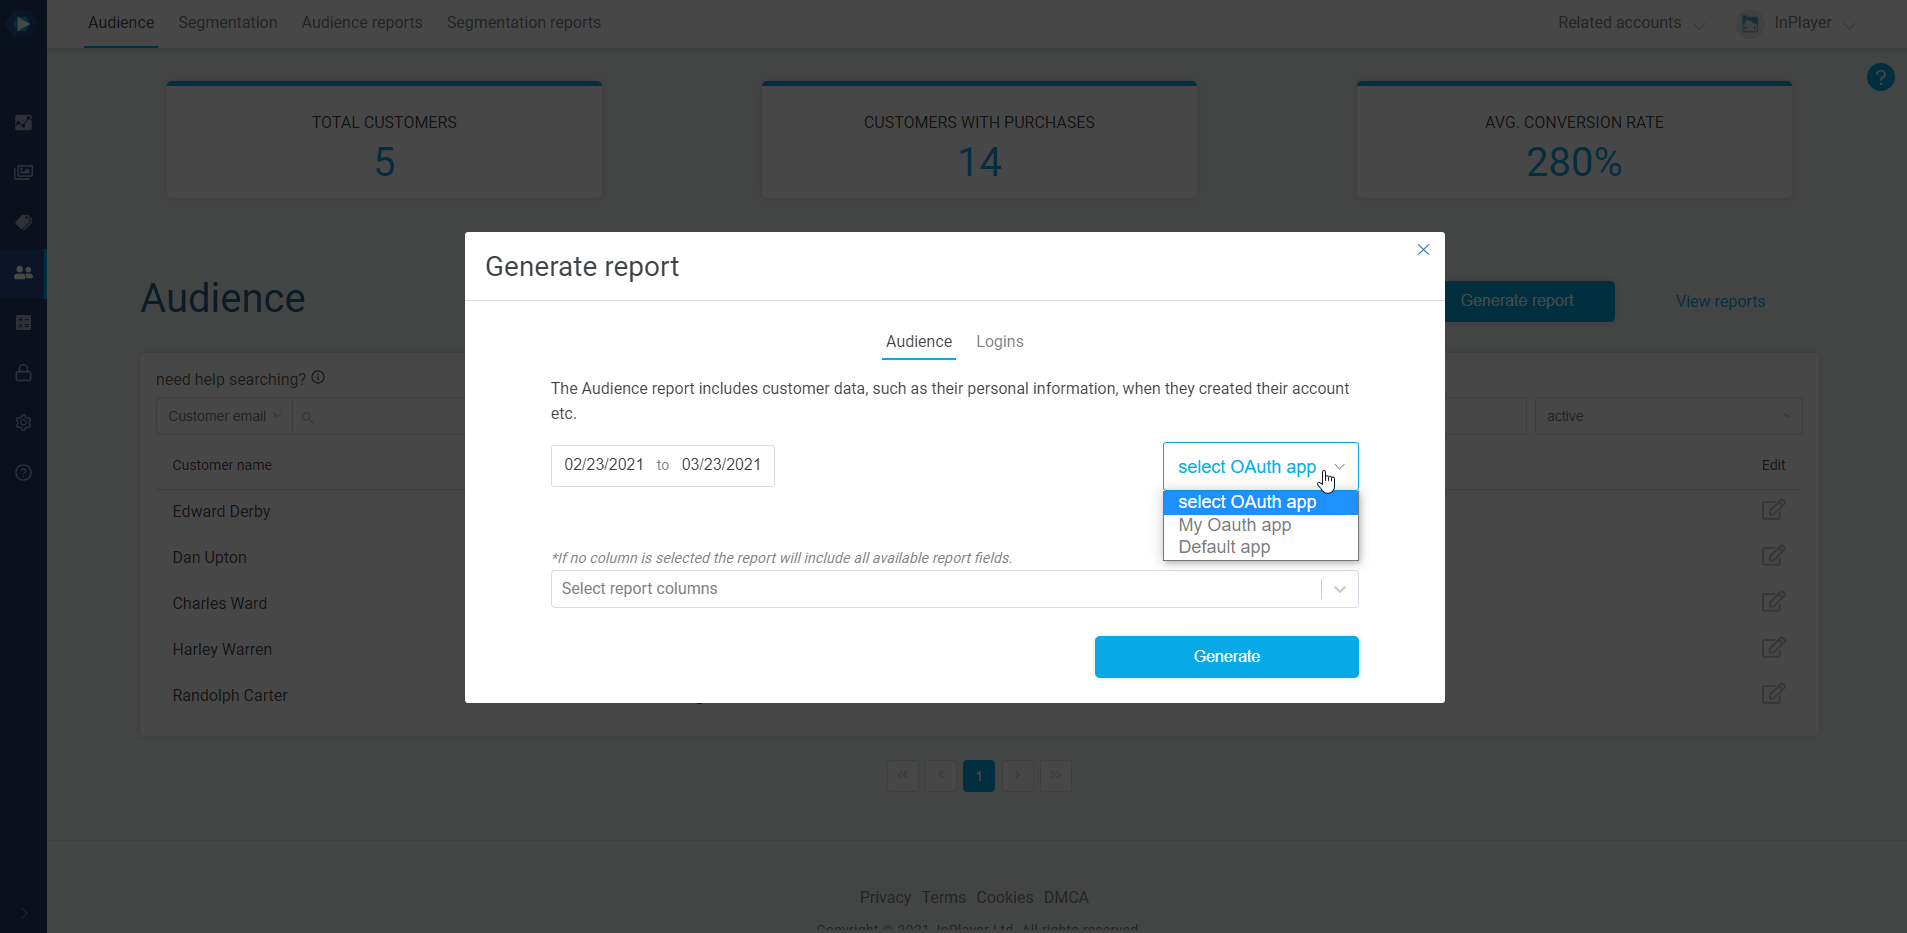
Click Generate report.
Choose the time period. The report will include all accounts that were created within the selected period.
Next, select whether you want to get the data for the audience from all OAuth apps, or a specific one. Choosing select OAuth app will include all accounts from all OAuth apps. To learn more about OAuth, click here.
In the Select report columns field you can choose what data you want the report to include. If you leave this field blank, all data will be included.
Finally, click Generate.
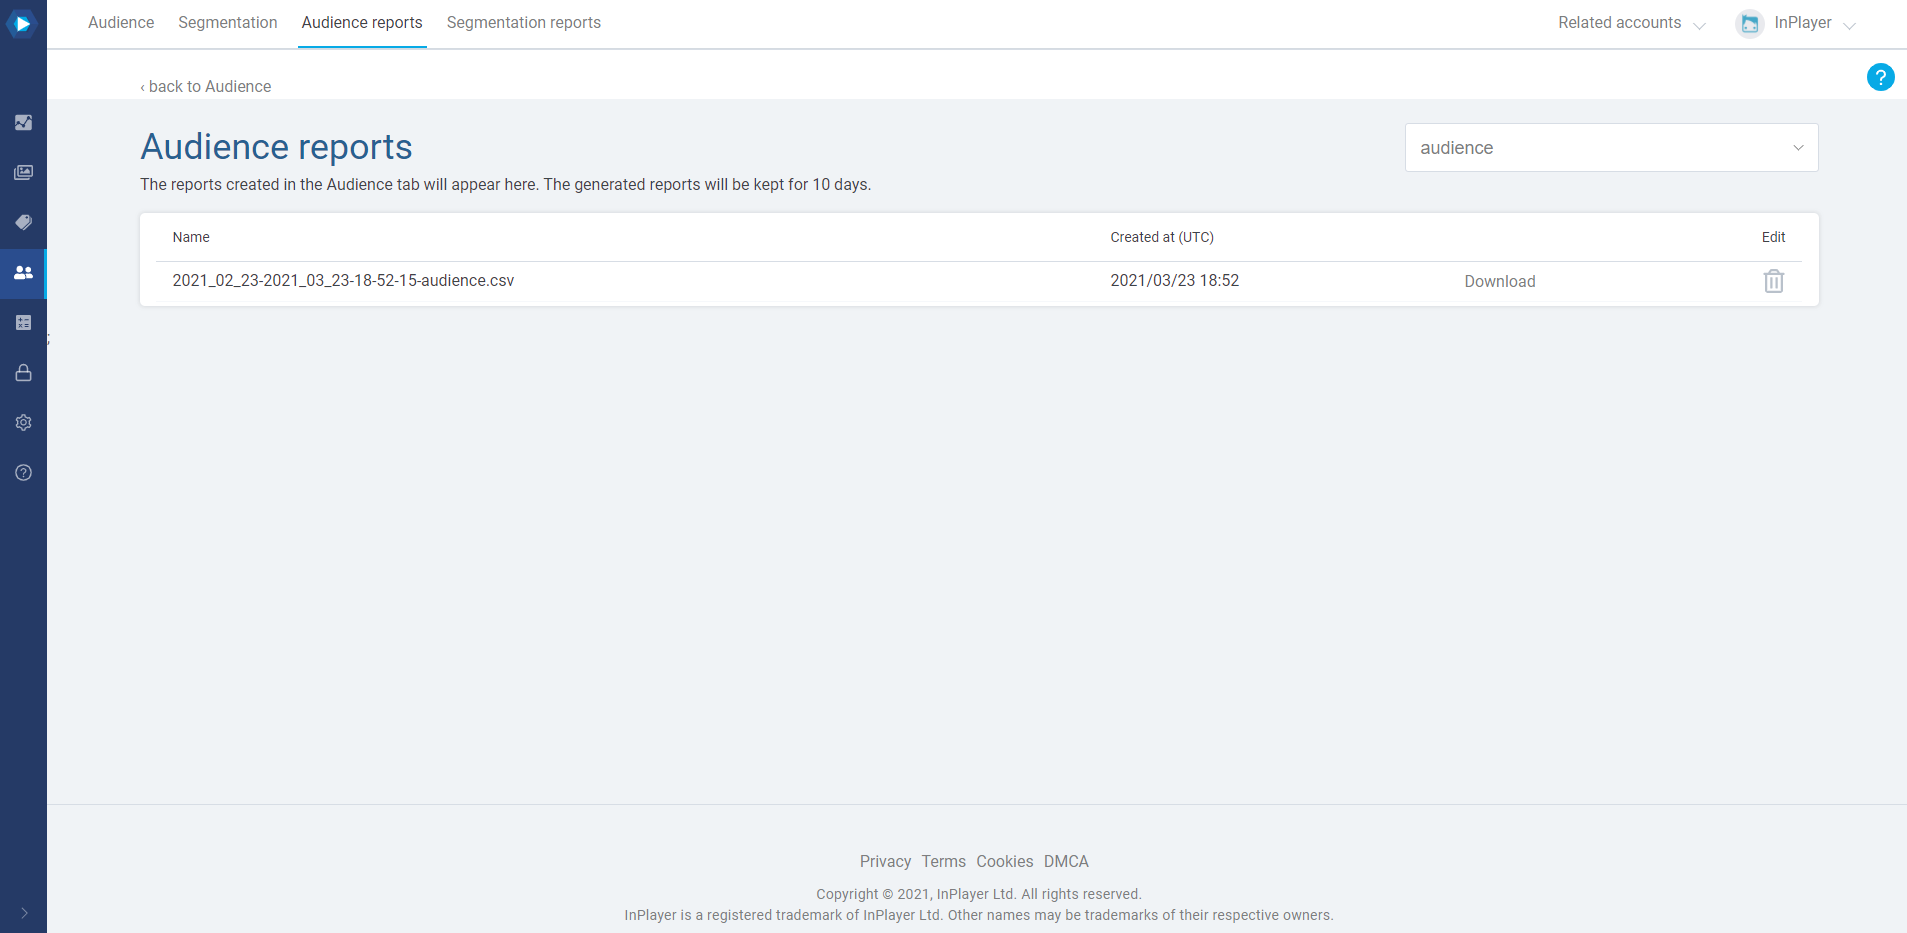
To get your report, click on View reports or go to the Audience reports tab.
Here, you can download the report as a CSV file.
All generated reports will be kept for 10 days and then automatically deleted.
The Logins report includes only the login activity records for your viewers, enabling you to see who logged into their account and when.
To get a Logins report, do the following:
In the InPlayer Dashboard, go to the Audience tab.
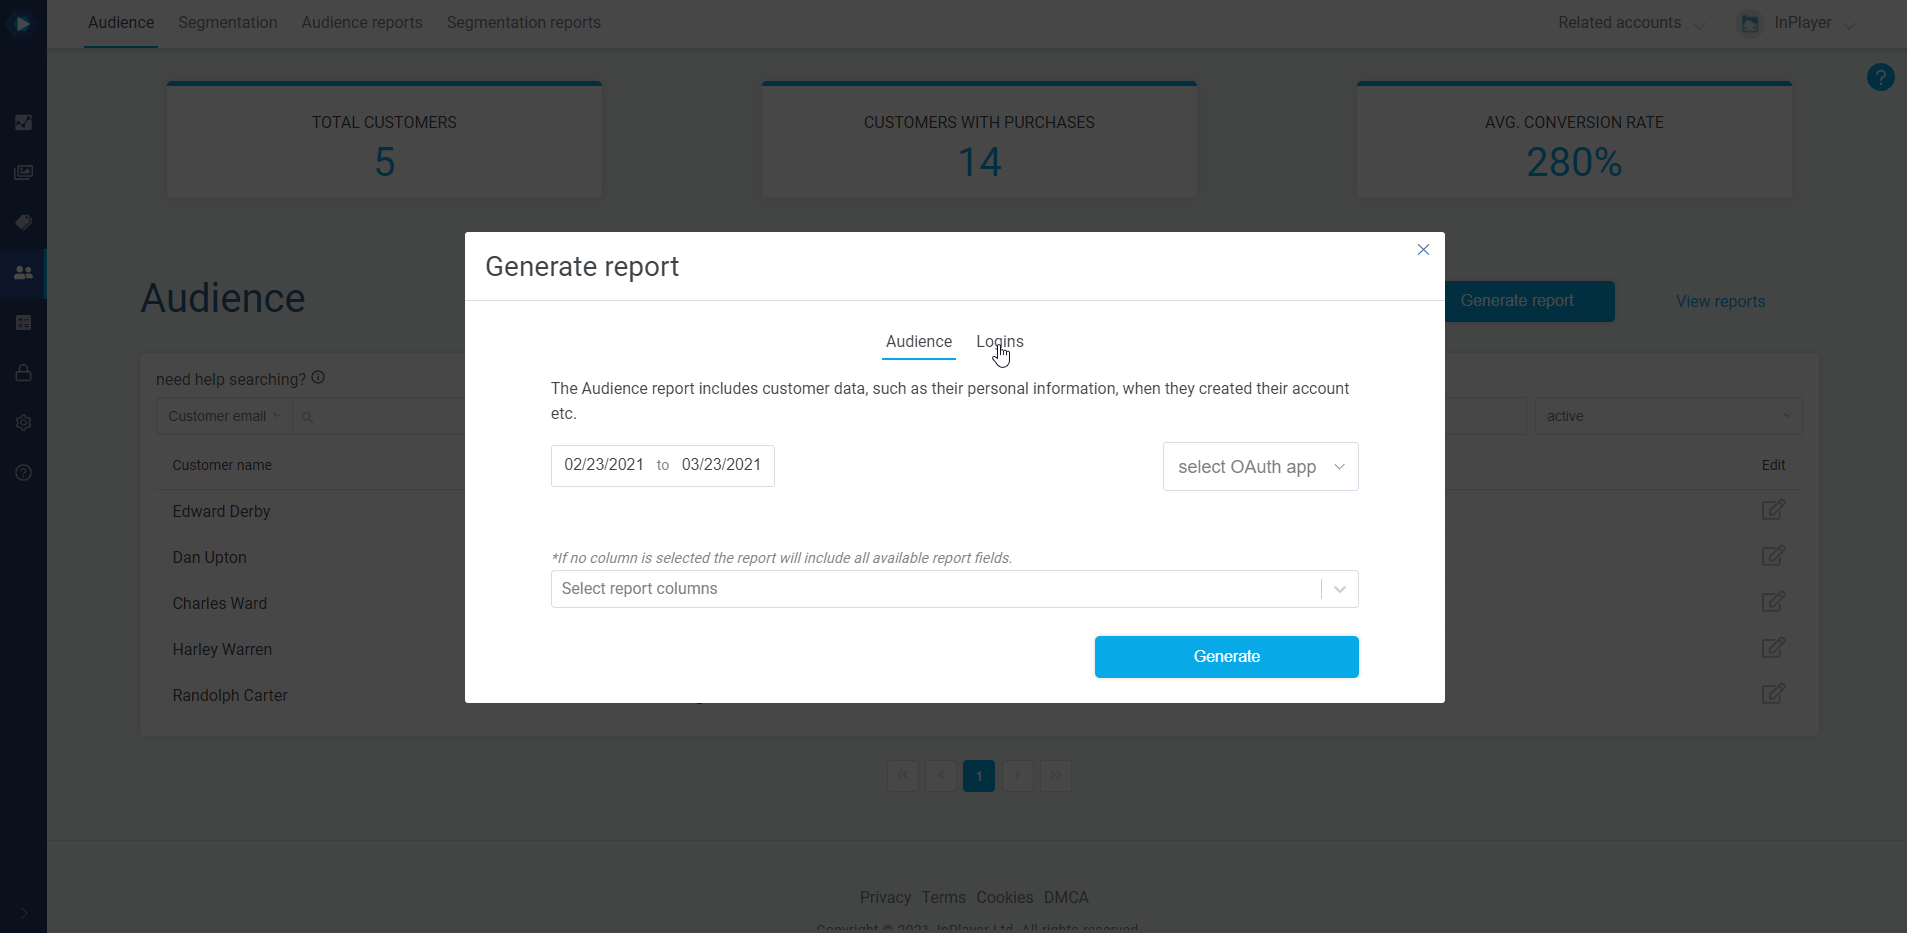
Click Generate report.
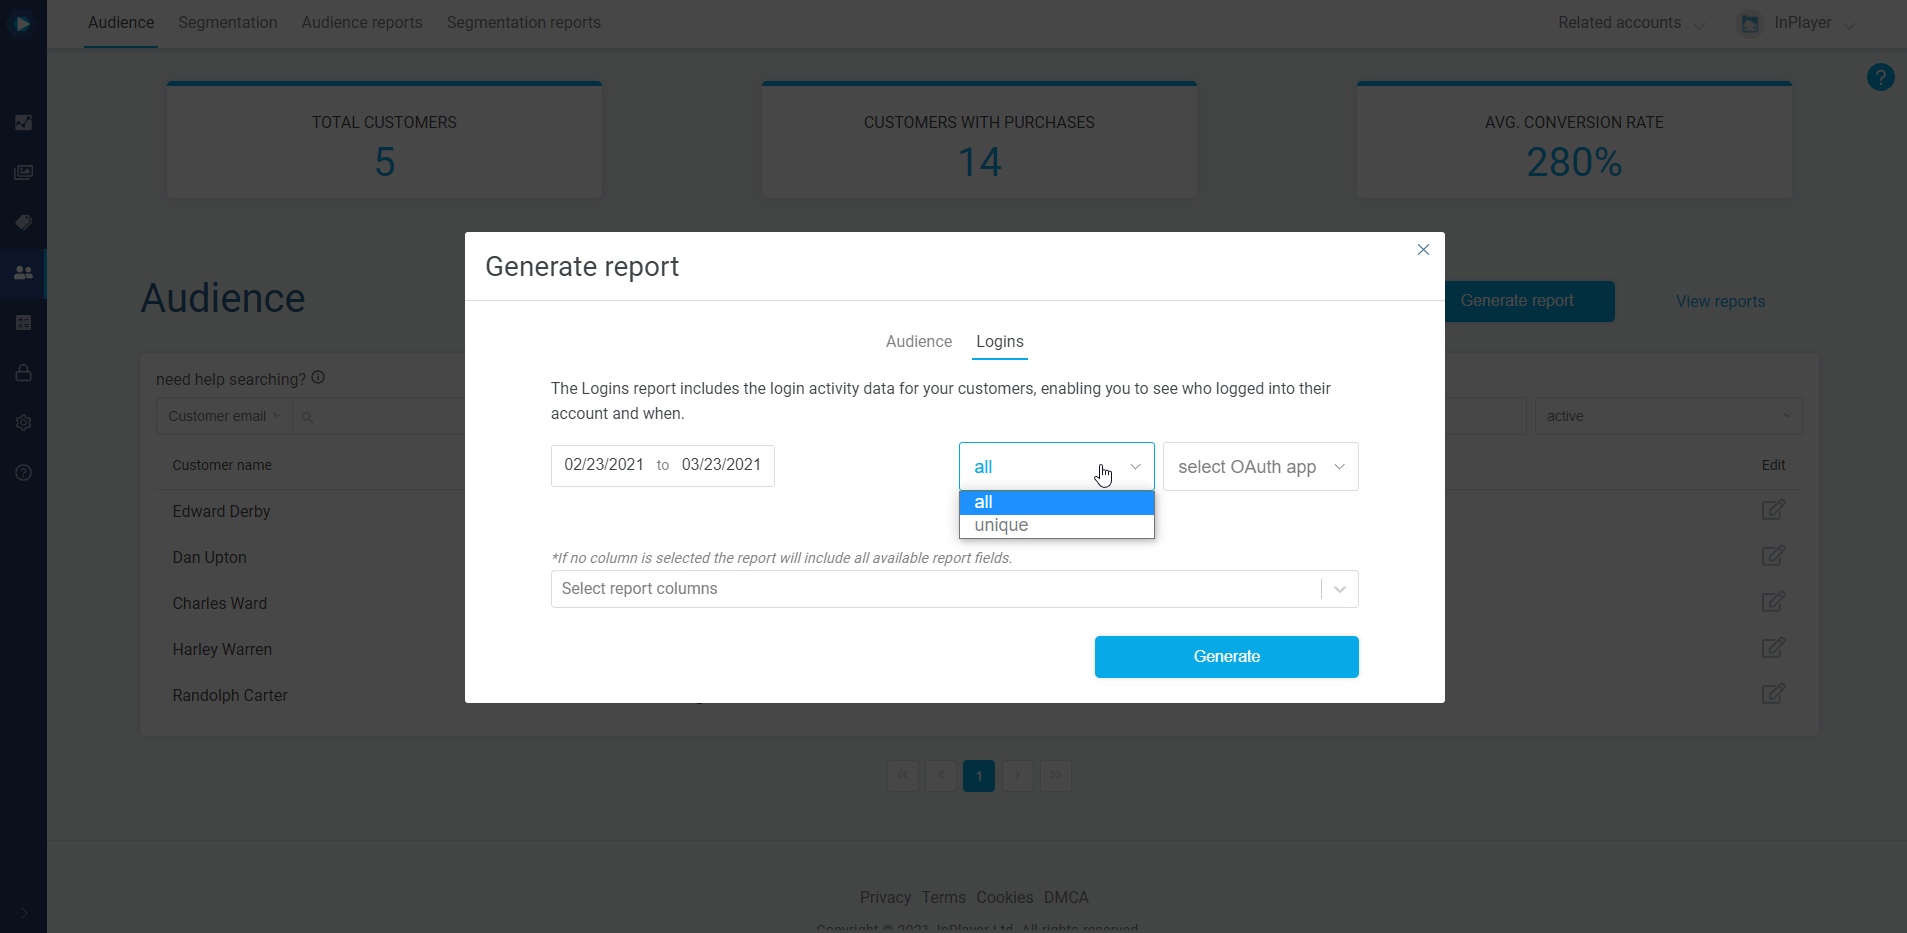
Click the Logins tab.
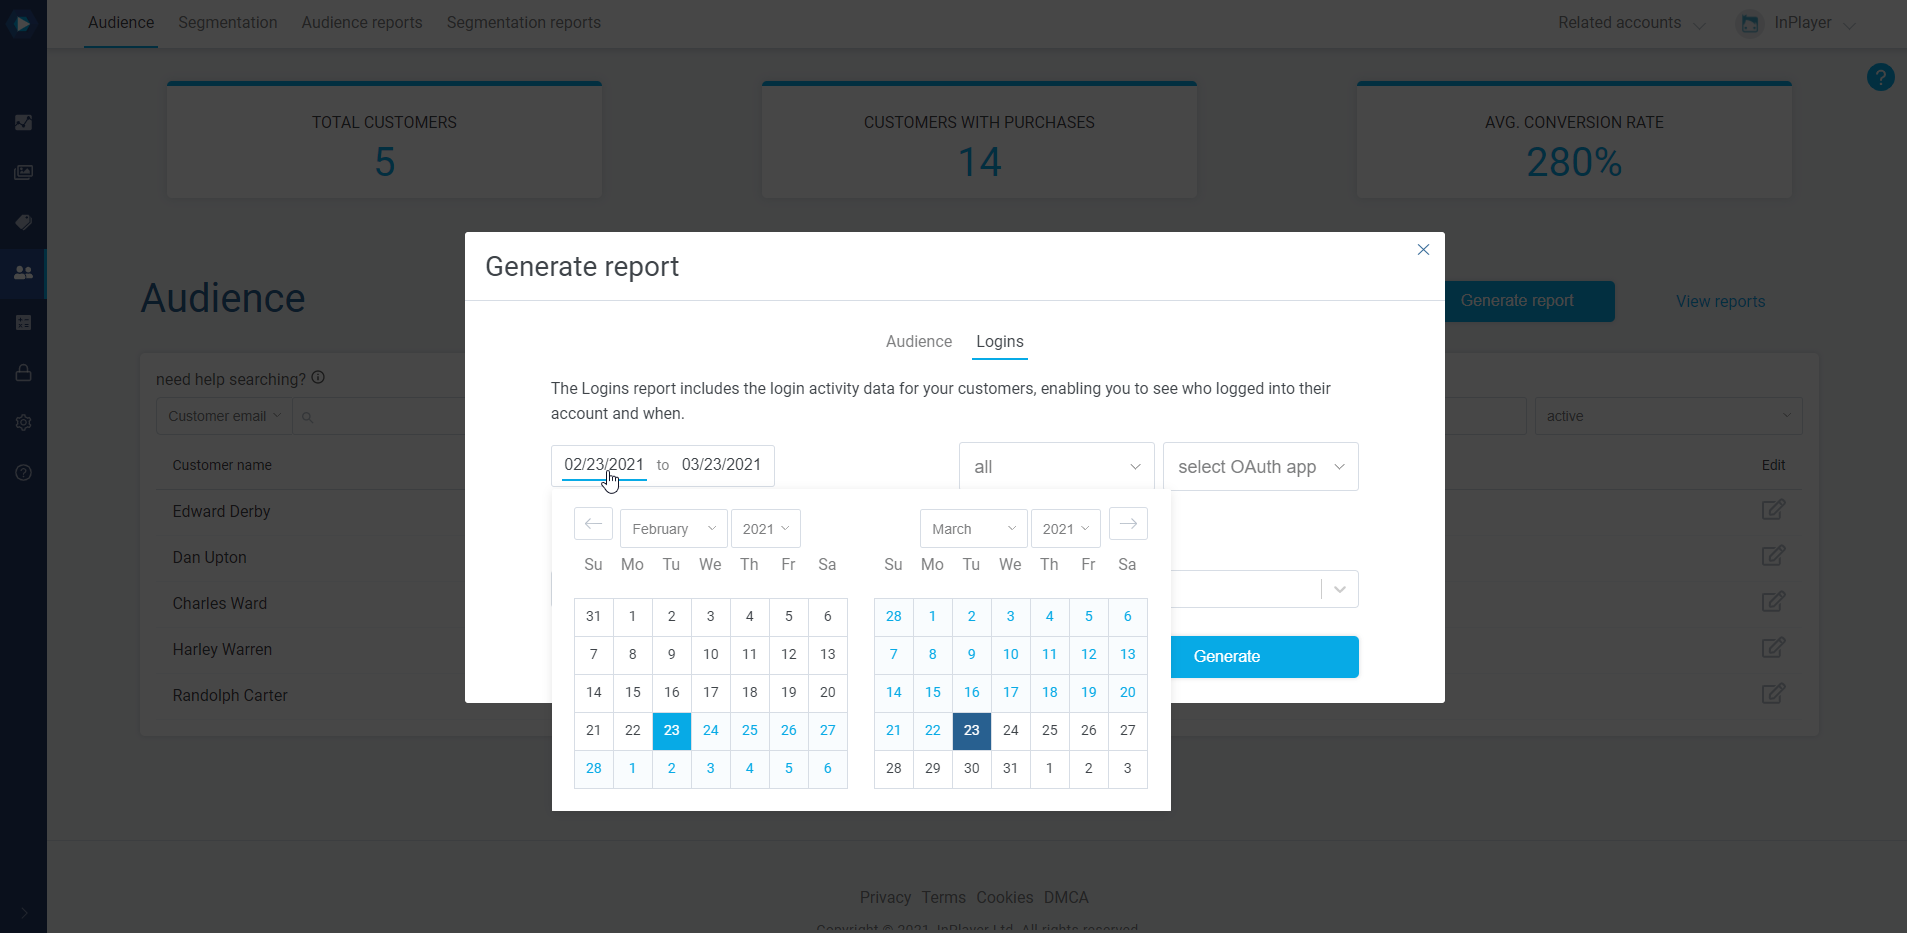
Next, choose the time period. The report will include records for all logins that were made within the selected period.
Choose to either get all login records for each viewer, or unique records meaning only one record (the latest one) per viewer will be included.
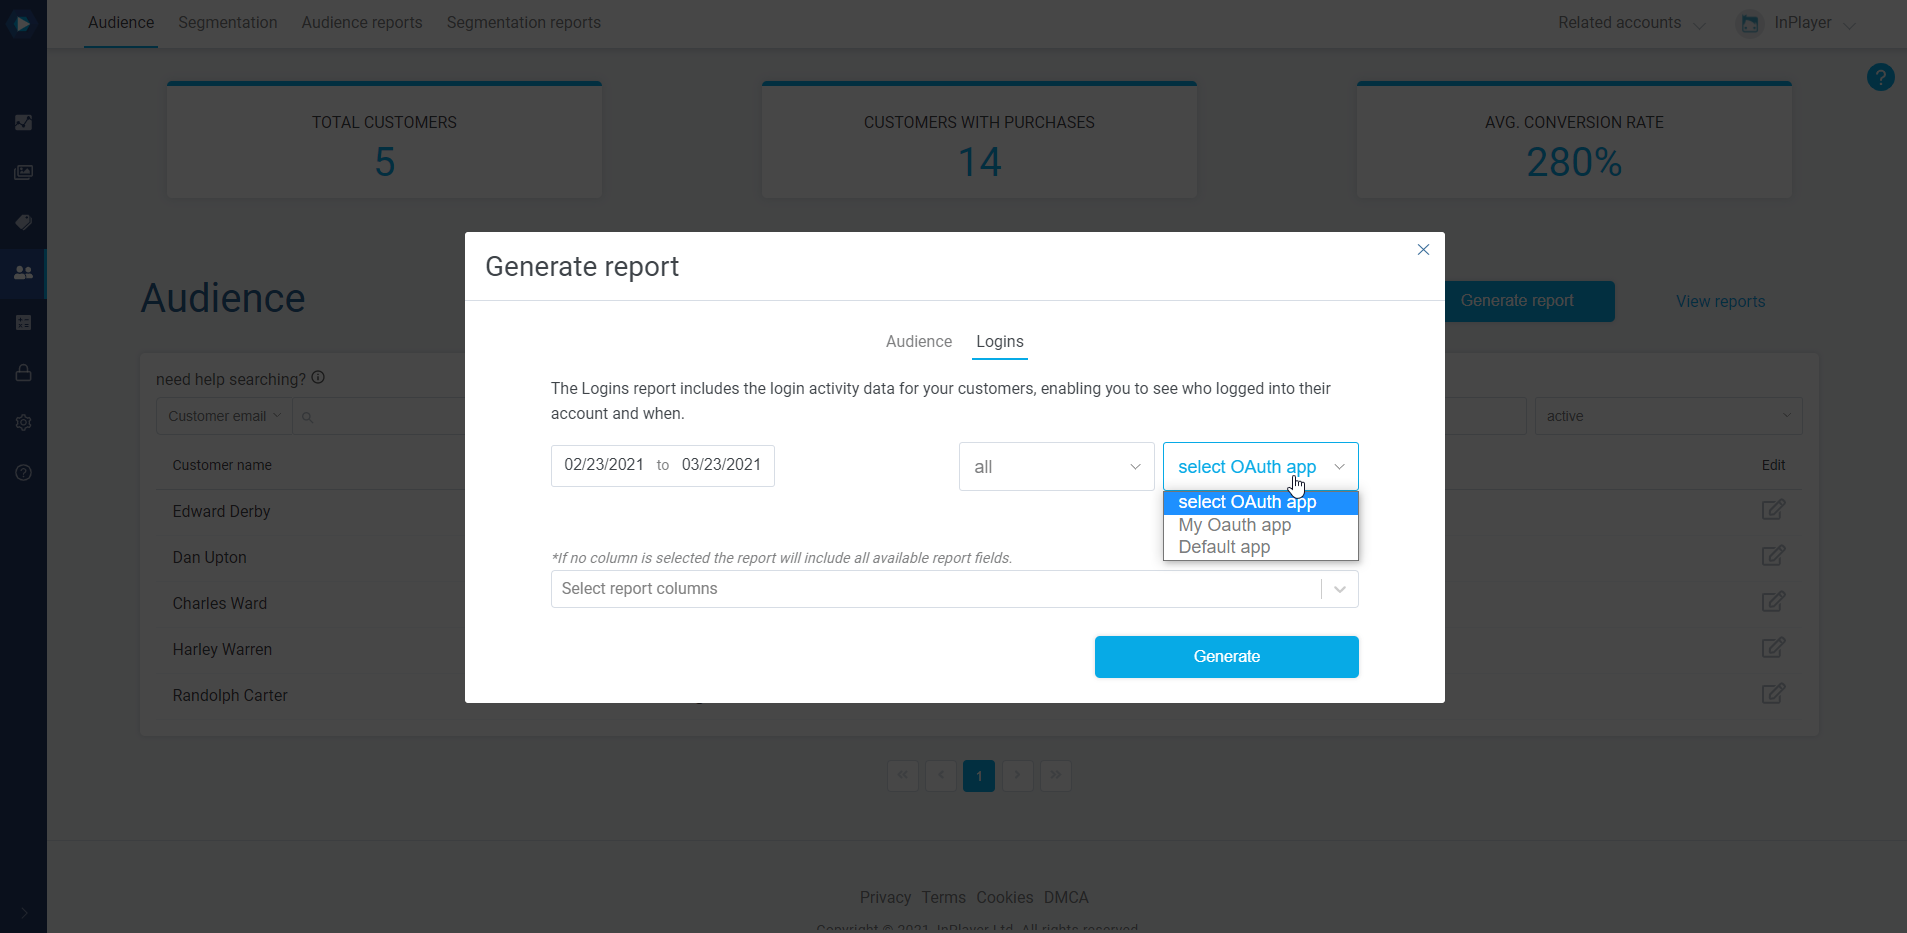
Next, select whether you want to get the data for the audience from all OAuth apps, or a specific one. Choosing select OAuth app will include all accounts from all OAuth apps. To learn more about OAuth, click here.
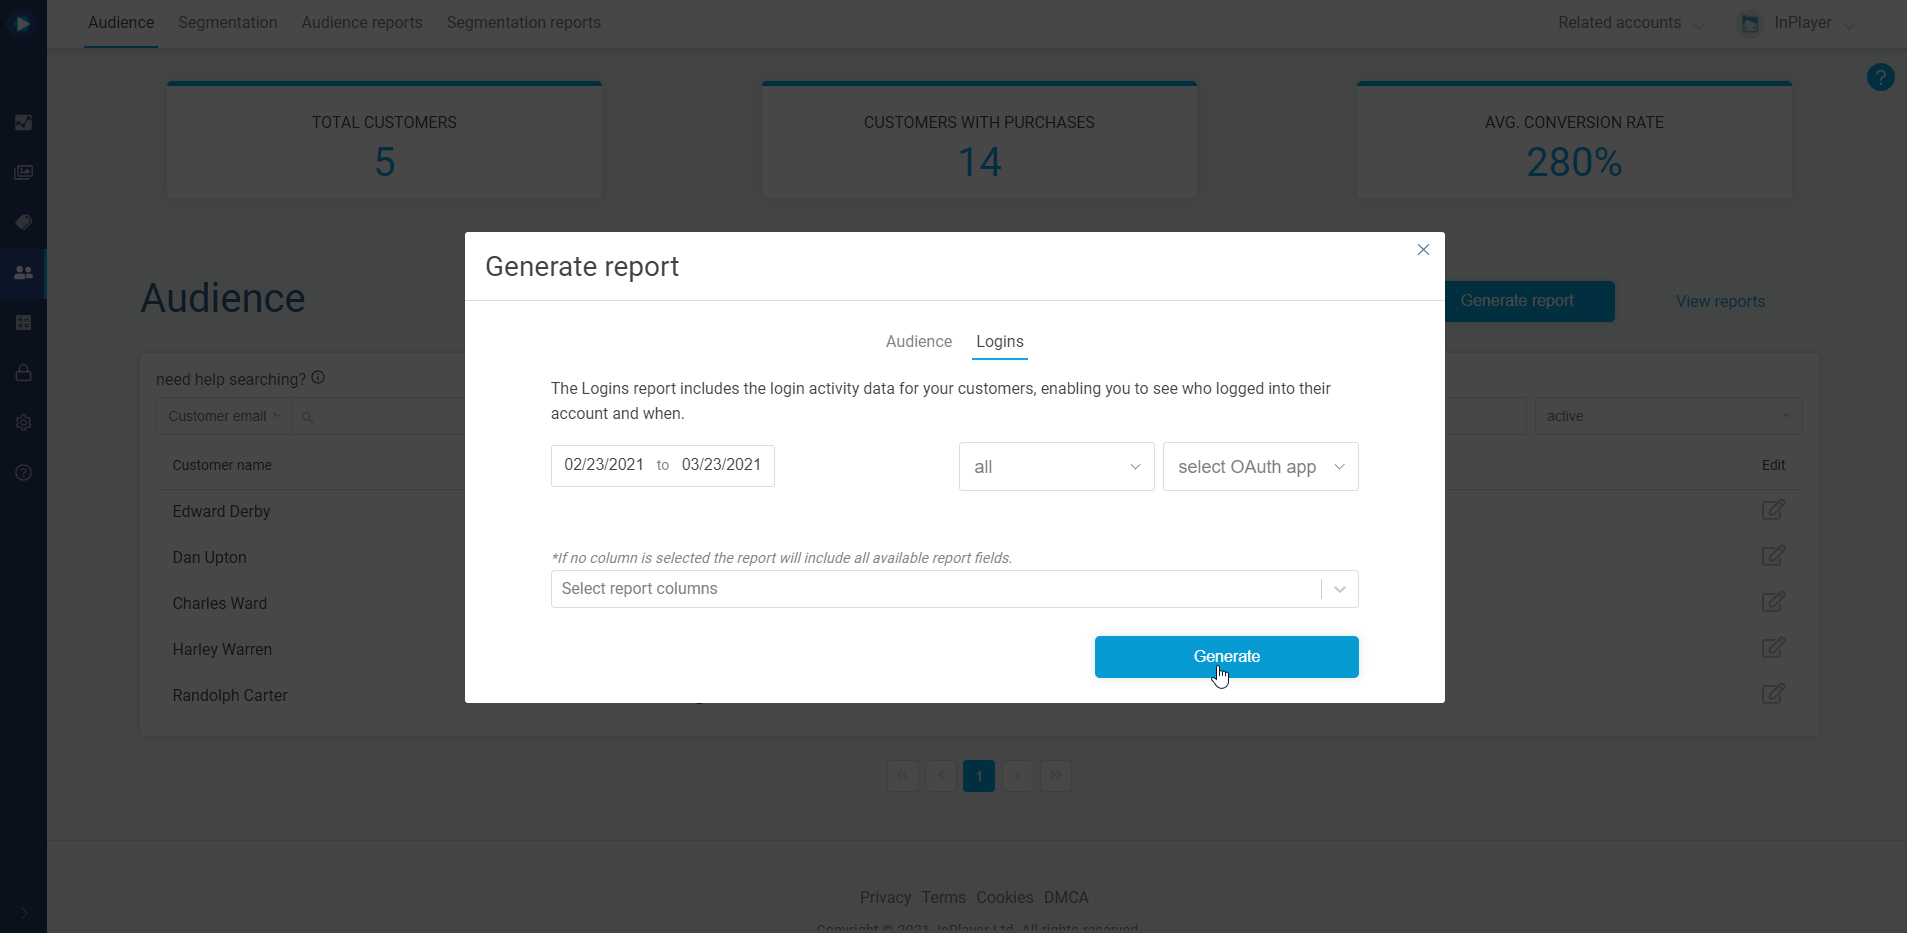
In the Select report columns field you can choose what data you want the report to include. If you leave this field blank, all data will be included.
Finally, click Generate.
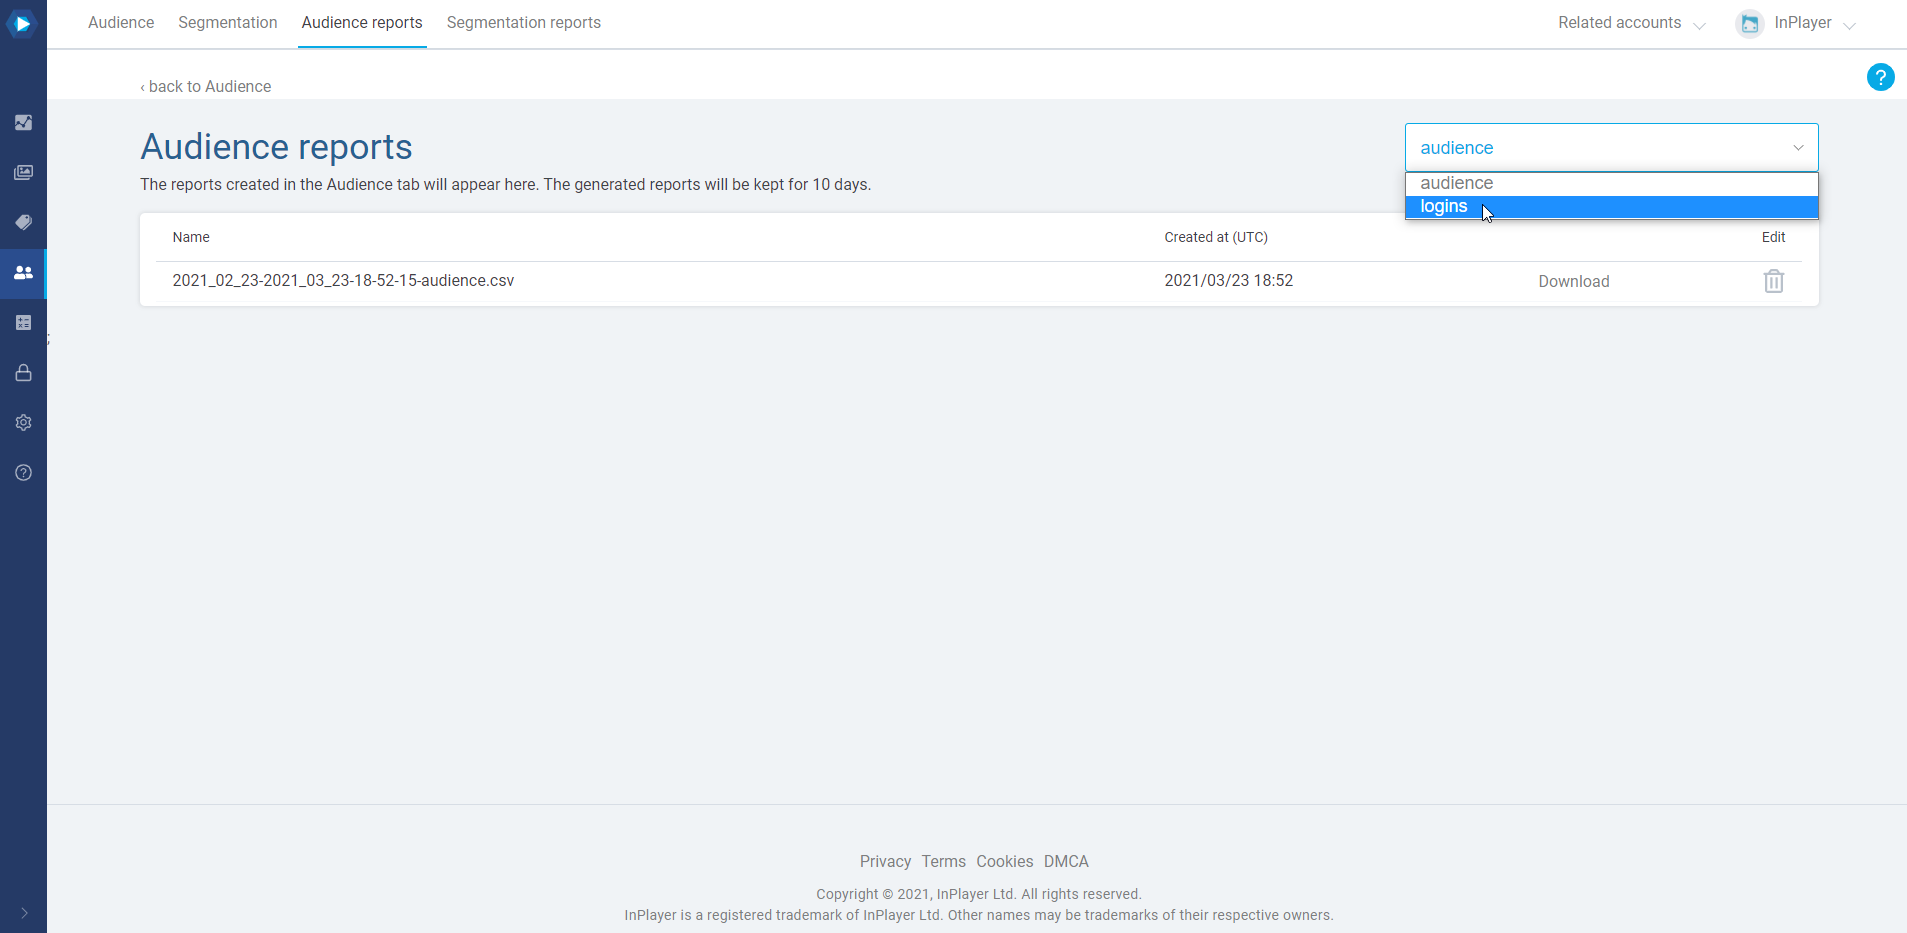
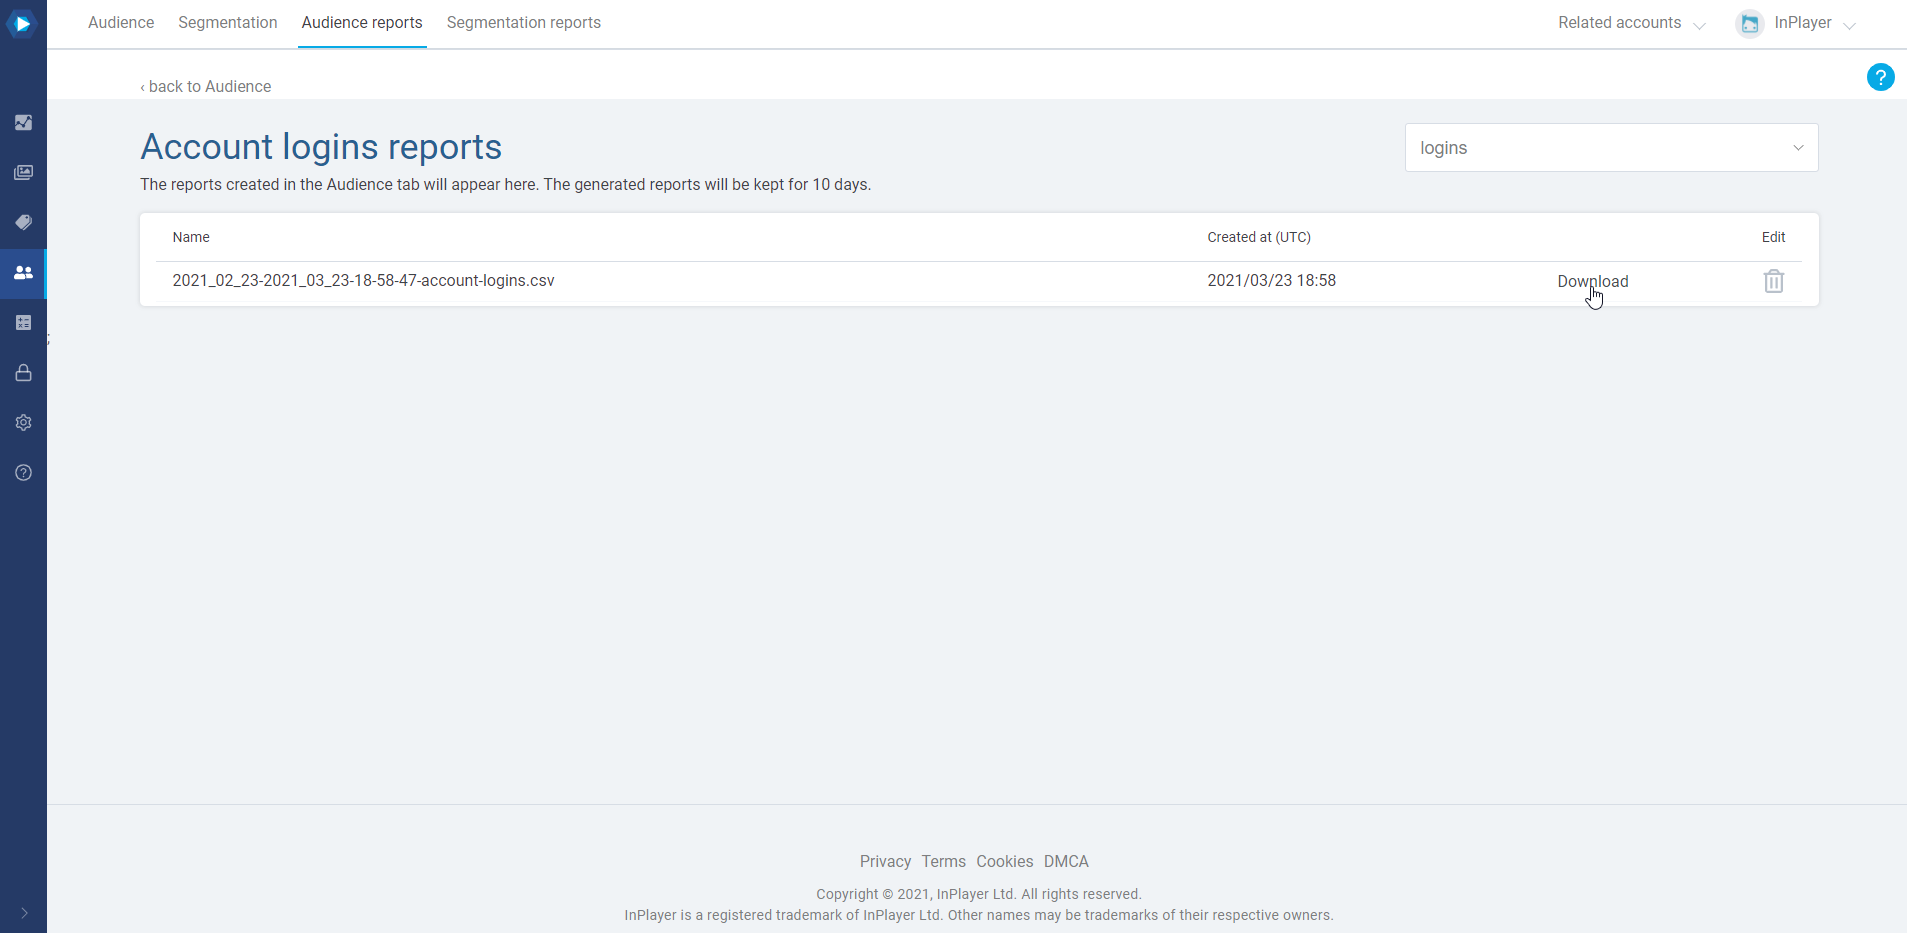
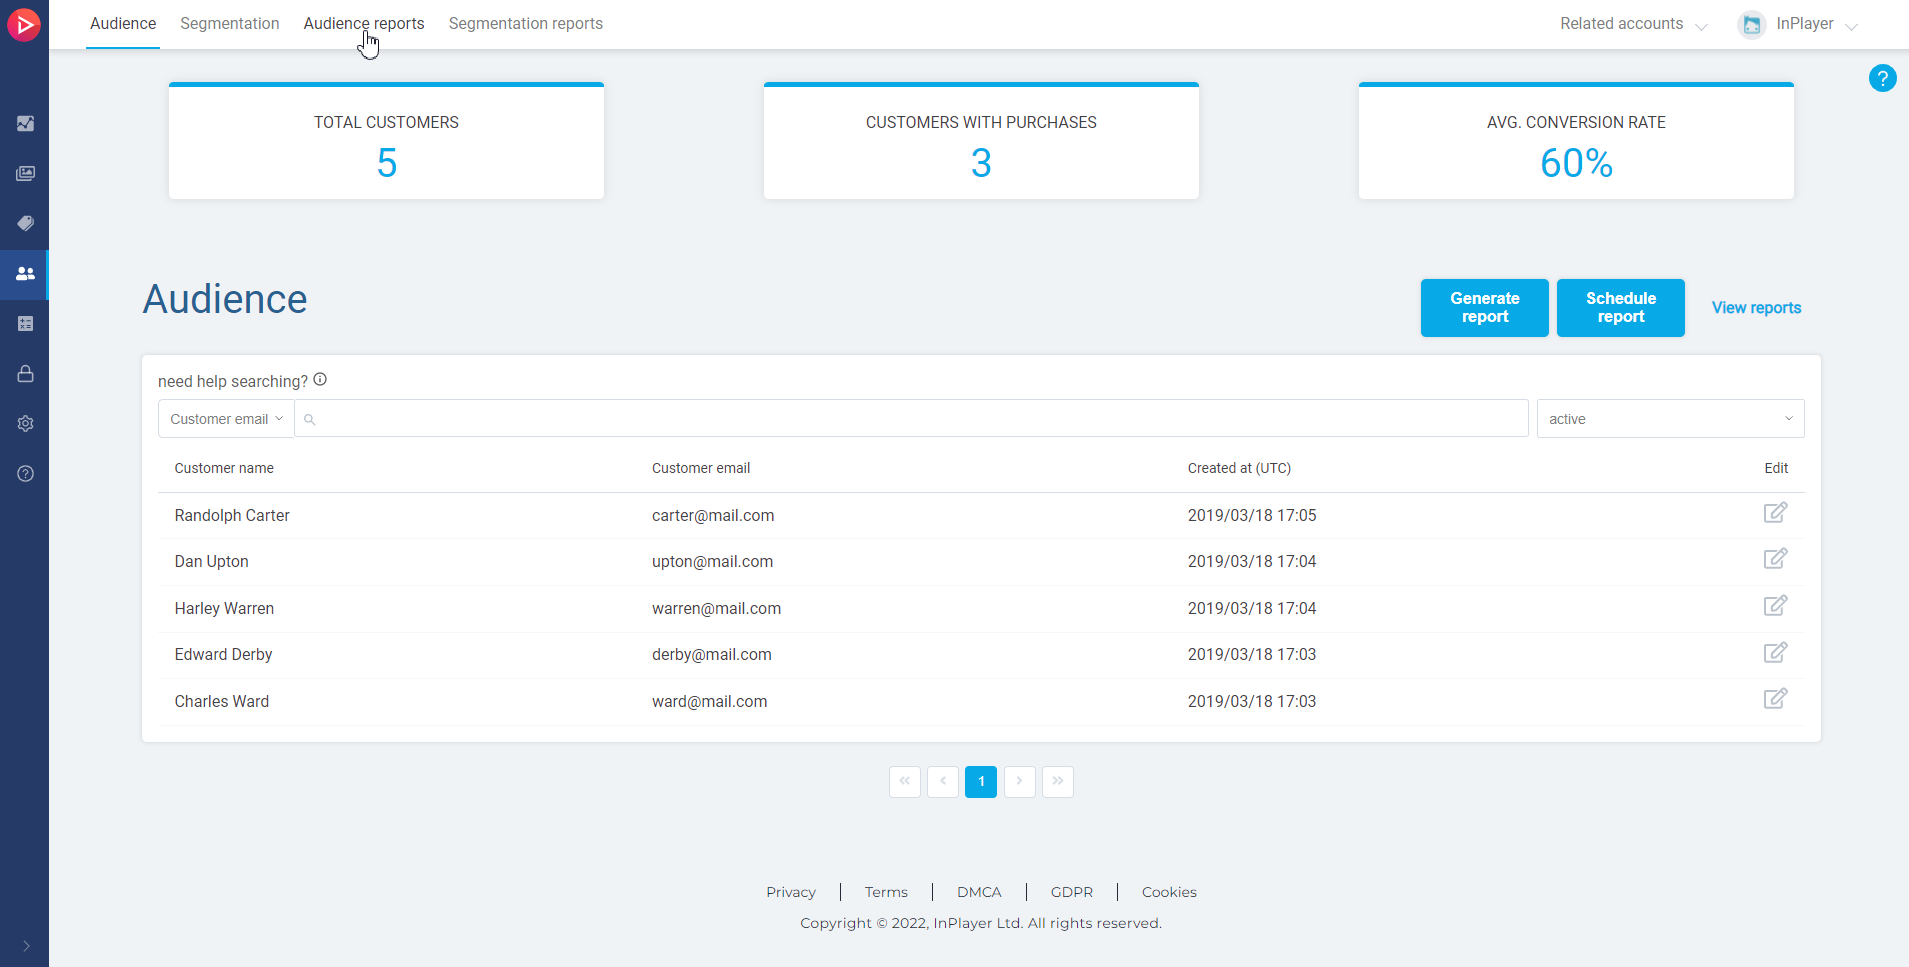
To get your report, click on View reports or go to the Audience reports tab.
Go to the logins dropdown menu.
Here, you can download the report as a CSV file.
All generated reports will be kept for 10 days and then automatically deleted.
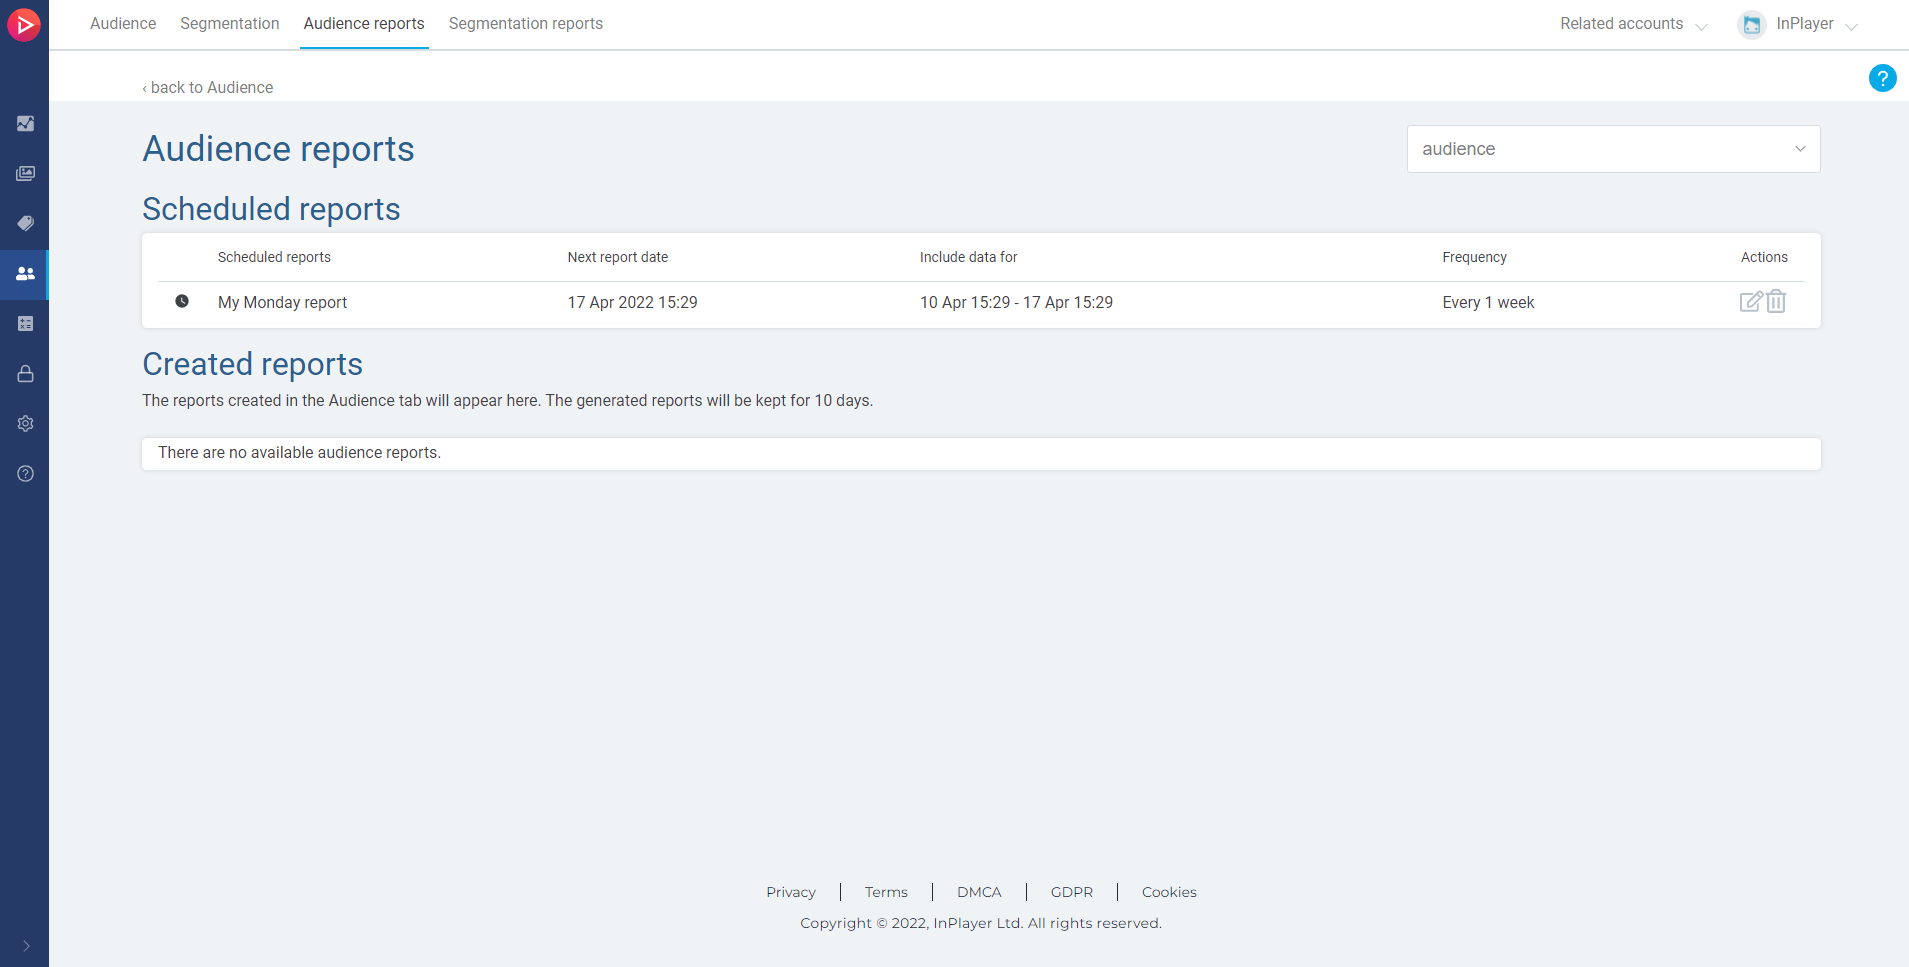
With report scheduling, you can automatically generate reports at a certain time & date, eliminating the need to do this manually. This can be quite useful for recuring reports you do on a regular basis.
To schedule the automatic creation of a report, do the following:
In the InPlayer Dashboard, go to the Audience tab.
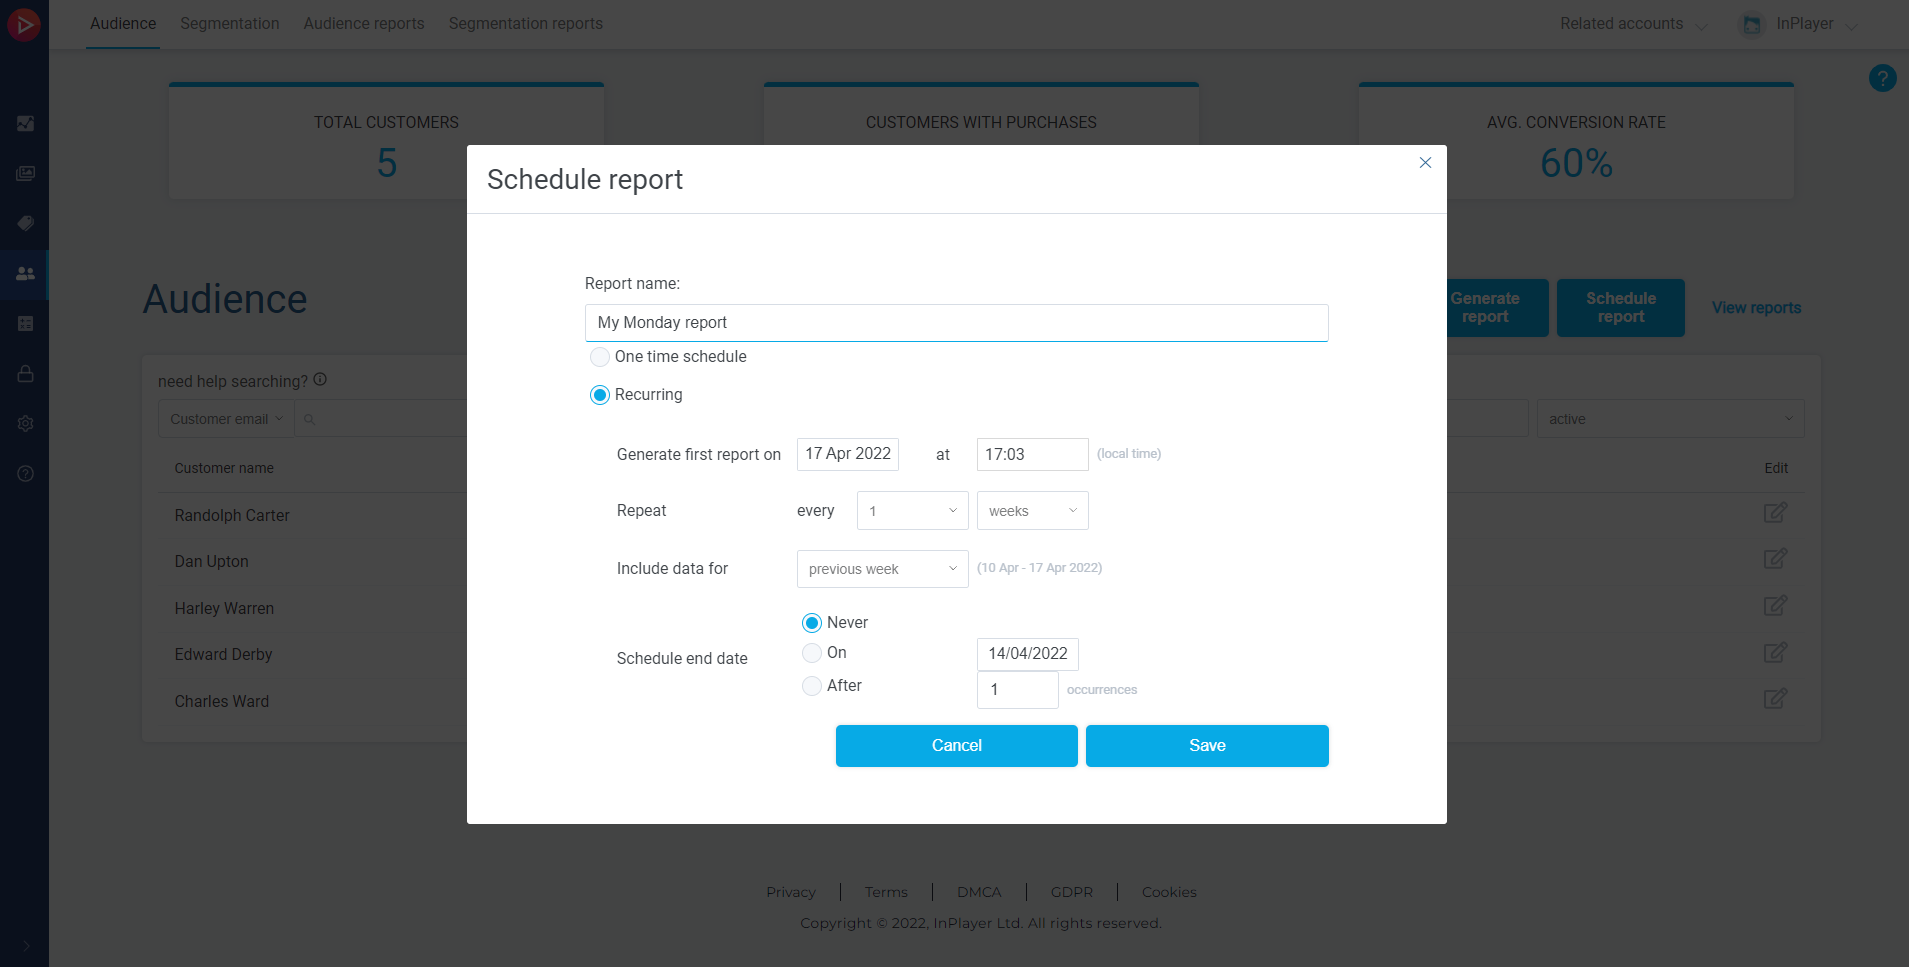
Click Schedule report.
Name your report.
Next, choose between One time schedule and Recurring.
One time scheduled will generate just one report on the date and time you set under Run export on, and will include the data for the date range you set up under Include data for.
Recurring will schedule the generation of recurring reports at regular intervals.
The first report will be generated on the date and time you set under Generate first report on, will continue to repeat according to the interval you set under Repeat, will include the data for the date range you set up under Include data for, and will end according to your selection under Scheduled end date.
Once you set everything up, click Save.
To get your report, click on View reports or go to the Audience reports tab.
You will find your report under Scheduled reports.
Here, you can download the report as a CSV file once it’s generated, or edit it.
All generated reports will be kept for 10 days and then automatically deleted.
This concludes our guide.
If you have any questions, don’t hesitate to contact us at clients@inplayer.com.
Unless you are using Stripe Connect, refunds can only be processed by our support team.
Viewer refund requests that fall under the following categories will be granted automatically:
The viewer has made a duplicate purchase using the same email address.
The availability of the content the viewer has purchased was canceled.
The Premium Content wasn’t published.
More than 80% of the Premium Content delivery had quality issues (no sound, or poor sound & video quality).
The content was misleading – the description didn’t relate to actual Premium Content.
When a viewer requests a refund for reasons that do not fall under the above-mentioned scenarios, we will always make sure to forward the case over to you for review. You will always have a final say in whether these refunds will be granted or not.
Note that PayPal has a limitation of 6 months for issuing refunds.
When we send a viewer refund request over to you for review, we will also make sure to send you regular follow-ups every 3 days, for 15 days. If after 15 days (5 follow-ups) we do not receive a response, we will automatically process the refund for the viewer.
To learn more about our refund policy, make sure to check out the Viewer and Customer Terms & Conditions pages.
If you are using Stripe Connect, you can action refunds directly from your Stripe account. All refunds actioned via Stripe, will also be recorded in your InPlayer Dashboard, so you will always have correct data there.
Direct Debit (SEPA) payments can be disputed for up to 8 weeks from payment, including after a payment has been refunded. If a refunded payment is later disputed, the funds will be returned to the viewer twice, resulting in a loss, and cannot be recovered without their cooperation.
Due to this, we do not process refunds for Direct Debit payments, nor do we suggest that you process them via your own Stripe dashboard. Instead, it is best that viewers are advised to submit a chargeback request to their bank.
Since In-app payment processors do not allow third-party platforms to process refunds, for all refunds for payments made via In-app the viewer will have to get in touch with the support of the In-app platform in question.
If you have any questions, don’t hesitate to contact us at clients@inplayer.com.
From here, you can use the search bar to find the viewer’s account.
To use the search bar, choose the filter you wish to use for your search from the dropdown menu, and type in your search.
Note that you can search with just the first part of the email address, in this case carter, or the second part, in this case mail.com, however, you cannot search by typing any of the two parts of the email address just partially, in this case, cart or mail.
To open a viewer account, just click the button on the right, under the Edit column in the viewer’s row.