Reporting
Create reports that will give you insight into your business.
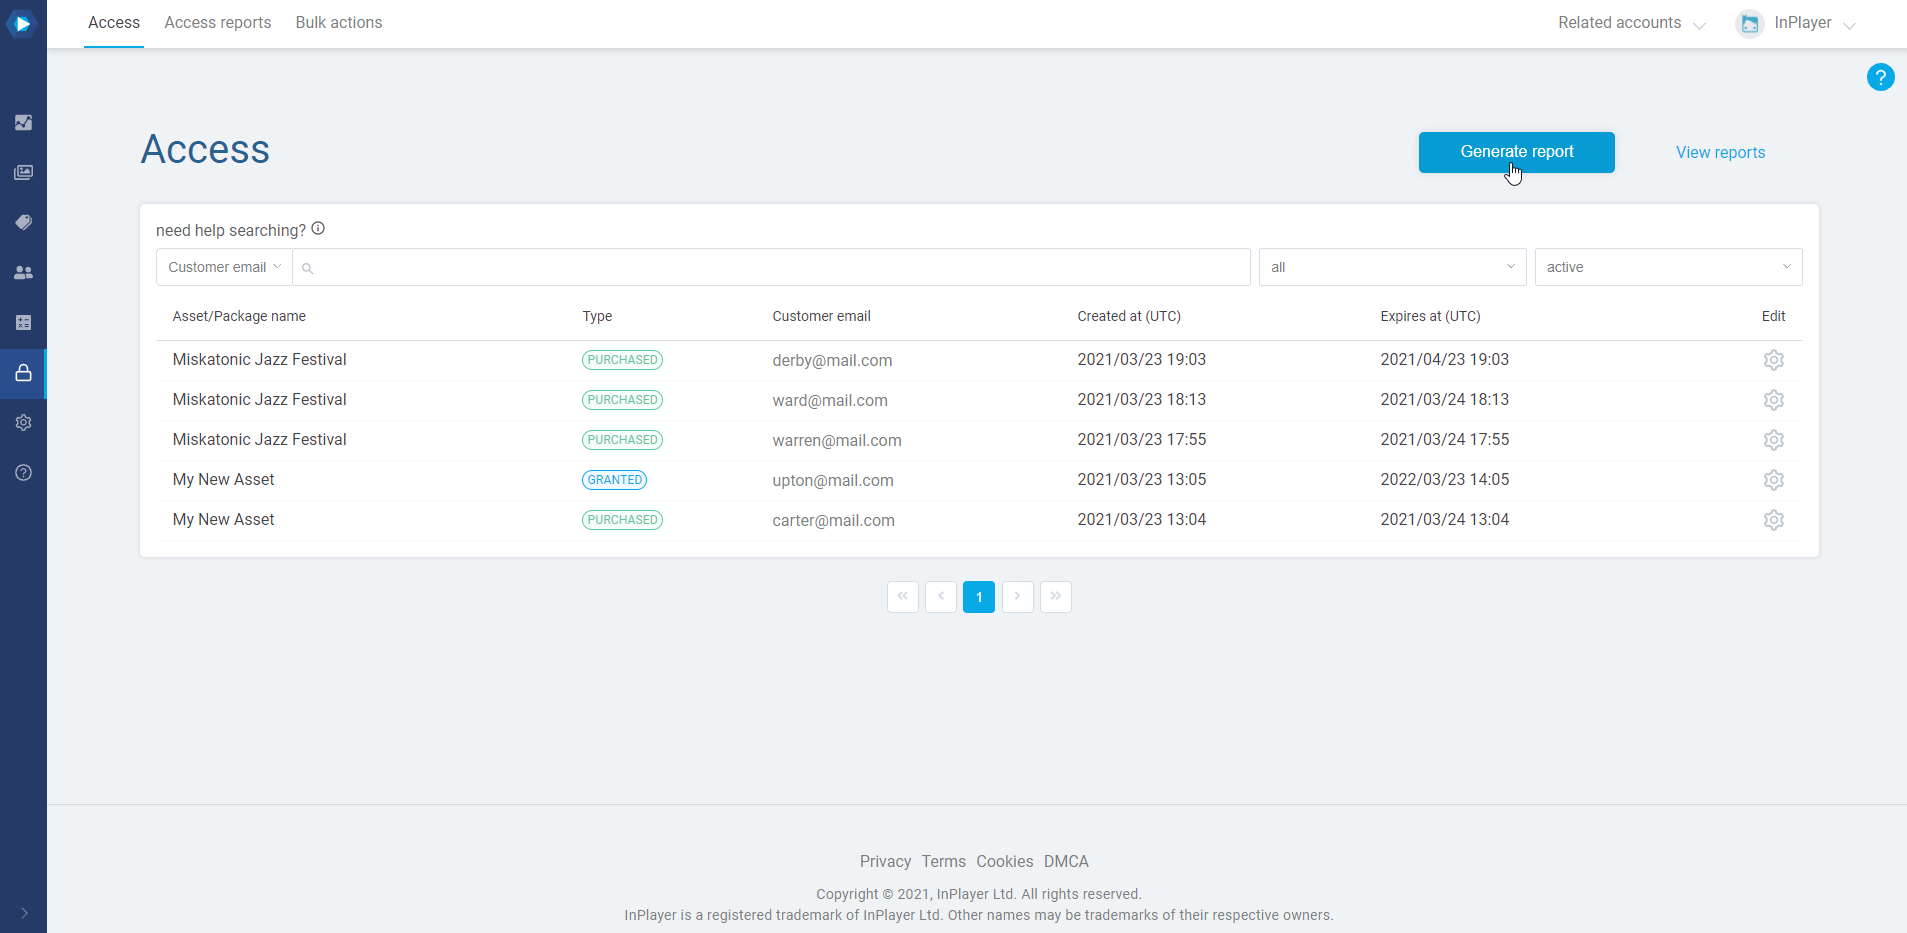
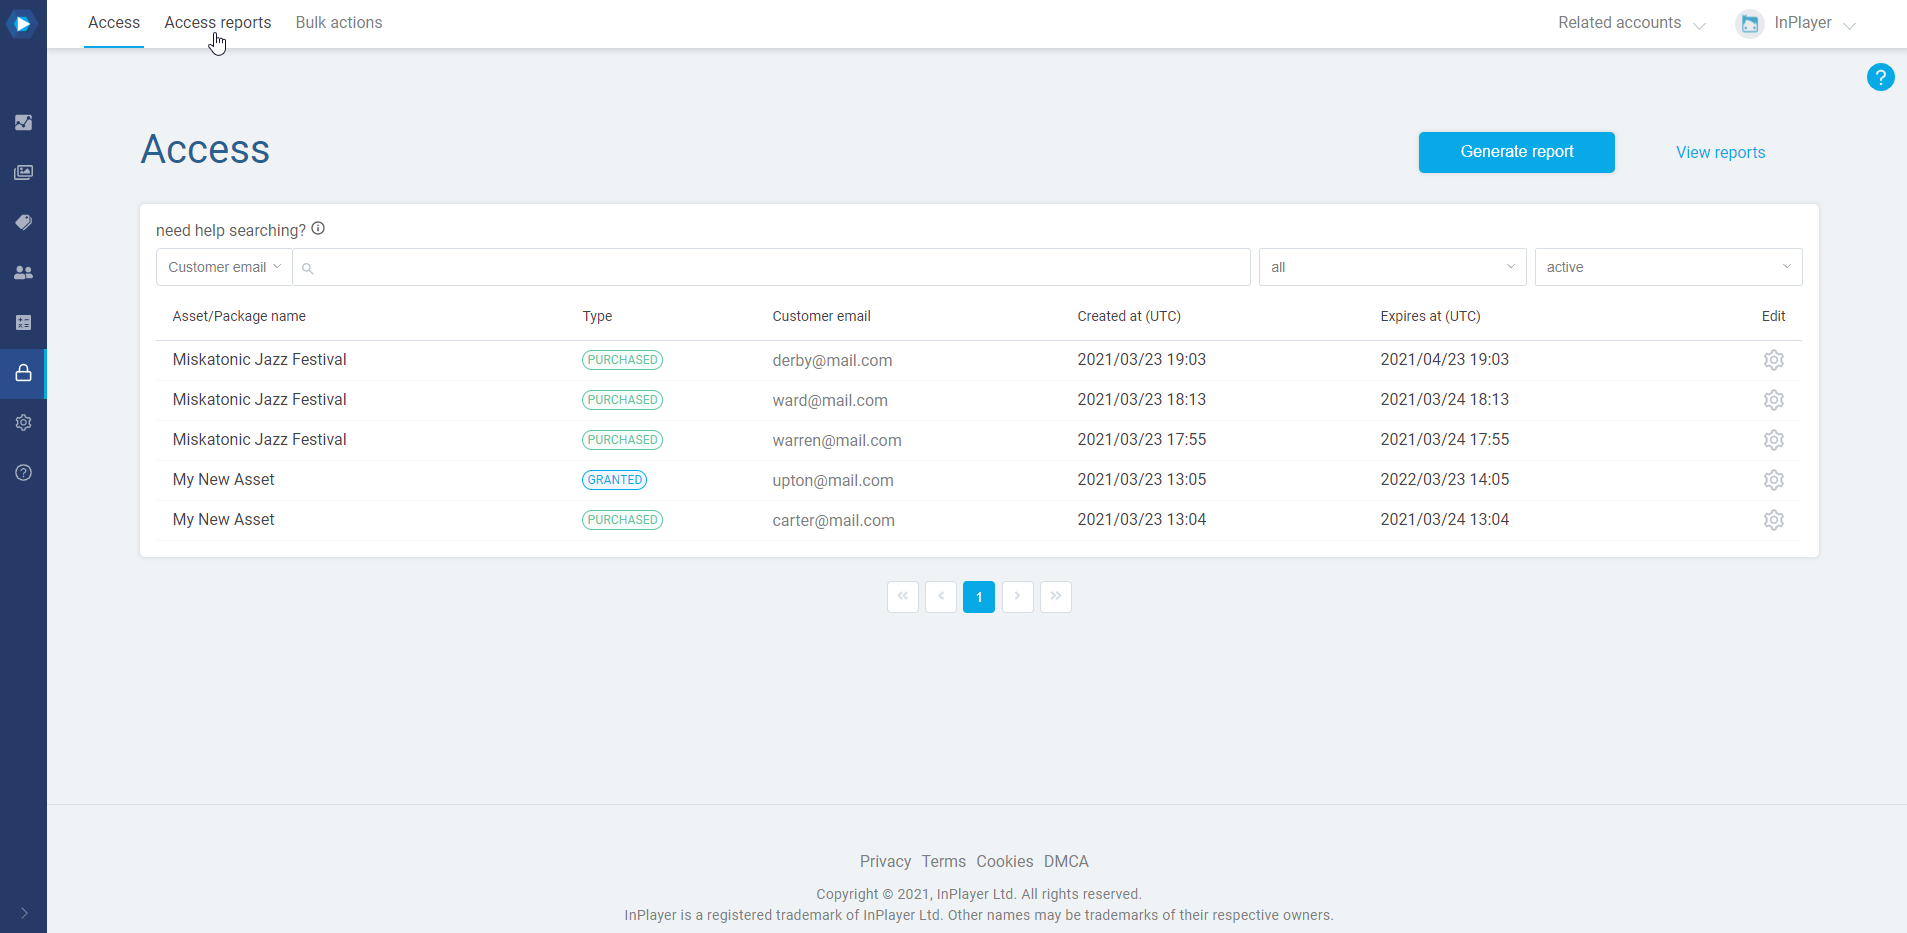
Access reports
With Access reports you can get the data on which viewer has access to which asset or package.
Note that for viewers who have access to packages, the report will show their package access only and not individual accesses for the individual assets that have been included in the package.
To get an Access report, do the following:
In the InPlayer Dashboard, go to the Access section.

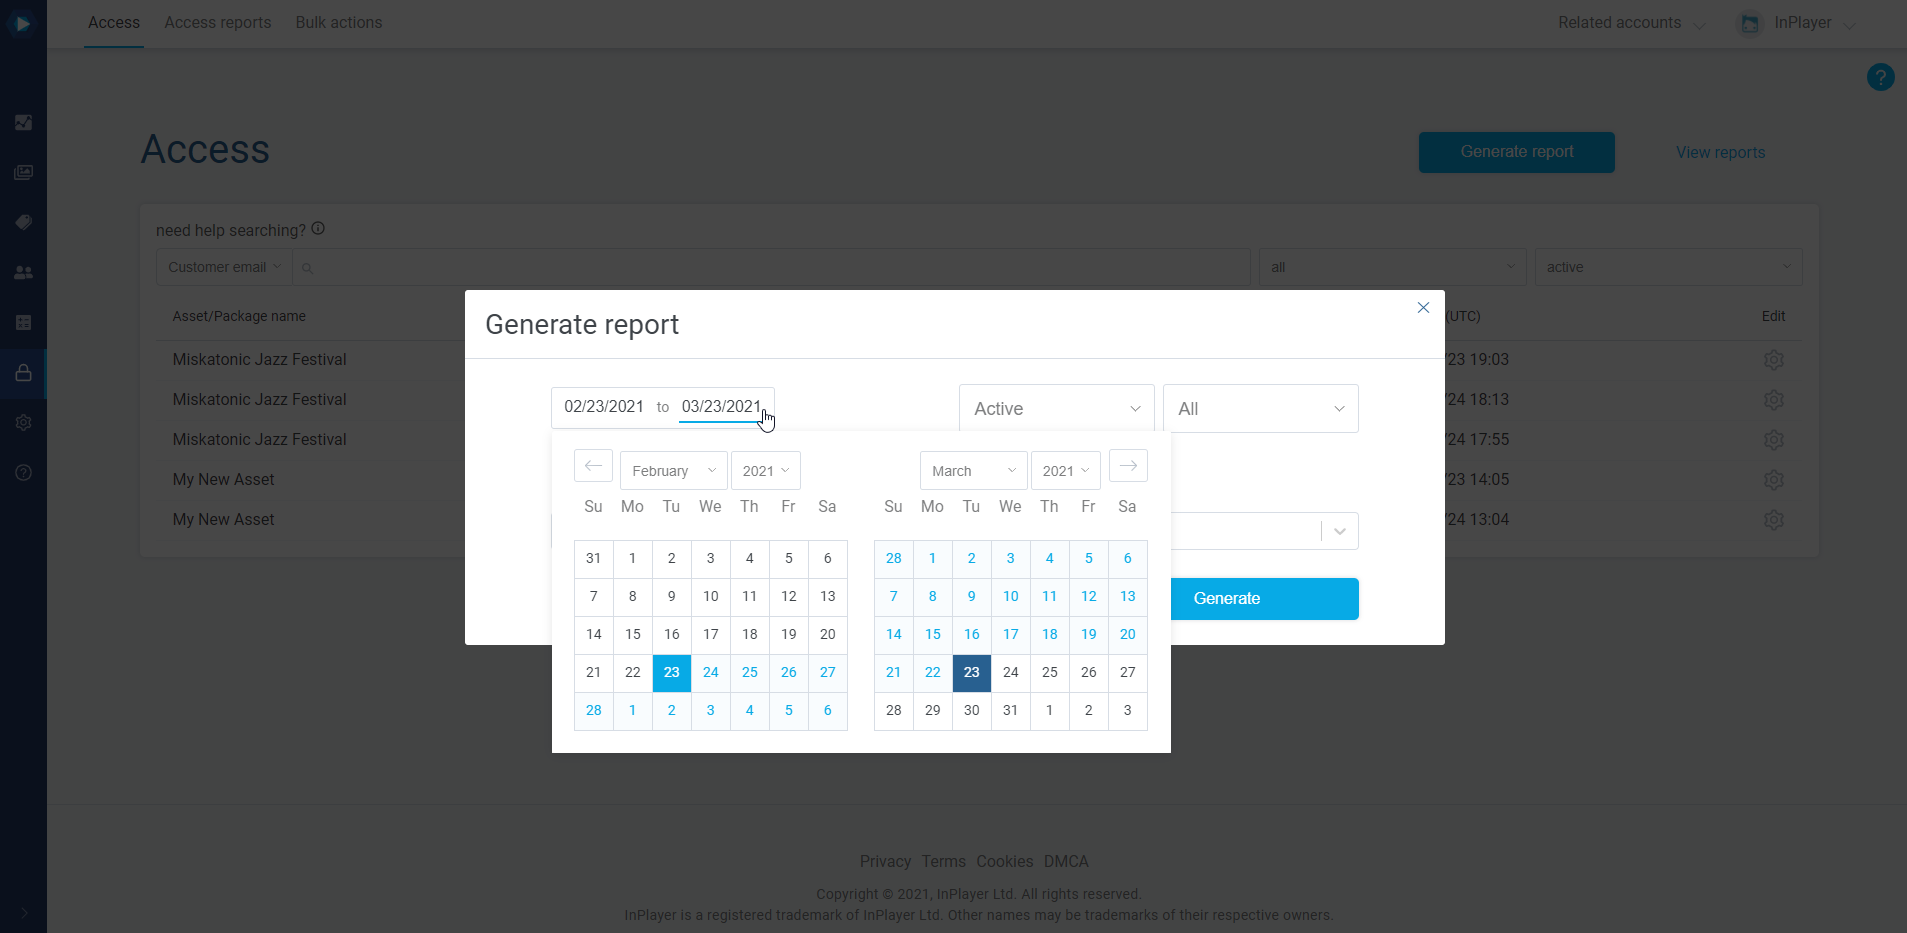
Click on Generate report.
Choose the time period. The report will include all access records that were created within the selected period.
Choose whether you want to include only active records, all, or inactive records only.
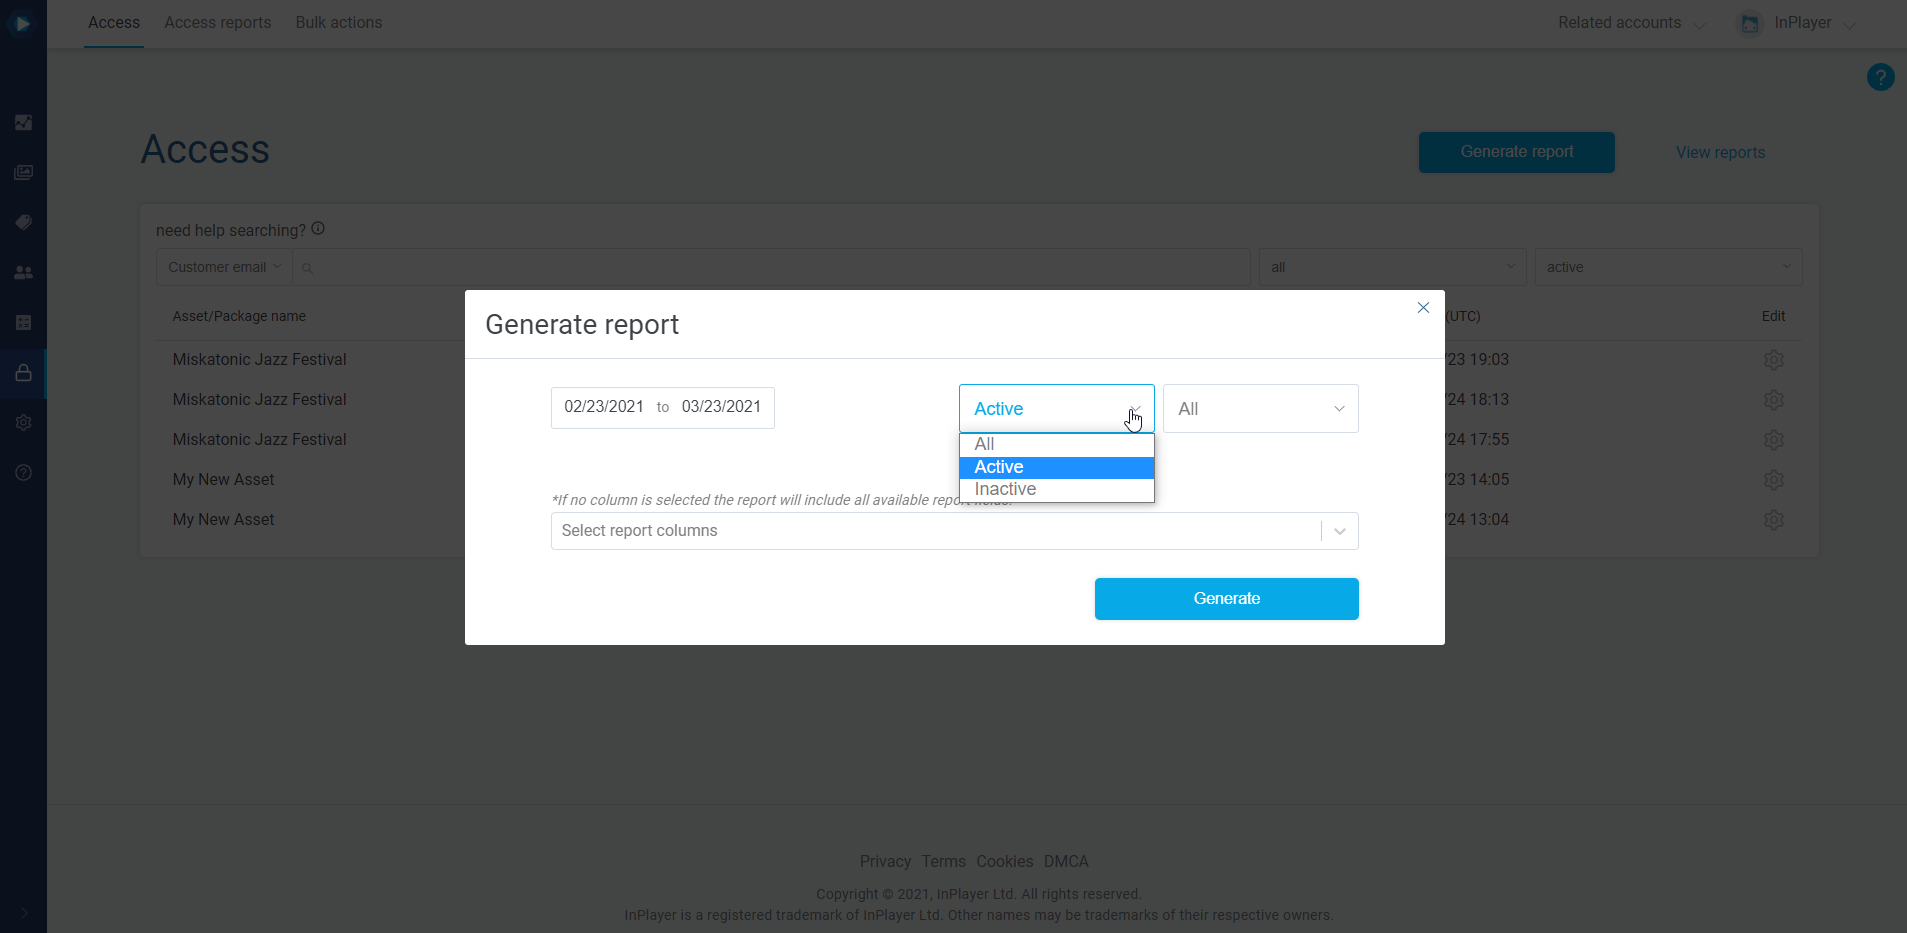
If you’ve selected active or inactive, you can further specify the type of records you want to include.

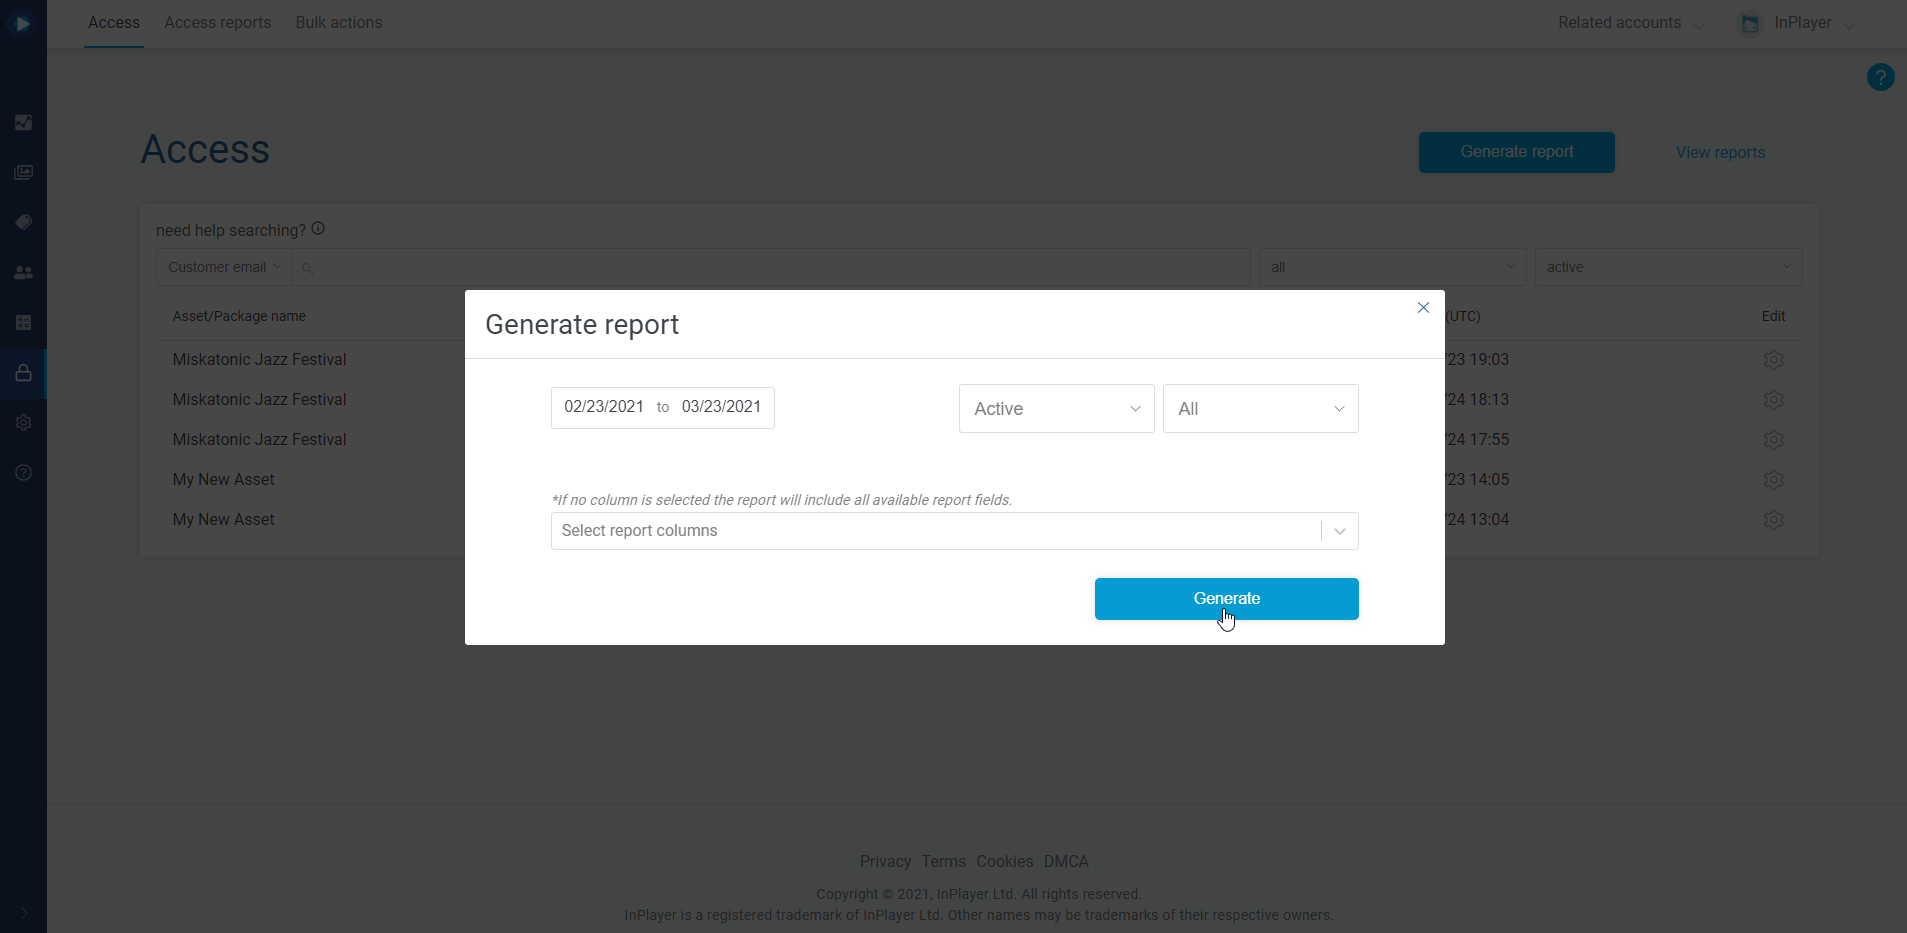
In the Select report columns field you can choose what data you want the report to include. If you leave this field blank, all data will be included.
Finally, click Generate.
To get your report, click on View reports or go to the Access reports tab.
Here, you can download the report as a CSV file.
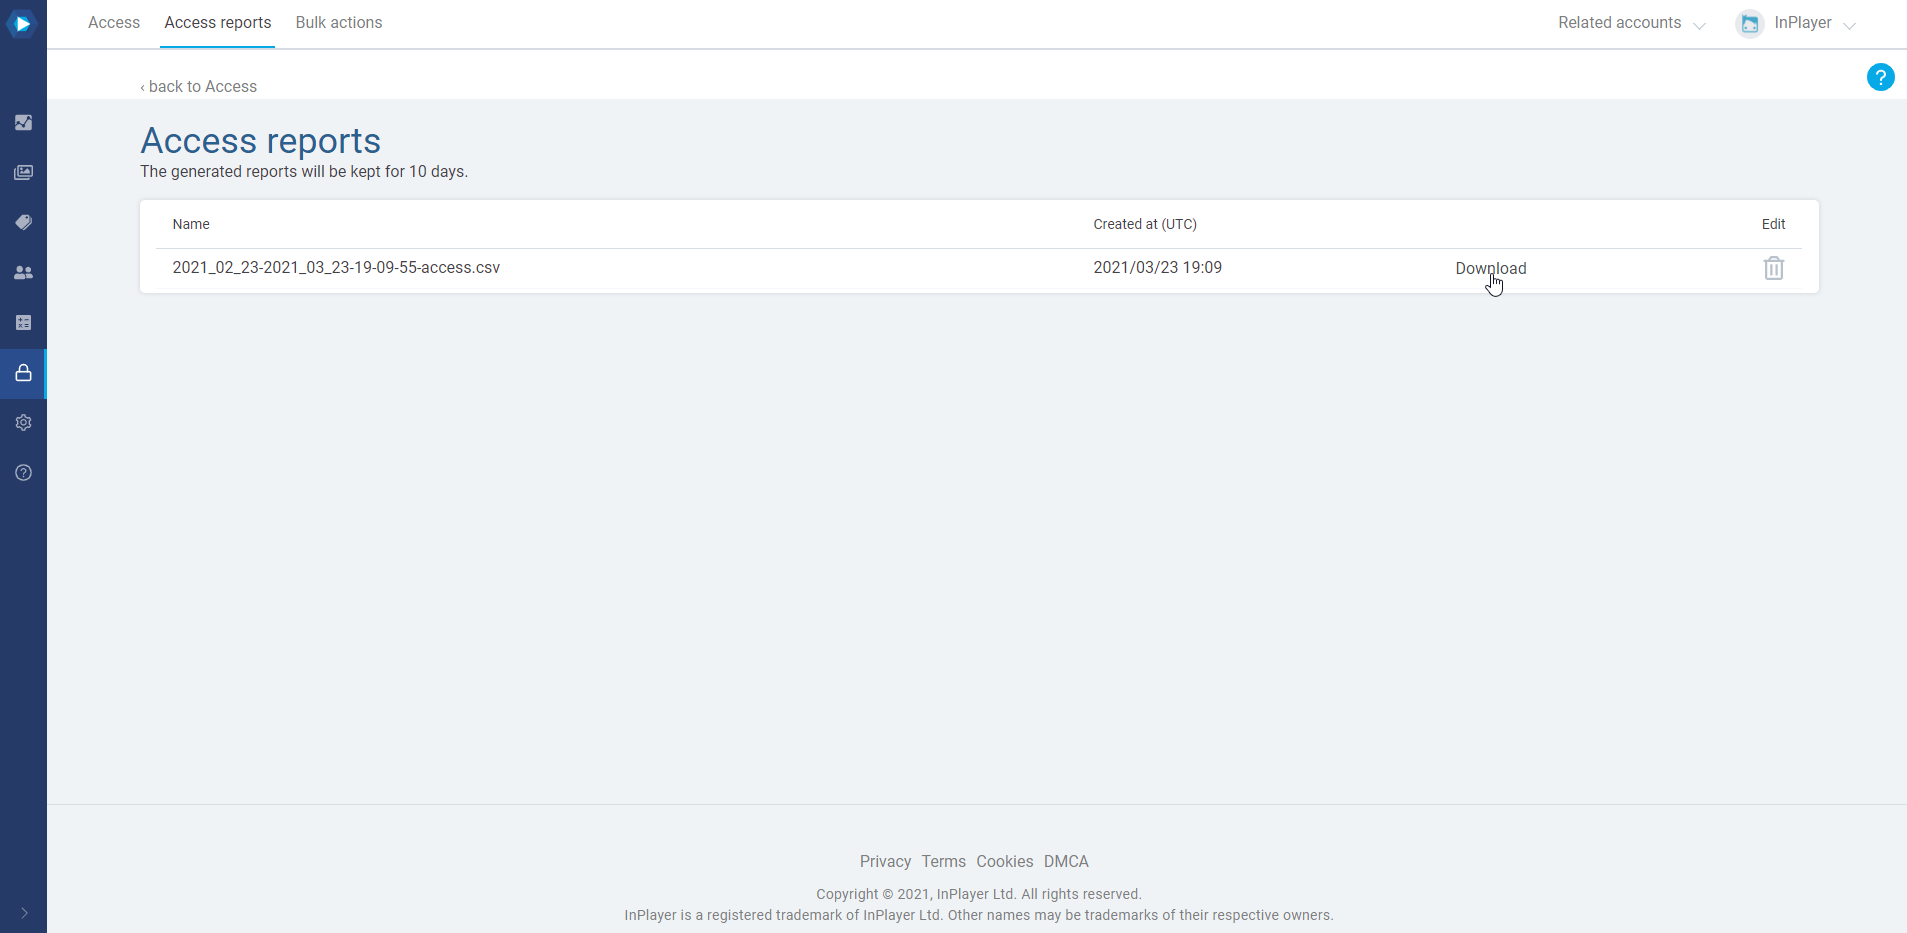
All generated reports will be kept for 10 days and then automatically deleted.
Report scheduling
With report scheduling, you can automatically generate reports at a certain time & date, eliminating the need to do this manually. This can be quite useful for recuring reports you do on a regular basis.
To schedule the automatic creation of a report, do the following:
In the InPlayer Dashboard, go to the Transactions section and then to either the Payments or Subscriptions tab.
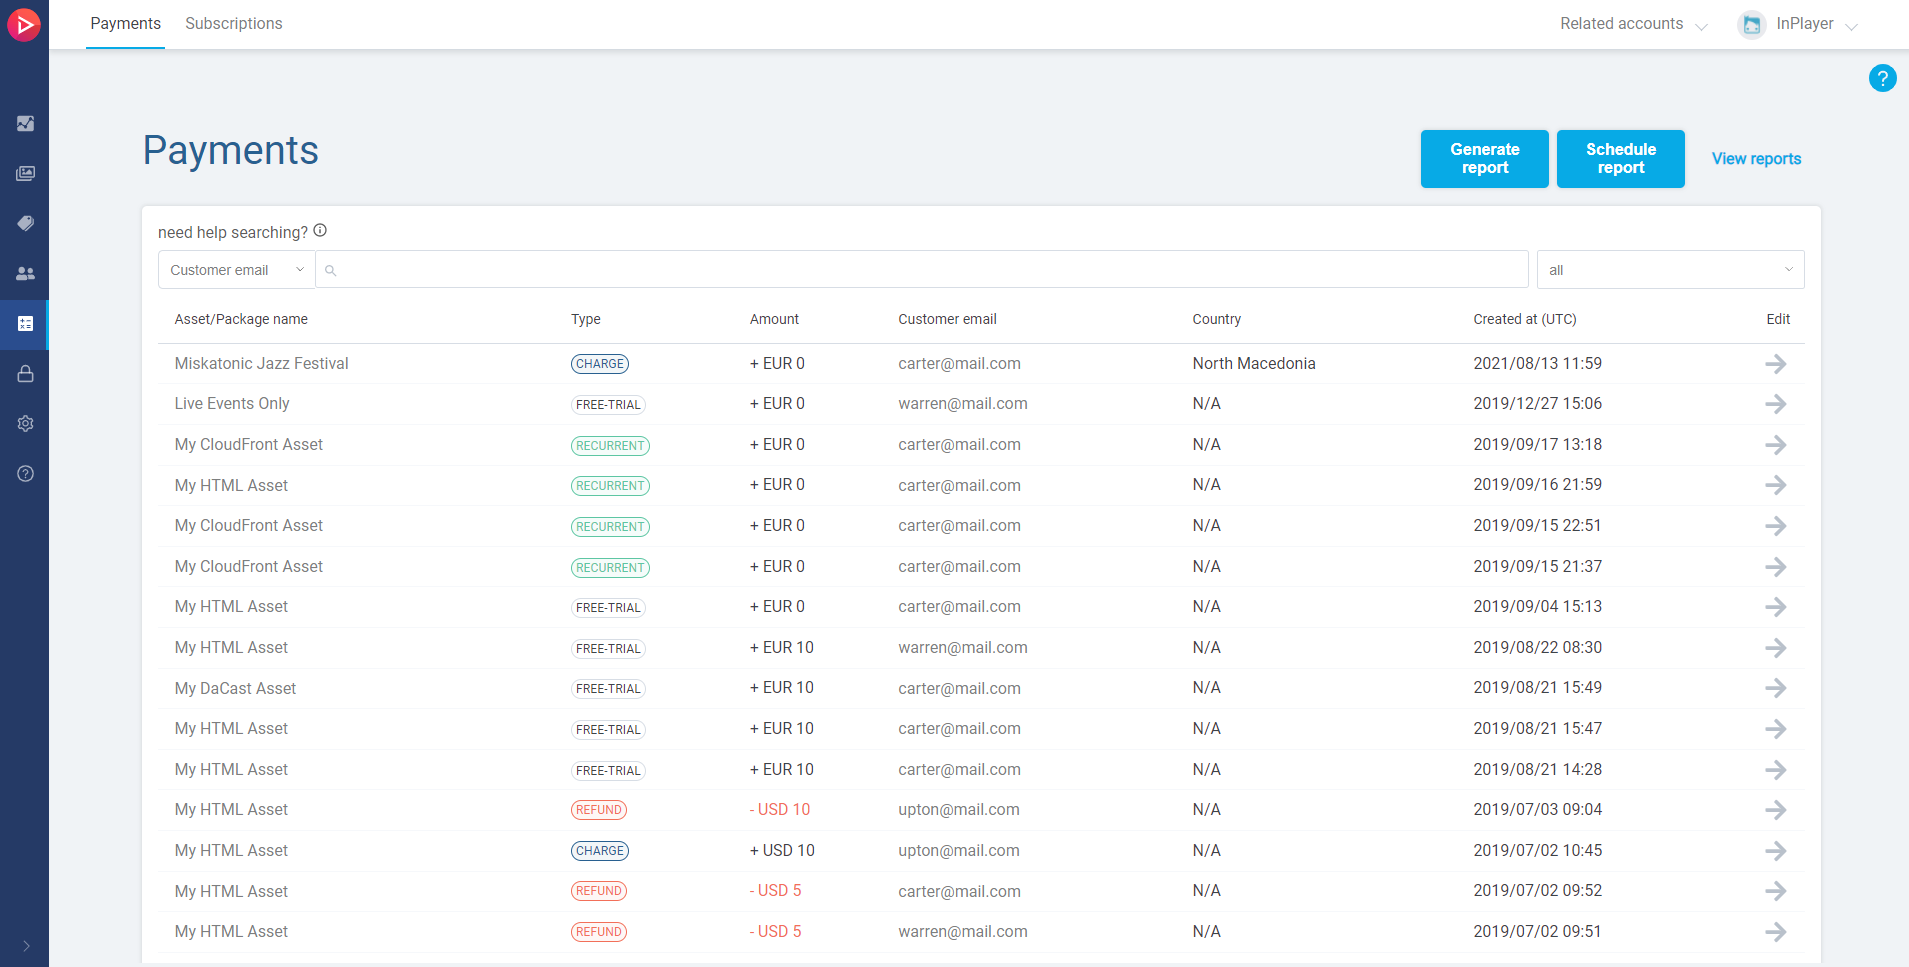
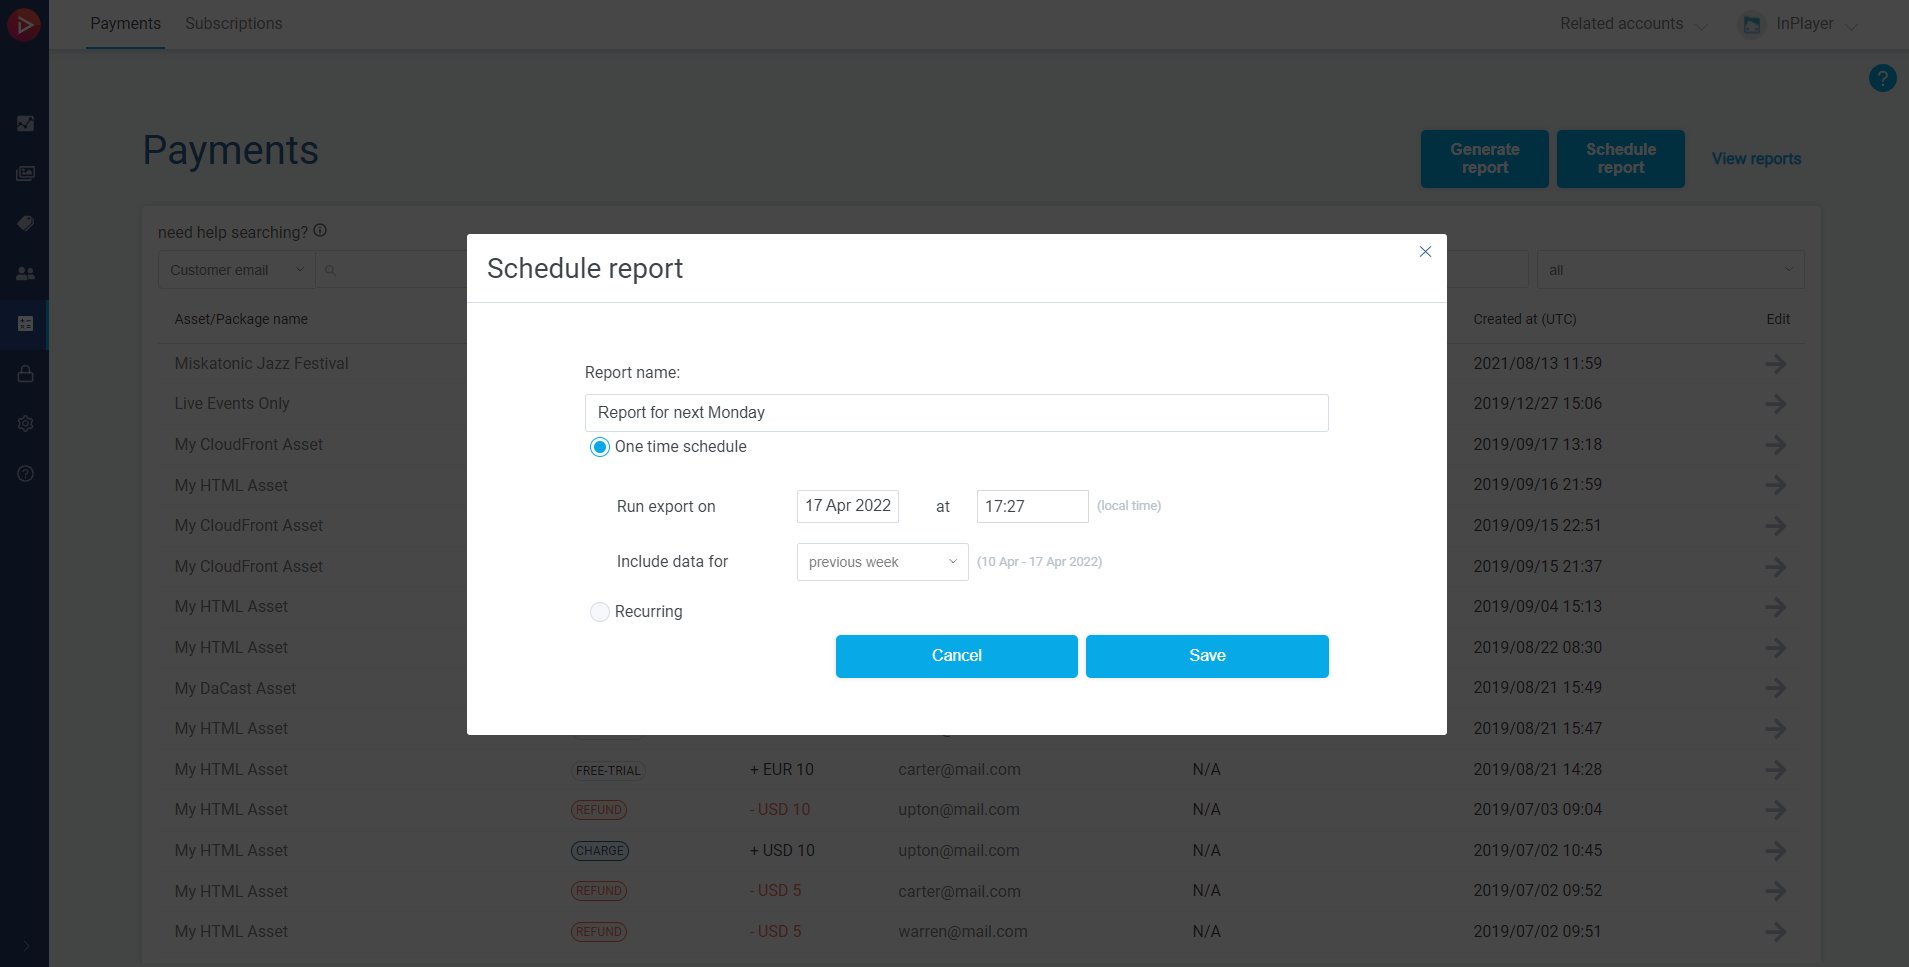
Click Schedule report.

Name your report.
Next, choose between One time schedule and Recurring.
One time scheduled will generate just one report on the date and time you set under Run export on, and will include the data for the date range you set up under Include data for.
Recurring will schedule the generation of recurring reports at regular intervals.
The first report will be generated on the date and time you set under Generate first report on, will continue to repeat according to the interval you set under Repeat, will include the data for the date range you set up under Include data for, and will end according to your selection under Scheduled end date.
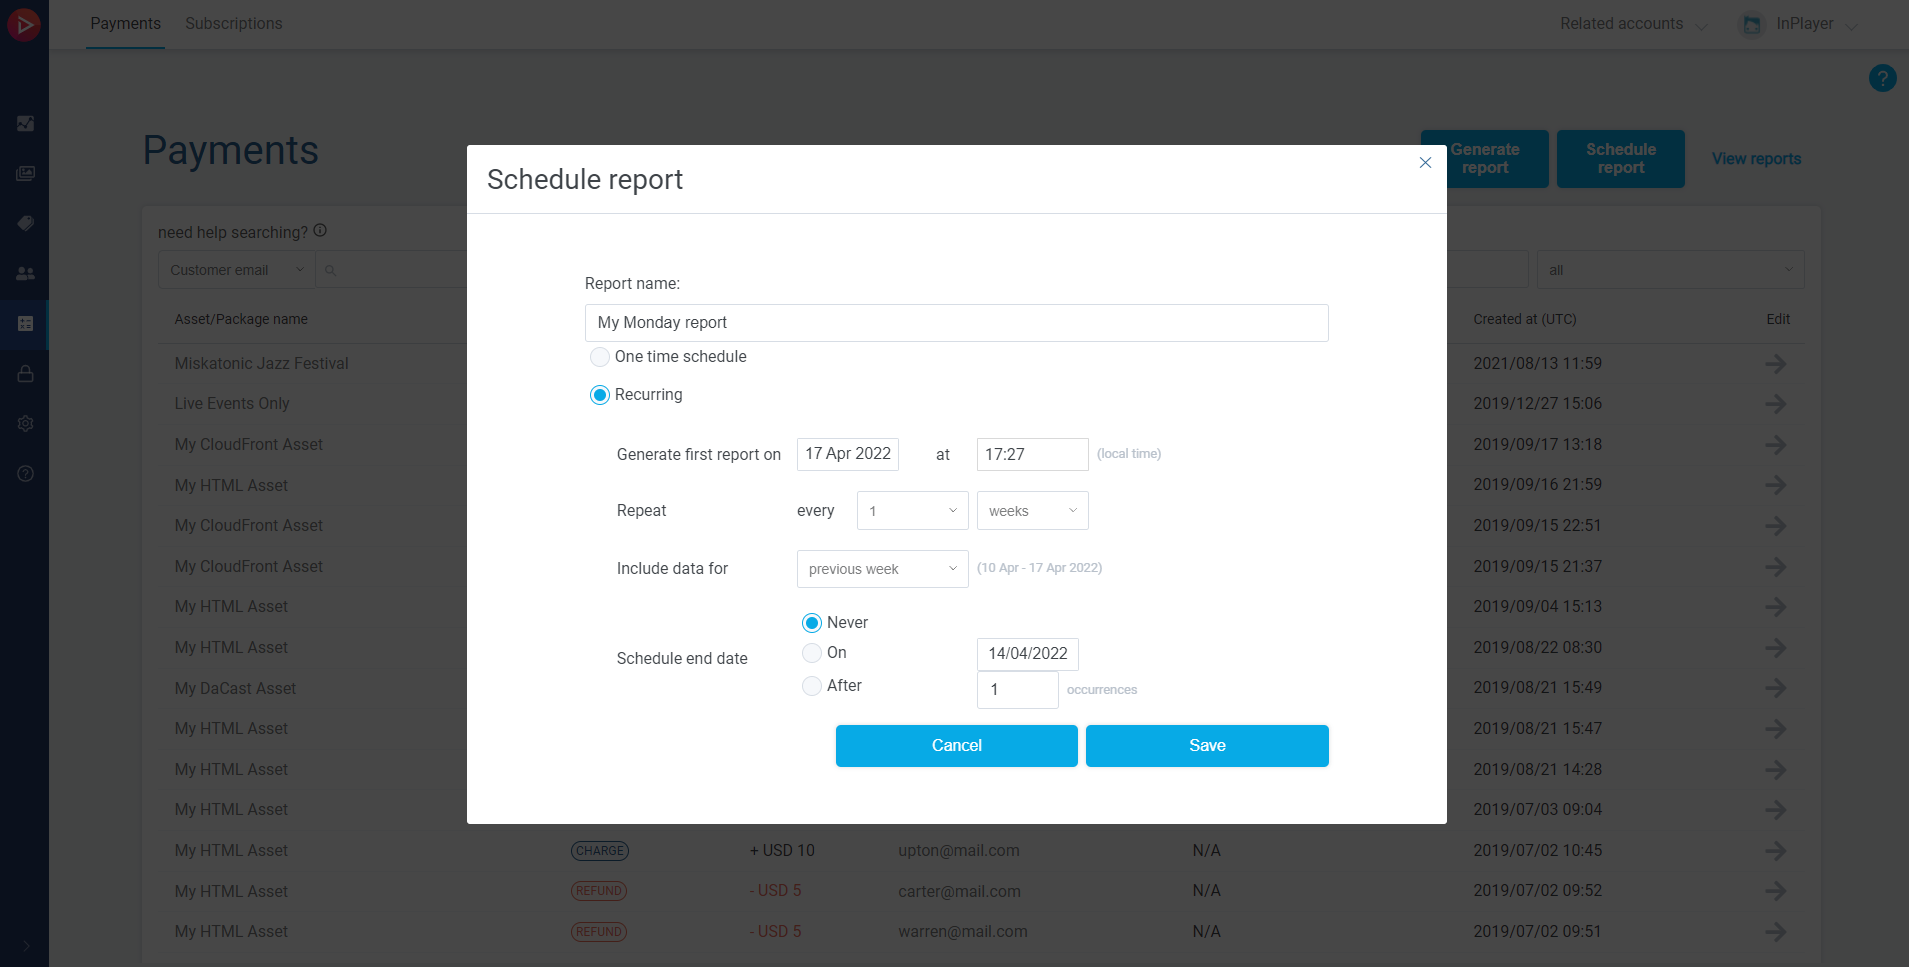
Once you set everything up, click Save.
To get your report, click on View reports.

You will find your report under Scheduled reports.
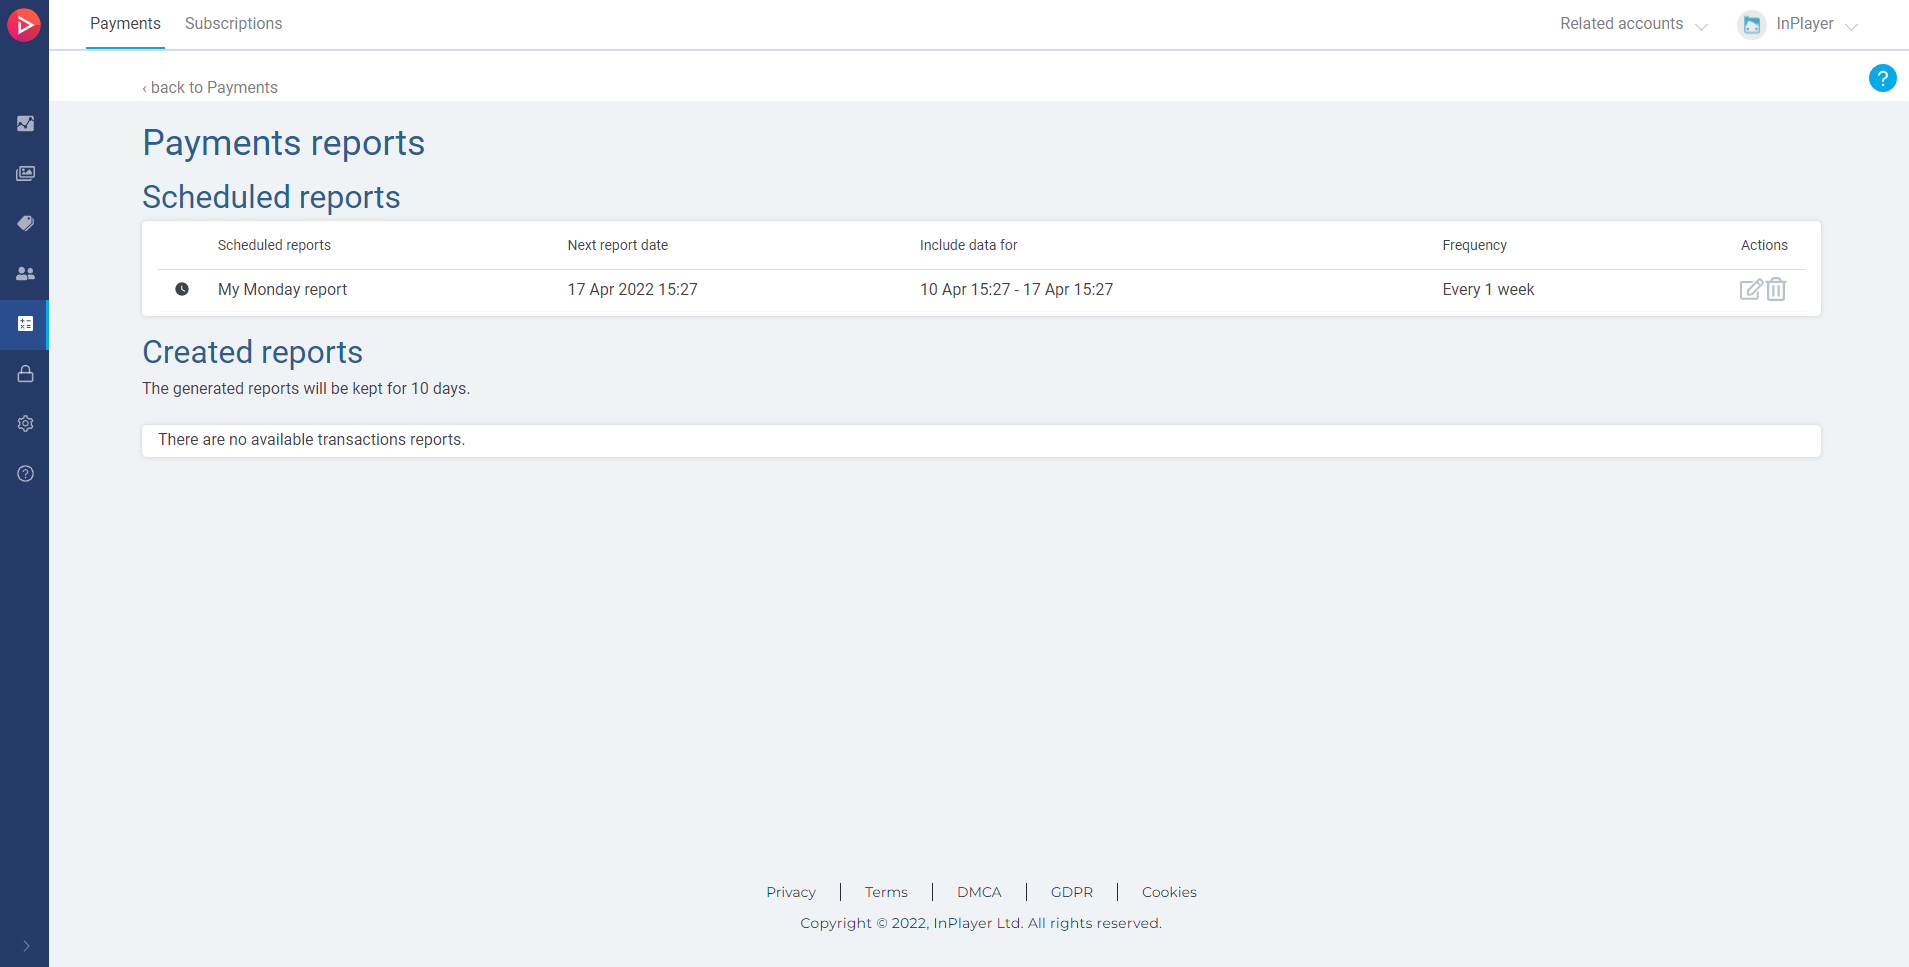
Here, you can download the report as a CSV file once it’s generated, or edit it.
All generated reports will be kept for 10 days and then automatically deleted.
This concludes our guide.
If you have any questions, don’t hesitate to contact us at clients@inplayer.com.