A good amount of basic customization can be done straight from the InPlayer Dashboard.
But using some extra HTML and CSS, you can make the paywall look exactly the way you want.
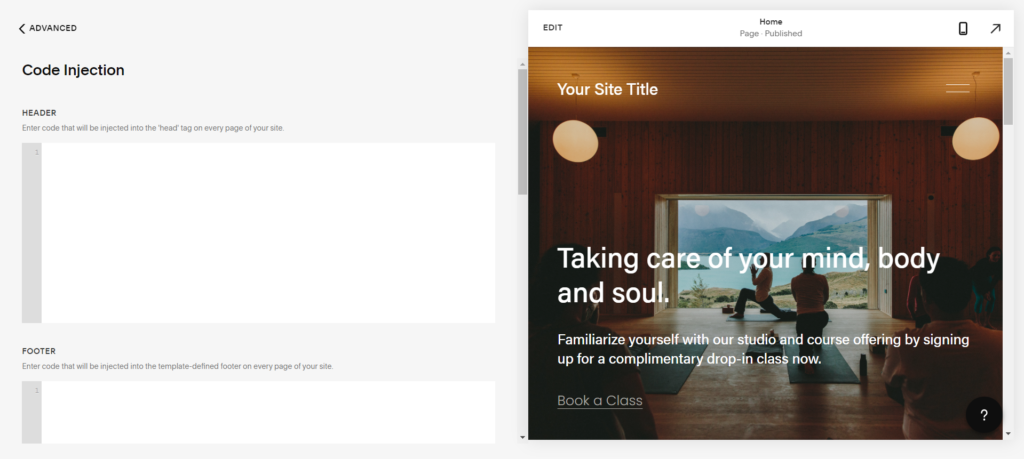
In this article, you will find some ready-made codes you can use to customize the paywall in a few basic but popular ways. Just modify the codes according to the few notes contained within them, and copy them in the <head> and/or <body> of your webpage accordingly.
All the codes below use the V3 version of the paywall.
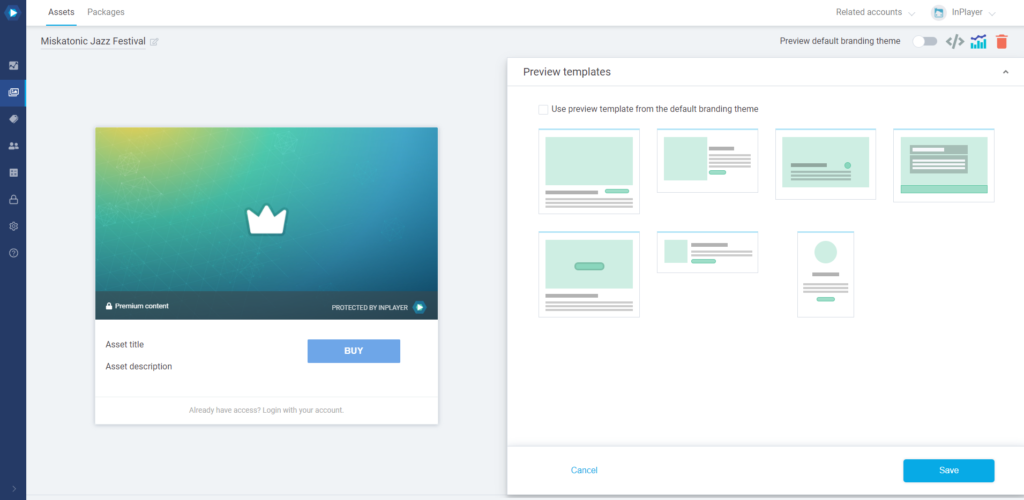
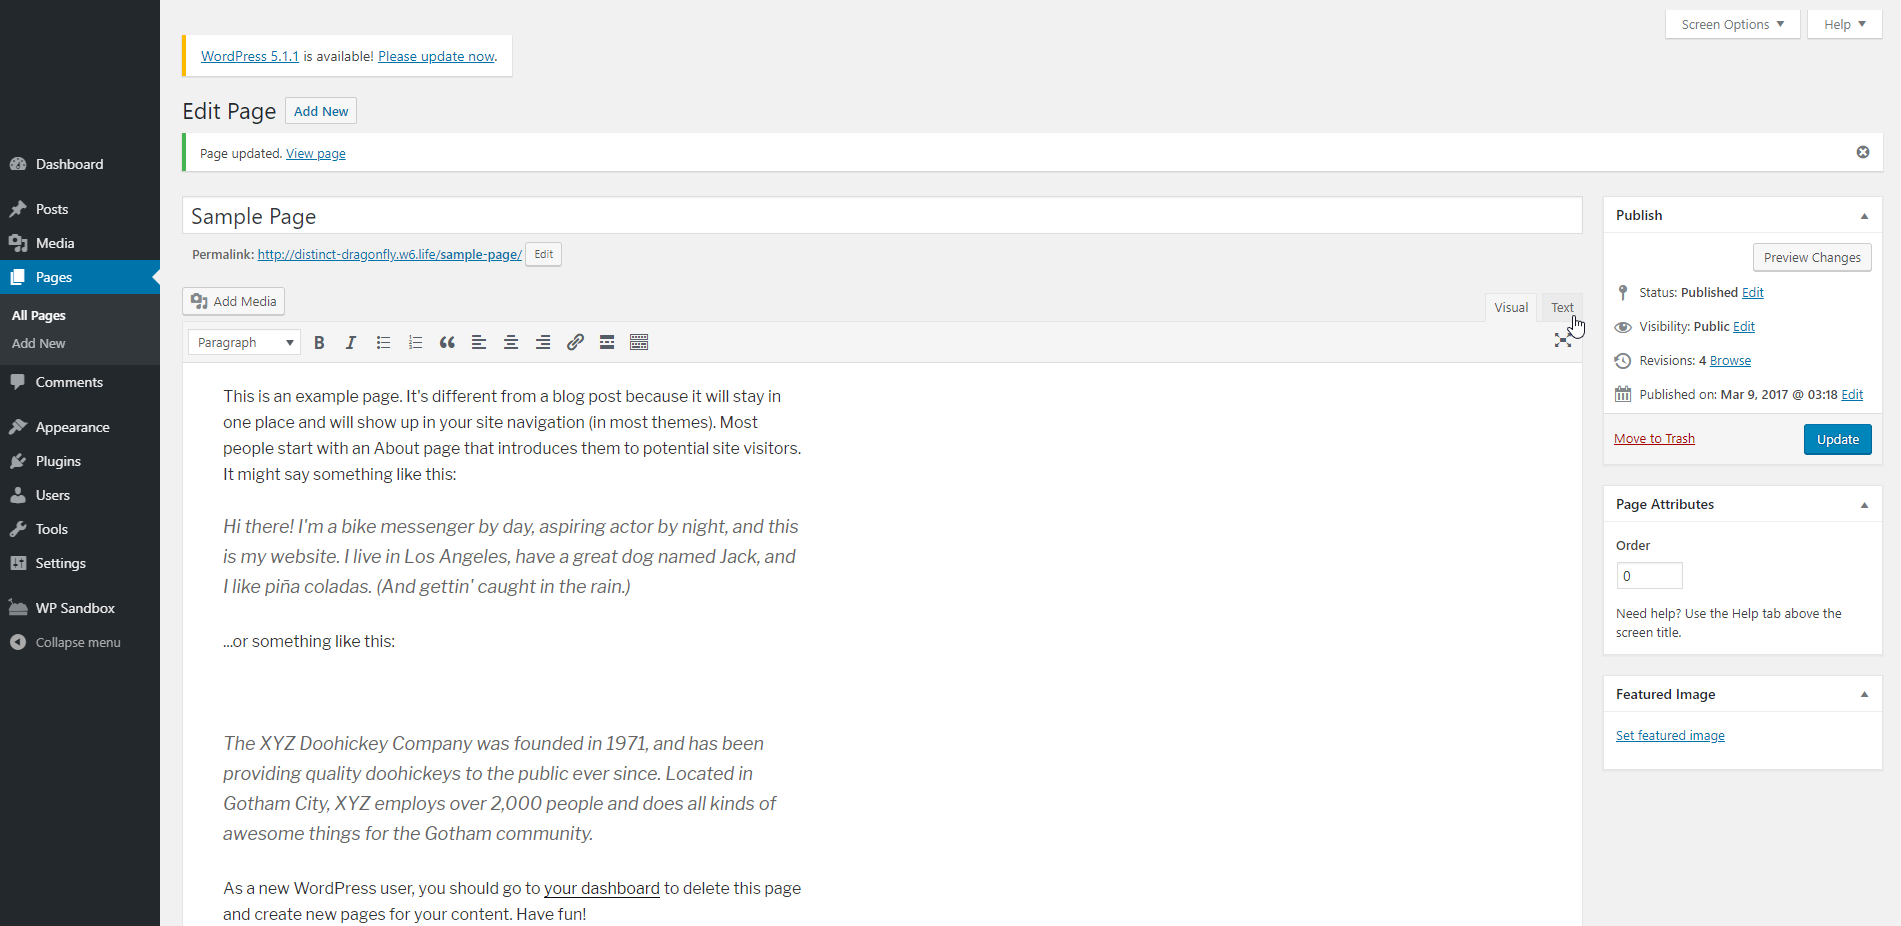
In the InPlayer Dashboard, you choose how your assets appear on your webpage. This is done in the Preview templates section of the asset.
However, if you don’t like the default preview templates, you are free to fully customize the way your asset looks.
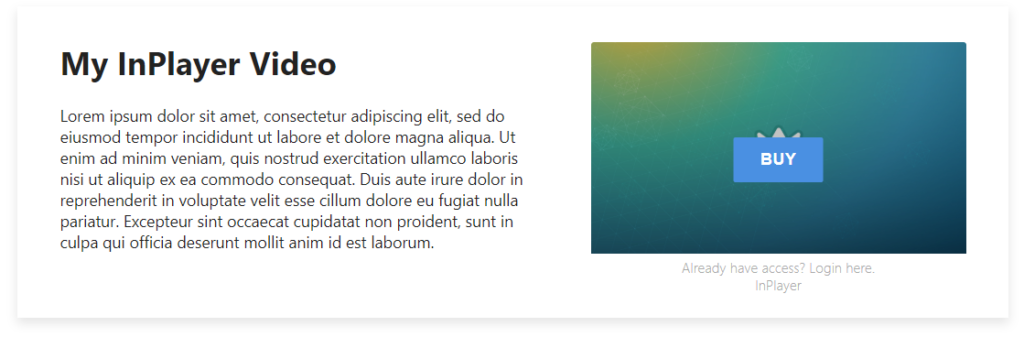
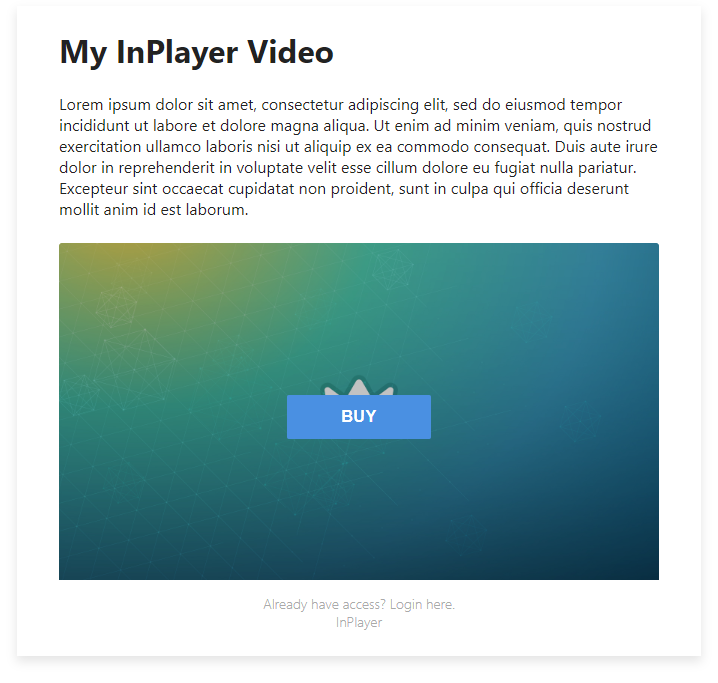
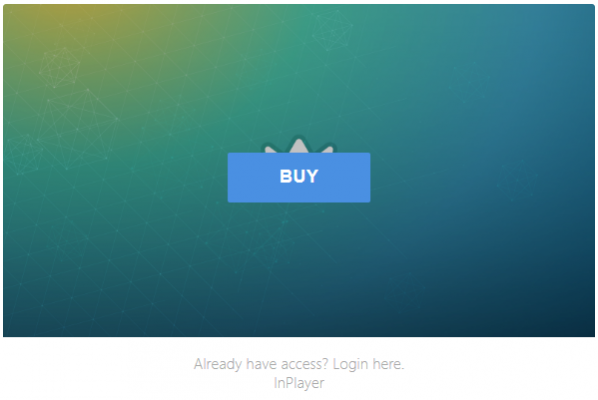
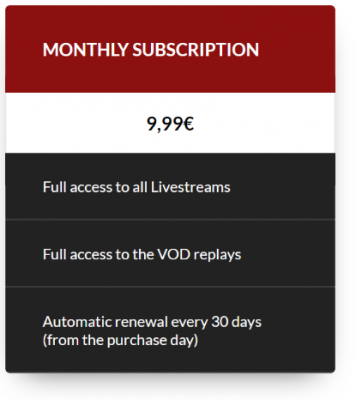
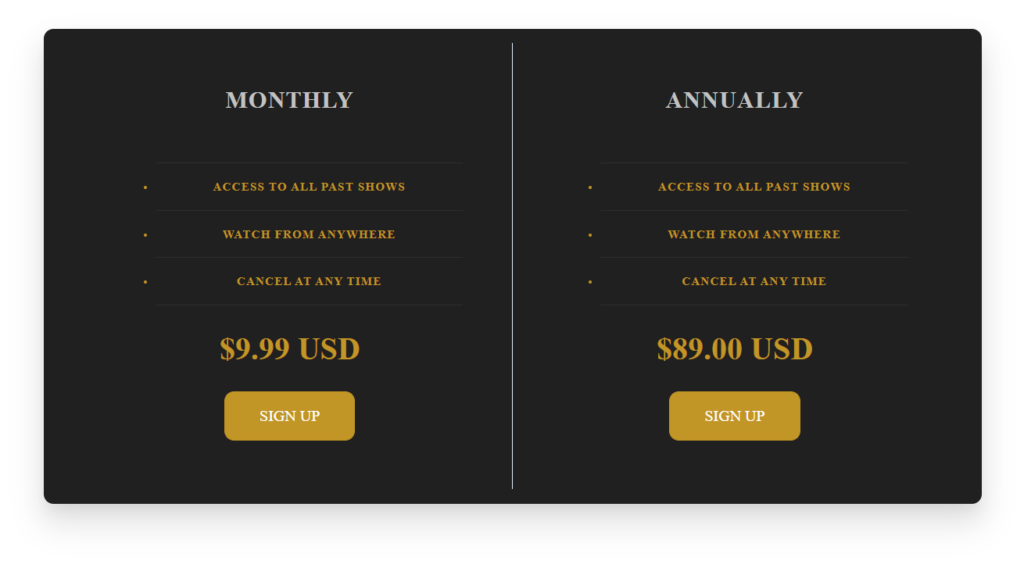
Here are some examples of alternative asset styles. You can further modify the preview code to your liking, or come up with something completely unique!
By default, once a viewer clicks on an asset and purchases their pass, the content behind the asset will be displayed in the place where the asset used to be.
However, sometimes you might want to have a button that will only serve as a way for viewers to purchase their passes and will not display any content after the purchase. This can be very useful if you have a dedicated pricing page on your site, where your viewers will only purchase their pass, but afterward has to go to another page to actually watch the content.
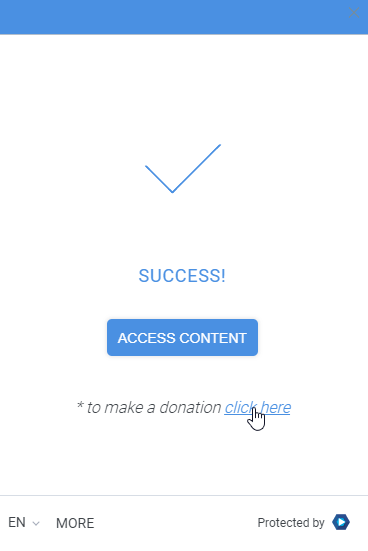
By default, the donation prompt appears after a viewer has made a payment, or in the case of Freemium assets, every time they click on the asset.
In case you wish to have a dedicated donation button on your page, you can do so by using the below code.
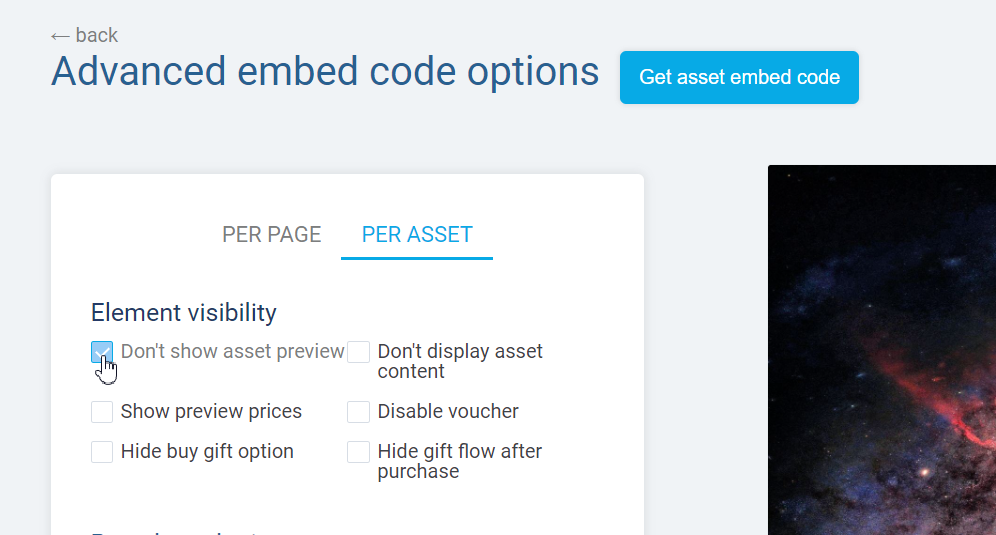
The code puts a donation button as an addition to the asset, but you can also have a donation button only, without the asset appearing on the page. To do so, you just need to go to the Advanced embedding screen on your asset, tick the Don’t show asset preview option, and get the embed code.
You can also tick the Don’t display asset content if you do not wish to display any content behind the asset.
Get code.Note that you can adjust the CSS style of the button so it blends with your site’s style.
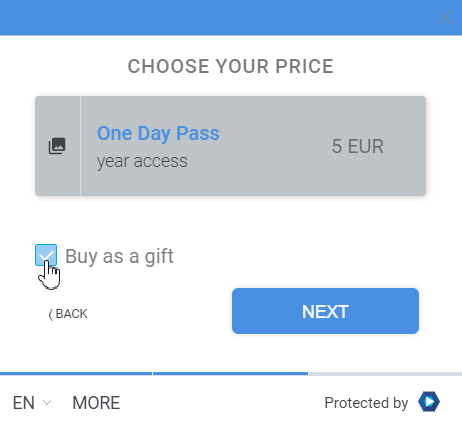
By default, viewers can purchase a gift pass for someone else by ticking the Buy as gift option in the price selection screen.
In case you wish to have a dedicated gift button on your page, you can do so by using the below code.
The code puts a gift button as an addition to the asset, but you can also have a gift button only, without the asset appearing on the page. To do so, you just need to go to the Advanced embedding screen on your asset, tick the Don’t show asset preview option, and get the embed code.
You can also tick the Don’t display asset content if you do not wish to display any content behind the asset.
Get code.Note that you can adjust the CSS style of the button so it blends with your site’s style.
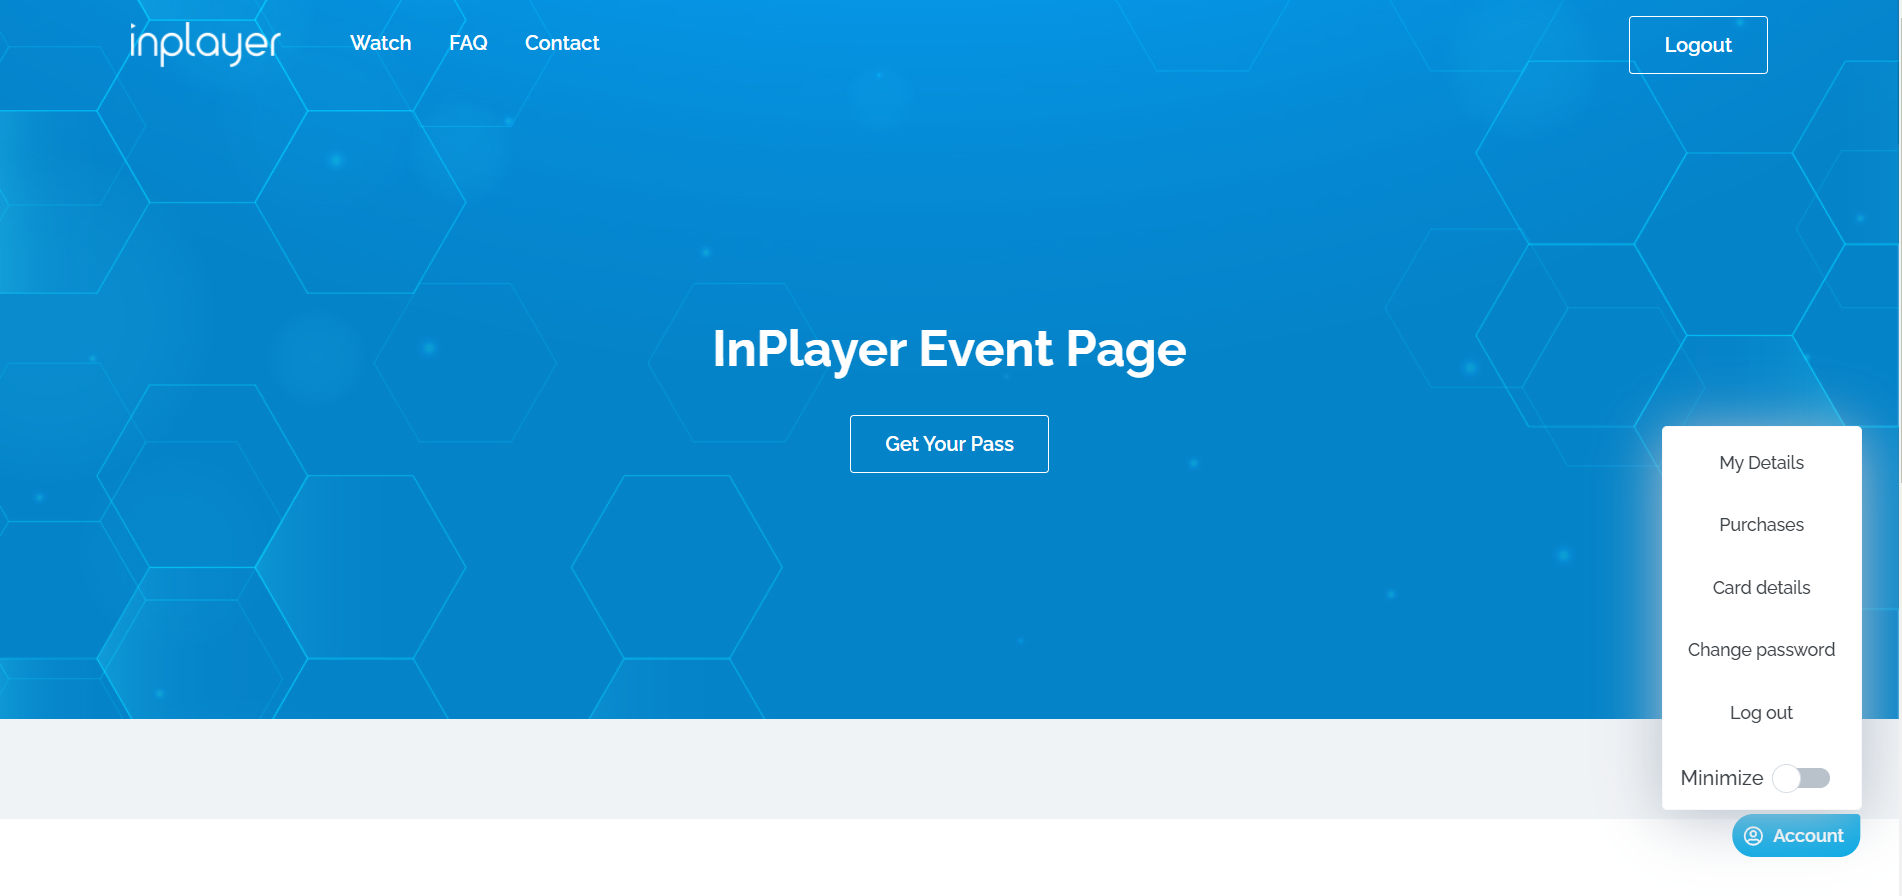
By default, when a viewer logs into their account, if they want to manage their details, they would click on the icon at the bottom right corner of the page.
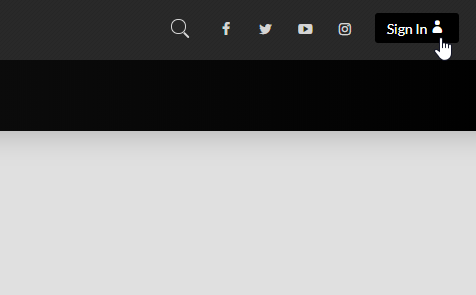
If you have an existing navigation bar on your page, you can streamline the navigation by adding a dedicated Login/Logout/My Account button there.
Get code.Note that you will have to adjust the CSS style of the buttons so it blends with your site’s style.
With Passcode assets viewer will access the content only by entering a code, without registering an account beforehand. No other type of access or payment will be possible. Passcodes can either have a limited or an unlimited number of simultaneous uses.
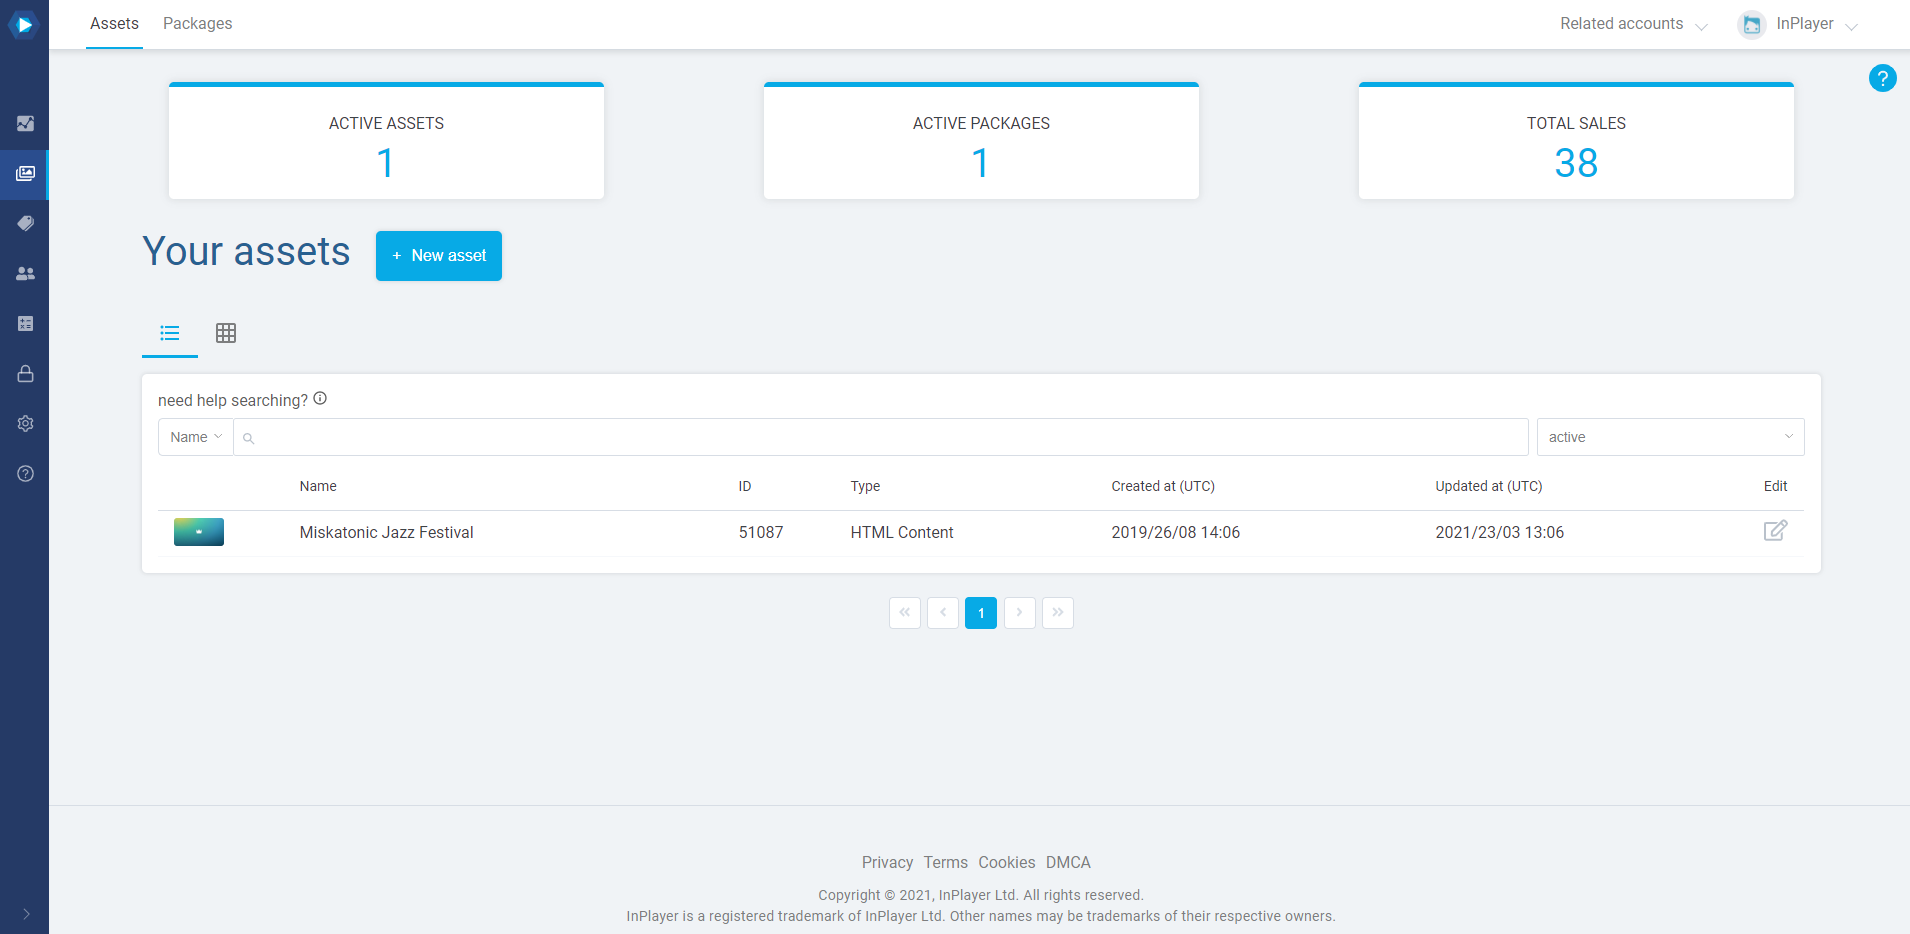
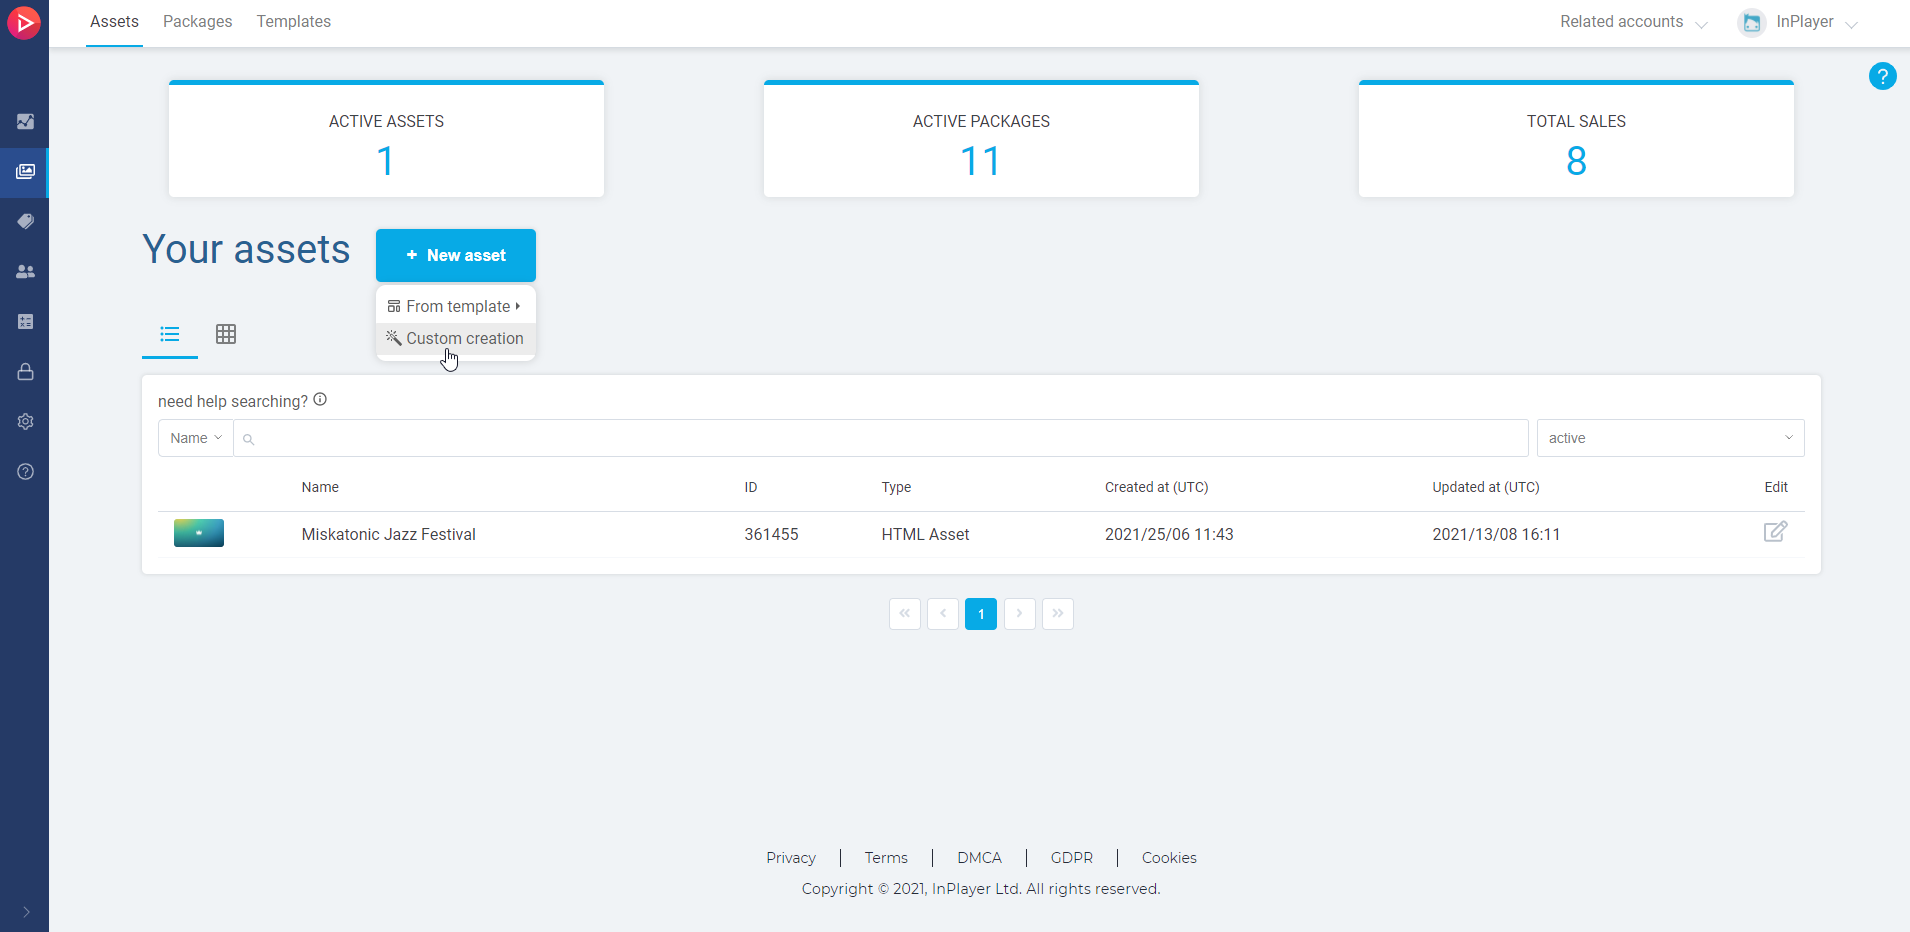
In the Assets tab, click on New asset, and then on Custom creation.
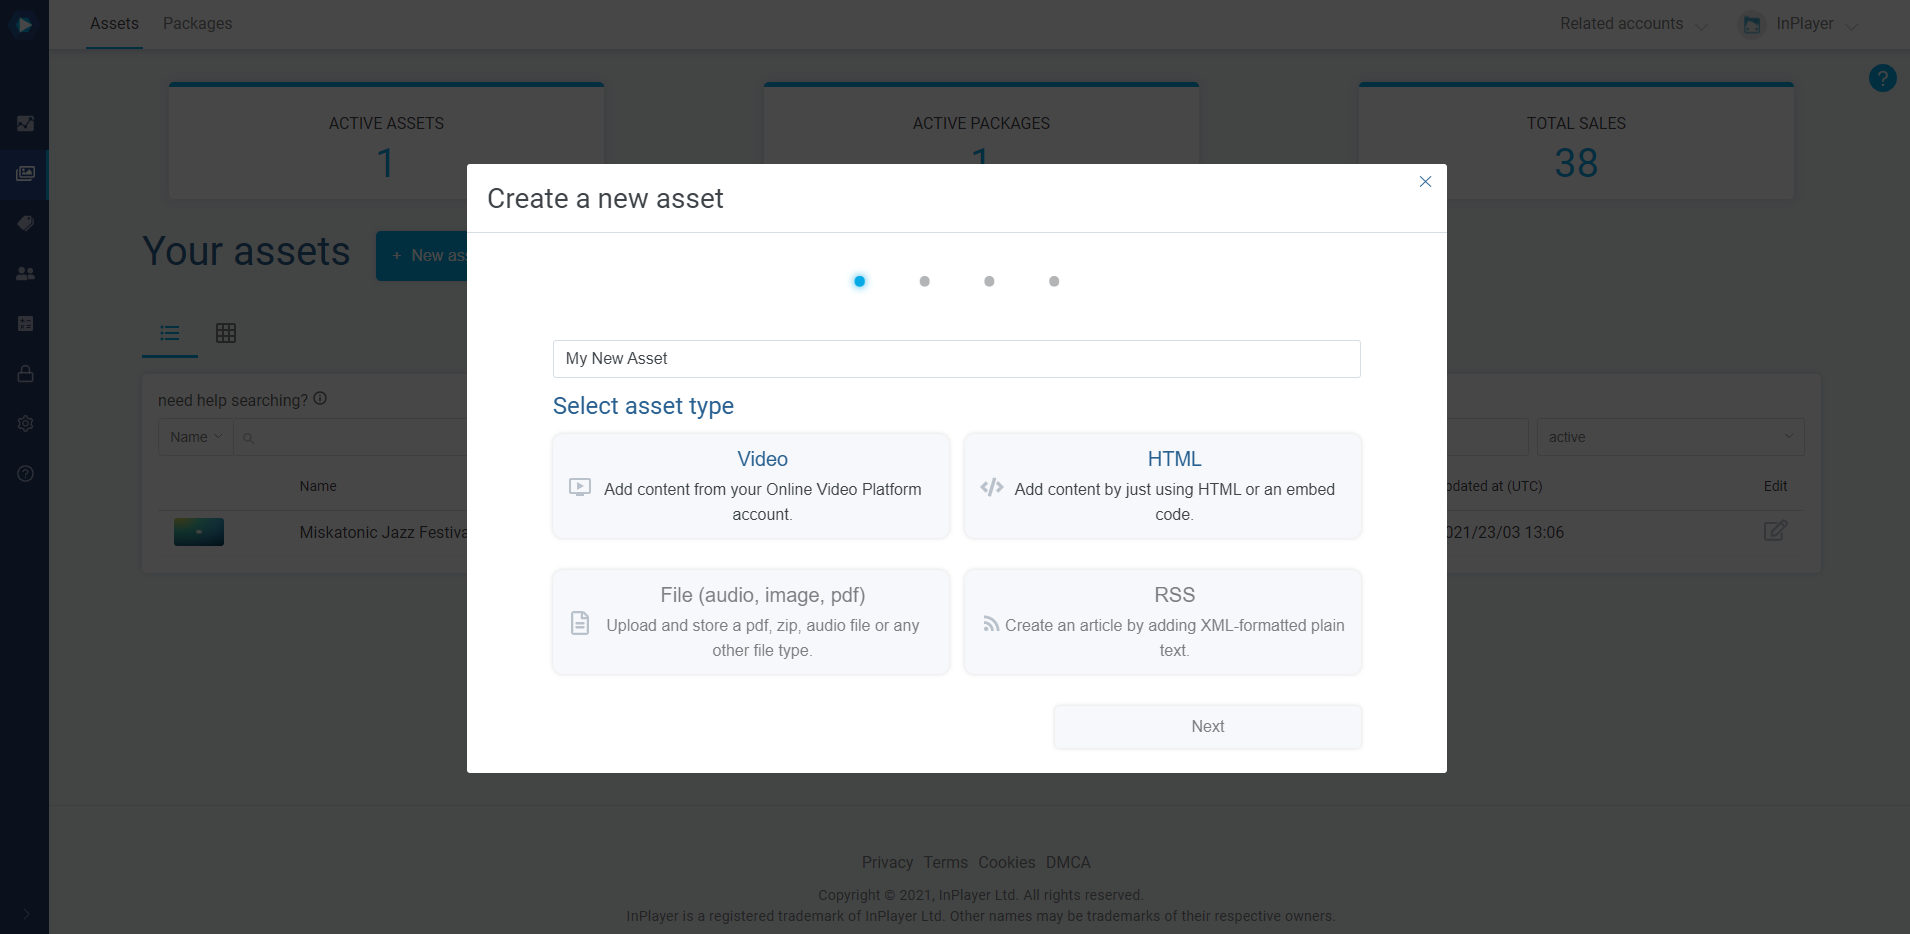
Enter a Name for your asset. This will be the name of the asset in your InPlayer Dashboard. The viewers won’t see this.
Select Video or HTML depending on the type of content you are going to protect with the asset.
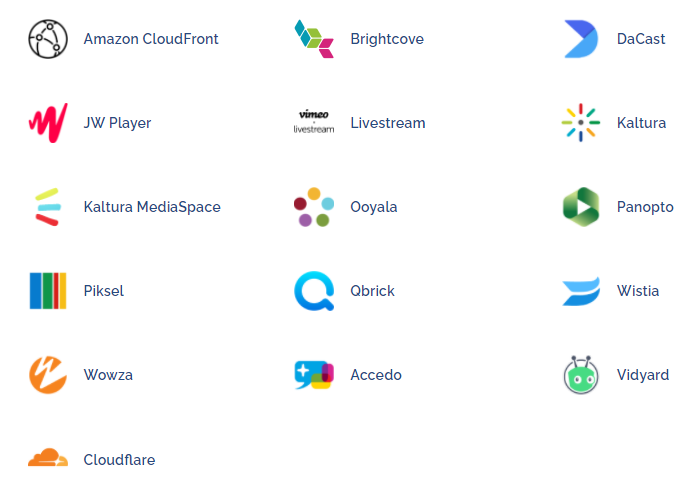
Video Use this if your content is videos that are hosted on one of the following platforms:
You can have only one video per Video asset.
HTML Use this if your content is videos that are hosted anywhere other than the above-mentioned platforms, or for non-video content. HTML is a universal asset and can be used for monetizing absolutely anything.
You can put as much content as you want in a single HTML asset, but we would still recommend sticking to only one piece of content per asset.
Once you select your asset type, click Next.
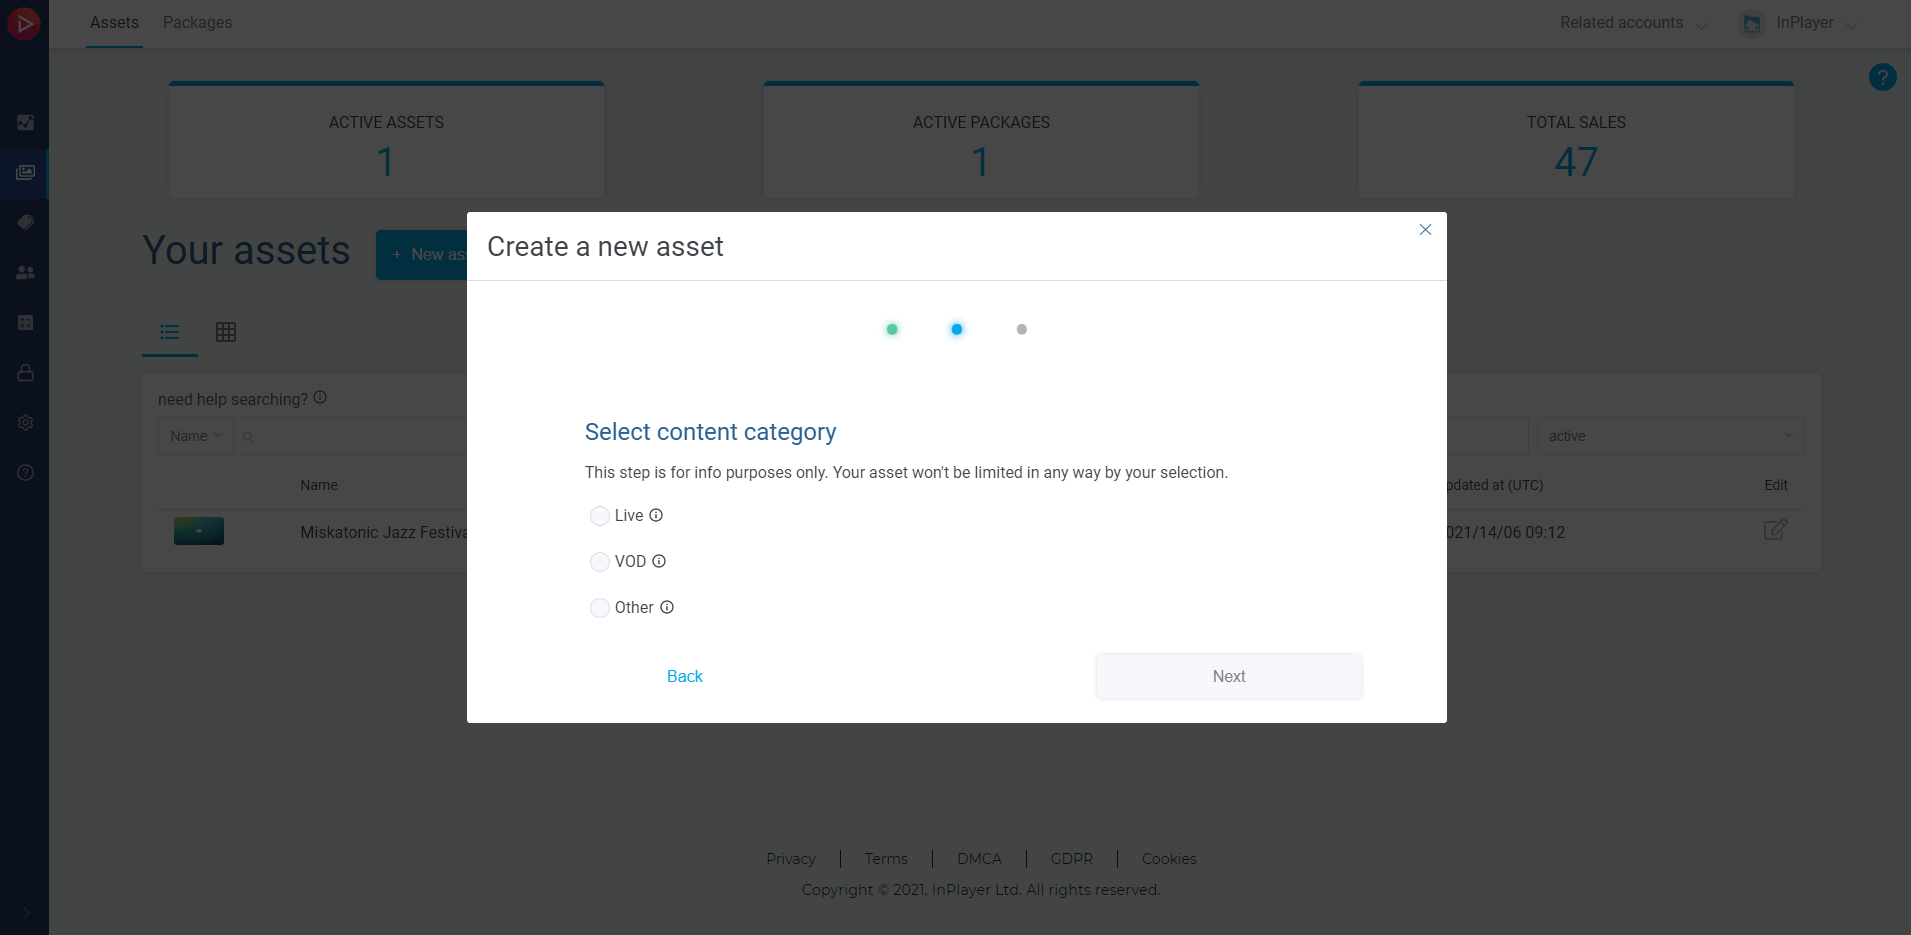
Under Select content category choose one of the following:
Live – for video content that will be livestreamed. This includes live streams where you plan on publishing a VOD replay afterwards.
VOD – for Video-on-demand-only content that isn’t going to be live streamed.
Other – for content other than video, or for test assets.
Click Next.
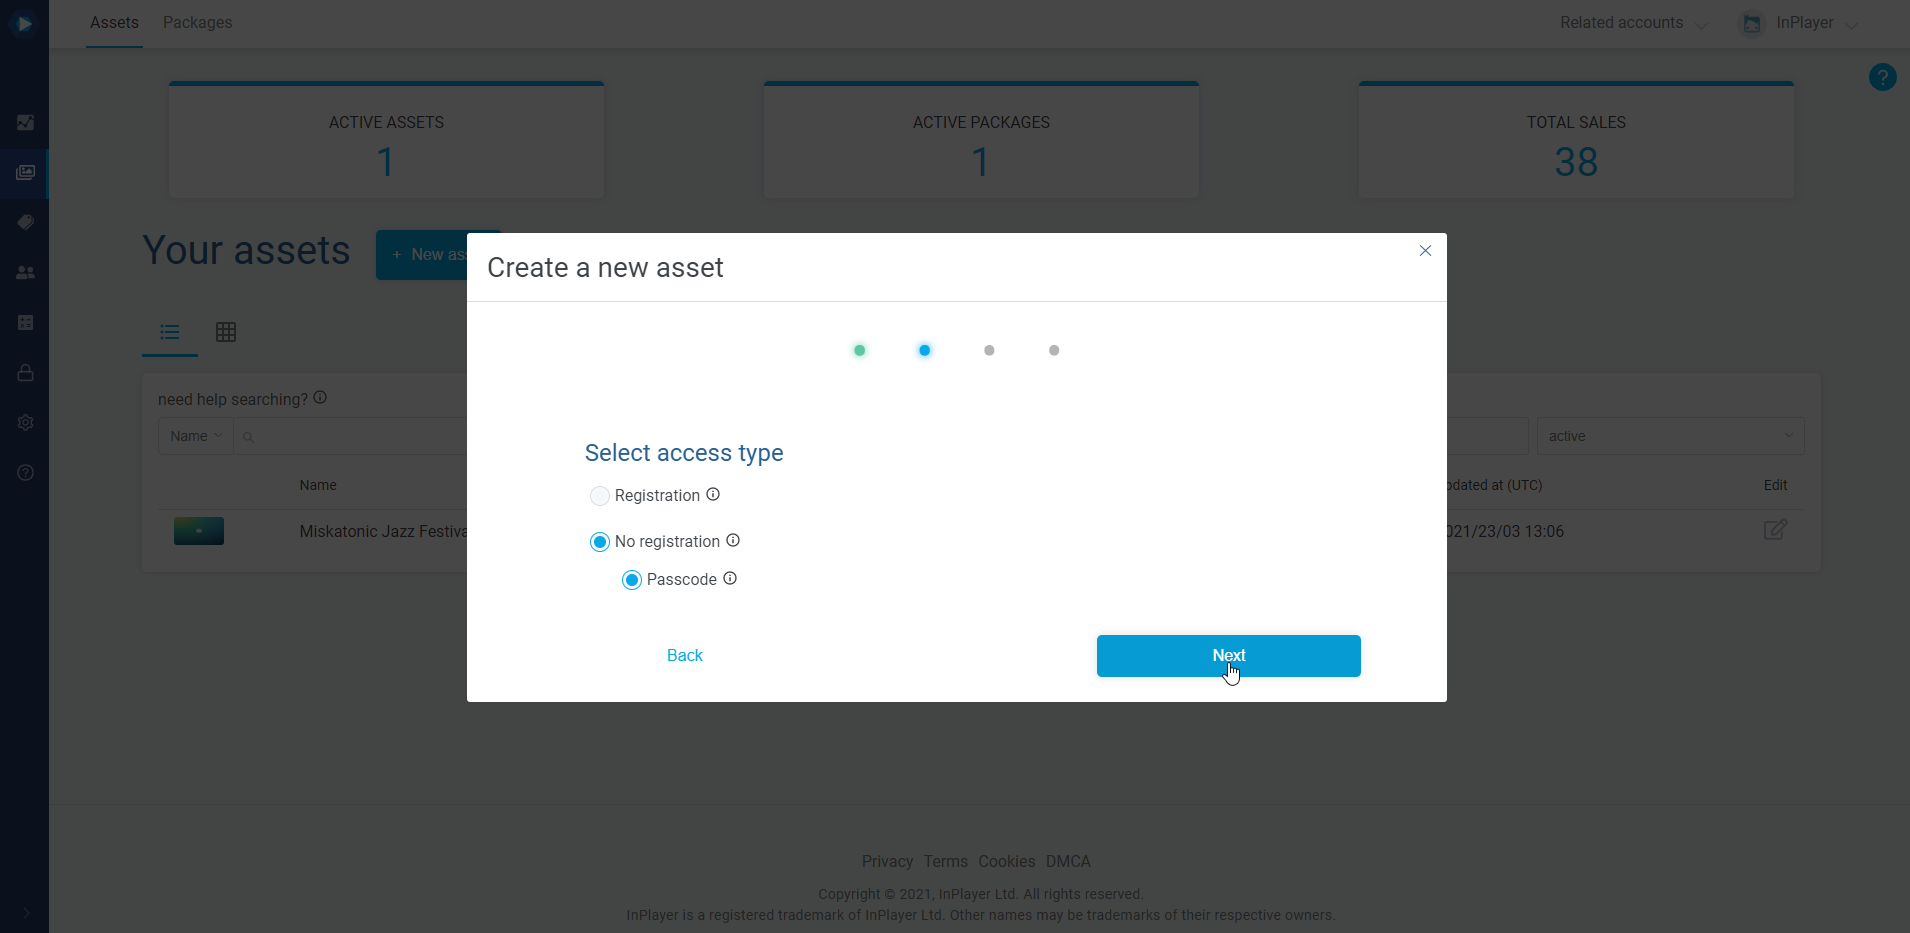
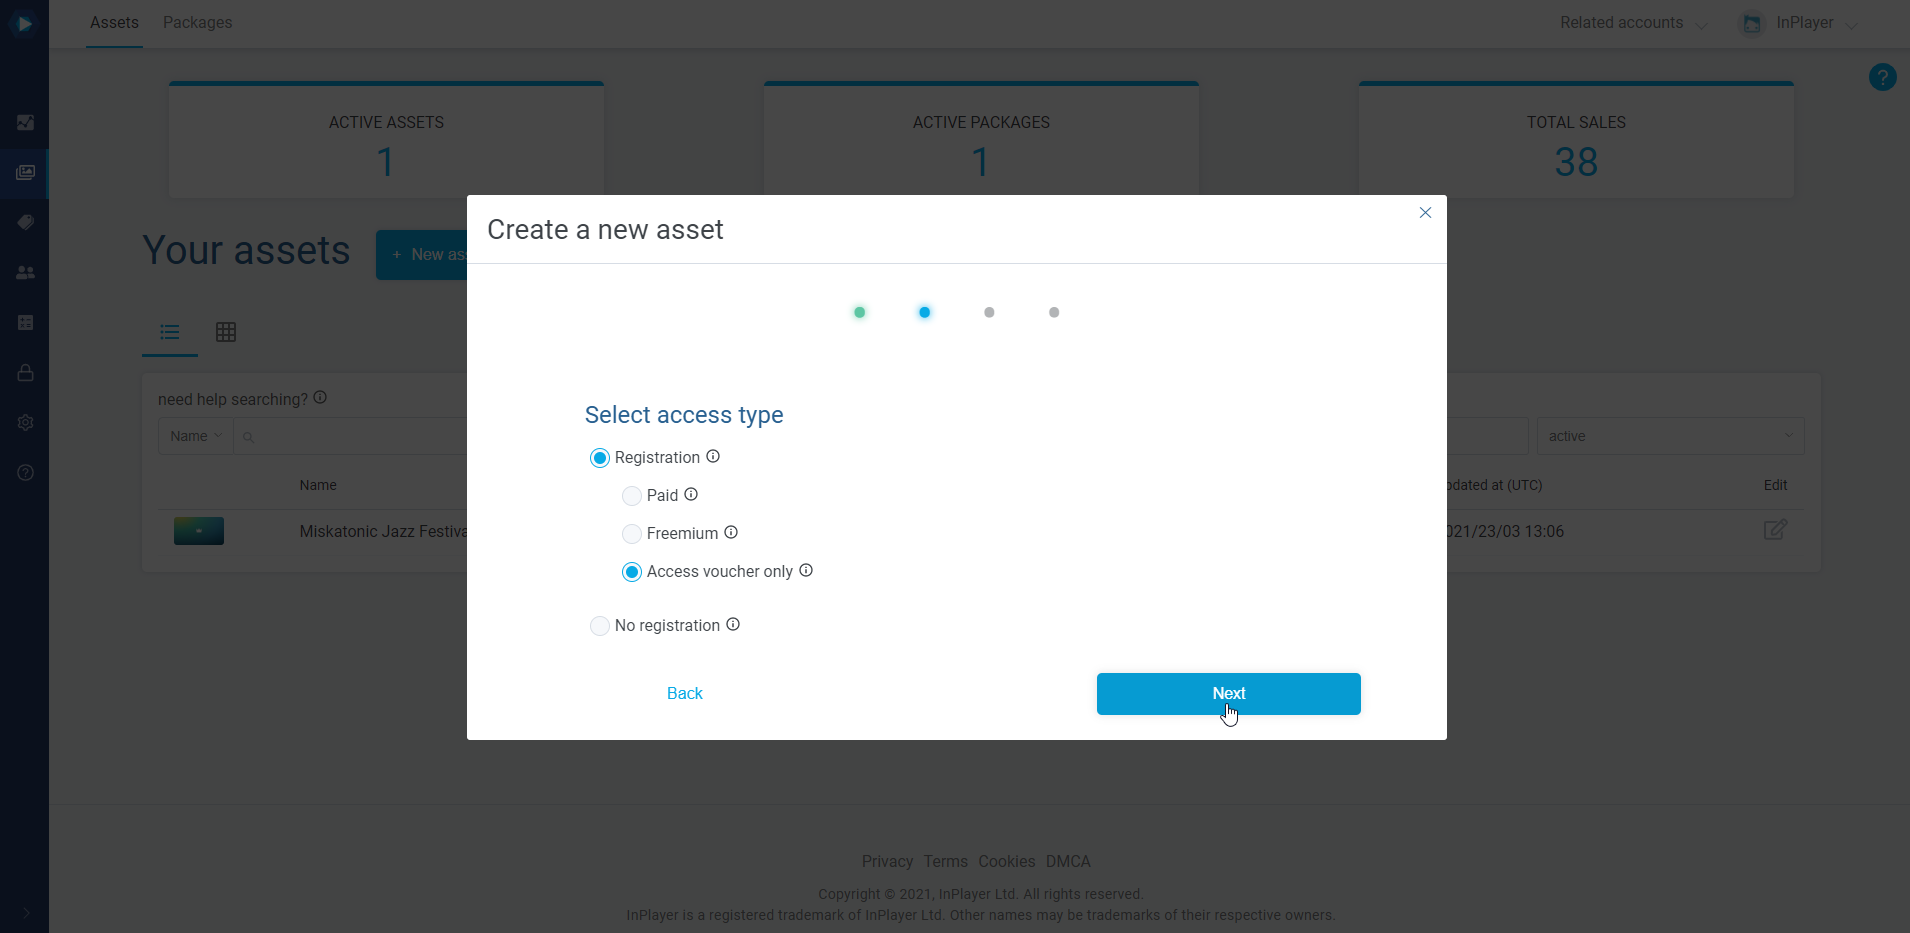
Under Select access type, choose No registration, and click Next. The Passcode option will be automatically selected.
If you are creating a Video asset hover over the platform where your videos are hosted, select one of the following, and click Next.
add one video – This creates a regular asset where you can add your video. You can select which video to use in the asset settings.
quick add – This creates an asset for a video and copies the title, description, and preview image for that video from Brightcove. You can select the video right now.
sync all videos – With this, you can create assets for all videos in your account at once. Each video is created as a separate asset. (not available for some platforms)
If you are creating an HTML asset you will automatically skip the above step.
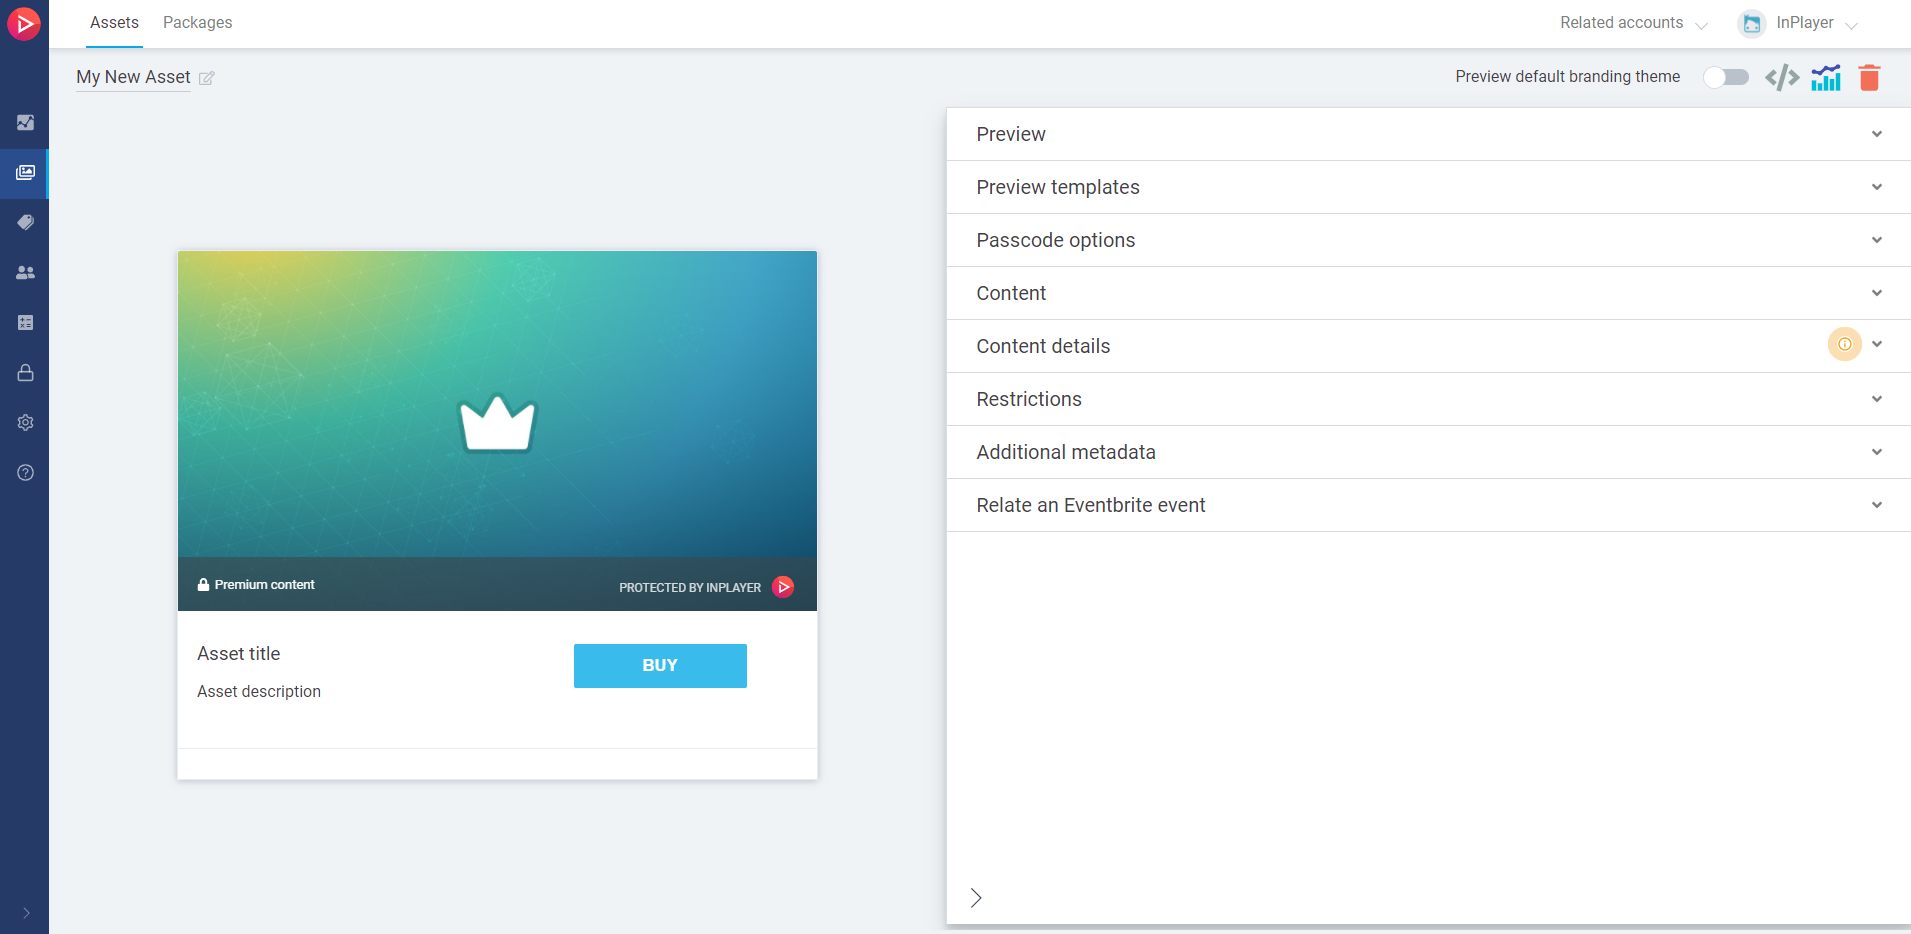
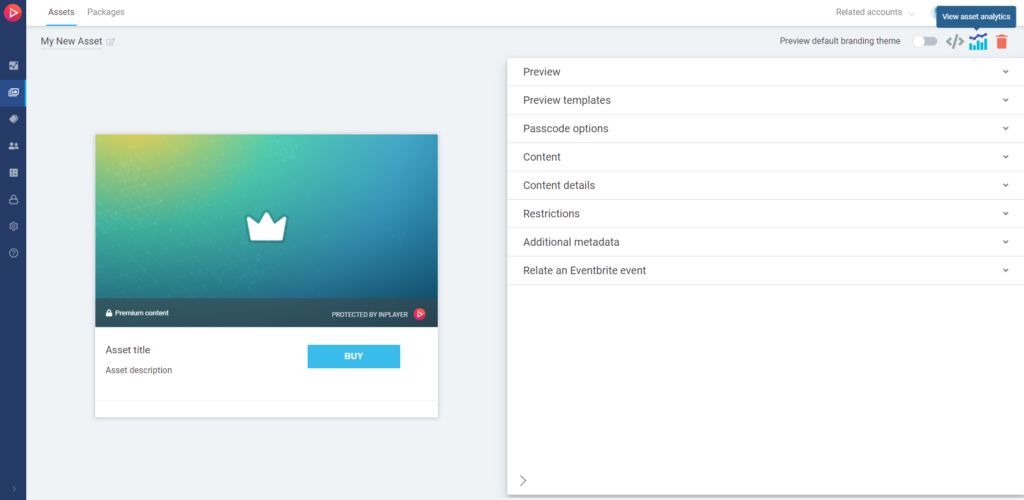
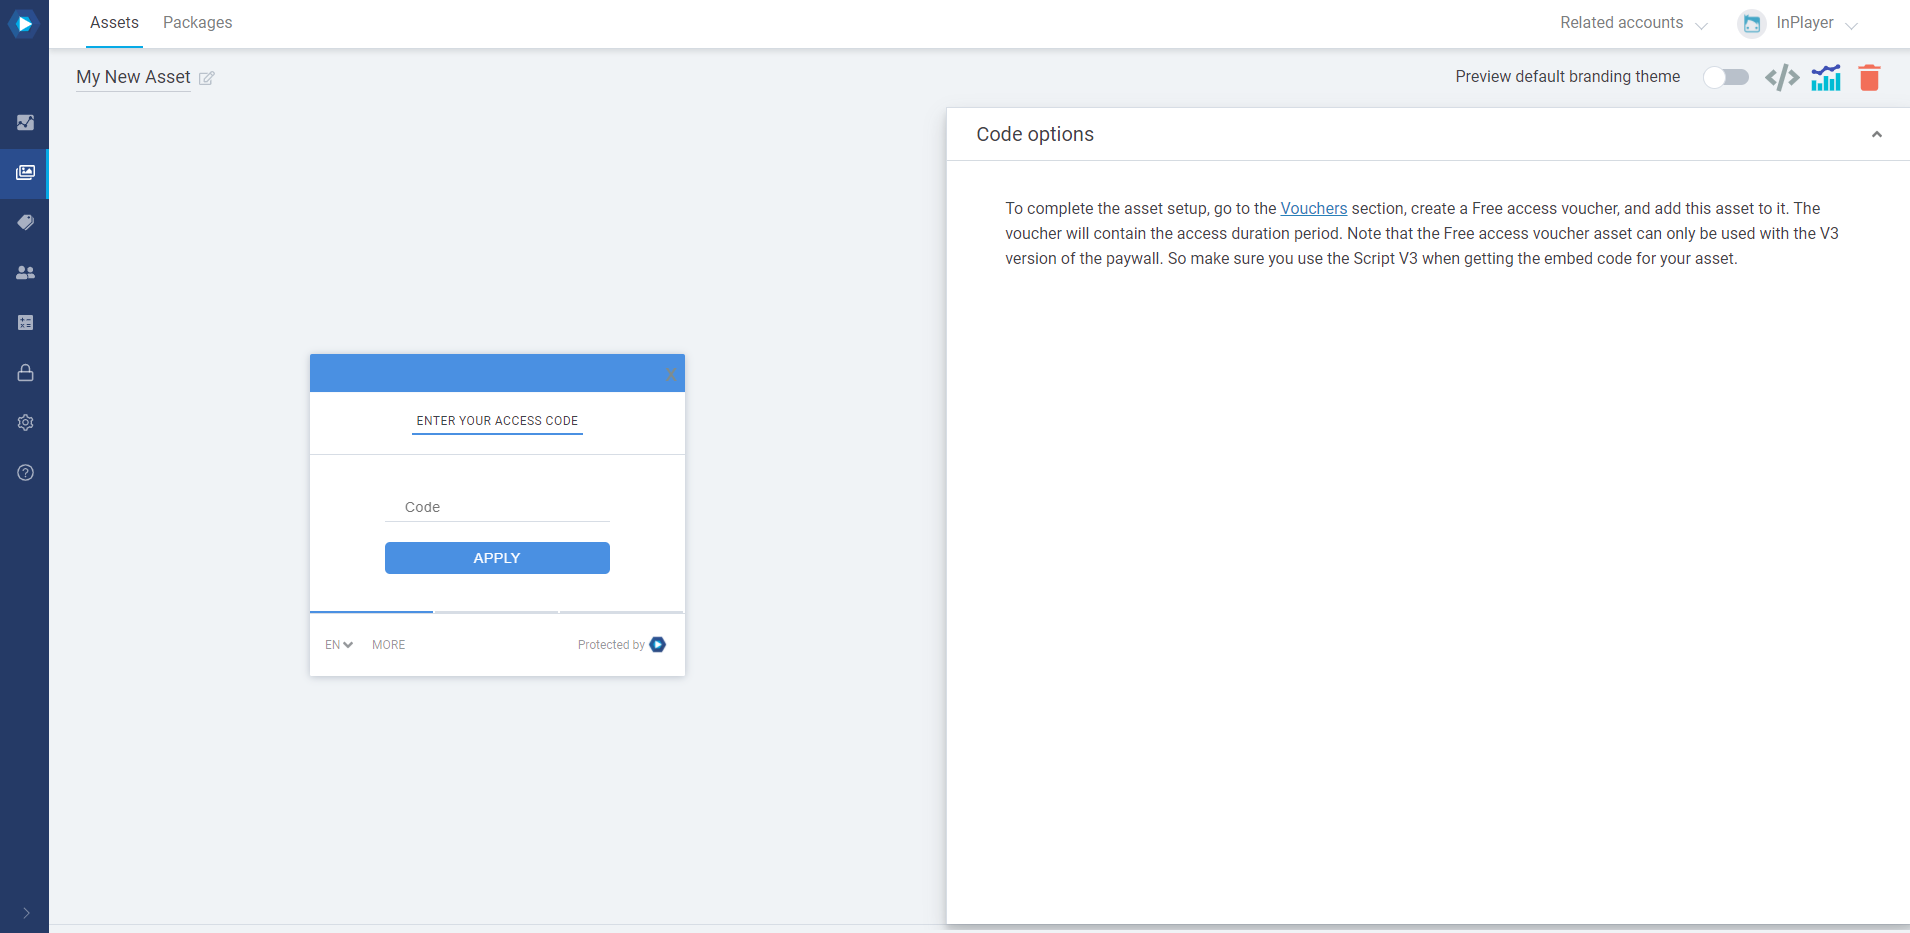
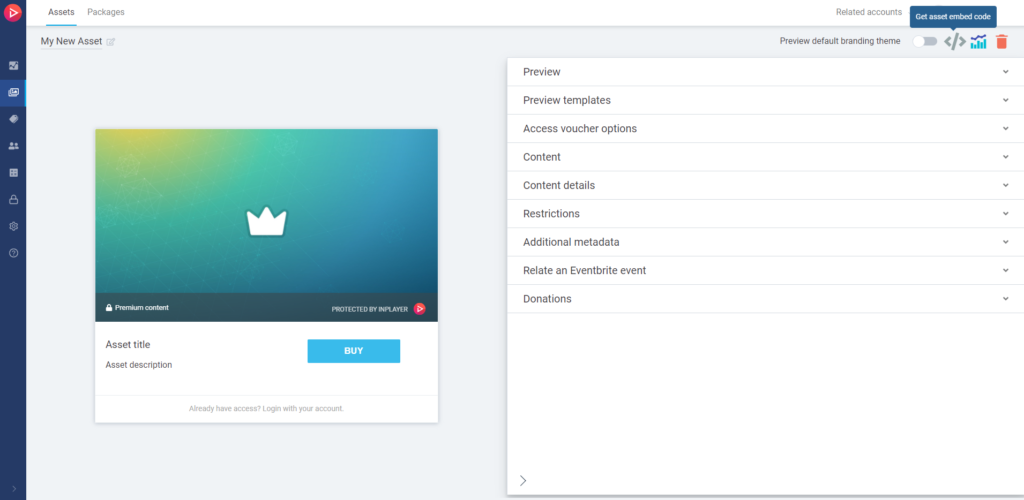
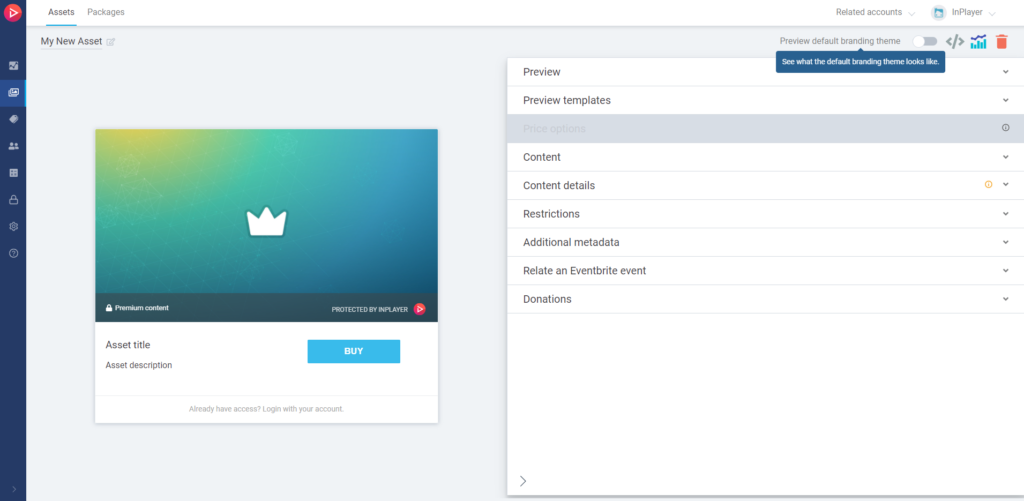
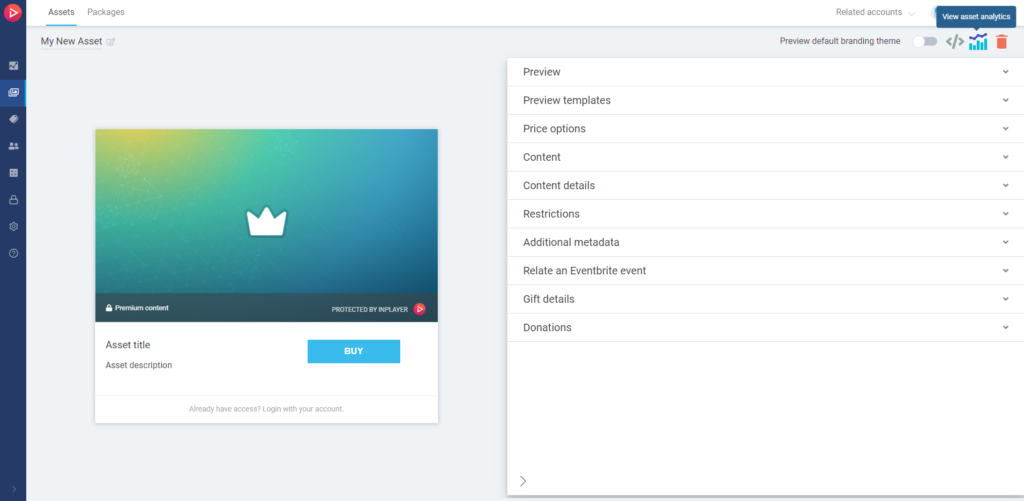
On the new page, you can set up your asset’s properties.
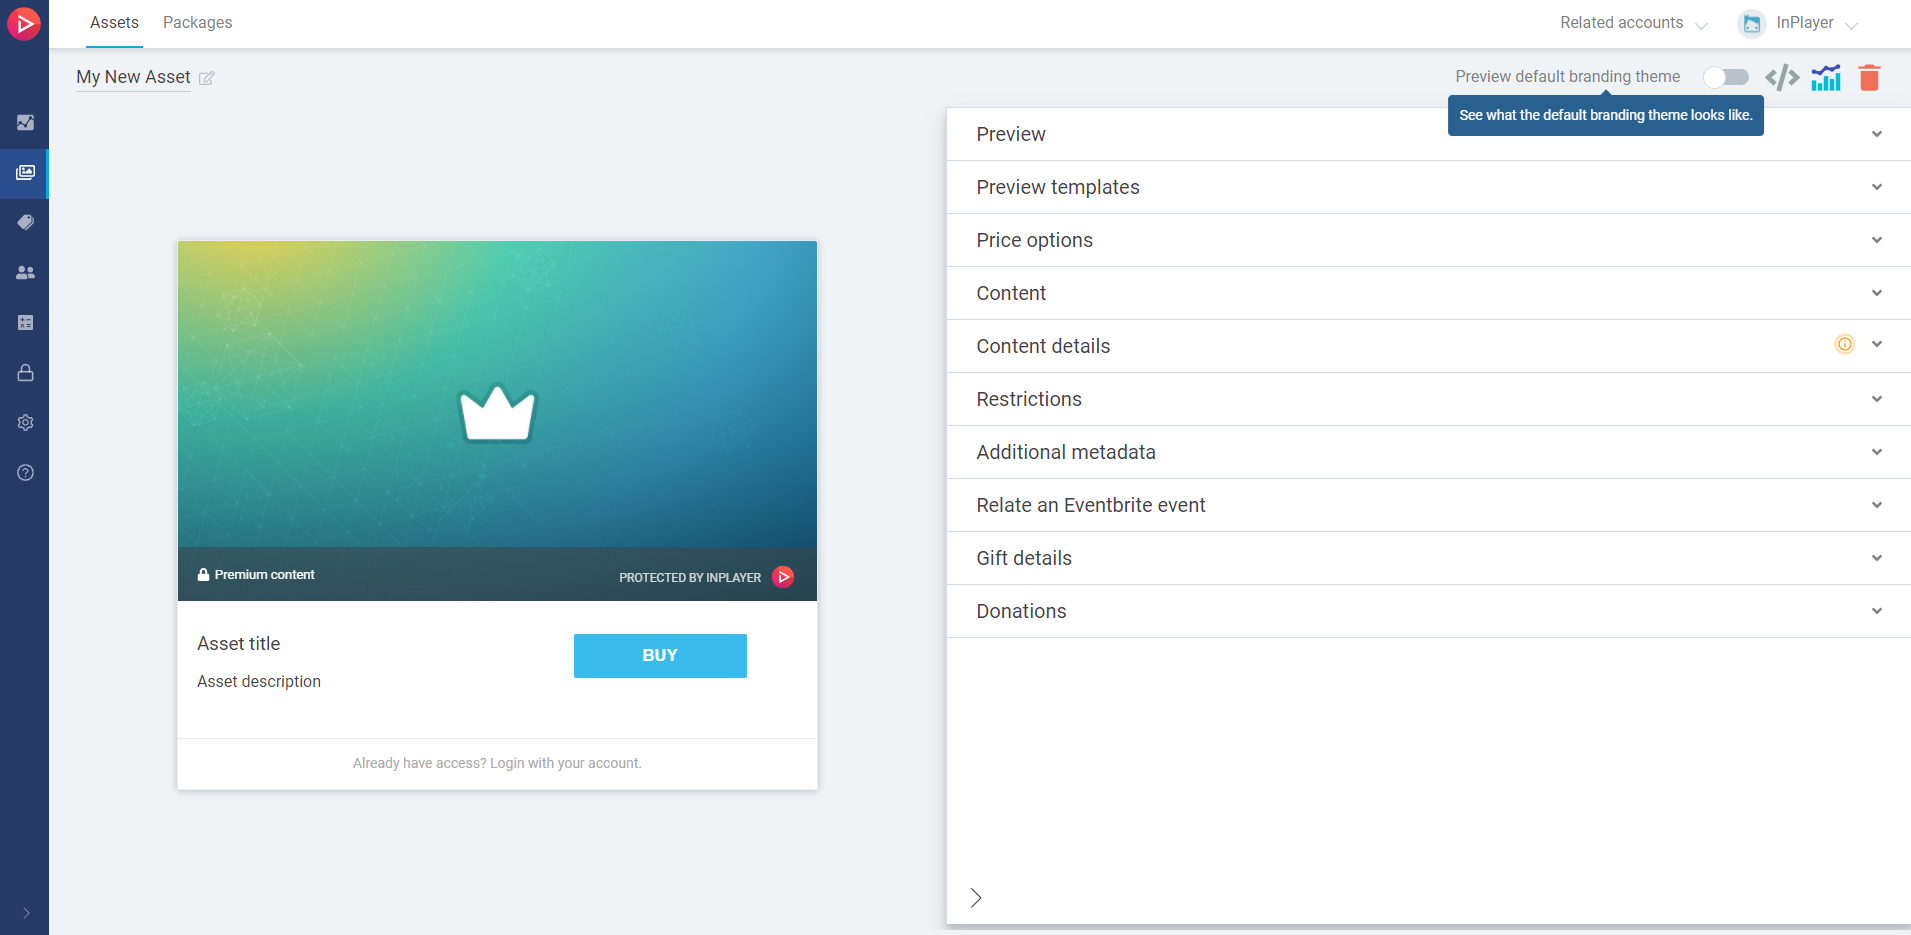
The right side of the screen is where you can set everything up, and the left side provides a preview where you can see how the various sections of the assets will look on your webpage.
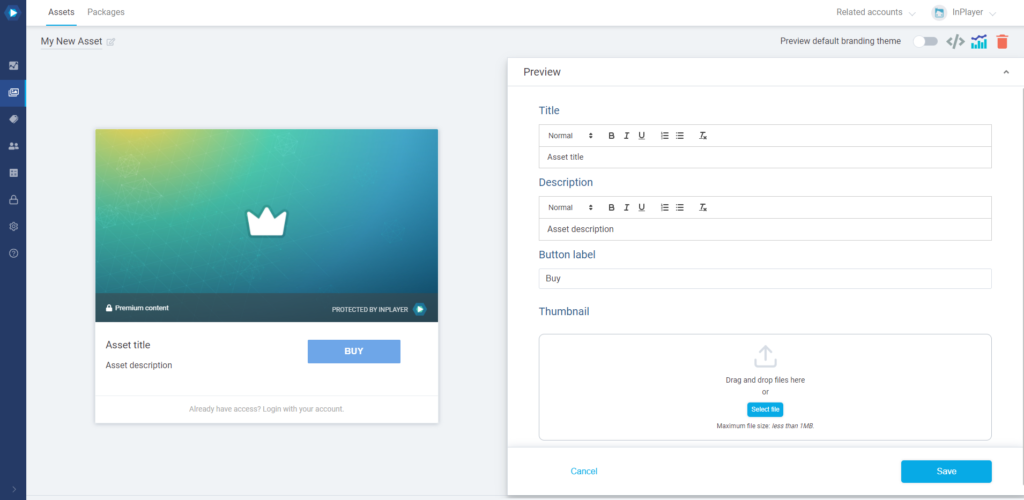
In the Preview section, set up the preview title, description, and thumbnail as well as the text for the BUY button. These will be the details that will appear on the actual asset preview when you embed it on your webpage.
Note that the Title will also appear on the final payment form on the paywall, as well as the notification email your viewers will receive.
After setting everything up, make sure to click the Save button in the bottom right corner.
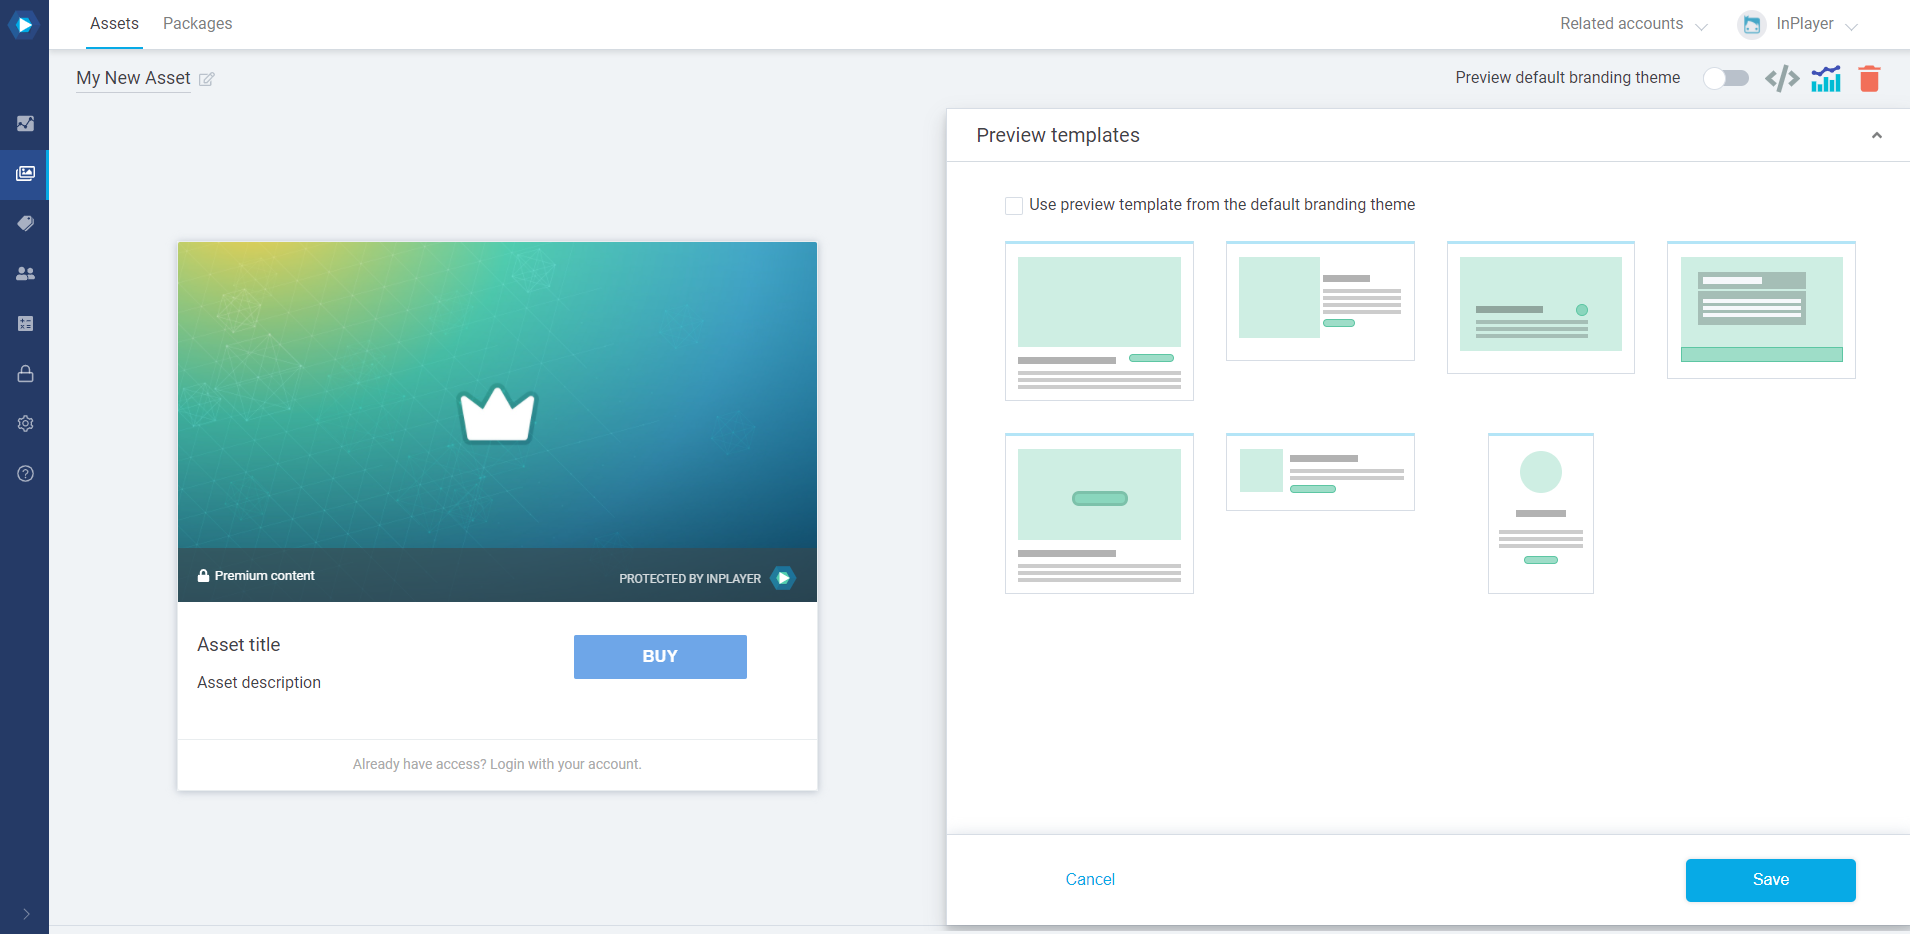
In the Preview templates section, you can choose how the asset will appear when you embed it on your webpage.
You can go with the default preview, or select one from the list.
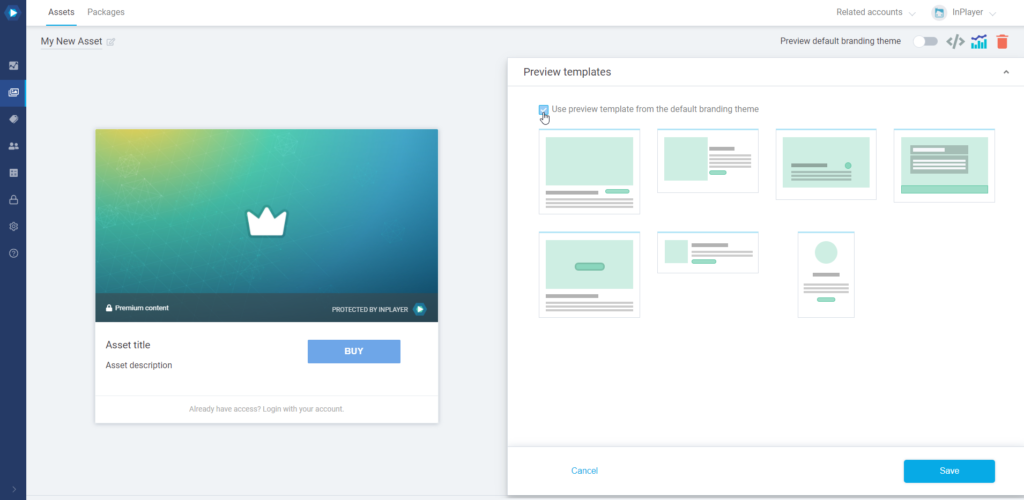
If you’ve set up a default branding theme in your dashboard Settings, where you’ve selected a default preview template, and you want to use that template for this asset as well, make sure to check the Use preview template from the default branding theme option.
If, however, you wish to use a separate preview template for this asset, despite the fact that you have set up a default one in your branding theme, make sure to leave the Use preview template from the default branding theme option unchecked.
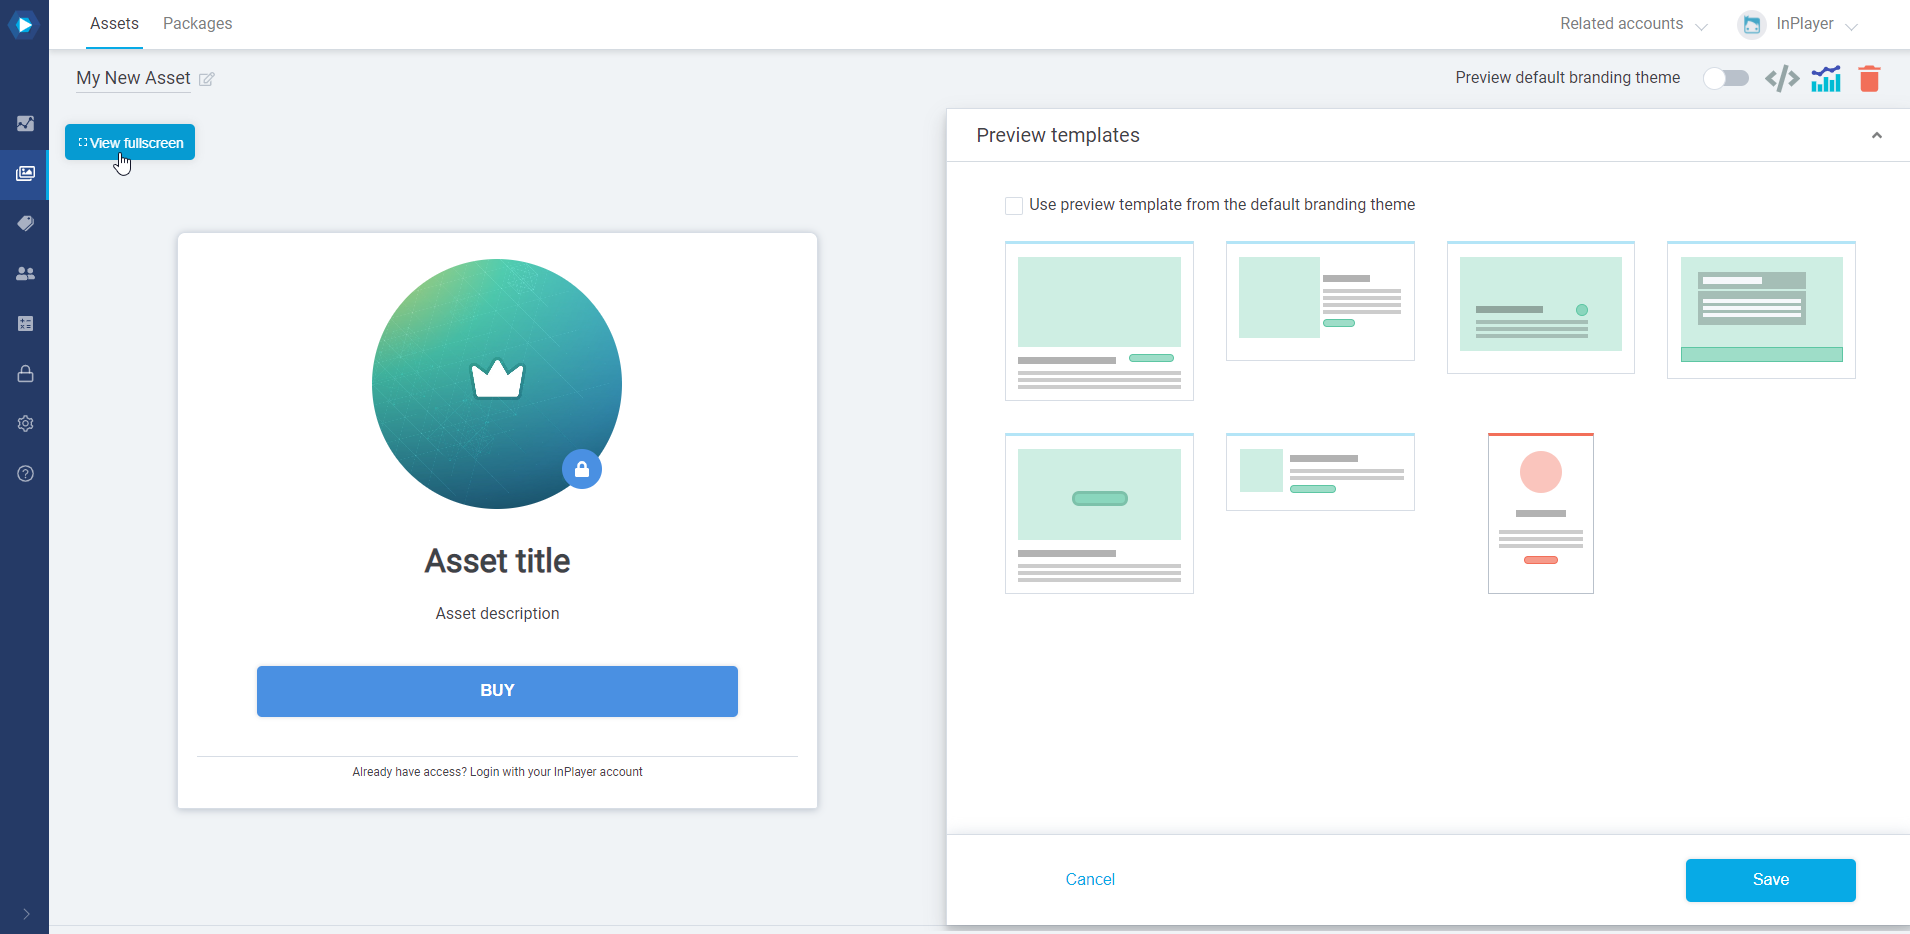
When choosing your preview template, you can click on the View fullscreen button at the top left to see how that template would look on various screen sizes.
After setting everything up, make sure to click the Save button in the bottom right corner.
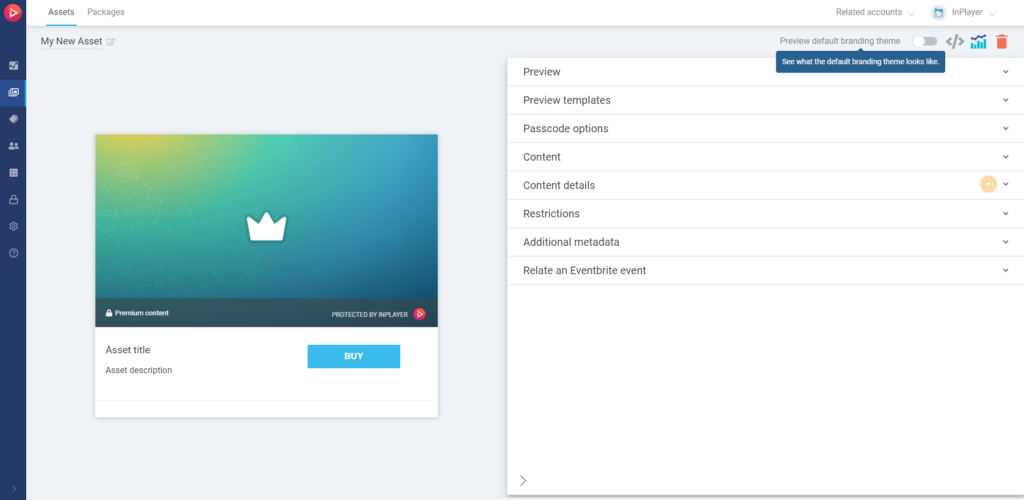
If you have set up a default branding theme in the Settings (more on this here), you can see how the asset will look once the theme will be applied to it.
To do this, just click the Preview default branding theme toggle.
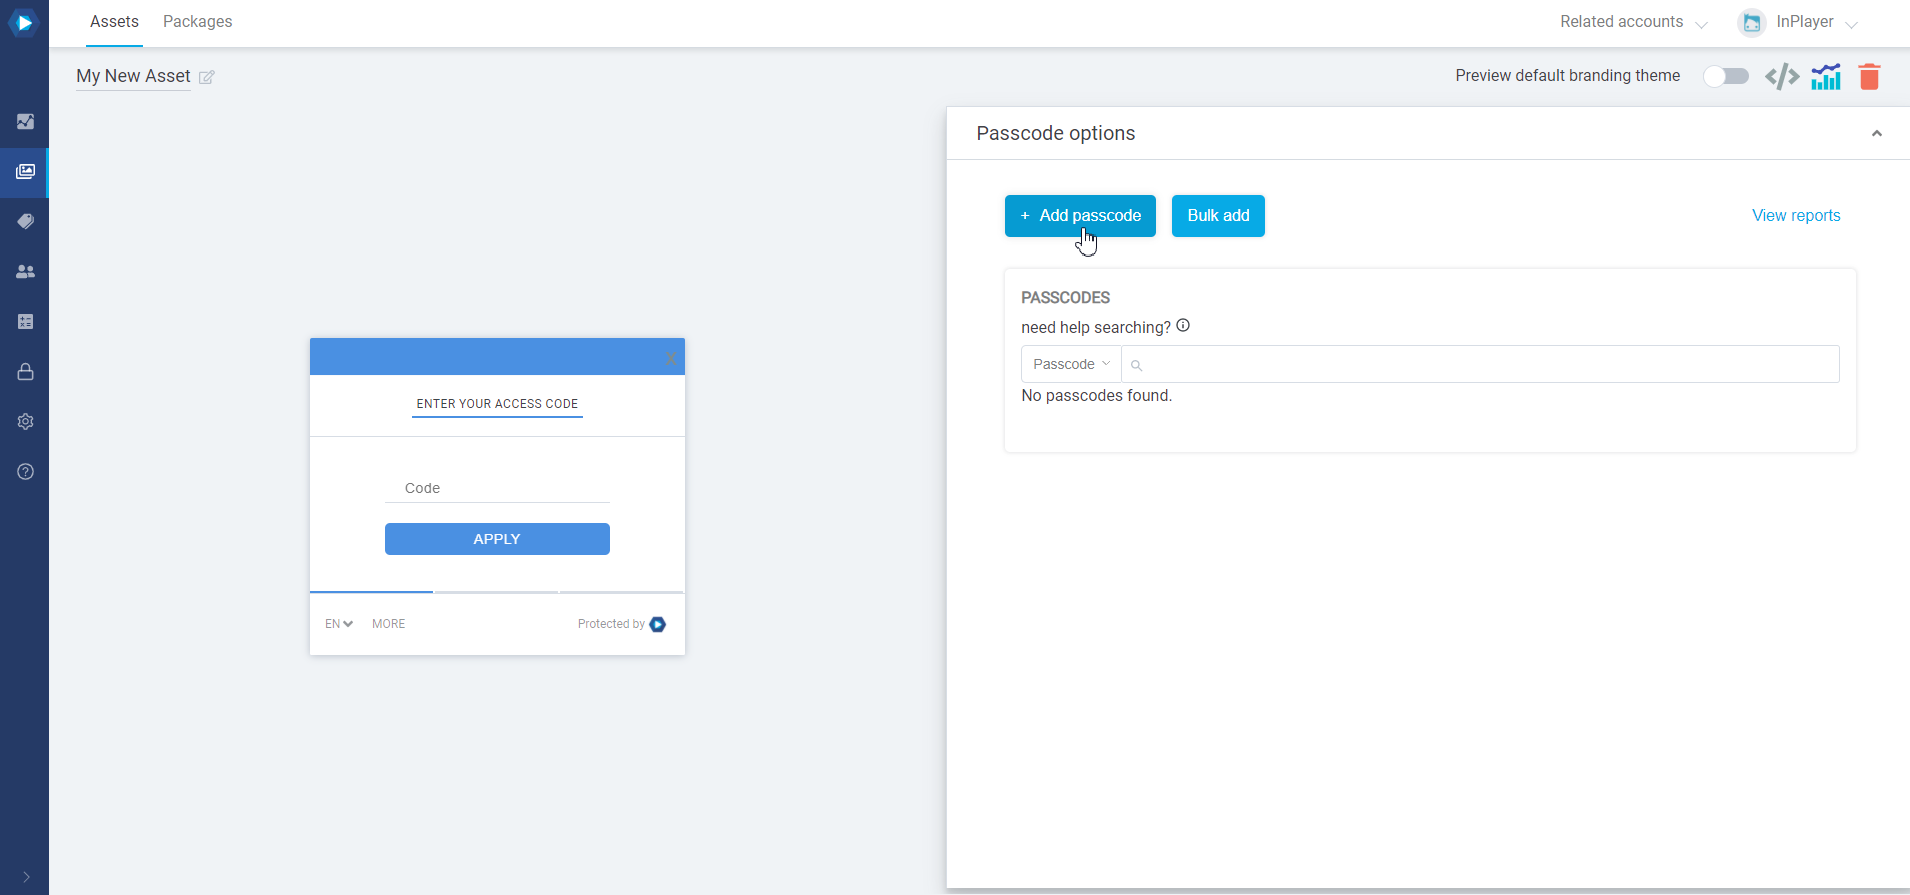
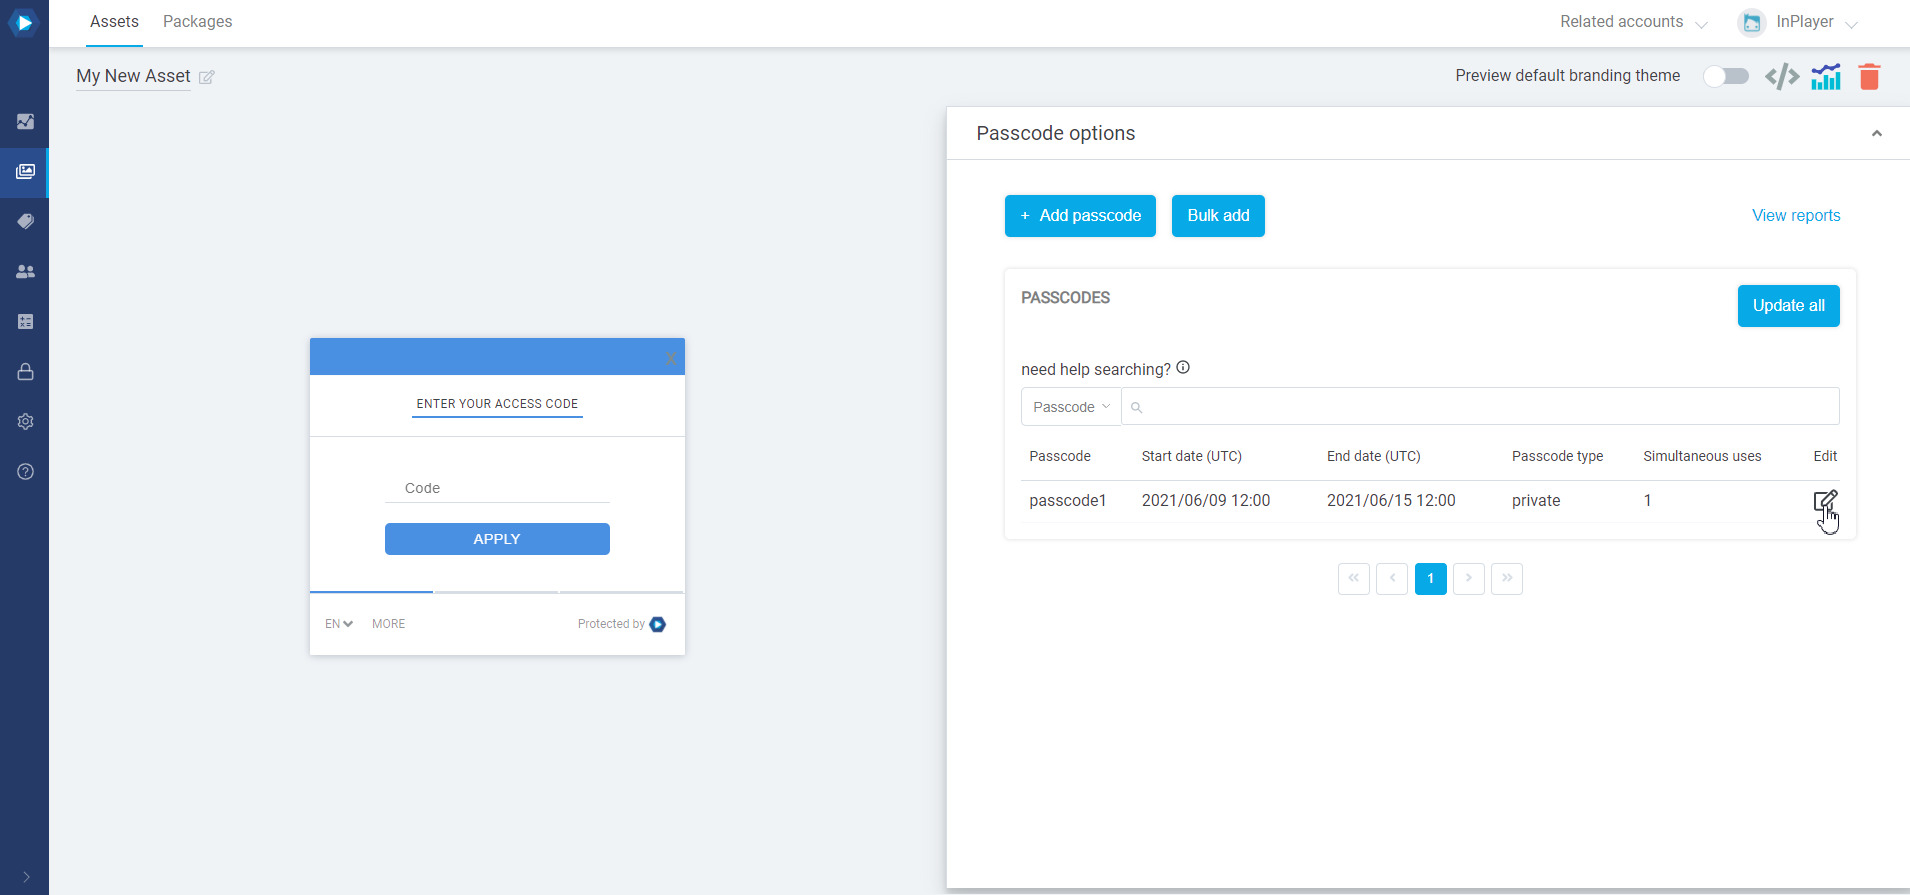
Here you can create the passcodes your viewers can use to access the asset.
You can create passcodes one at a time or in bulk.
Creating passcodes one at a time
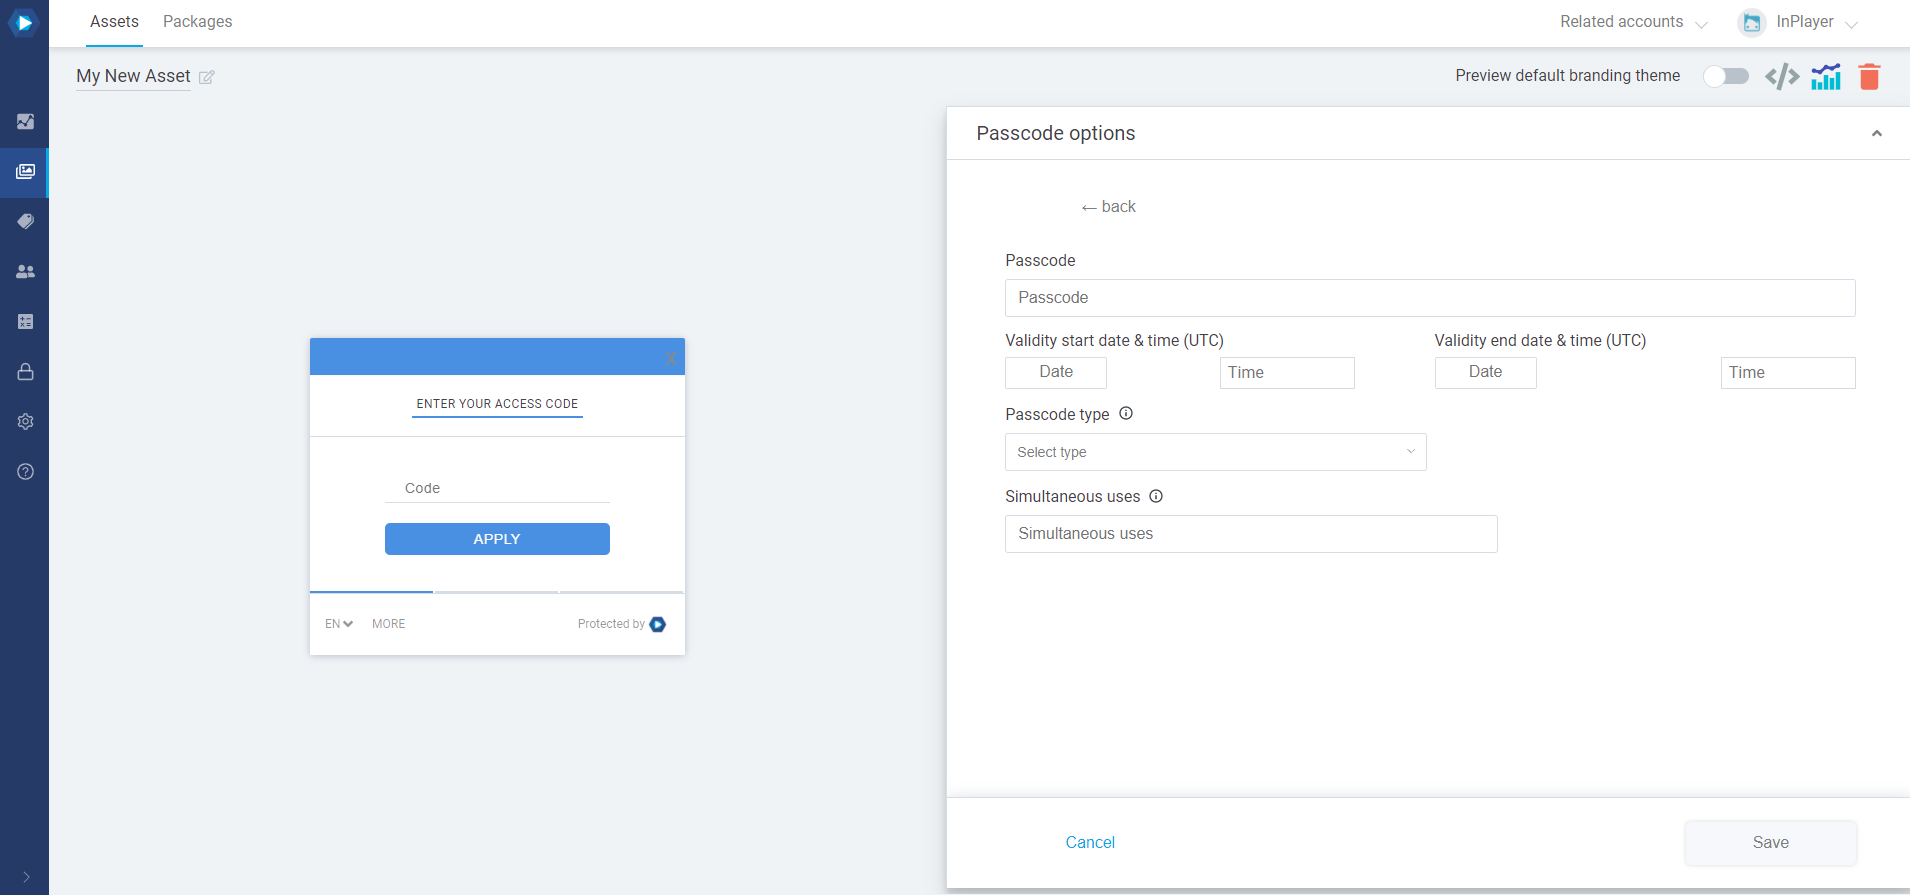
Click Add passcode.
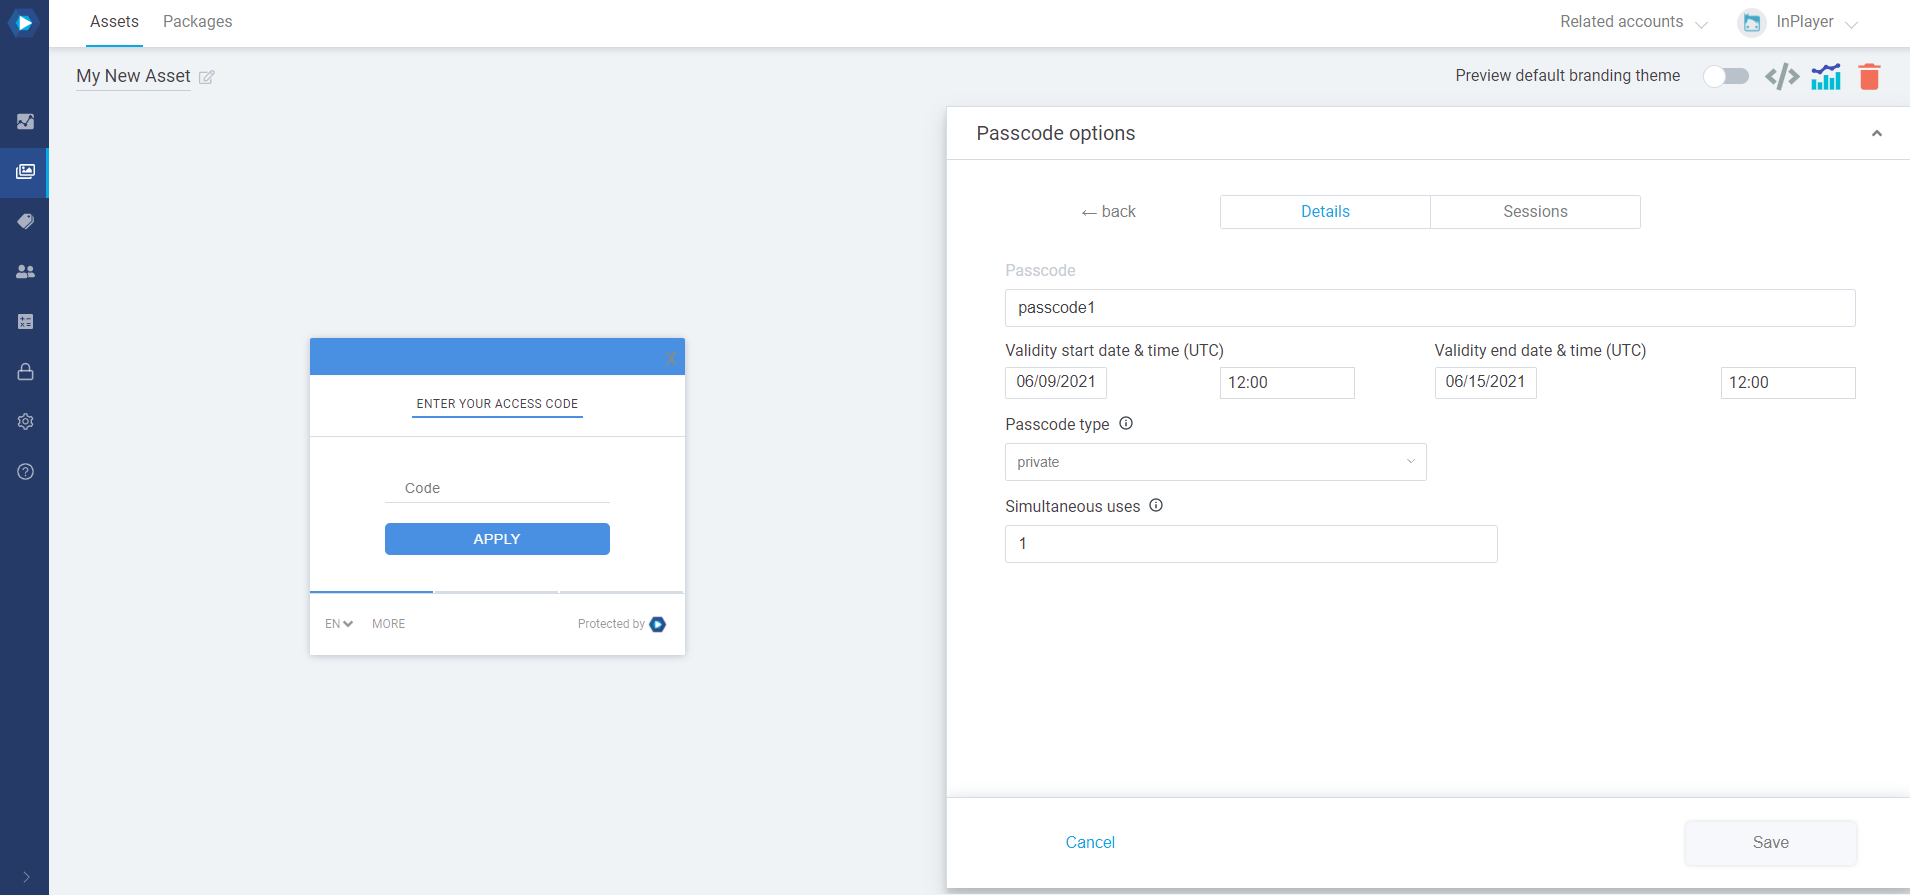
Set up the passcode details.
Passcode – the code the viewer will use to log in.
Validity start date & time (UTC) – the date and time when the passcode will start being valid.
Validity end date & time (UTC) – the date and time when the passcode will stop being valid.
Passcode type – use public if you want a passcode that can be used by an unlimited number of viewers simultaneously. Use private if you want a passcode that can have a limit on the number of simultaneous uses, thereby preventing passcode sharing.
Simultaneous uses – set the limit to how many times can the passcode be used to watch at the same time. The option is available only for private-type passcodes. Although the most common way to market this to viewers is as a “device limitation”, the limit is actually browser-based, meaning one browser window counts as one session. Viewers can watch on multiple tabs in the same browser window, and that would still only count as one session. Opening a second browser window, or using a new device would count as a second session, and so on. The limit is also per-asset based, meaning that each asset has its own limit counter.
The system will count a session as “active” for as long as a viewer is logged in using the passcode in the particular browser, so it is very important for viewers to be informed to always log out after watching, to avoid unintentionally hitting the limit. Once the limit is reached, the viewer will have to manually log out of a previous session if they want to watch again. This will not happen automatically.
After setting everything up, make sure to click the Save button in the bottom right corner.
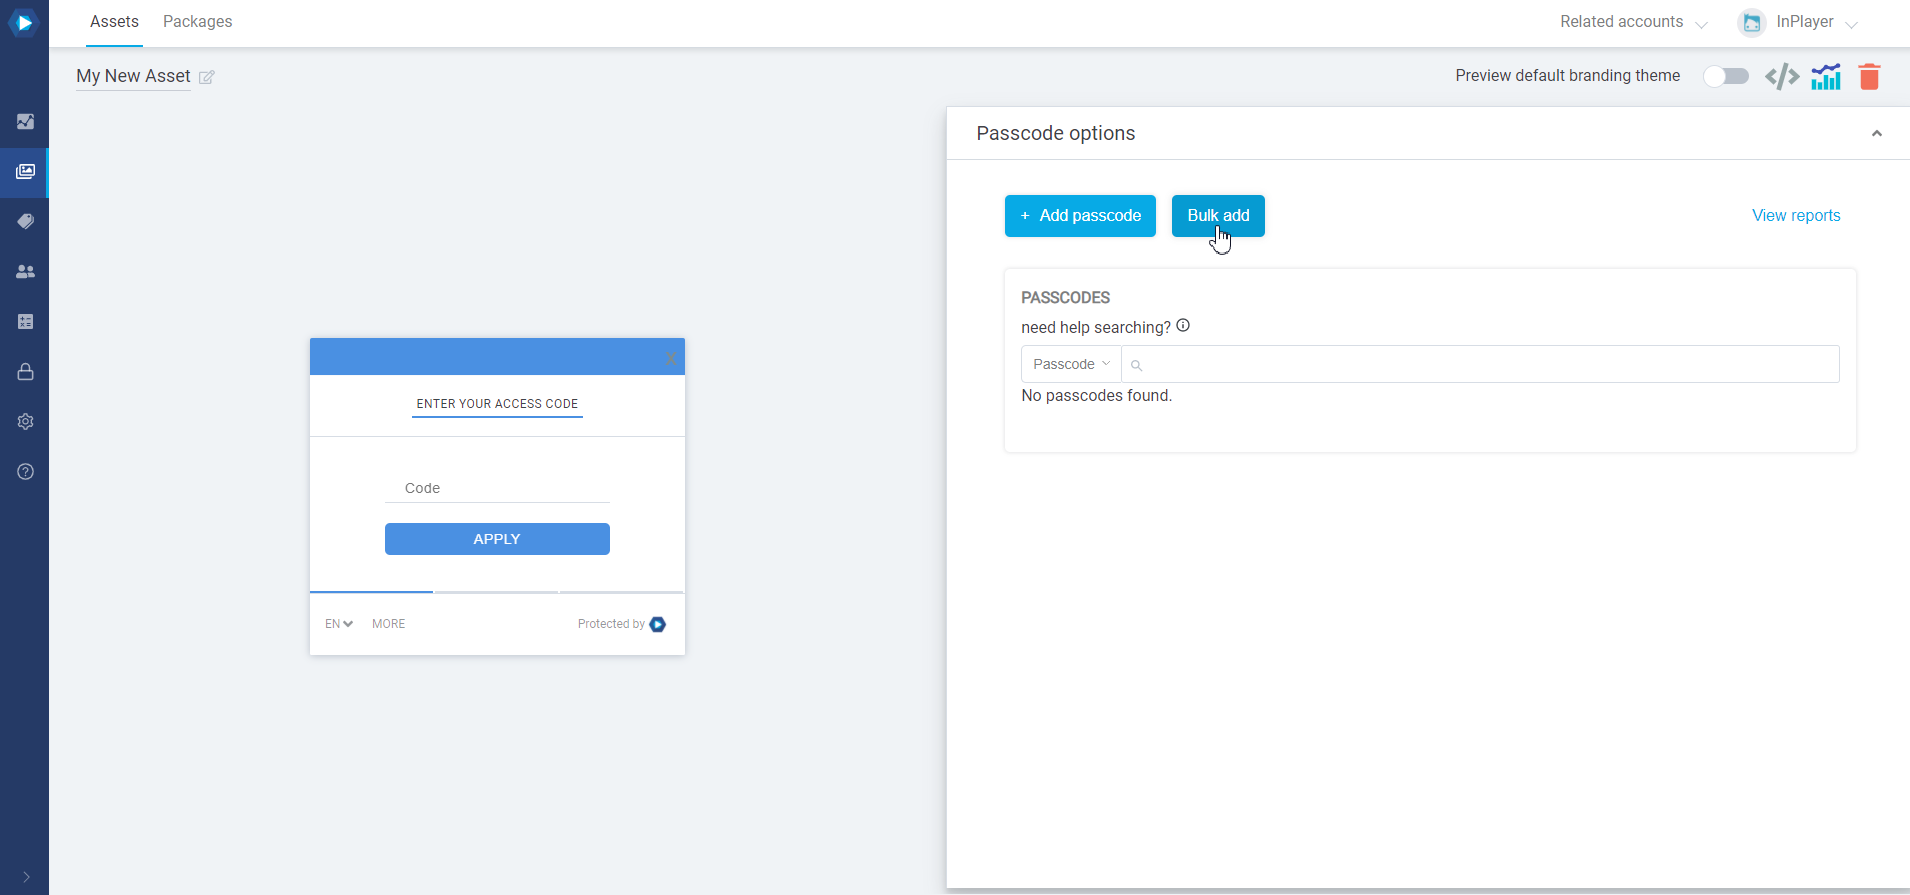
Creating passcodes in bulk
Click Bulk add.
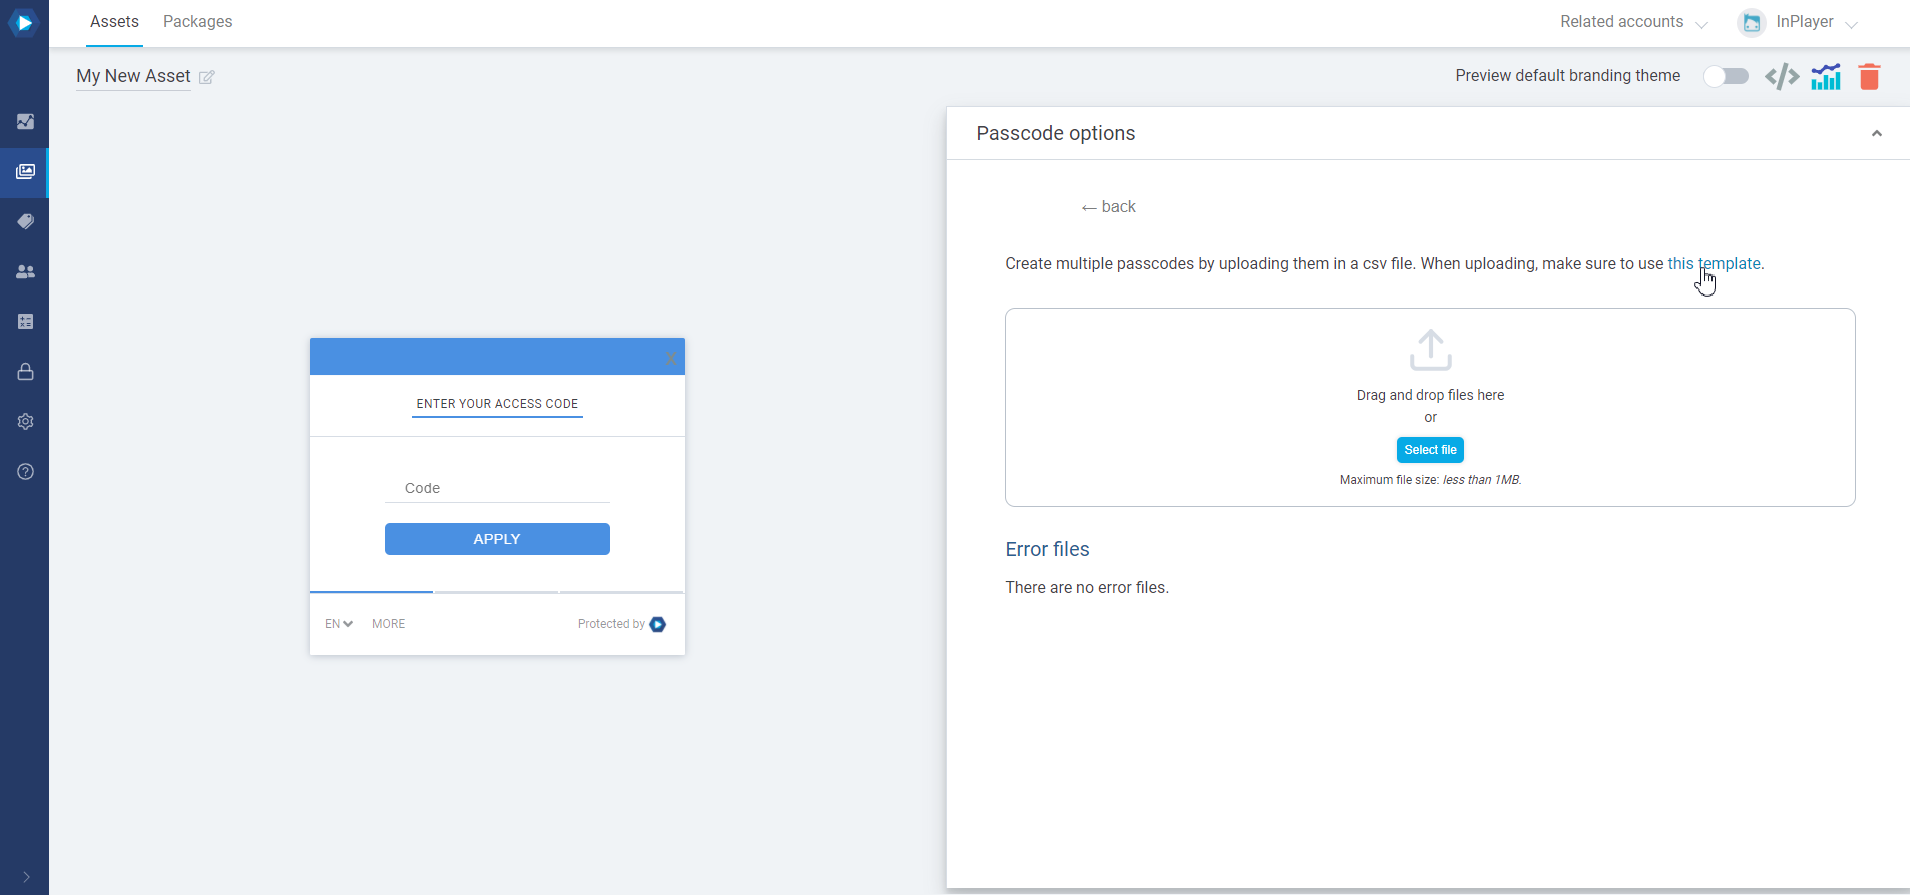
To create passcodes in bulk, you will need to upload a CSV file that contains the passcodes you want to create, along with their details. For this, make sure to use the CSV template provided in the link on the screen.
The columns in the CSV table contain the same fields described in the Creating passcodes one at a time section above:
Passccode – the code the viewer will use to log in.
Validity start date & time (UTC) – the date and time when the passcode will start being valid.
Validity end date & time (UTC) – the date and time when the passcode will stop being valid.
Passcode type – use public if you want a passcode that can be used by an unlimited number of viewers simultaneously. Use private if you want a passcode that can have a limit on the number of simultaneous uses.
Simultaneous uses – set the limit to how many viewers can watch at the same time with the passcode. Available only for private-type passcodes. This limit is per-asset based, meaning that each asset has its own limit counter.
After you upload the CSV file, if there was an issue generating some of the passcodes, you will find them in a CSV file under the Error files section at the bottom, along with an explanation as to what went wrong.
After setting everything up, make sure to click the Save button in the bottom right corner.
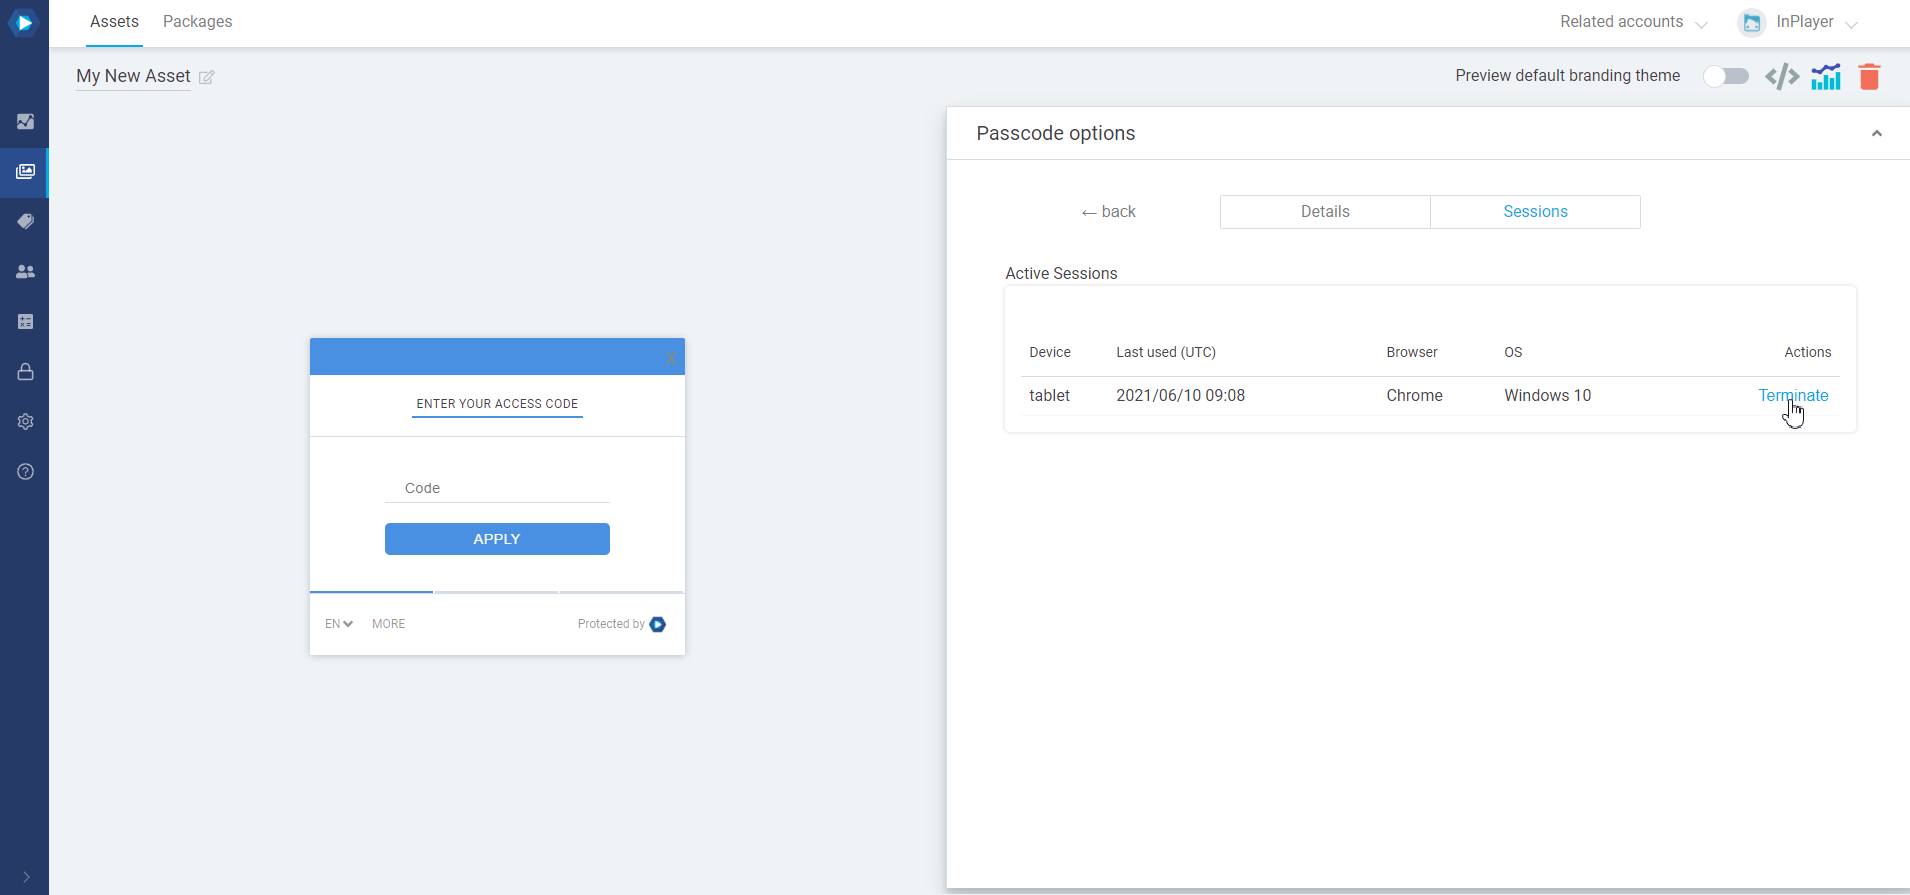
Terminating a passcode is needed when a viewer hasn’t logged out properly after watching.
Termination disconnects the viewer’s login session and frees up a login instance so that the passcode can be used again as per the Simultaneous logins setting in the passcode.
This is usually not necessary since viewers should always be informed to terminate their sessions by logging out themselves, but in cases where the viewer hasn’t done so, you can terminate the session from the InPlayer Dashboard.
To terminate a session, first open the passcode, and go to Sessions.
Then, just click Terminate and confirm the action.
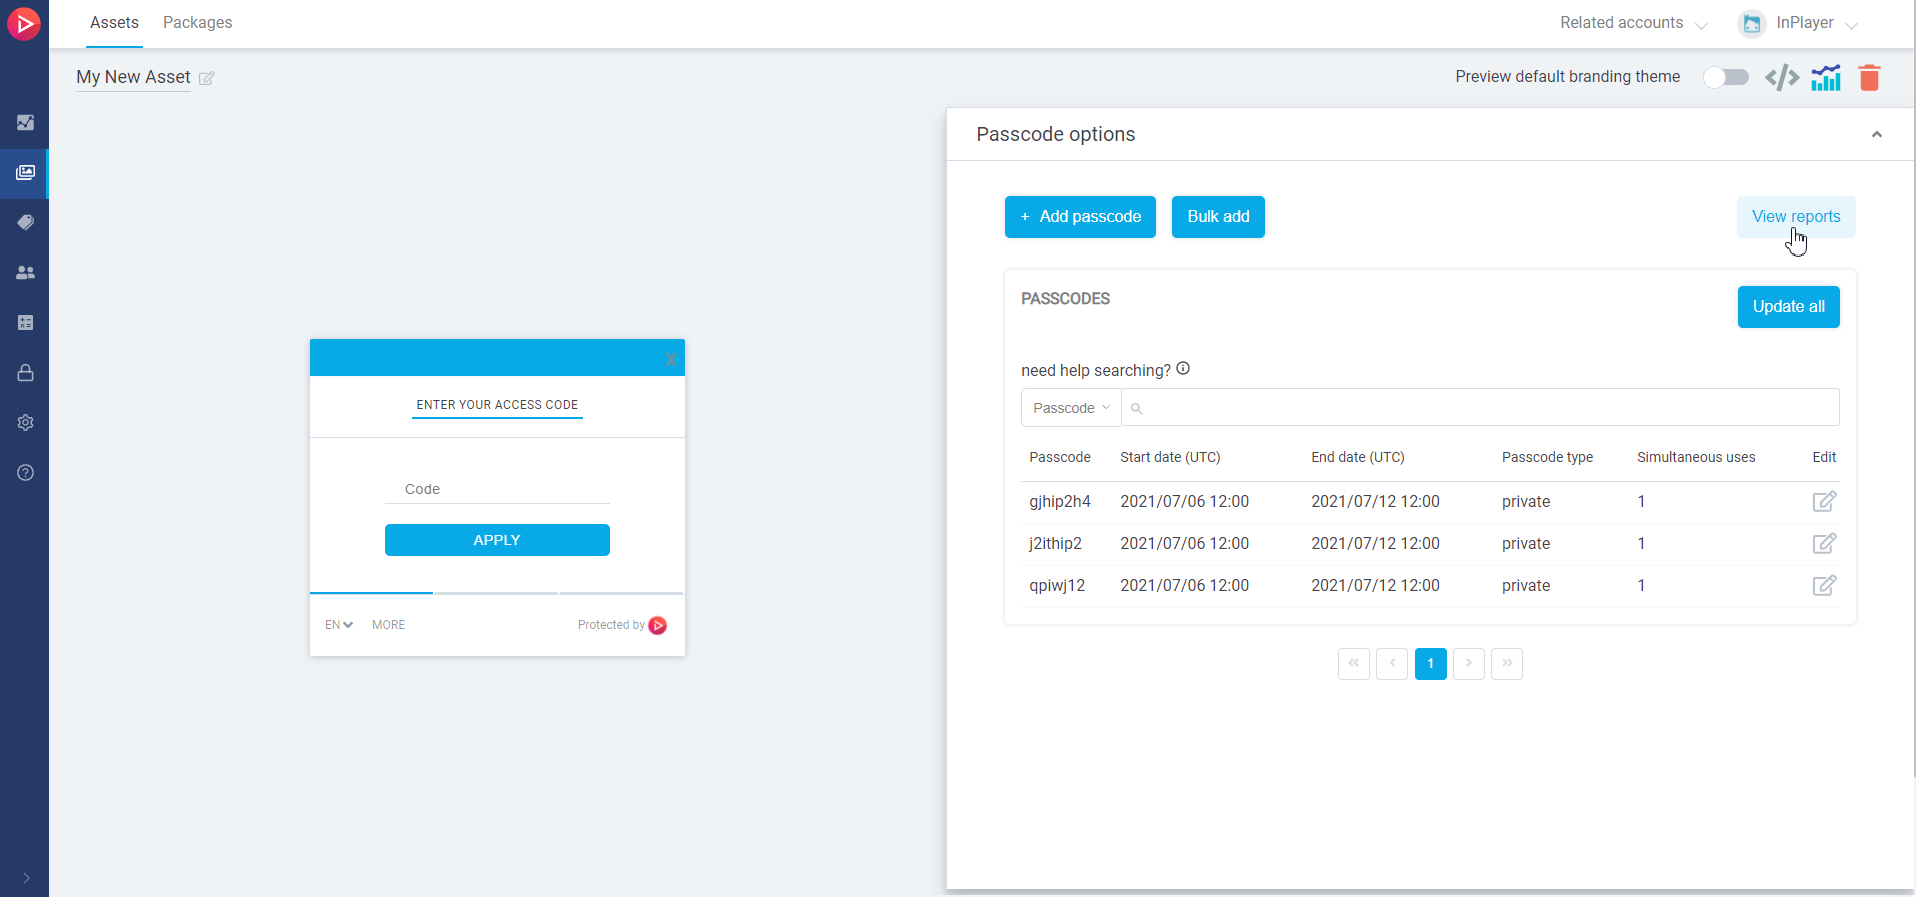
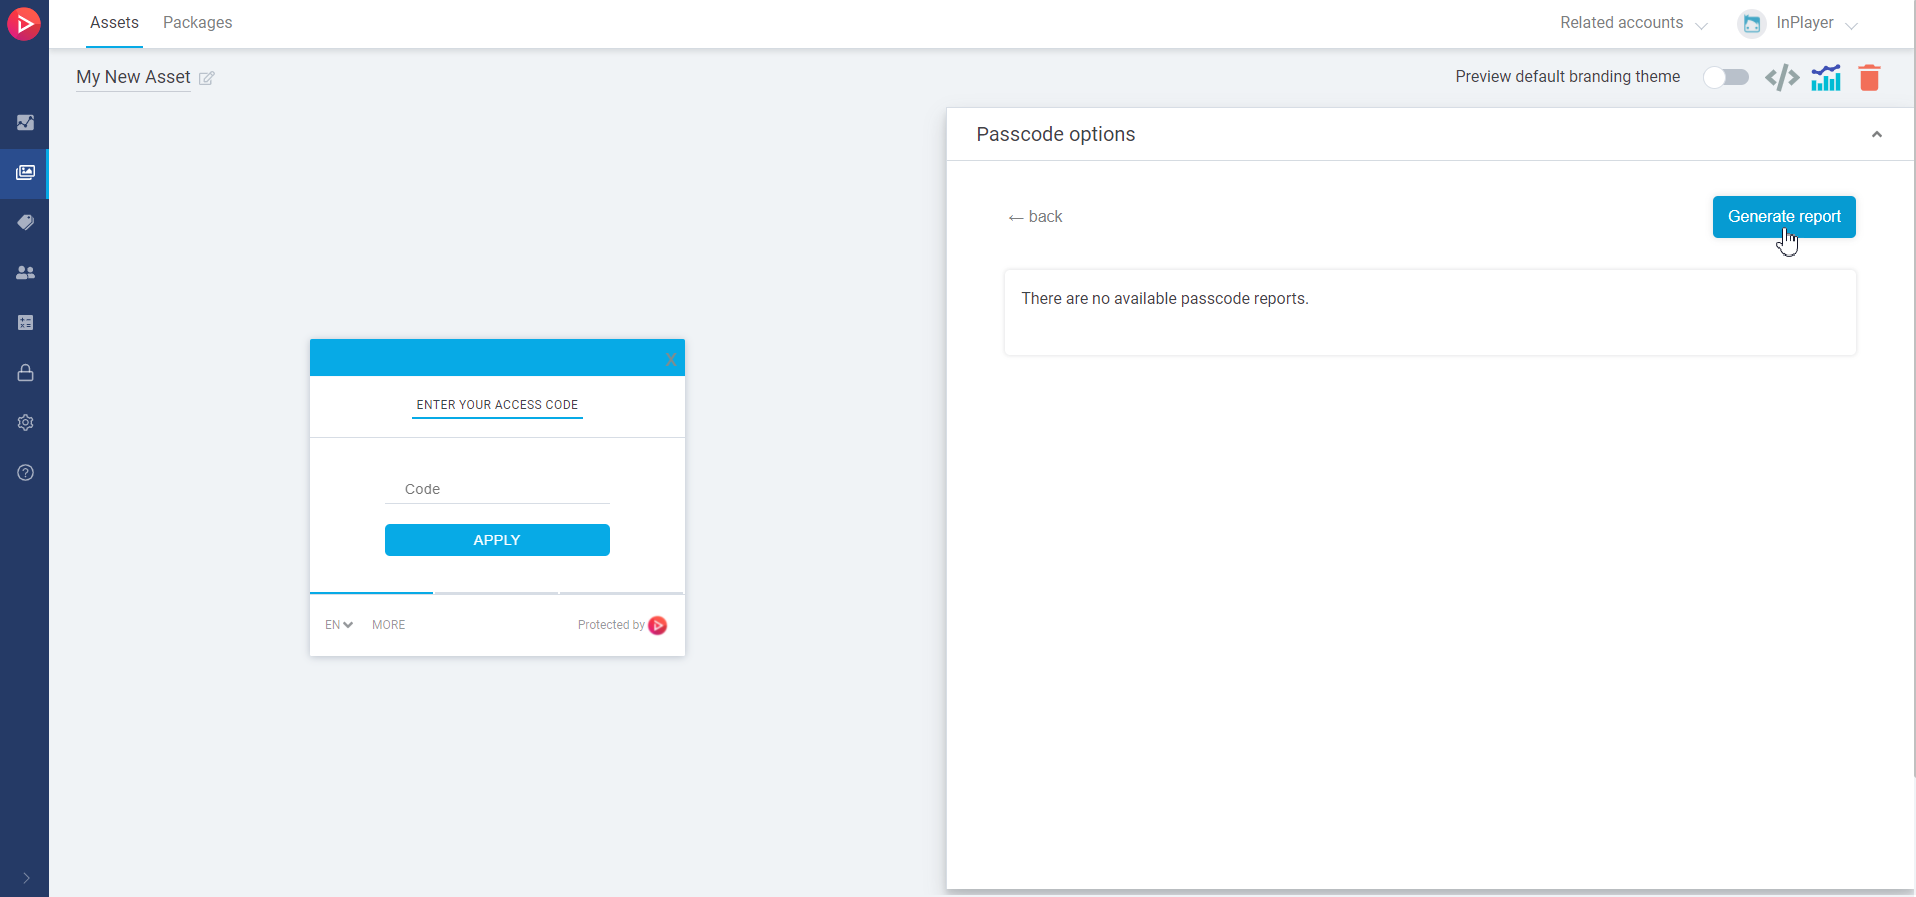
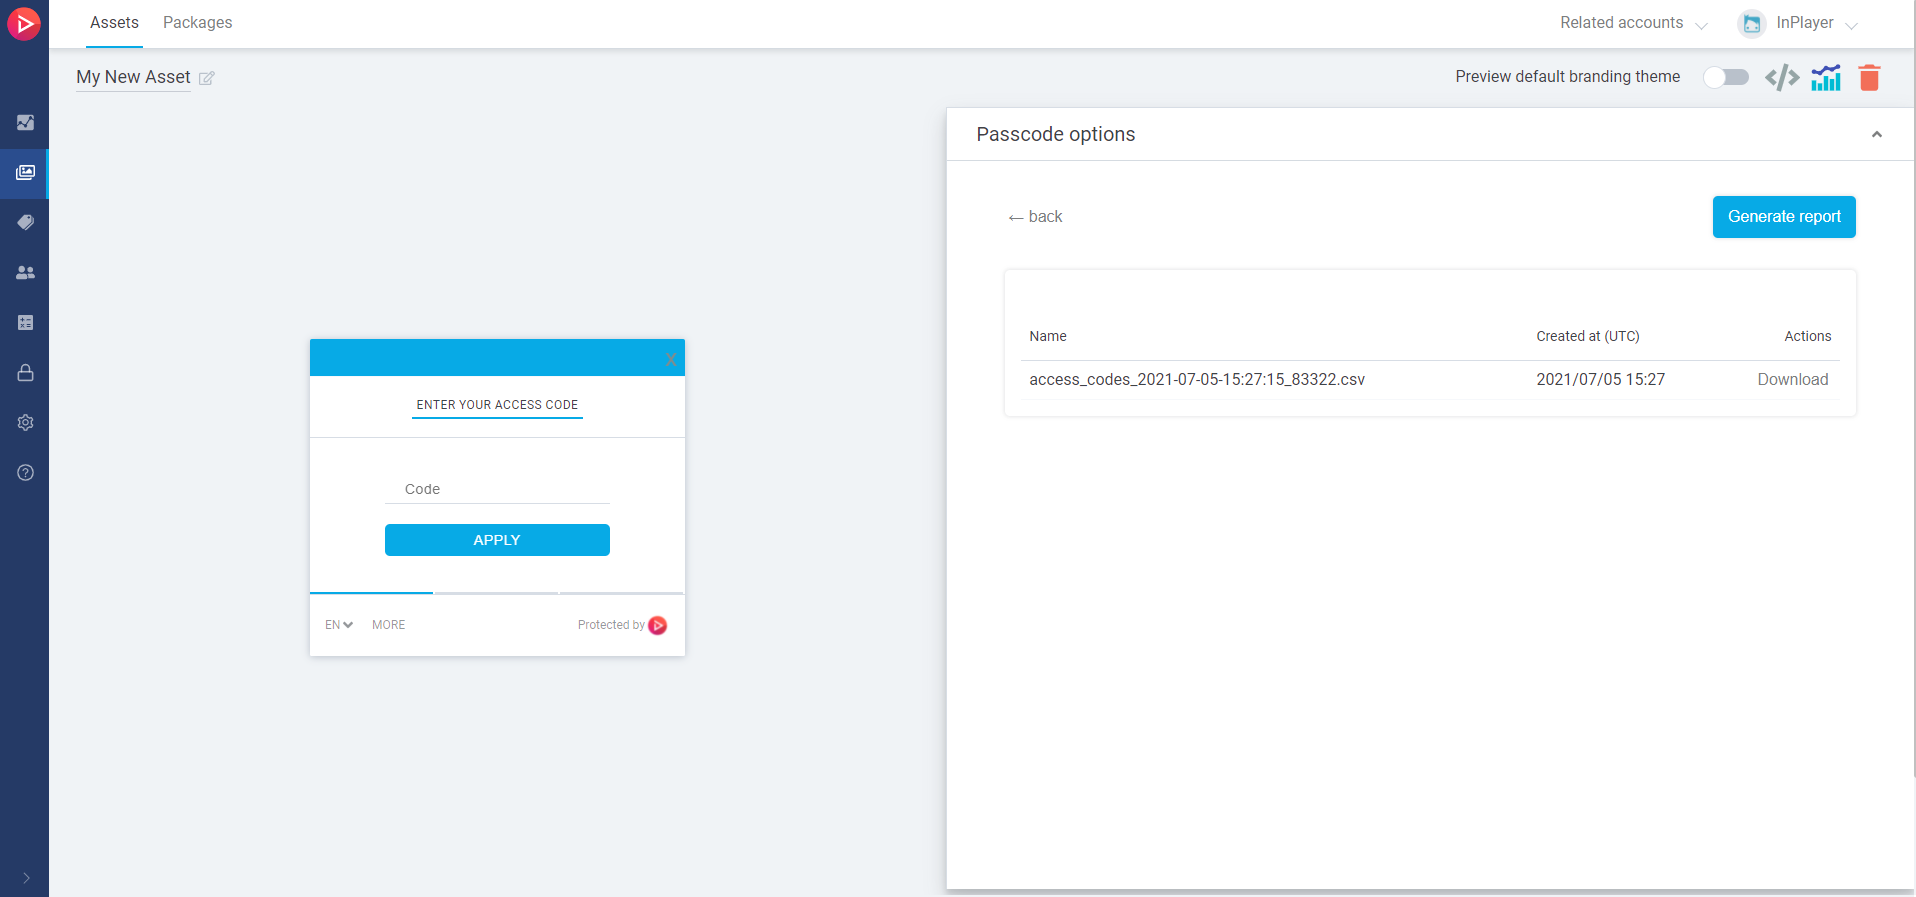
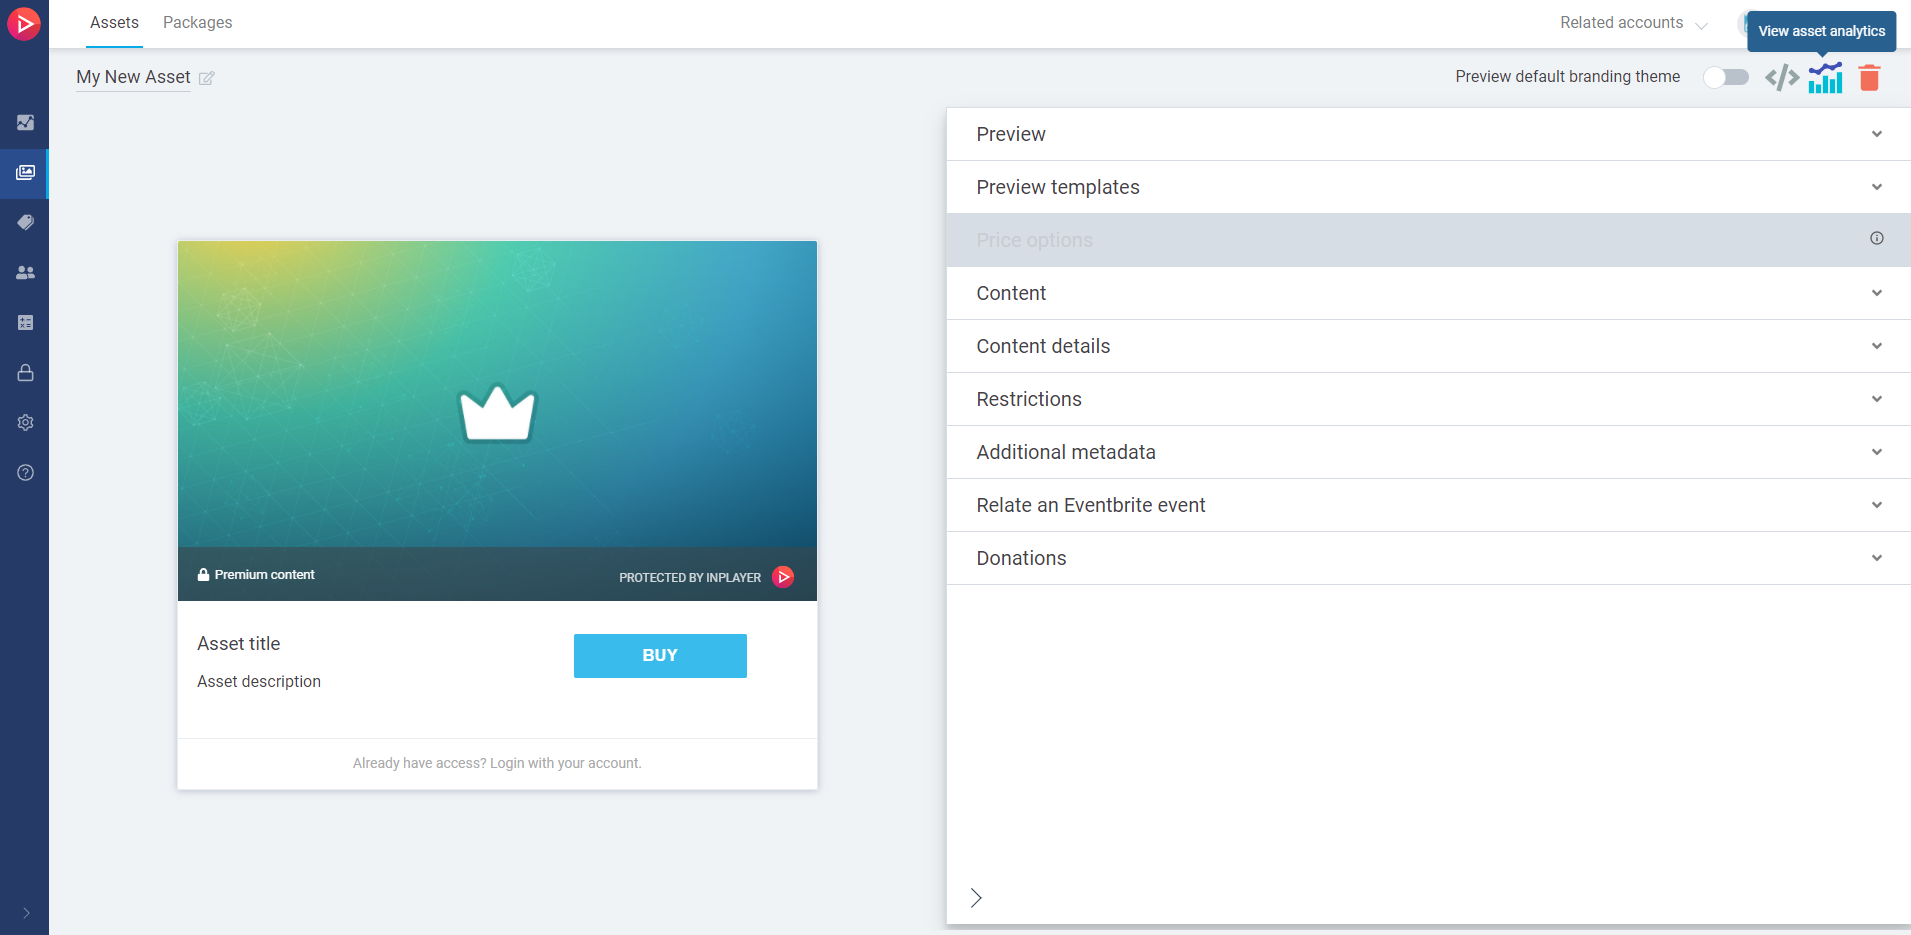
To get a report with all passcodes on an asset, along with info on how many times each passcode was used, click on View reports in the Passcode option section.
Then click on Generatereport.
A CSV report will be generated and you will be able to download it.
In the Content section, enter the content you wish to monetize depending on the type of asset you’ve created (HTML or Video). See the list below for help in doing this.
HTML
In the Content section, simply paste the embed code of the content you are trying to monetize.
You can paste as many embed codes as you want in a single HTML asset, but we would recommend sticking to only one piece of content per asset.
After setting everything up, make sure to click the Save button in the bottom right corner.
In the Content section, select the Brightcove video you wish to use. Either click on the video from the collection or enter the Video ID in the field.
If you used the quick add or sync all videos option during the asset creation, this will already be filled in.
After setting everything up, make sure to click the Save button in the bottom right corner.
Cloudflare
In the Content section, enter the Video ID of the Cloudflare video you wish to use.
To get the Cloudflare Video ID, please contact Cloudflare support via the Cloudflare Help Center.
After setting everything up, make sure to click the Save button in the bottom right corner.
DaCast
For DaCast videos, please use the HTML type asset for now. This is due to some updates that are being done on the DaCast platform. You can convert a Video asset to an HTML type asset by clicking Change content type in the asset Content section. Viewer accesses will not be affected by this conversion.
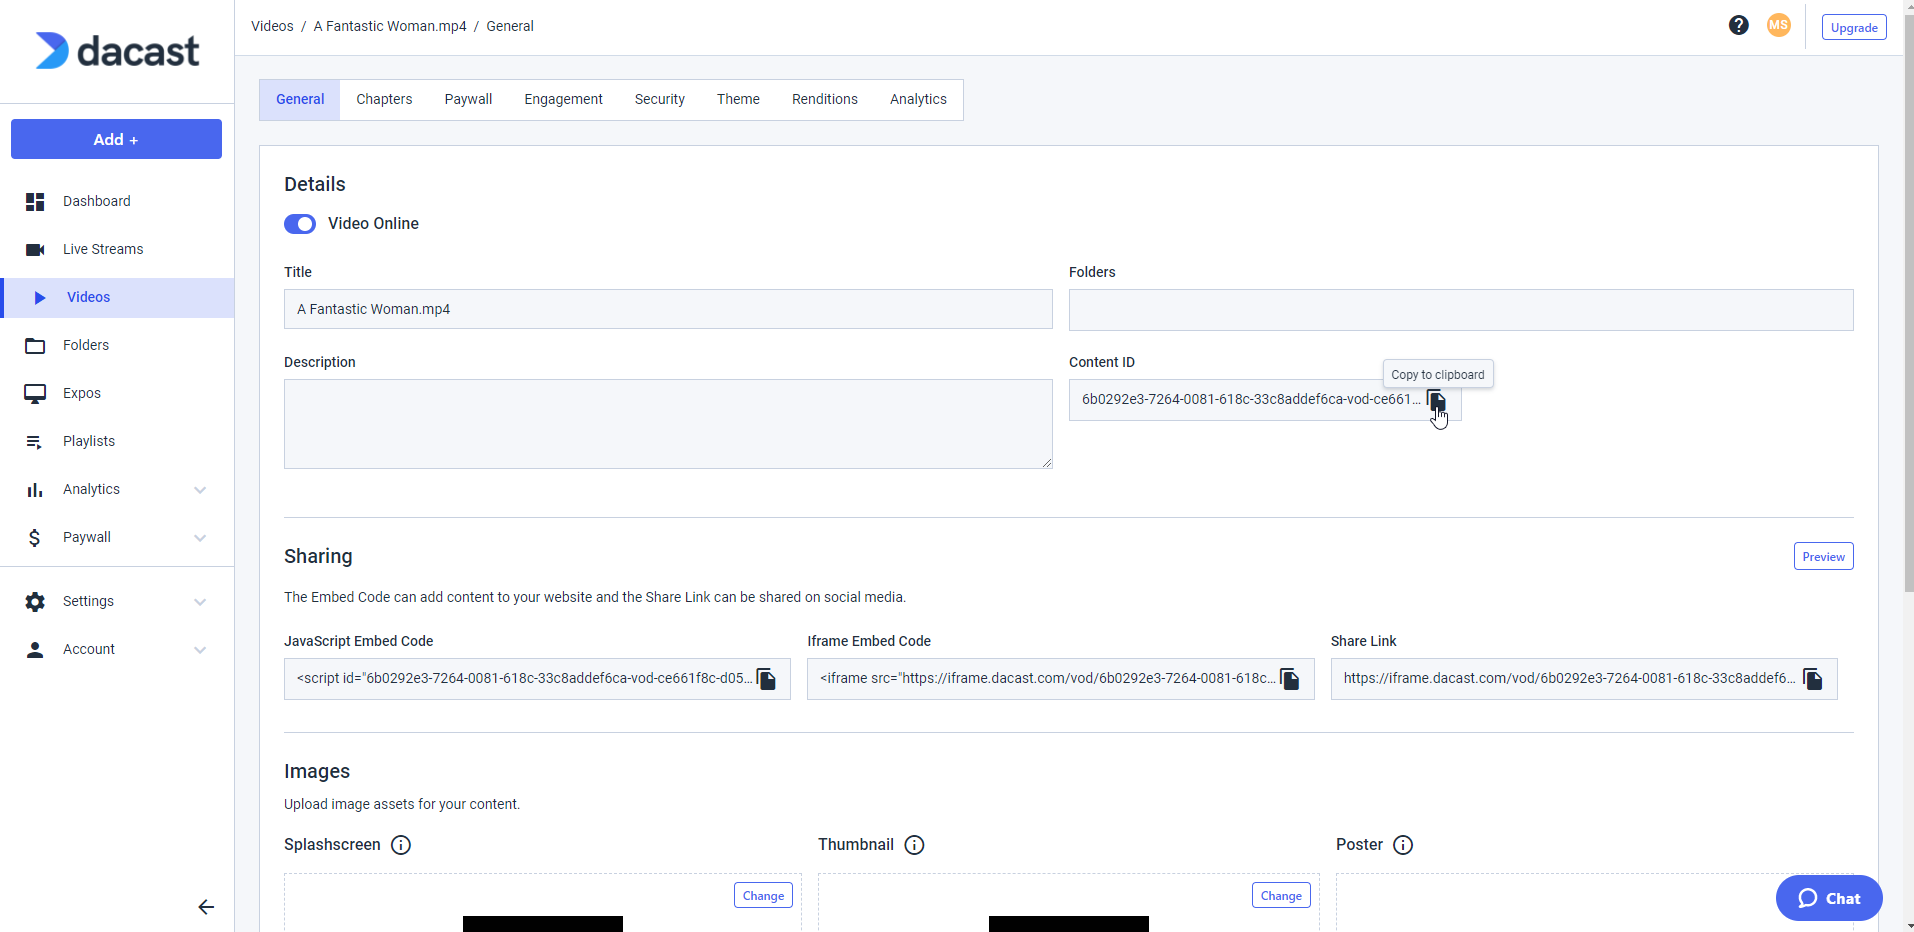
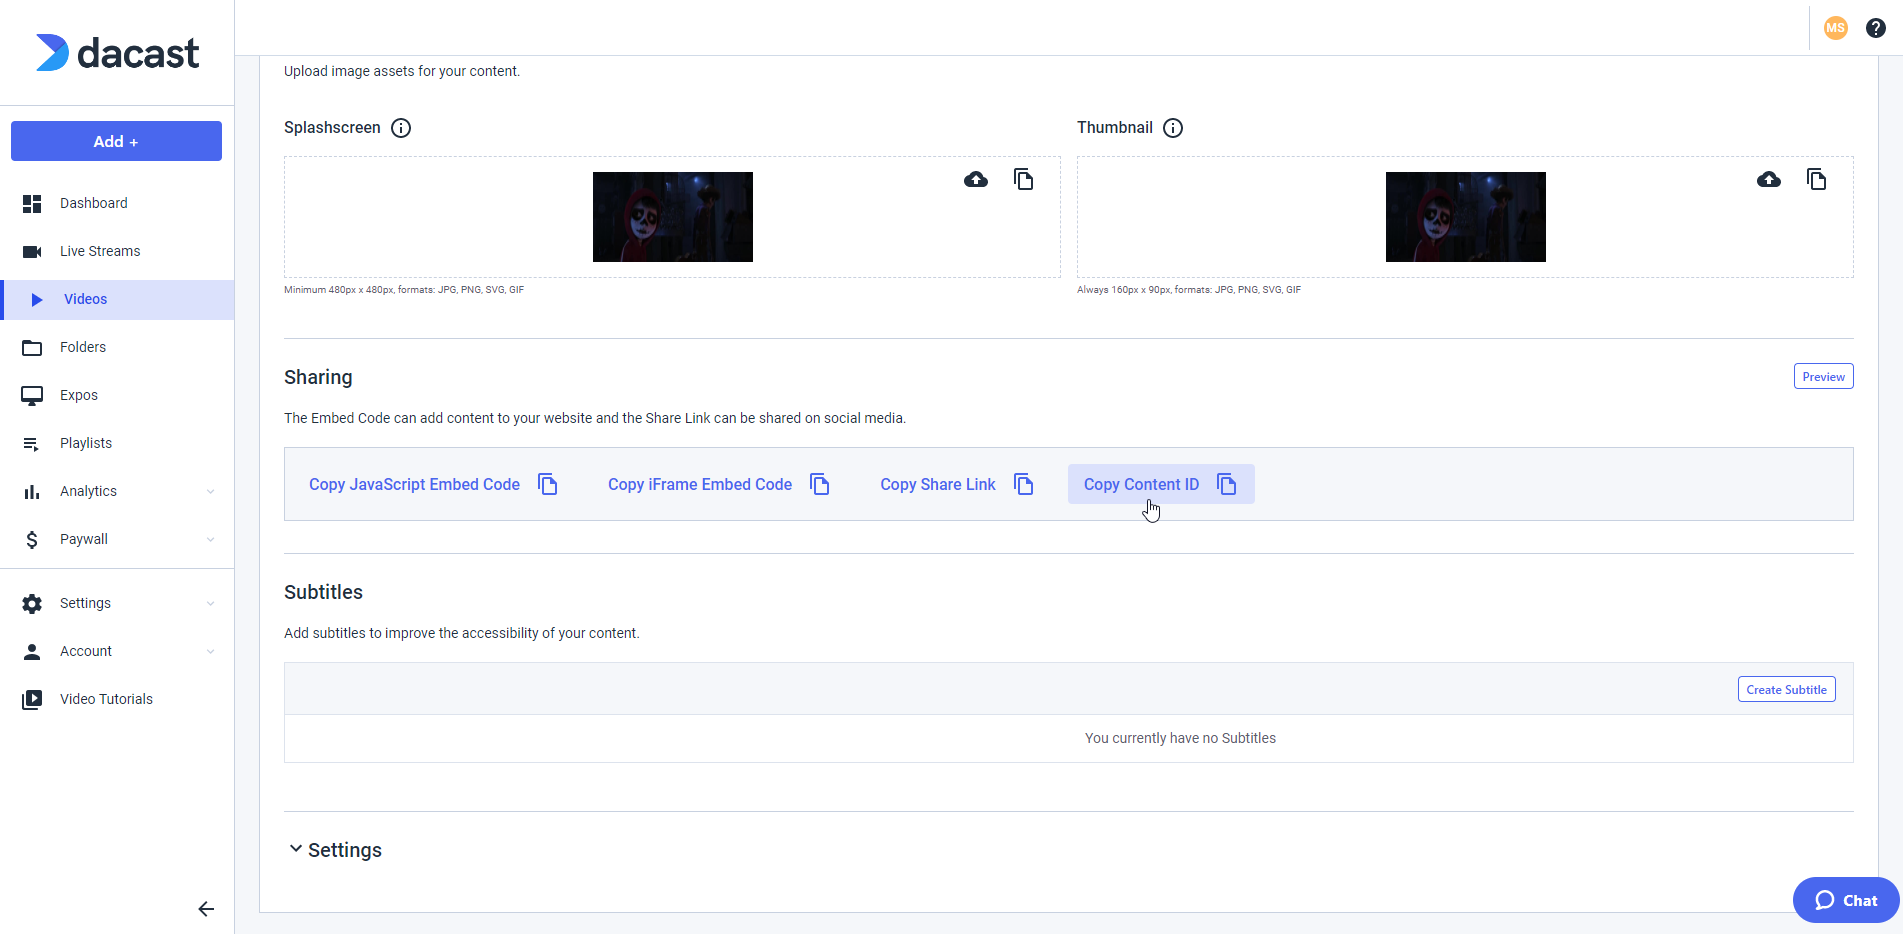
In the Content section, enter the Content ID of the video you wish to use. Read below on how to find this.
After setting everything up, make sure to click the Save button in the bottom right corner.
Note that you can only protect individual videos. You cannot protect a DaCast “Package”, i.e. a playlist of multiple videos created on the DaCast platform. To do this, please use the HTML asset type, and put the embed code of the DaCast Package inside the Content section. Alternatively, you can create a Package by using InPlayer’s own Package feature. Read more about that here.
How to find the Content ID
To get the Content ID for a video, just go to your DaCast account and open the video you want to monetize.
The Content ID will be stated in the Details section.
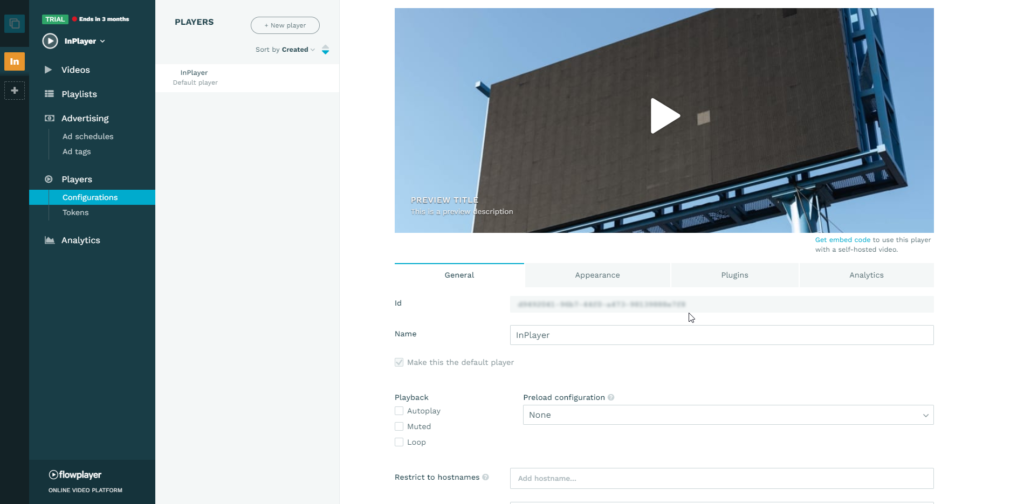
For the Player Id, under Players, go to Configurations and open the player you want to use. The Player Id will be listed there.
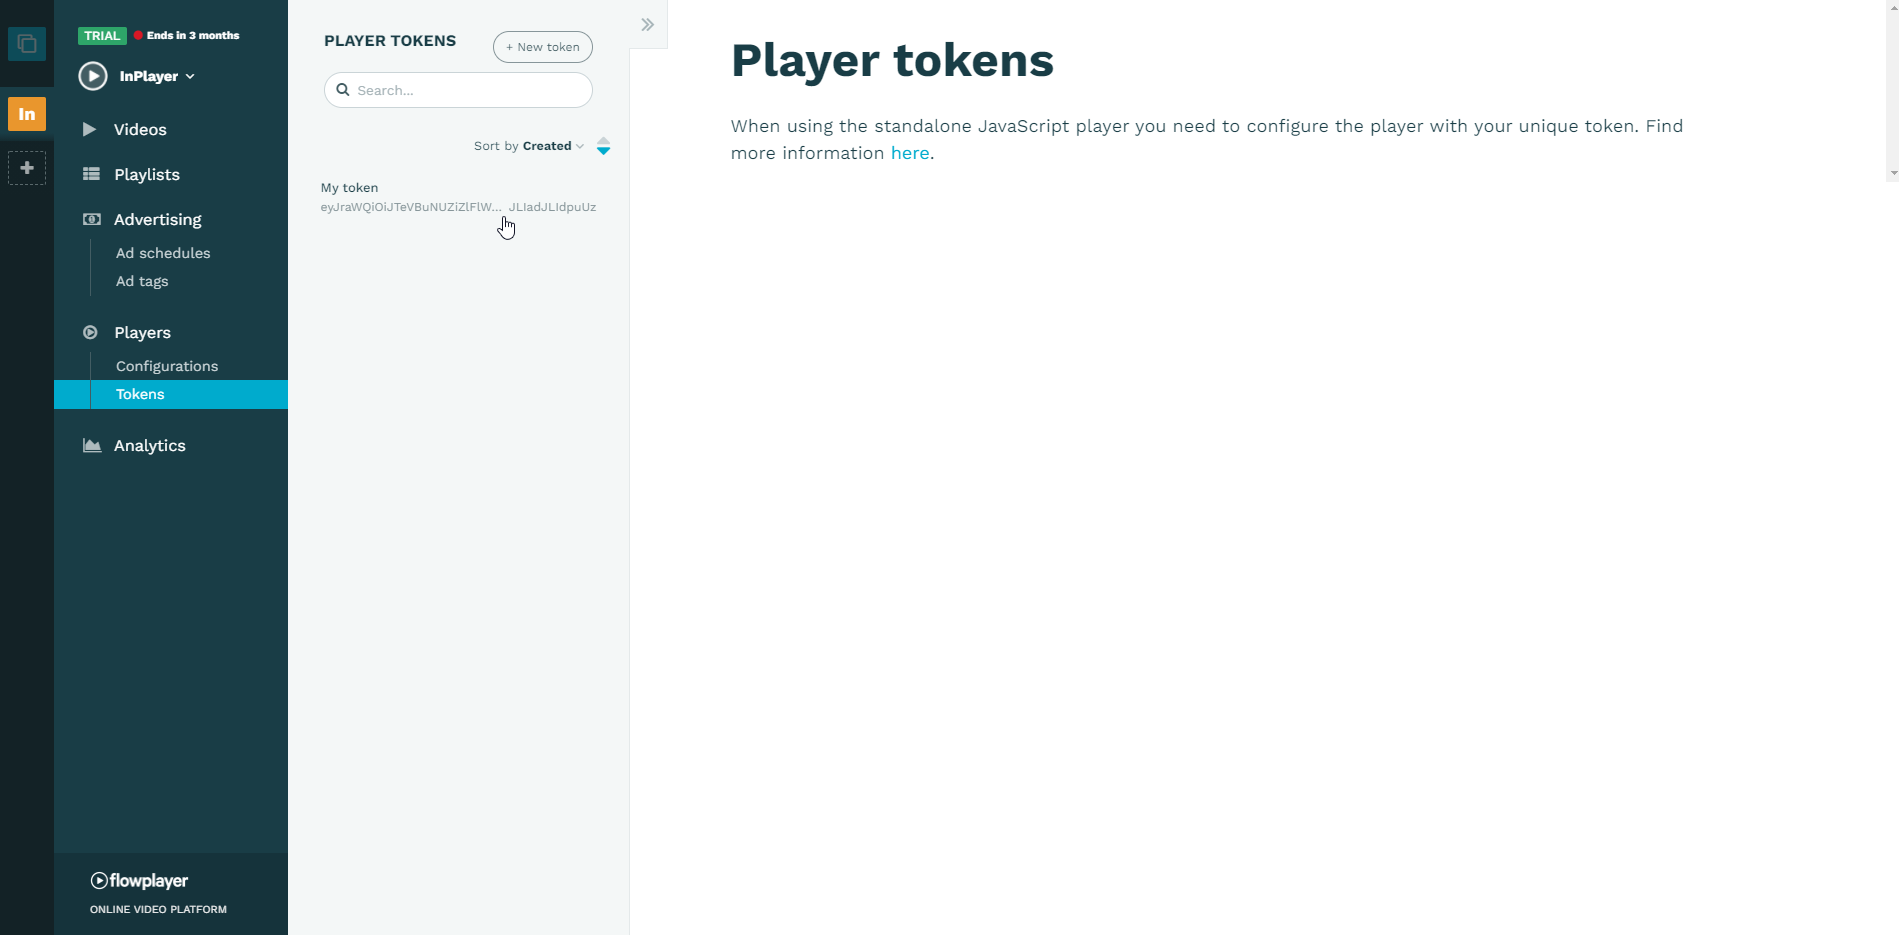
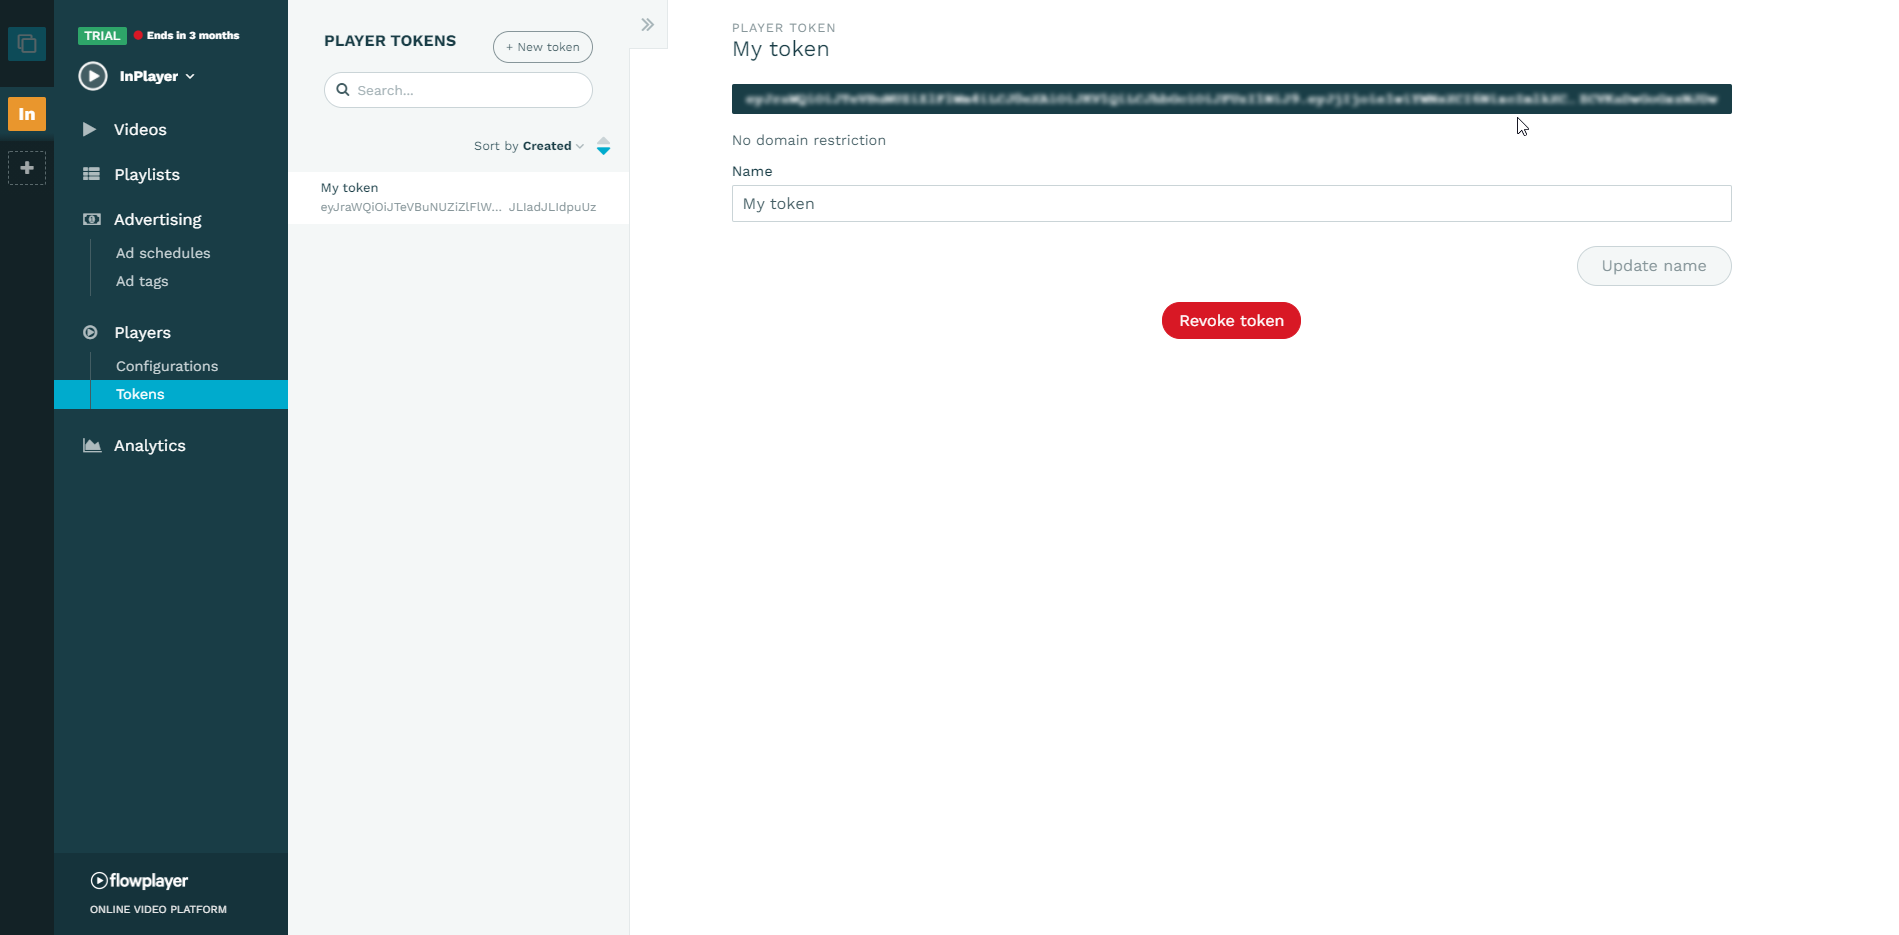
For the Player Token, under Players, go to Tokens. You can create a new token or use a pre-existing one.
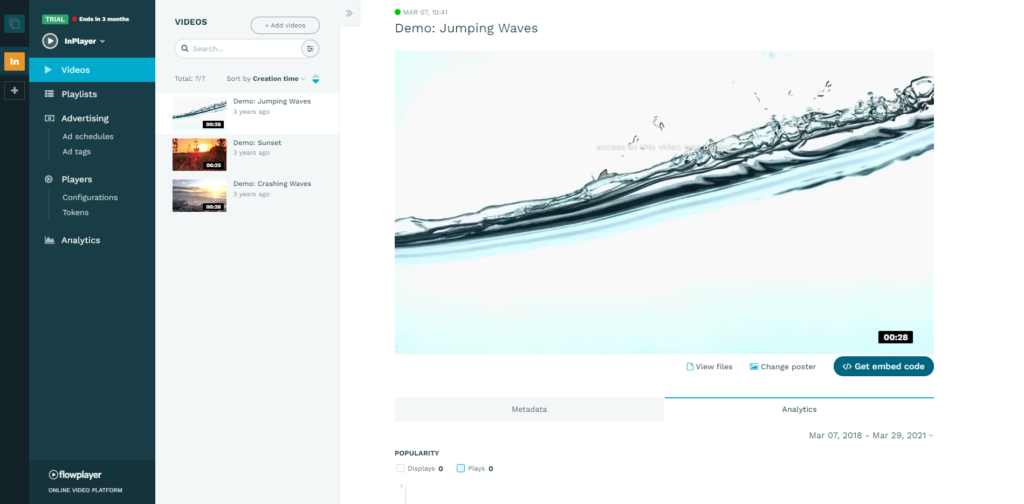
For the Source Id, go to Videos and open the video you want to use.
You can get the Source Id from the URL of the video in your browser’s address bar. In the example URL below, the Source Id is marked with bold: https://flowplayer.com/app/videos/5c47dc7f-8cc7-4af5-b02a-bdf9ff725aa2
In the Content section, enter the Type of video, the Video ID of the JW Player video you wish to use and select a Player. Read below on how to find the Video ID.
If you used the quick add option during the asset creation, this will already be filled out. Make sure to check that the Type field is also filled in correctly (VOD or Live).
After setting everything up, make sure to click the Save button in the bottom right corner.
How to find the Video ID
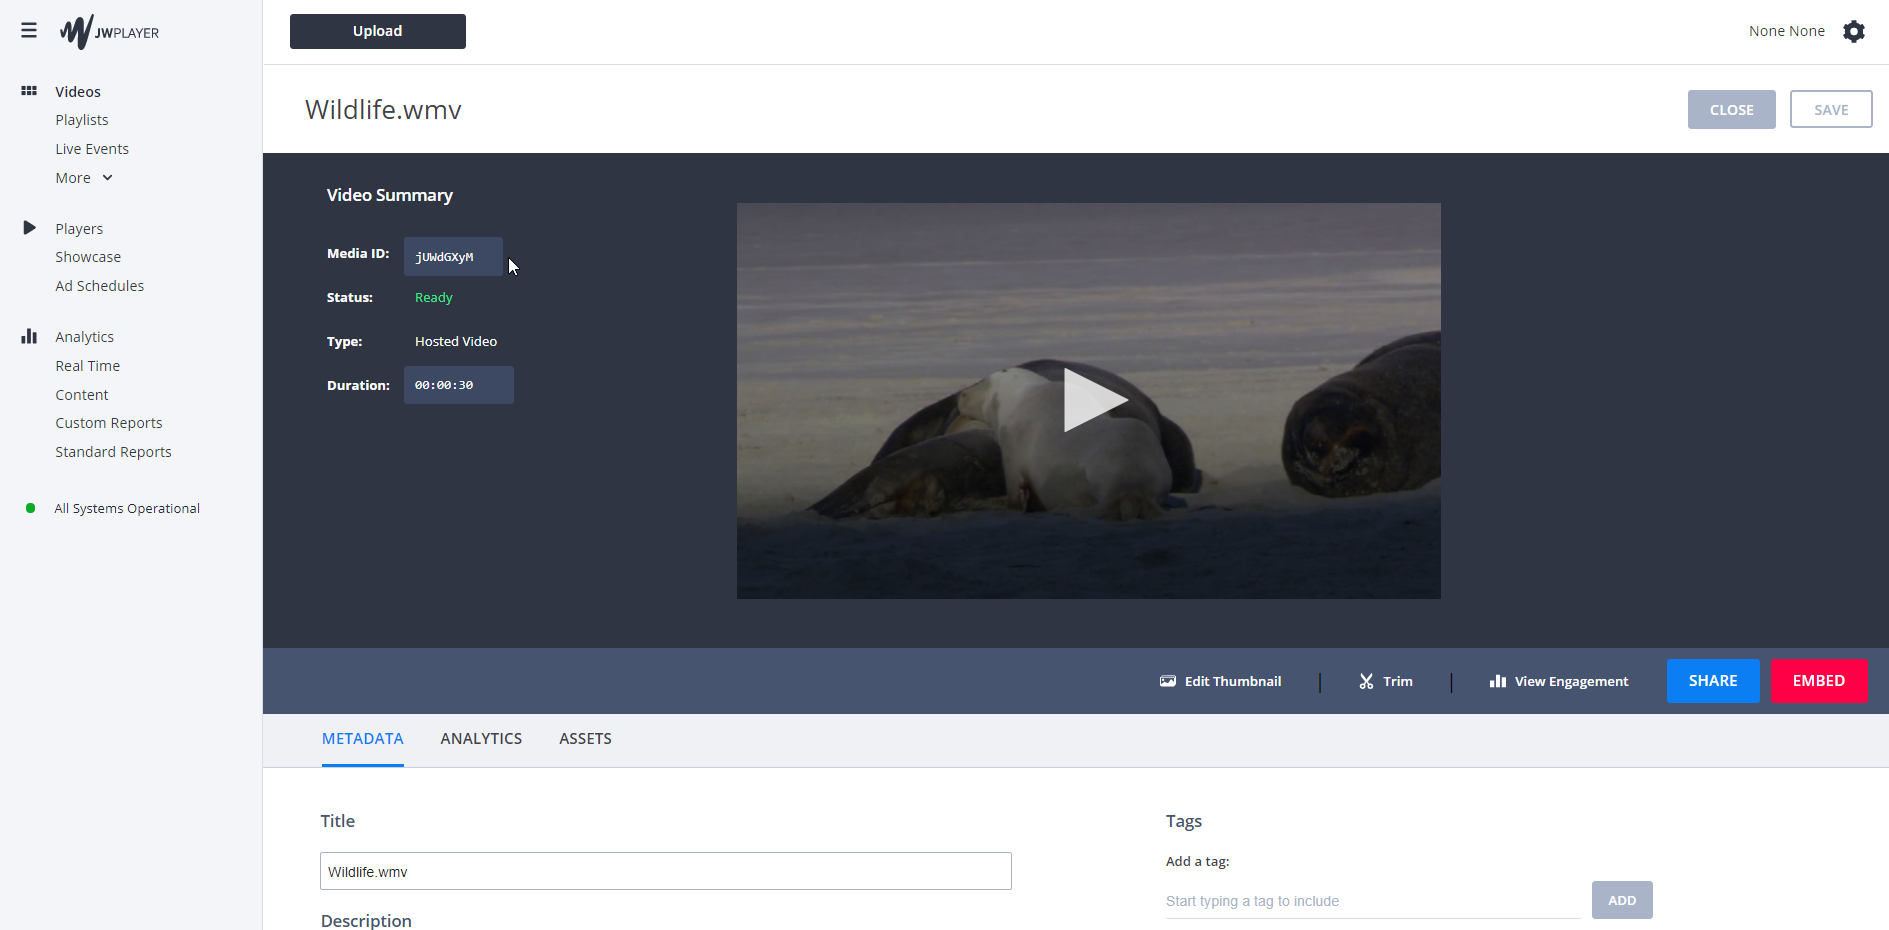
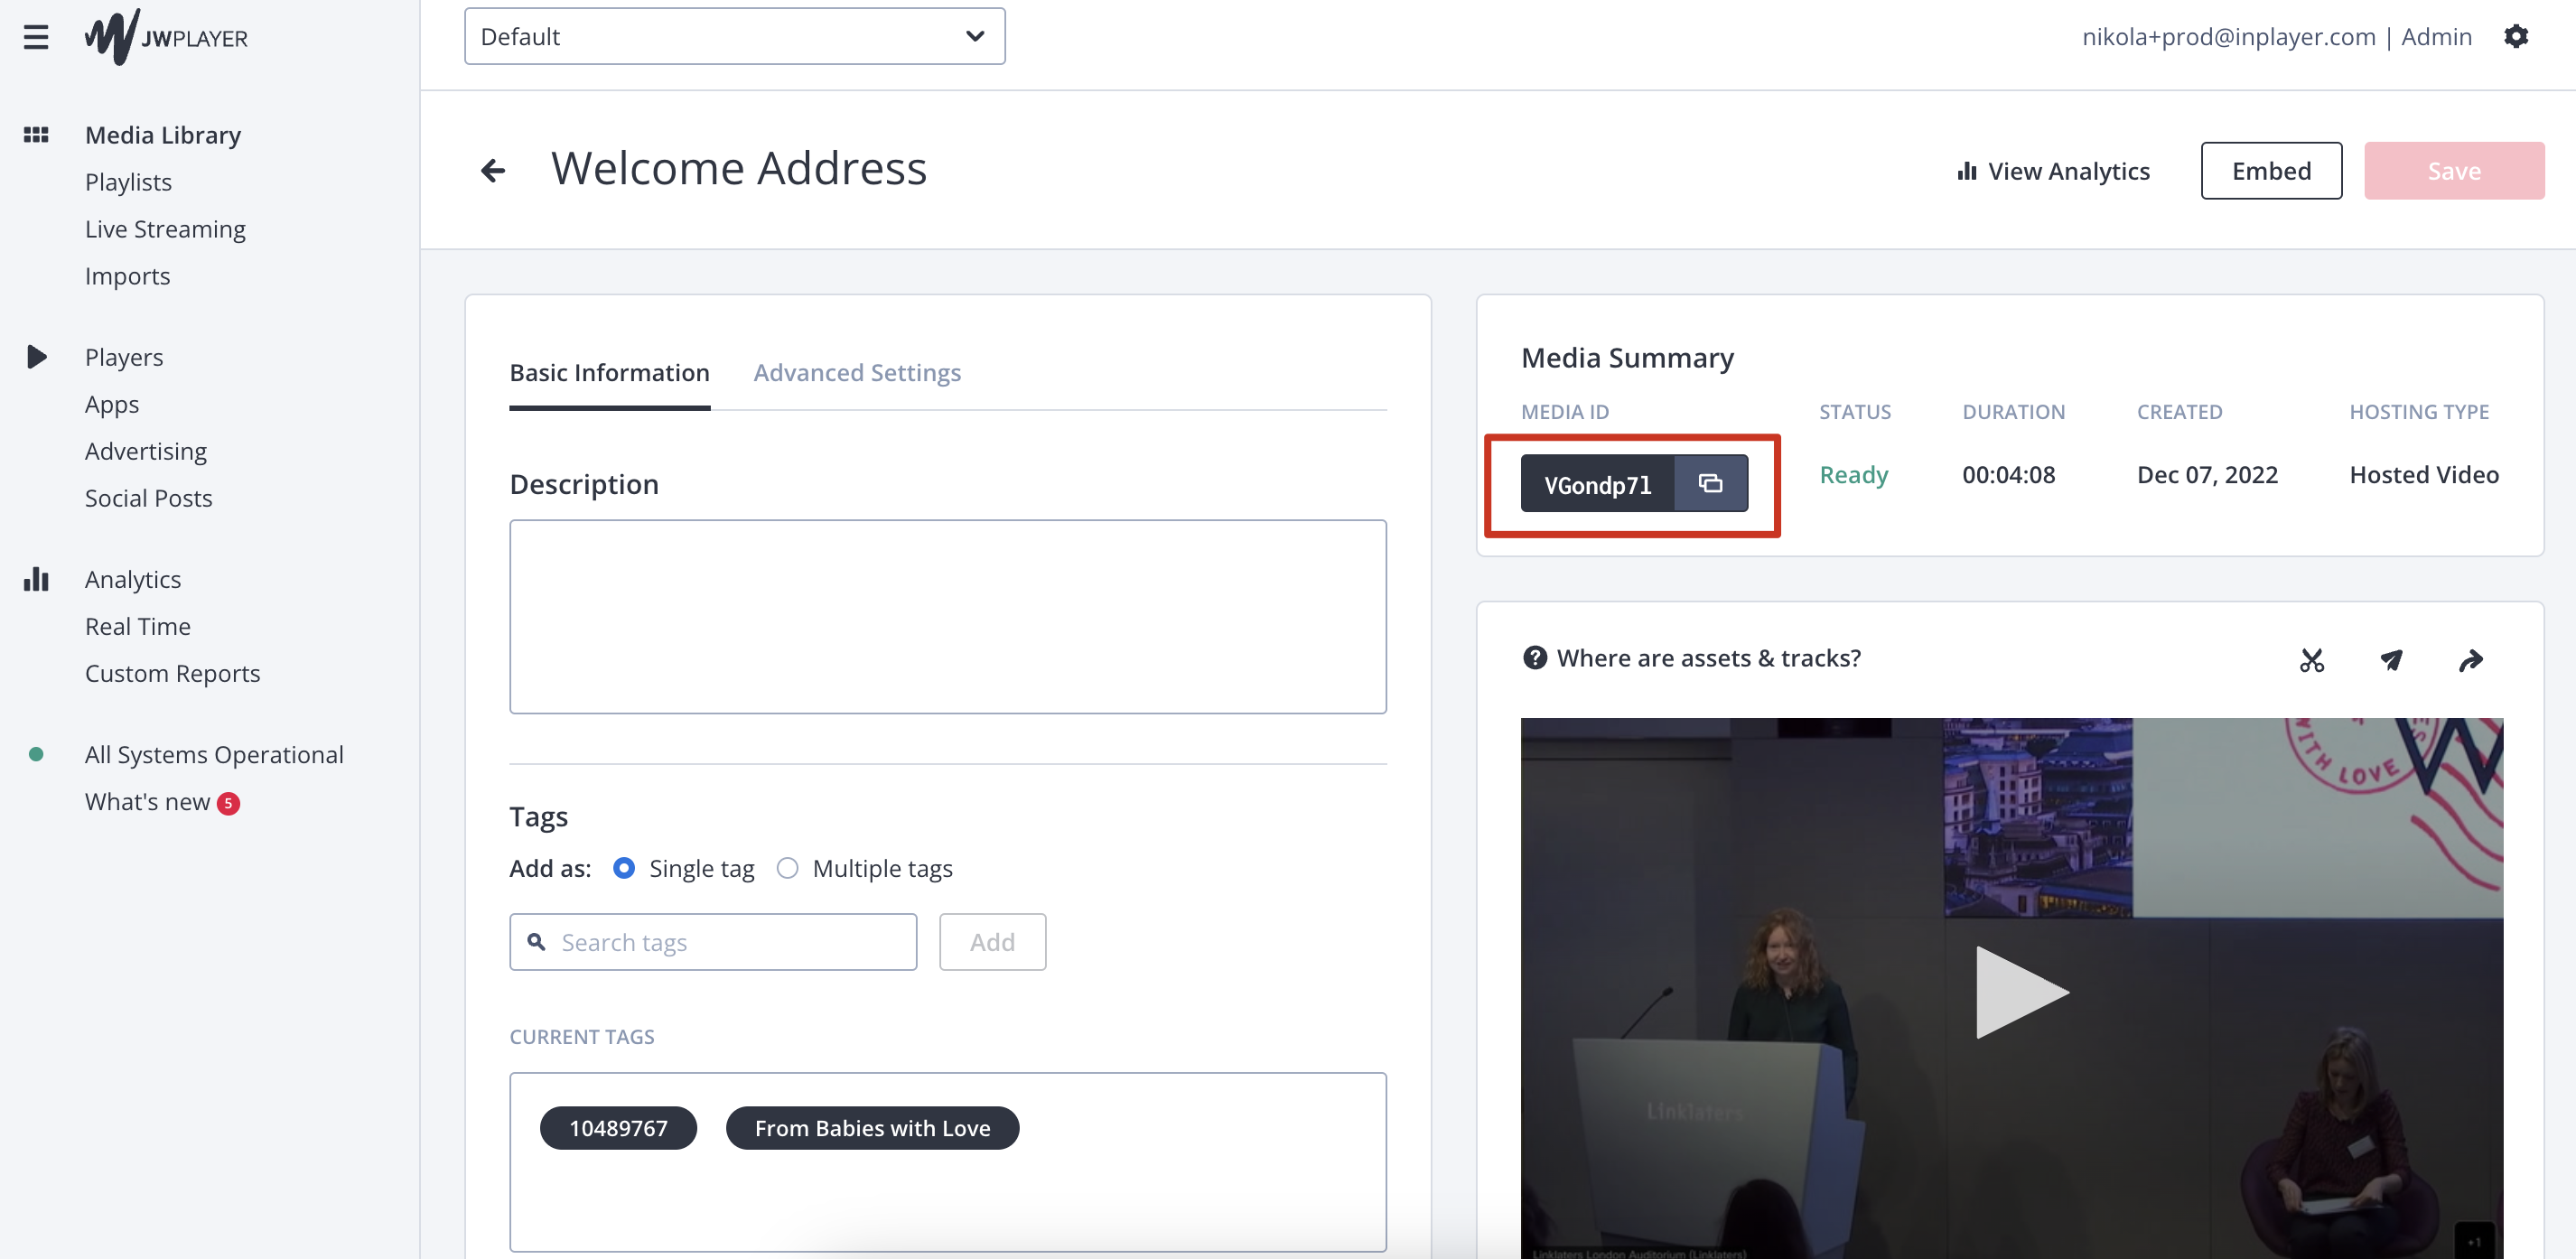
Log into your JW Player account and open the video you wish to use.
The Video ID is the Media ID.
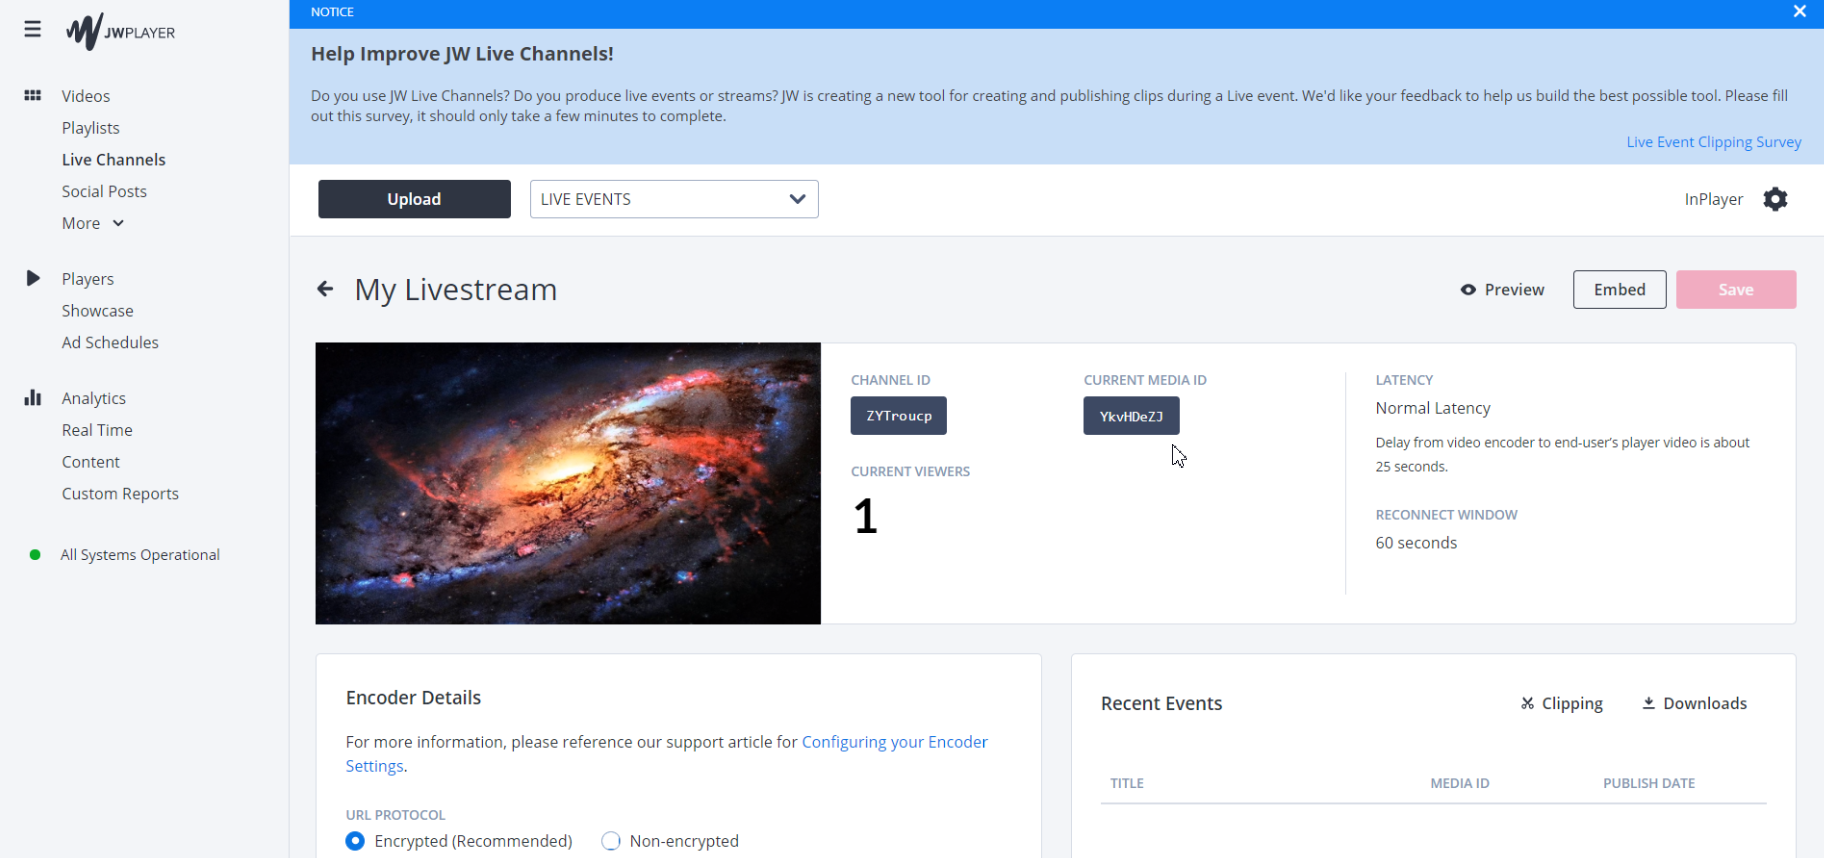
For live events, you will need to open the Live Channel you’ll use and start the live stream from your encoder. As soon as the video feed appears in the channel a new field will also appear, next to the CHANNEL ID field, called CURRENT MEDIA ID.
Copy the CURRENT MEDIA ID and paste it in the Video ID field of the InPlayer asset.
Due to this JW Player limitation, we recommend starting the stream an hour before the actual start time of the event so you can have the time to update the asset content, and avoid viewers logging in before the event, not seeing anything, and refreshing their browsers, all of them at the same time, thereby crashing your page.
An alternative method to Asset creation
If, for some reason, you don’t want to use a Video type asset for your video, you can use an HTML type asset. If you’ve already created a Video asset, read Changing the asset content type below to see how to change it to an HTML asset.
Then, in the Content section of the asset, you can enter the iframe of the video.
For live events, JW Player only generates an iframe once you actually start streaming, so you will need to start the stream first, and then get the iframe and put it in the asset.
Due to this JW Player limitation, we recommend starting the stream an hour before the actual start time of the event so you can have the time to update the asset content, and avoid viewers logging in before the event, not seeing anything, and refreshing their browsers, all of them at the same time, thereby crashing your page.
Workaround for having to start the live stream before the event start
As mentioned above, for live streams, you first need to start the stream, before you can get the Video ID or the iframe from JW Player that you’ll need to put in the asset’s Content section.
It is possible to get around this, by putting this iframe in the asset’s Content section:
<script src="https://cdn.jwplayer.com/libraries/INSERT PLAYER ID HERE.js"></script>
<script src="https://ssl.p.jwpcdn.com/live/channel-embed.js">
</script>
<div id="container_INSERT CHANNEL ID HERE"></div>
<script>
  (function waitForJwLiveChannelSetup() {
    if (window.jwLiveChannelSetup) {
      window.jwLiveChannelSetup({
        channelId: "INSERT CHANNEL ID HERE",
        embedContainer: "container_INSERT CHANNEL ID HERE"
      });
    } else {
      setTimeout(waitForJwLiveChannelSetup, 500);
    }
  })();
</script>
Make sure to insert the Player ID and the Channel ID in the place specified for it in the code.
Note also that this code is a custom JW Player code and is still in beta, so if you are having any troubles with it, please make sure to contact JW Player’s support.
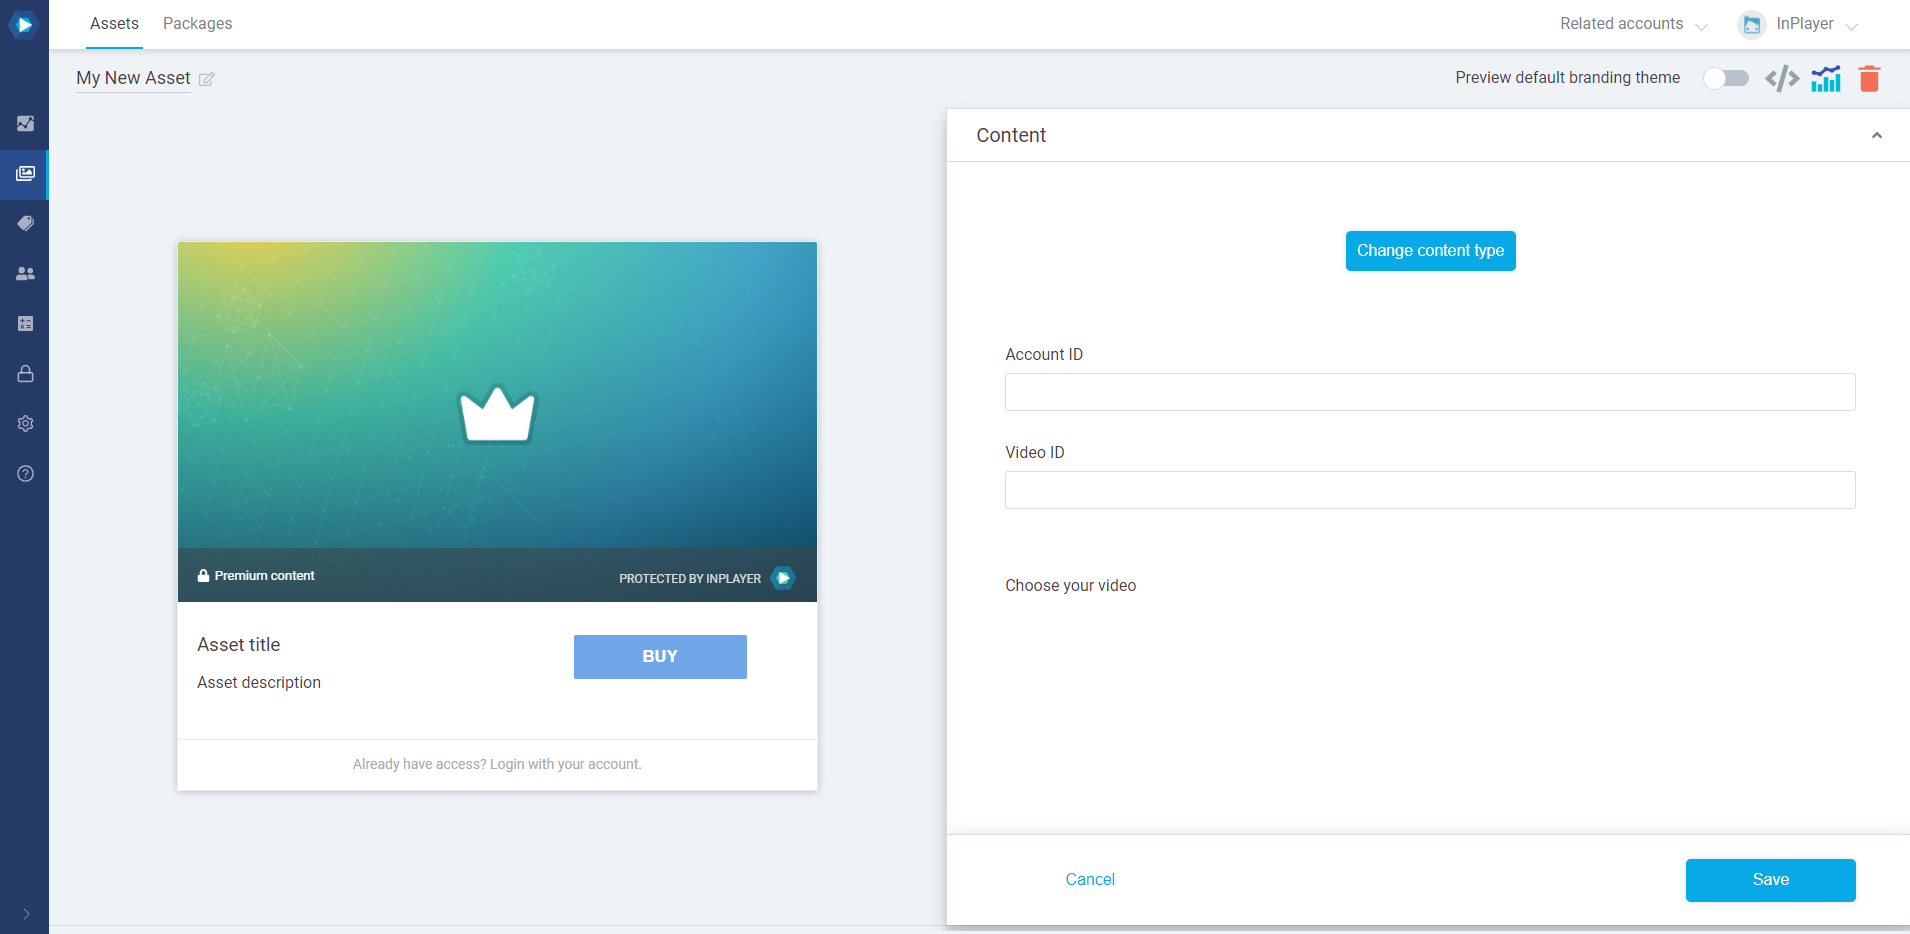
In the Content section, enter the Account ID, Event ID, and Video ID of the Livestream event you wish to use. Read below on how to find these.
Note that the Video ID is optional and only used for protecting individual video posts. For protecting whole Livestream events, the field can be left blank.
After setting everything up, make sure to click the Save button in the bottom right corner.
How to find the Account ID, Event ID, and Video ID
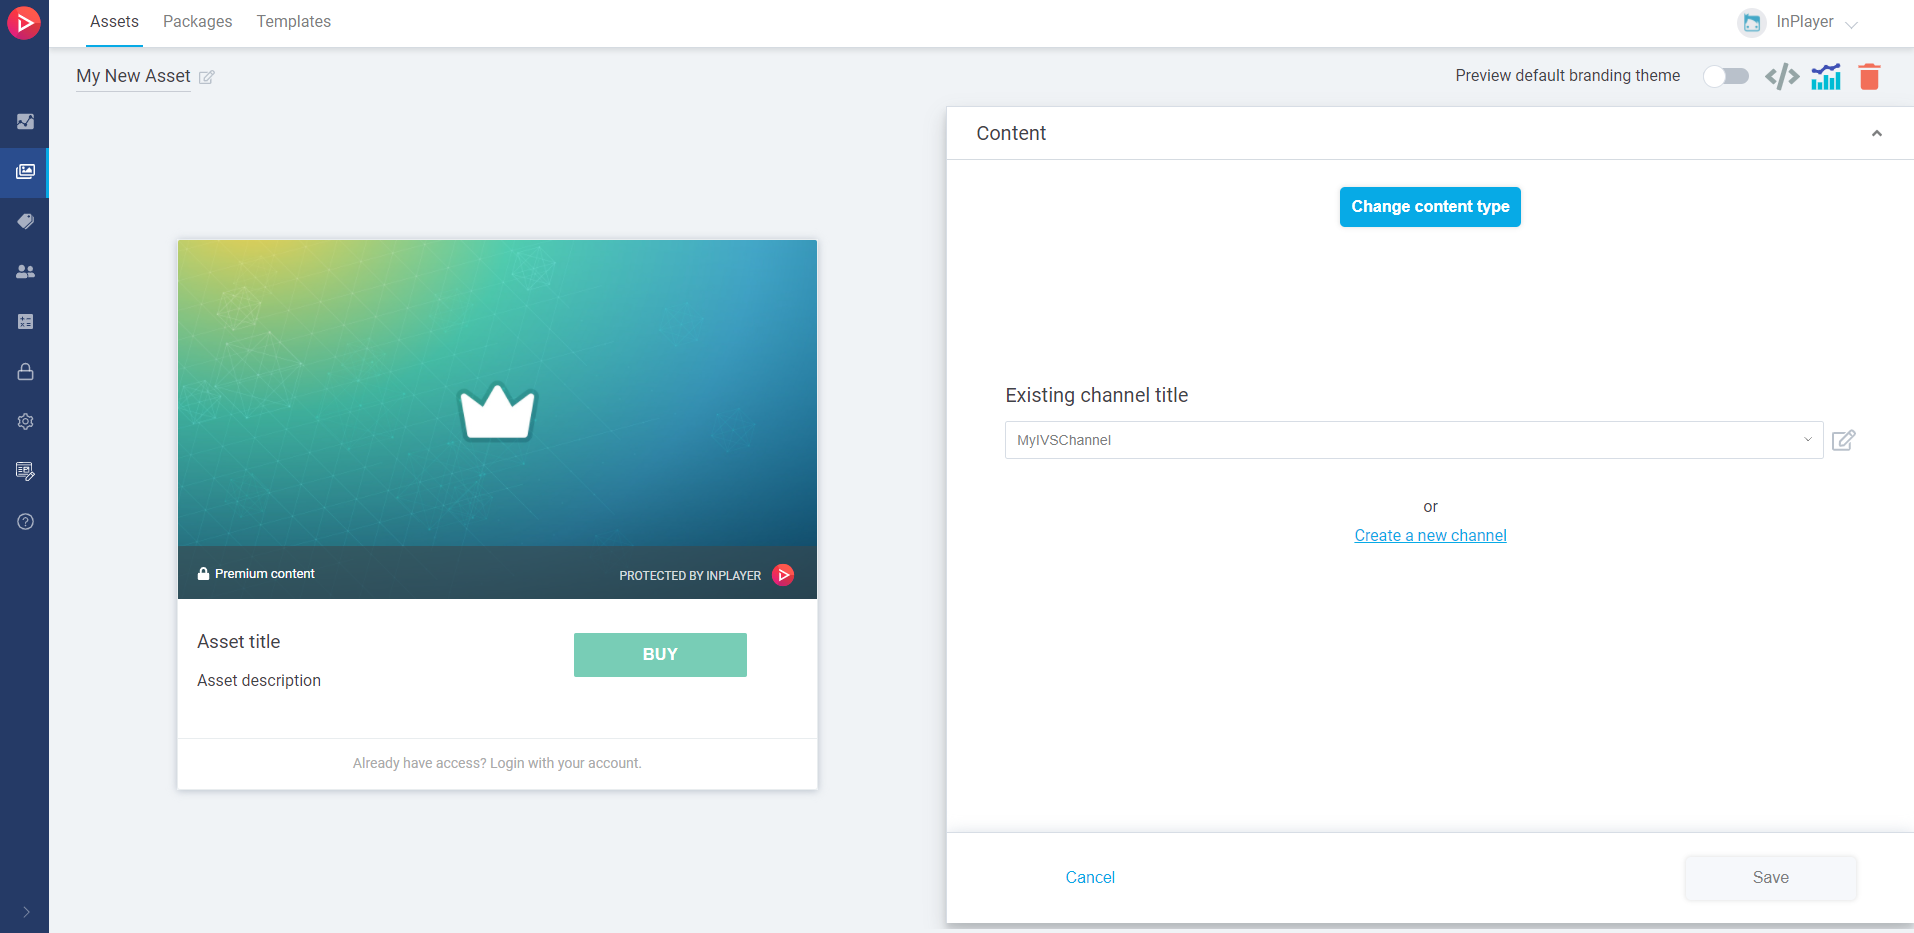
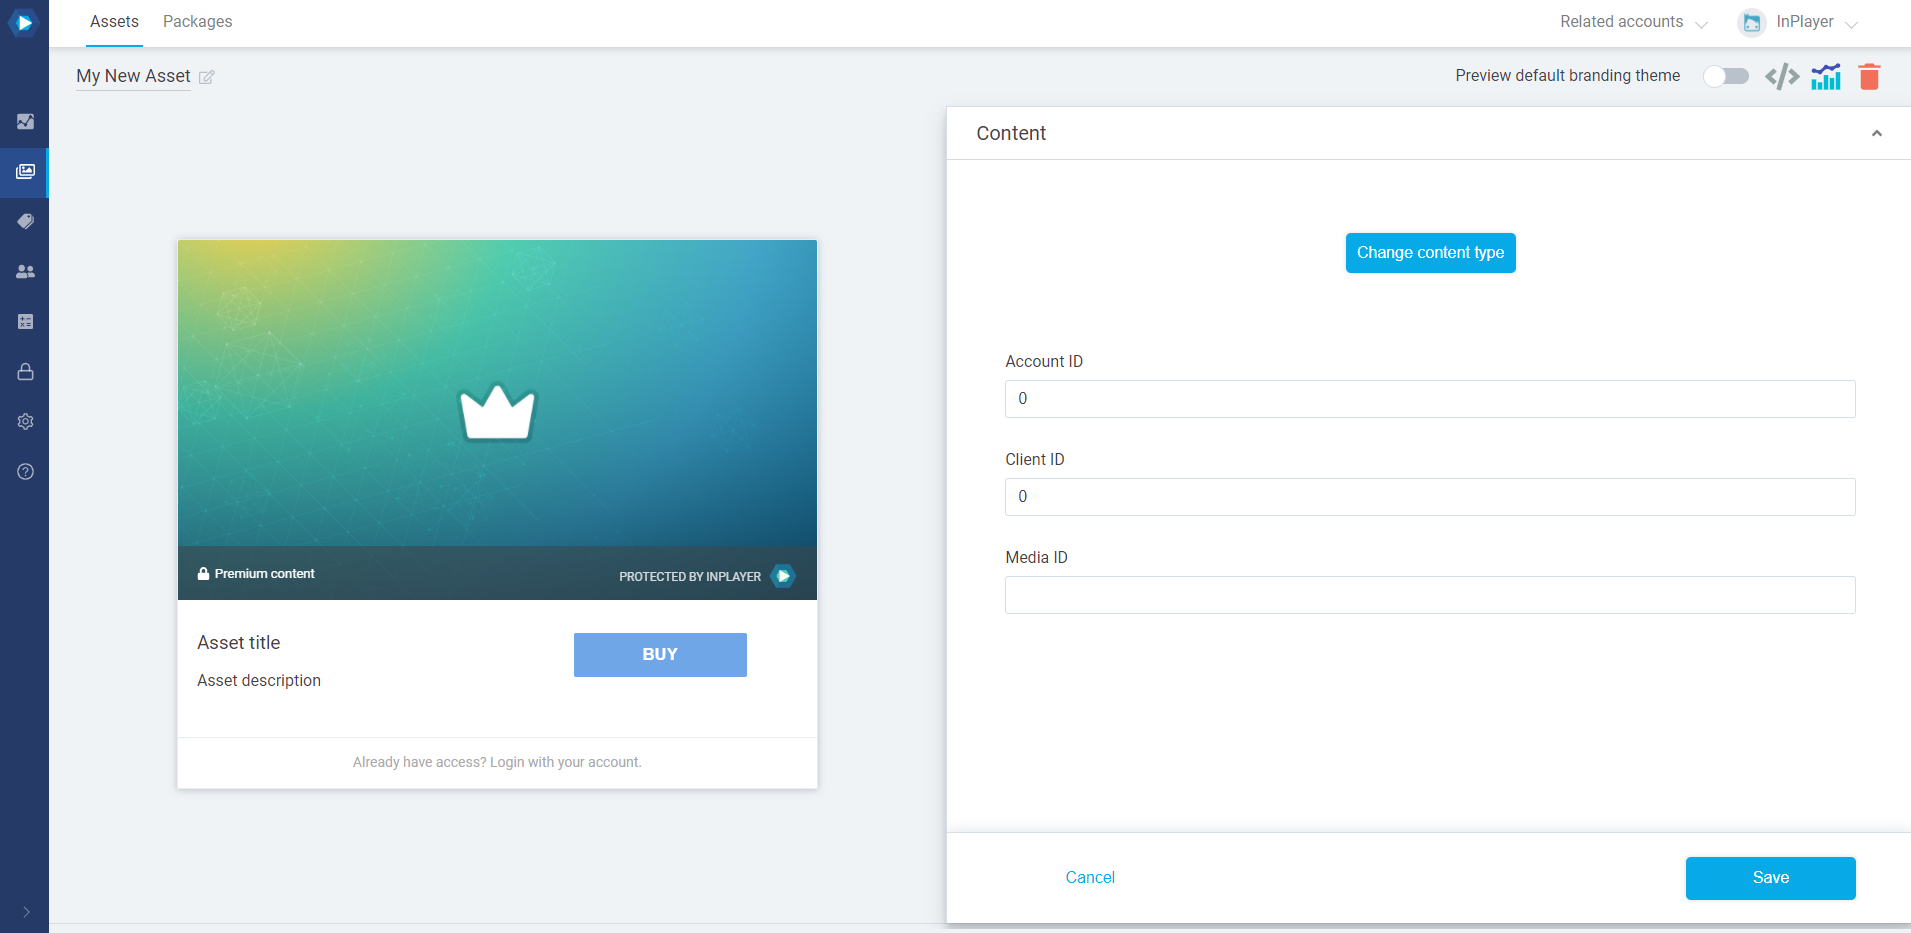
If you’ve created an HTML asset, and now you wish to change it to a Video asset, or vice versa, you can do so by clicking the Change content type button.
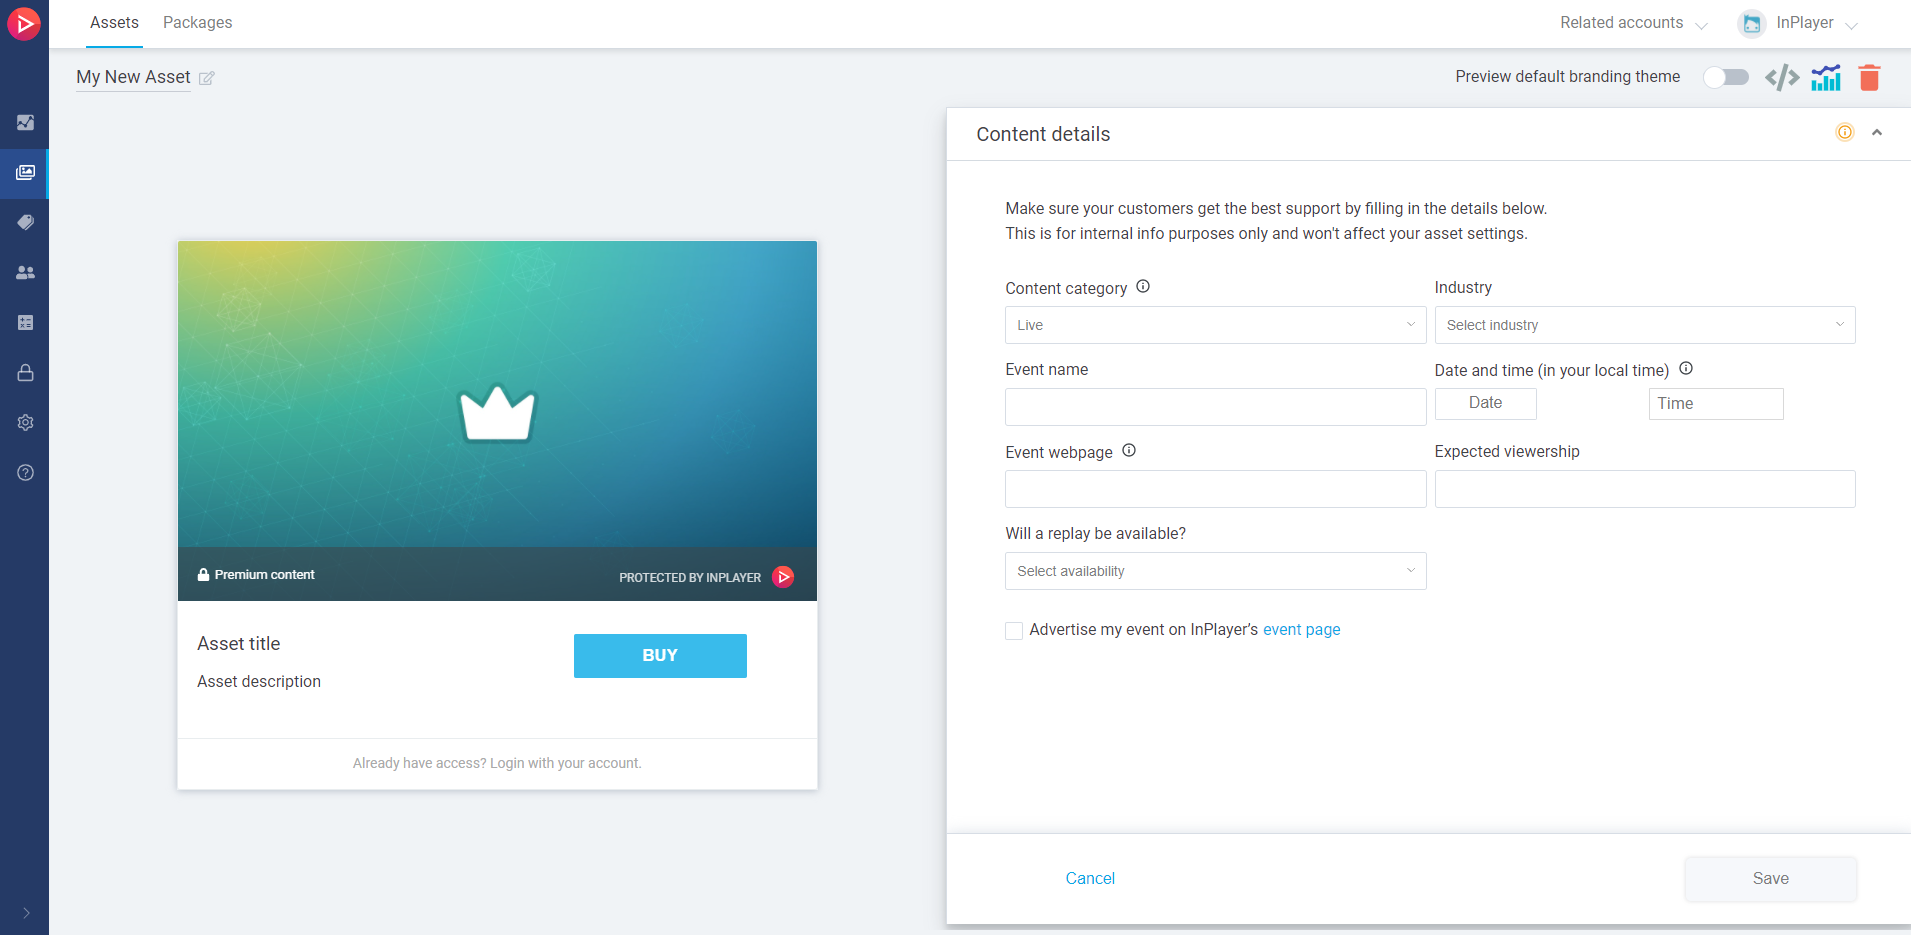
Here you will find the selection you have made in the Select content category step during the first steps of the asset creation.
If the Content category is VOD or Other, no further setup is needed here.
If the Content category is Live, make sure to fill in all the details about your live event. This info will be sent to our support team and will make sure your viewers get the best support possible.
It is very important to always fill in the event details here. This is one of the reasons why InPlayer can provide such high quality of support.
After your live event ends and you have published your VOD replay for it, make sure not to change the Content category from Live to VOD. There is no need for this.
You also have the option to have your event advertised on our Client Events page. If you choose to do so, just enter the text you want to appear in your event post description. It’s a good idea to include the webpage where your event can be found in the post. After you save, our webpage administrators will review the post and publish it. This might take up to 24 hours.
After setting everything up, make sure to click the Save button in the bottom right corner.
In the Restrictions section, you can set up any geographic, URL, and/or age restrictions for the asset you wish to use.
Geo-restrictions make the asset available only in certain countries, URL restrictions make it embeddable on only certain URLs, and Age restrictions make it accessible by only viewers who fall under a certain age group.
You can learn more about setting up the restrictions here, here and here.
Remember that any restrictions you set up in the individual assets will overwrite the ones that have been set up in the dashboard Settings. After setting everything up, make sure to click the Save button in the bottom right corner.
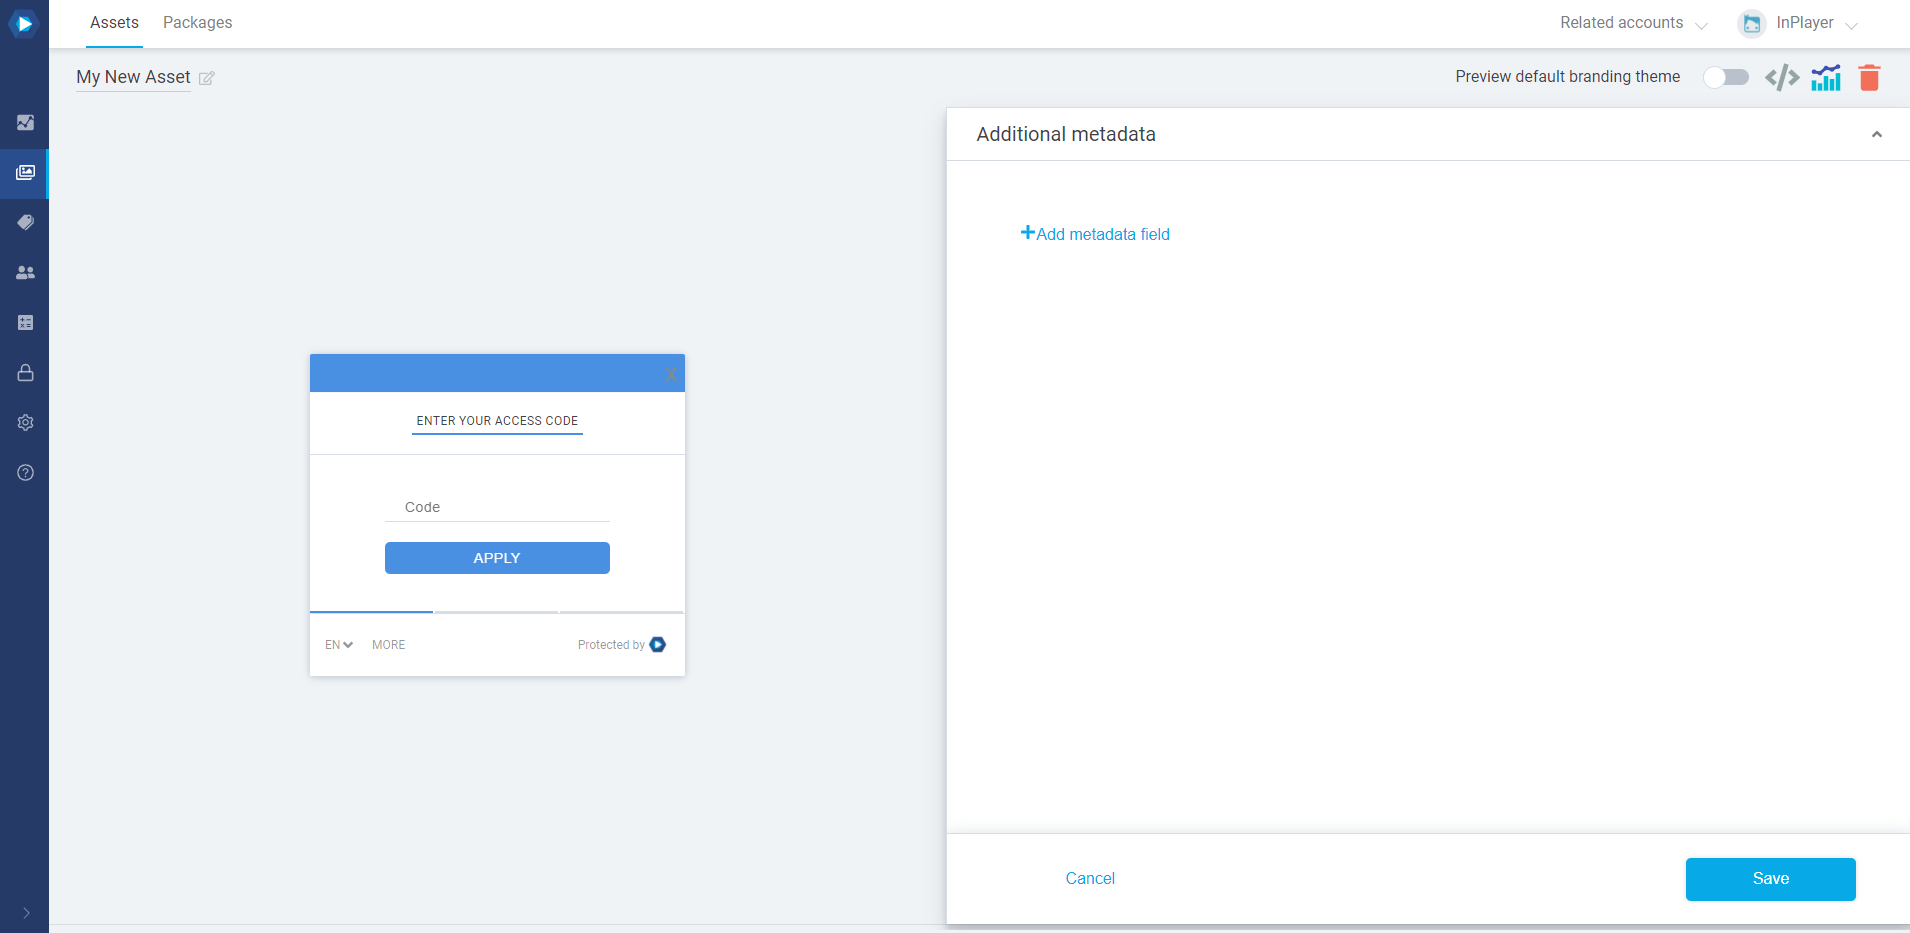
Here, you can add additional metadata to your asset, which can be used for various purposes. An example would be to add metadata that will group the assets in different categories that you can later use in a filter you have developed for your webpage.
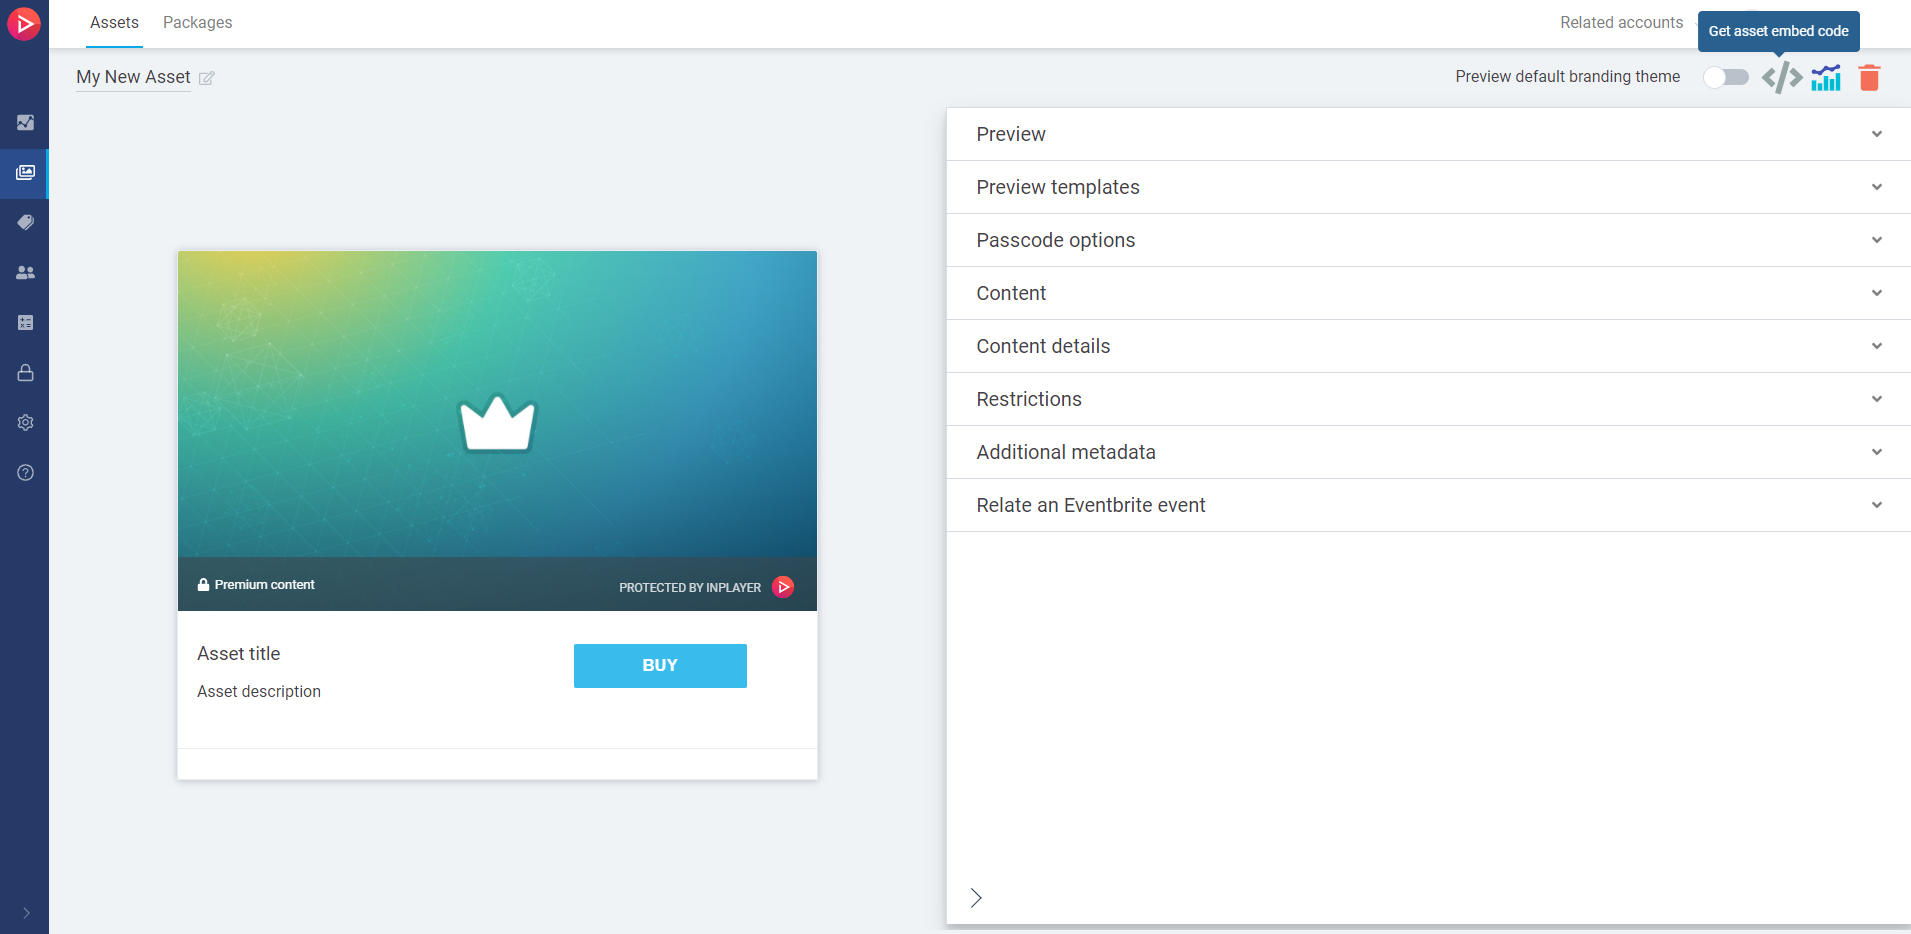
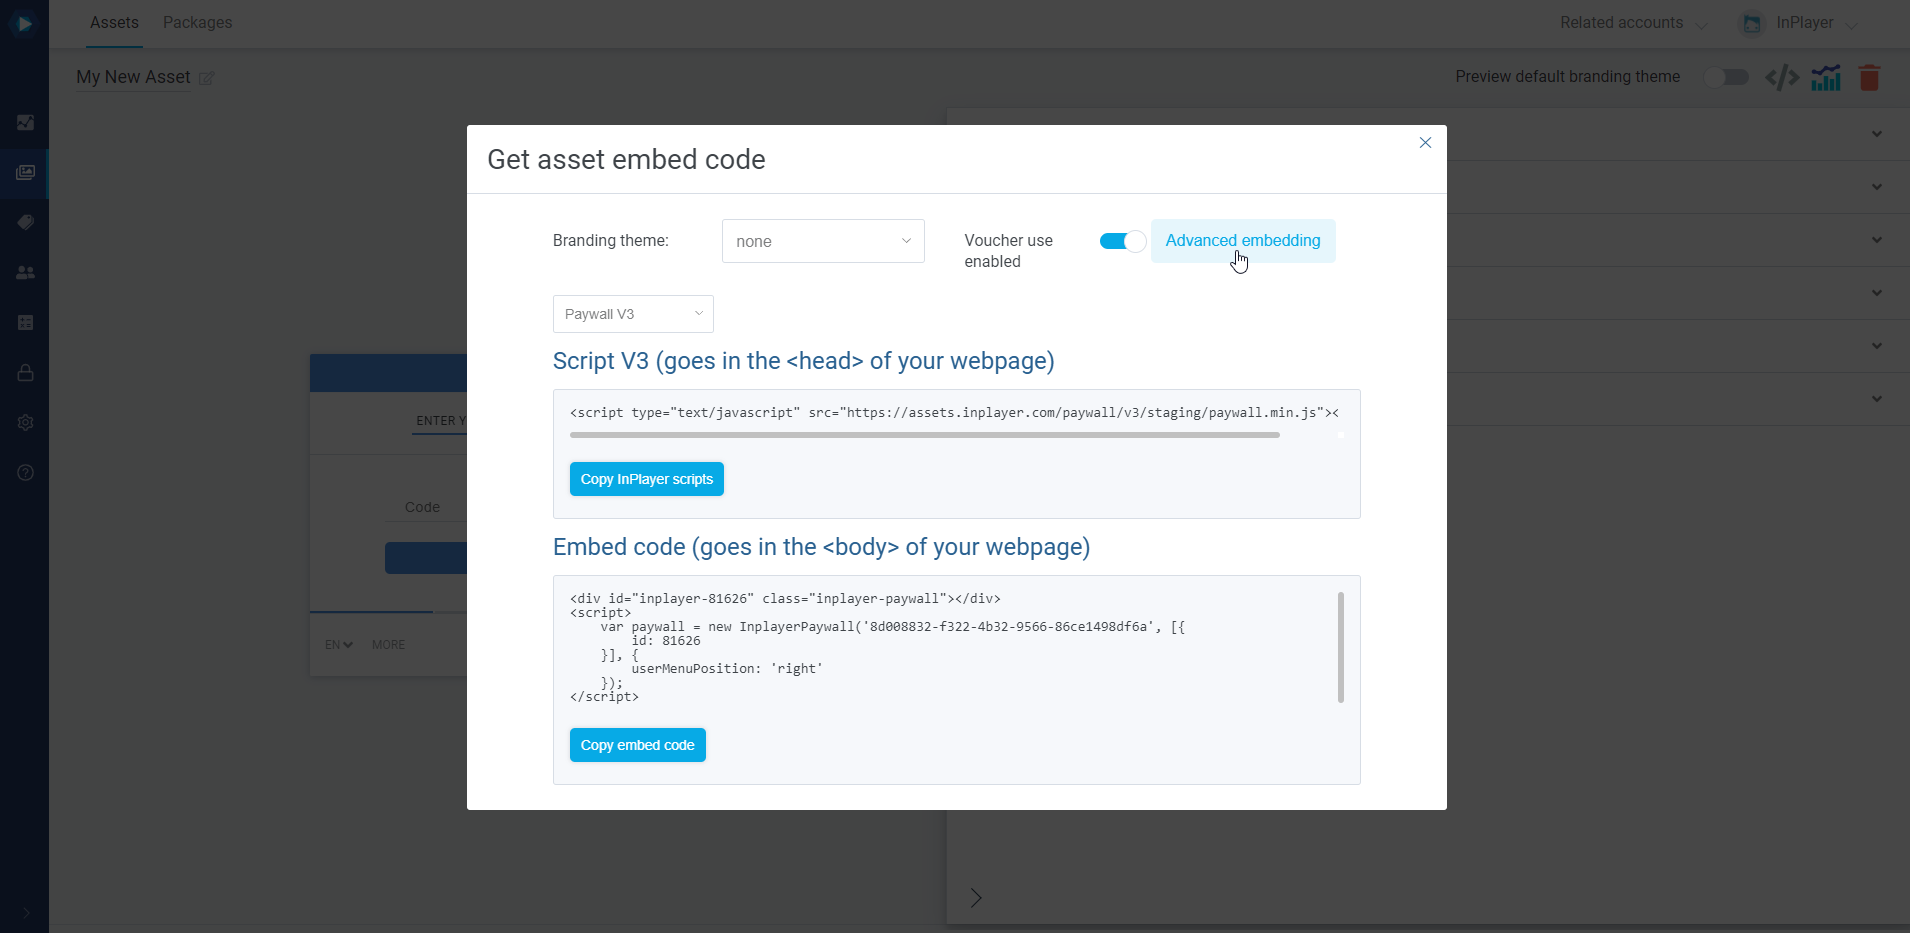
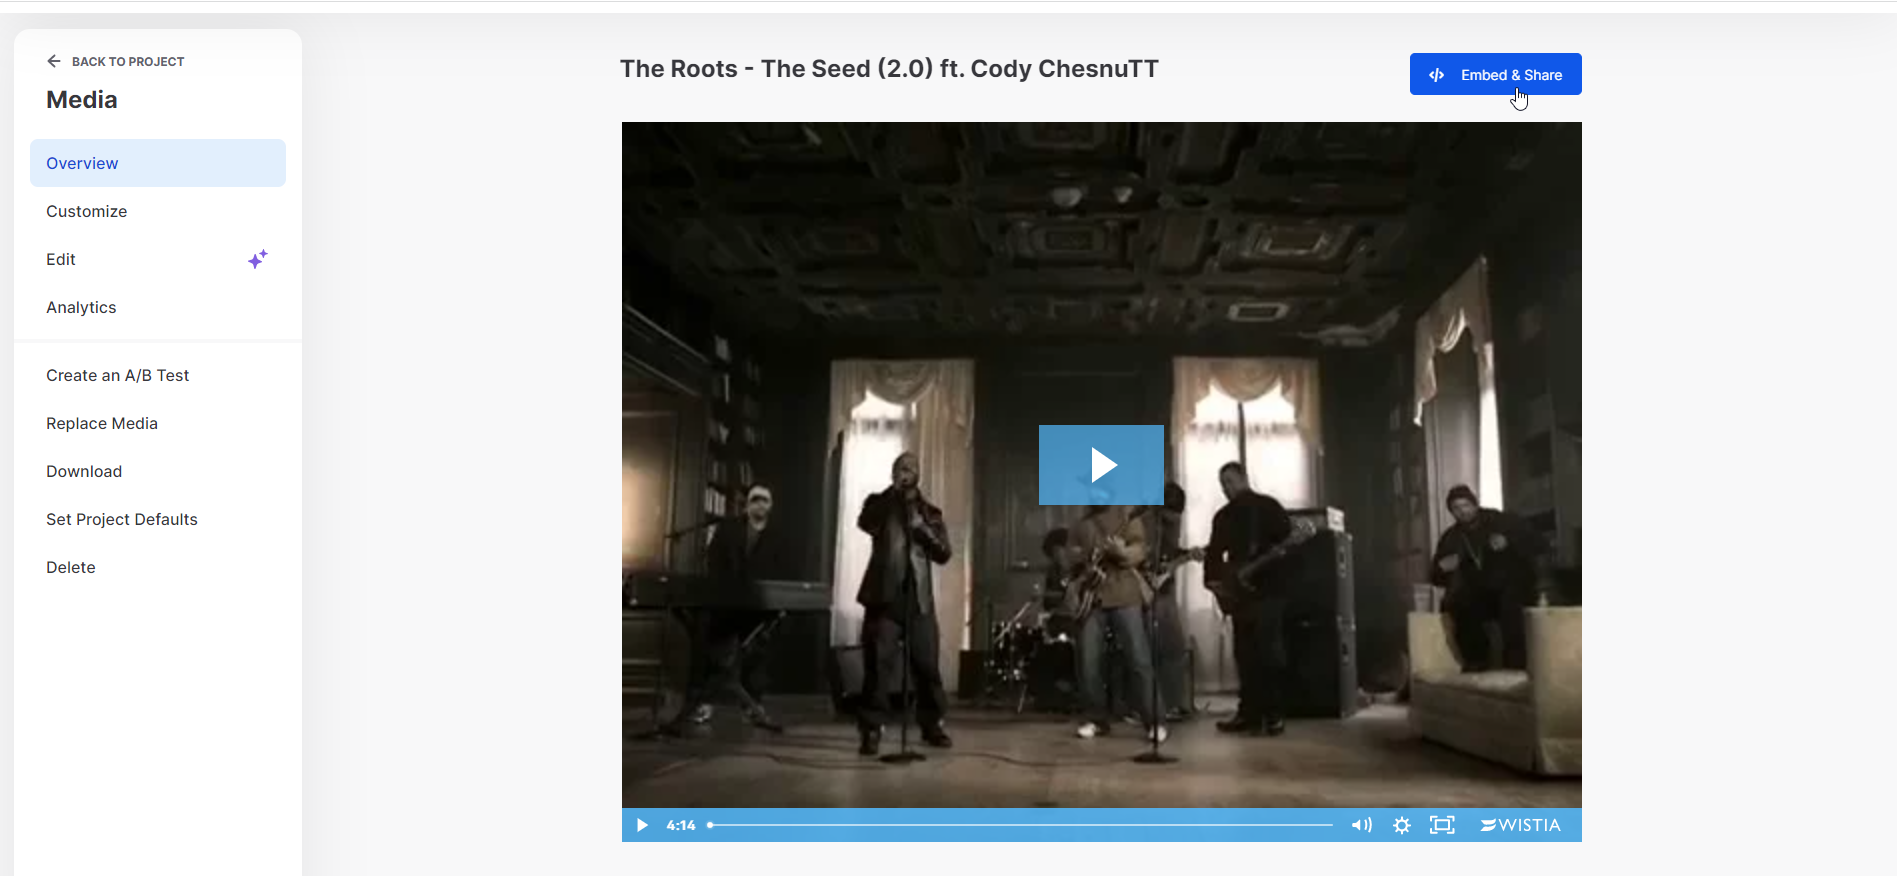
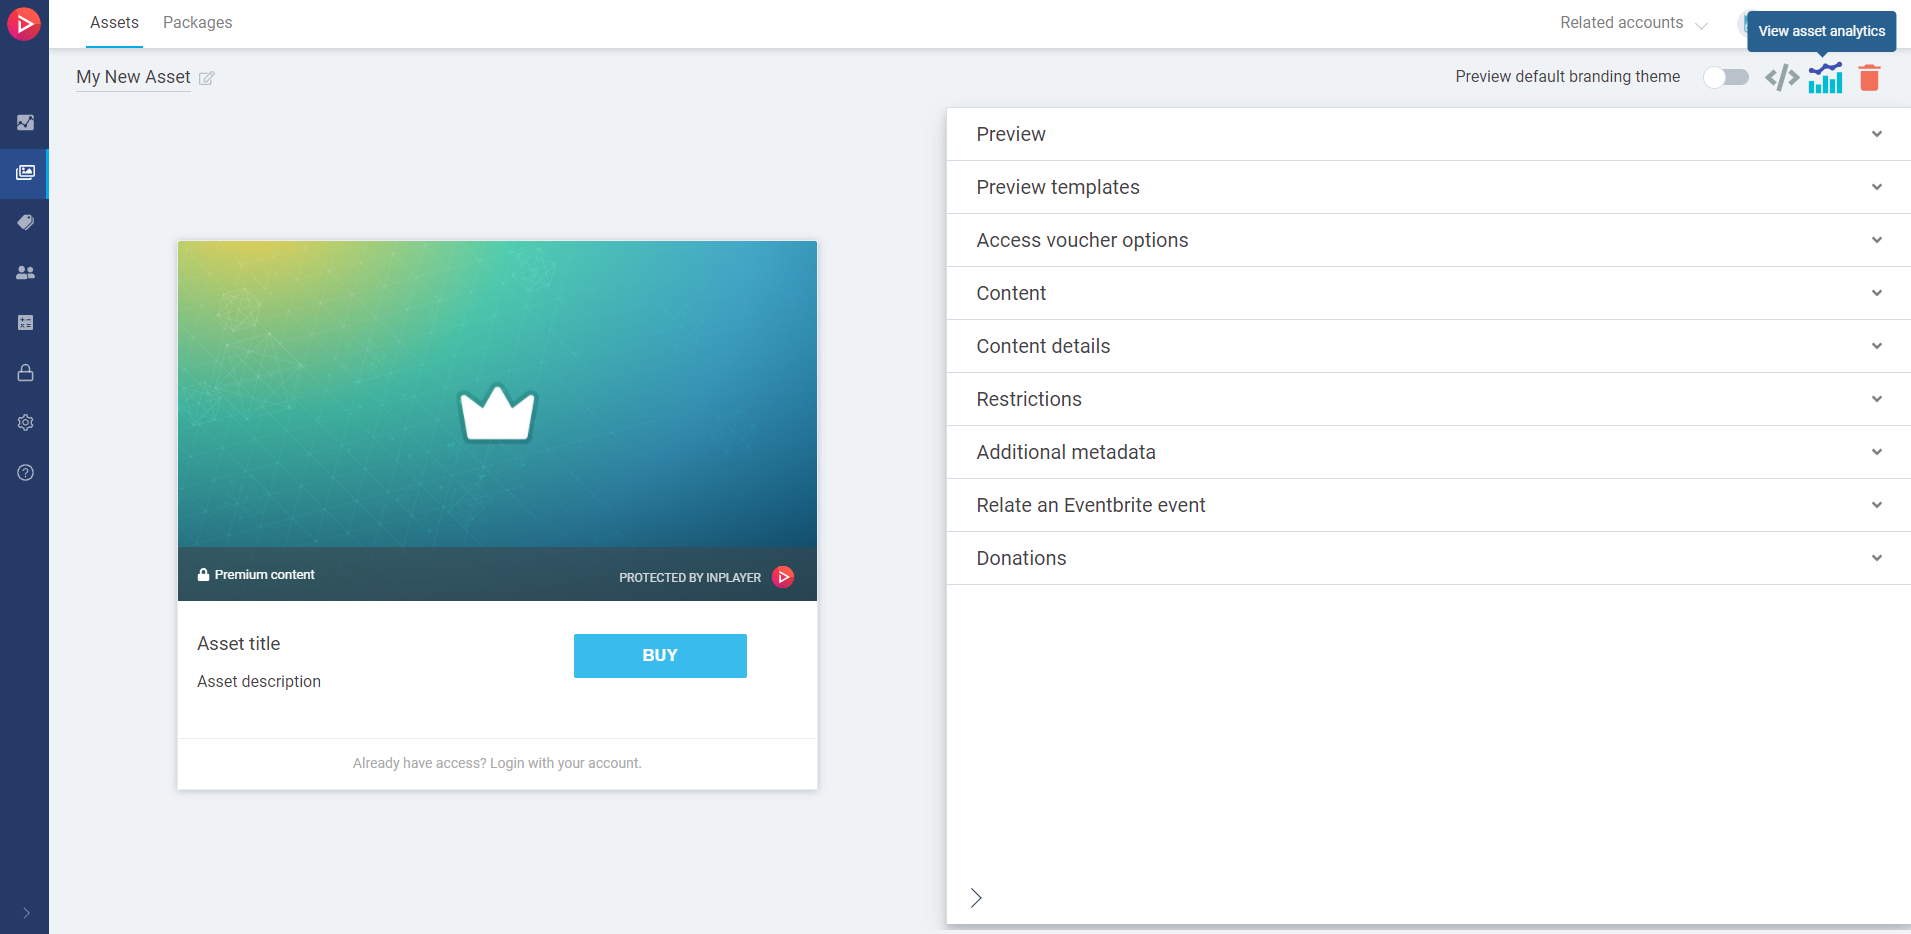
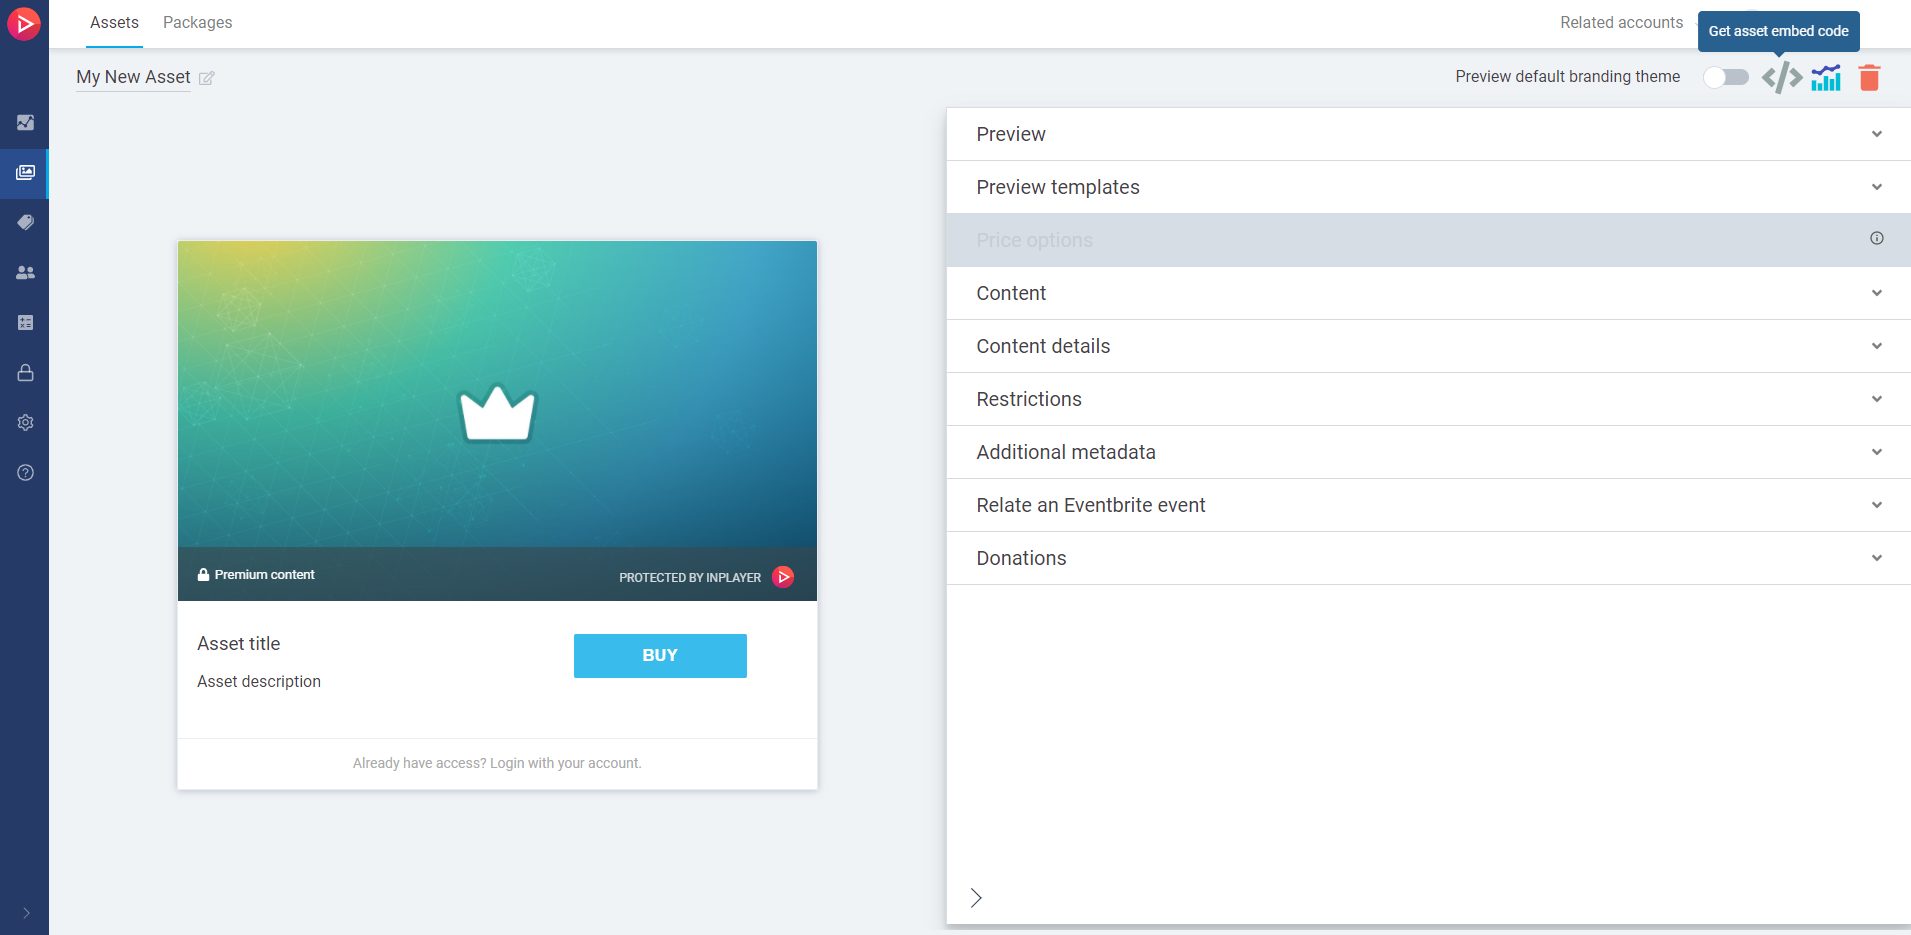
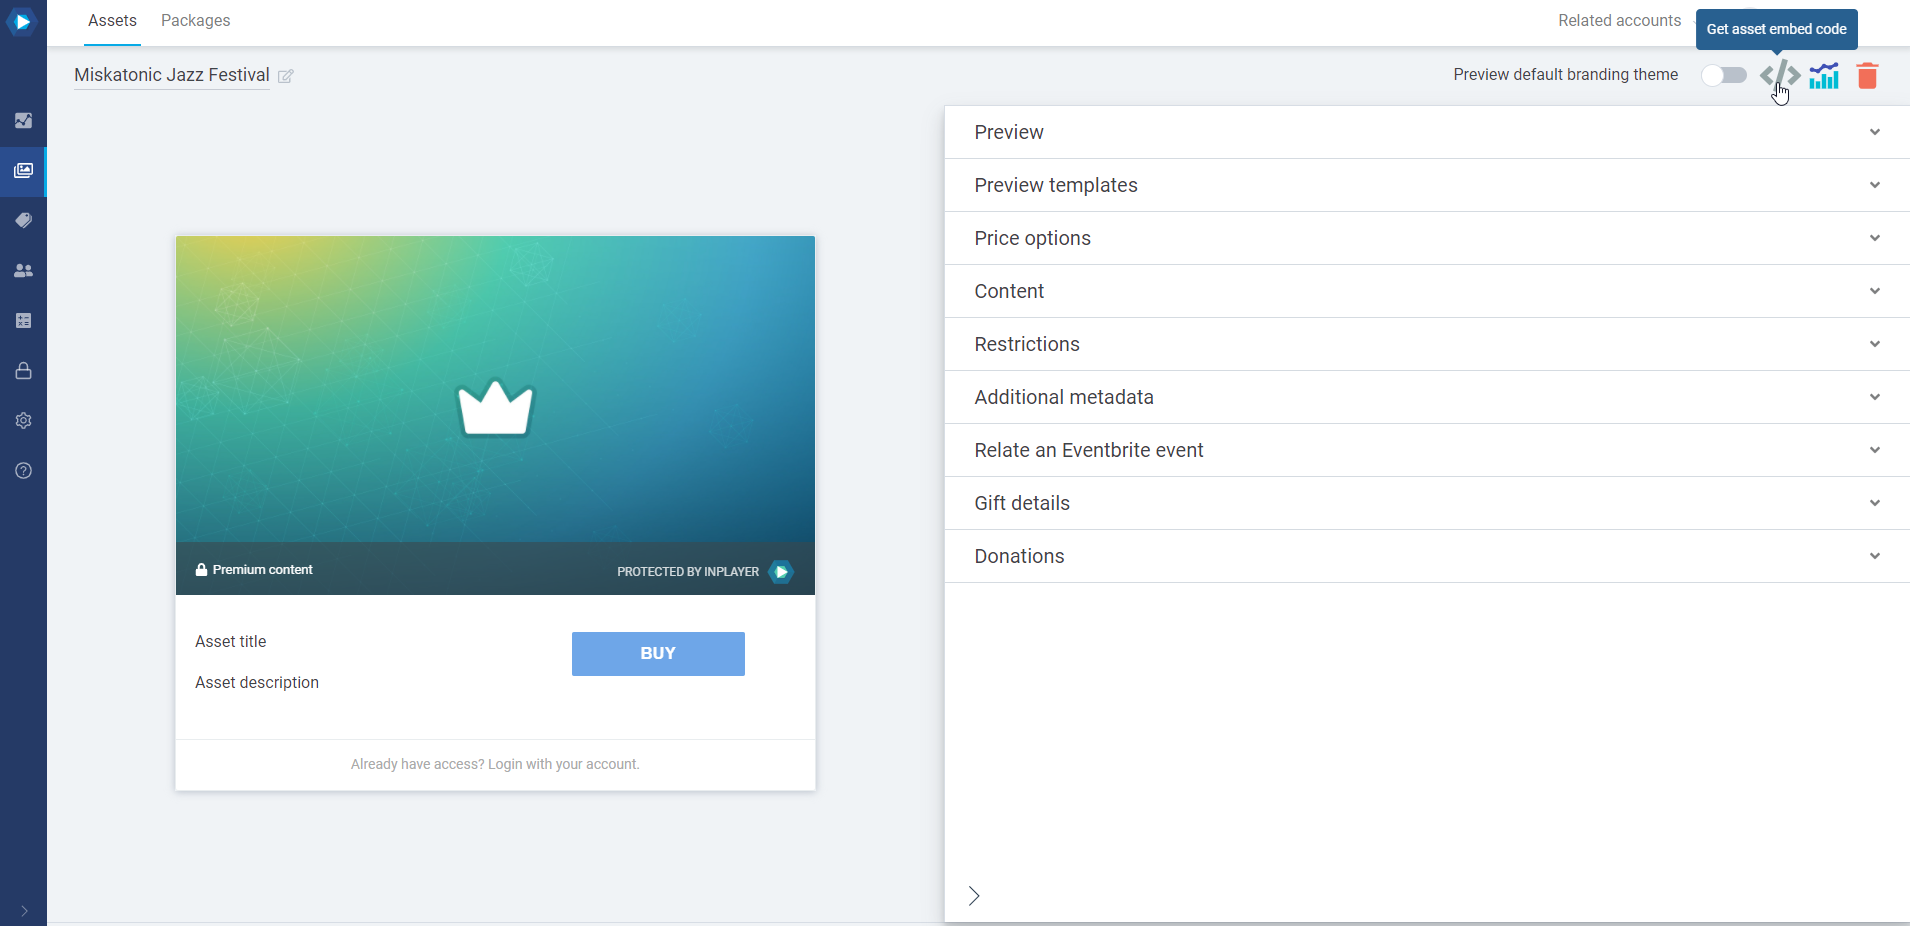
Once you’ve created your asset, it’s time to embed it on your website. For this, click on the Get asset embed code button at the top right.
A pop-up with the embed codes will appear.
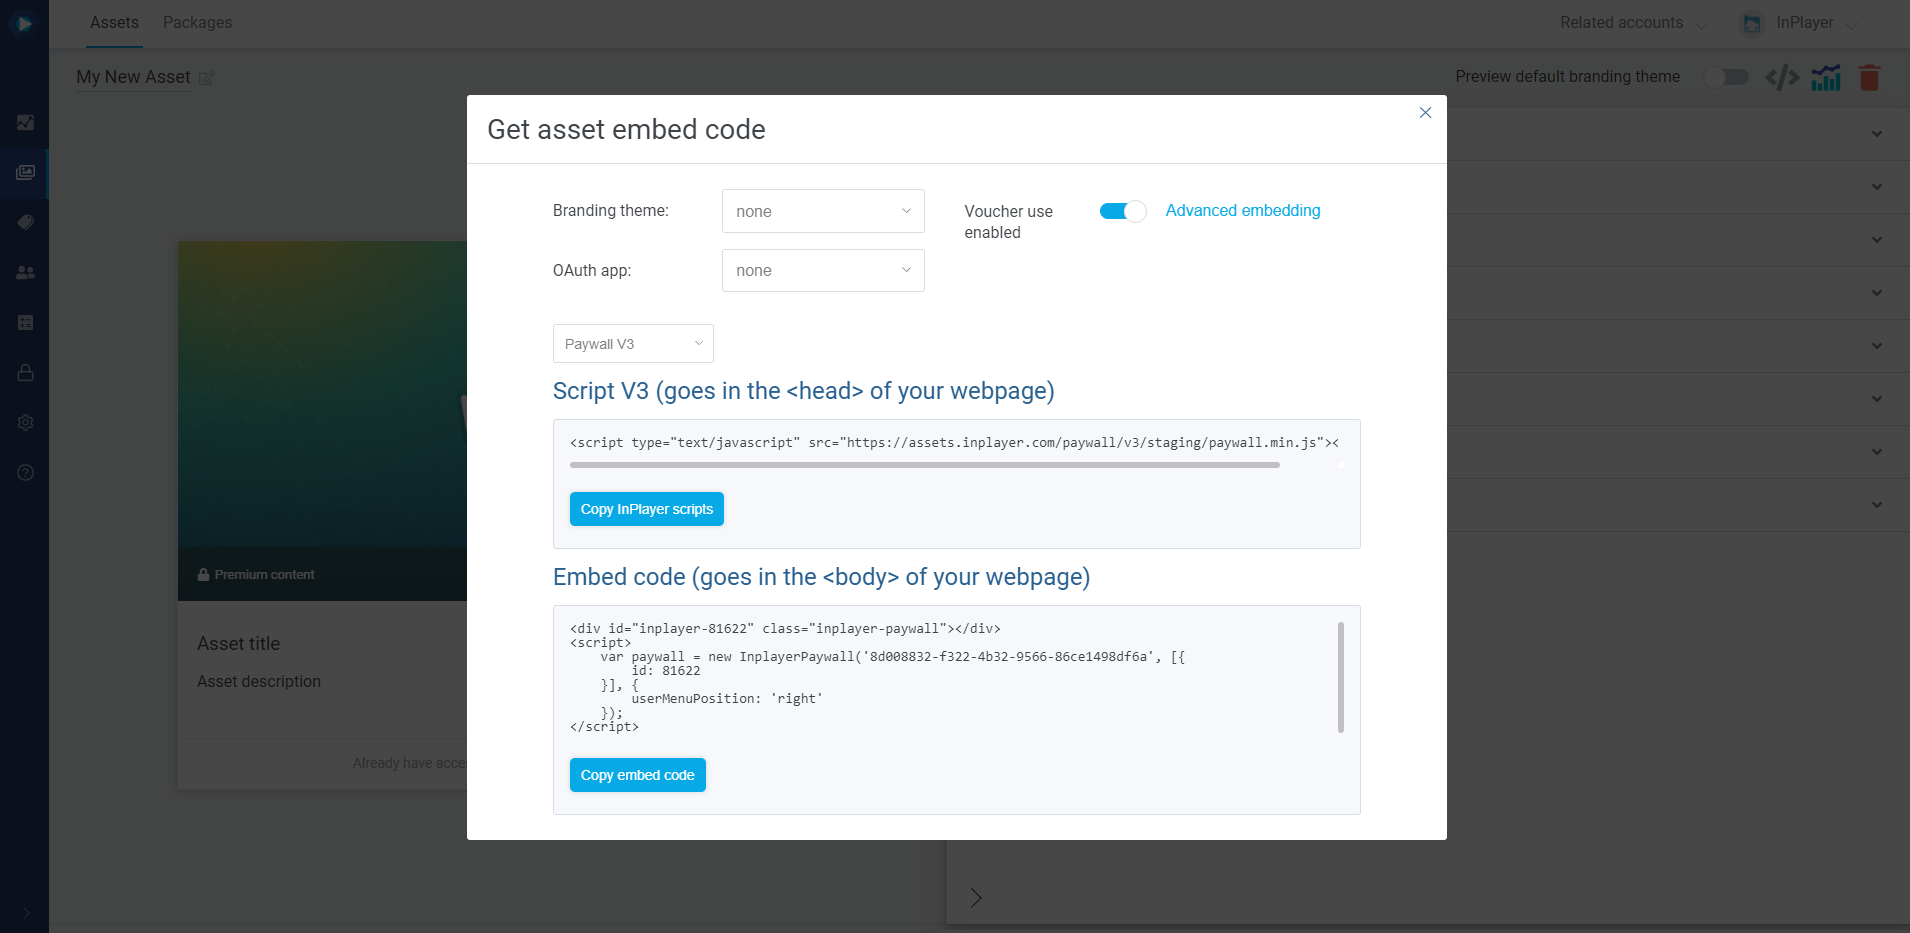
Here, you can set up the following settings:
Branding theme Select the branding theme you wish to use for the asset. Note that this option will only be available if you’ve already created a branding theme. Read this article for a guide on how to do this. If you do not select a branding theme here, the default theme will be applied.
OAuth app Select whether to use a custom OAuth app for the asset. This feature will group viewers that register an account on this asset into one user group. This is useful if you have multiple websites and you want to group viewers from each website into a separate group. Read this article to learn more about the OAuth feature.
Paywall version Select whether to use the Paywall V2 or Paywall V3 for the asset. These are the two versions of our paywall. We recommend always using Paywall V3 because it is the most up-to-date version.
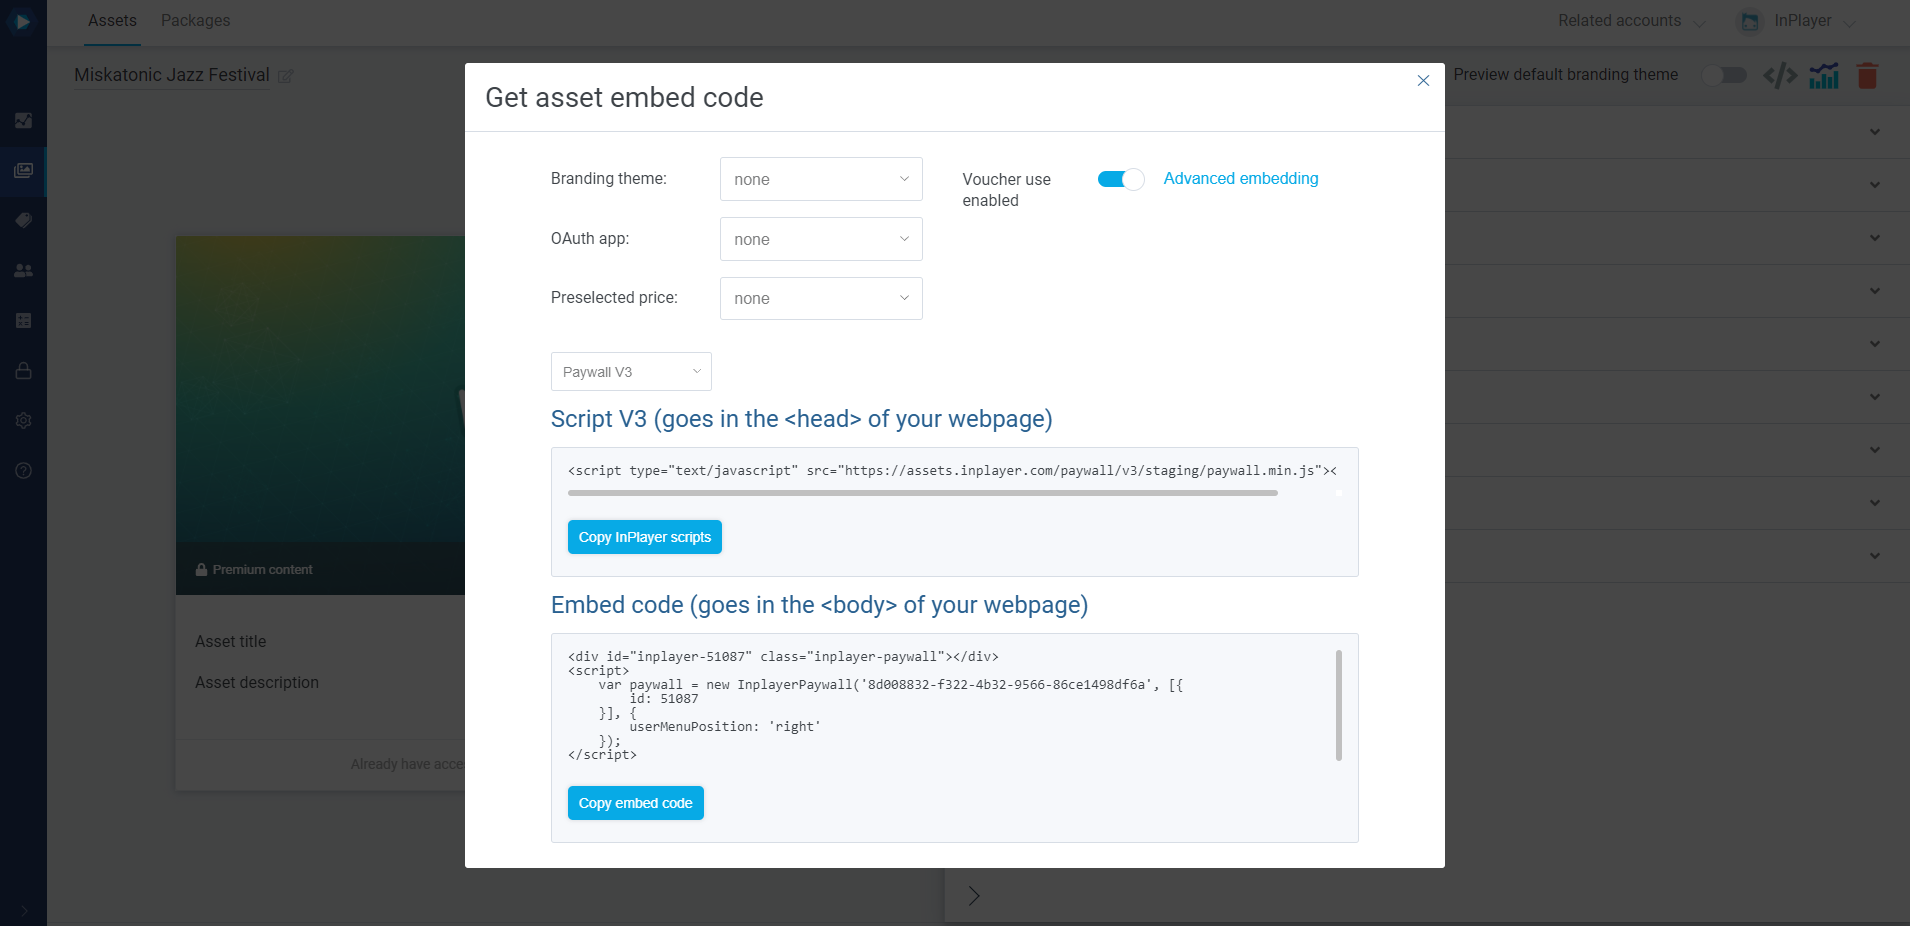
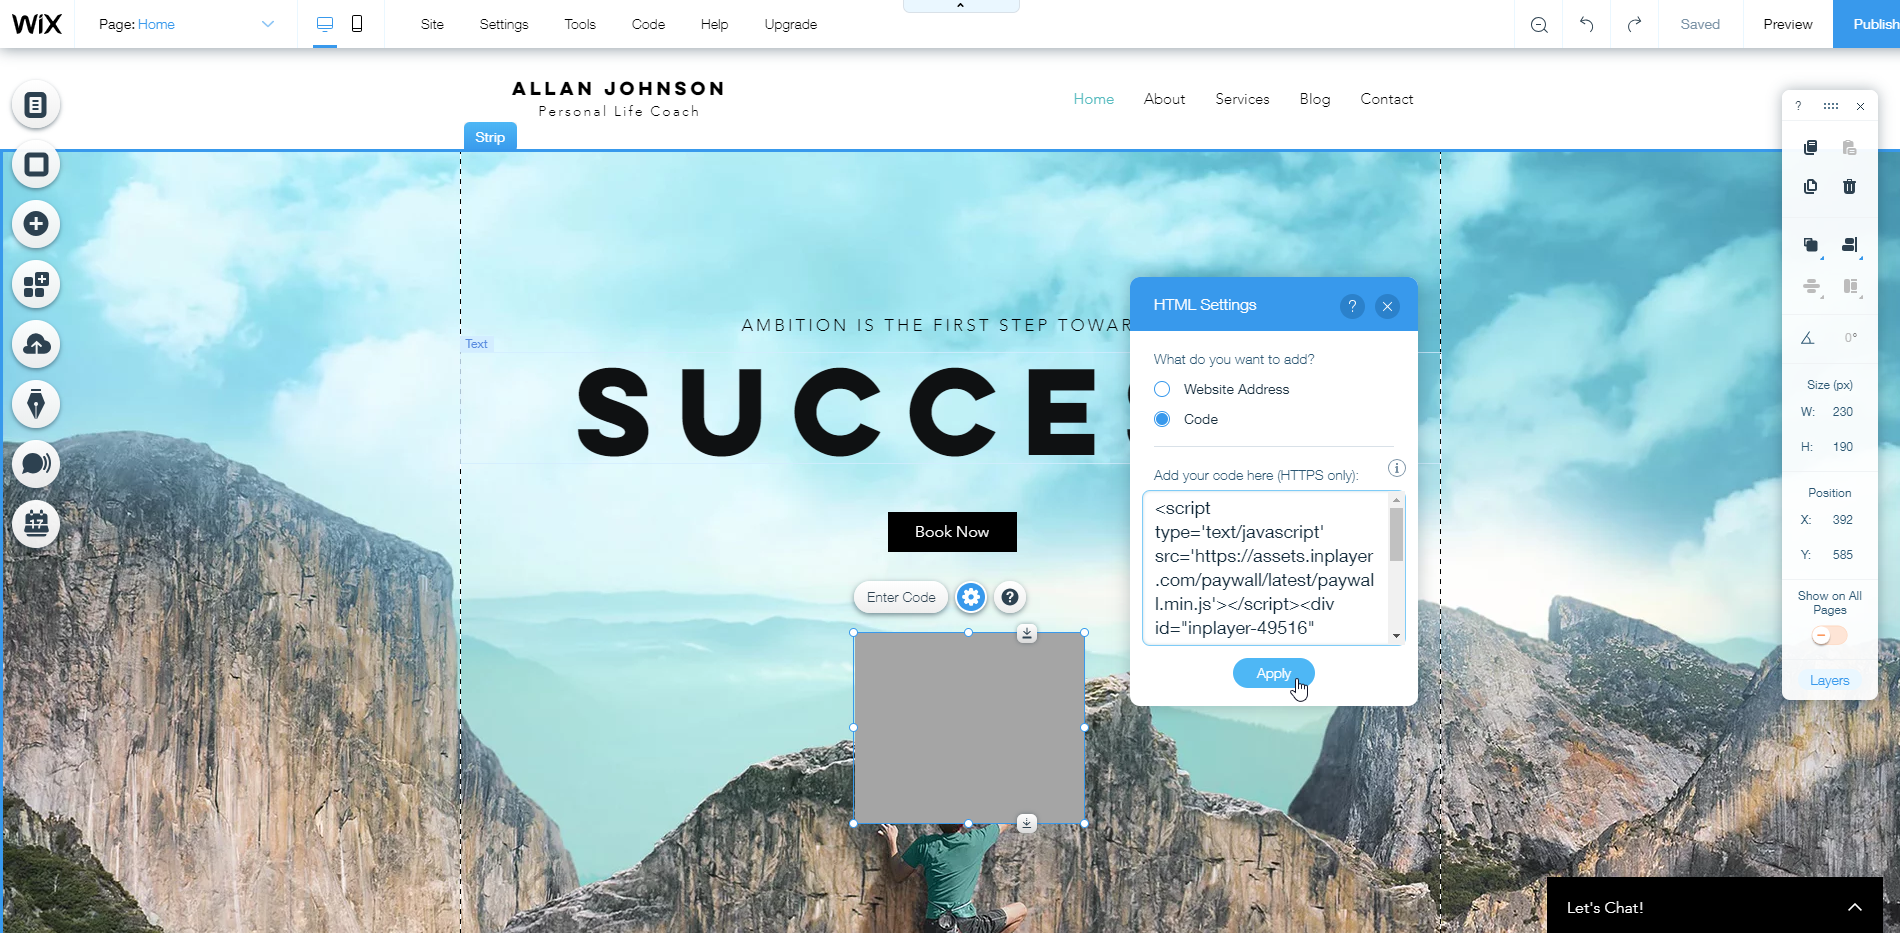
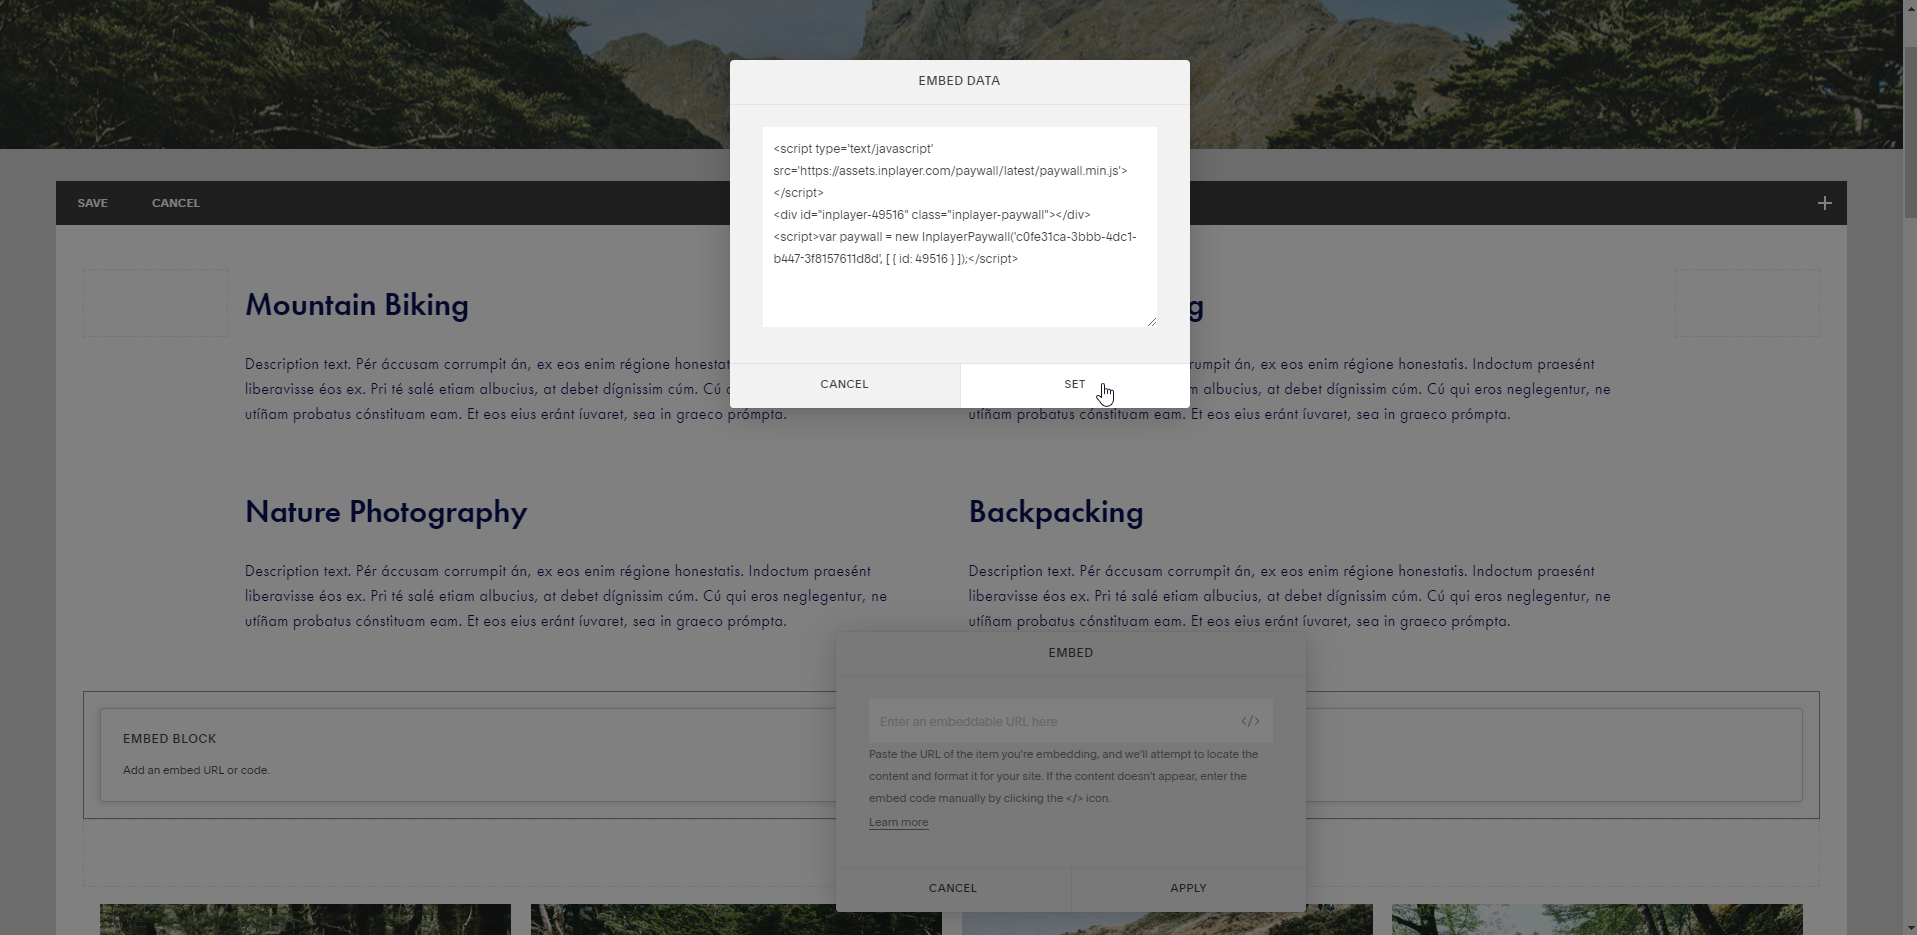
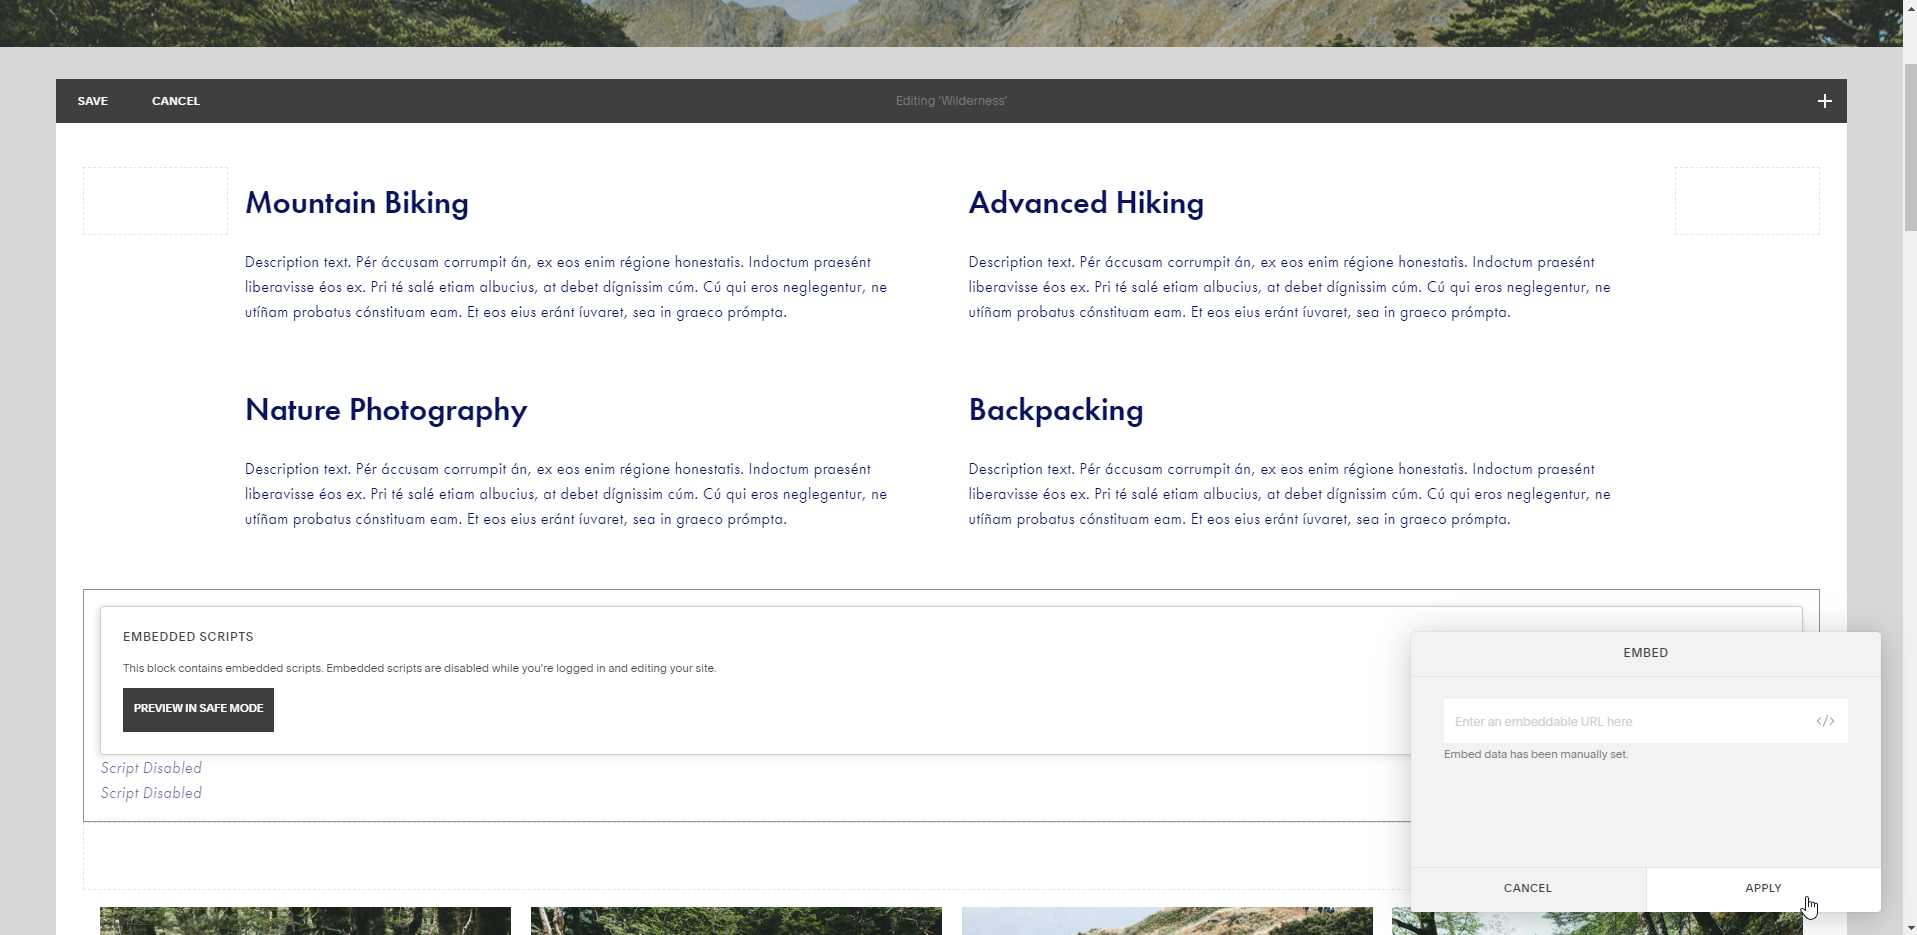
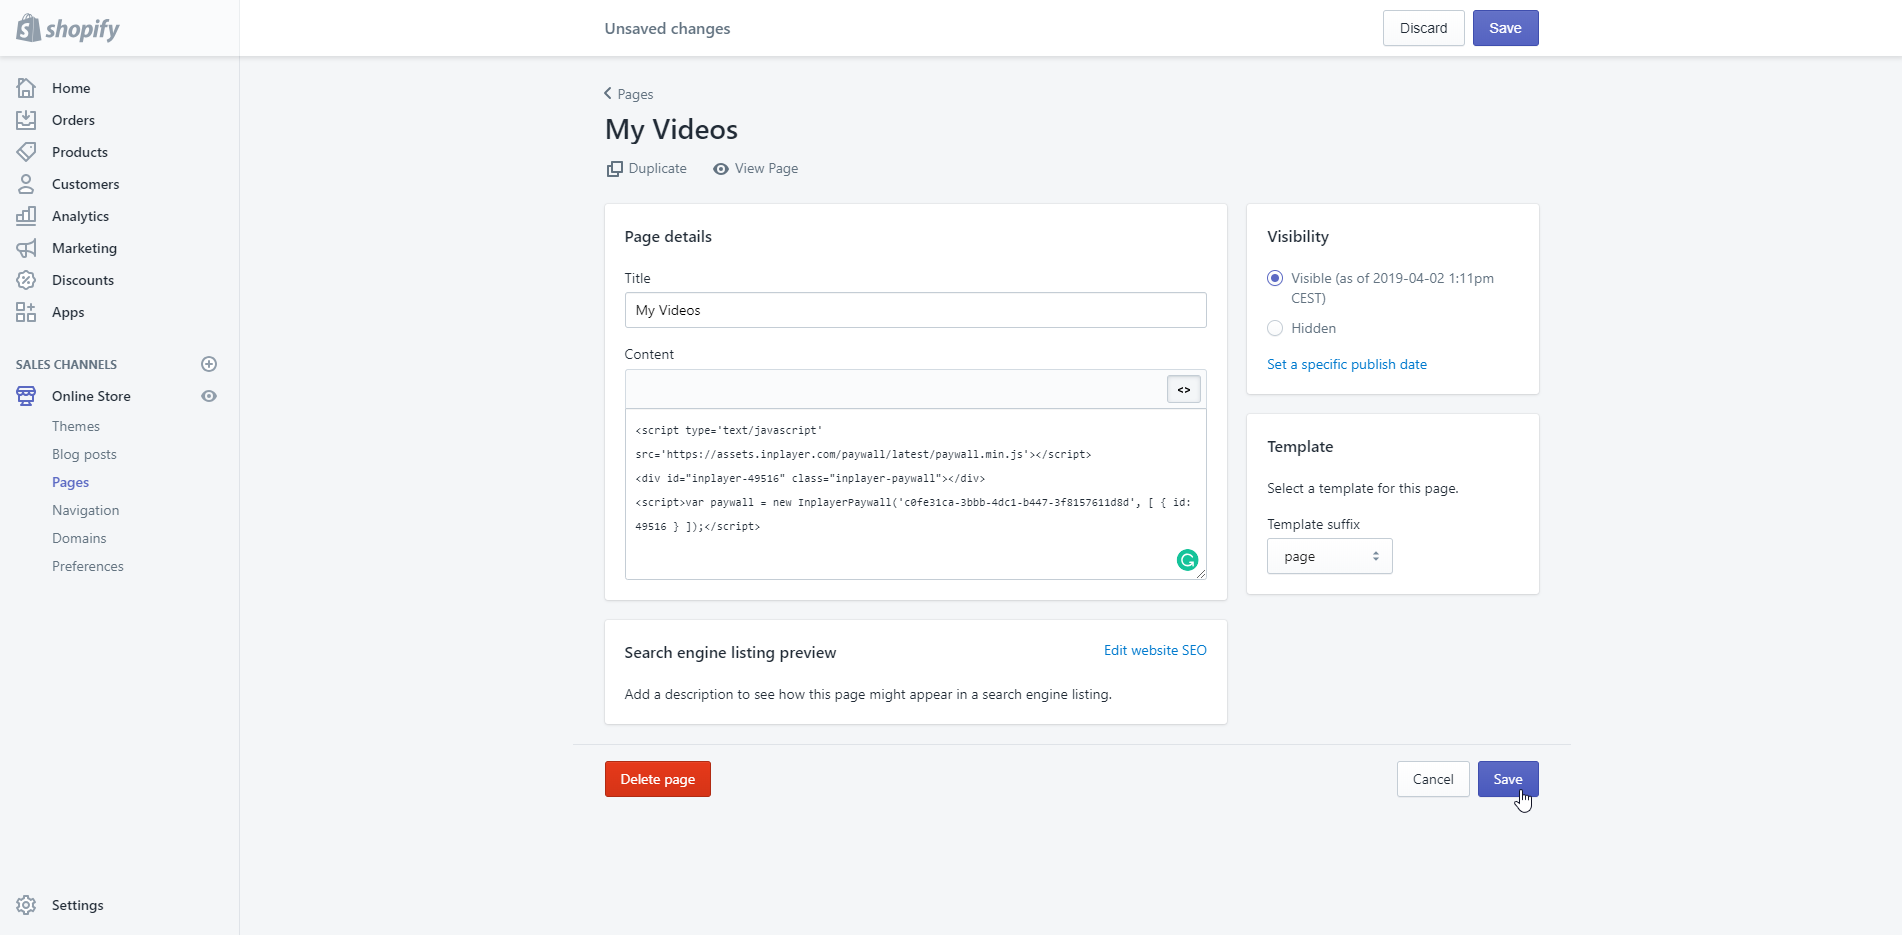
Once everything is set up, copy the InPlayer Script code and paste it into the <head> section of your webpage.
Then copy the Embed code and paste it into the <body> section of your webpage.
With that, your asset will appear on your page, and you are ready to start monetizing your content.
If you wish to have multiple assets on the same page, it is not very advisable that you just take the embed codes for all assets you wish to use and put them into the body of the web-page as-is. Instead, use the code below.
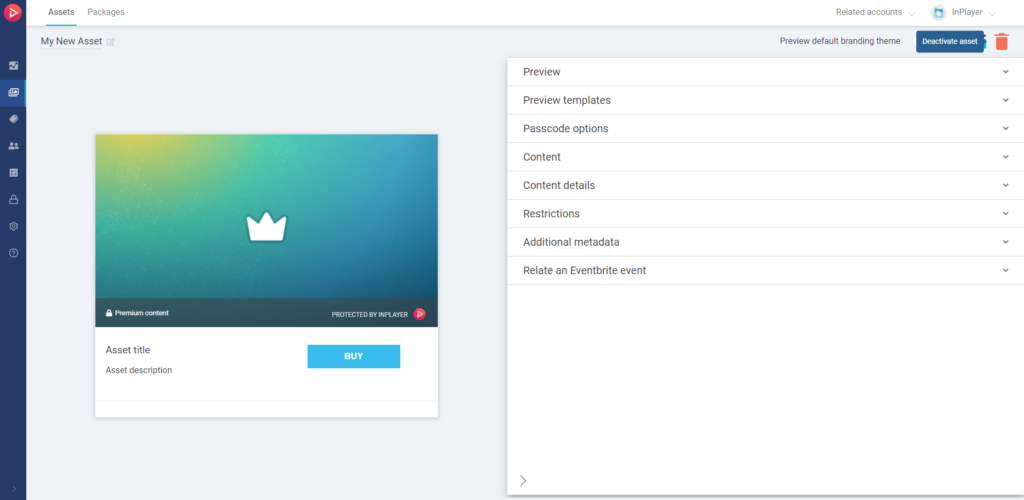
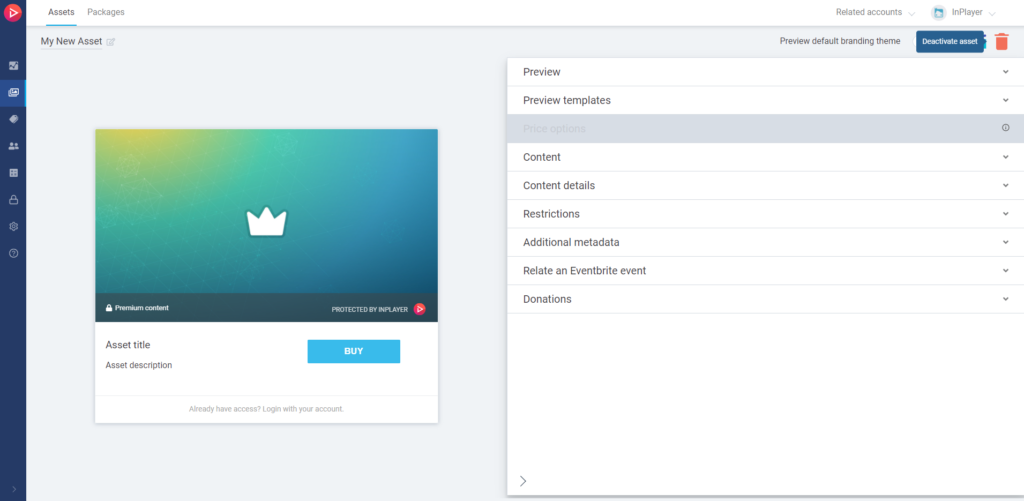
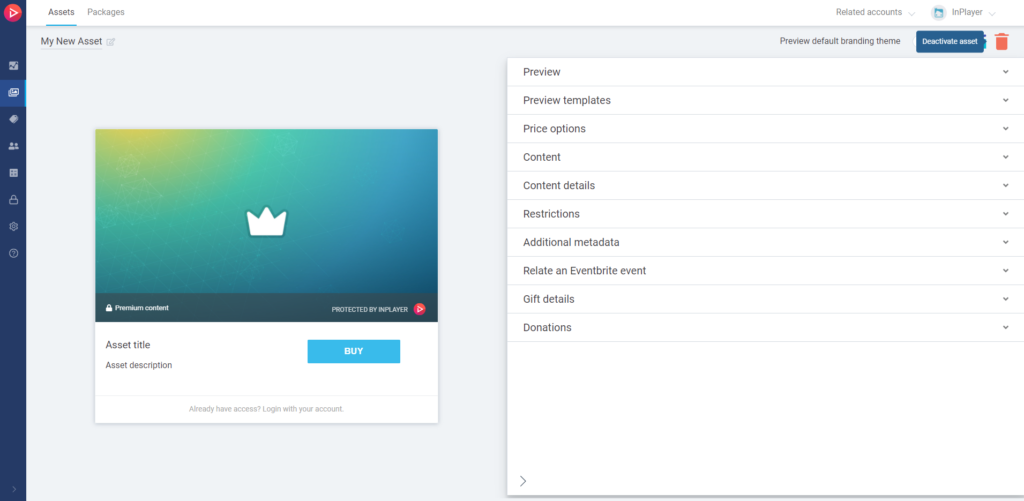
To deactivate an asset, just open it and click the button at the top right.
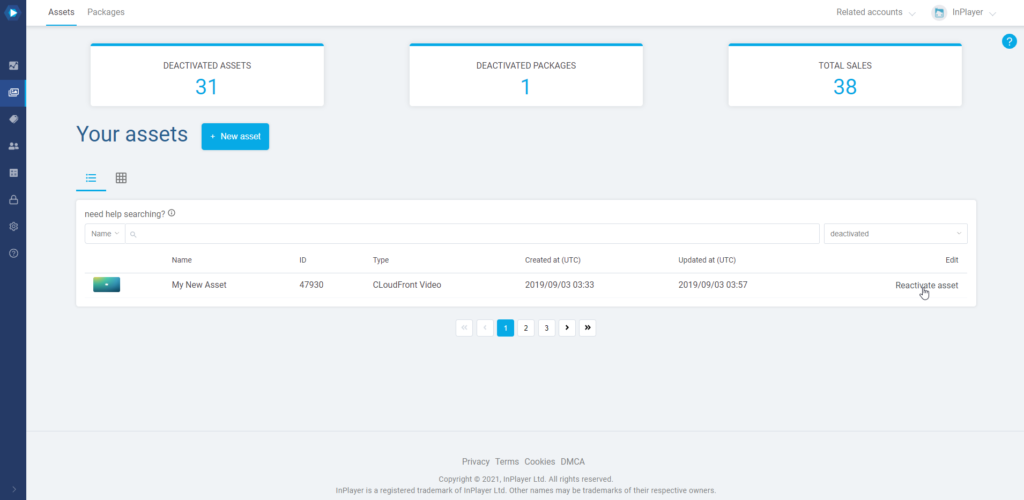
You can always bring a deactivated asset back by going to the Assets tab, selecting deactivated from the drop-down menu next to the search field, and clicking the Reactivate asset button on the asset you want to bring back.
When you go back to the active assets list, you will find the asset there.
That concludes our guide.
If you have any questions, don’t hesitate to contact us at clients@inplayer.com.
With Access voucheronly assets viewers will access the content by registering an account and using an access voucher code. No other type of access or payment will be possible.
In the Assets tab, click on New asset, and then on Custom creation.
Enter a Name for your asset. This will be the name of the asset in your InPlayer Dashboard. The viewers won’t see this.
Select Video or HTML depending on the type of content you are going to protect with the asset.
Video Use this if your content is videos that are hosted on one of the following platforms:
You can have only one video per Video asset.
HTML Use this if your content is videos that are hosted anywhere other than the above-mentioned platforms, or for non-video content. HTML is a universal asset and can be used for monetizing absolutely anything.
You can put as much content as you want in a single HTML asset, but we would still recommend sticking to only one piece of content per asset.
Once you select your asset type, click Next.
Under Select content category choose one of the following:
Live – for video content that will be livestreamed. This includes live streams where you plan on publishing a VOD replay afterwards.
VOD – for Video-on-demand-only content that isn’t going to be live streamed.
Other – for content other than video, or for test assets.
Click Next.
Under Select access type, choose Registration, then Access voucheronly and click Next.
If you are creating a Video asset hover over the platform where your videos are hosted, select one of the following, and click Next.
add one video – This creates a regular asset where you can add your video. You can select which video to use in the asset settings.
quick add – This creates an asset for a video and copies the title, description, and preview image for that video from Brightcove. You can select the video right now.
sync all videos – With this, you can create assets for all videos in your account at once. Each video is created as a separate asset. (not available for some platforms)
If you are creating an HTML asset you will automatically skip the above step.
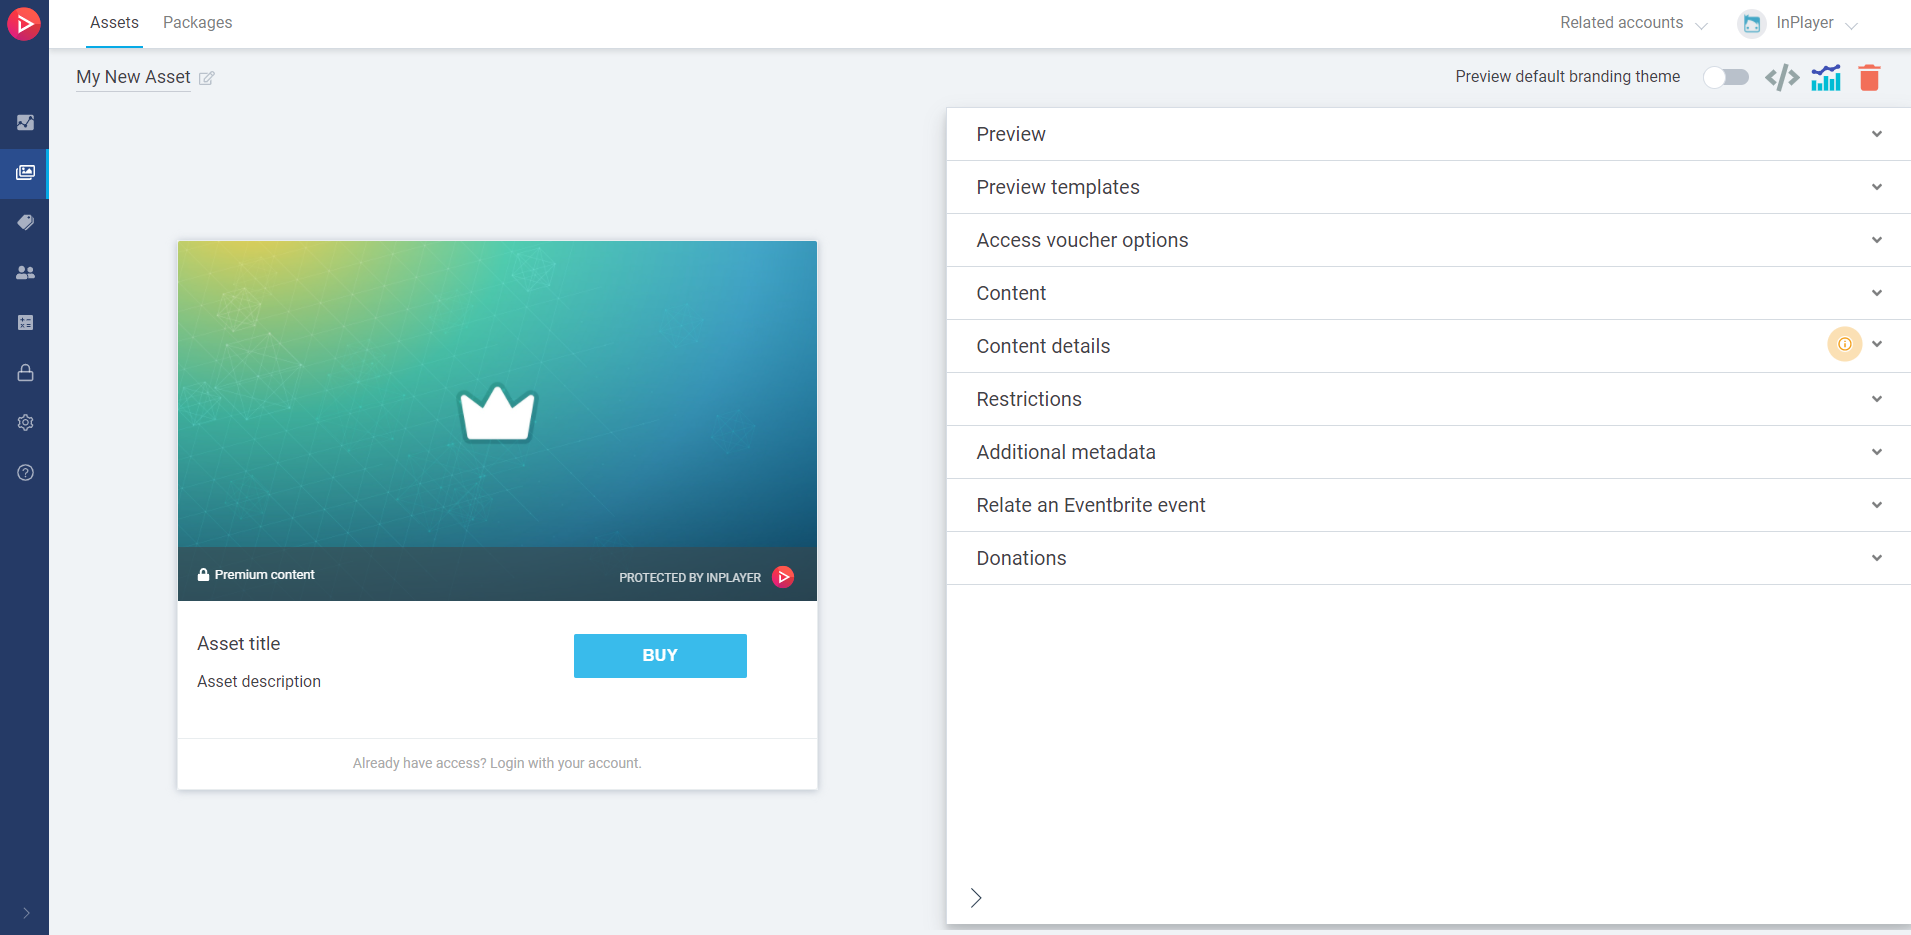
On the new page, you can set up your asset’s properties.
The right side of the screen is where you can set everything up, and the left side provides a preview where you can see how the various sections of the assets will look on your webpage.
In the Preview section, set up the preview title, description, and thumbnail as well as the text for the BUY button. These will be the details that will appear on the actual asset preview when you embed it on your webpage.
Note that the Title will also appear on the final payment form on the paywall, as well as the notification email your viewers will receive.
After setting everything up, make sure to click the Save button in the bottom right corner.
In the Preview templates section, you can choose how the asset will appear when you embed it on your webpage.
You can go with the default preview, or select one from the list.
If you’ve set up a default branding theme in your dashboard Settings, where you’ve selected a default preview template, and you want to use that template for this asset as well, make sure to check the Use preview template from the default branding theme option.
If, however, you wish to use a separate preview template for this asset, despite the fact that you have set up a default one in your branding theme, make sure to leave the Use preview template from the default branding theme option unchecked.
When choosing your preview template, you can click on the View fullscreen button at the top left to see how that template would look on various screen sizes.
After setting everything up, make sure to click the Save button in the bottom right corner.
If you have set up a default branding theme in the Settings (more on this here), you can see how the asset will look like once the theme will be applied to it.
To do this, just click the Preview default branding theme toggle.
In the Content section, enter the content you wish to monetize depending on the type of asset you’ve created (HTML or Video). See the list below for help in doing this.
HTML
In the Content section, simply paste the embed code of the content you are trying to monetize.
You can paste as many embed codes as you want in a single HTML asset, but we would recommend sticking to only one piece of content per asset.
After setting everything up, make sure to click the Save button in the bottom right corner.
In the Content section, select the Brightcove video you wish to use. Either click on the video from the collection or enter the Video ID in the field.
If you used the quick add or sync all videos option during the asset creation, this will already be filled in.
After setting everything up, make sure to click the Save button in the bottom right corner.
Cloudflare
In the Content section, enter the Video ID of the Cloudflare video you wish to use.
To get the Cloudflare Video ID, please contact Cloudflare support via the Cloudflare Help Center.
After setting everything up, make sure to click the Save button in the bottom right corner.
DaCast
For DaCast videos, please use the HTML type asset for now. This is due to some updates that are being done on the DaCast platform. You can convert a Video asset to an HTML type asset by clicking Change content type in the asset Content section. Viewer accesses will not be affected by this conversion.
In the Content section, enter the Content ID of the video you wish to use. Read below on how to find this.
After setting everything up, make sure to click the Save button in the bottom right corner.
Note that you can only protect individual videos. You cannot protect a DaCast “Package”, i.e. a playlist of multiple videos created on the DaCast platform. To do this, please use the HTML asset type, and put the embed code of the DaCast Package inside the Content section. Alternatively, you can create a Package by using InPlayer’s own Package feature. Read more about that here.
How to find the Content ID
To get the Content ID for a video, just go to your DaCast account and open the video you want to monetize.
For the Player Id, under Players, go to Configurations and open the player you want to use. The Player Id will be listed there.
For the Player Token, under Players, go to Tokens. You can create a new token or use a pre-existing one.
For the Source Id, go to Videos and open the video you want to use.
You can get the Source Id from the URL of the video in your browser’s address bar. In the example URL below, the Source Id is marked with bold: https://flowplayer.com/app/videos/5c47dc7f-8cc7-4af5-b02a-bdf9ff725aa2
JW Player
Make sure you have integrated your JW Player account Property before setting up the asset content. Also, keep in mind that if you change the integration to another Property after having created the assets, you will have to re-configure the below mentioned settings in all assets (Insert new IDs, select new Players, etc).
In the Content section, select the Type of video between VOD, Instant Live, Broadcast Live. If you used the quick add option during the asset creation, this will already be filled out.
VOD For this, you need to use the Video ID of the JW Player video you wish to protect, and also select a Player. Read below on how to find the Video ID.
Instant Live For this, you need to use the Channel ID of the JW Player Instant Live channel you wish to protect, and also select a Player. Read below on how to find the Channel ID. Note that if you wish to publish the VOD replay once the stream ends, you need to come back to the asset, change the Type to VOD, and enter the Video IDof the VOD video.
Broadcast Live For this, you need to use the Stream ID of the JW Player Broadcast Live channel you wish to protect, and also select a Player. Read below on how to find the Stream ID. Note that if you wish to publish the VOD replay once the stream ends, you need to come back to the asset, change the Type to VOD, and enter the Video ID of the VOD video.
After setting everything up, make sure to click the Save button in the bottom right corner.
How to find the Video ID
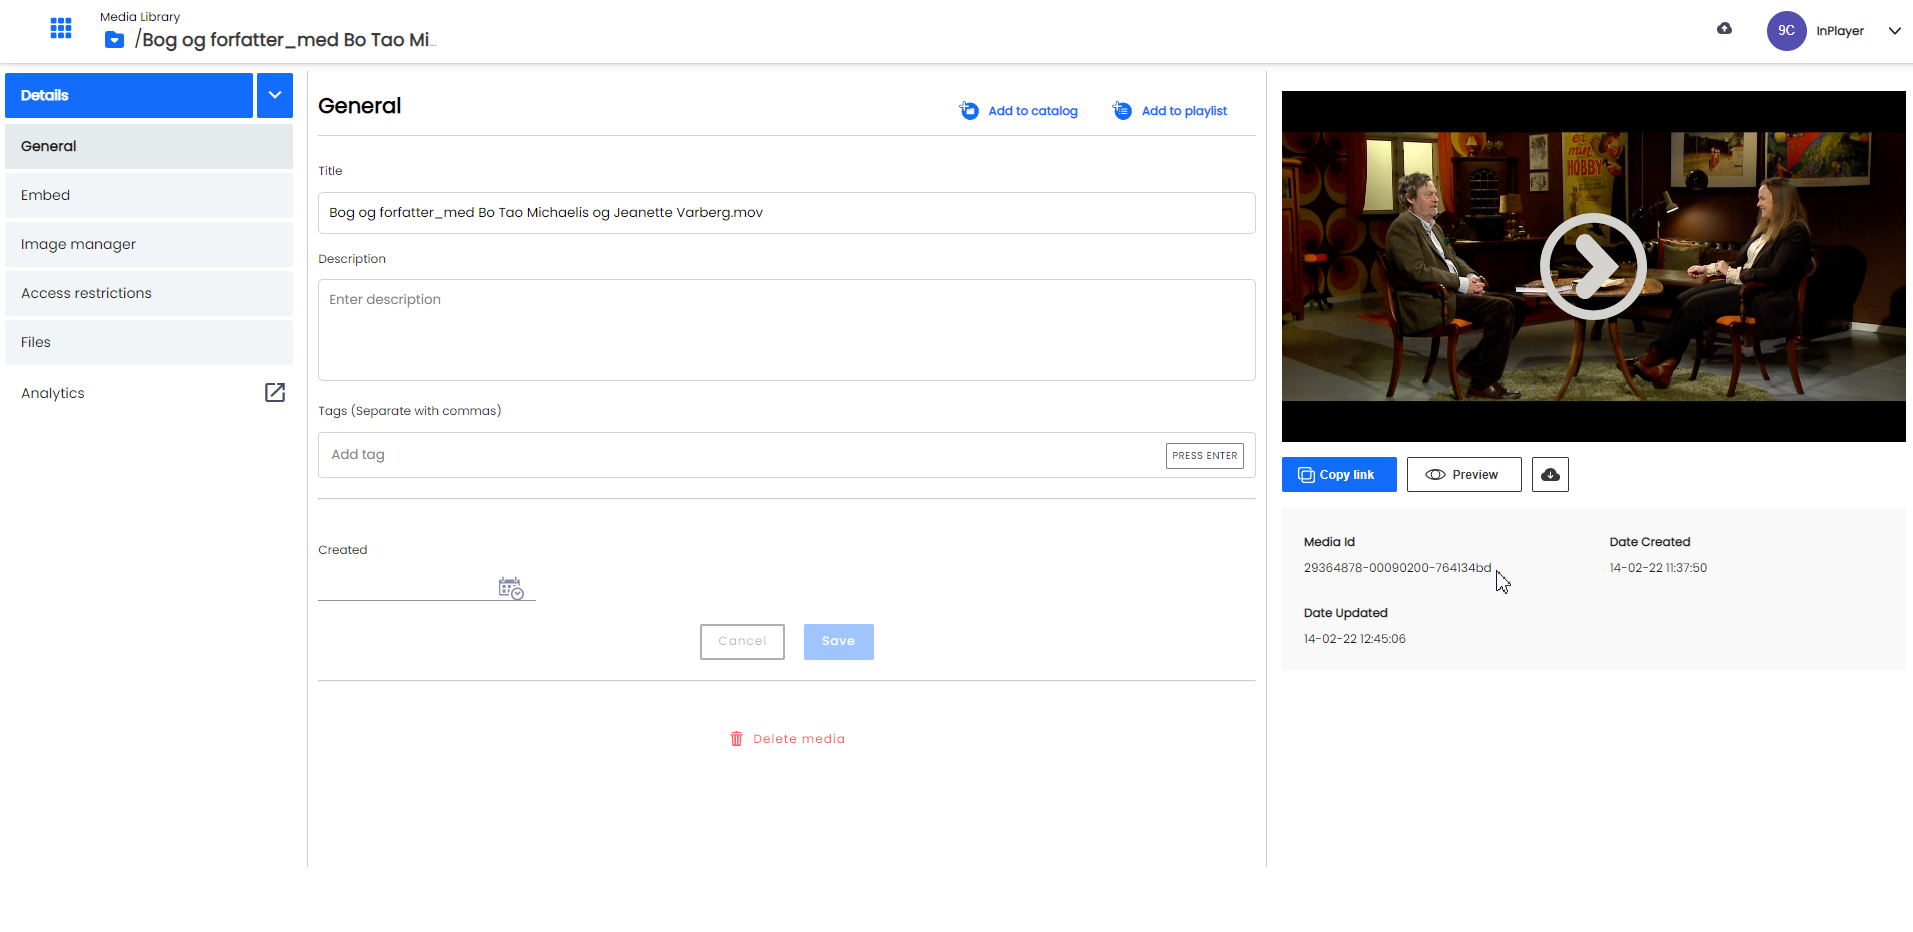
Log into your JW Player account, go to Media Library, and open the video you wish to use.
You’ll find the Media ID in the Media Summary section above the player preview.
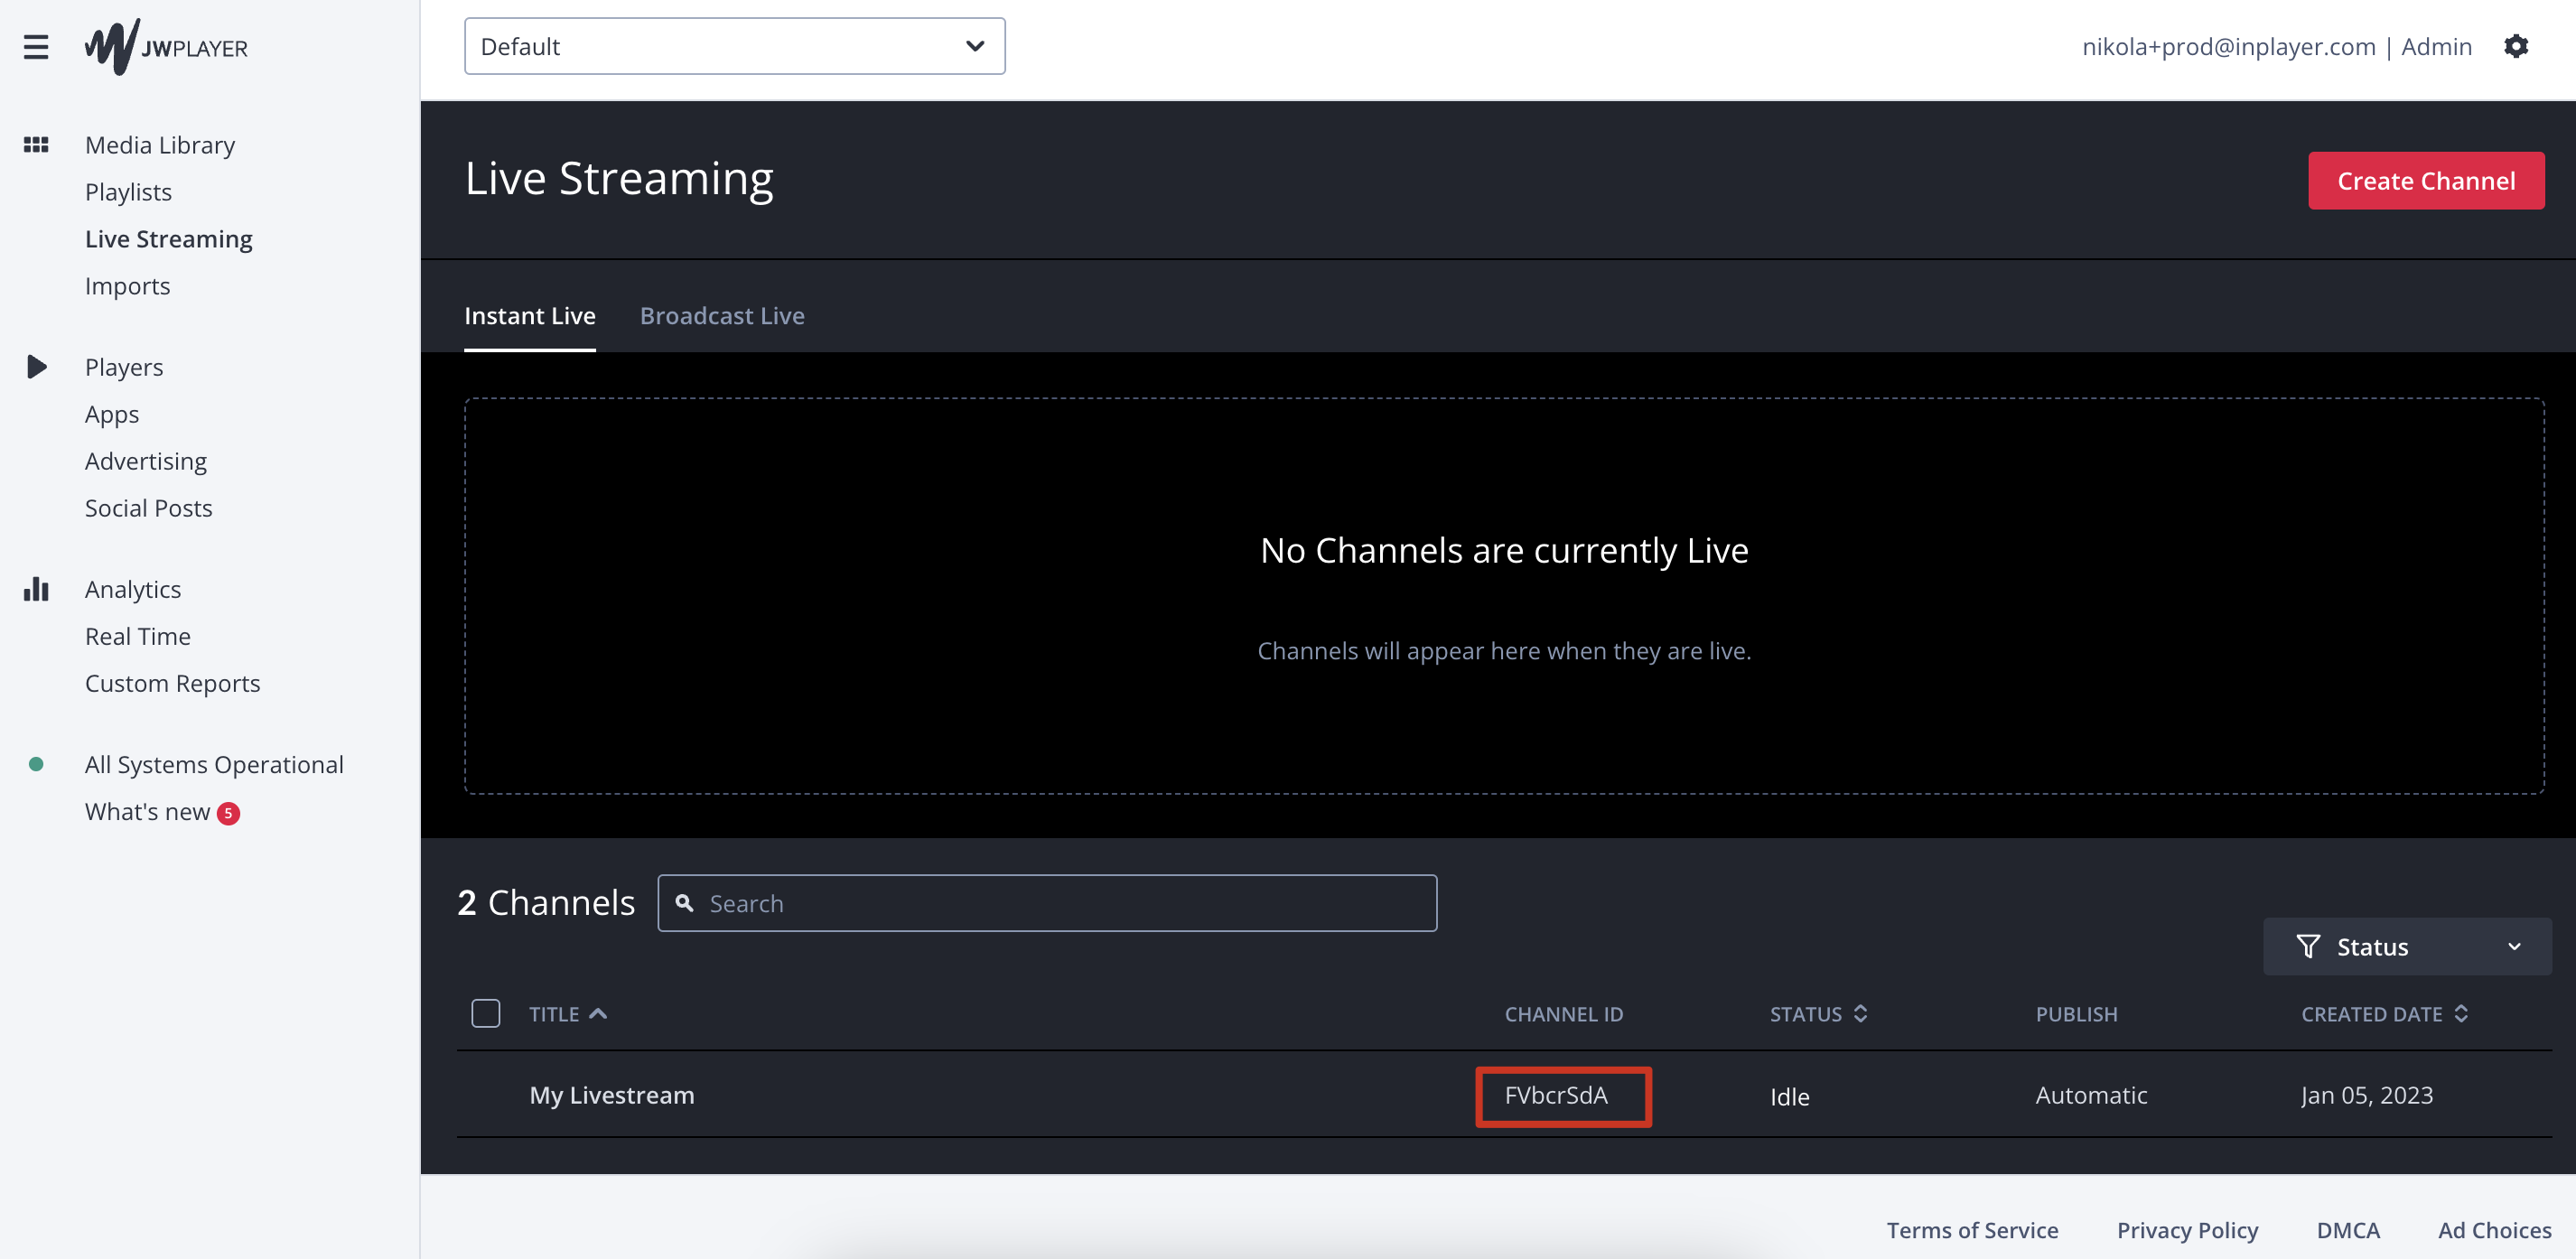
How to find the Channel ID
Log into your JW Player account, go to Live Streaming and then to the Instant Live tab.
In the channel list, locate the channel you’ll use for your event.
The Channel ID will be stated in the CHANNEL ID row.
How to find the Stream ID
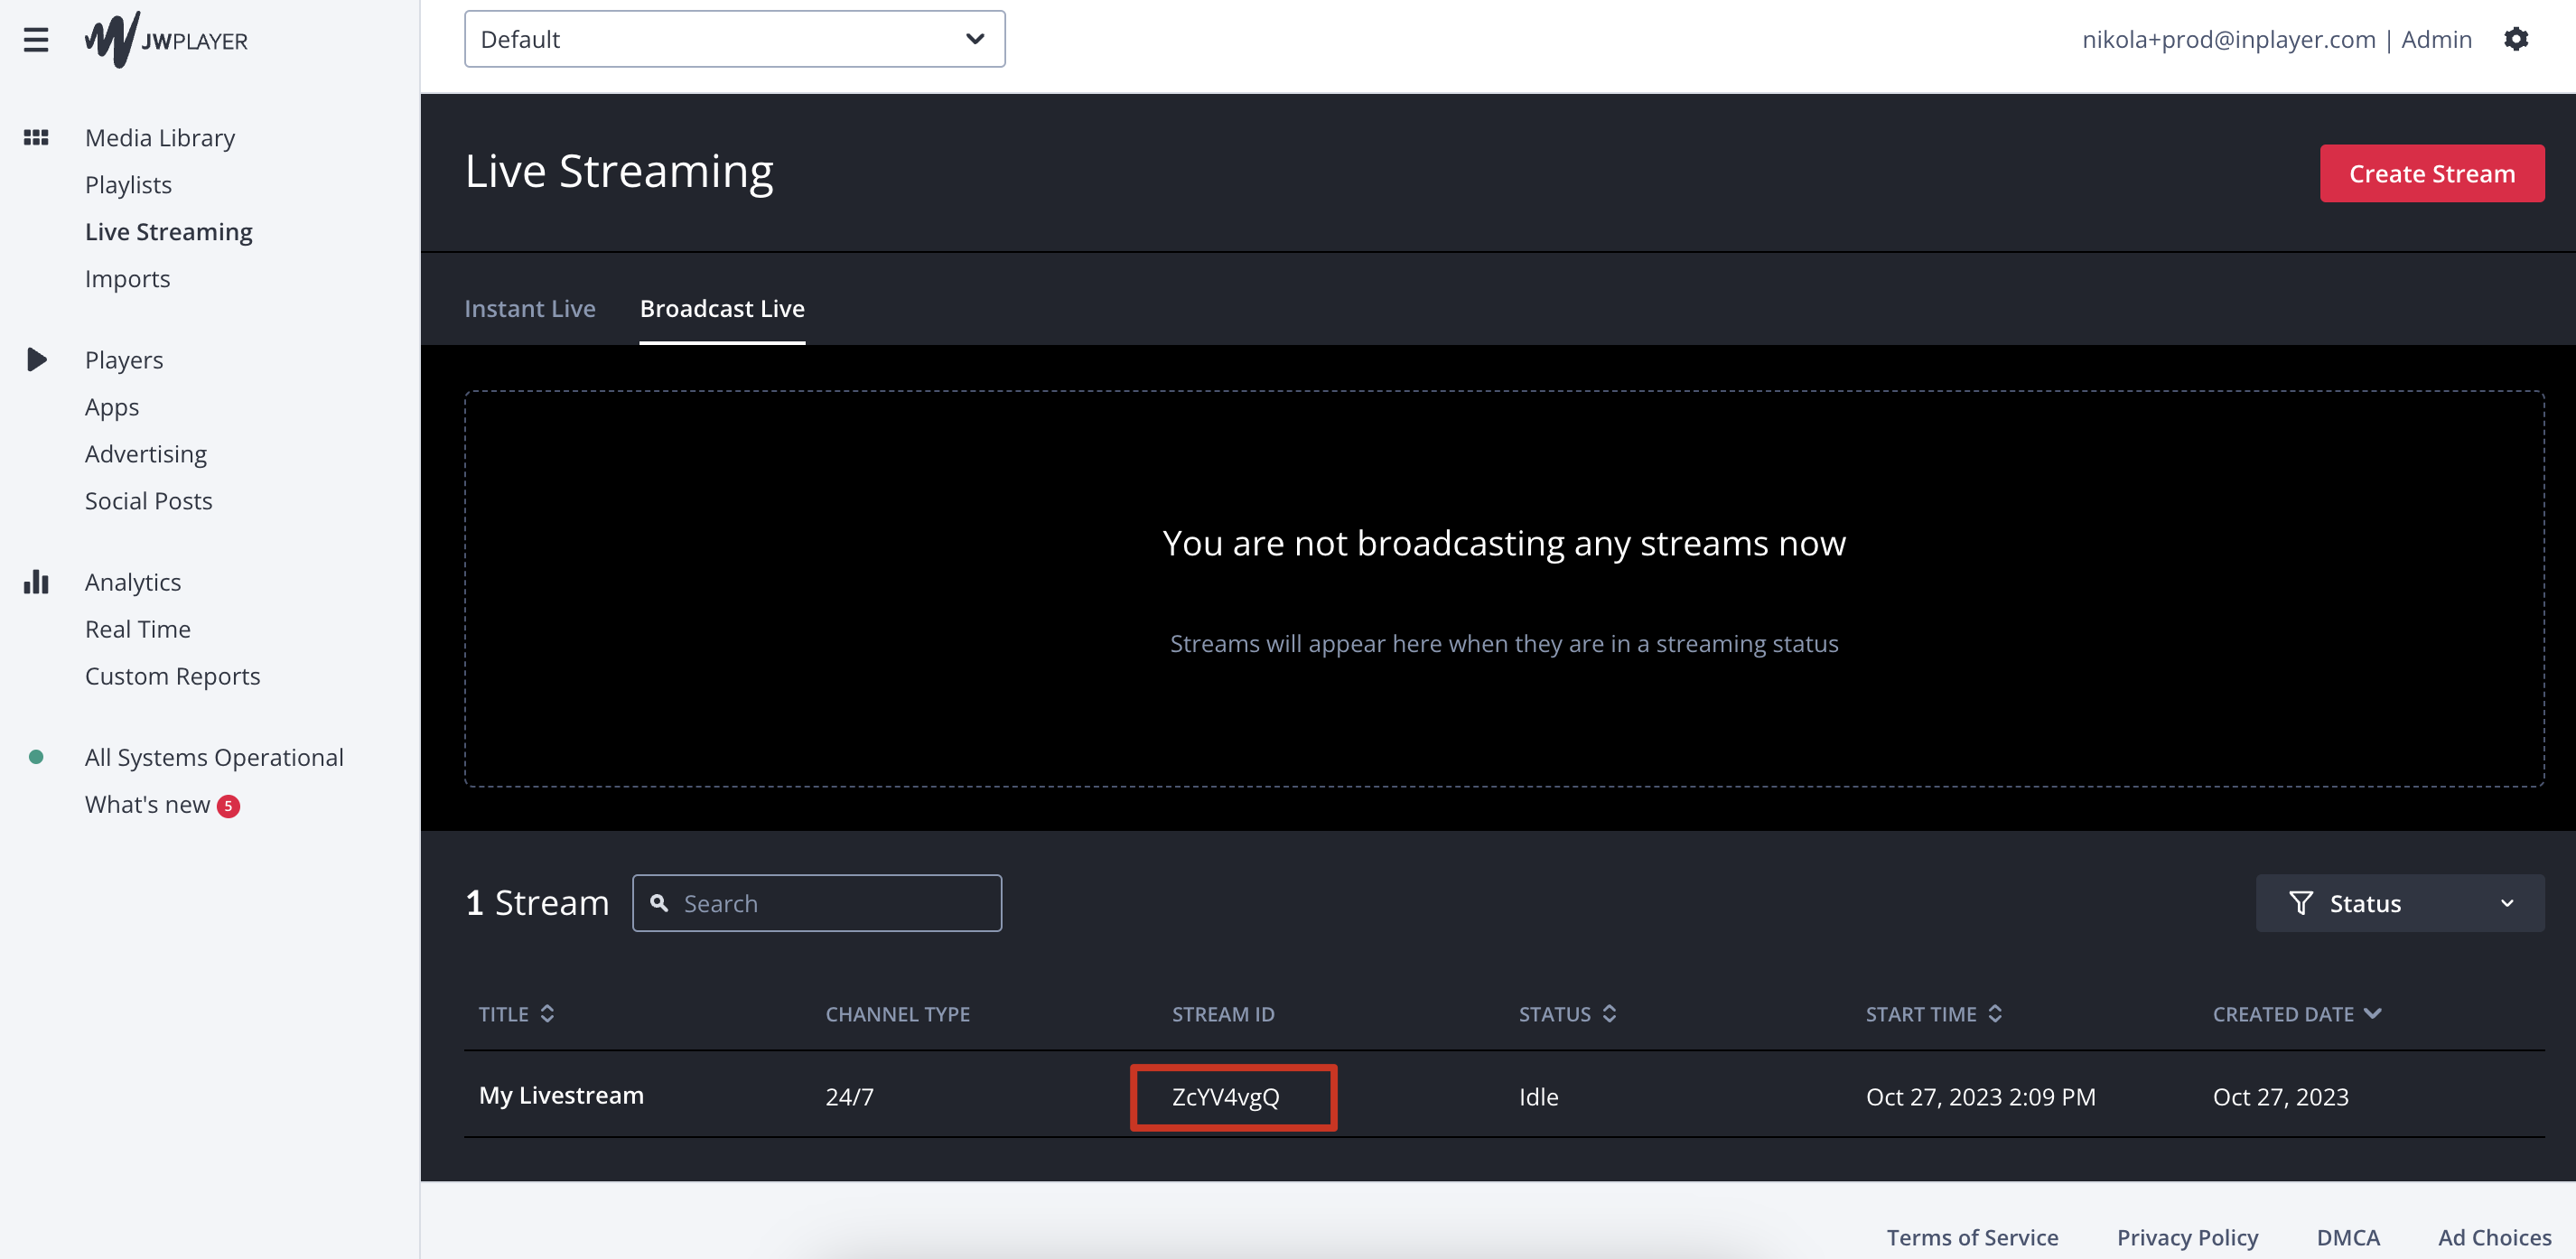
Log into your JW Player account, go to Live Streaming and then to the Broadcast Live tab.
In the channel list, locate the channel you’ll use for your event.
The Stream ID will be stated in the STREAM ID row.
Using an HTML asset as an alternative
If, for some reason, you don’t want to use a Video type asset for your video, you can use an HTML type asset. If you’ve already created a Video asset, read Changing the asset content type below to see how to change it to an HTML asset. (Note that using a Video asset is the recommended approach.)
Then, in the Content section of the asset, you can enter the iframe of the video.
For live events, JW Player only generates an iframe once you actually start streaming, so you will need to start the stream first, and then get the iframe and put it in the asset.
Due to this JW Player limitation, we recommend starting the stream an hour before the actual start time of the event so you can have the time to update the asset content, and avoid viewers logging in before the event, not seeing anything, and refreshing their browsers, all of them at the same time, thereby crashing your page.
Workaround for having to start the live stream before the event start
As mentioned above, for live streams, you first need to start the stream, before you can get the Video ID or the iframe from JW Player that you’ll need to put in the asset’s Content section.
It is possible to get around this, by putting this iframe in the asset’s Content section:
<script src="https://cdn.jwplayer.com/libraries/INSERT PLAYER ID HERE.js"></script>
<script src="https://ssl.p.jwpcdn.com/live/channel-embed.js">
</script>
<div id="container_INSERT CHANNEL ID HERE"></div>
<script>
  (function waitForJwLiveChannelSetup() {
    if (window.jwLiveChannelSetup) {
      window.jwLiveChannelSetup({
        channelId: "INSERT CHANNEL ID HERE",
        embedContainer: "container_INSERT CHANNEL ID HERE"
      });
    } else {
      setTimeout(waitForJwLiveChannelSetup, 500);
    }
  })();
</script>
Make sure to insert the Player ID and the Channel ID in the place specified for it in the code.
In the Content section, enter the Account ID, Event ID, and Video ID of the Livestream event you wish to use. Read below on how to find these.
Note that the Video ID is optional and only used for protecting individual video posts. For protecting whole Livestream events, the field can be left blank.
After setting everything up, make sure to click the Save button in the bottom right corner.
How to find the Account ID, Event ID, and Video ID
If you’ve created an HTML asset, and now you wish to change it to a Video asset, or vice versa, you can do so by clicking the Change content type button.
Here you will find the selection you have made in the Select content category step during the first steps of the asset creation.
If the Content category is VOD or Other, no further setup is needed here.
If the Content category is Live, make sure to fill in all the details about your live event. This info will be sent to our support team and will make sure your viewers get the best support possible.
It is very important to always fill in the event details here. This is one of the reasons why InPlayer can provide such high quality of support.
After your live event ends and you have published your VOD replay for it, make sure not to change the Content category from Live to VOD. There is no need for this.
You also have the option to have your event advertised on our Client Events page. If you choose to do so, just enter the text you want to appear in your event post description. It’s a good idea to include the webpage where your event can be found in the post. After you save, our webpage administrators will review the post and publish it. This might take up to 24 hours.
After setting everything up, make sure to click the Save button in the bottom right corner.
In the Restrictions section, you can set up any geographic, URL, and/or age restrictions for the asset you wish to use.
Geo-restrictions make the asset available only in certain countries, URL restrictions make it embeddable on only certain URLs, and Age restrictions make it accessible by only viewers who fall under a certain age group.
You can learn more about setting up the restrictions here, here and here.
Remember that any restrictions you set up in the individual assets will overwrite the ones that have been set up in the dashboard Settings. After setting everything up, make sure to click the Save button in the bottom right corner.
Here, you can add additional metadata to your asset, which can be used for various purposes. An example would be to add metadata that will group the assets in different categories that you can later use in a filter you have developed for your webpage.
Once you’ve created your asset, it’s time to embed it on your website. For this, click on the Get asset embed code button at the top right.
A pop-up with the embed codes will appear.
Here, you can set up the following settings:
Branding theme Select the branding theme you wish to use for the asset. Note that this option will only be available if you’ve already created a branding theme. Read this article for a guide on how to do this. If you do not select a branding theme here, the default theme will be applied.
OAuth app Select whether to use a custom OAuth app for the asset. This feature will group viewers that register an account on this asset into one user group. This is useful if you have multiple websites and you want to group viewers from each website into a separate group. Read this article to learn more about the OAuth feature.
Paywall version Select whether to use the Paywall V2 or Paywall V3 for the asset. These are the two versions of our paywall. We recommend always using Paywall V3 because it is the most up-to-date version.
Once everything is set up, copy the InPlayer Script code and paste it into the <head> section of your webpage.
Then copy the Embed code and paste it into the <body> section of your webpage.
With that, your asset will appear on your page, and you are ready to start monetizing your content.
If you wish to have multiple assets on the same page, it is not very advisable that you just take the embed codes for all assets you wish to use and put them into the body of the web-page as-is. Instead, use the code below.
To deactivate an asset, just open it and click the button at the top right.
You can always bring a deactivated asset back by going to the Assets tab, selecting deactivated from the drop-down menu next to the search field, and clicking the Reactivate asset button on the asset you want to bring back.
When you go back to the active assets list, you will find the asset there.
That concludes our guide.
If you have any questions, don’t hesitate to contact us at clients@inplayer.com.
In the Assets tab, click on New asset, and then on Custom creation.
Enter a Name for your asset. This will be the name of the asset in your InPlayer Dashboard. The viewers won’t see this.
Select Video or HTML depending on the type of content you are going to protect with the asset.
Video Use this if your content is videos that are hosted on one of the following platforms:
You can have only one video per Video asset.
HTML Use this if your content is videos that are hosted anywhere other than the above-mentioned platforms, or for non-video content. HTML is a universal asset and can be used for monetizing absolutely anything.
You can put as much content as you want in a single HTML asset, but we would still recommend sticking to only one piece of content per asset.
Once you select your asset type, click Next.
Under Select content category choose one of the following:
Live – for video content that will be livestreamed. This includes live streams where you plan on publishing a VOD replay afterwards.
VOD – for Video-on-demand-only content that isn’t going to be live streamed.
Other – for content other than video, or for test assets.
Click Next.
Under Select access type, choose Registration, then Freemium and click Next.
If you are creating a Video asset hover over the platform where your videos are hosted, select one of the following, and click Next.
add one video – This creates a regular asset where you can add your video. You can select which video to use in the asset settings.
quick add – This creates an asset for a video and copies the title, description, and preview image for that video from Brightcove. You can select the video right now.
sync all videos – With this, you can create assets for all videos in your account at once. Each video is created as a separate asset. (not available for some platforms)
If you are creating an HTML asset you will automatically skip the above step.
On the new page, you can set up your asset’s properties.
The right side of the screen is where you can set everything up, and the left side provides a preview where you can see how the various sections of the assets will look on your webpage.
In the Preview section, set up the preview title, description, and thumbnail as well as the text for the BUY button. These will be the details that will appear on the actual asset preview when you embed it on your webpage.
Note that the Title will also appear on the final payment form on the paywall, as well as the notification email your viewers will receive.
After setting everything up, make sure to click the Save button in the bottom right corner.
In the Preview templates section, you can choose how the asset will appear when you embed it on your webpage.
You can go with the default preview, or select one from the list.
If you’ve set up a default branding theme in your dashboard Settings, where you’ve selected a default preview template, and you want to use that template for this asset as well, make sure to check the Use preview template from the default branding theme option.
If, however, you wish to use a separate preview template for this asset, despite the fact that you have set up a default one in your branding theme, make sure to leave the Use preview template from the default branding theme option unchecked.
When choosing your preview template, you can click on the View fullscreen button at the top left to see how that template would look on various screen sizes.
After setting everything up, make sure to click the Save button in the bottom right corner.
If you have set up a default branding theme in the Settings (more on this here), you can see how the asset will look like once the theme will be applied to it.
To do this, just click the Preview default branding theme toggle.
In the Content section, enter the content you wish to monetize depending on the type of asset you’ve created (HTML or Video). See the list below for help in doing this.
HTML
In the Content section, simply paste the embed code of the content you are trying to monetize.
You can paste as many embed codes as you want in a single HTML asset, but we would recommend sticking to only one piece of content per asset.
After setting everything up, make sure to click the Save button in the bottom right corner.
In the Content section, select the Brightcove video you wish to use. Either click on the video from the collection or enter the Video ID in the field.
If you used the quick add or sync all videos option during the asset creation, this will already be filled in.
After setting everything up, make sure to click the Save button in the bottom right corner.
Cloudflare
In the Content section, enter the Video ID of the Cloudflare video you wish to use.
To get the Cloudflare Video ID, please contact Cloudflare support via the Cloudflare Help Center.
After setting everything up, make sure to click the Save button in the bottom right corner.
DaCast
For DaCast videos, please use the HTML type asset for now. This is due to some updates that are being done on the DaCast platform. You can convert a Video asset to an HTML type asset by clicking Change content type in the asset Content section. Viewer accesses will not be affected by this conversion.
In the Content section, enter the Content ID of the video you wish to use. Read below on how to find this.
After setting everything up, make sure to click the Save button in the bottom right corner.
Note that you can only protect individual videos. You cannot protect a DaCast “Package”, i.e. a playlist of multiple videos created on the DaCast platform. To do this, please use the HTML asset type, and put the embed code of the DaCast Package inside the Content section. Alternatively, you can create a Package by using InPlayer’s own Package feature. Read more about that here.
How to find the Content ID
To get the Content ID for a video, just go to your DaCast account and open the video you want to monetize.
For the Player Id, under Players, go to Configurations and open the player you want to use. The Player Id will be listed there.
For the Player Token, under Players, go to Tokens. You can create a new token or use a pre-existing one.
For the Source Id, go to Videos and open the video you want to use.
You can get the Source Id from the URL of the video in your browser’s address bar. In the example URL below, the Source Id is marked with bold: https://flowplayer.com/app/videos/5c47dc7f-8cc7-4af5-b02a-bdf9ff725aa2
JW Player
Make sure you have integrated your JW Player account Property before setting up the asset content. Also, keep in mind that if you change the integration to another Property after having created the assets, you will have to re-configure the below mentioned settings in all assets (Insert new IDs, select new Players, etc).
In the Content section, select the Type of video between VOD, Instant Live, Broadcast Live. If you used the quick add option during the asset creation, this will already be filled out.
VOD For this, you need to use the Video ID of the JW Player video you wish to protect, and also select a Player. Read below on how to find the Video ID.
Instant Live For this, you need to use the Channel ID of the JW Player Instant Live channel you wish to protect, and also select a Player. Read below on how to find the Channel ID. Note that if you wish to publish the VOD replay once the stream ends, you need to come back to the asset, change the Type to VOD, and enter the Video ID of the VOD video.
Broadcast Live For this, you need to use the Stream ID of the JW Player Broadcast Live channel you wish to protect, and also select a Player. Read below on how to find the Stream ID. Note that if you wish to publish the VOD replay once the stream ends, you need to come back to the asset, change the Type to VOD, and enter the Video ID of the VOD video.
After setting everything up, make sure to click the Save button in the bottom right corner.
How to find the Video ID
Log into your JW Player account, go to Media Library, and open the video you wish to use.
You’ll find the Media ID in the Media Summary section above the player preview.
How to find the Channel ID
Log into your JW Player account, go to Live Streaming and then to the Instant Live tab.
In the channel list, locate the channel you’ll use for your event.
The Channel ID will be stated in the CHANNEL ID row.
How to find the Stream ID
Log into your JW Player account, go to Live Streaming and then to the Broadcast Live tab.
In the channel list, locate the channel you’ll use for your event.
The Stream ID will be stated in the STREAM ID row.
Using an HTML asset as an alternative
If, for some reason, you don’t want to use a Video type asset for your video, you can use an HTML type asset. If you’ve already created a Video asset, read Changing the asset content type below to see how to change it to an HTML asset. (Note that using a Video asset is the recommended approach.)
Then, in the Content section of the asset, you can enter the iframe of the video.
For live events, JW Player only generates an iframe once you actually start streaming, so you will need to start the stream first, and then get the iframe and put it in the asset.
Due to this JW Player limitation, we recommend starting the stream an hour before the actual start time of the event so you can have the time to update the asset content, and avoid viewers logging in before the event, not seeing anything, and refreshing their browsers, all of them at the same time, thereby crashing your page.
Workaround for having to start the live stream before the event start
As mentioned above, for live streams, you first need to start the stream, before you can get the Video ID or the iframe from JW Player that you’ll need to put in the asset’s Content section.
It is possible to get around this, by putting this iframe in the asset’s Content section:
<script src="https://cdn.jwplayer.com/libraries/INSERT PLAYER ID HERE.js"></script>
<script src="https://ssl.p.jwpcdn.com/live/channel-embed.js">
</script>
<div id="container_INSERT CHANNEL ID HERE"></div>
<script>
  (function waitForJwLiveChannelSetup() {
    if (window.jwLiveChannelSetup) {
      window.jwLiveChannelSetup({
        channelId: "INSERT CHANNEL ID HERE",
        embedContainer: "container_INSERT CHANNEL ID HERE"
      });
    } else {
      setTimeout(waitForJwLiveChannelSetup, 500);
    }
  })();
</script>
Make sure to insert the Player ID and the Channel ID in the place specified for it in the code.
In the Content section, enter the Account ID, Event ID, and Video ID of the Livestream event you wish to use. Read below on how to find these.
Note that the Video ID is optional and only used for protecting individual video posts. For protecting whole Livestream events, the field can be left blank.
After setting everything up, make sure to click the Save button in the bottom right corner.
How to find the Account ID, Event ID, and Video ID
If you’ve created an HTML asset, and now you wish to change it to a Video asset, or vice versa, you can do so by clicking the Change content type button.
Here you will find the selection you have made in the Select content category step during the first steps of the asset creation.
If the Content category is VOD or Other, no further setup is needed here.
If the Content category is Live, make sure to fill in all the details about your live event. This info will be sent to our support team and will make sure your viewers get the best support possible.
It is very important to always fill in the event details here. This is one of the reasons why InPlayer can provide such high quality of support.
After your live event ends and you have published your VOD replay for it, make sure not to change the Content category from Live to VOD. There is no need for this.
You also have the option to have your event advertised on our Client Events page. If you choose to do so, just enter the text you want to appear in your event post description. It’s a good idea to include the webpage where your event can be found in the post. After you save, our webpage administrators will review the post and publish it. This might take up to 24 hours.
After setting everything up, make sure to click the Save button in the bottom right corner.
In the Restrictions section, you can set up any geographic, URL, and/or age restrictions for the asset you wish to use.
Geo-restrictions make the asset available only in certain countries, URL restrictions make it embeddable on only certain URLs, and Age restrictions make it accessible by only viewers who fall under a certain age group.
You can learn more about setting up the restrictions here, here and here.
Remember that any restrictions you set up in the individual assets will overwrite the ones that have been set up in the dashboard Settings. After setting everything up, make sure to click the Save button in the bottom right corner.
Here, you can add additional metadata to your asset, which can be used for various purposes. An example would be to add metadata that will group the assets in different categories that you can later use in a filter you have developed for your webpage.
Once you’ve created your asset, it’s time to embed it on your website. For this, click on the Get asset embed code button at the top right.
A pop-up with the embed codes will appear.
Here, you can set up the following settings:
Branding theme Select the branding theme you wish to use for the asset. Note that this option will only be available if you’ve already created a branding theme. Read this article for a guide on how to do this. If you do not select a branding theme here, the default theme will be applied.
OAuth app Select whether to use a custom OAuth app for the asset. This feature will group viewers that register an account on this asset into one user group. This is useful if you have multiple websites and you want to group viewers from each website into a separate group. Read this article to learn more about the OAuth feature.
Paywall version Select whether to use the Paywall V2 or Paywall V3 for the asset. These are the two versions of our paywall. We recommend always using Paywall V3 because it is the most up-to-date version.
Once everything is set up, copy the InPlayer Script code and paste it into the <head> section of your webpage.
Then copy the Embed code and paste it into the <body> section of your webpage.
With that, your asset will appear on your page, and you are ready to start monetizing your content.
If you wish to have multiple assets on the same page, it is not very advisable that you just take the embed codes for all assets you wish to use and put them into the body of the web-page as-is. Instead, use the code below.
To deactivate an asset, just open it and click the button at the top right.
You can always bring a deactivated asset back by going to the Assets tab, selecting deactivated from the drop-down menu next to the search field, and clicking the Reactivate asset button on the asset you want to bring back.
When you go back to the active assets list, you will find the asset there.
That concludes our guide.
If you have any questions, don’t hesitate to contact us at clients@inplayer.com.
In the Assets tab, click on New asset, and then on Custom creation.
Enter a Name for your asset. This will be the name of the asset in your InPlayer Dashboard. The viewers won’t see this.
Select Video or HTML depending on the type of content you are going to protect with the asset.
Video Use this if your content are videos that are hosted on one of the following platforms:
You can have only one video per Video asset.
HTML Use this if your content are videos that are hosted anywhere other than the above-mentioned platforms, or for non-video content. HTML is a universal asset and can be used for monetizing absolutely anything.
You can put as much content as you want in a single HTML asset, but we would still recommend sticking to only one piece of content per asset.
Once you select your asset type, click Next.
Under Select content category choose one of the following:
Live – for video content that will be livestreamed. This includes live streams where you plan on publishing a VOD replay afterwards.
VOD – for Video-on-demand-only content that isn’t going to be live streamed.
Other – for content other than video, or for test assets.
Click Next.
Under Select access type, choose Registration, then Paid and click Next.
If you are creating a Video asset hover over the platform where your videos are hosted, select one of the following, and click Next.
add one video – This creates a regular asset where you can add your video. You can select which video to use in the asset settings.
quick add – This creates an asset for a video and copies the title, description, and preview image for that video from Brightcove. You can select the video right now.
sync all videos – With this, you can create assets for all videos in your account at once. Each video is created as a separate asset. (not available for some platforms)
If you are creating an HTML asset you will automatically skip the above step.
On the new page, you can set up your asset’s properties.
The right side of the screen is where you can set everything up, and the left side provides a preview where you can see how the various sections of the assets will look on your webpage.
In the Preview section, set up the preview title, description, and thumbnail as well as the text for the BUY button. These will be the details that will appear on the actual asset preview when you embed it on your webpage.
Note that the Title will also appear on the final payment form on the paywall, as well as the notification email your viewers will receive.
After setting everything up, make sure to click the Save button in the bottom right corner.
In the Preview templates section, you can choose how the asset will appear when you embed it on your webpage.
You can go with the default preview, or select one from the list.
If you’ve set up a default branding theme in your dashboard Settings, where you’ve selected a default preview template, and you want to use that template for this asset as well, make sure to check the Use preview template from the default branding theme option.
If, however, you wish to use a separate preview template for this asset, despite the fact that you have set up a default one in your branding theme, make sure to leave the Use preview template from the default branding theme option unchecked.
When choosing your preview template, you can click on the View fullscreen button at the top left to see how that template would look on various screen sizes.
After setting everything up, make sure to click the Save button in the bottom right corner.
If you have set up a default branding theme in the Settings (more on this here), you can see how the asset will look like once the theme will be applied to it.
To do this, just click the Preview default branding theme toggle.
ppv – the viewer makes a one-time payment and gets access for a limited time,
subscription – the viewer accepts a recurrent charge at regular intervals that can be canceled at any time,
season – the viewer makes a payment and gets access for a limited period, but at the same time accepts a recurrent charge for being able to watch during the next period. The date for the upcoming charge is determined by the merchant.
Note that the season price type needs to be activated on your account by our team, so make sure to contact us at clients@inplayer.com for this.
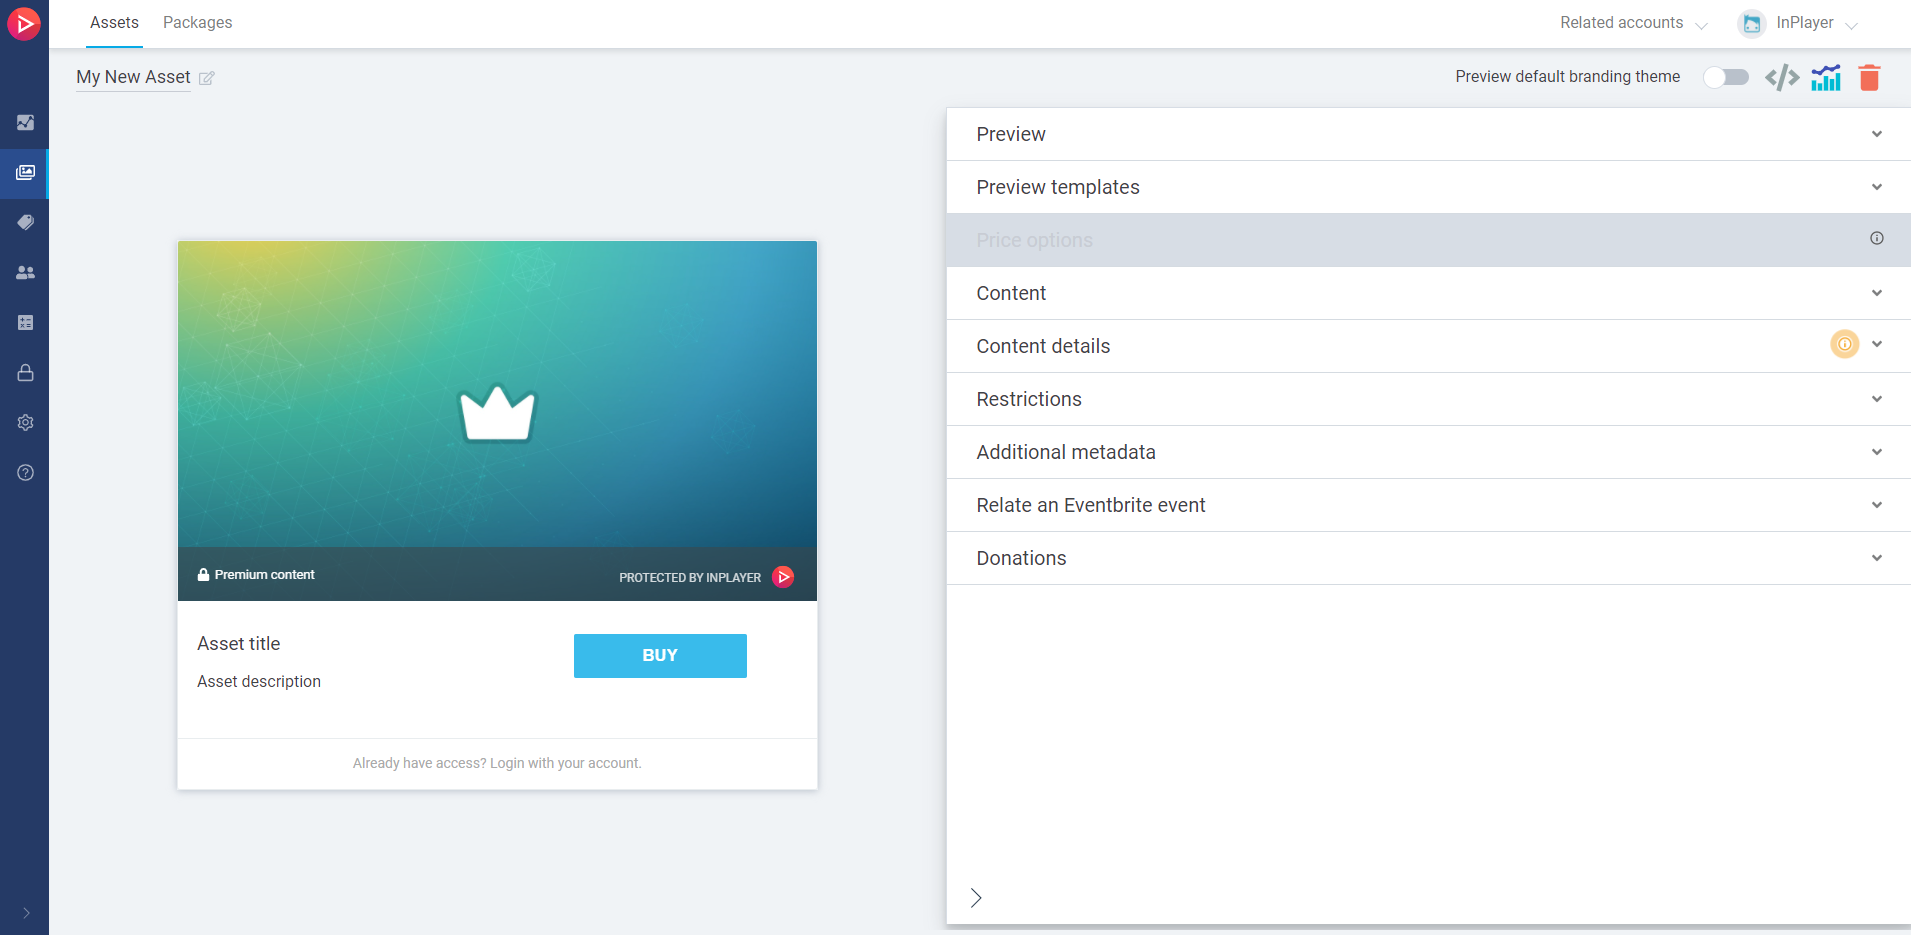
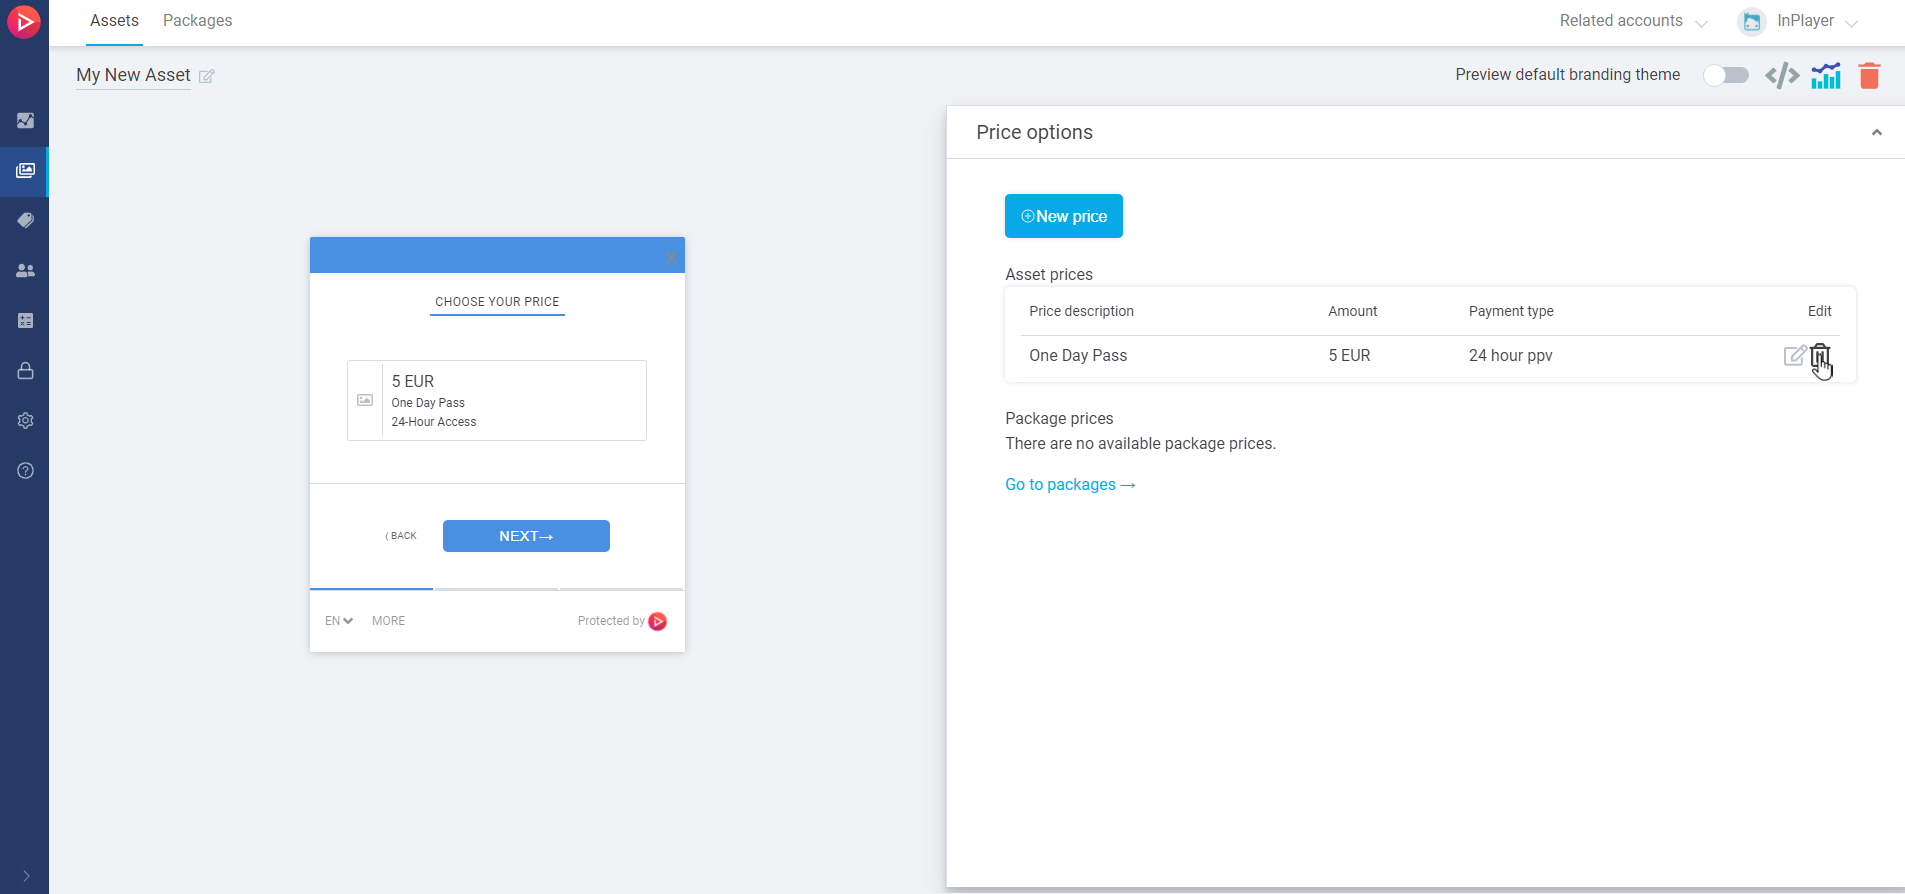
Setting up a PPV price
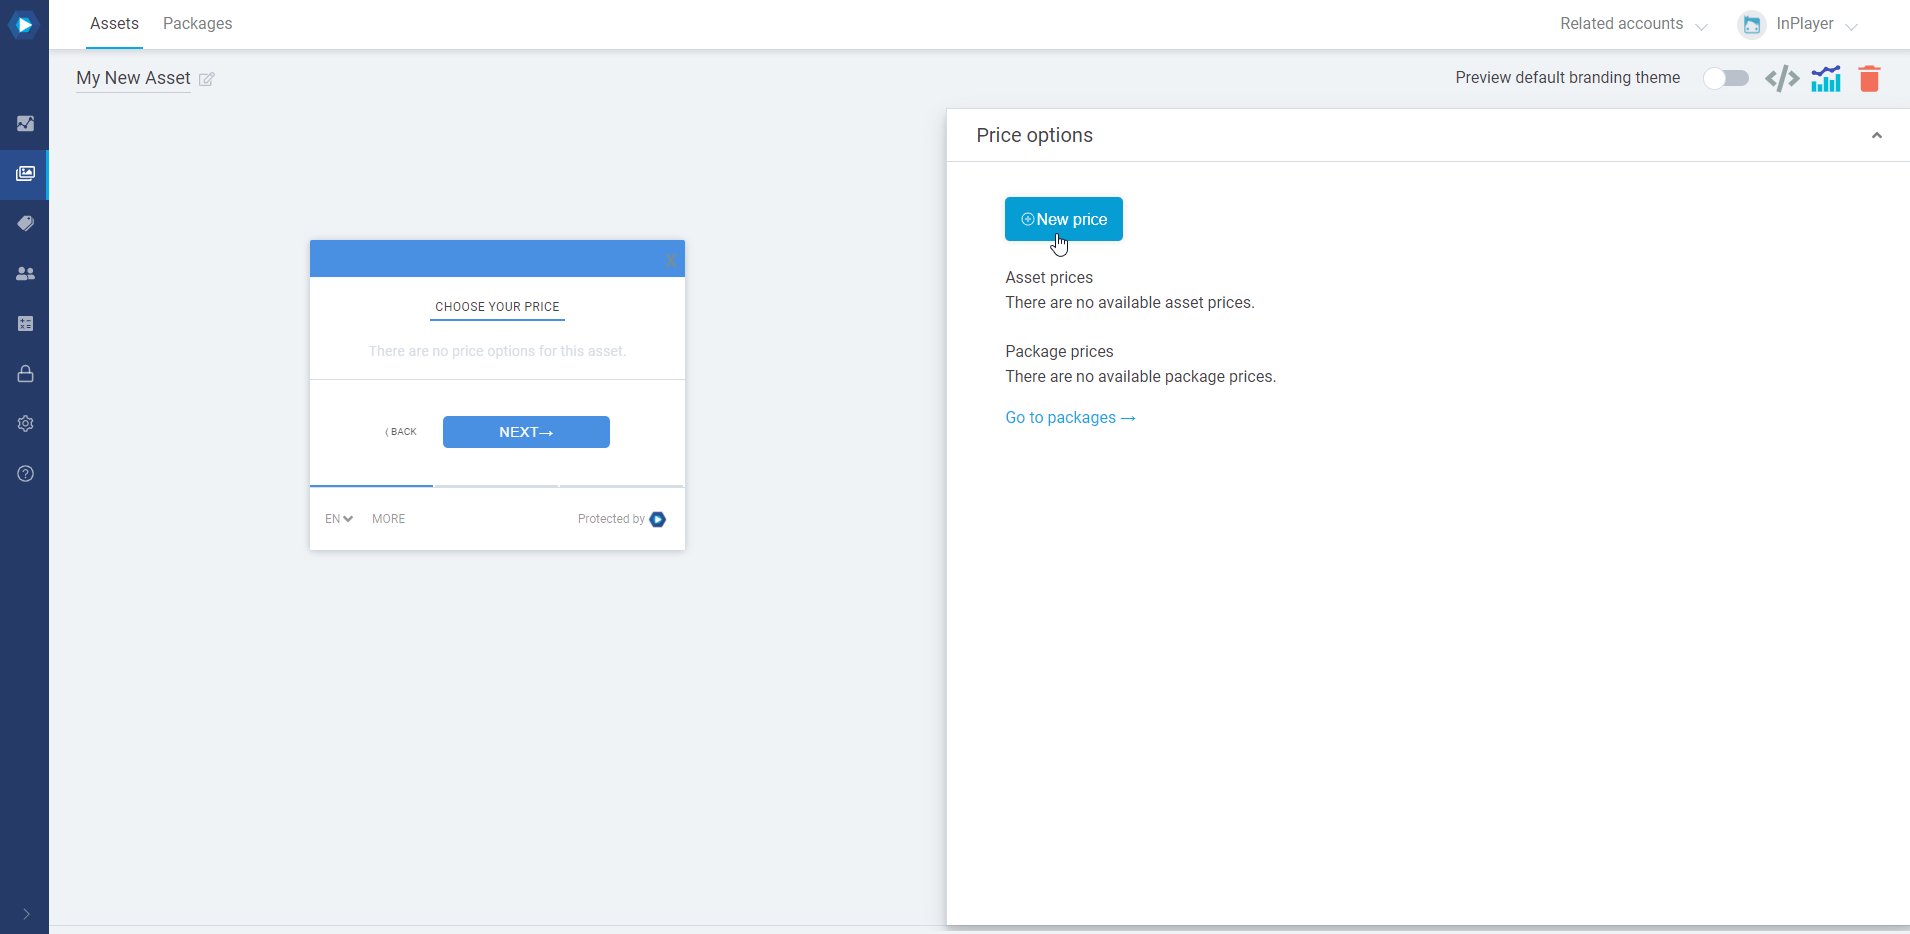
In the Price options section, click New price.
In the General info tab of the price option, set up the following:
In the Price description field, enter the price description that will appear on the paywall. Make it concise so your viewers know exactly what they are buying.
In the Payment type field, select ppv. This is a one-time payment which grants access that expires after the end of the specified period counter either from the moment of purchase, or if using the Schedule start feature, from the date set in the Schedule start field (more on this below). The access period can be selected from the drop-down menu. You can pick one of the premade periods, or use the custom period option. When using the custom period option, you can specify the exact date and time at which the viewers’ access will expire. This is very useful for doing presales since the viewers’ access will expire on the date you’ve set up, regardless of when they’ve purchased their pass. An alternative way to set up presales is by using the Schedule start option from the Additional info tab. More on that below.
In the Amount field, enter the price. The minimum price when using USD, EUR, or GBP is 1. When using all other currencies, the minimum is the equivalent converted amount of 1 USD. The currency can be selected from the drop-down menu. If you wish to use a currency that is not on the list, you can contact us at clients@inplayer.com and we’ll make sure to add the currency for you asap. We support all currencies listed here.
In the Additional info tab, you can set up the following:
Schedule start This is the date and time at which the viewer’s access period will start after they’ve purchased the asset. Until that time, they will see a message informing them to come back on the scheduled date. This is a useful option for setting up presales. You can select the access period from the Payment type section in the General info tab, and then set up when will that access period begin. It works for both the pre-defined access periods (24 hours, 48 hours, etc), and for the custom period. If you leave the Schedule start field blank, the viewers’ access will begin right after purchasing. Note that if you change the scheduled start setting after some viewers have made their purchase, their access start will not change. Always set this according to your own timezone. This will be automatically converted to the viewer’s own timezone, based on the time settings of their device’s operating system. Their IP address location does not play a role here.
Geo-restriction With this option, you can restrict the price option to specific countries. You can choose to either allow (whitelist) or deny (blacklist) a single country, or use a country set you have created previously. You can learn more about setting up country sets here.
After setting everything up, make sure to click the Save button in the bottom right corner.
Note that once you set the payment type for an asset, you cannot change it. You can change the other payment fields (access period duration, price, etc) but not the payment type. If you wish to set a new payment type, you will need to set up a new price option.
If you’d like to have a custom ppv access period added to the list of pre-made periods under Payment type, you can reach out to your account manager or our support team at clients@inplayer.com.
Setting up a Subscription price
In the Price options section, click New price.
In the General info tab of the price option, set up the following:
In the Price description field, enter the price description that will appear on the paywall. Make it concise so your viewers know exactly what they are buying.
In the Payment type field, select subscription. This is a recurring payment that is renewed automatically. Access is granted at each renewal. The renewal period can be selected from the drop-down menu.
In the Amount field, enter the price. The minimum price when using USD, EUR, or GBP is 1. When using all other currencies, the minimum is the equivalent converted amount of 1 USD. The currency can be selected from the drop-down menu. If you wish to use a currency that is not on the list, you can contact us at clients@inplayer.com and we’ll make sure to add the currency for you asap. We support all currencies listed here.
In the Additional info tab, you can set up the following:
Free trial With this, you can set up a free trial period. Free trials are tied to a viewer’s credit card, and not their account. If they open a second account but still use the same card to buy their second subscription, they will not get a second free trial. This is intended to prevent abuse.
Additional fee With this option, you can set up a one-time fee that will be charged when the viewer purchases the subscription, as an addition to the regular subscription fee. The fee will only be charged once, together with the first subscription charge.
Geo-restriction With this option, you can restrict the price option to specific countries. You can choose to either include (whitelist) or exclude (blacklist) a single country, or use a country set you have created previously. You can learn more about setting up country sets here.
After setting everything up, make sure to click the Save button in the bottom right corner.
Note that once you set the payment type for an asset, you cannot change it. You can change the other payment fields (access period duration, price, etc) but not the payment type. If you wish to set a new payment type, you will need to set up a new price option.
If you’d like to have a custom subscription period added to the list of pre-made periods under Payment type, you can reach out to your account manager or our support team at clients@inplayer.com.
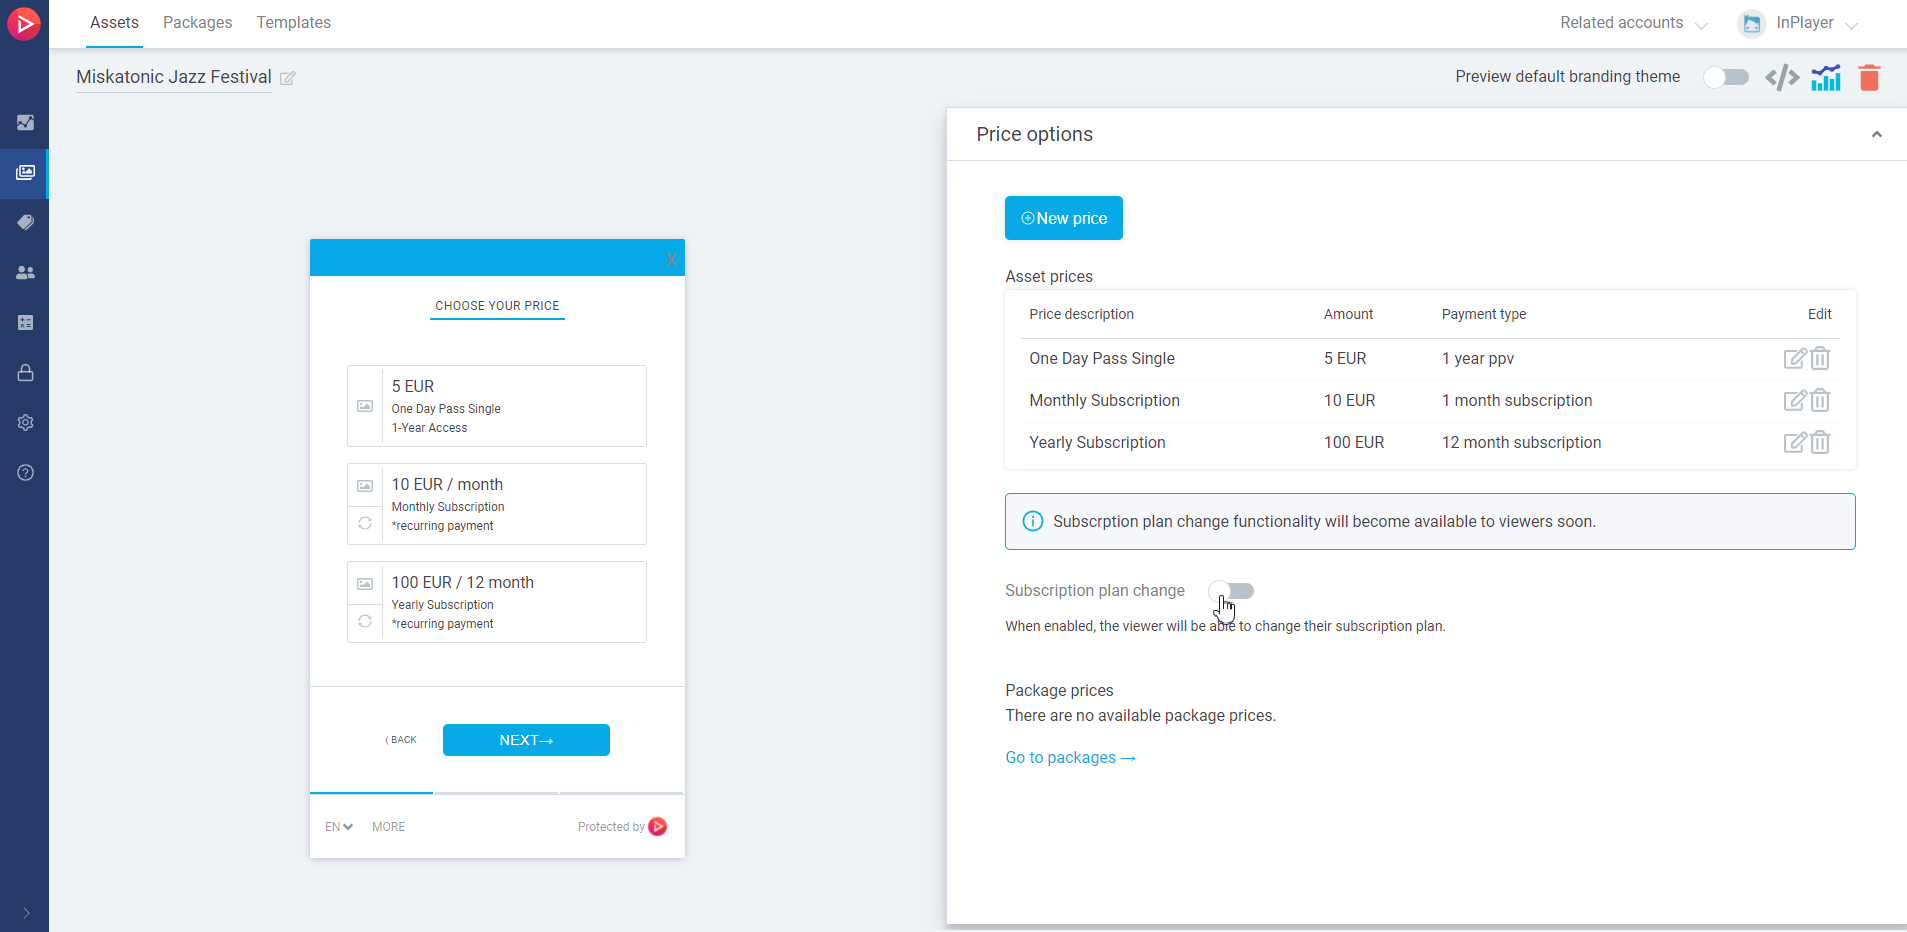
Subscription upgrades & downgrades
If you have multiple subscriptions for an asset, the Subscription plan change option will become available in the Price options section.
Enabling this will allow your viewers to upgrade or downgrade their subscription plan.
Upgrades on the viewer’s plan will happen and be billed immediately. A pro rata deduction for the unused portion of their old subscription will be applied to the charge for the new subscription.
Downgrades will happen and be billed after the expiration of their currently ongoing subscription cycle. Note that after choosing to downgrade, viewers cannot change plans while they’re waiting for the downgrade to happen. They can change their plan again once the downgrade has happened.
Note that upgrades/downgrades are only possible on payments made via credit card.
Viewers can upgrade or downgrade their subscriptions by following the instructions here.
Setting up a Season price
In the Price options section, click New price.
In the General info tab of the price option, set up the following:
In the Price description field, enter the price description that will appear on the paywall. Make it concise so your viewers know exactly what they are buying.
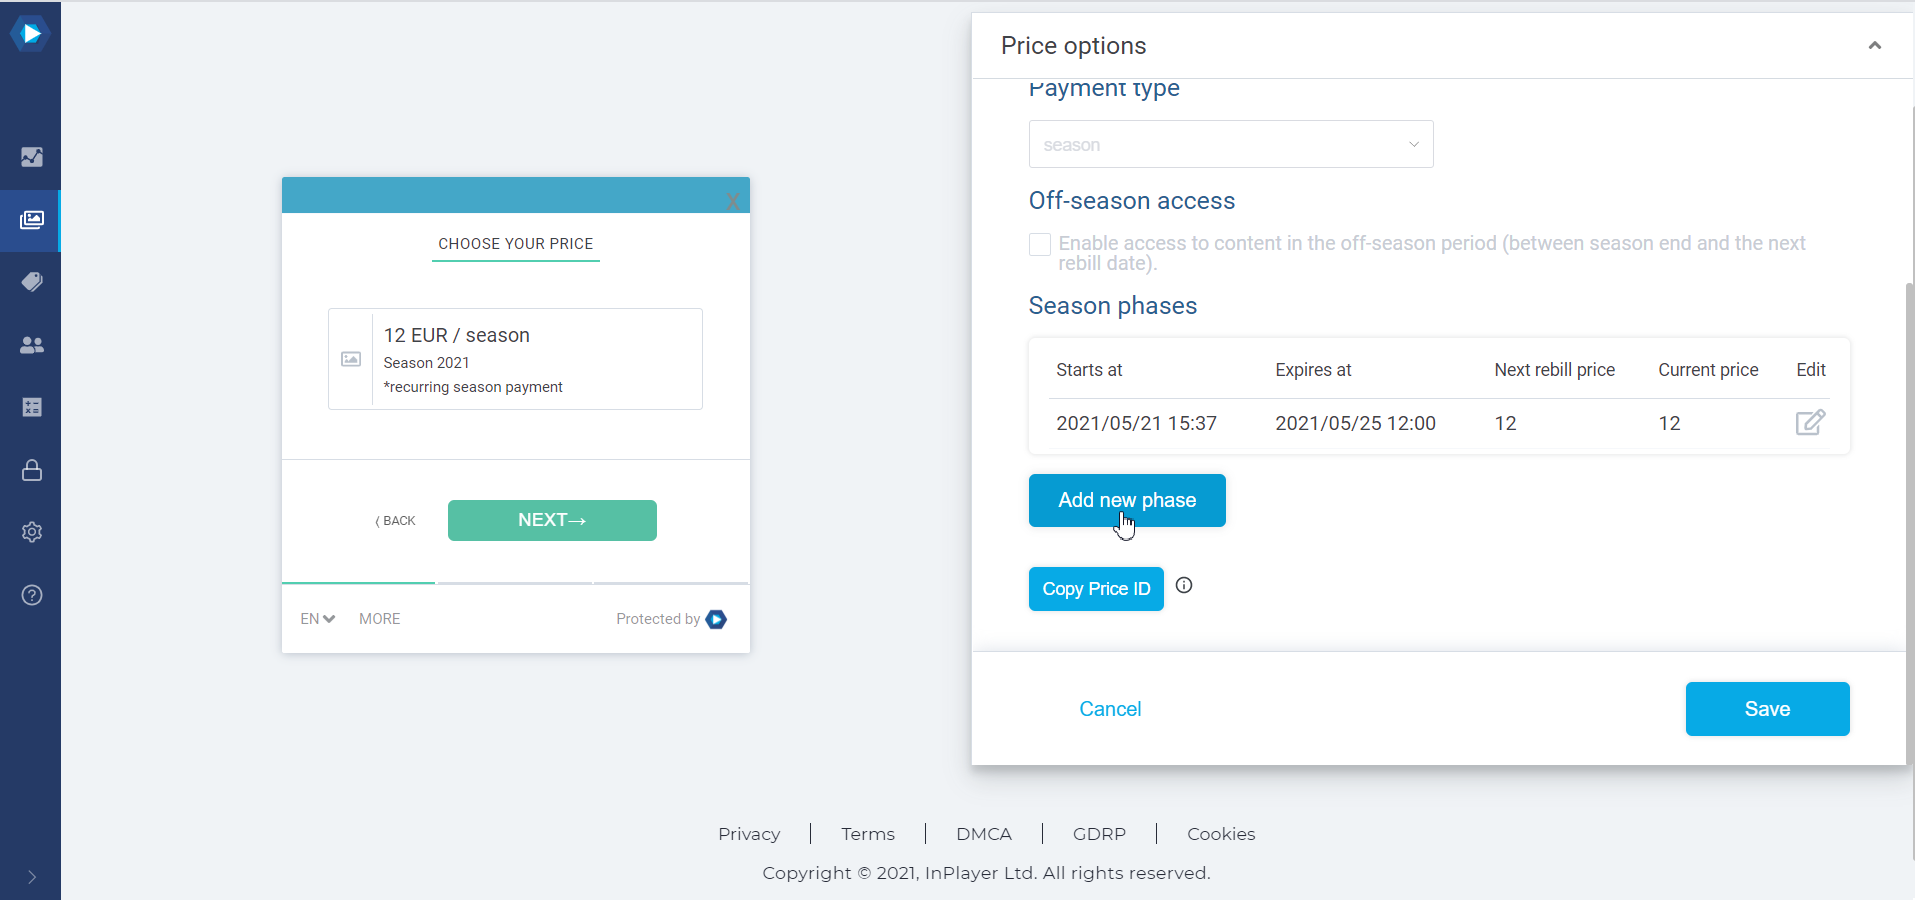
In the Payment type field, select season. With this payment type, the viewer purchases a season pass that lasts for a specific period, then expires, and is then renewed for a second period at a certain point in the future, upon which a new charge is taken from the viewer. The payment will continue to renew in the same manner for as long as you keep scheduling upcoming seasons. The season payment type is best suited for seasonal content, like sports, where using standard back-to-back subscription payments might not be suitable, since content is only available during specific parts of the year, and in between there are periods with nothing or nothing new to watch. A basic season cycle is represented here:
Setting up the first season phase
In the Season start field, enter the start date and time of the season. This determines when the access for viewers who purchase a pass will start. It is also possible for access to be granted to the viewers from the moment of their purchase. This is accomplished with the Off-season access option. We’ll talk about that further below. Also, a season price option will not be available for purchase until the Season start has been set.
In the Season end field, enter the end date and time of the season. This is the access cut-off date for the current season. Access will be re-granted upon the renewal of the payment for the next season. It is also possible for the access to continue beyond the end of the season, i.e. until the moment of renewal of the payment for the next season. This is, again, done with the Off-season access option, which we’ll see below. Also, a season price option will not be available for purchase until the Season end has been set.
In the Next rebill date field, enter the date and time for the renewal of the payment, i.e. the date and time when the payment for next season will be taken. Note that once you set up the first rebill date, the rebill date for the next season will be automatically set to one year after the first date. You can always go back and change it if you wish.
In the Next rebill price field, enter the amount that will be charged upon renewal for the next season, i.e. on the Next rebill date. Note that this is not the price for the current season. The minimum price when using USD, EUR, or GBP is 1. When using all other currencies, the minimum is the equivalent converted amount of 1 USD. The currency can be selected from the drop-down menu. If you wish to use a currency that is not in the list, you can contact us at clients@inplayer.com and we’ll make sure to add the currency for you asap. We support all currencies listed here.
In the Current price field, enter the account that will be charged for the current season. Whenever a viewer goes to your page, they will see this price. You can change this price at any time. For example, you can have it be equal to the New rebill price at the beginning of the season, and then reduce it as the season progresses. The minimum price when using USD, EUR, or GBP is 1. When using all other currencies, the minimum is the equivalent converted amount of 1 USD. The currency can be selected from the drop-down menu. If you wish to use a currency that is not in the list, you can contact us at clients@inplayer.com and we’ll make sure to add the currency for you asap. We support all currencies that are listed here.
With the Off-season access option, you can decide whether the viewers will only have access during a season (between the season start and end date), or also during the off-season period, so they can watch replays, for example.
Note that once you set the Season start, Season end, Next rebill date, and Next rebill price you cannot change them until the current season ends. You can only change the Current price amount.
In the Additional info tab, you can set up the following:
Free trial With this, you can set up a free trial period. If the Off-season access option is enabled, the free trial will begin right after the viewer completes their purchase. If the Off-seasonaccess option is disabled, the free trial will begin on the Season start date.
Additional fee With this option, you can set up a one-time fee that will be charged when the viewer purchases the subscription, as an addition to the regular subscription fee. The fee will only be charged once, together with the first subscription charge.
Geo-restriction With this option, you can restrict the price option to specific countries. You can choose to either allow (whitelist) or deny (blacklist) a single country, or use a country set you have created previously. You can learn more about setting up country sets here.
After setting everything up, make sure to click the Save button in the bottom right corner.
Setting up the next season phase (etc)
Click Add new phase.
The same settings described above will be available, except this time you set them up from the next upcoming season.
Add a new phase for all future seasons.
Note that once you set the payment type for an asset, you cannot change it. You can change the other payment fields (access period duration, price, etc) but not the payment type. If you wish to set a new payment type, you will need to set up a new price option. You also cannot delete a season price option before the current season ends.
Deleting a price option from an asset will make that price option unavailable for new purchases. Any viewers that have already purchased it will keep their access, and won’t be affected by this change.
To delete a price option, simply click the bin icon to the right of it.
In the Content section, enter the content you wish to monetize depending on the type of asset you’ve created (HTML or Video). See the list below for help in doing this.
HTML
In the Content section, simply paste the embed code of the content you are trying to monetize.
You can paste as many embed codes as you want in a single HTML asset, but we would recommend sticking to only one piece of content per asset.
After setting everything up, make sure to click the Save button in the bottom right corner.
In the Content section, select the Brightcove video you wish to use. Either click on the video from the collection or enter the Video ID in the field.
If you used the quick add or sync all videos option during the asset creation, this will already be filled in.
After setting everything up, make sure to click the Save button in the bottom right corner.
Cloudflare
In the Content section, enter the Video ID of the Cloudflare video you wish to use.
To get the Cloudflare Video ID, please contact Cloudflare support via the Cloudflare Help Center.
After setting everything up, make sure to click the Save button in the bottom right corner.
DaCast
For DaCast videos, please use the HTML type asset for now. This is due to some updates that are being done on the DaCast platform. You can convert a Video asset to an HTML type asset by clicking Change content type in the asset Content section. Viewer accesses will not be affected by this conversion.
In the Content section, enter the Content ID of the video you wish to use. Read below on how to find this.
After setting everything up, make sure to click the Save button in the bottom right corner.
Note that you can only protect individual videos. You cannot protect a DaCast “Package”, i.e. a playlist of multiple videos created on the DaCast platform. To do this, please use the HTML asset type, and put the embed code of the DaCast Package inside the Content section. Alternatively, you can create a Package by using InPlayer’s own Package feature. Read more about that here.
For the Player Id, under Players, go to Configurations and open the player you want to use. The Player Id will be listed there.
For the Player Token, under Players, go to Tokens. You can create a new token or use a pre-existing one.
For the Source Id, go to Videos and open the video you want to use.
You can get the Source Id from the URL of the video in your browser’s address bar. In the example URL below, the Source Id is marked with bold: https://flowplayer.com/app/videos/5c47dc7f-8cc7-4af5-b02a-bdf9ff725aa2
JW Player
Make sure you have integrated your JW Player account Property before setting up the asset content. Also, keep in mind that if you change the integration to another Property after having created the assets, you will have to re-configure the below mentioned settings in all assets (Insert new IDs, select new Players, etc).
In the Content section, select the Type of video between VOD, Instant Live, Broadcast Live. If you used the quick add option during the asset creation, this will already be filled out.
VOD For this, you need to use the Video ID of the JW Player video you wish to protect, and also select a Player. Read below on how to find the Video ID.
Instant Live For this, you need to use the Channel ID of the JW Player Instant Live channel you wish to protect, and also select a Player. Read below on how to find the Channel ID. Note that if you wish to publish the VOD replay once the stream ends, you need to come back to the asset, change the Type to VOD, and enter the Video IDof the VOD video.
Broadcast Live For this, you need to use the Stream ID of the JW Player Broadcast Live channel you wish to protect, and also select a Player. Read below on how to find the Stream ID. Note that if you wish to publish the VOD replay once the stream ends, you need to come back to the asset, change the Type to VOD, and enter the Video ID of the VOD video.
After setting everything up, make sure to click the Save button in the bottom right corner.
How to find the Video ID
Log into your JW Player account, go to Media Library, and open the video you wish to use.
You’ll find the Media ID in the Media Summary section above the player preview.
How to find the Channel ID
Log into your JW Player account, go to Live Streaming and then to the Instant Live tab.
In the channel list, locate the channel you’ll use for your event.
The Channel ID will be stated in the CHANNEL ID row.
How to find the Stream ID
Log into your JW Player account, go to Live Streaming and then to the Broadcast Live tab.
In the channel list, locate the channel you’ll use for your event.
The Stream ID will be stated in the STREAM ID row.
Using an HTML asset as an alternative
If, for some reason, you don’t want to use a Video type asset for your video, you can use an HTML type asset. If you’ve already created a Video asset, read Changing the asset content type below to see how to change it to an HTML asset. (Note that using a Video asset is the recommended approach.)
Then, in the Content section of the asset, you can enter the iframe of the video.
For live events, JW Player only generates an iframe once you actually start streaming, so you will need to start the stream first, and then get the iframe and put it in the asset.
Due to this JW Player limitation, we recommend starting the stream an hour before the actual start time of the event so you can have the time to update the asset content, and avoid viewers logging in before the event, not seeing anything, and refreshing their browsers, all of them at the same time, thereby crashing your page.
Workaround for having to start the live stream before the event start
As mentioned above, for live streams, you first need to start the stream, before you can get the Video ID or the iframe from JW Player that you’ll need to put in the asset’s Content section.
It is possible to get around this, by putting this iframe in the asset’s Content section:
<script src="https://cdn.jwplayer.com/libraries/INSERT PLAYER ID HERE.js"></script>
<script src="https://ssl.p.jwpcdn.com/live/channel-embed.js">
</script>
<div id="container_INSERT CHANNEL ID HERE"></div>
<script>
  (function waitForJwLiveChannelSetup() {
    if (window.jwLiveChannelSetup) {
      window.jwLiveChannelSetup({
        channelId: "INSERT CHANNEL ID HERE",
        embedContainer: "container_INSERT CHANNEL ID HERE"
      });
    } else {
      setTimeout(waitForJwLiveChannelSetup, 500);
    }
  })();
</script>
Make sure to insert the Player ID and the Channel ID in the place specified for it in the code.
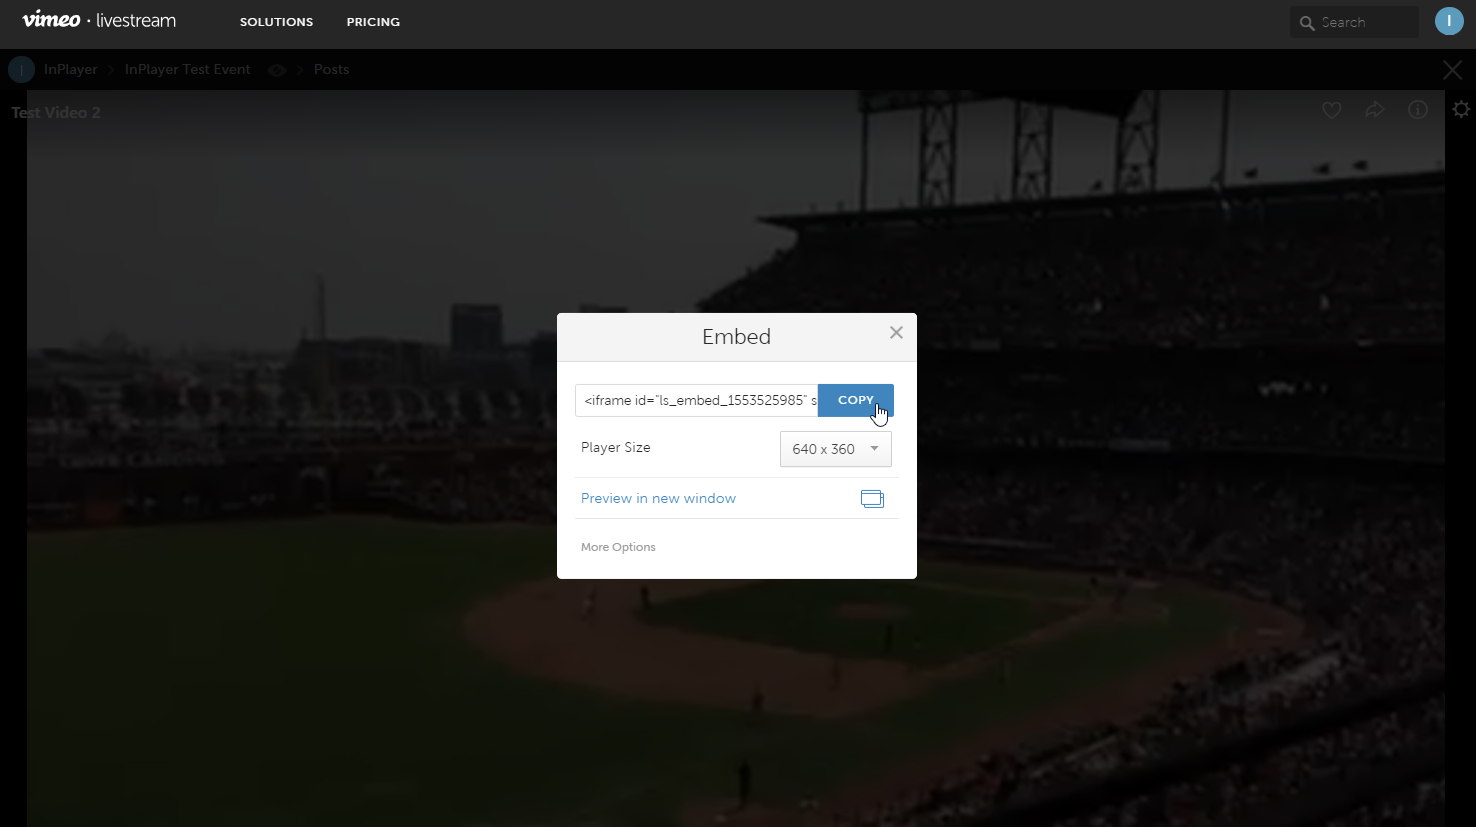
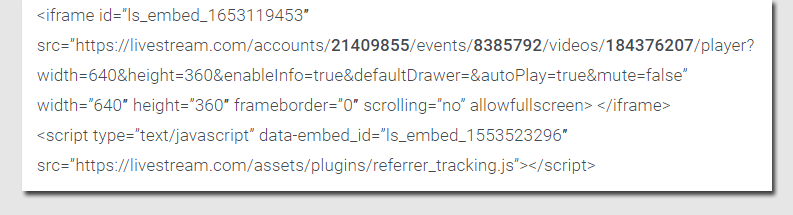
In the Content section, enter the Account ID, Event ID, and Video ID of the Livestream event you wish to use. Read below on how to find these.
Note that the Video ID is optional and only used for protecting individual video posts. For protecting whole Livestream events, the field can be left blank.
After setting everything up, make sure to click the Save button in the bottom right corner.
How to find the Account ID, Event ID, and Video ID
If you’ve created an HTML asset, and now you wish to change it to a Video asset, or vice versa, you can do so by clicking the Change content type button.
Here you will find the selection you have made in the Select content category step during the first steps of the asset creation.
If the Content category is VOD or Other, no further setup is needed here.
If the Content category is Live, make sure to fill in all the details about your live event. This info will be sent to our support team and will make sure your viewers get the best support possible.
It is very important to always fill in the event details here. This is one of the reasons why InPlayer can provide such high quality of support.
After your live event ends and you have published your VOD replay for it, make sure not to change the Content category from Live to VOD. There is no need for this.
You also have the option to have your event advertised on our Client Events page. If you choose to do so, just enter the text you want to appear in your event post description. It’s a good idea to include the webpage where your event can be found in the post. After you save, our webpage administrators will review the post and publish it. This might take up to 24 hours.
After setting everything up, make sure to click the Save button in the bottom right corner.
In the Restrictions section, you can set up any geographic, URL, and/or age restrictions for the asset you wish to use.
Geo-restrictions make the asset available only in certain countries, URL restrictions make it embeddable on only certain URLs, and Age restrictions make it accessible by only viewers who fall under a certain age group.
You can learn more about setting up the restrictions here, here and here.
Remember that any restrictions you set up in the individual assets will overwrite the ones that have been set up in the dashboard Settings. After setting everything up, make sure to click the Save button in the bottom right corner.
Here, you can add additional metadata to your asset, which can be used for various purposes. An example would be to add metadata that will group the assets in different categories that you can later use in a filter you have developed for your webpage.
Once you’ve created your asset, it’s time to embed it on your website. For this, click on the Get asset embed code button at the top right.
A pop-up with the embed codes will appear.
Here, you can set up the following settings:
Branding theme Select the branding theme you wish to use for the asset. Note that this option will only be available if you’ve already created a branding theme. Read this article for a guide on how to do this. If you do not select a branding theme here, the default theme will be applied.
OAuth app Select whether to use a custom OAuth app for the asset. This feature will group viewers that register an account on this asset into one user group. This is useful if you have multiple websites and you want to group viewers from each website into a separate group. Read this article to learn more about the OAuth feature.
Preselected price Select whether you want to have one of the asset prices be pre-selected when a viewer clicks the BUY button. This is very useful if you wish to attach the same asset to different buttons on your webpage that are meant to represent the different prices. Whenever a viewer clicks on one button on the webpage, they will automatically be forwarded to the final payment screen for that option.
Paywall version Select whether to use the Paywall V2 or Paywall V3 for the asset. These are the two versions of our paywall. We recommend always using Paywall V3 because it is the most up-to-date version.
Once everything is set up, copy the InPlayer Script code and paste it into the <head> section of your webpage.
Then copy the Embed code and paste it into the <body> section of your webpage.
With that, your asset will appear on your page, and you are ready to start monetizing your content.
If you wish to have multiple assets on the same page, it is not very advisable that you just take the embed codes for all assets you wish to use and put them into the body of the web-page as-is. Instead, use the code below.
To deactivate an asset, just open it and click the button at the top right.
You can always bring a deactivated asset back by going to the Assets tab, selecting deactivated from the drop-down menu next to the search field, and clicking the Reactivate asset button on the asset you want to bring back.
When you go back to the active assets list, you will find the asset there.
That concludes our guide.
If you have any questions, don’t hesitate to contact us at clients@inplayer.com.
Webhooks are used for creating or updating a platform action/operation tracker, for syncing data between platforms, or for fetching results of backend operations of an application. In simple terms, it is a way you can set up notifications about various events happening on the InPlayer Platform. This includes things like receiving a notification whenever a viewer registers an account, completes a payment, cancels a subscription, etc, as long as you have an app ready to receive those notifications.
Webhooks can be accessed via the Account menu are the top right of your Dashboard.
To add a webhook, go to the Webhooks section and click Add Webhook.
Note that even though you can create as many webhooks as you want, you cannot send webhooks to more than 10 URLs at the same time.
Next, enter the URL where you will be expecting the webhook. Note that the URL should always be kept up to date, and that you are responsible for the safety and security of the transmitted data. Once you enter the URL, select the event types you would like to receive a webhook for, meaning, the notification you would like to receive
Select the HTML iframe block and drag and drop it to the place on the page where you want your InPlayer asset to be.
Once you position the block, click on Enter Code.
Now, go to your InPlayer dashboard, open the asset you wish to embed, and click on the Get asset embed button at the top right.
A pop-up with the embed codes will appear.
Copy the InPlayer scripts and Embed code, and paste them both in Wix, one under the other. Then click Apply.
Resize and reposition the asset block, if necessary.
Finally, click Publish to save and publish the changes.
With that, your InPlayer asset has been successfully embedded onto your Wix site.
Note that due to a limitation of the Wix platform, you will not be able to use the fullscreen functionality of any video player, by default. However, this is can be easily fixed by adding an extra bit of code on your page. For this, please contact your Wix account manager or Wix support.
If you have any questions, don’t hesitate to contact us at clients@inplayer.com.
From the menu on the left, navigate to the page where you want to embed the InPlayer asset.
Scroll to the section of the webpage where you want to embed your asset, and click Edit.
Click on the + button on the right to add an element block.
Click on the Embed block.
In the window that pops up, click on </>.
Now, go to your InPlayer dashboard, open the asset you wish to embed, and click on the Get asset embed button at the top right.
A pop-up with the embed codes will appear.
Copy the InPlayer scripts and Embed code, and paste them both in Squarespace, one under the other. Then click SET.
Click APPLY.
Finish by clicking SAVE.
Your asset is now embedded onto your page.
You might notice that the asset does not appear while you are in editing mode. Instead, you’ll see a Script Disabled message. This is normal. To see the asset, just refresh the page.
With that, your InPlayer asset has been successfully embedded onto your Squarespace site.
If you are having trouble with the above-described method of embedding your assets, you can try the alternate method.
Here, you are still using the same Embed blocks from the first method, but instead of putting both the InPlayer script and the embed code in the embed block, you only put in the embed code. And you put the InPlayer script in the header of your Squarespace website. When you do this, the InPlayer script will automatically be applied on every page, and you will only need to put the InPlayer asset embed code in the embed blocks on all your pages.
You will find the header settings of your Squarespace website by going to Settings > Advanced > Code Injection.
Once there, just put the InPlayer script in the HEADER section and save.
If you use this method, make sure you don’t have any blocks that also contain the InPlayer script, since having the script in both the header of your Squarespace website and in an embed block on a page could cause issues.
If you have any questions, don’t hesitate to contact us at clients@inplayer.com.
OpenCms is a platform that allows users to create a complete website from the ground up.
Go to the page where you want to embed your asset.
From the menu at the top left, click on the magic wand tool.
Then click on the square menu button at the right side of the Flexible content field, and drag-and-drop the element to where you want the asset on your page to be.
Once you create your element, hover the mouse pointer over the circle icon in the top right corner of the element, and click the pencil button.
Now, go to your InPlayer dashboard, open the asset you wish to embed, and click on the Get asset embed button at the top right.
A pop-up with the embed codes will appear.
Copy the InPlayer scripts and Embed code, and paste them both in OpenCms, one under the other.
Save the webpage.
With that, your InPlayer asset has been successfully embedded onto your OpenCms site.
If you have any questions, don’t hesitate to contact us at clients@inplayer.com.
From the right-hand menu, go to Website, and then to Static Pages.
Choose the page where you want to embed your InPlayer asset, and click Edit.
From the toolbar, click on <> to see the code of the page.
Now, go to your InPlayer dashboard, open the asset you wish to embed, and click on the Get asset embed button at the top right.
A pop-up with the embed codes will appear.
Copy the InPlayer scripts and Embed code, and paste them both into the code of your Muvi page, one under the other, in the place where you want the asset to appear. Then click OK.
Finally, click Save Page.
With that, your InPlayer asset has been successfully embedded onto your Muvi site.
If you have any questions, don’t hesitate to contact us at clients@inplayer.com.