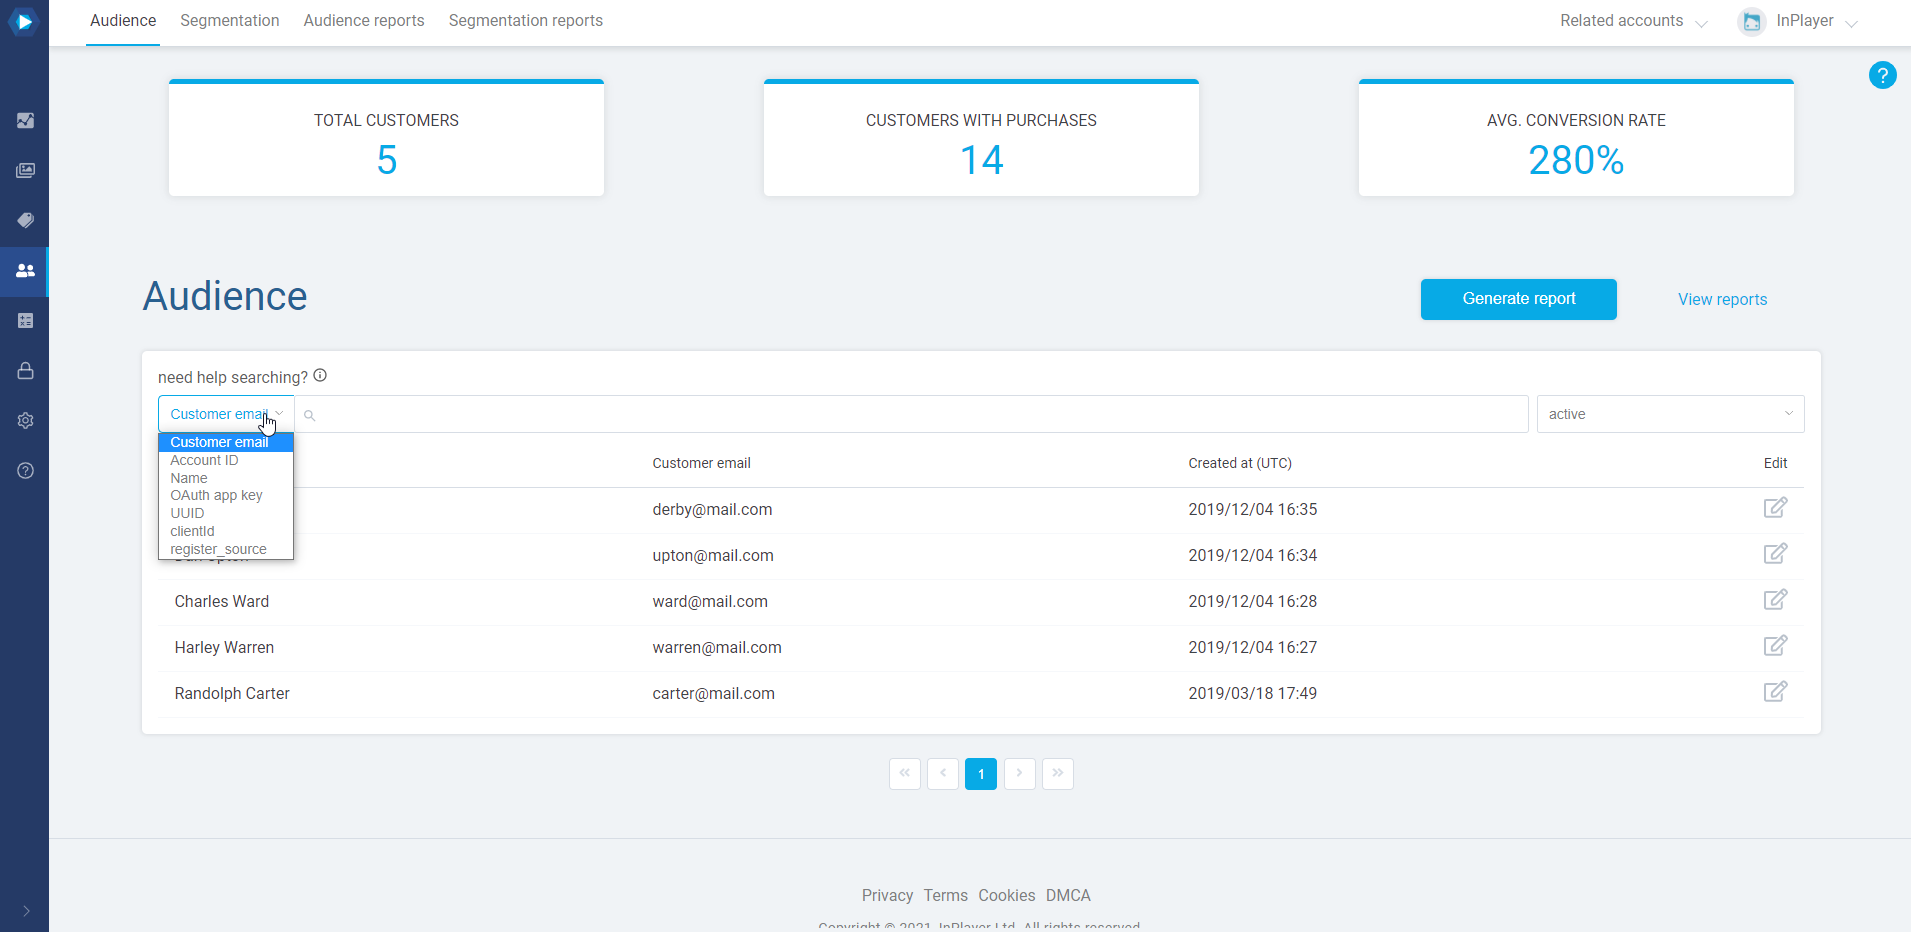
From here, you can use the search bar to find the viewer’s account.
To use the search bar, choose the filter you wish to use for your search from the dropdown menu, and type in your search.
Note that you can search with just the first part of the email address, in this case carter, or the second part, in this case mail.com, however, you cannot search by typing any of the two parts of the email address just partially, in this case, cart or mail.
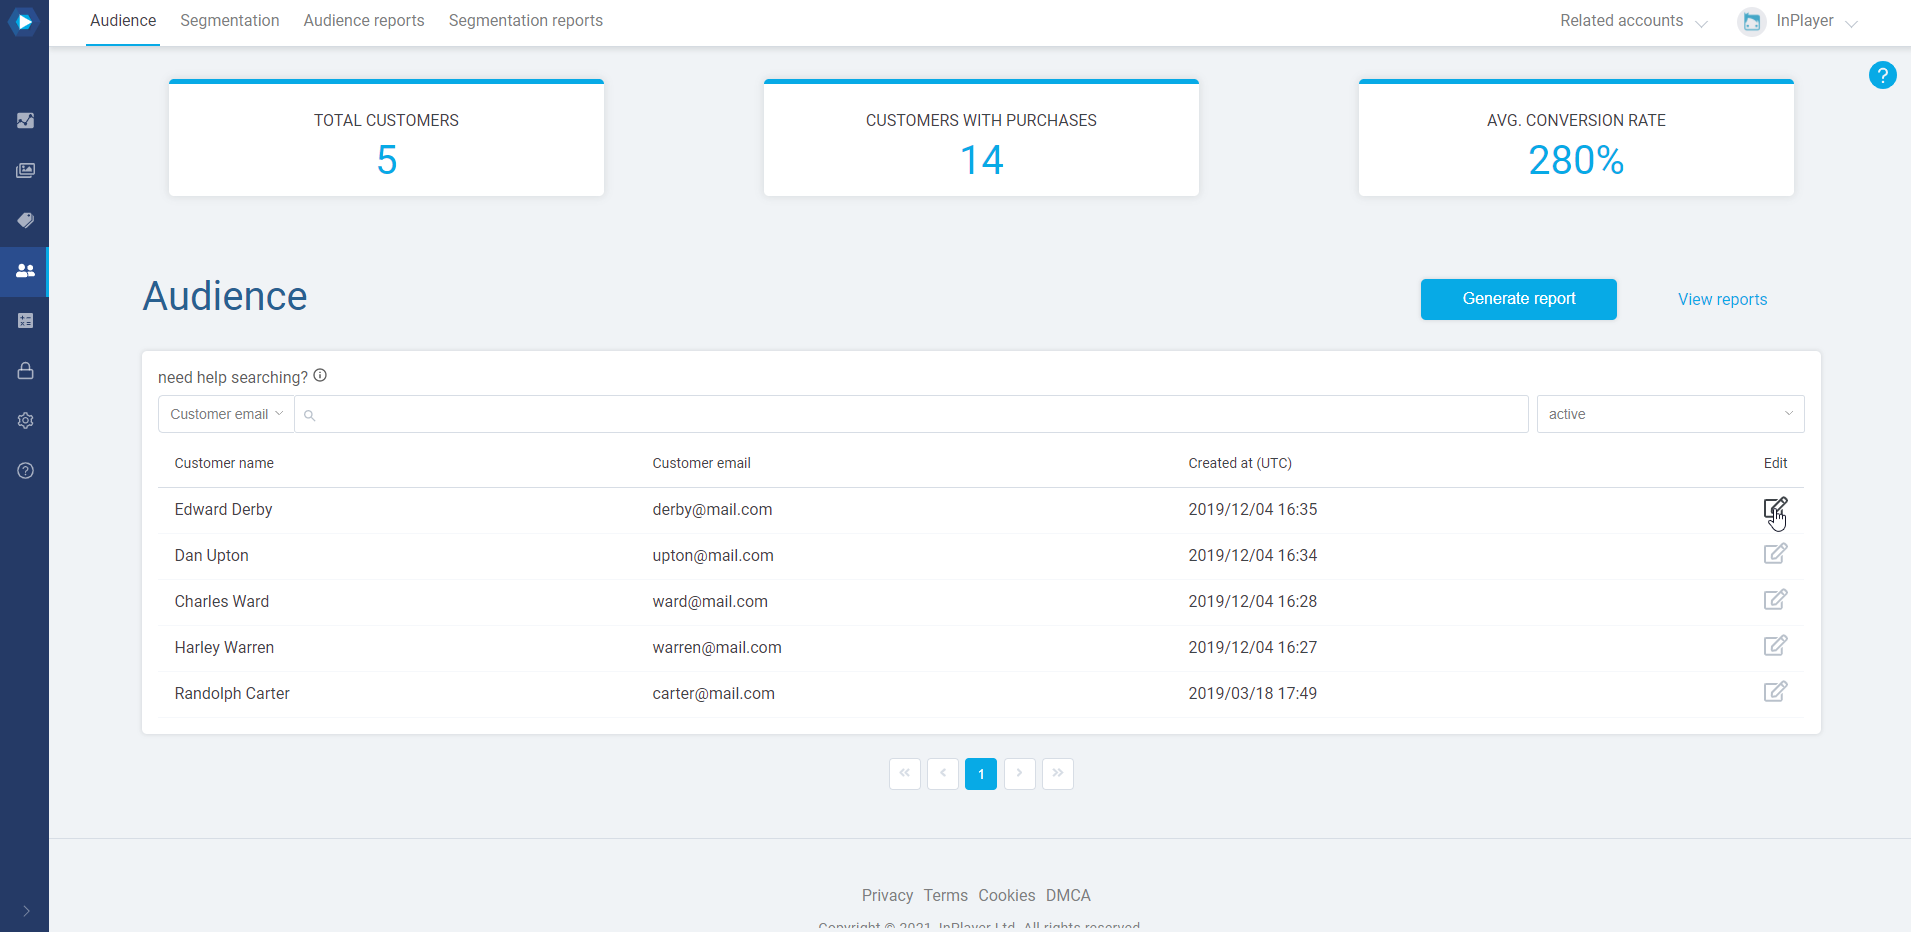
To open a viewer account, just click the button on the right, under the Edit column in the viewer’s row.
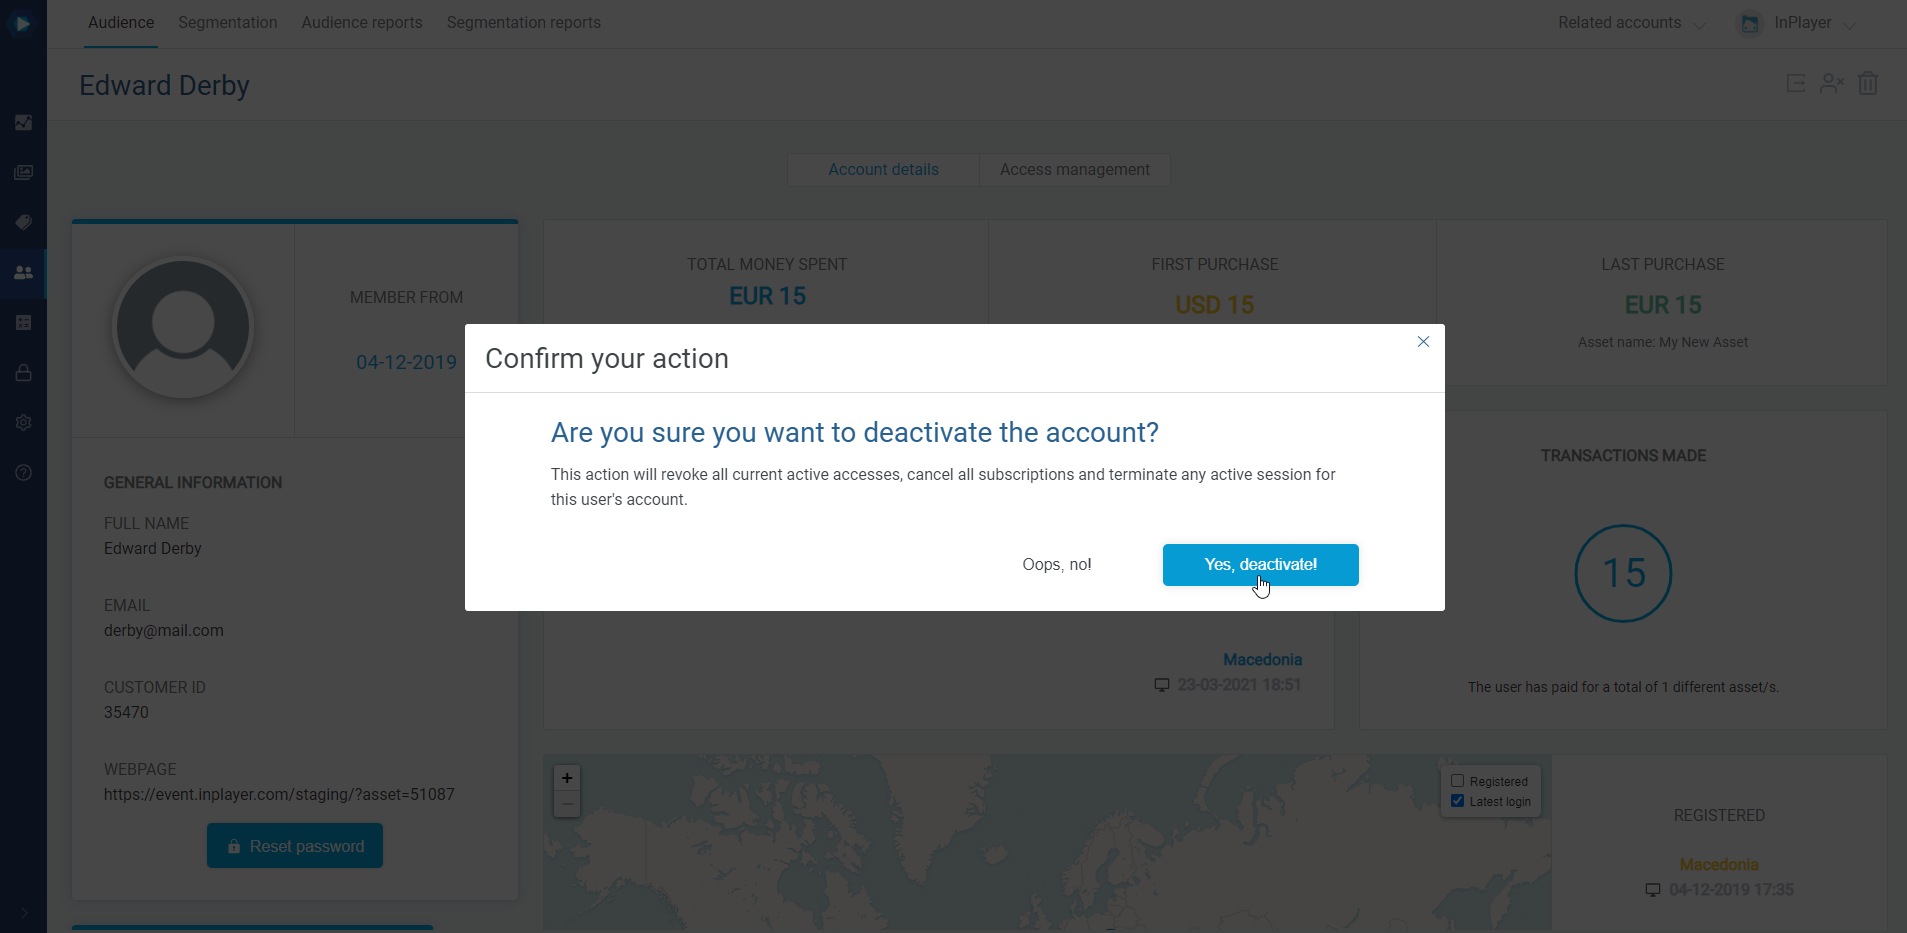
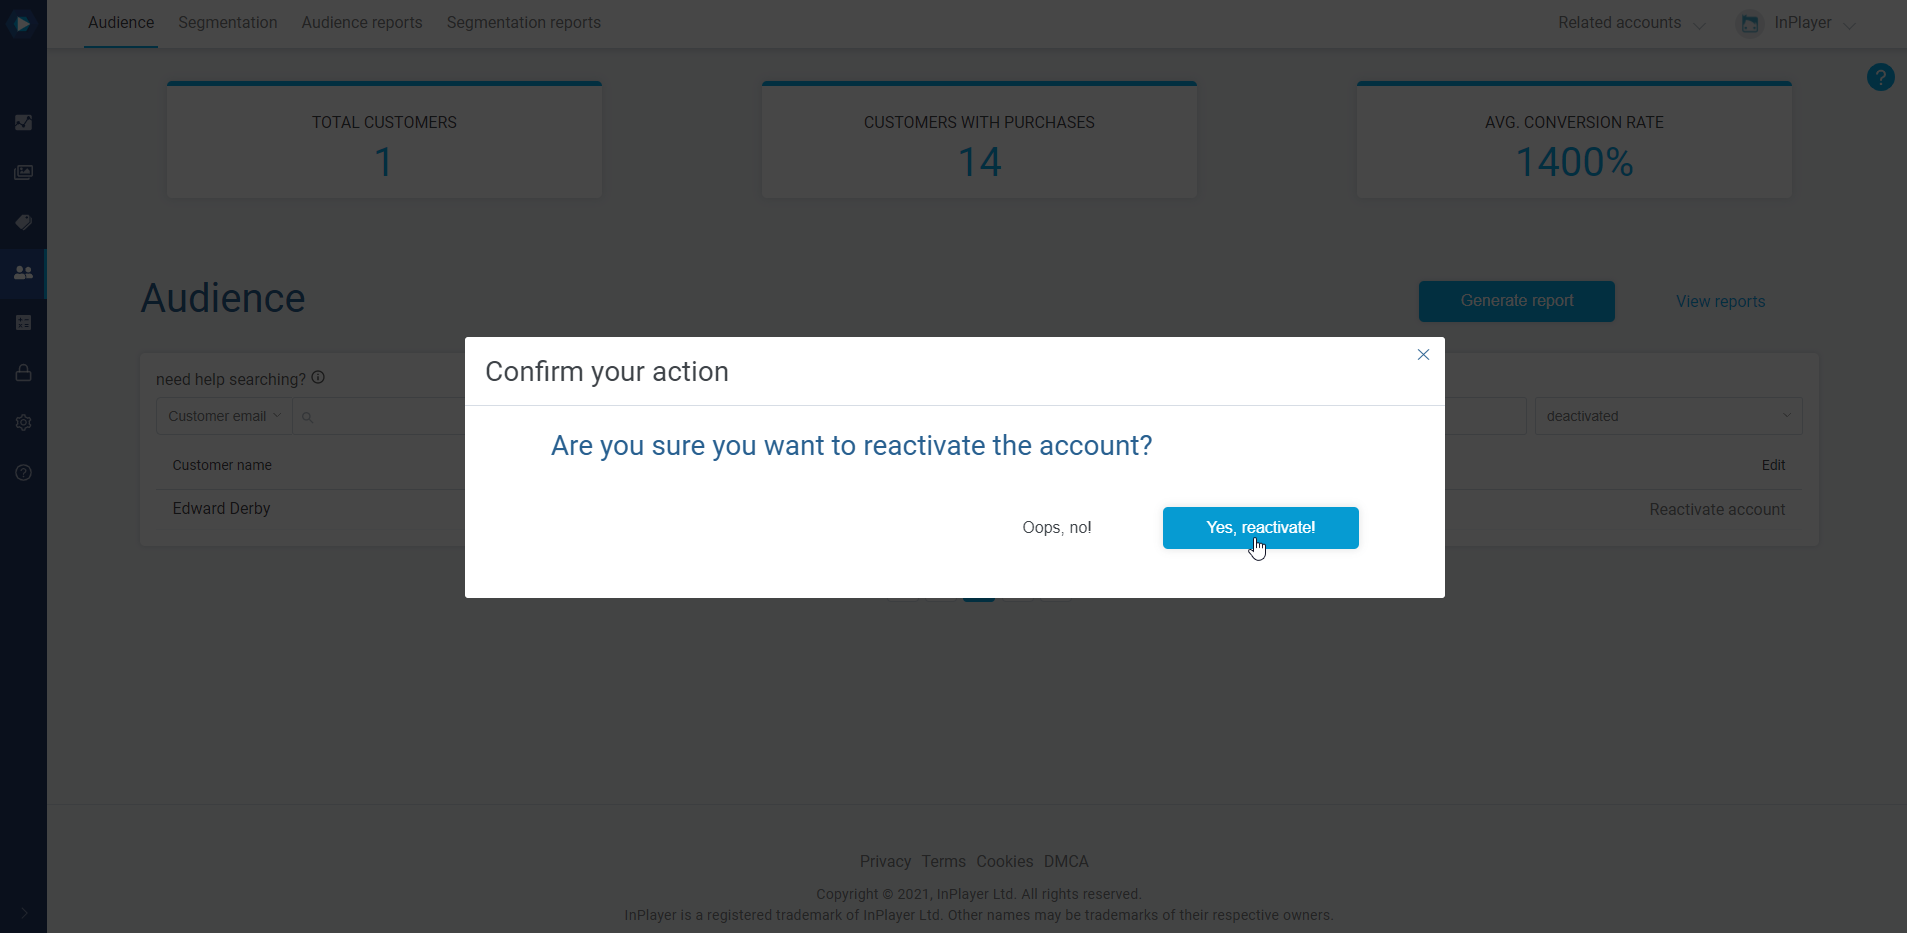
Deactivating a viewer account will terminate all accesses and subscriptions the viewer has, and the viewer won’t be able to log in or watch anything. Since the account will only be deactivated, but not deleted, it can be re-activated at any time. When reactivated, the account will still have its previous active accesses.
To deactivate the account, click the button at the top right.
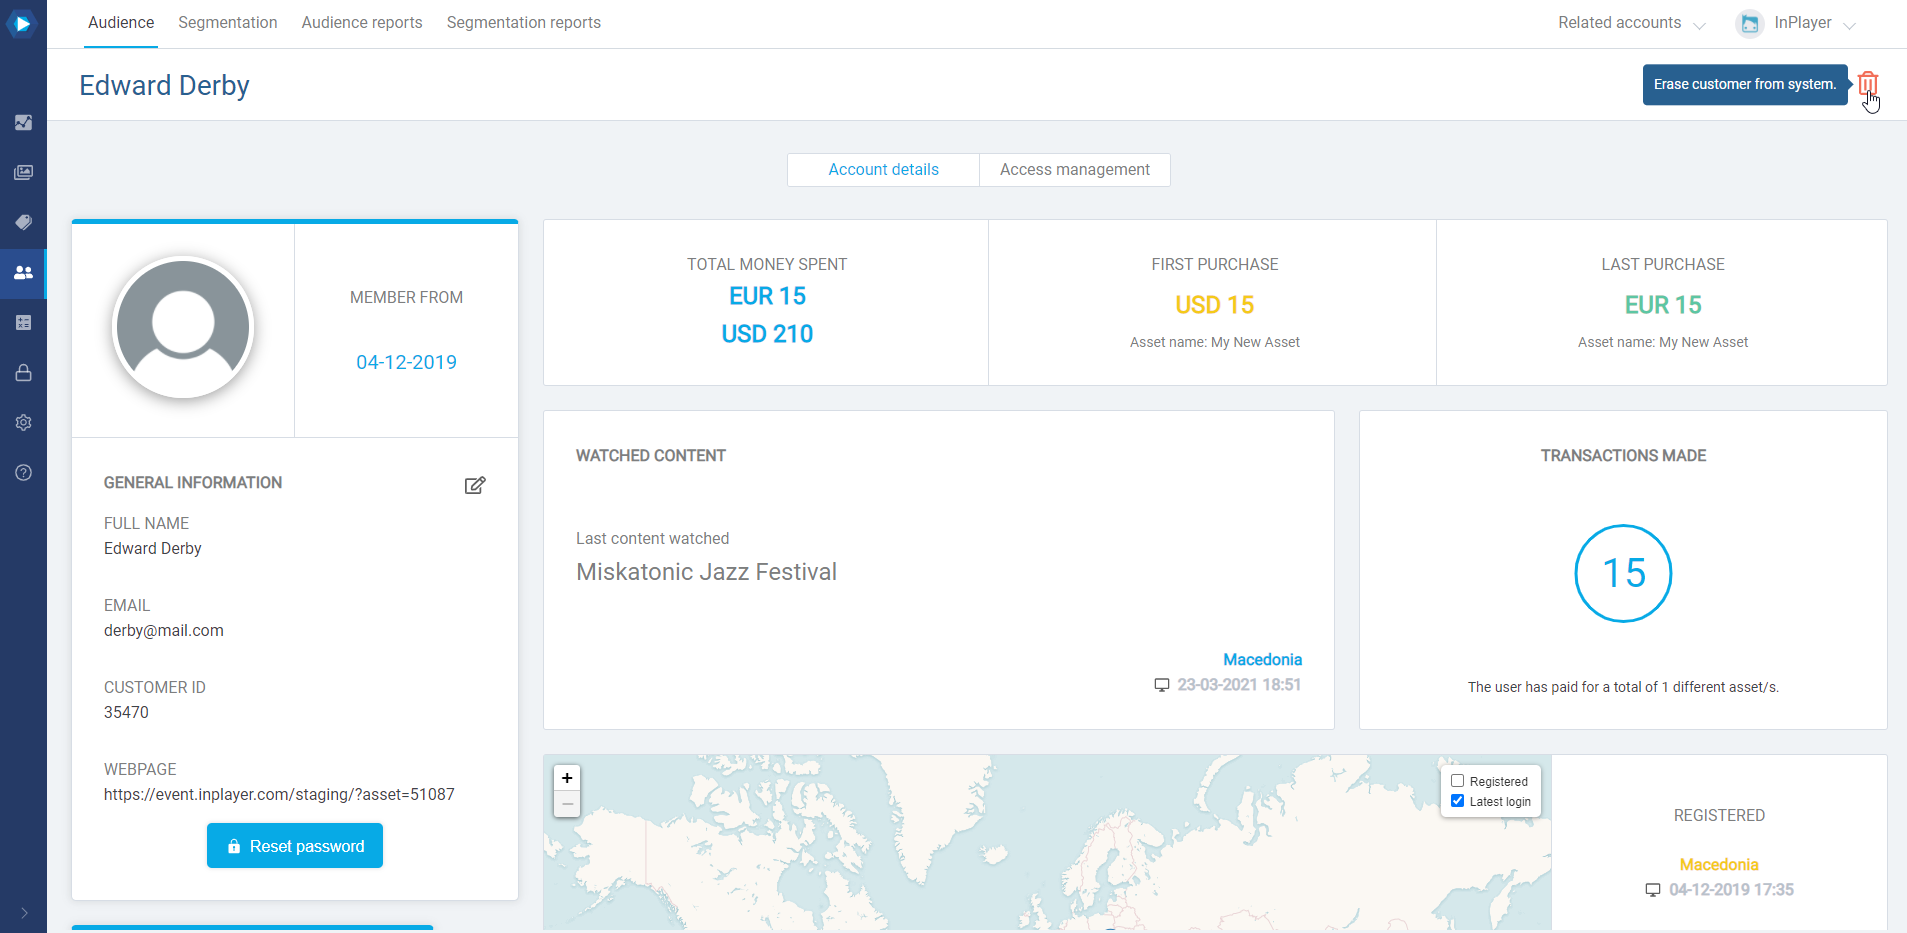
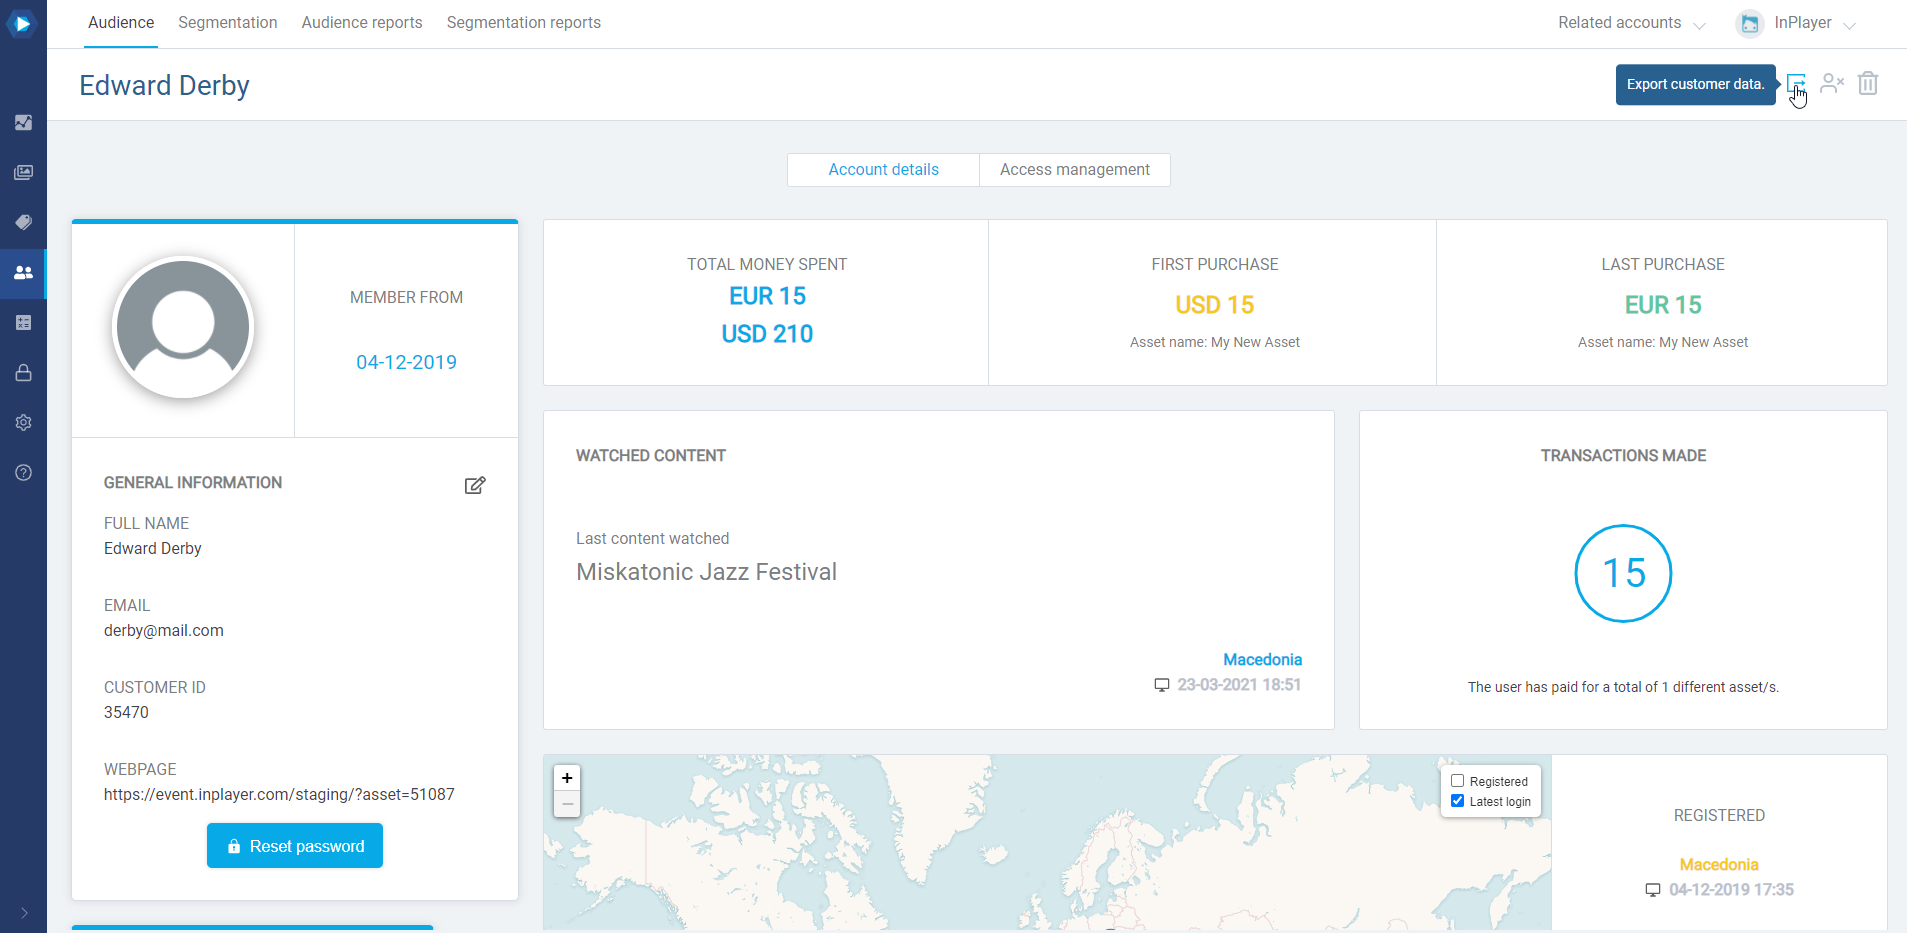
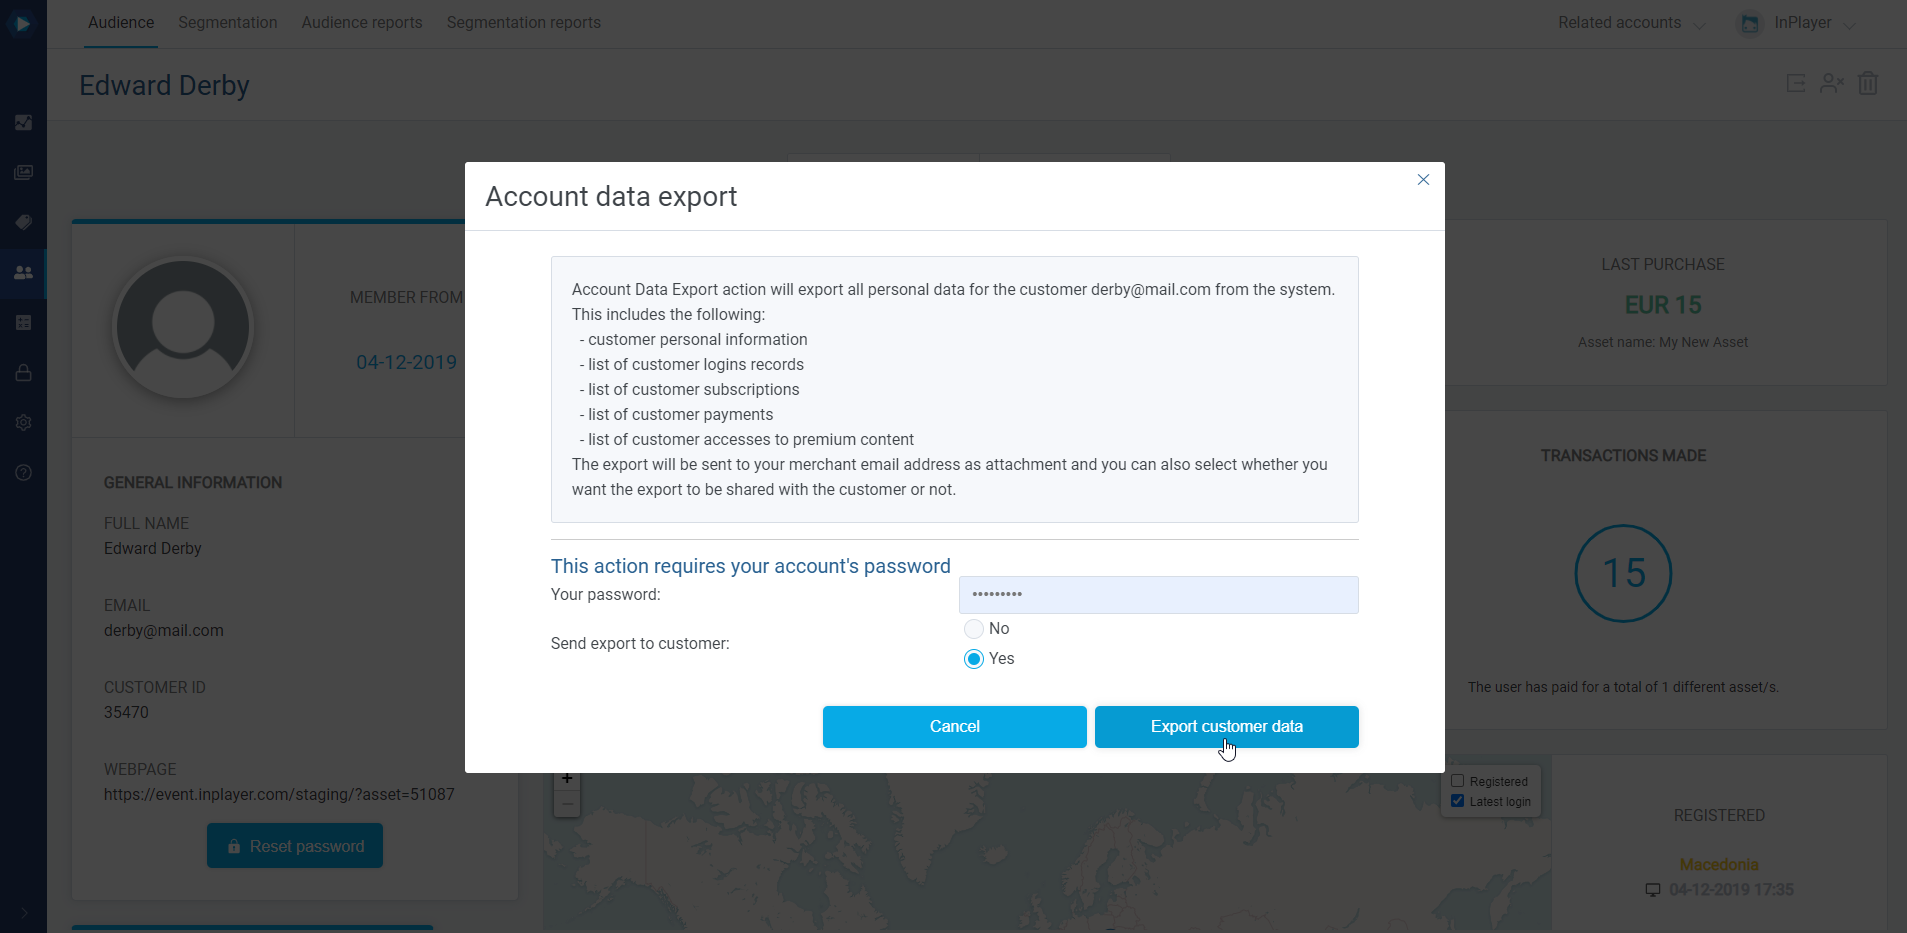
To export all the viewer details stored in our system, should the viewer request this as per GDPR regulation, click the button.
You can select whether you want to send the file with the details to the viewer via email, or whether you just want to download the file to your computer.
Finally, click Export customer data.
This concludes our guide.
If you have any questions, don’t hesitate to contact us at clients@inplayer.com.
With our Donations feature, you can accept donations from your viewers in fixed amounts you have set yourself, or allow viewers to donate as much as they want. You can also use both donation types together.
A viewer can make a donation only after completing a payment for an asset. After this, the viewer will not be able to make another donation on the same asset, until they purchase it again after their access expires. For Freemium assets, since there is no payment to be made, the viewer will be prompted whether they wish to donate each time they log into the asset.
To activate this feature, contact your account manager or send us an email at clients@inplayer.com. Once you get a confirmation that the feature has been activated, you can start setting things up.
Donations need to be enabled in the asset settings, which means they are always tied to an asset.
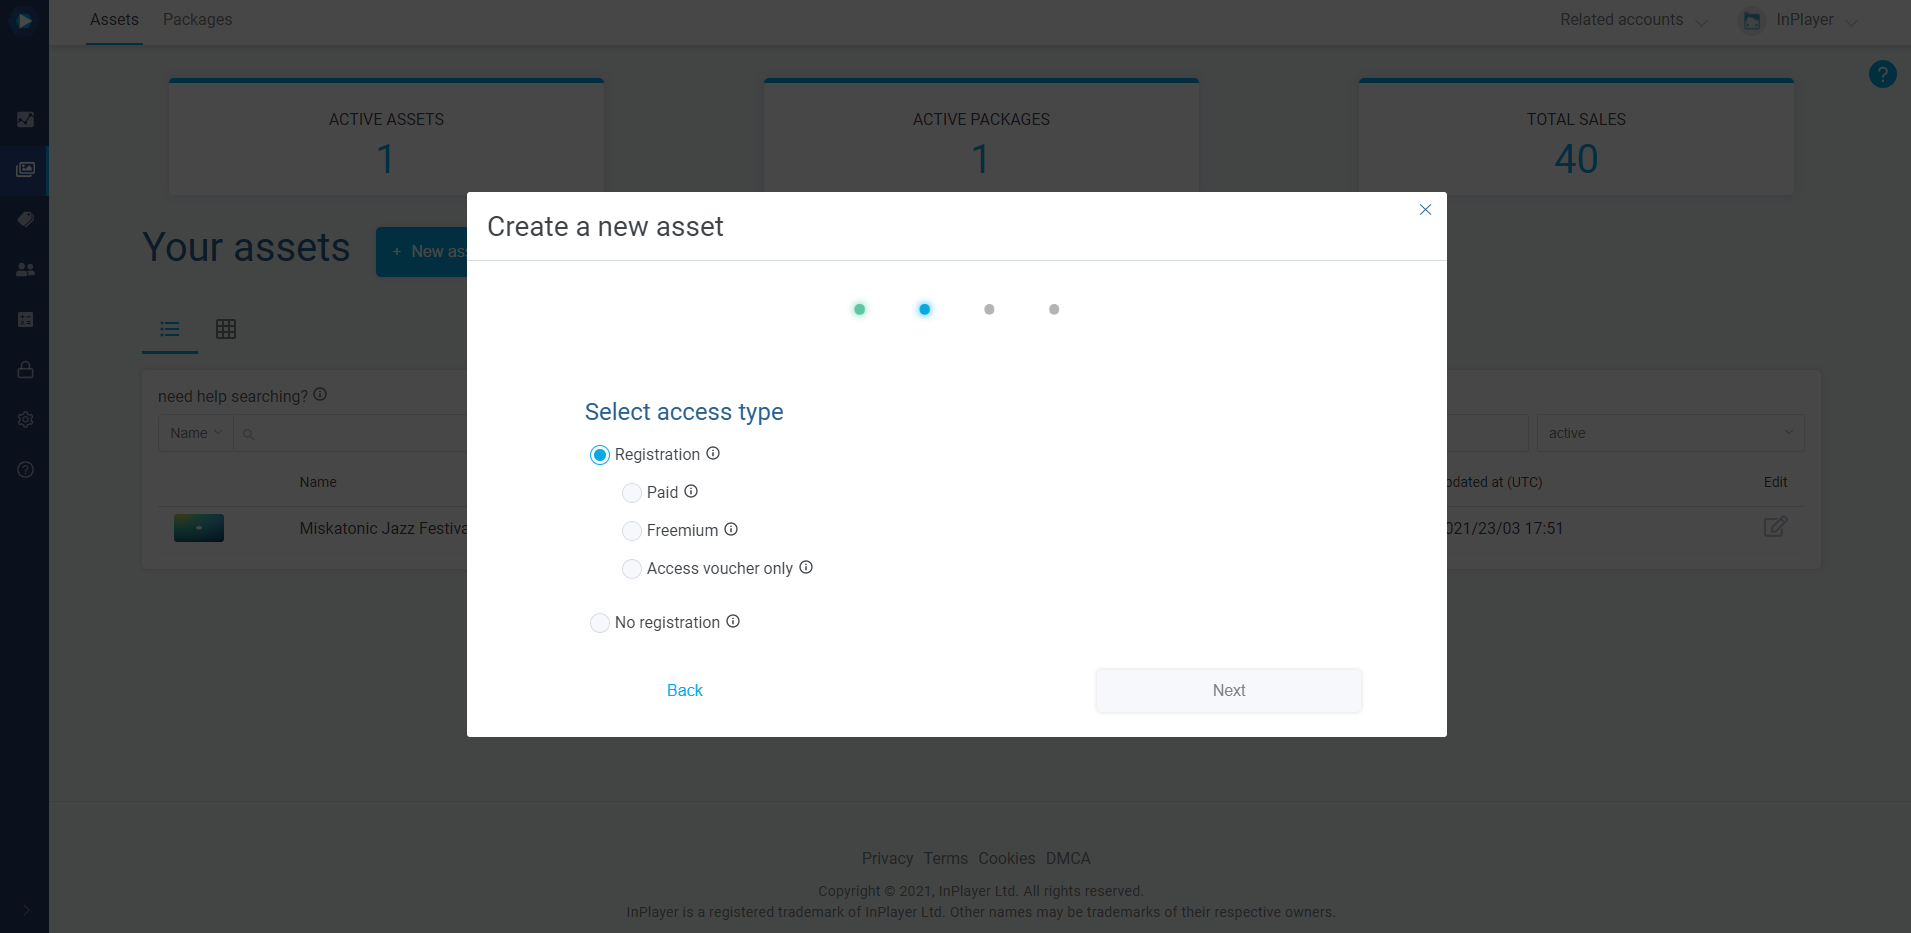
First, make sure you have created an asset in your InPlayer Dashboard. You can learn about creating assets in the asset creation guides here. You can enable donations on all assets of the Registration access type, i.e. Paid, Freemium, and Access voucheronly assets.
With this option, the viewer will be able to enter their own amount in the donation screen and donate as much as they want.
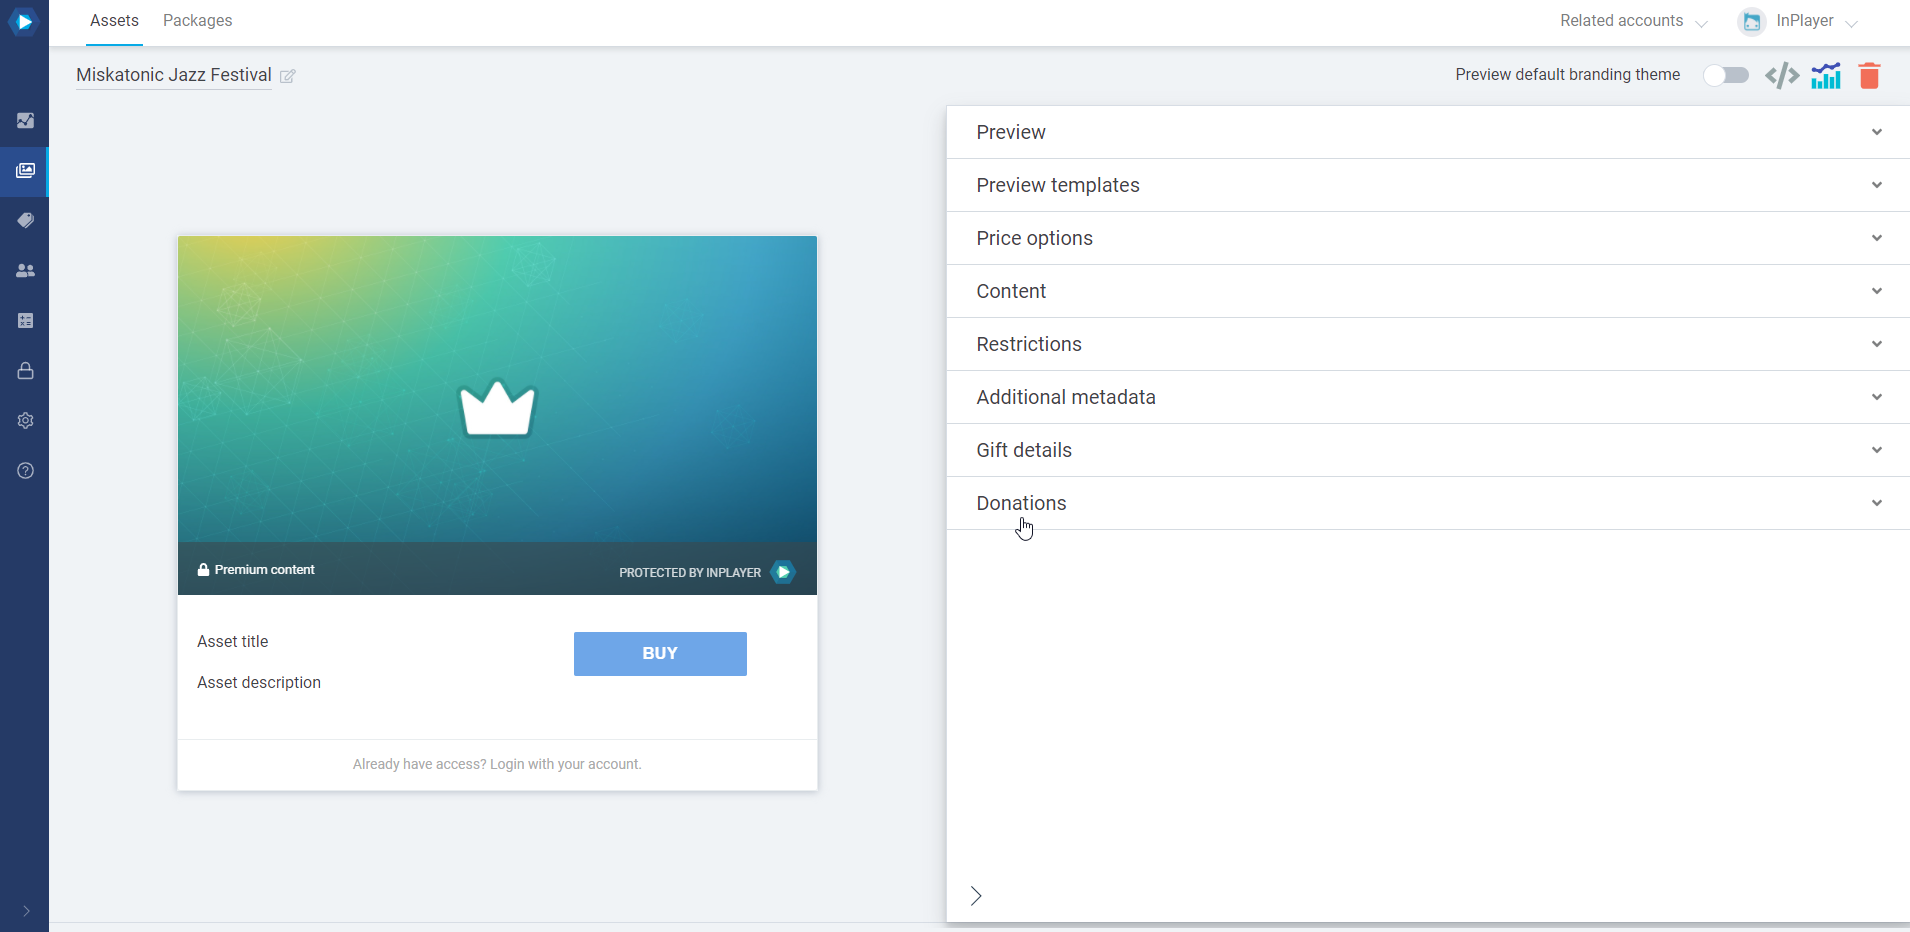
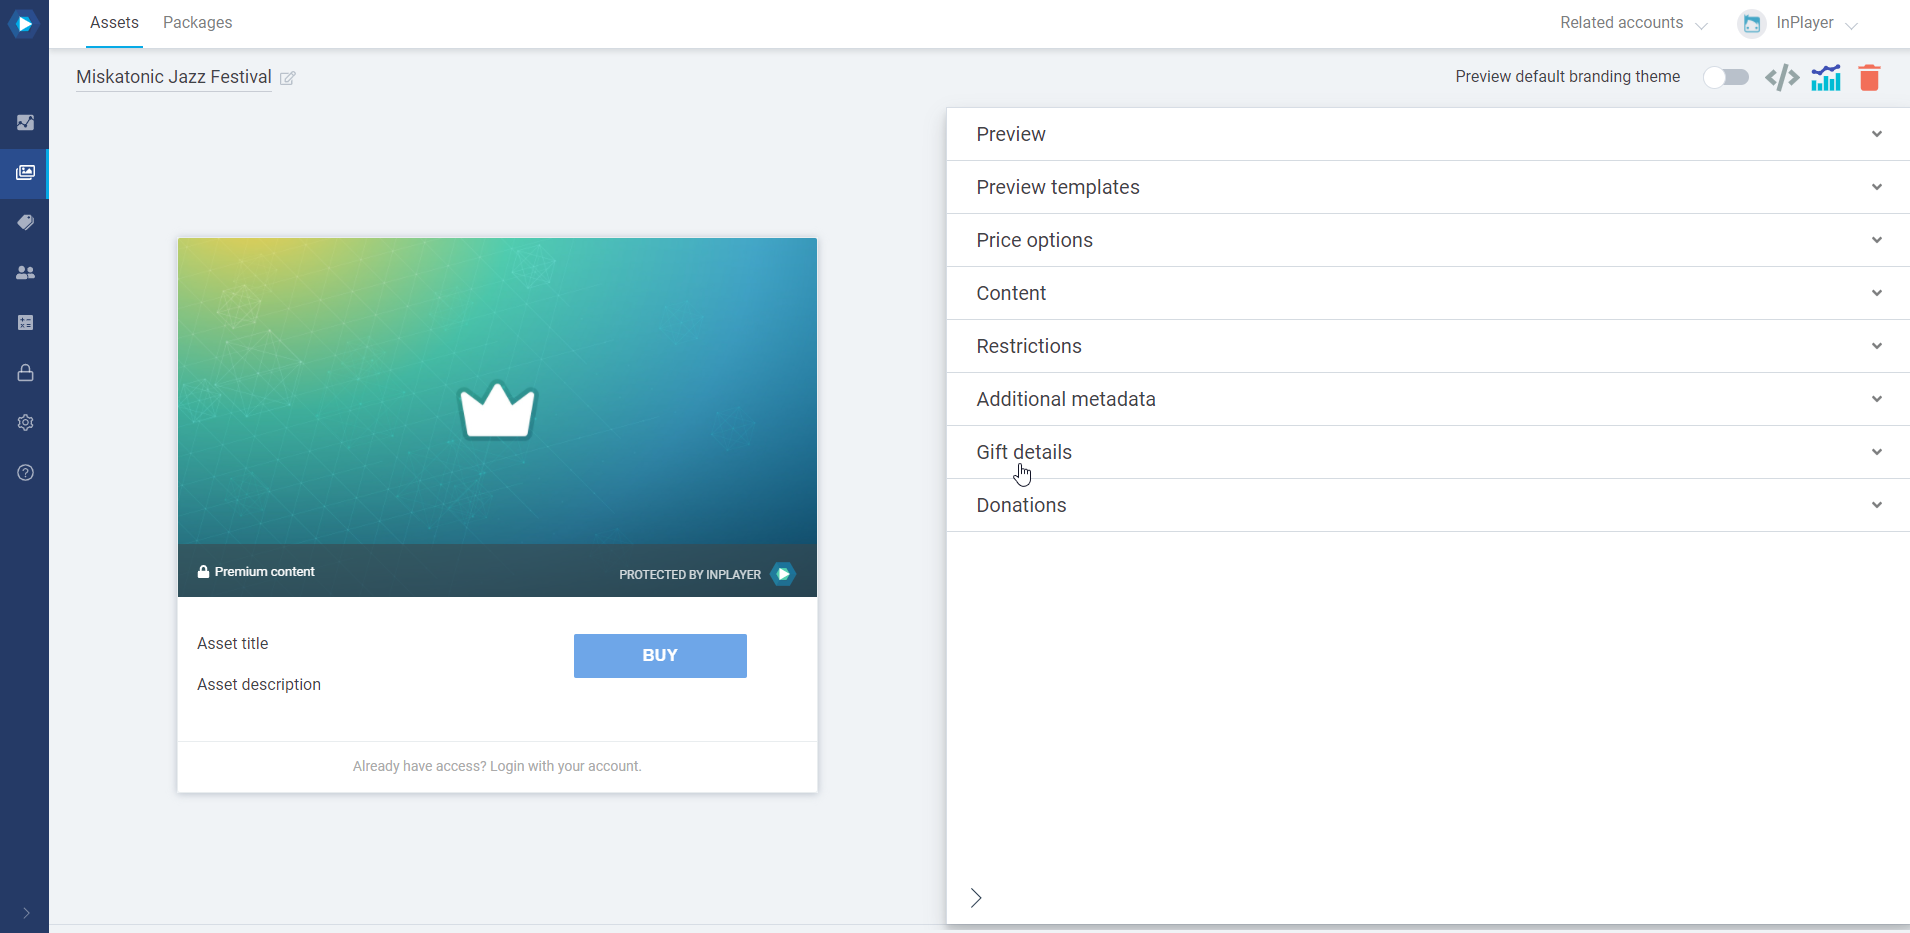
Once you create your asset, open the asset management screen, and click on Donations.
If you don’t see the Donation section, make sure to send us an email at clients@inplayer.com so we can activate this feature for you.
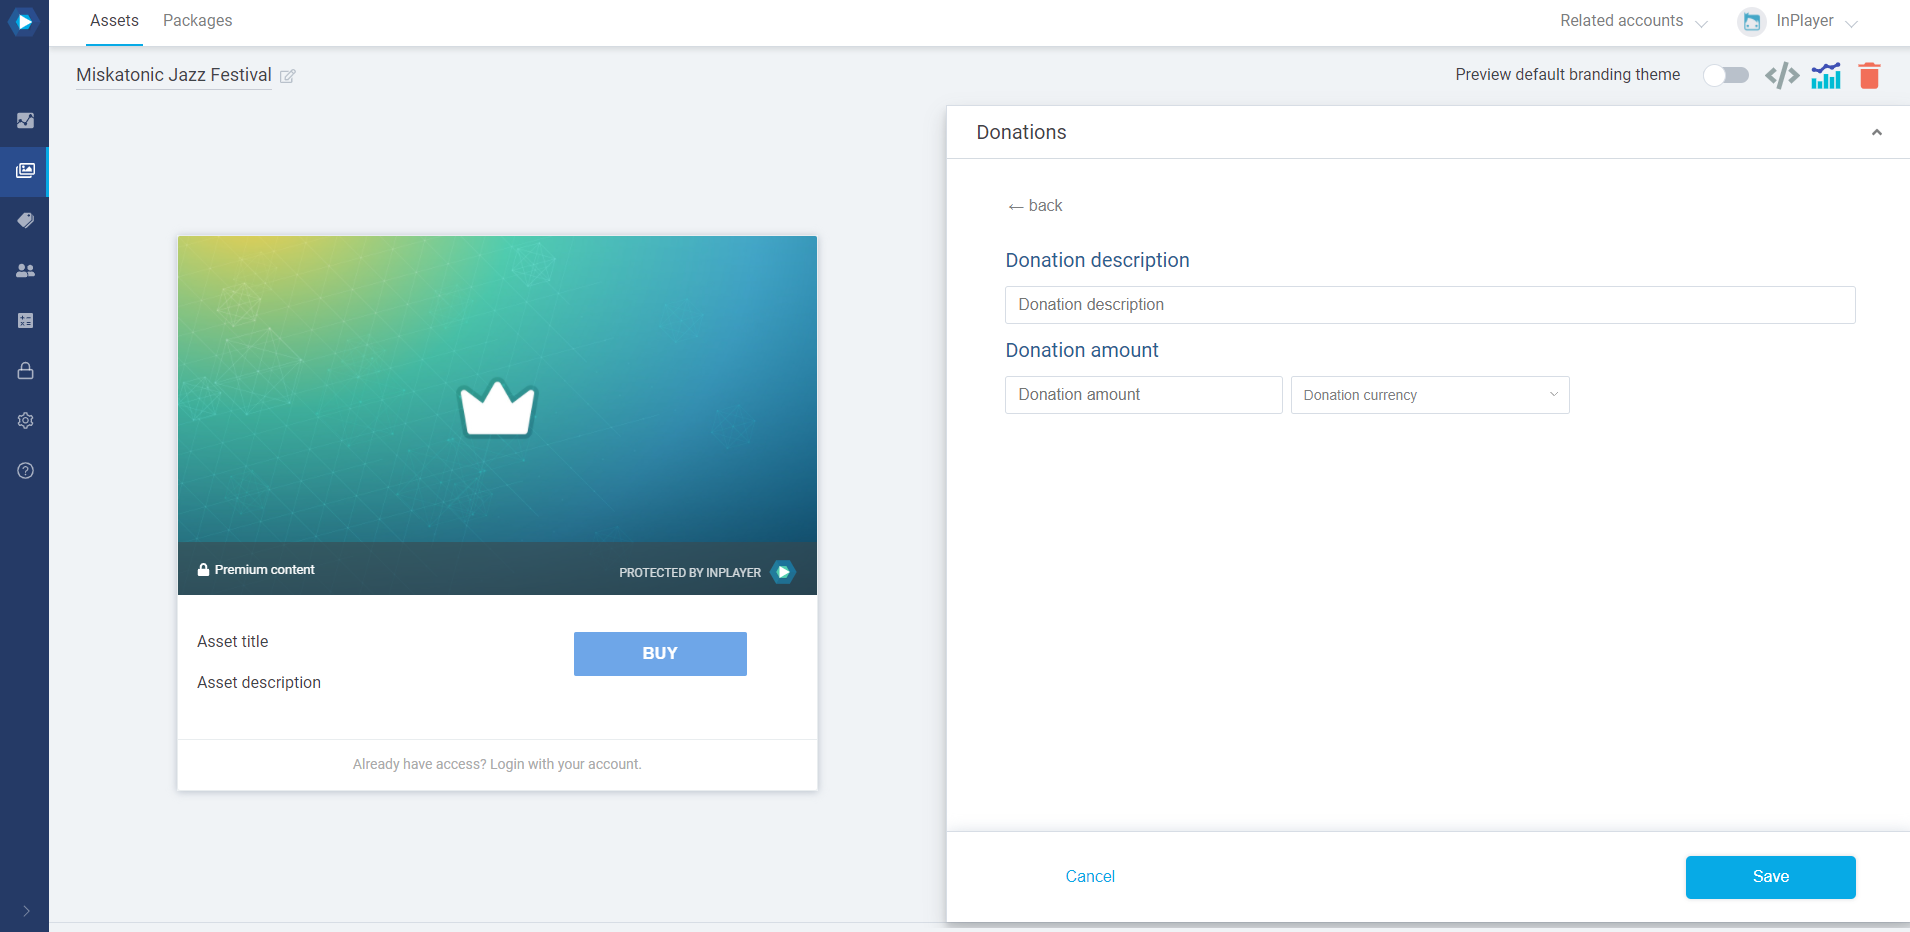
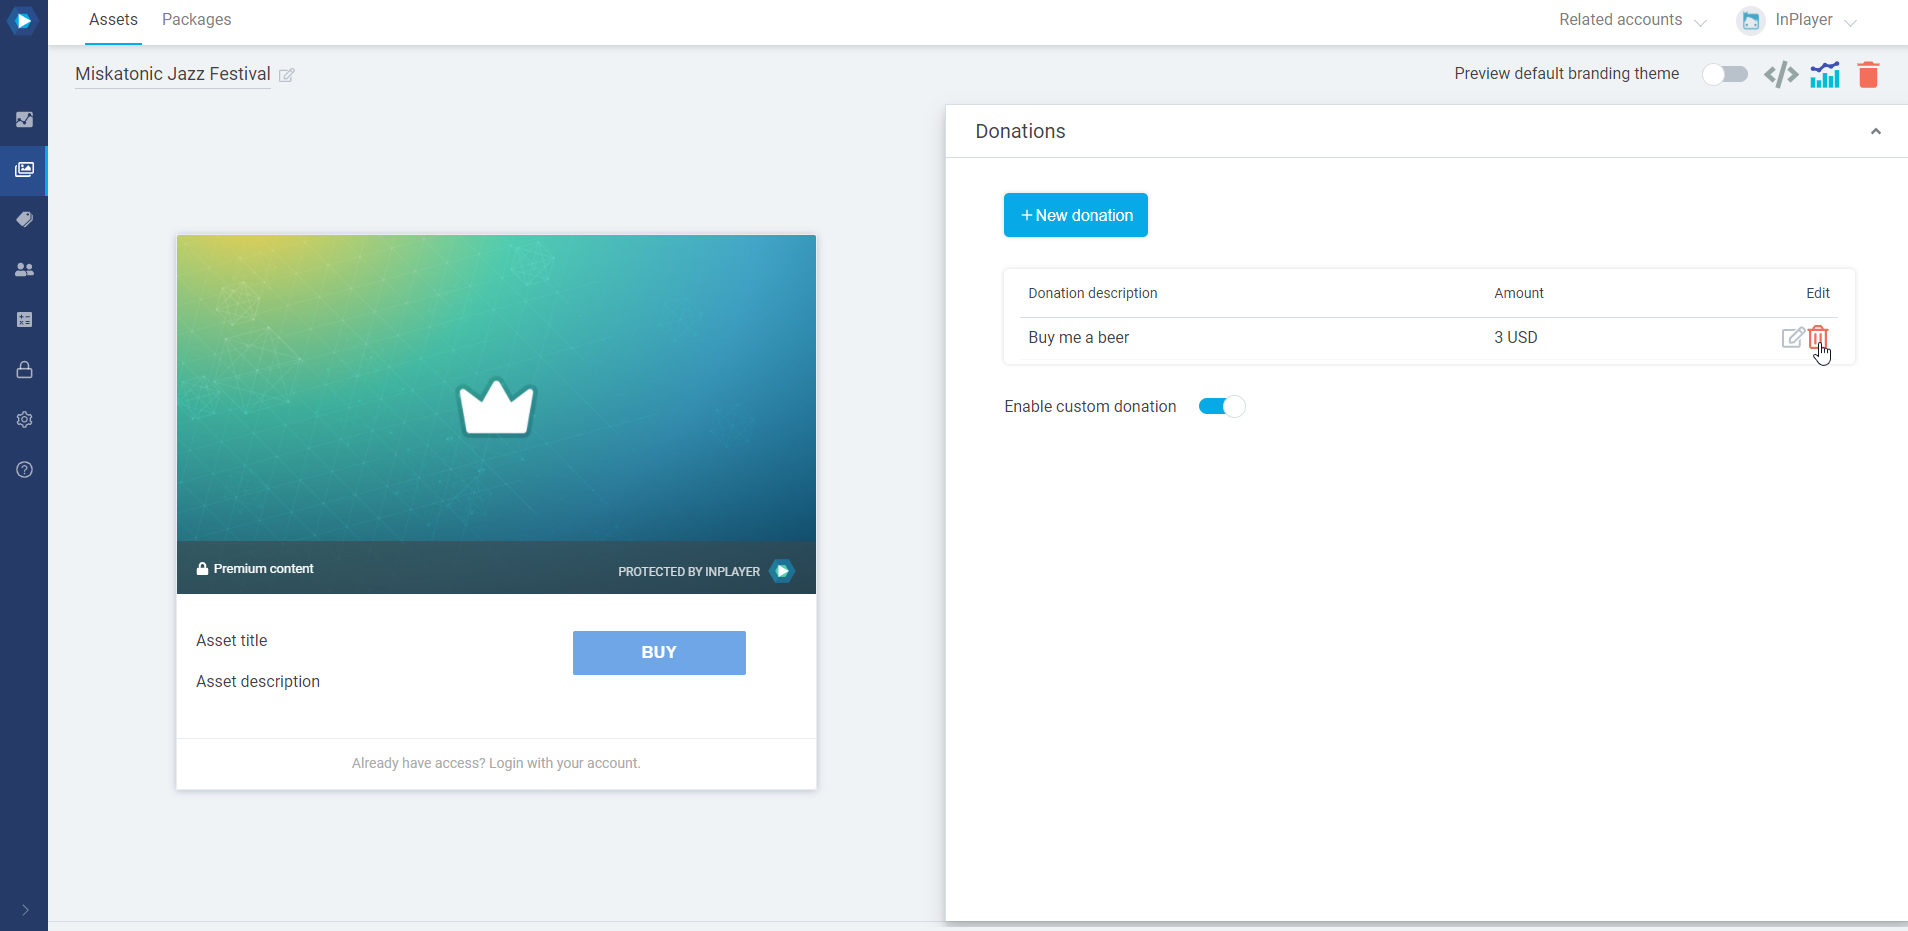
Click on the Enable custom donation toggle.
Note that for custom donations, the available currencies will be inhereted from the fixed donation options. If there are no fixed donation options, the available currencies will be USD, EUR, and GBP.
If you ask us to deactivate the Donation feature on your account, all the previously active donation options will still be visible and available to viewers, but they won’t be editable, until the feature is re-activated.
A viewer can make a donation right after completing their payment for an asset.
They go to your website, click on the content they want to purchase, make an account if they haven’t already, and log in. They choose their price option and complete their payment.
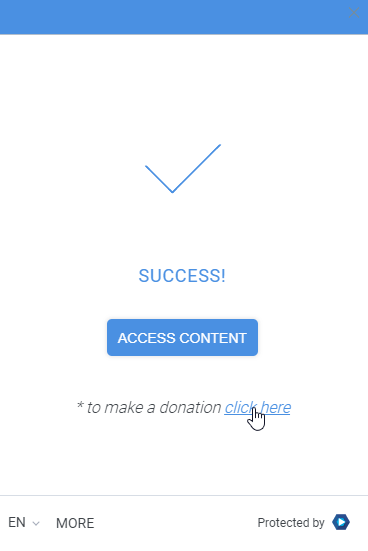
After a successful purchase, the viewer will see the following screen, where they can choose to make a donation.
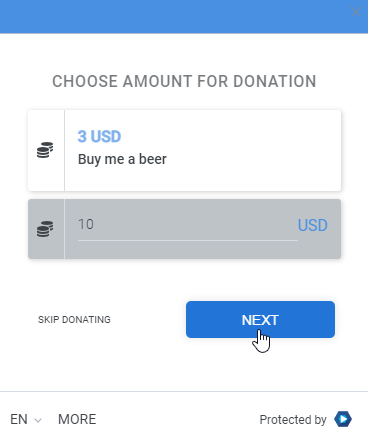
They select the donation they wish to make and click NEXT.
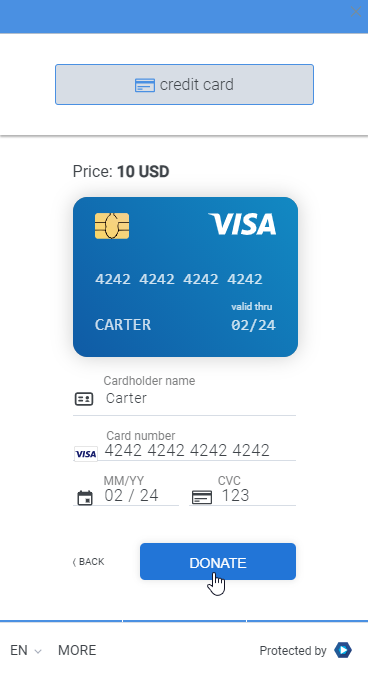
Finally, they enter their card information and click DONATE.
As described above, the donation prompt appears after a viewer has made a payment, or in the case of Freemium assets, every time they click on the asset.
However, if you wish to have a dedicated donation button on your page that will lead a viewer straight to the donations screen, you can do so by using the code here.
This concludes our guide.
If you have any other questions, don’t hesitate to contact us at clients@inplayer.com.
With the Gift feature, a viewer can purchase content for someone else.
The gift comes in the form of a 100% discount voucher that will automatically be sent to the recipient via email. As soon as they receive the email with the voucher, the recipient will be able to go to the content webpage, create their account, and purchase the content using the 100% discount code.
The gift voucher will be tied to the email address of the recipient and no one else will be able to use it.
Note that the gift voucher codes and their validity are independent of the codes for other voucher types.
This works for both PPV content, and subscriptions. For subscriptions, the gift will only be for the first subscription period (first month for monthly subscriptions, first year for yearly subscriptions etc.). After the first subscription period expires, the recipient will be charged for the next period, unless, of course, they cancel their subscription beforehand.
By purchasing a gift, no accesses or subscriptions are activated on the gift purchaser’s account.
The Gift feature is only available on assets of the Paid type.
To activate this feature, contact your account manager or send us an email at clients@inplayer.com. Once you get a confirmation that the feature has been activated, you can start setting things up.
Gift purchases need to be enabled in the asset settings.
First, make sure you have created an asset, and have added a price option to that asset. You can learn about creating assets and adding price options in the asset creation guides here.
Note that the Gift feature is only available on assets of the Paid type.
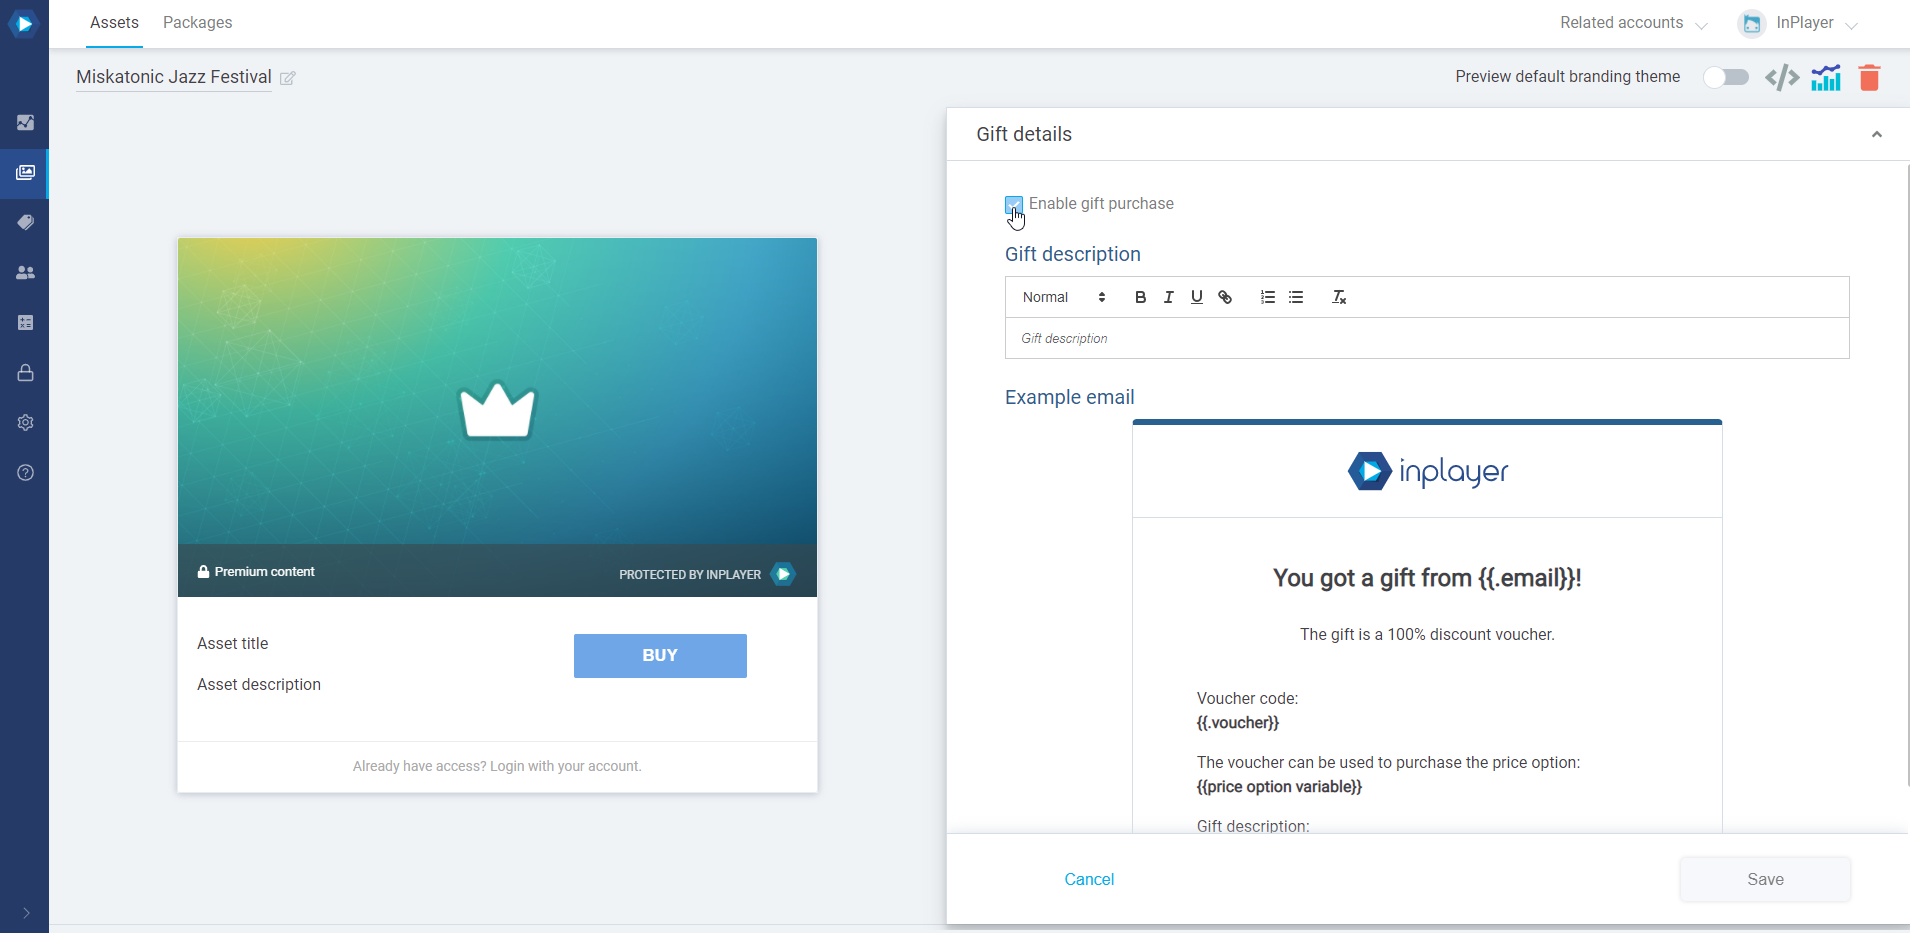
Once you have your asset, in the asset management screen, go to Gift details.
If you don’t see the Gift details section, make sure to send us an email at clients@inplayer.com so we can activate this feature for you.
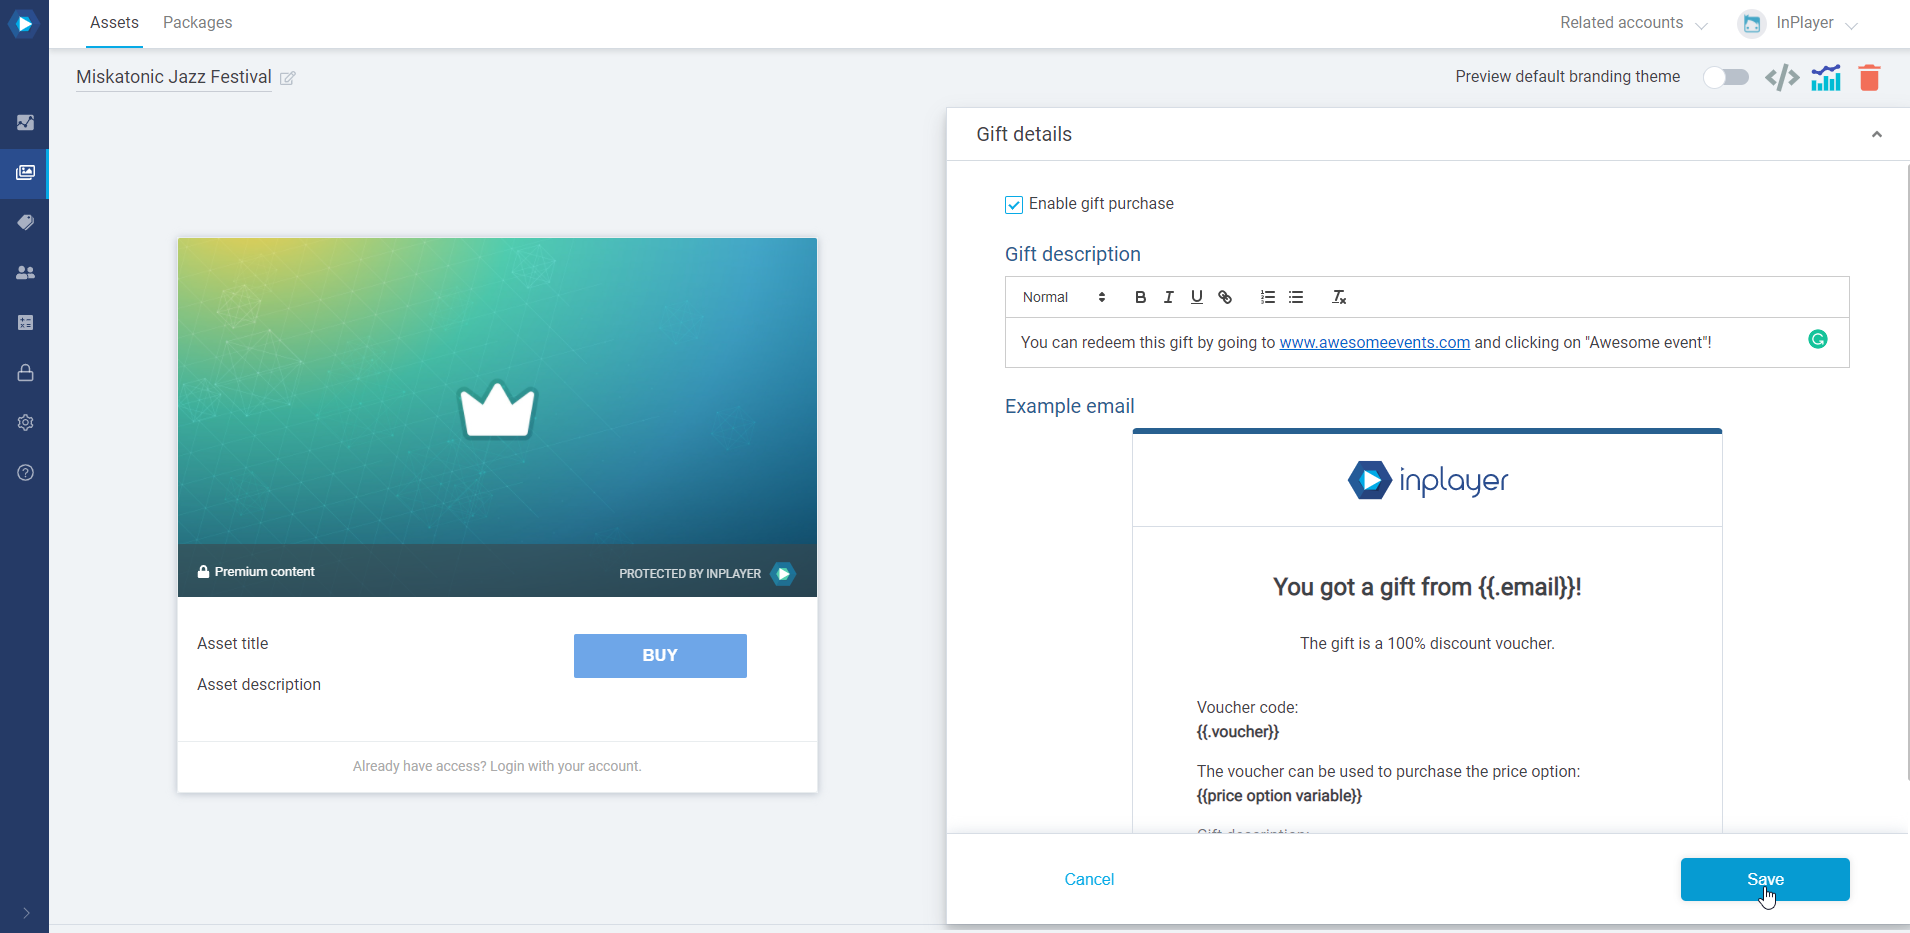
Tick the Enable gift purchase option.
Under Gift description, write the message you want to appear in the email that will be sent to the recipient. This is a required field.
Including short instructions on where the gift can be redeemed is a good idea. Here is an example:
You can redeem this gift by going to www.awesomeevents.com and clicking on “Awesome event”!
Under Example email, you can see a preview of the email that will be sent to the recipient.
Note that if you have set up custom email templates, the look of the email in this preview might not reflect the actual email that will be sent.
Viewers can also buy packages as gifts, not just individual assets.
To do this, just enable the Gift option for the assets in the package. When a viewer is purchasing a package via an asset that has the Gift option enabled, they will be able to purchase the package price option as a gift.
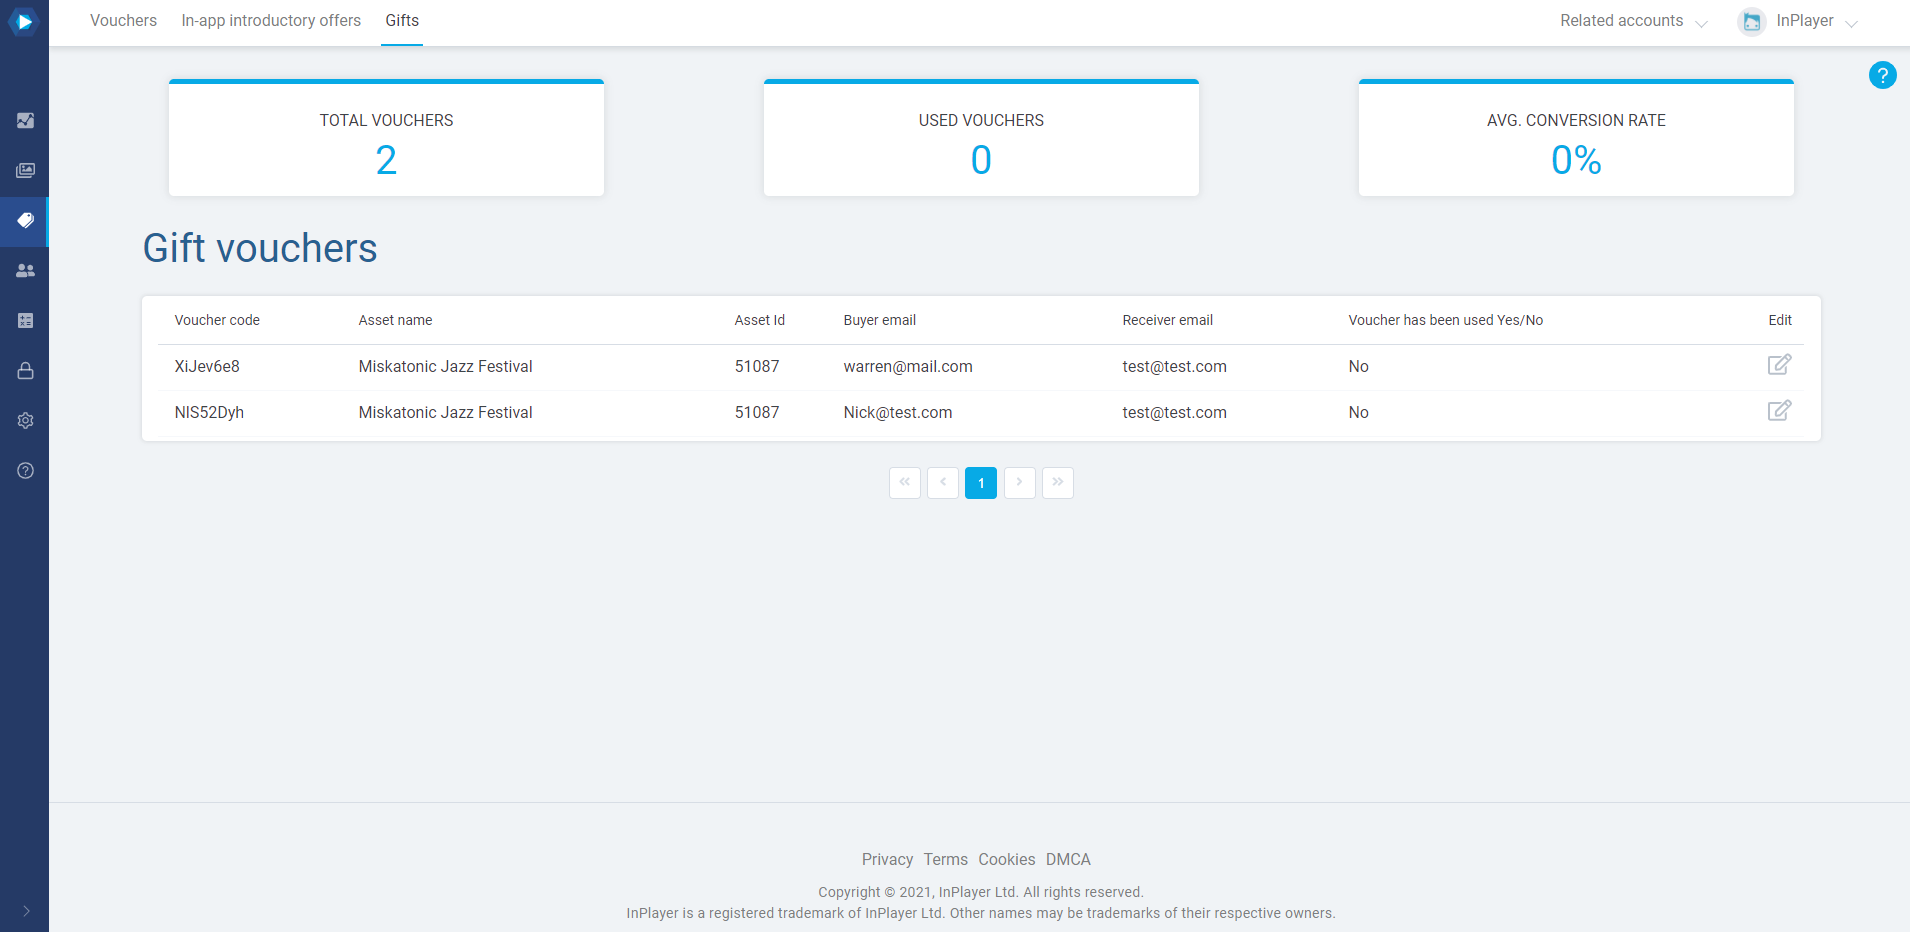
You can find all the gift vouchers that were created as a result of gift purchases by going to the Gifts tab of the Promotions section of the InPlayer Dashboard.
Currently, you can get a report of all the gifts and their details via the following API call:
curl --location -g --request GET 'https://services.inplayer.com/v2/vouchers/gifts?page=1&limit=100&search[]=type:gift-vouchers&size=100' \
--header 'Authorization: Bearer'
The request will pull the last 100 gift purchases at most. In order to see the next 100 gift purchases simply change the page number in parameters to 2.
This is the viewer experience flow for cases where a viewer wants to purchase a gift without also purchasing a pass for themselves. In these cases, no accesses or subscriptions are activated on the gift purchaser’s account.
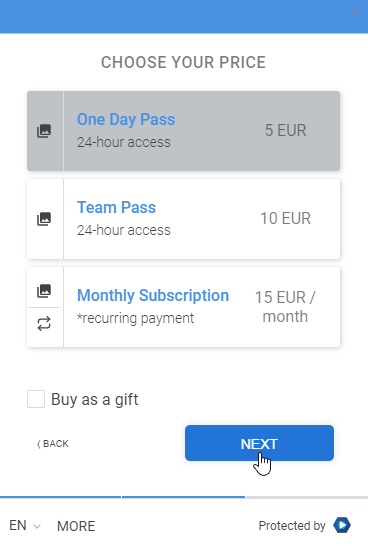
The viewer goes to your website, clicks on the content they want to purchase, makes an account if they haven’t already, and logs in.
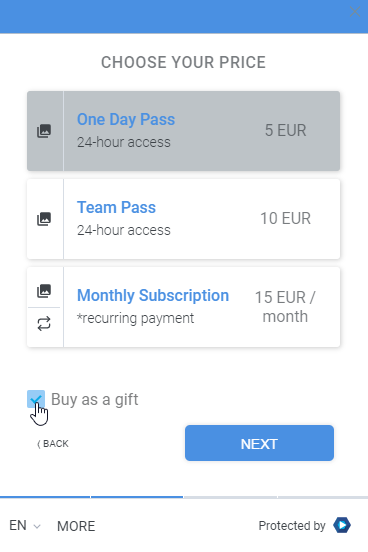
They are then taken to the price selection screen, where they can select the pass they wish to buy, and then tick the Buy as a gift option.
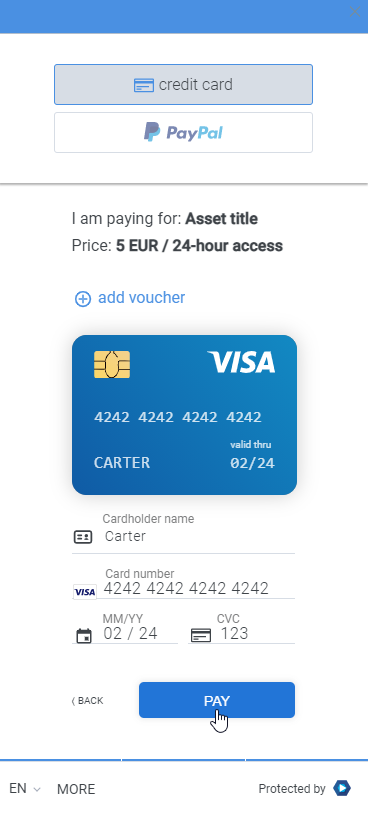
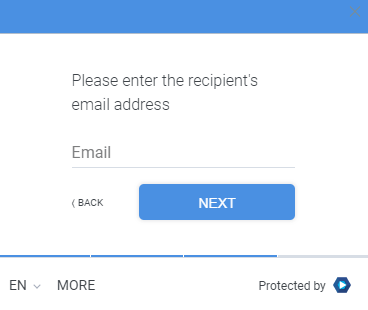
On the next screen, they enter the email address to which the gift should be sent.
They then finish the payment like they normally would, by entering their payment details and clicking PAY.
Note that discount or access vouchers cannot be used when purchasing a gift.
As soon as the payment is finalized, an email will be sent to both the gift giver and the gift recipient, with their payment confirmation and their gift code, respectively.
This is the viewer experience flow for cases where a viewer wants to purchase a gift, but also wants to purchase the same pass for themselves. The viewer first purchases a pass for themselves and then purchases the gift.
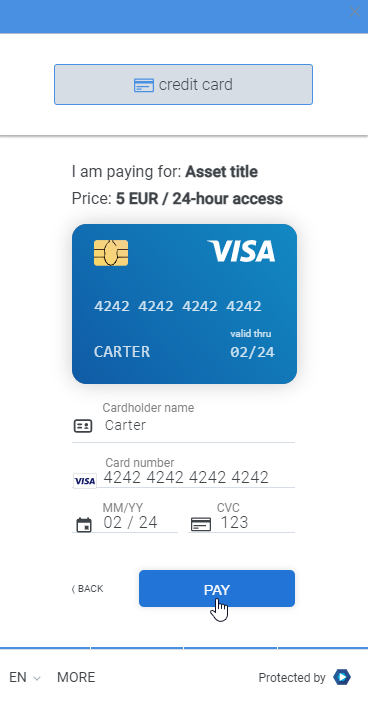
The viewer goes to your website, clicks on the content they want to purchase, makes an account if they haven’t already, and logs in.
They are then taken to the price selection screen, where they can select the pass they wish to buy. They do not select the Buy as a gift option.
They enter their payment details and click PAY.
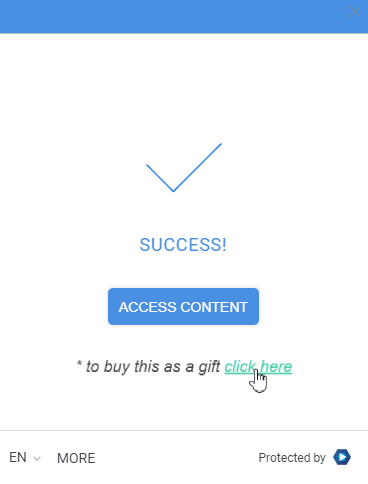
On the next screen, they click the * to buy this as a gift click here option.
They enter the email address to which the gift should be sent.
They then finish the payment like they did previously, by entering their payment details and clicking PAY.
Note that discount or access vouchers cannot be used when purchasing a gift.
As soon as the payment is finalized, an email will be sent to both the gift giver and the gift recipient, with their payment confirmation and their gift code, respectively.
As described above, viewers can purchase a gift pass for someone else by ticking the Buy as gift option in the price selection screen, or on the payment confirmation screen after purchasing their own pass.
However, if you wish to have a dedicated gift button on your page that will lead a viewer straight to the gift-purchasing screen, you can do so by using the code here.
This concludes our guide.
If you have any other questions, don’t hesitate to contact us at clients@inplayer.com.