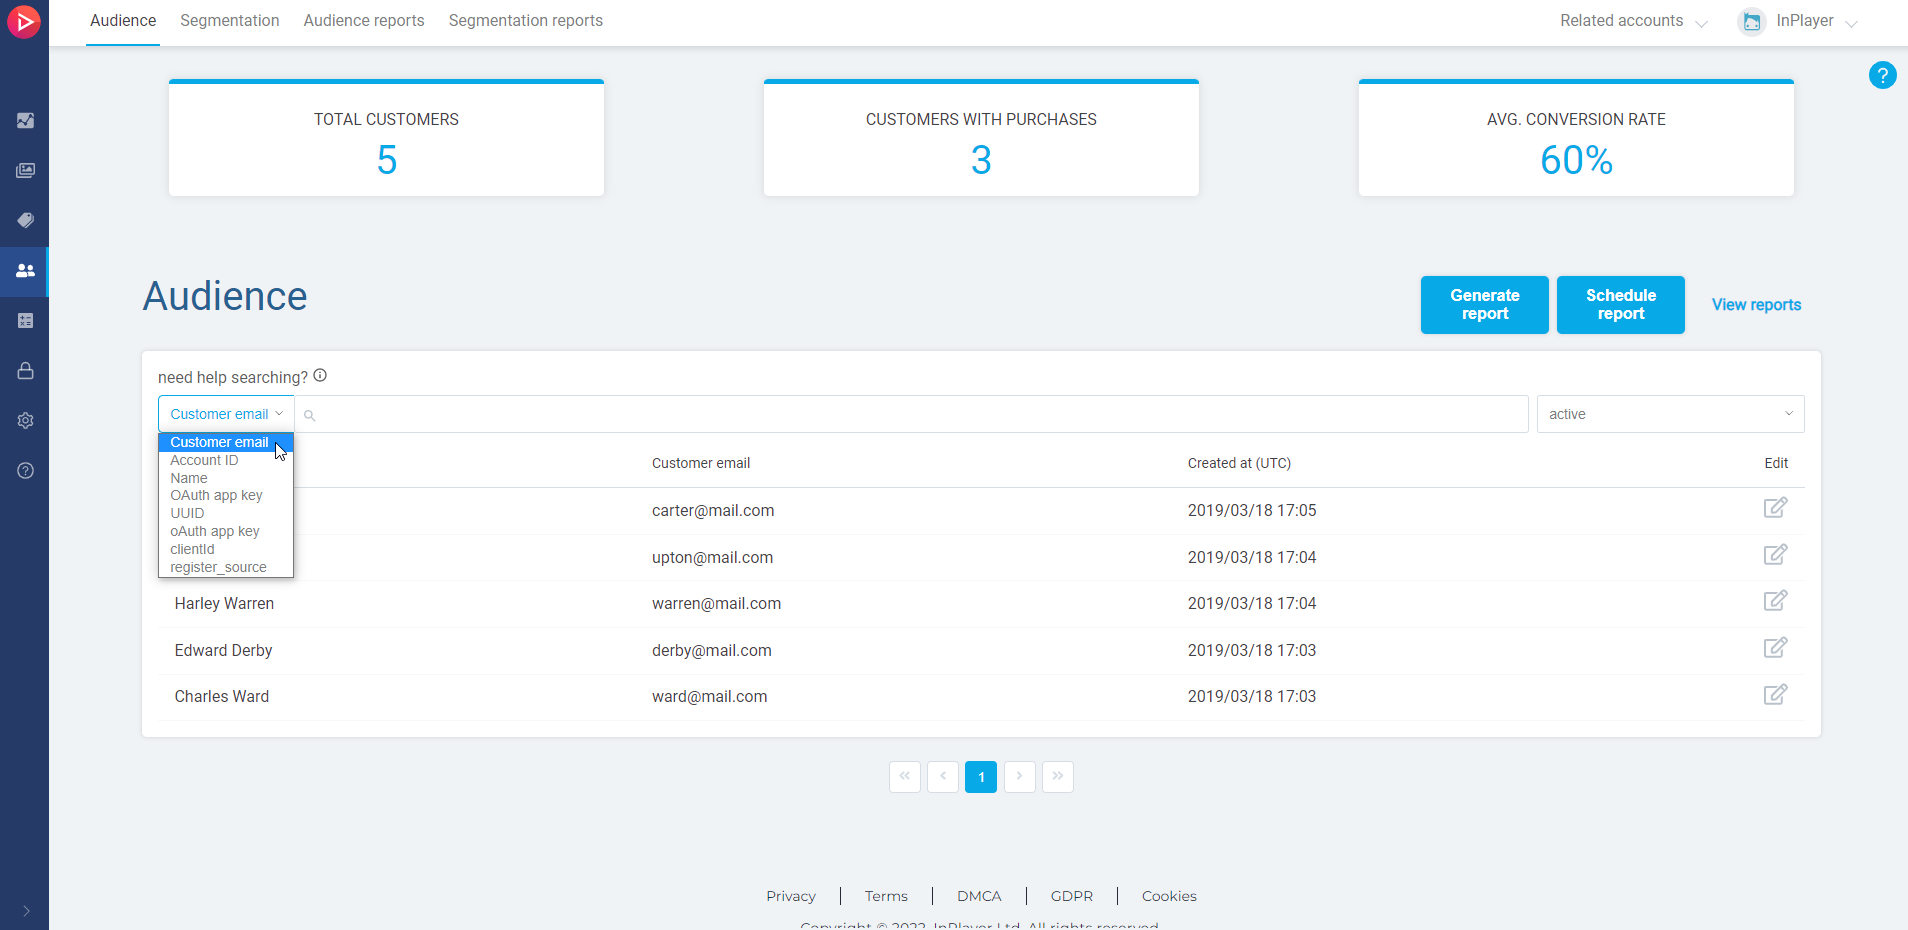
From here, you can use the search bar to find the viewer’s account.
To use the search bar, choose the filter you wish to use for your search from the dropdown menu, and type in your search.
Note that you can search with just the first part of the email address, in this case carter, or the second part, in this case mail.com, however, you cannot search by typing any of the two parts of the email address just partially, in this case, cart or mail.
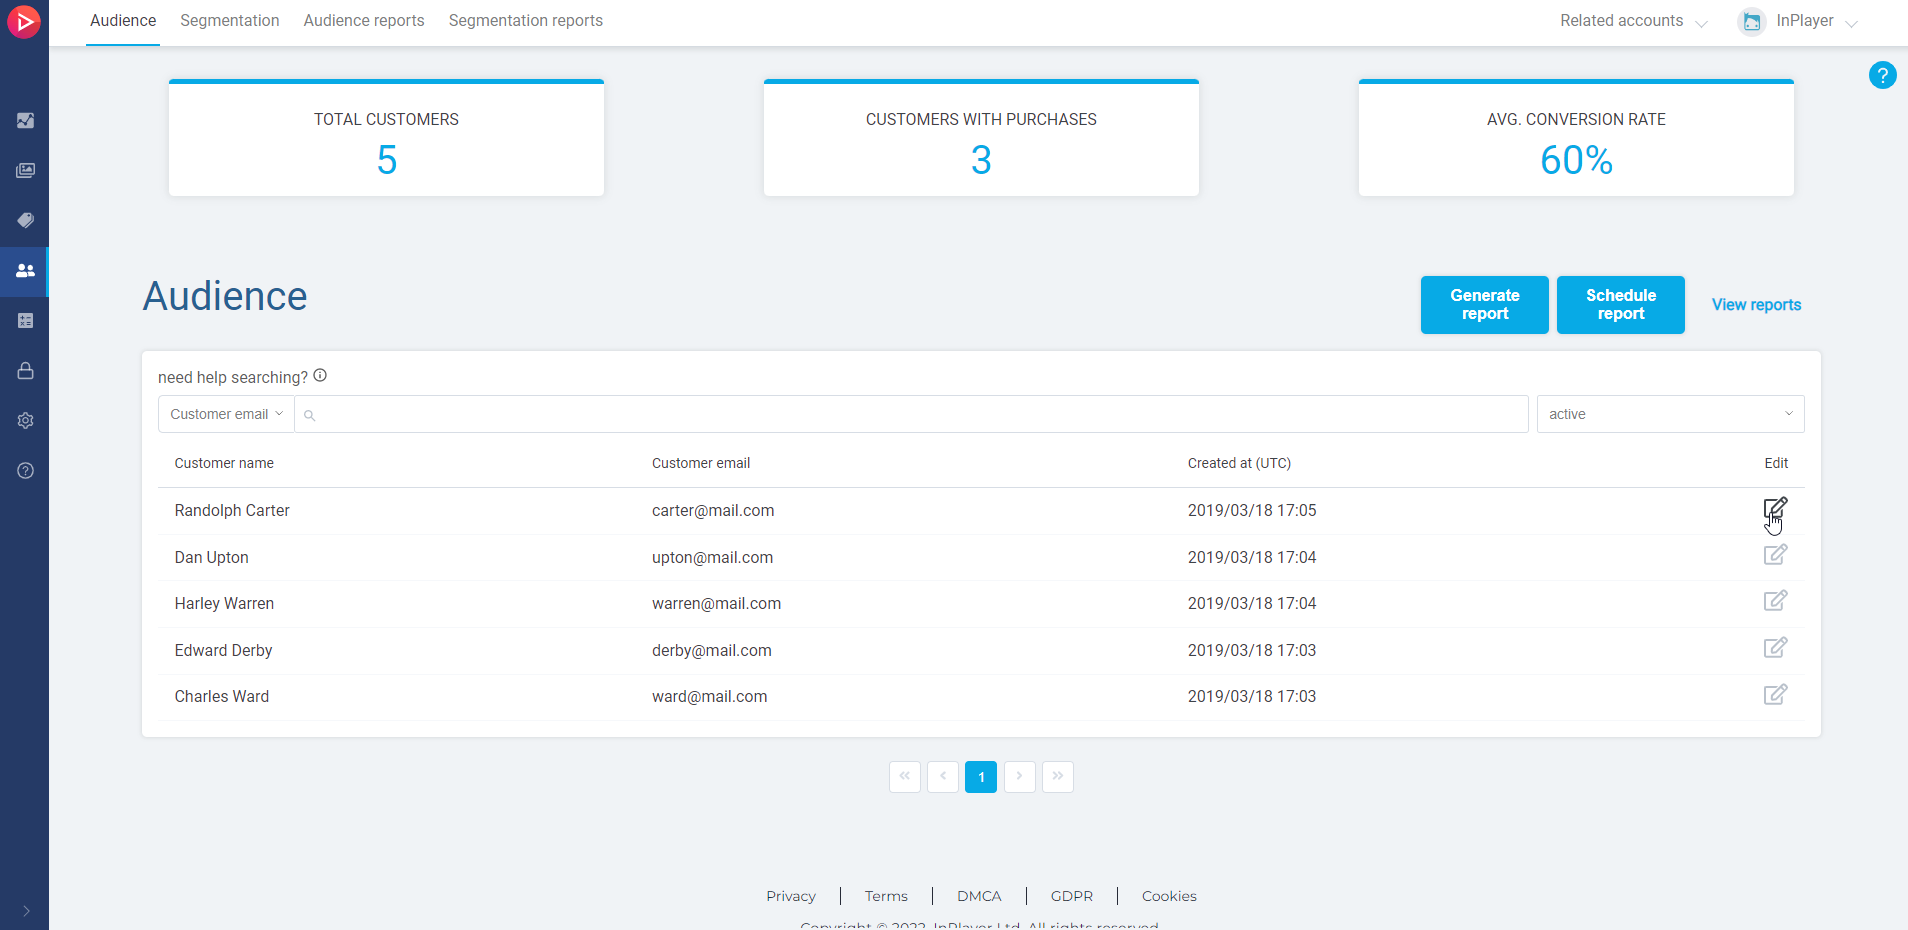
To open a viewer account, just click the button on the right, under the Edit column in the viewer’s row.
From here, you can use the search bar to find the viewer’s account.
To use the search bar, choose the filter you wish to use for your search from the dropdown menu, and type in your search.
Note that you can search with just the first part of the email address, in this case carter, or the second part, in this case mail.com, however, you cannot search by typing any of the two parts of the email address just partially, in this case, cart or mail.
To open a viewer account, just click the button on the right, under the Edit column in the viewer’s row.
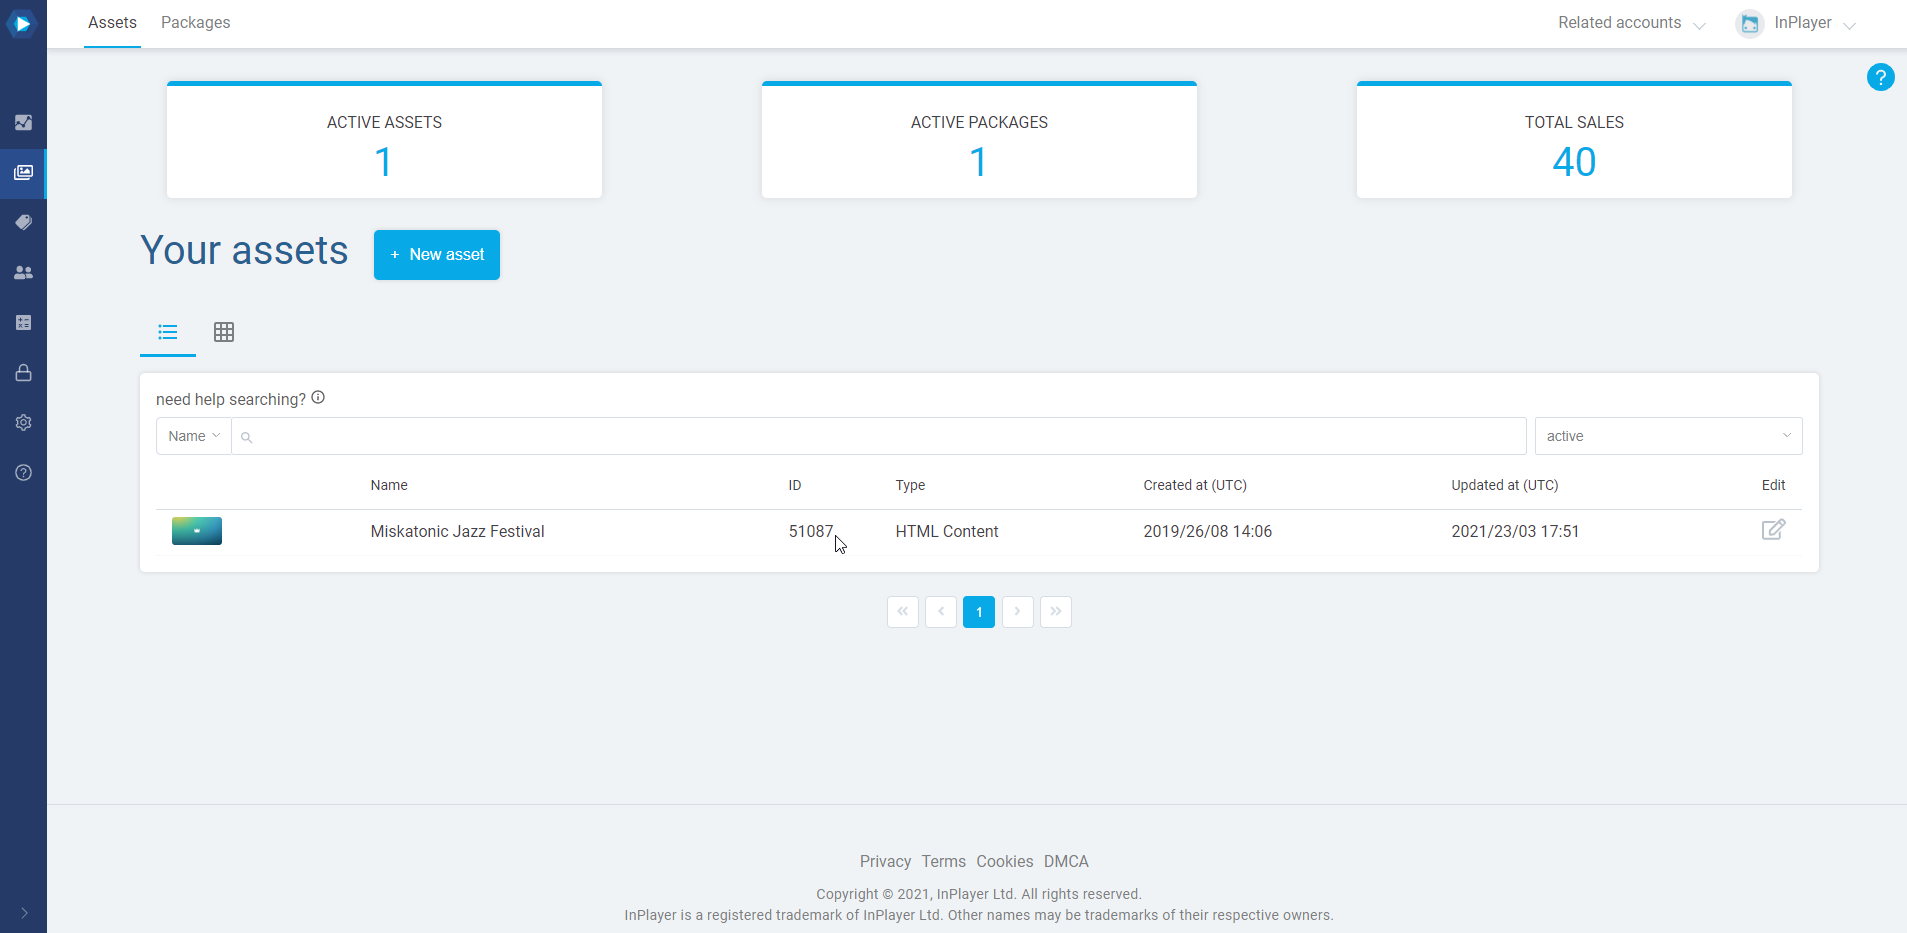
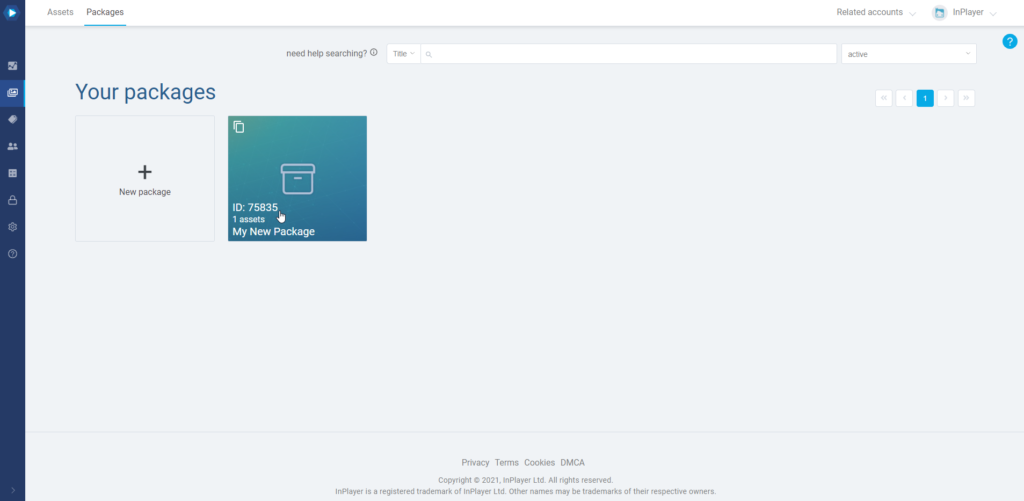
To grant a viewer free access to an asset or a package, first get the asset ID of the asset or package to which you wish to grant the access.
You will find the asset ID in the Assets tab:
Similarly, you will find the package ID in the Packages tab:
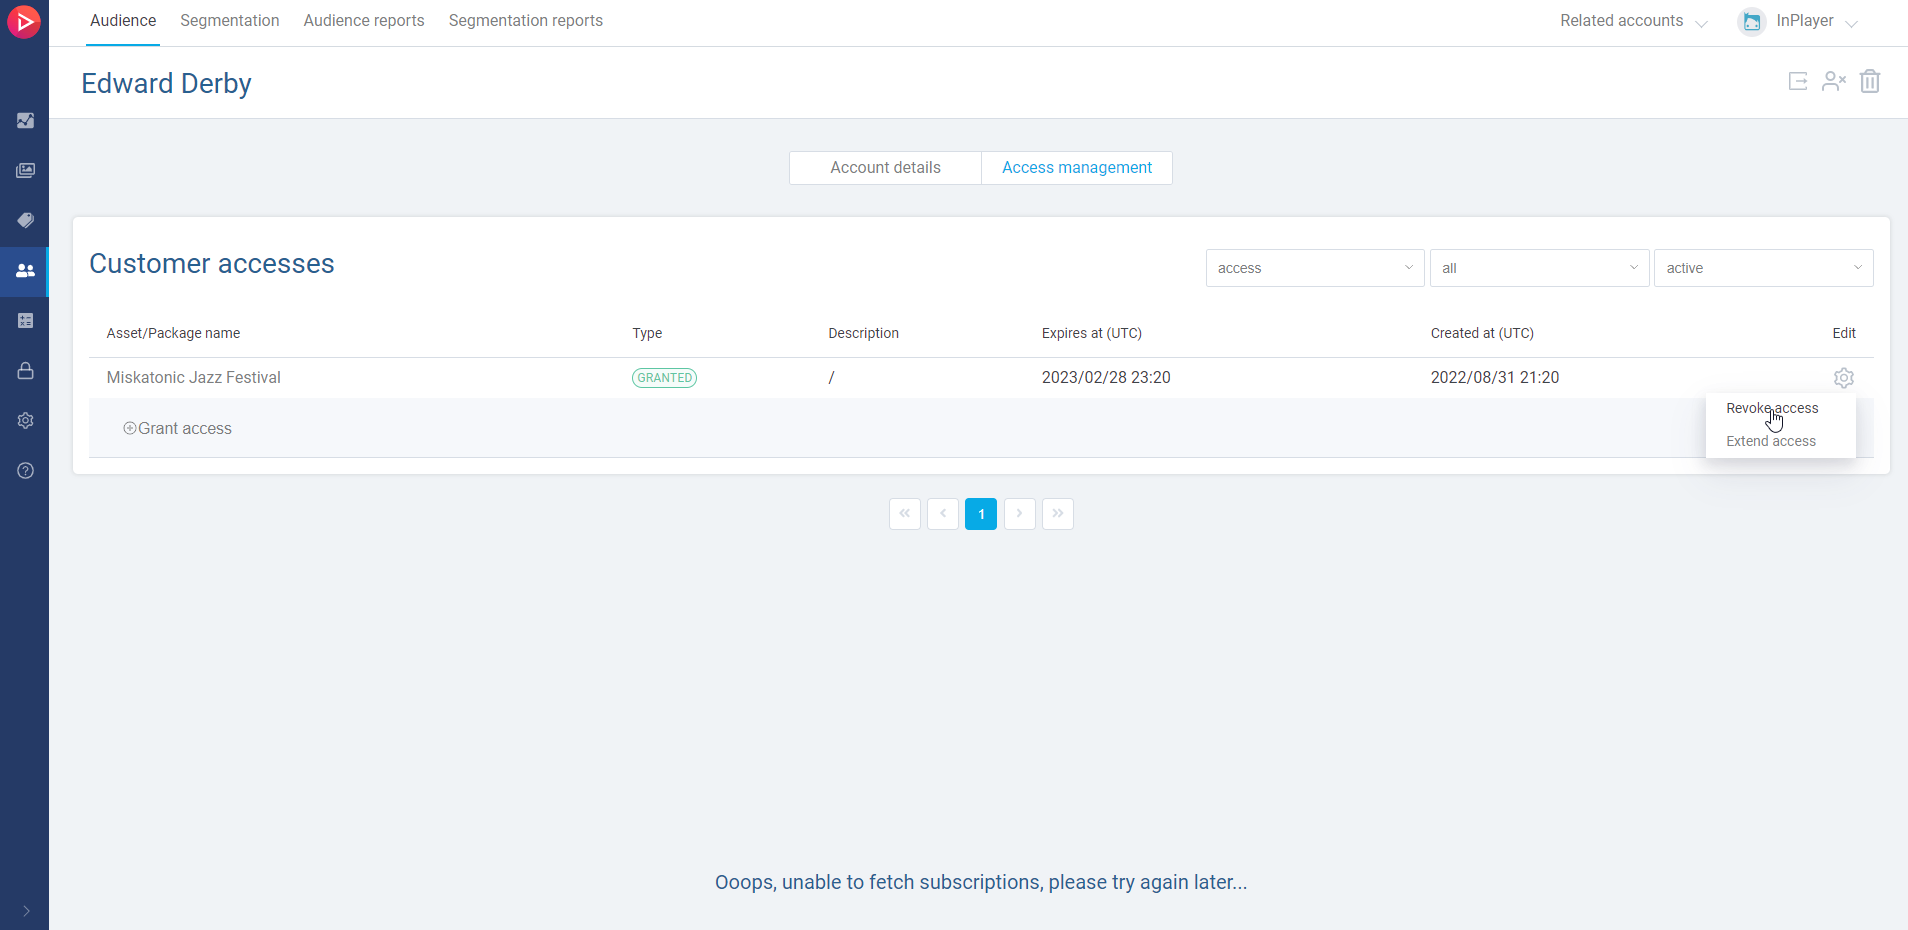
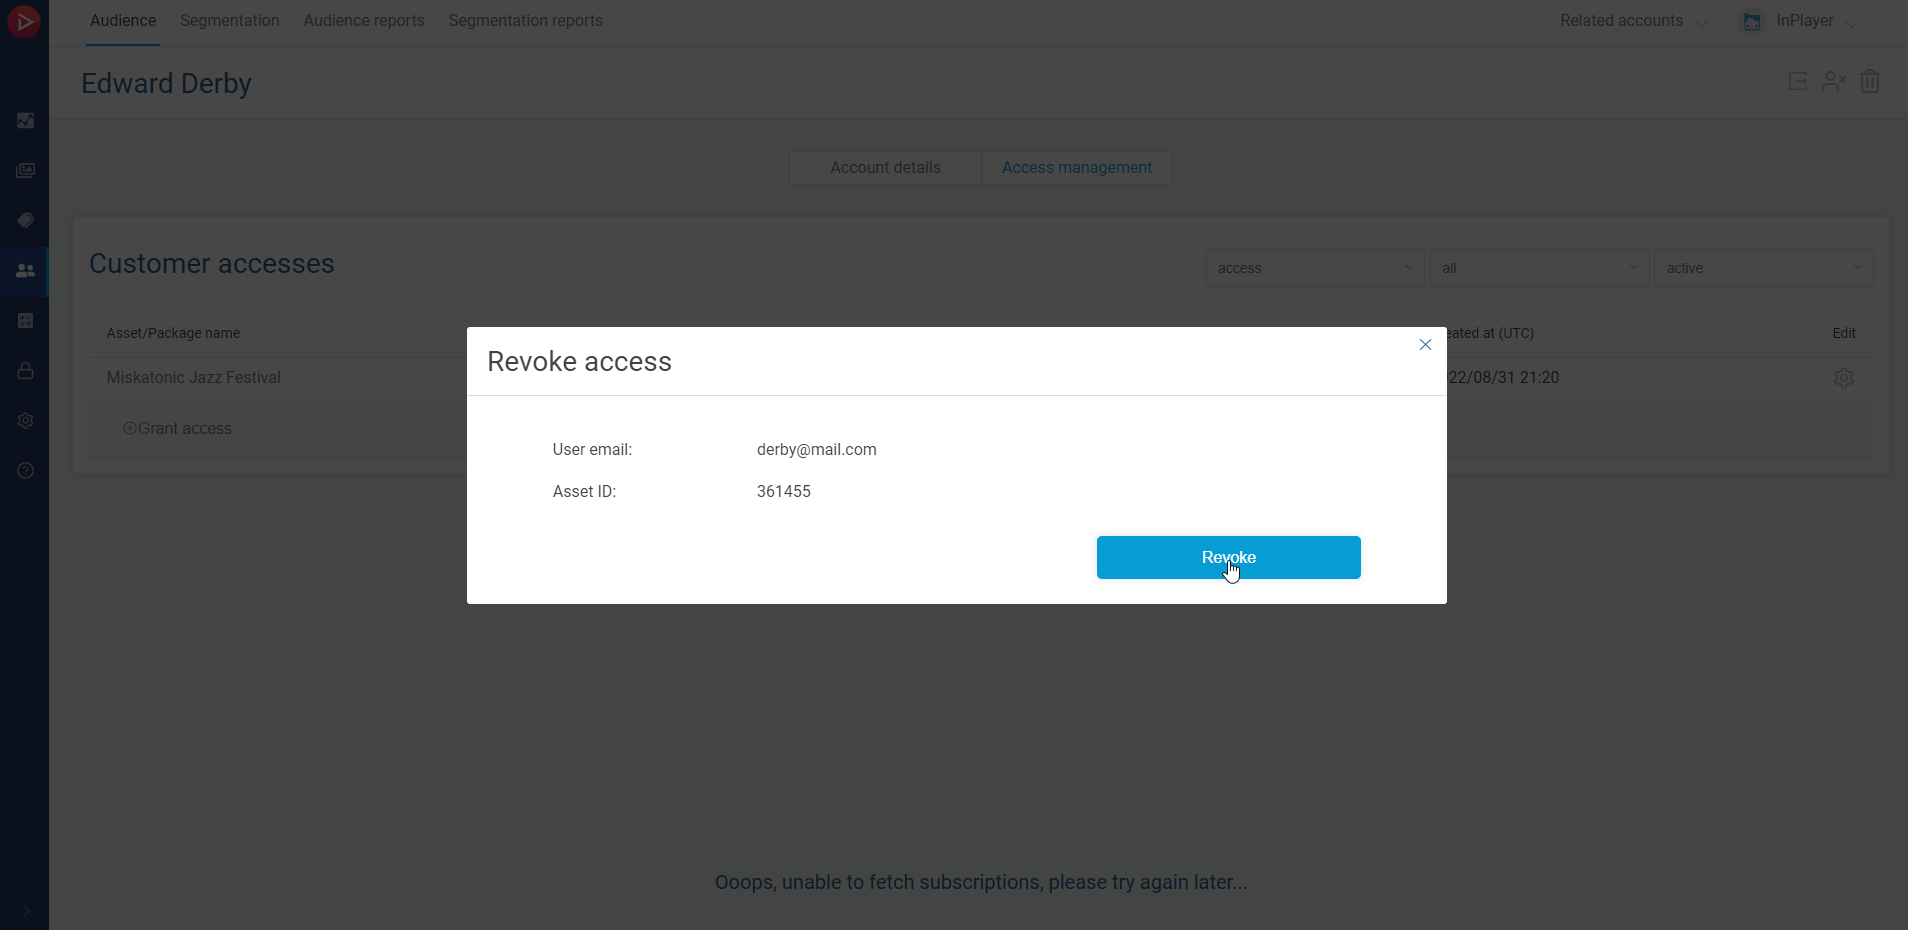
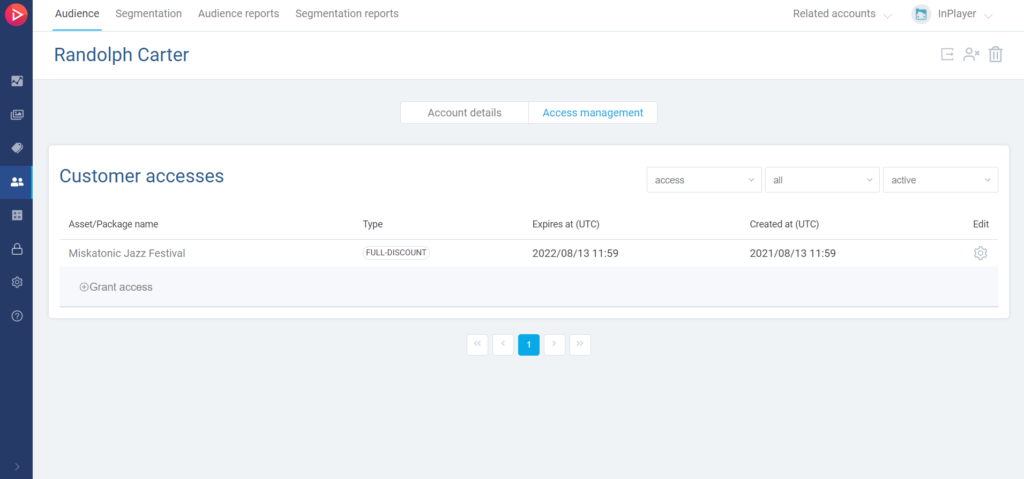
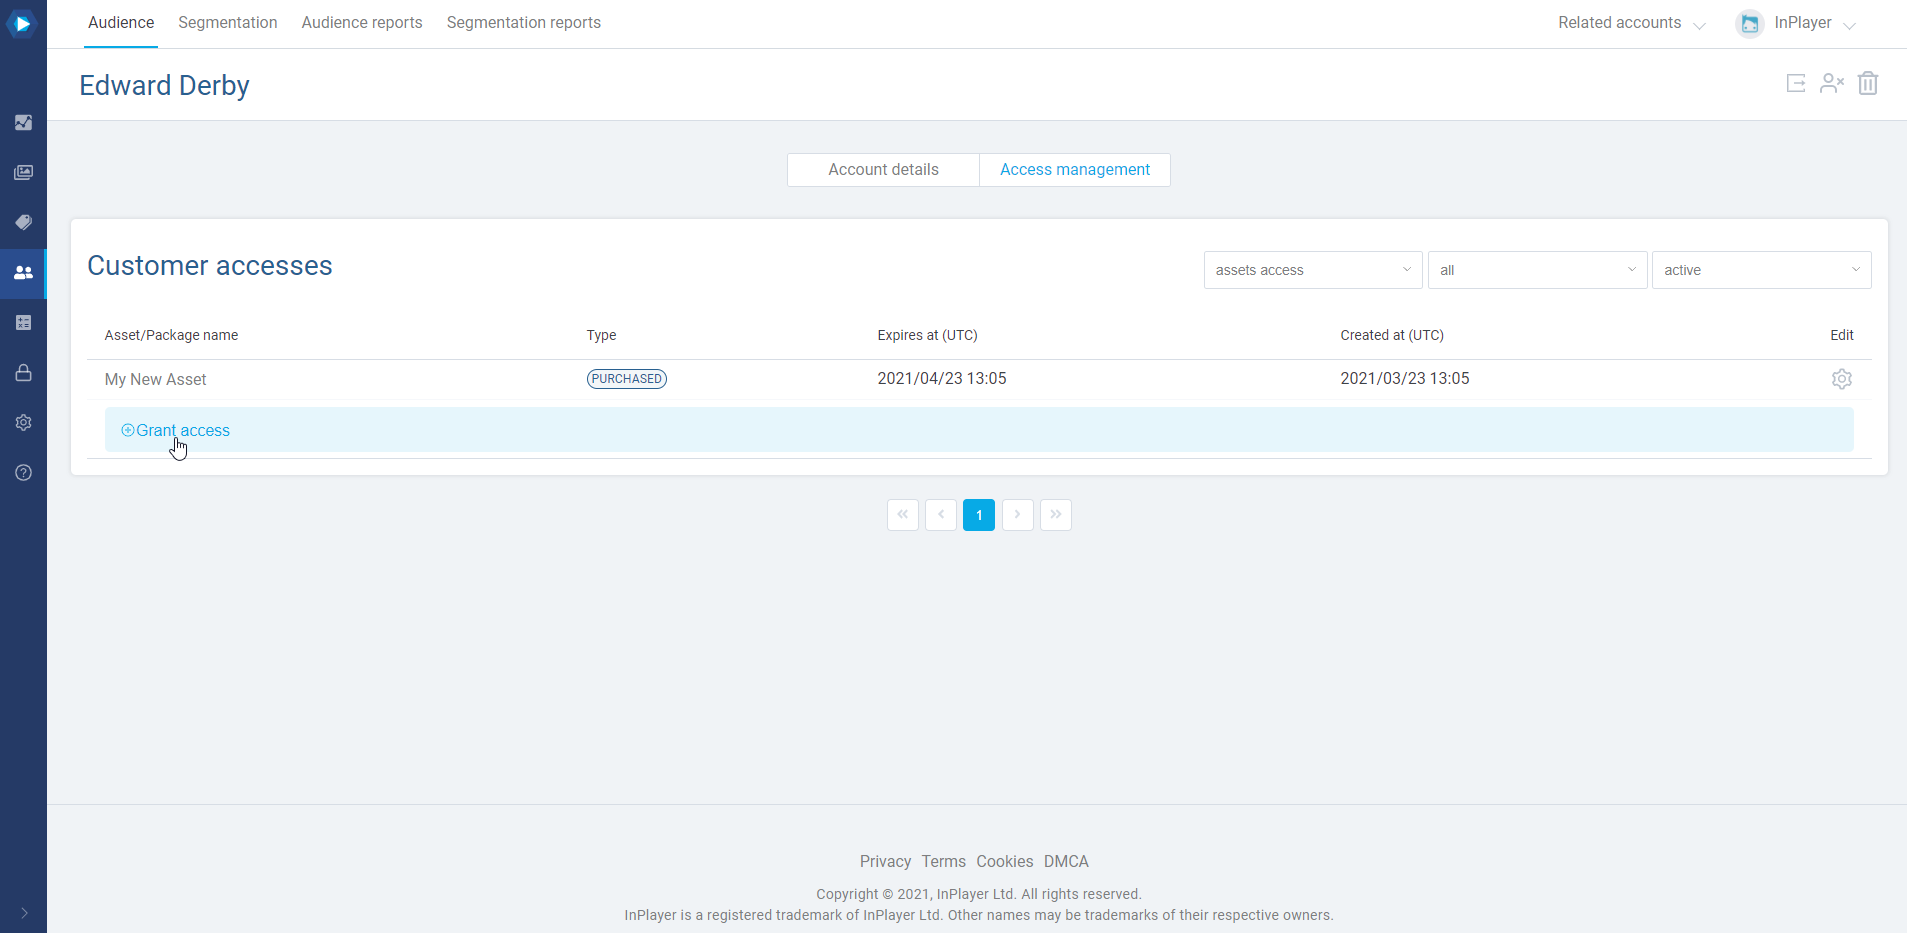
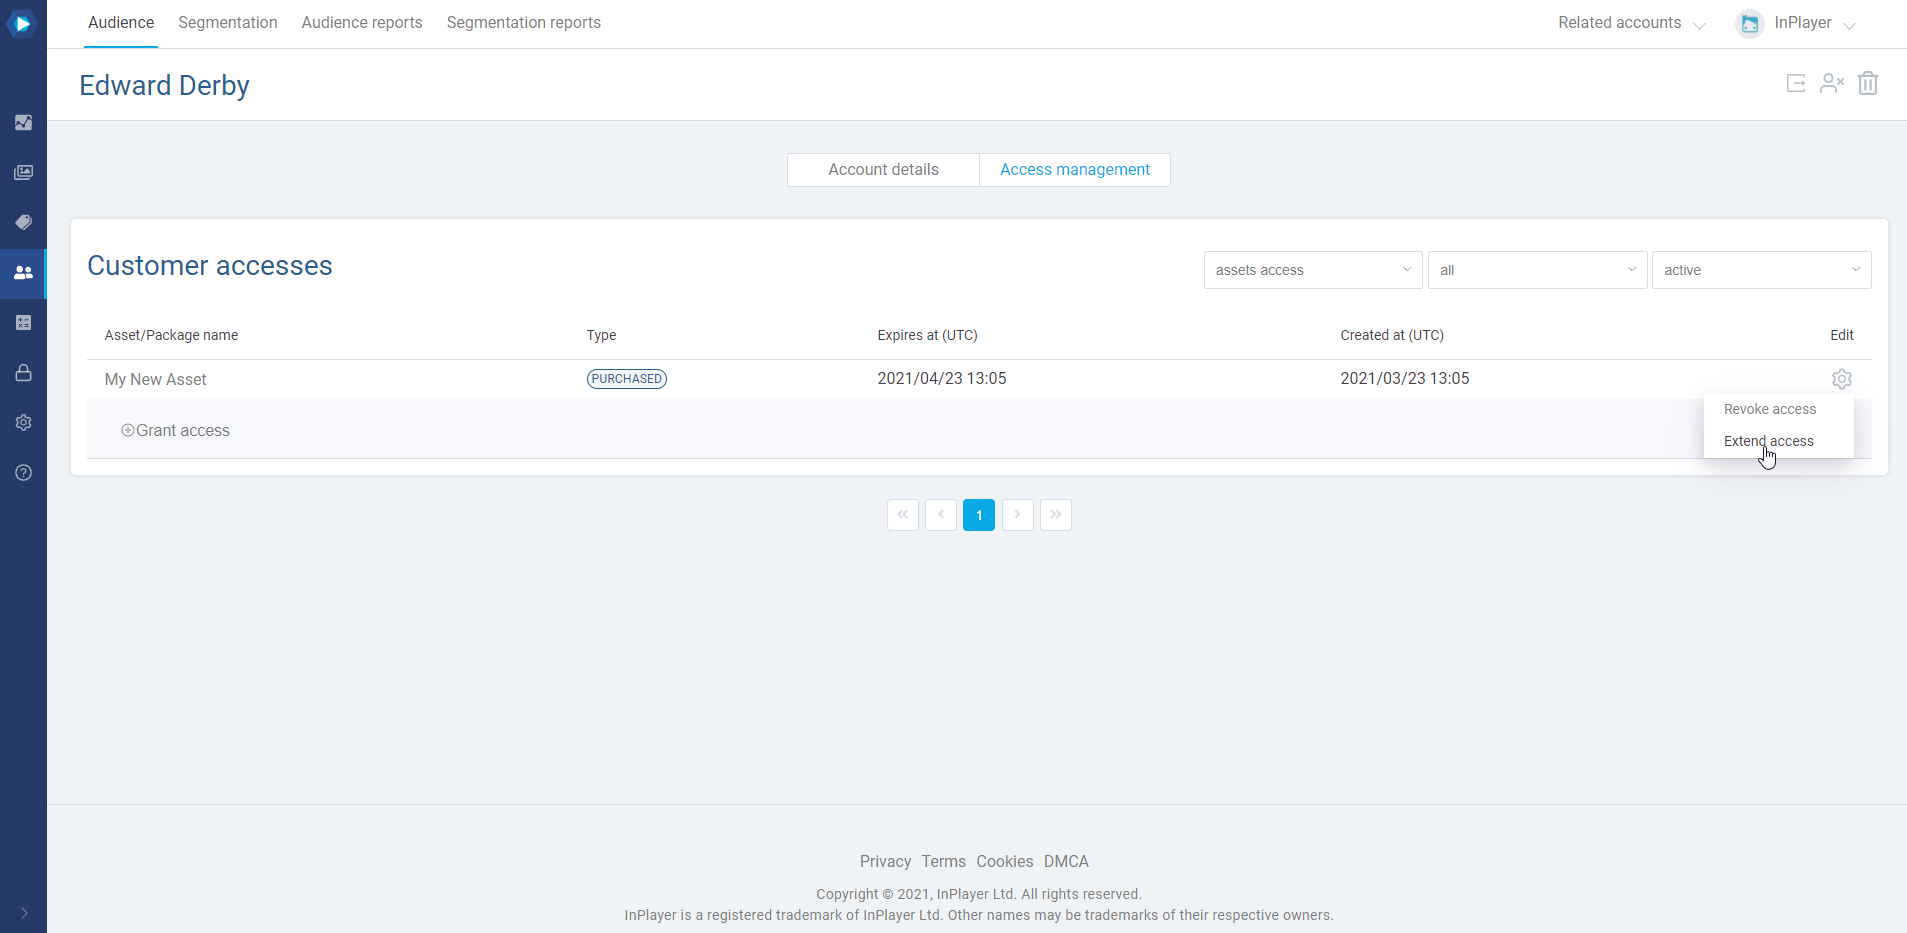
Once you have the ID, go back to the viewer’s account and click on the Access management tab.
There, click on Grant access.
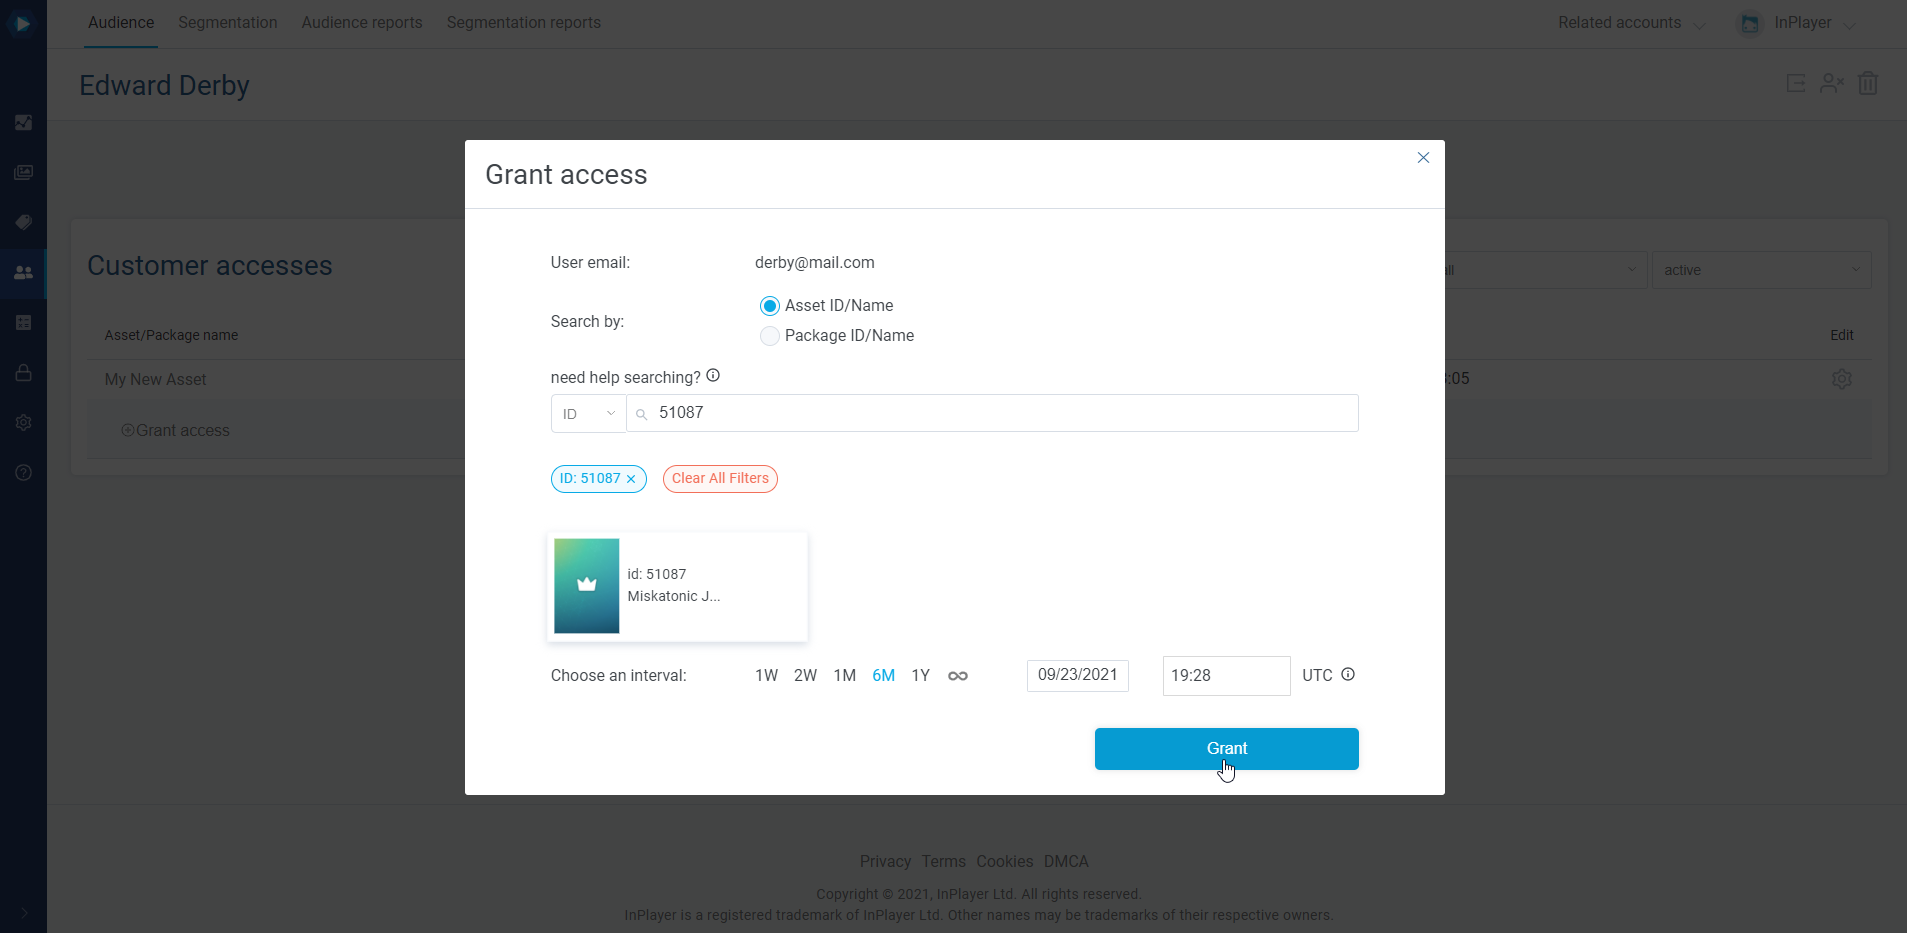
In the new window, select whether you are granting access to an Asset or a Package. In the search bar, click on ID or Title, depending on what you want to use to search for the asset or package, and paste the asset or package ID or Title. Click on the package or asset. Choose for how long you wish to grant the access.
If you want to grant or extend access to an entire list of viewers, you can do so in the Bulk actions tab of the Access section. Click here to learn how.
From here, you can use the search bar to find the viewer’s account.
To use the search bar, choose the filter you wish to use for your search from the dropdown menu, and type in your search.
Note that you can search with just the first part of the email address, in this case carter, or the second part, in this case mail.com, however, you cannot search by typing any of the two parts of the email address just partially, in this case, cart or mail.
To open a viewer account, just click the button on the right, under the Edit column in the viewer’s row.
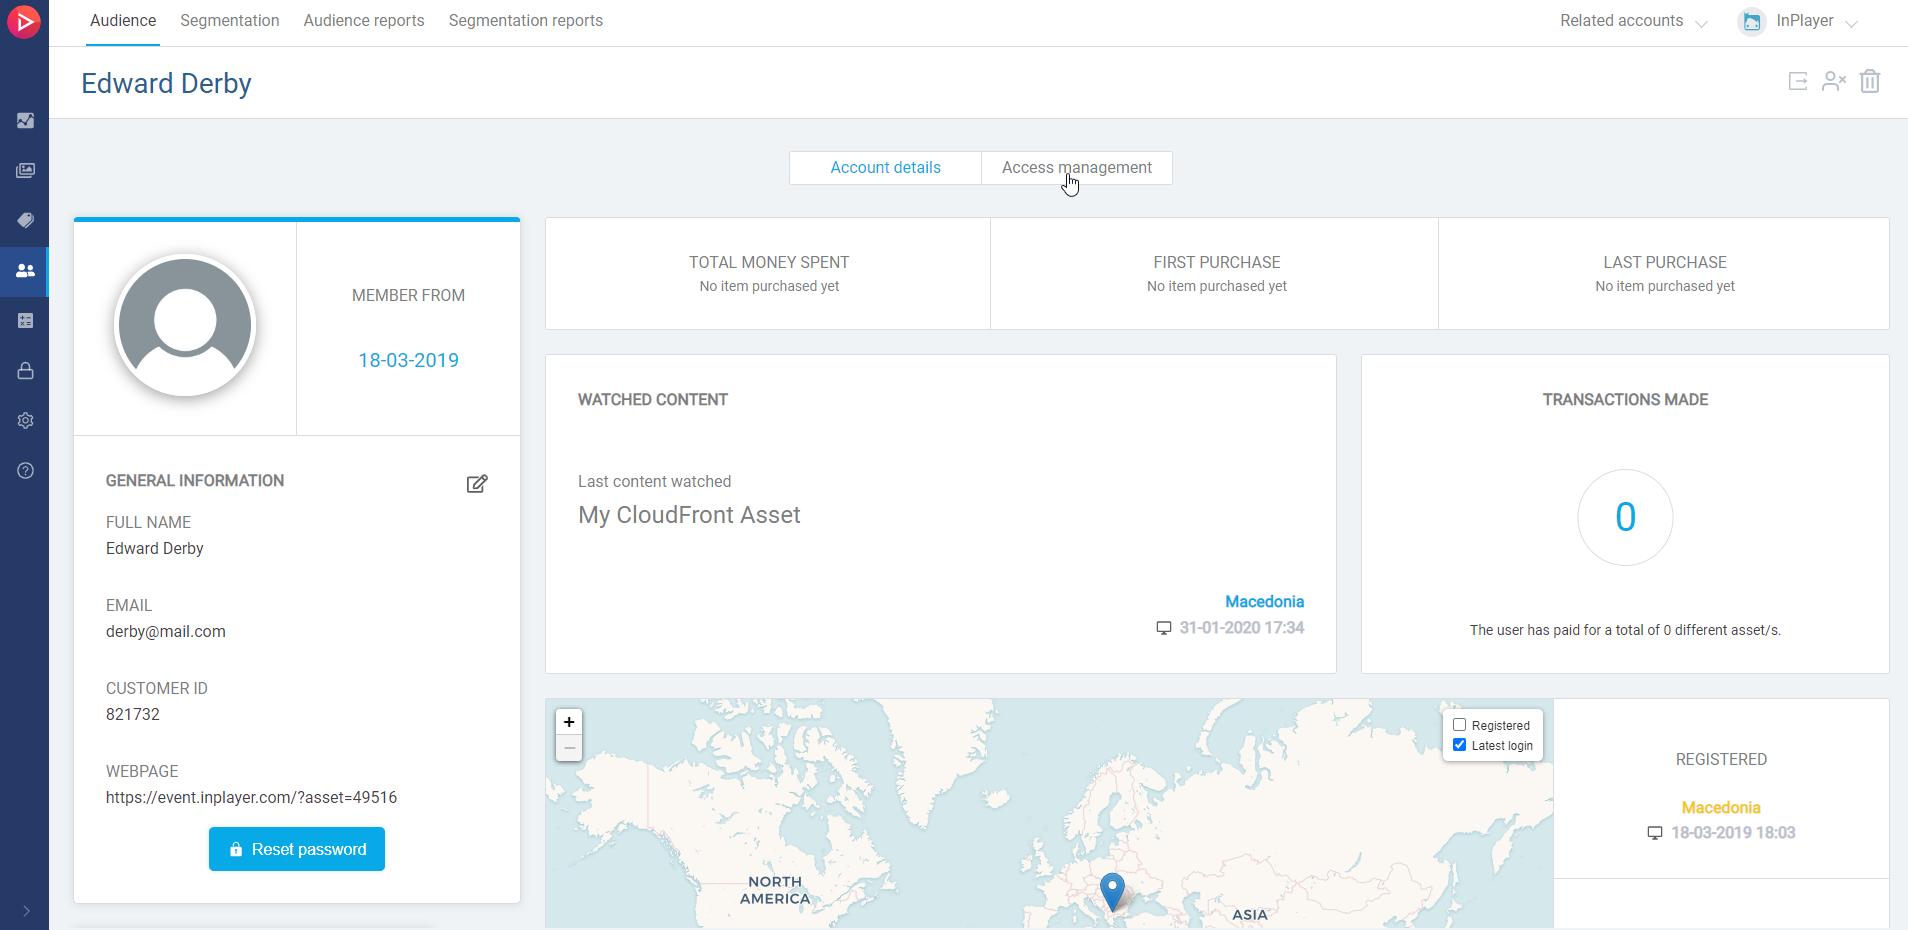
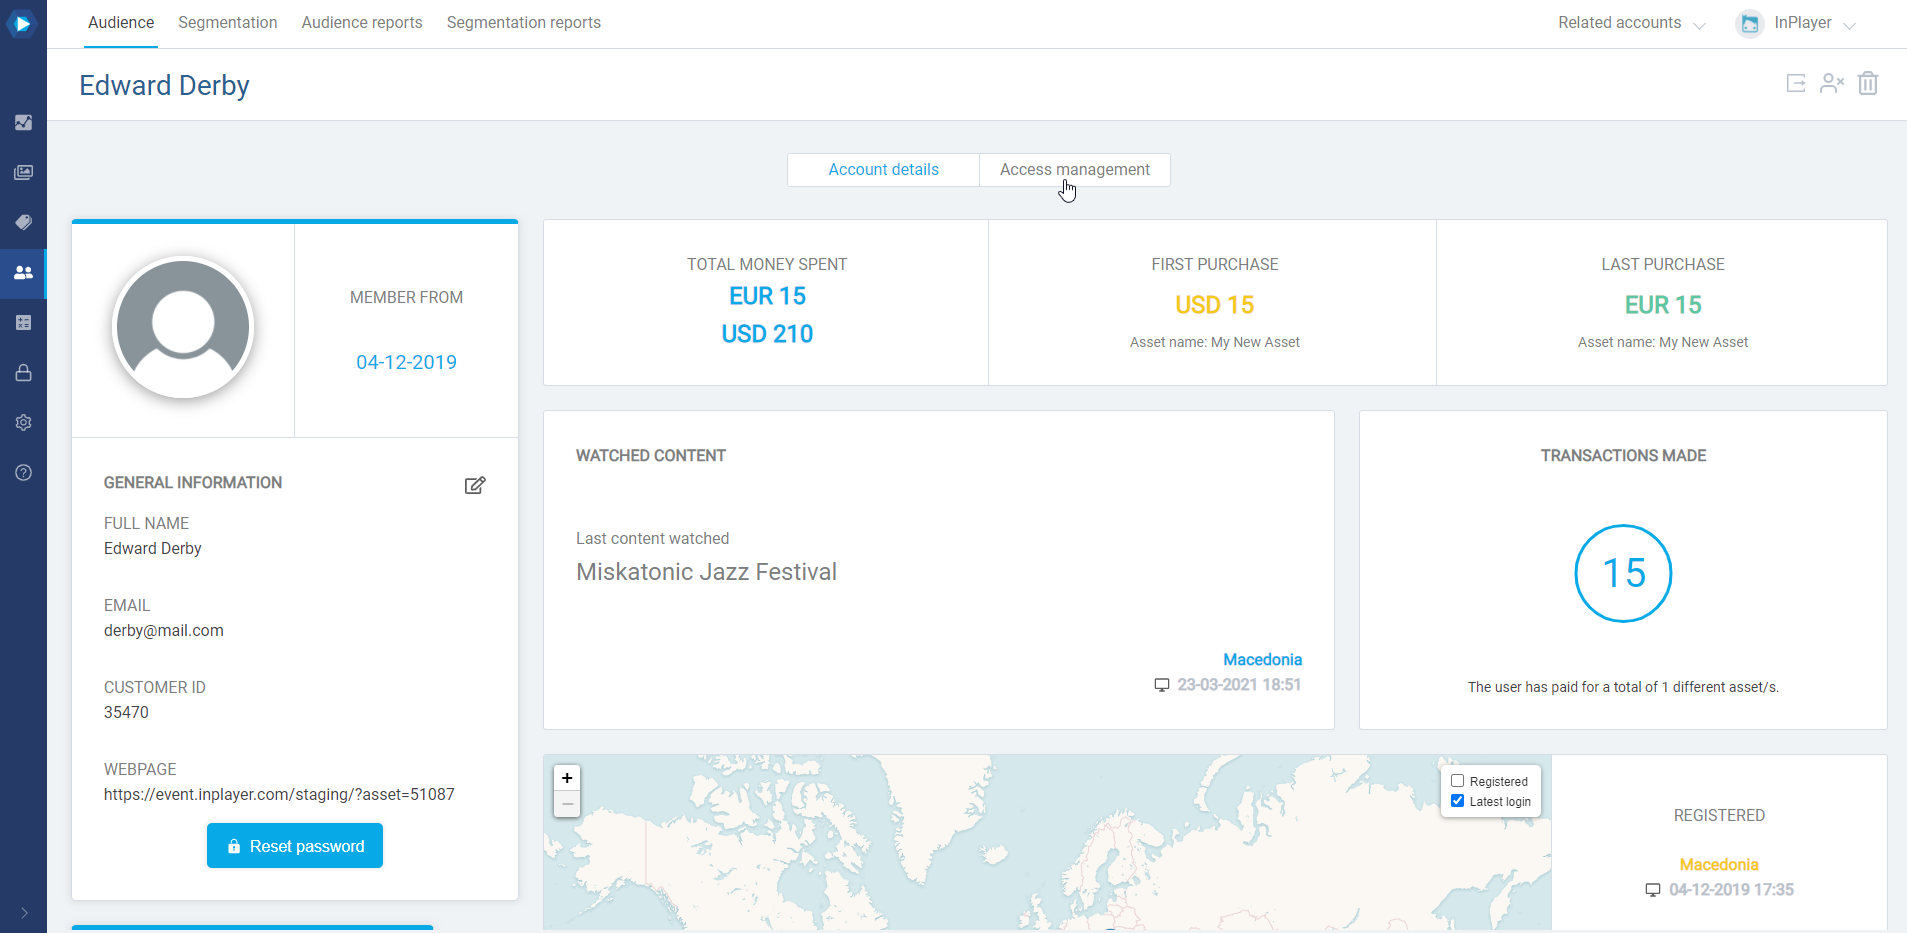
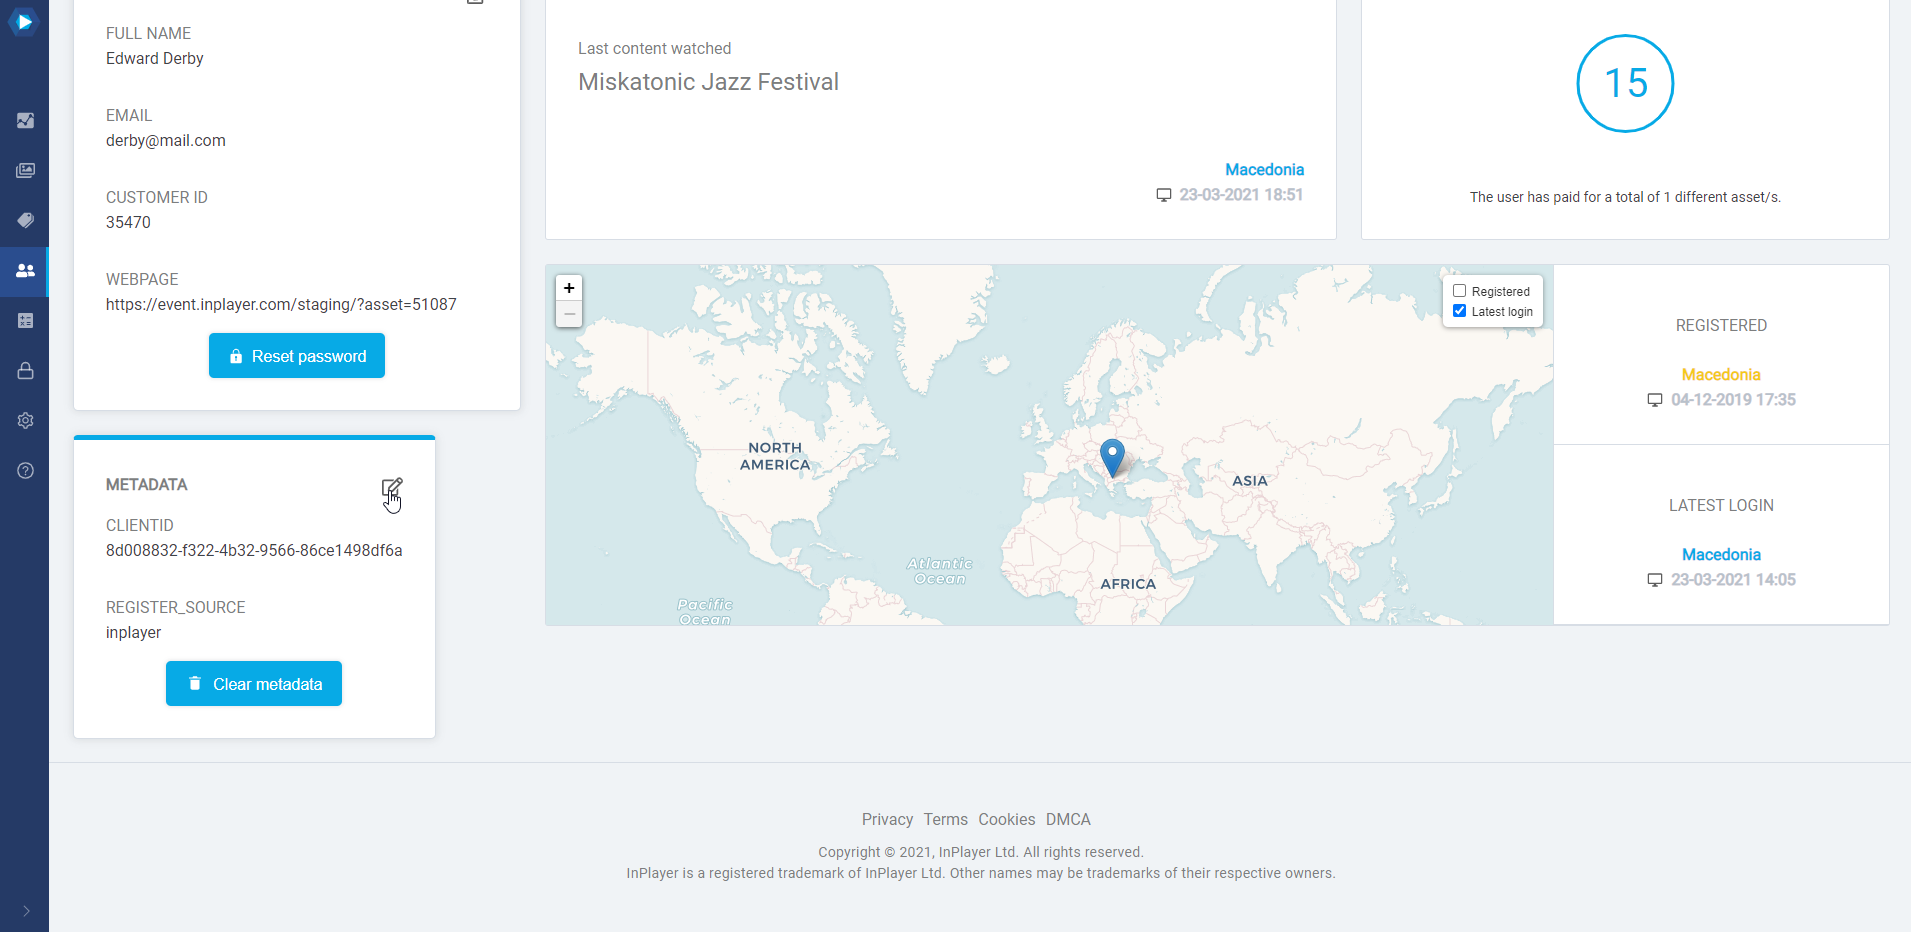
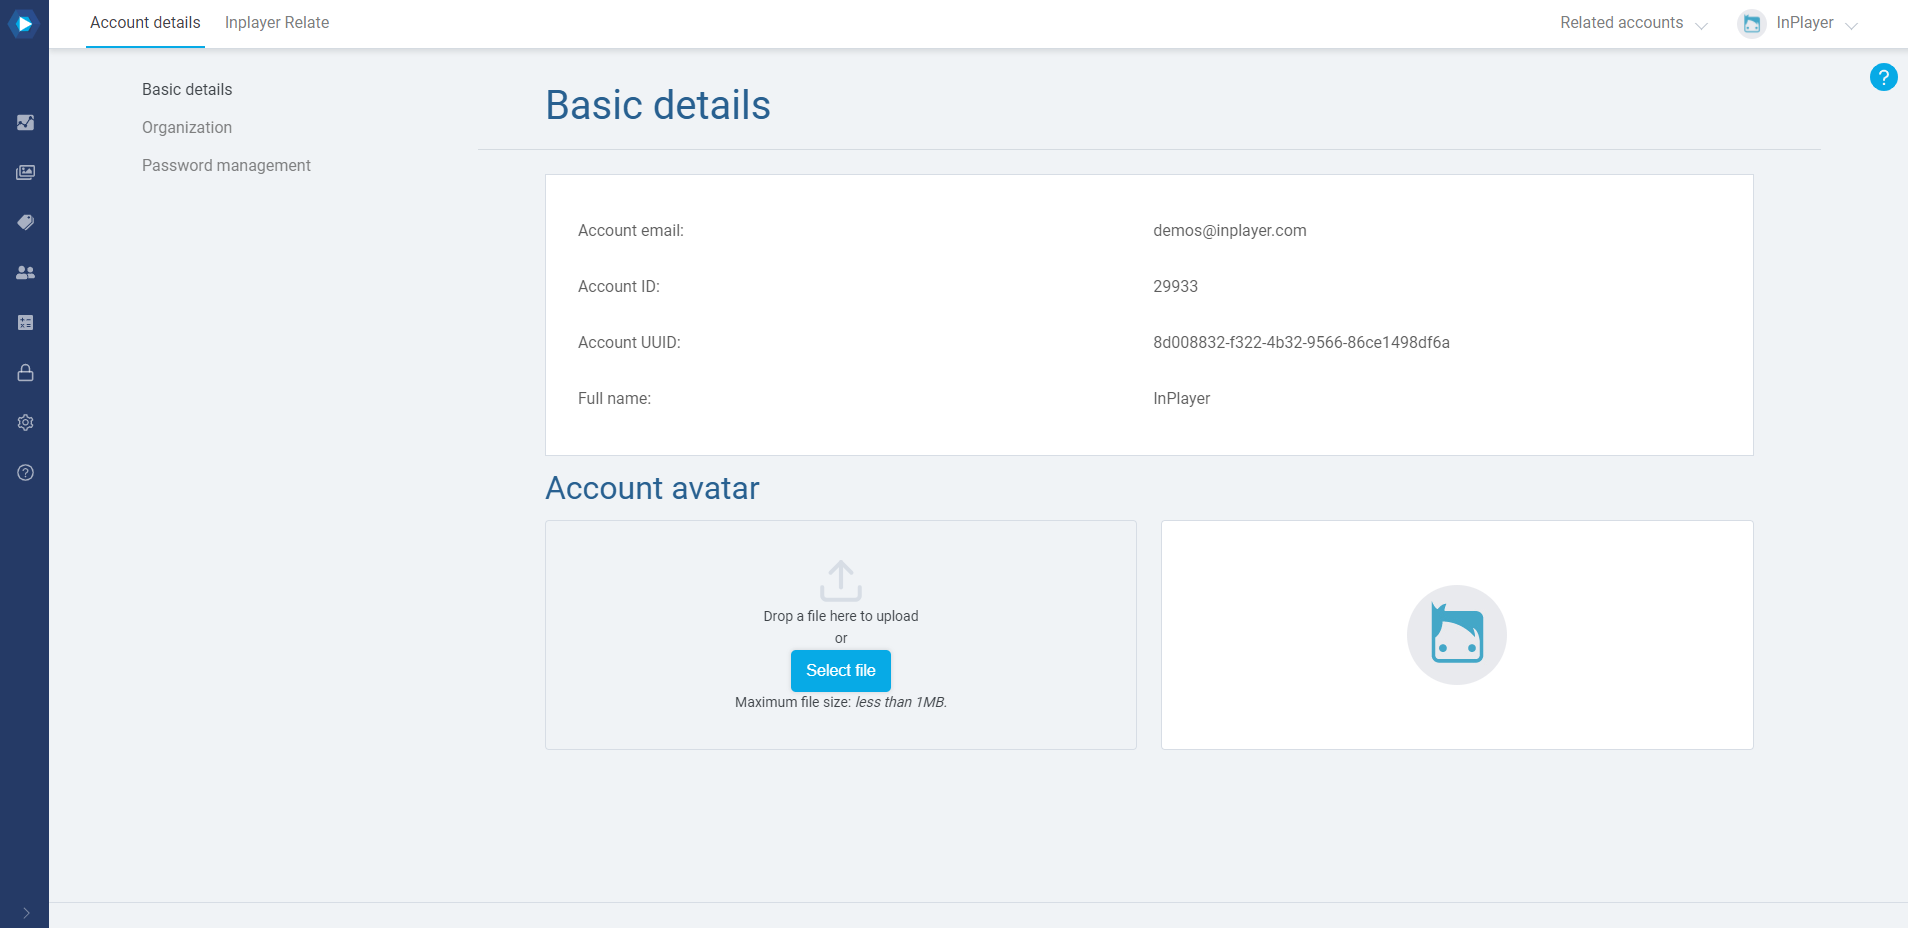
Once you open a viewer account, you can see various info and manage the account in various ways.
You can see the viewer’s personal details like the email, full name, additional info they have entered during registration, the webpage on which they’ve registered their account, how much money they’ve spent, from which location they logged in last etc.
If you’ve added additional fields in the paywall registration form where you’ve asked viewers to provide various information such as shipping address, shirt size etc, you will find this info in the METADATA section on the right, right under the GENERAL INFORMATION section.
To edit the data, click on in the METADATA section on the left.
This concludes our guide.
If you have any questions, don’t hesitate to contact us at clients@inplayer.com.
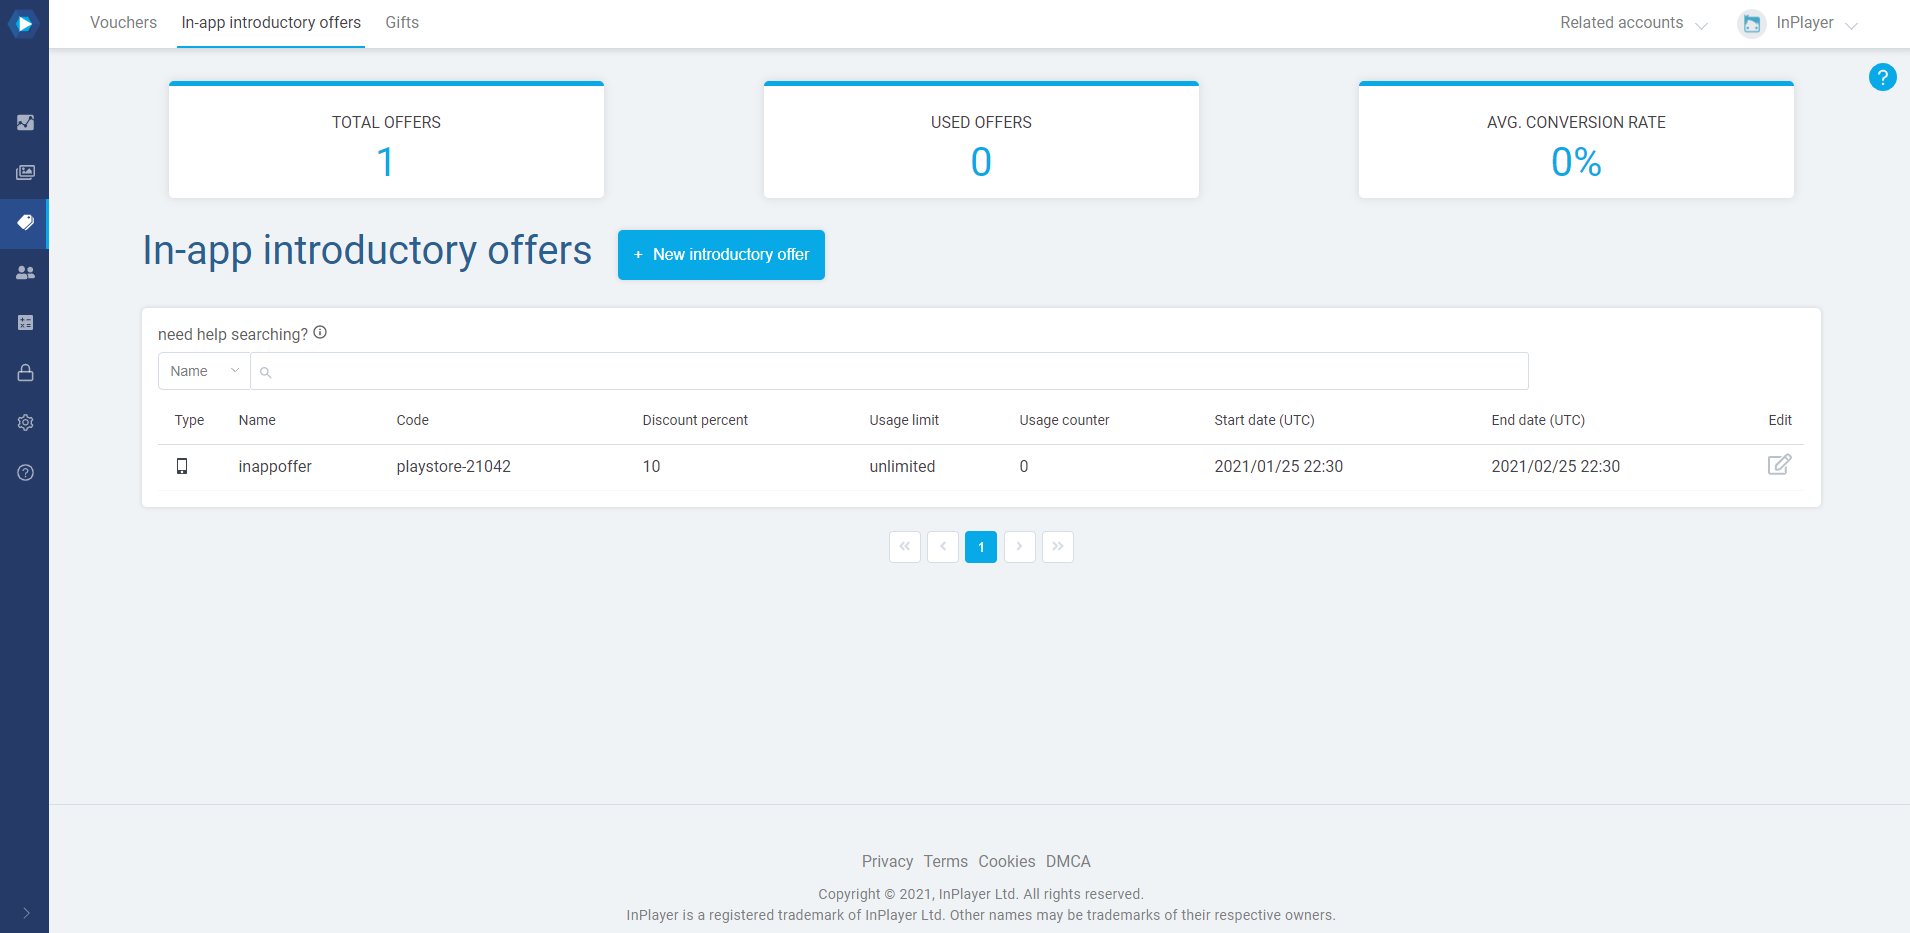
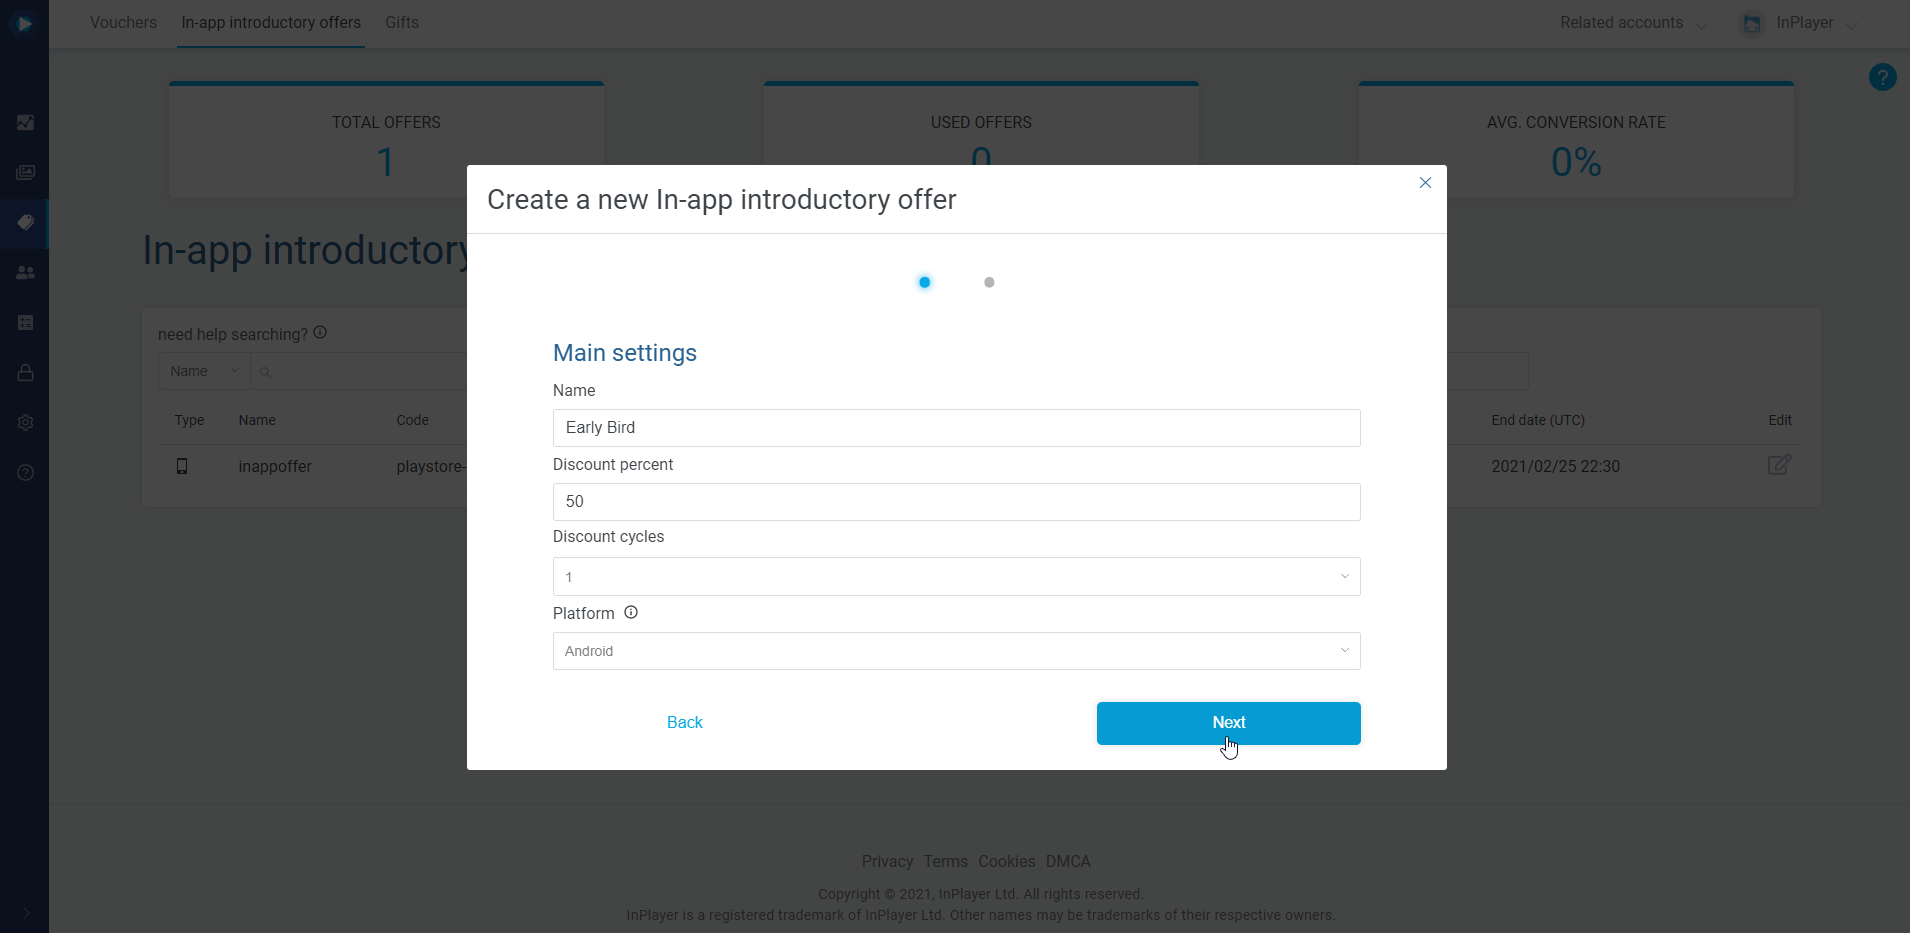
In-app introductory offers are different than vouchers, since there is no “code” the viewer needs to enter to get the discount. Instead, the discount is in the form of a discounted price that is available to anyone that has access to your app. This means that you cannot use in-app introductory offers to give a discount to only a specific viewer or a group of viewers. You can only have it as a discounted price that will be available to everyone.
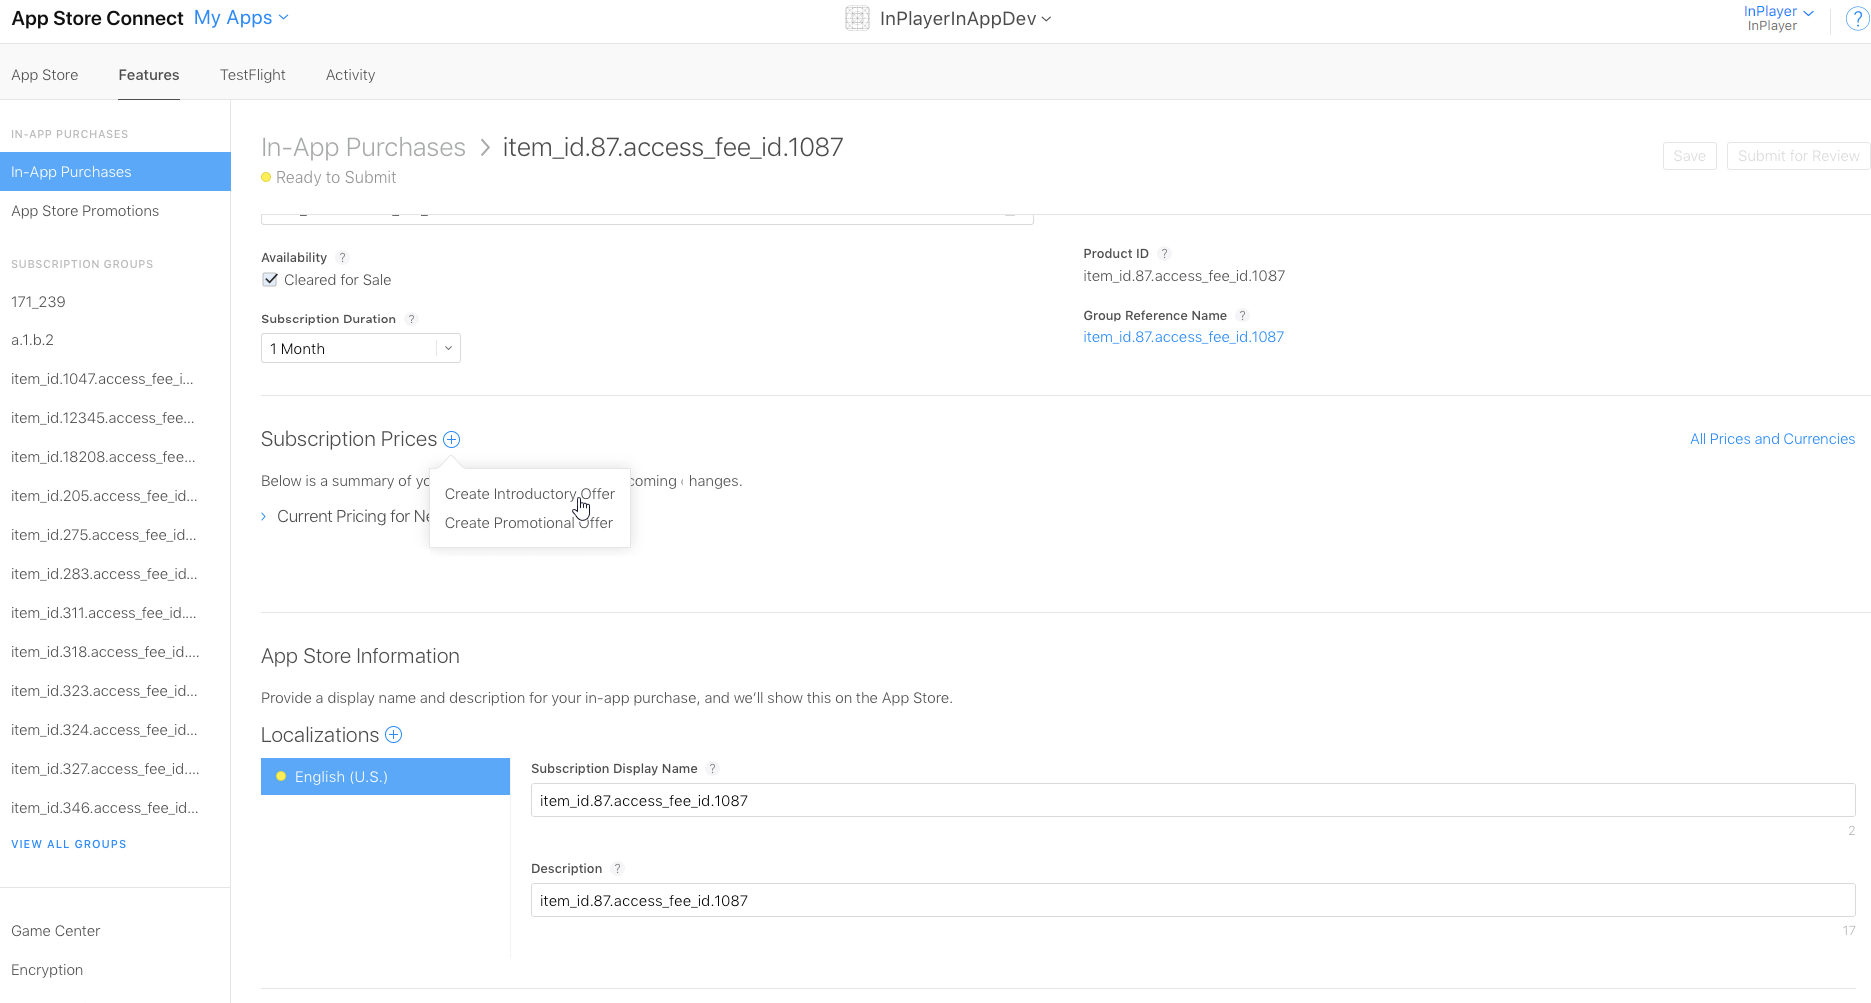
All In-app introductory offers that have been created in the InPlayer Dashboard need to be replicated in the Dashboard of the In-app platform they are intended for. Read below for full details on doing this.
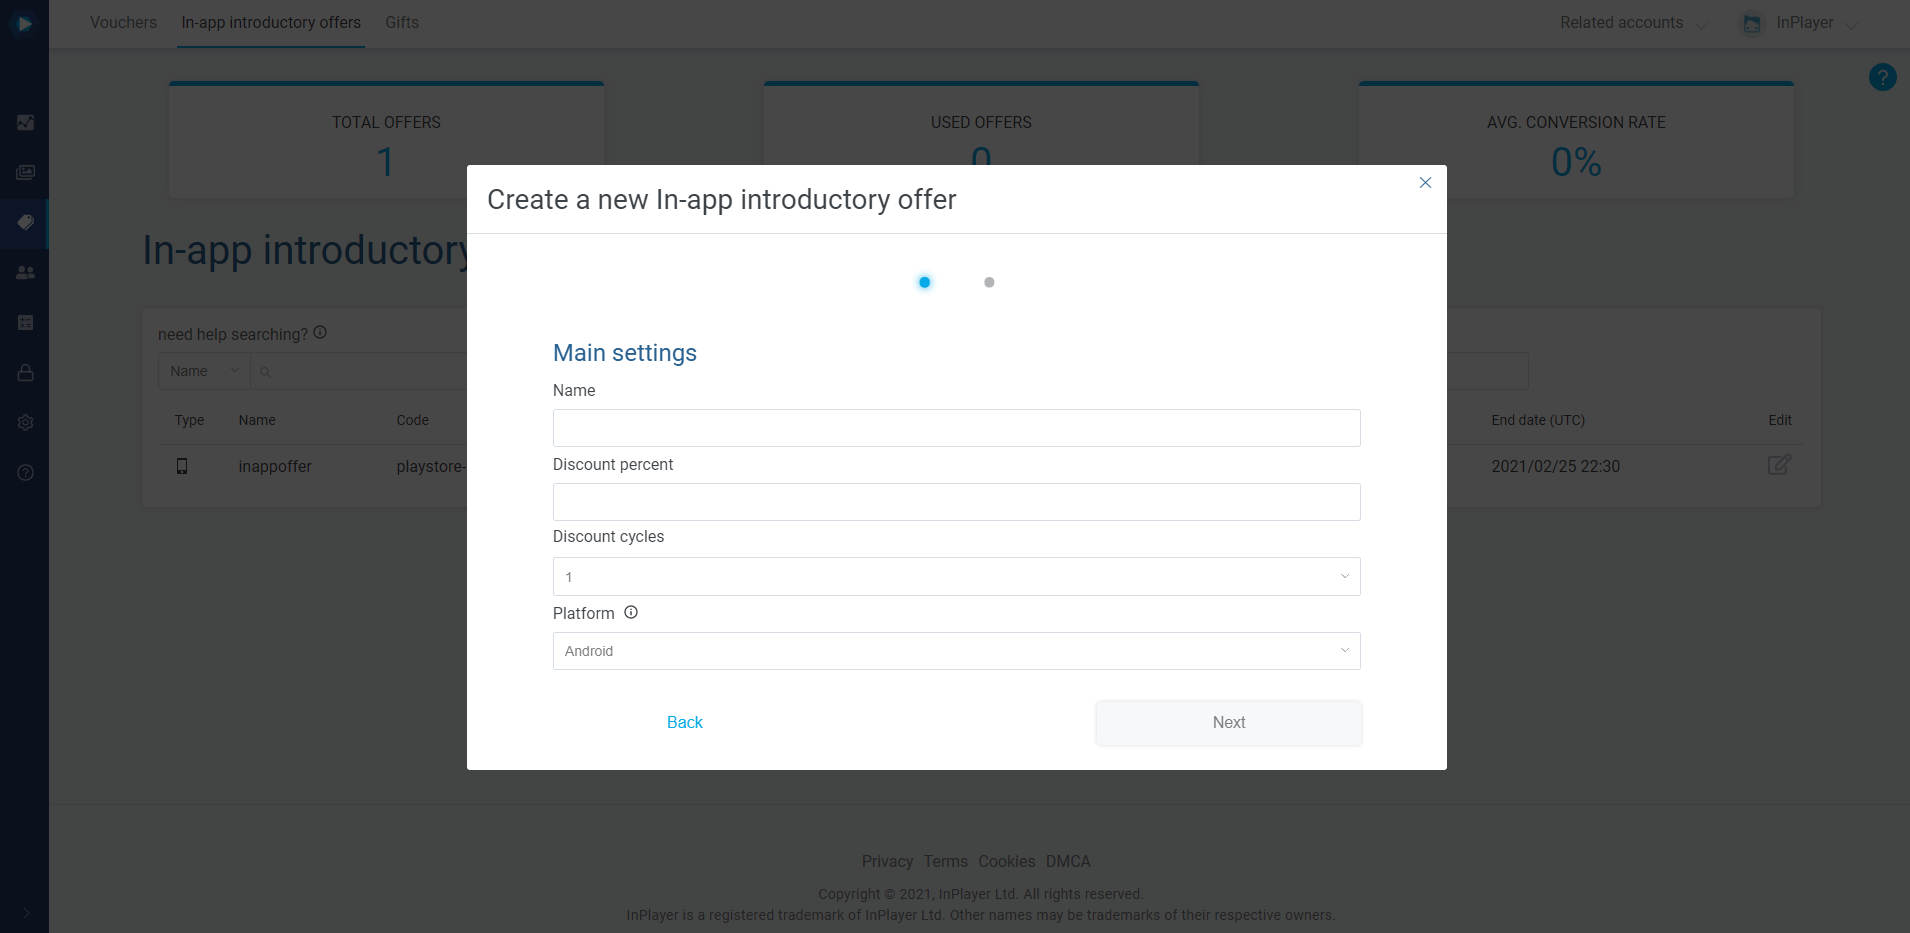
Discount percent is the discount the viewers will get with this offer. You can set it up to 100 which means the viewers will not have to pay anything. Note that you only need to enter the number of the discount percent, without the % sign after it.
In Discount cycles, setup the following: If you are setting up a one-time discount offer, choose 1. If you want the offer to grant recurring discounts for a subscription, select the number of recurring discounts, i.e. cycles.
In Platform, select either Android or iOS, depending on the platform on which the offer will be used.
Click Next.
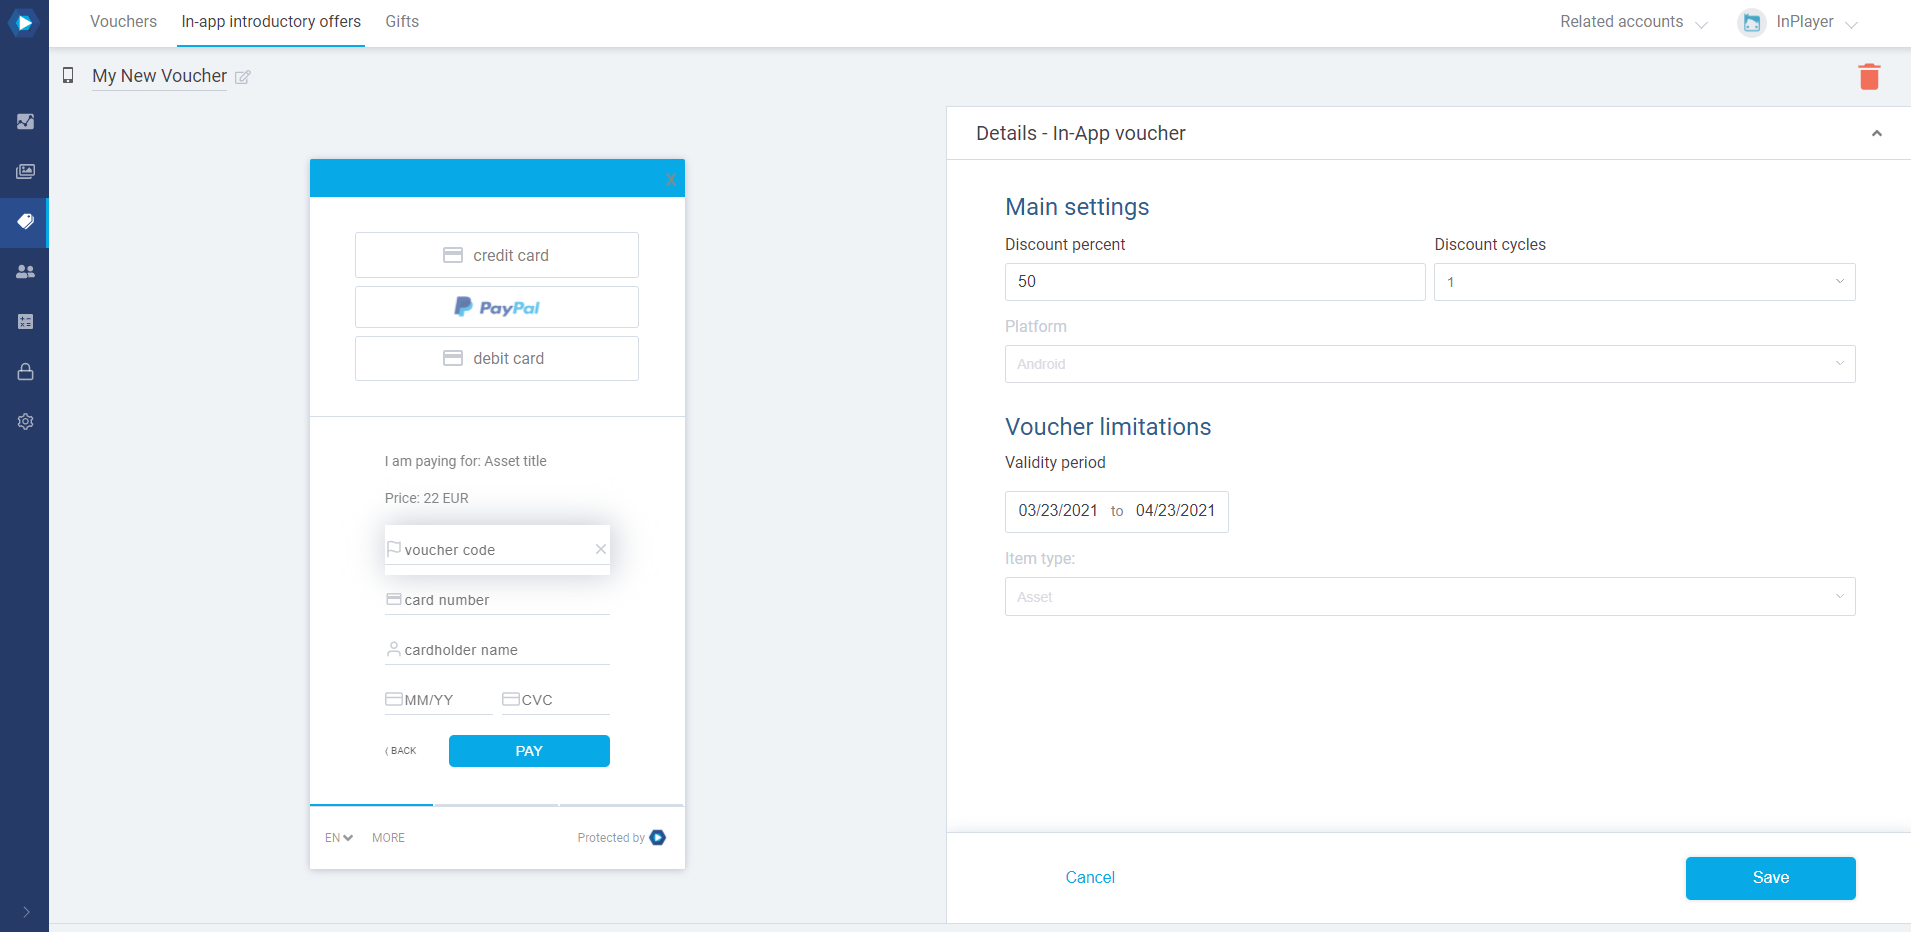
Validity period sets the offer validity period. Note that this is different from the access period, which is controlled by the Payment type setting in the price option of your asset or package.
Item type lets you choose whether the offer will be used for an Asset or a Package.
After selecting an Item type, select the asset or package, as well the specific price option of that asset or package for which the offer will be applicable. Note that, due to the nature of in-app purchases, the offer can only be valid for one asset or package, and for one price option in that asset or package.
Click Next.
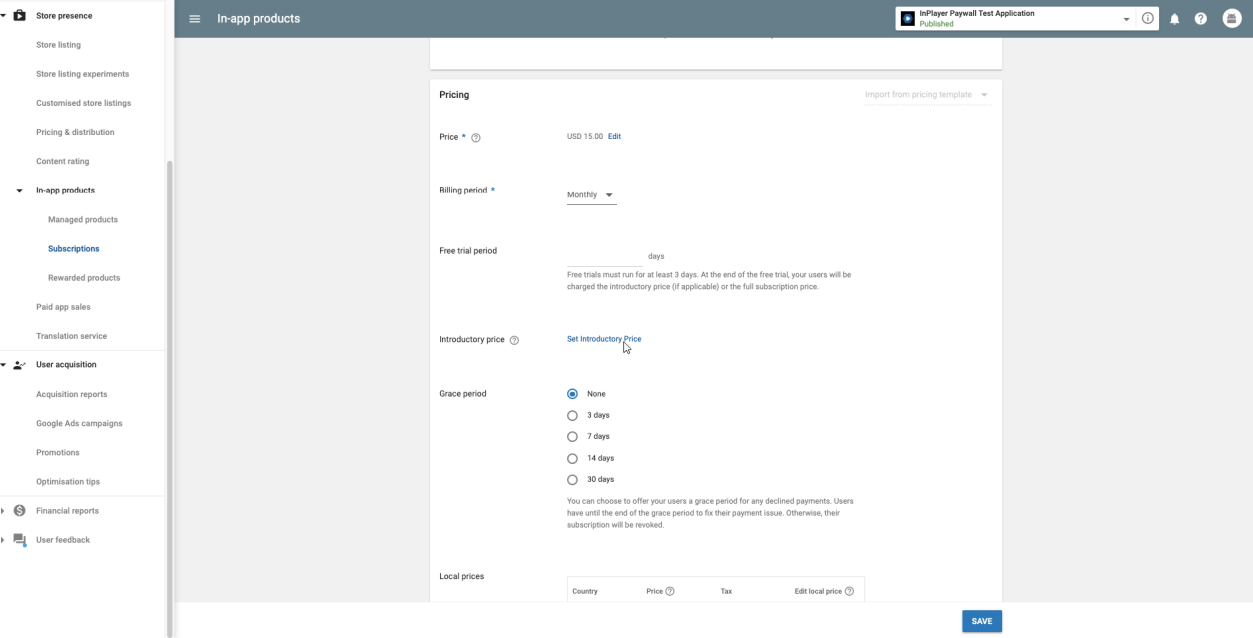
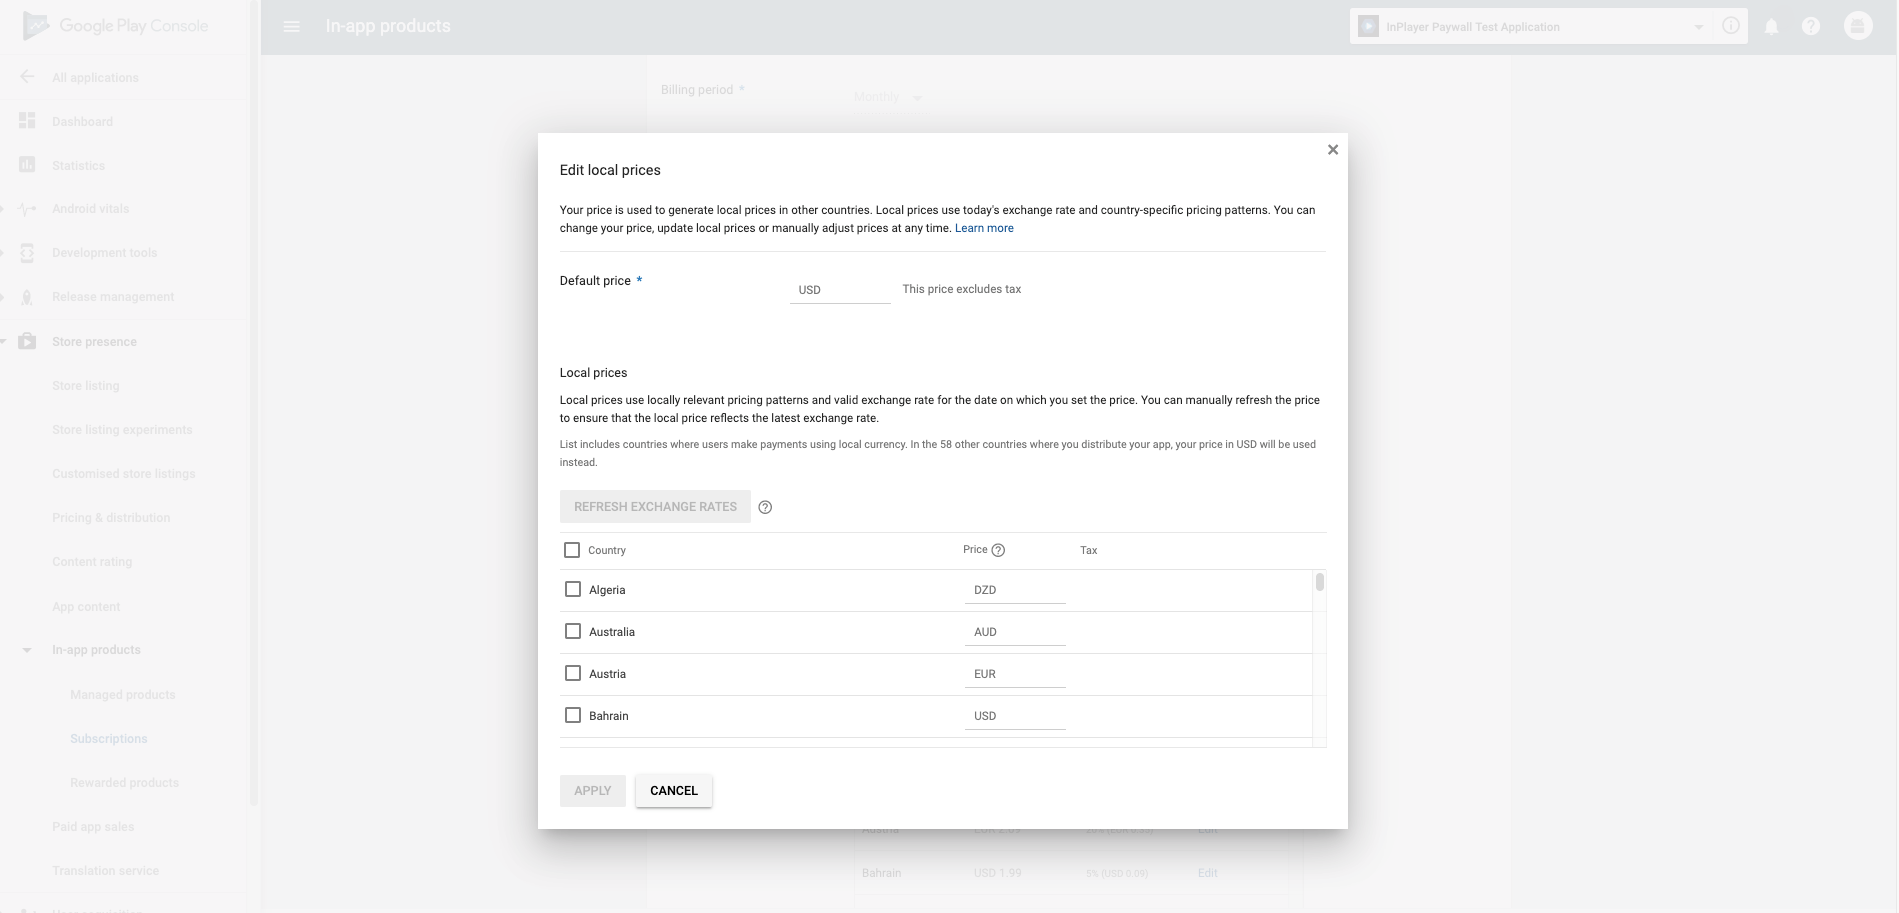
Your In-app introductory offer has been created. On the new screen, you can review the offer settings. After that, the next step is to create an introductory price (or introductory offer) for your product in your Android or iOS app.
Access vouchers can be used via a web browser, for getting access to content. In this sense, they are the same as a 100% Discount voucher. However, there is an important difference: By using an Access voucher a viewer will get access for a period that is going to be specified in the voucher itself, while with the Discount voucher they will get the access period that has been specified in the Payment type setting in the price option of the asset the viewer is purchasing.
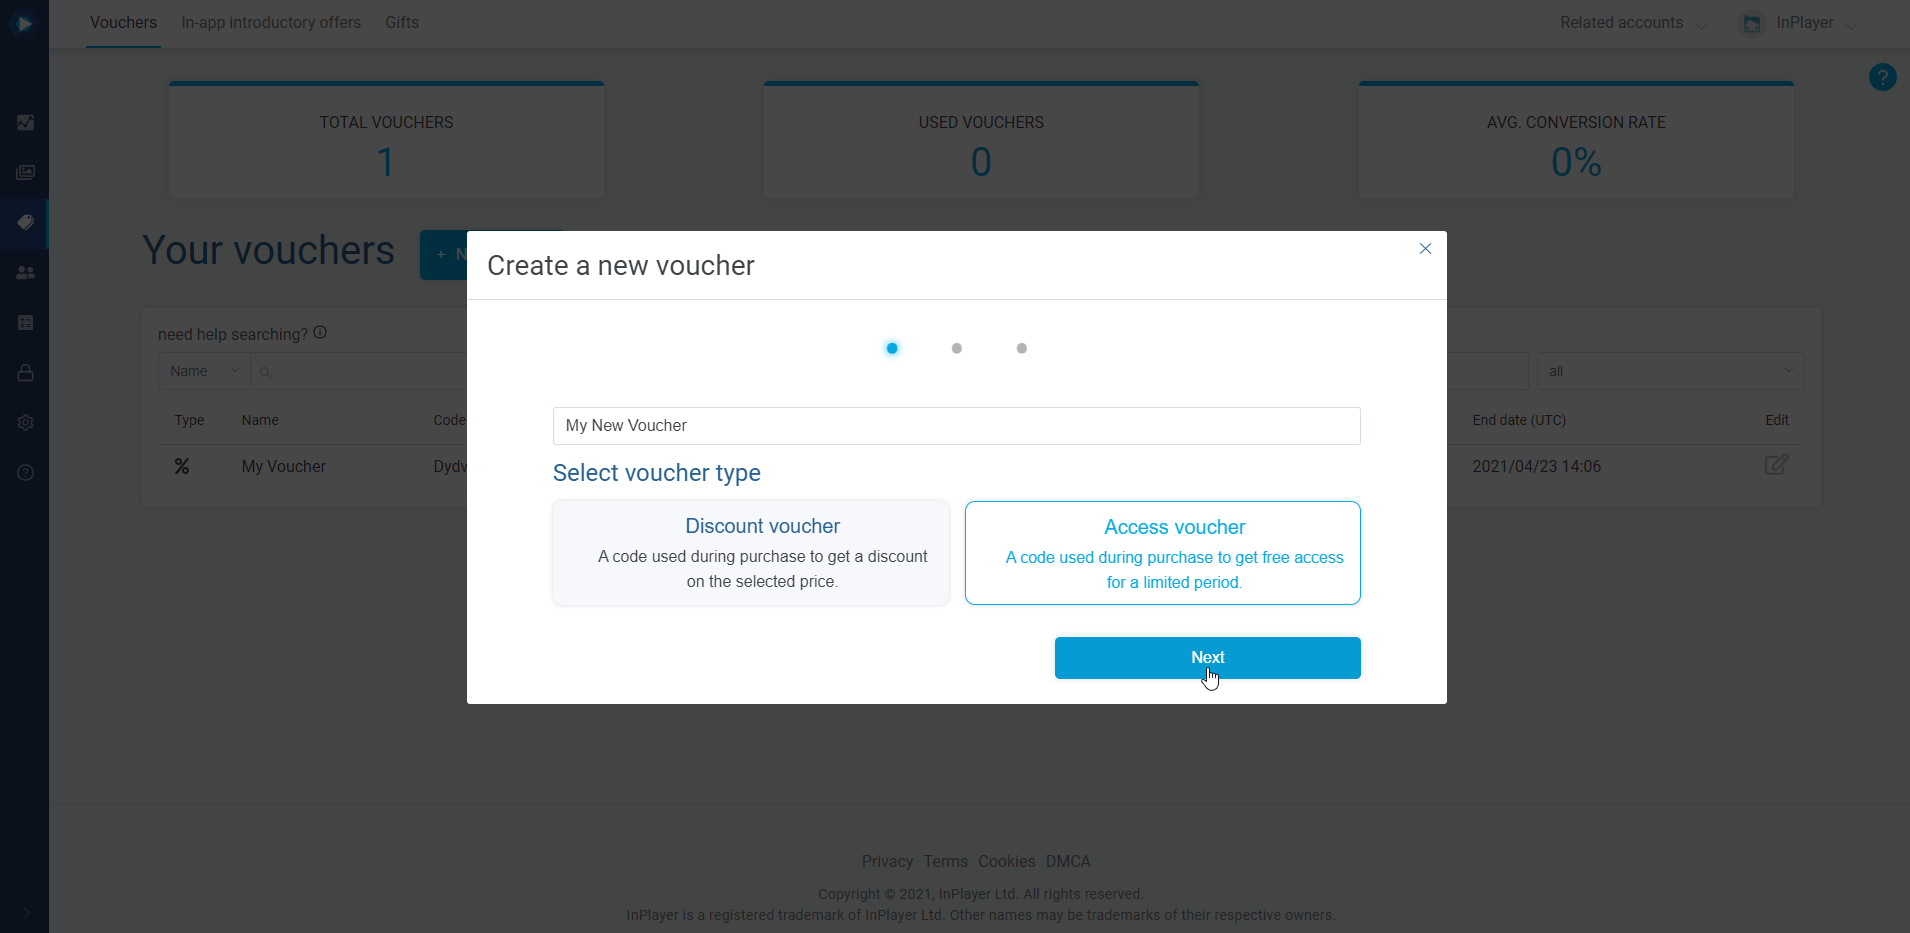
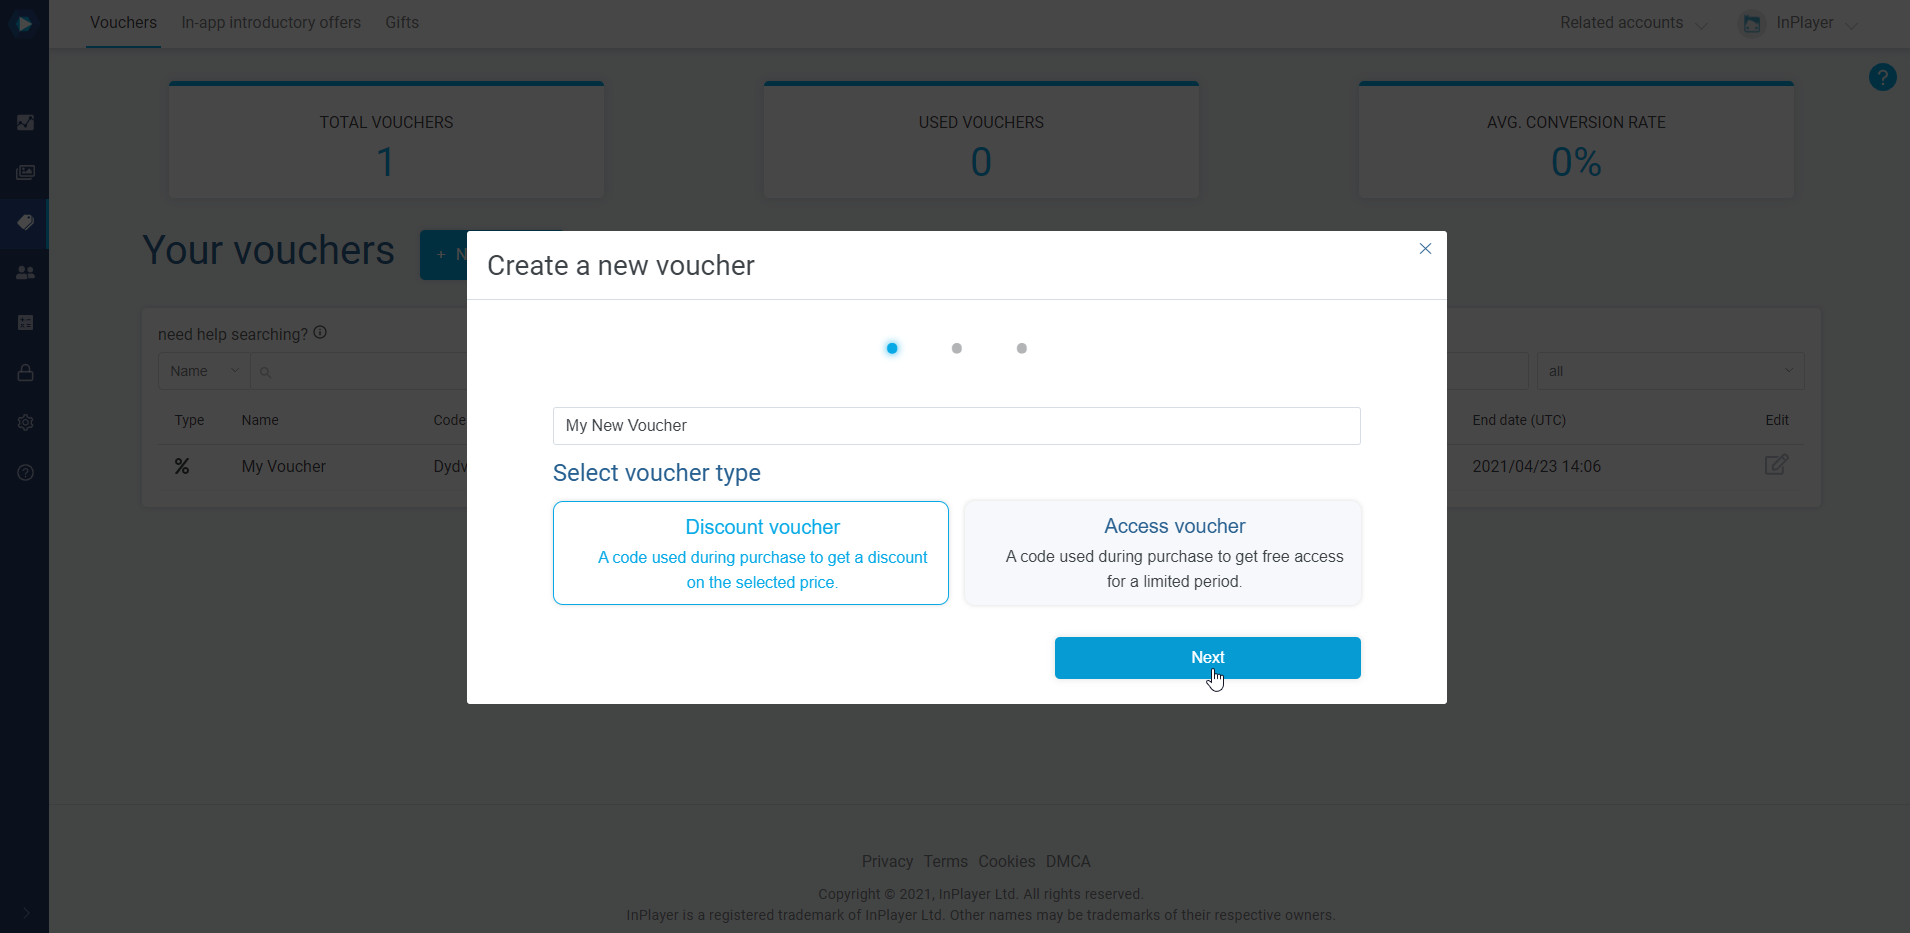
Enter the voucher name. This isn’t the code the viewer will need to use.
Choose Access voucher and click Next.
Configure the voucher.
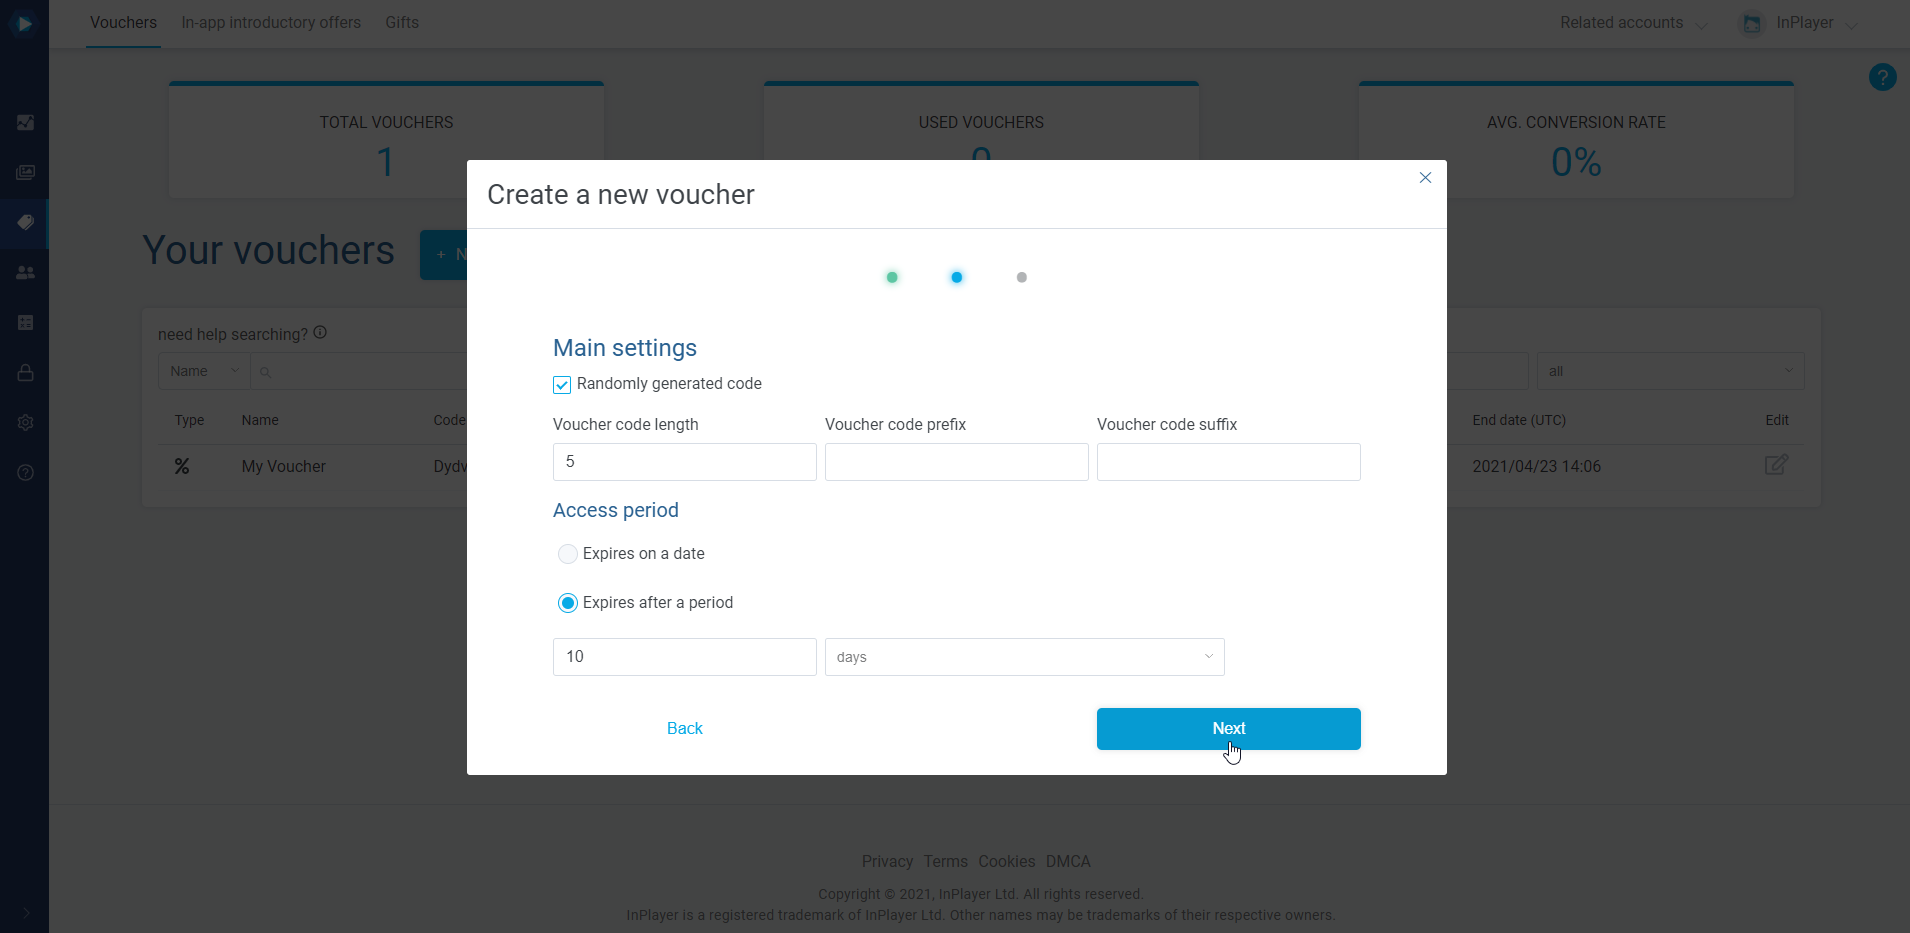
Randomly generated code lets you generate the voucher code automatically, by setting up the voucher length, prefix, and suffix. Note that the Voucher codelength does not include the prefix and suffix. It only refers to the automatically generated part in the middle.
Voucher code lets you enter a custom code, if you are not using the Randomly generated code setting.
Access period sets the access period the viewer will get when using the voucher. There are two options here:
Expires on a date With this option, you can set the date on which the viewer’s access will expire, regardless of when the viewer uses the voucher.
Expires after a period With this, you can set a specific access period (days, months, years) that the viewer will get after using the voucher.
Note that when a viewer uses an access voucher to purchase a subscription, they will not need to enter their credit card. Also, a subscripton will not be created for them. They will only get the access stated in the “Access period” section of the voucher.
Click Next.
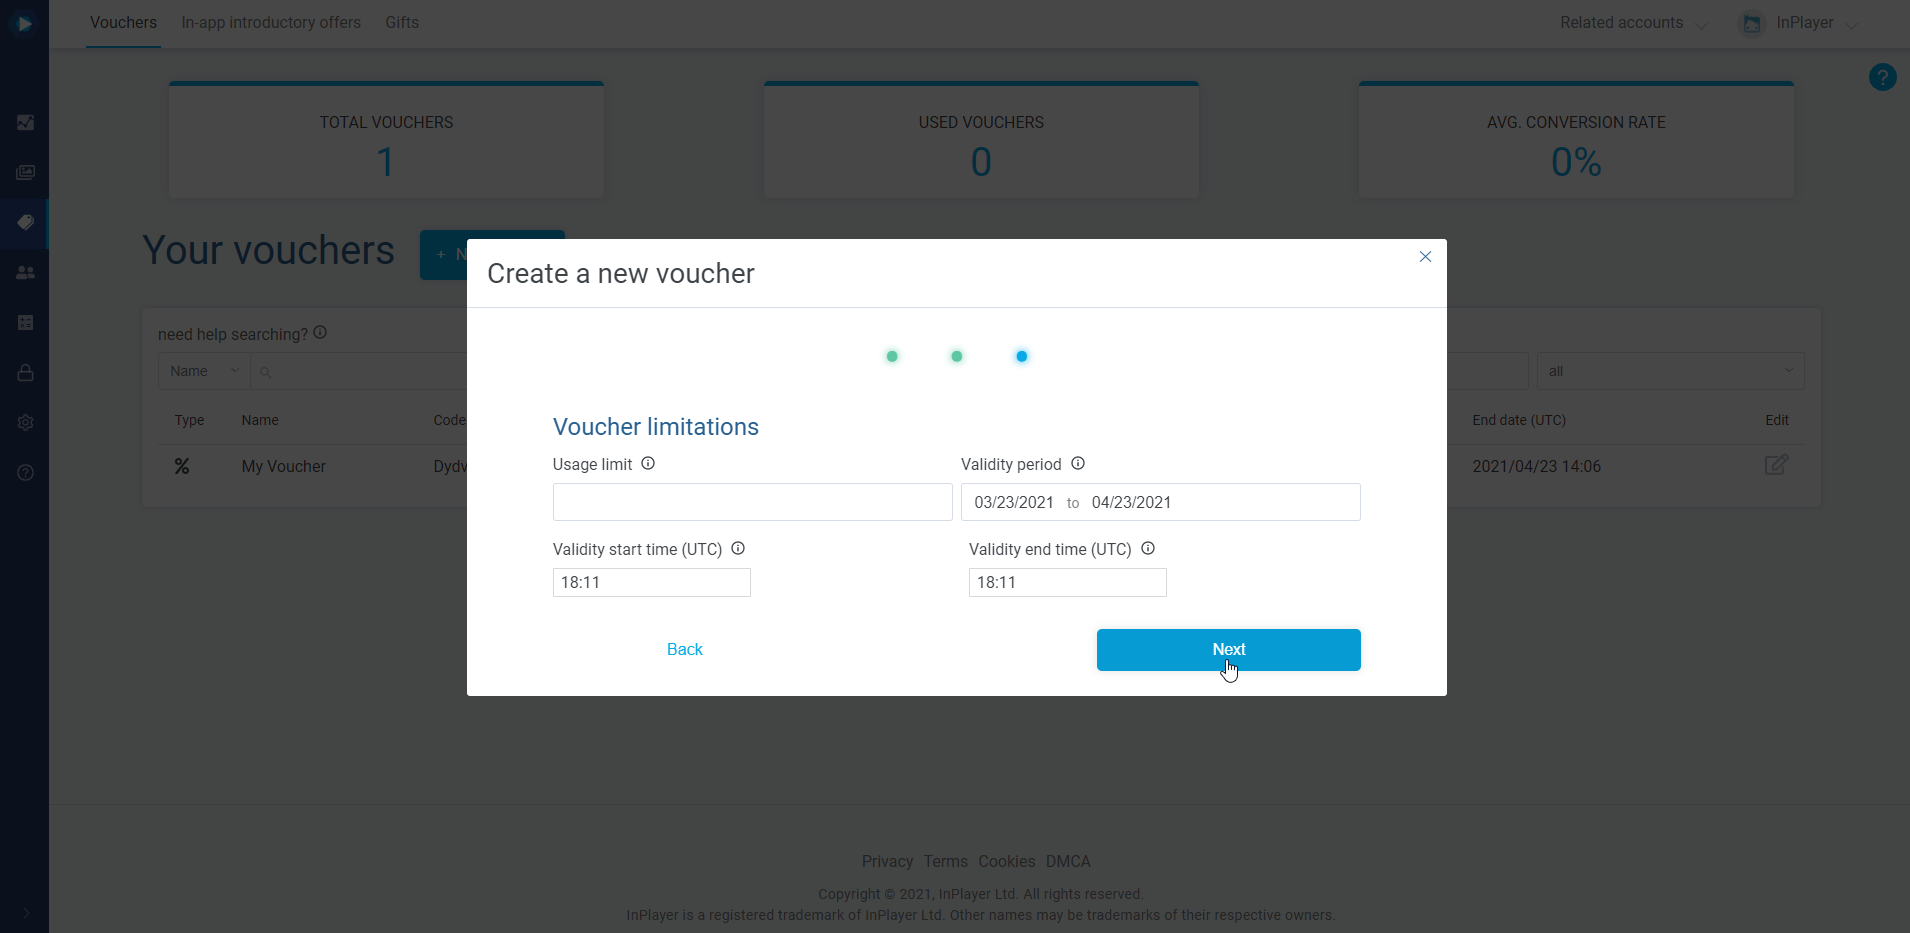
Set the Usage limit. This is how many times the voucher can be used. The default is set as blank, which means a voucher can be used an unlimited number of times.
Set the Validity period and start and endtimes. This sets the voucher validity period. Note that this is different from the content access period, which is controlled by the Access period setting from the previous step. Note also that the times are in UTC.
Click Next.
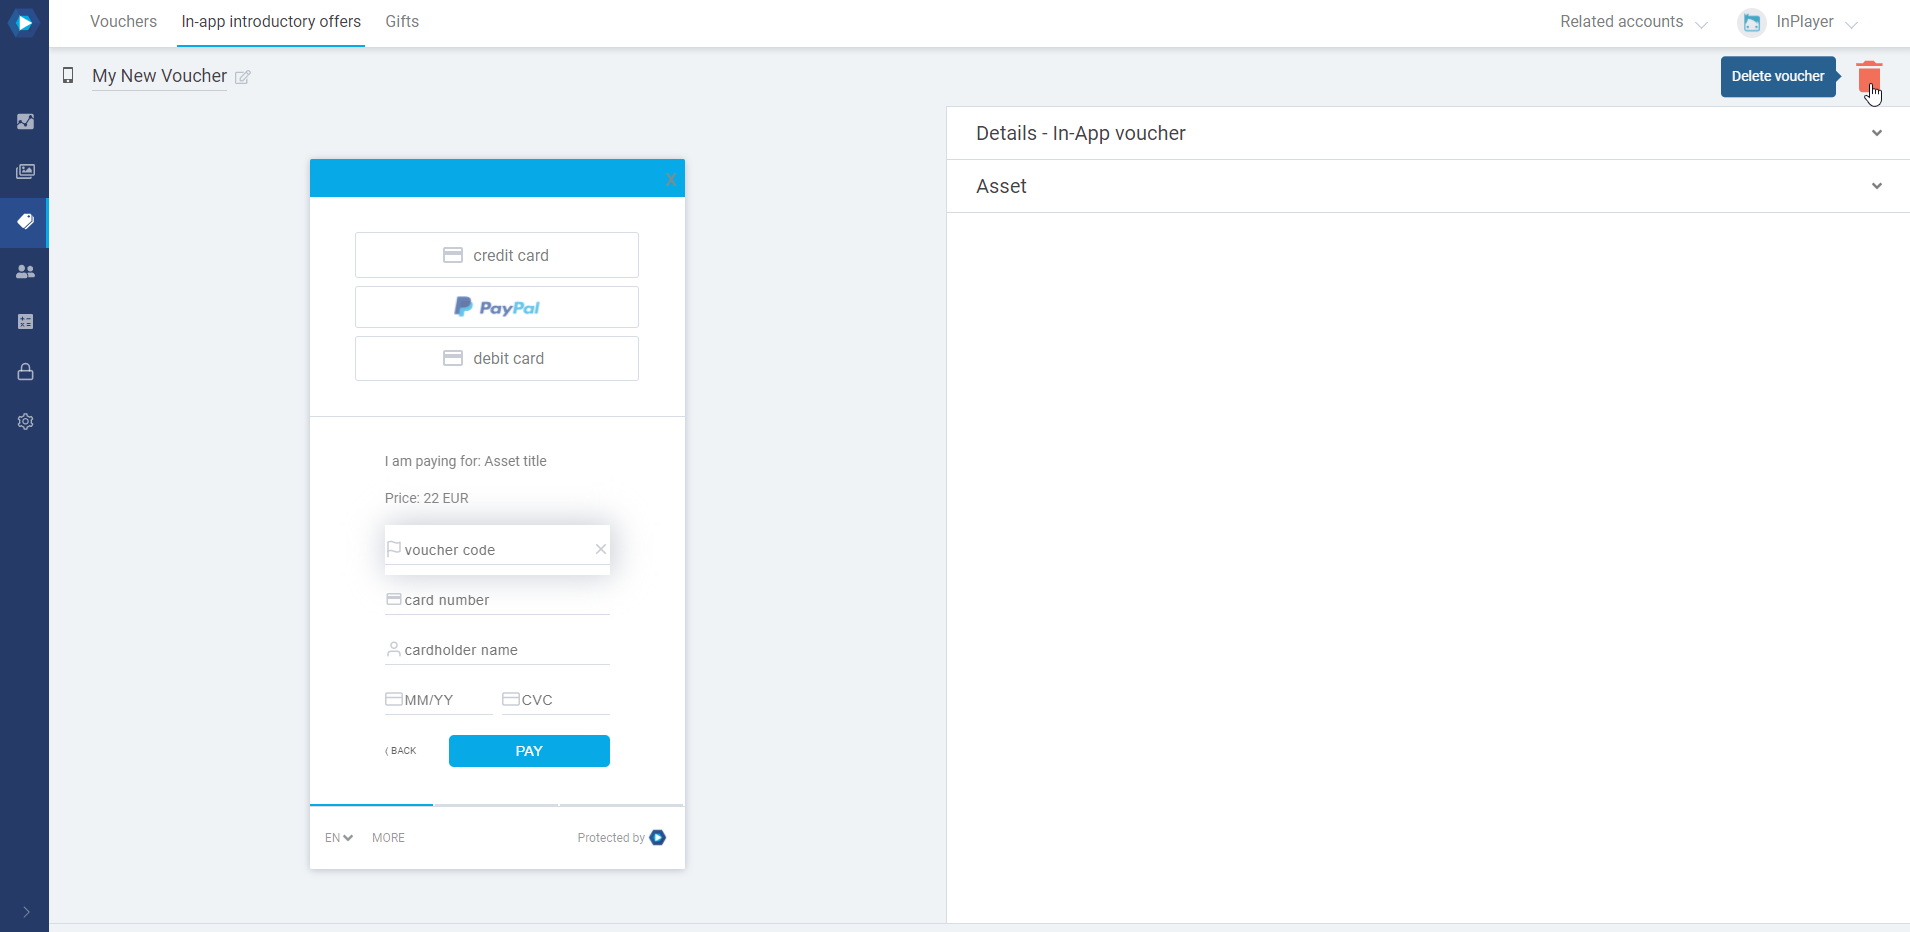
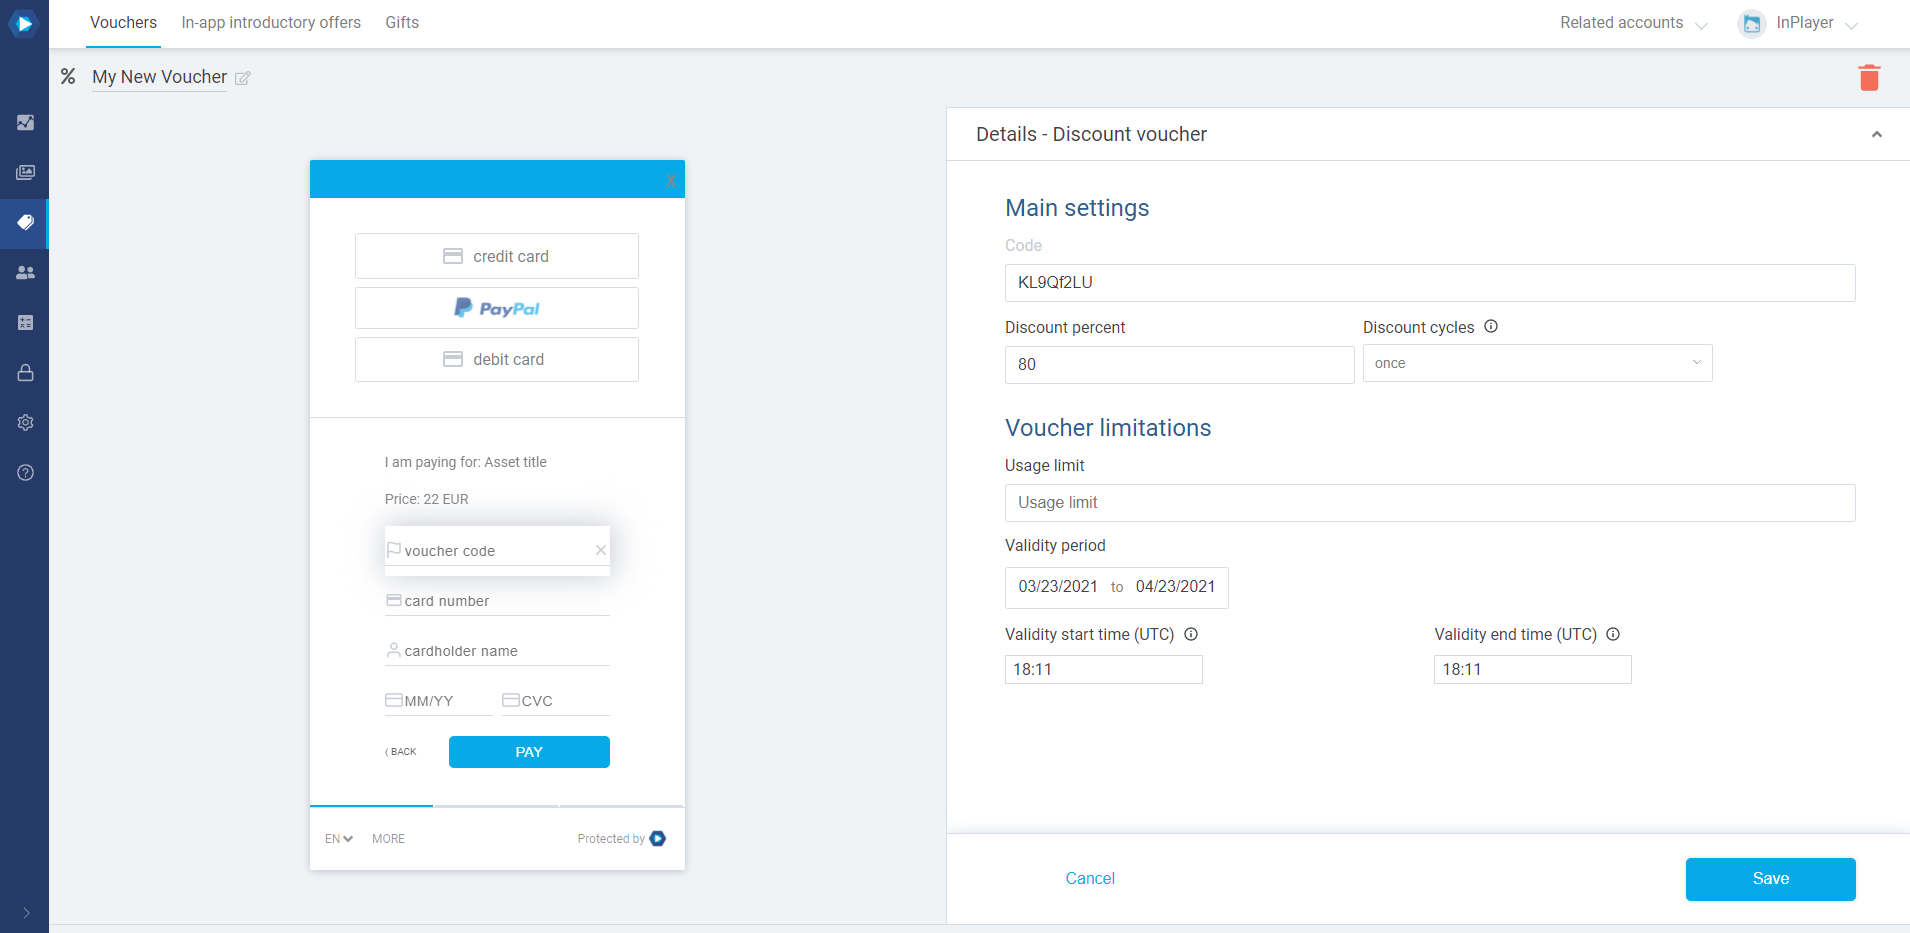
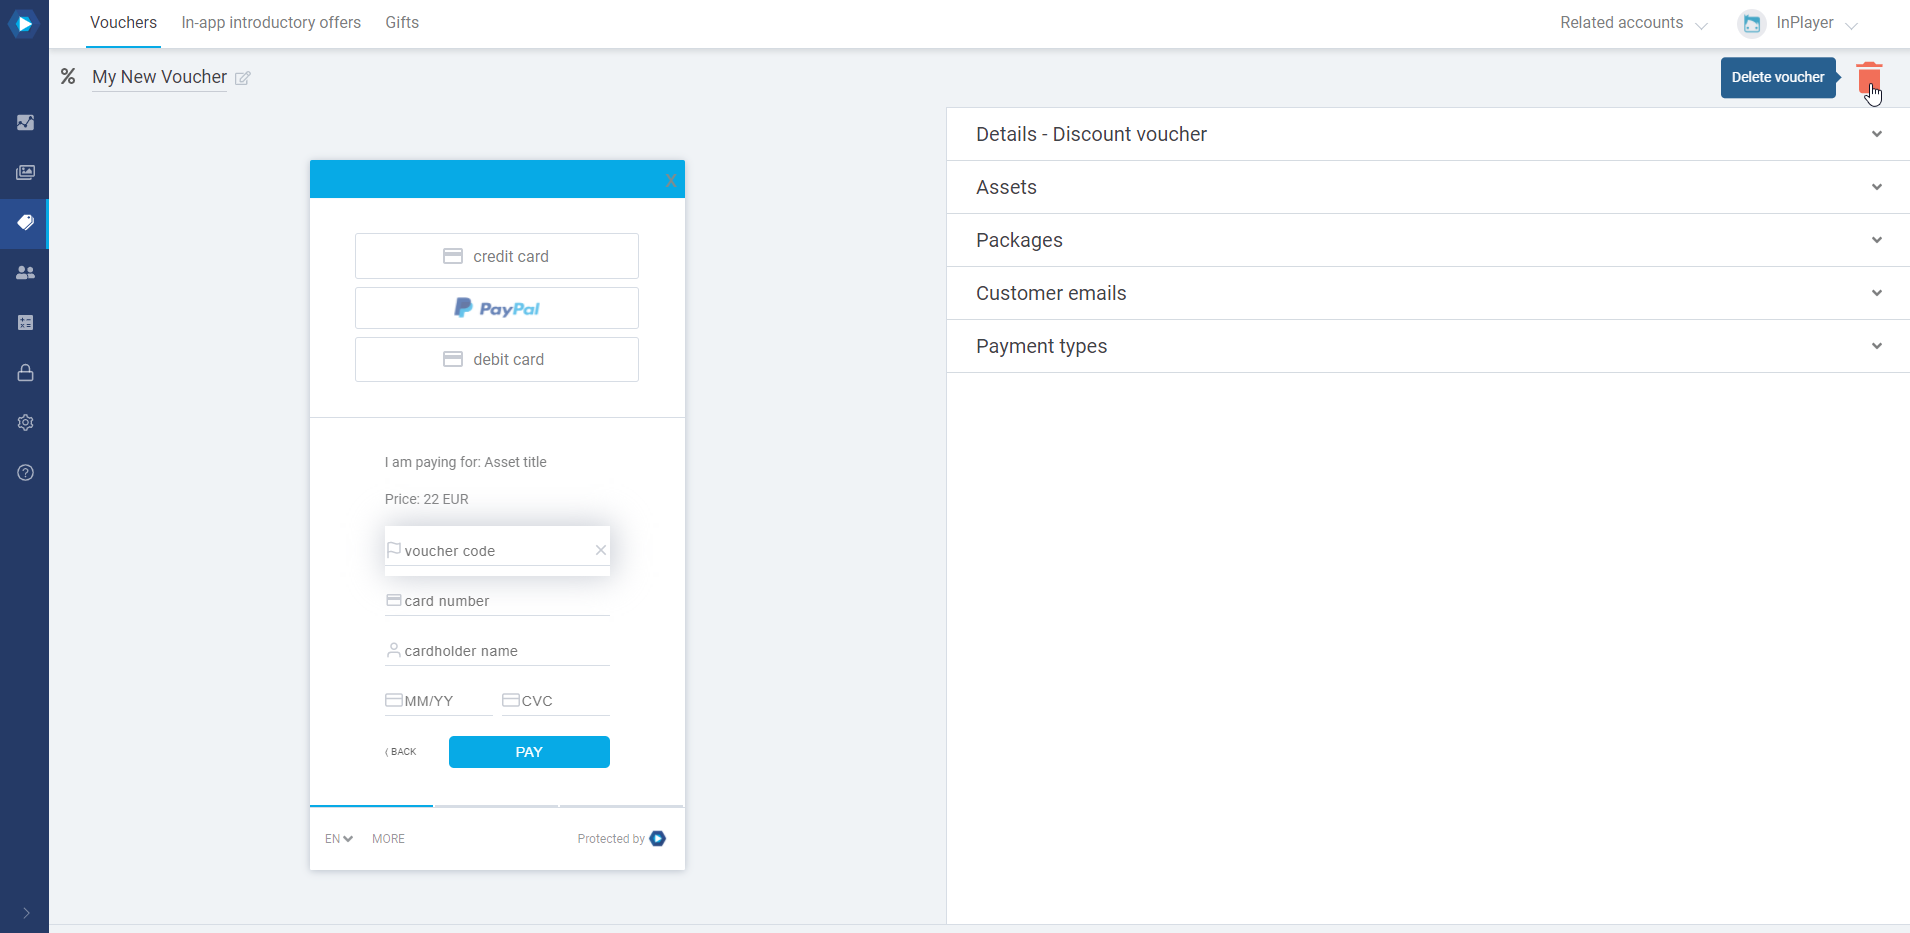
Your voucher has now been created and is ready for use. In its current state, the voucher can be used by any viewer, for every asset and package you have. If you wish to make it valid for only a certain asset, or package, or price option, or to make it so only a certain viewer can use it, you can proceed to modify the voucher properties.
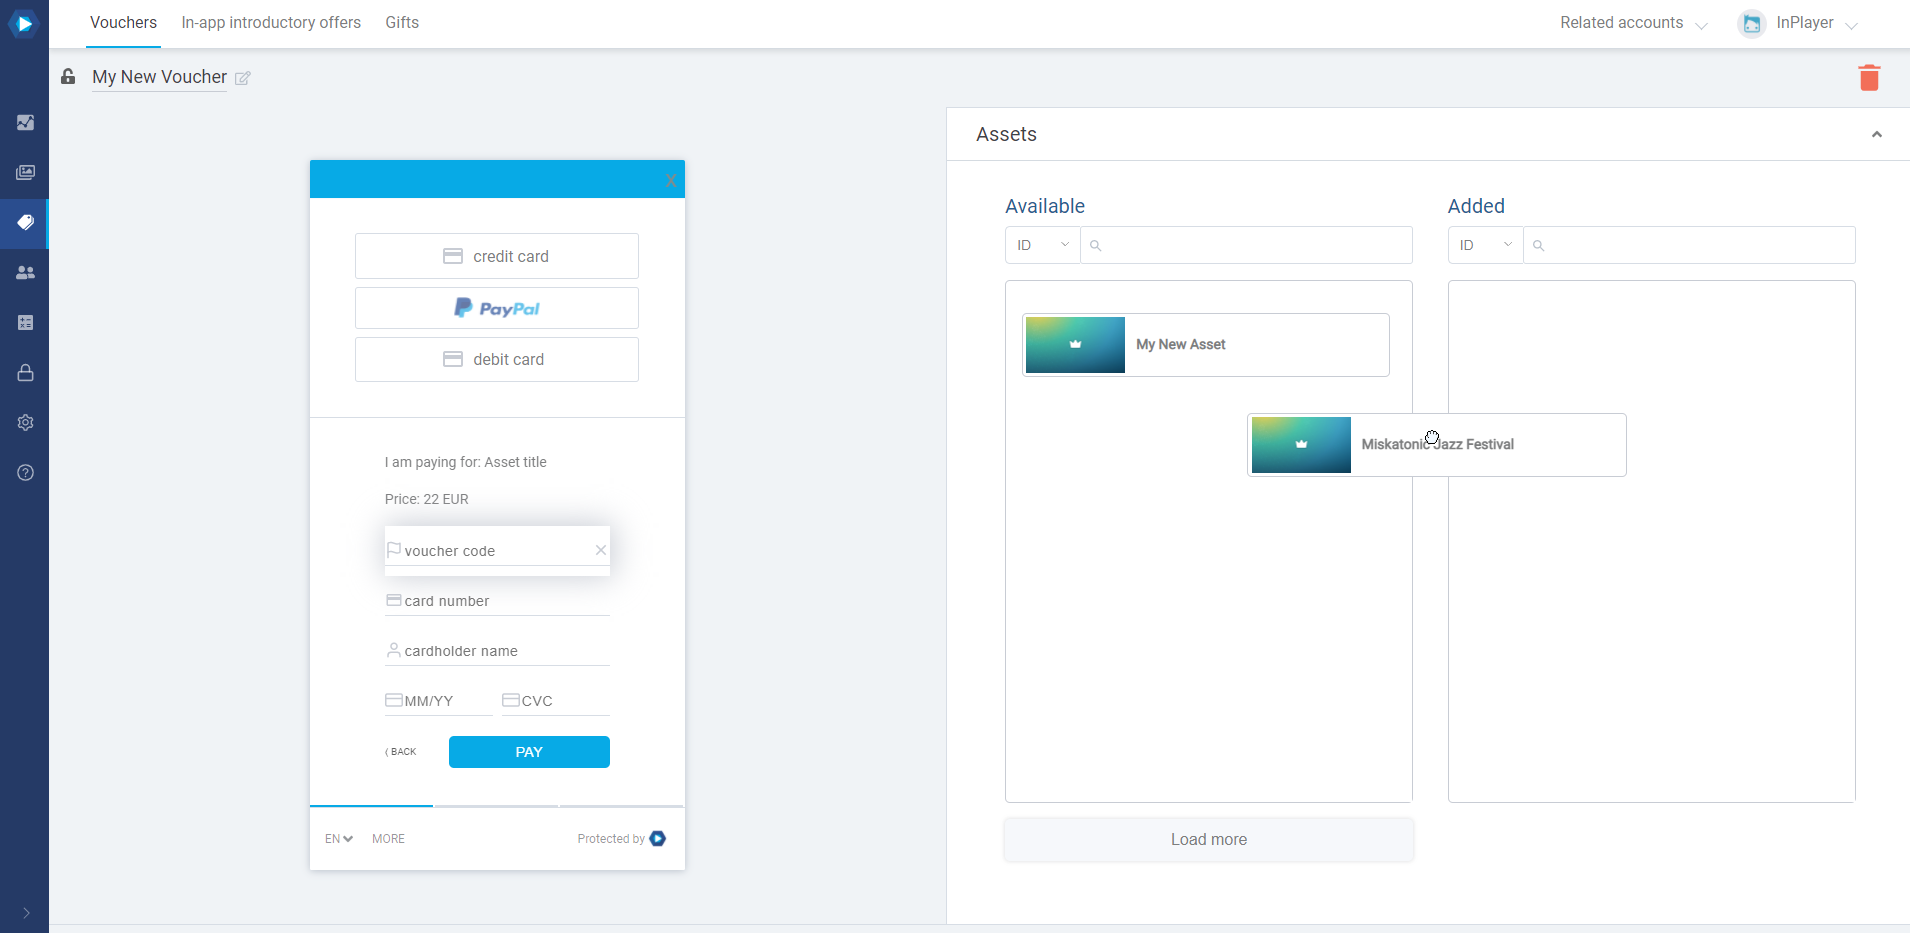
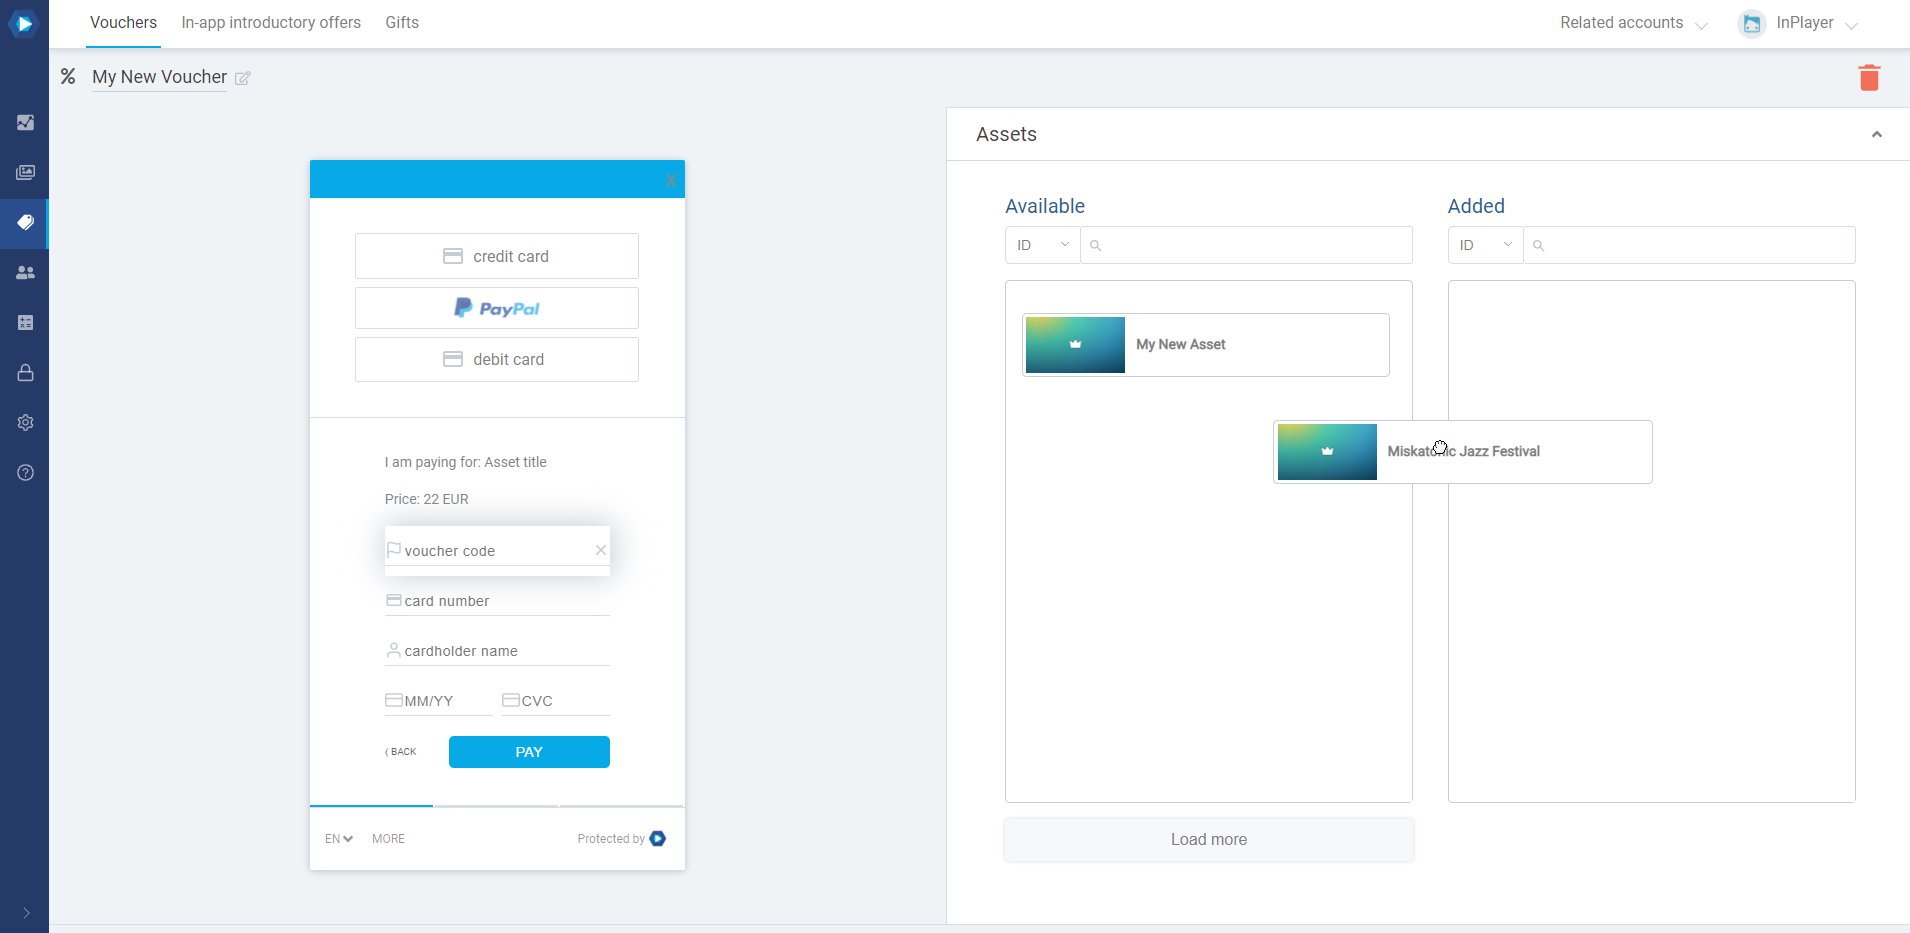
In the Assets and Packages sections, you can select for which assets and/or packages the voucher can be used. Just drag and drop the asset or package you want to add to the voucher from left to right.
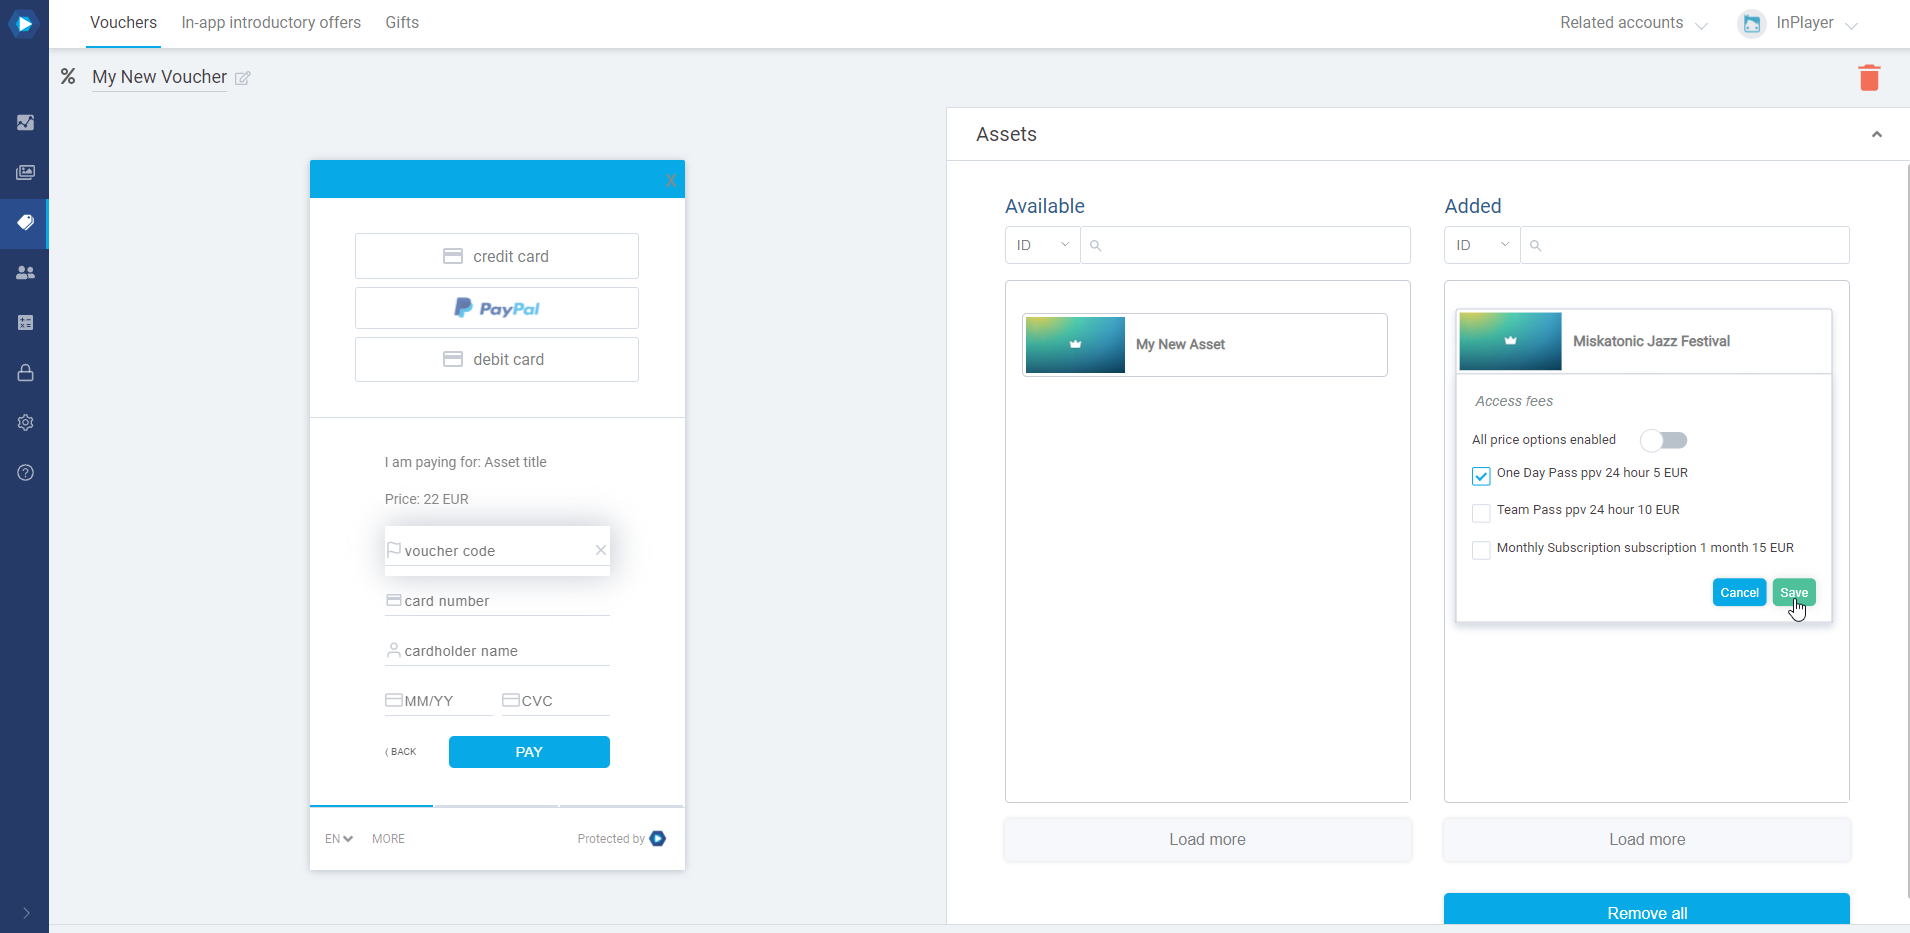
You can even go one step further, and specify for which price options will the voucher be valid, in case your assets or packages have multiple price options set up. To do this, click on Access fees, select the price option you want to enable, and click Save.
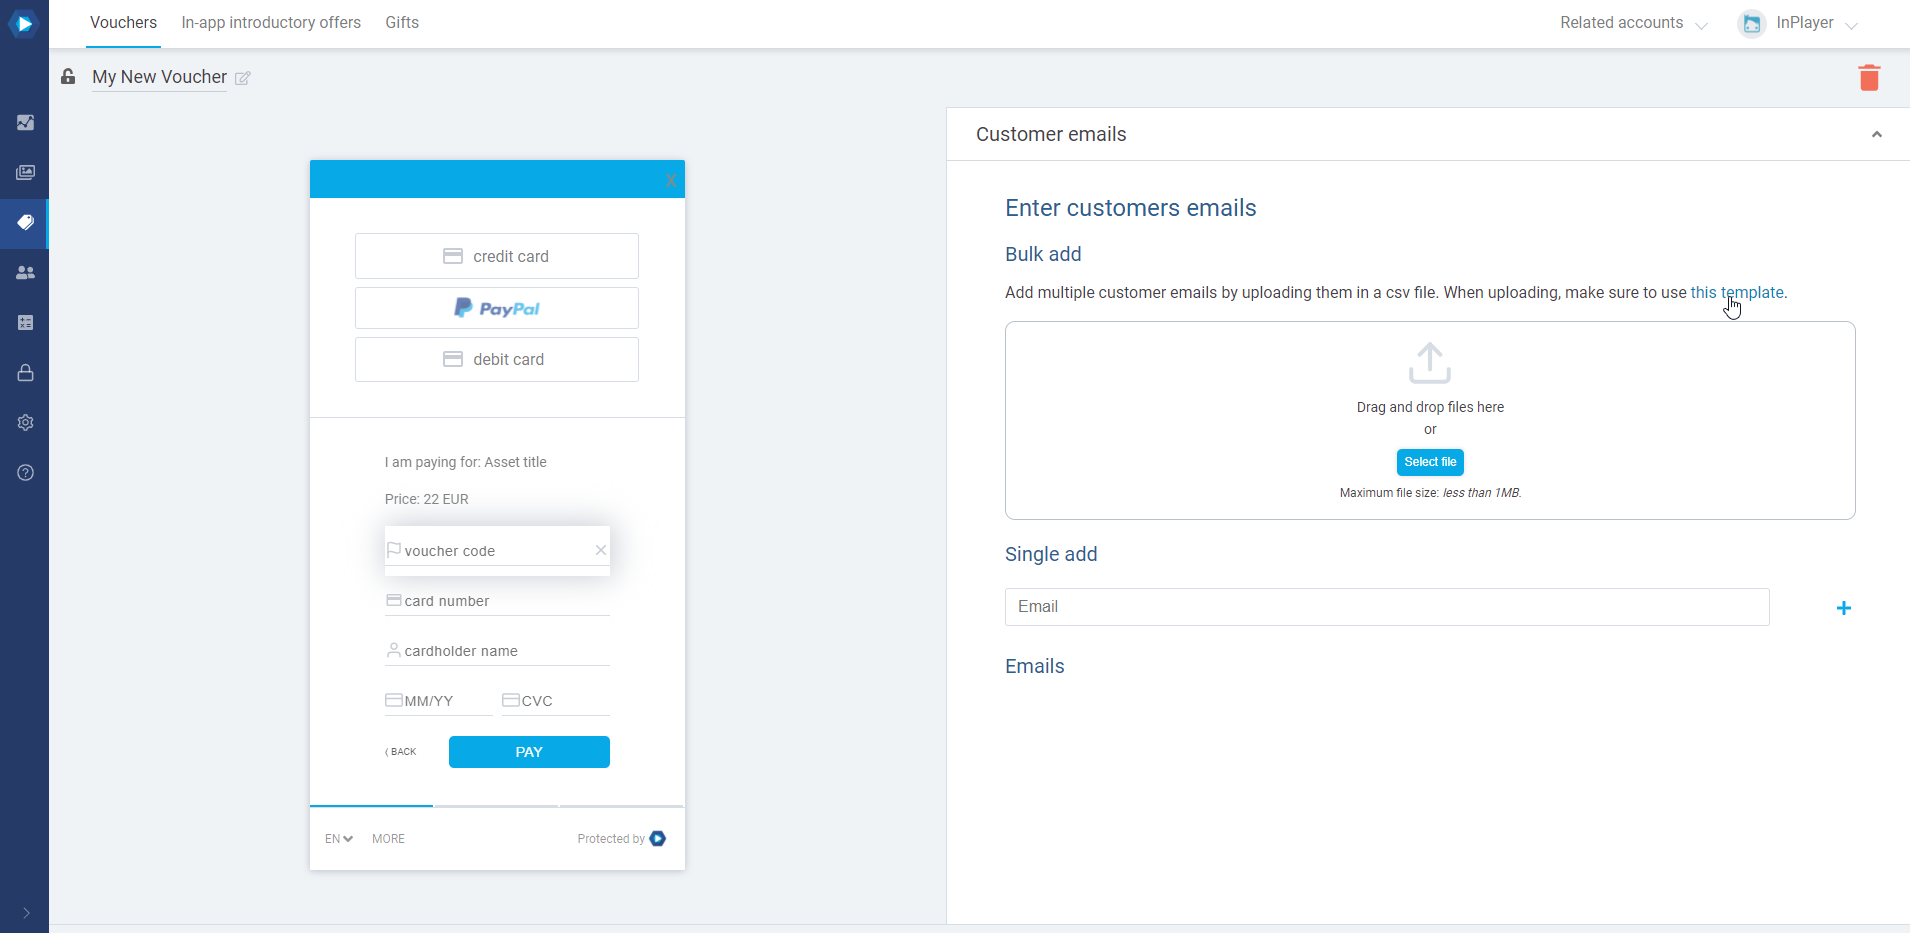
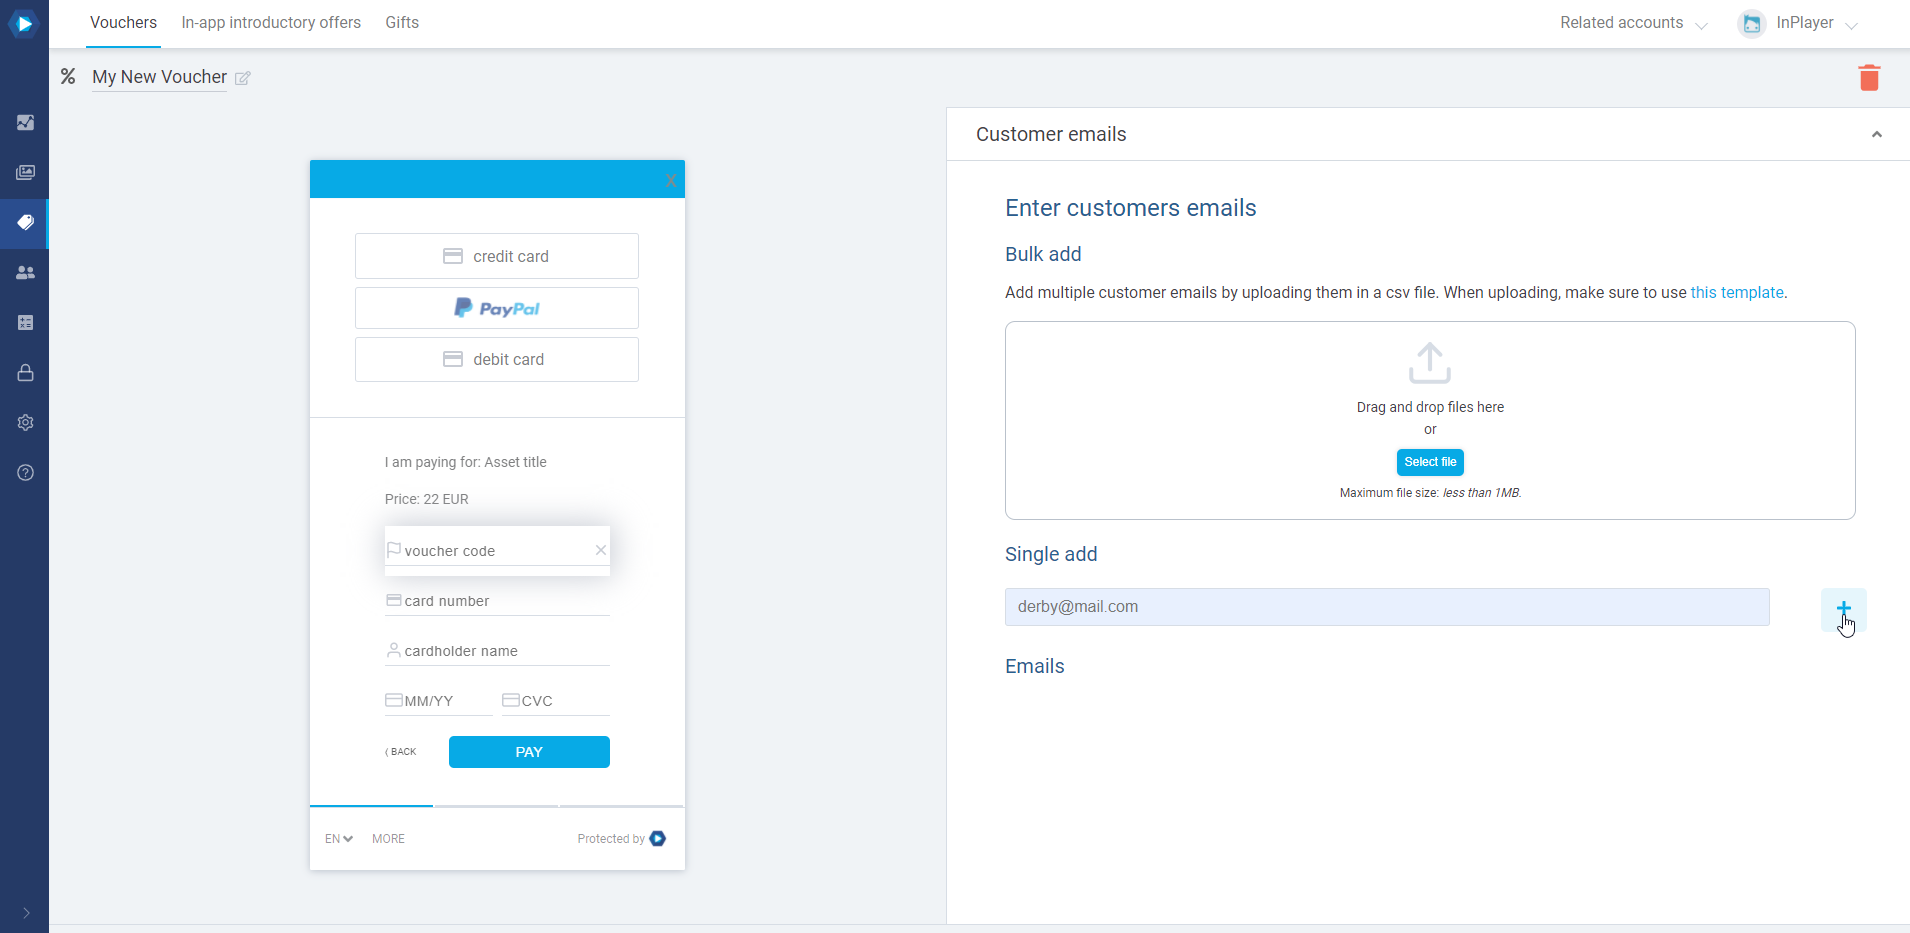
In the Customer emails section, you can choose to assign the voucher to only a specific set of viewers, so that only they can use it.
You can either bulk add a list of viewers or add viewers one by one.
Adding viewer emails in bulk
For bulk adding, make sure to download the CSV template provided in the voucher settings.
Once you enter the viewer emails in the CSV file, just upload the file to the voucher.
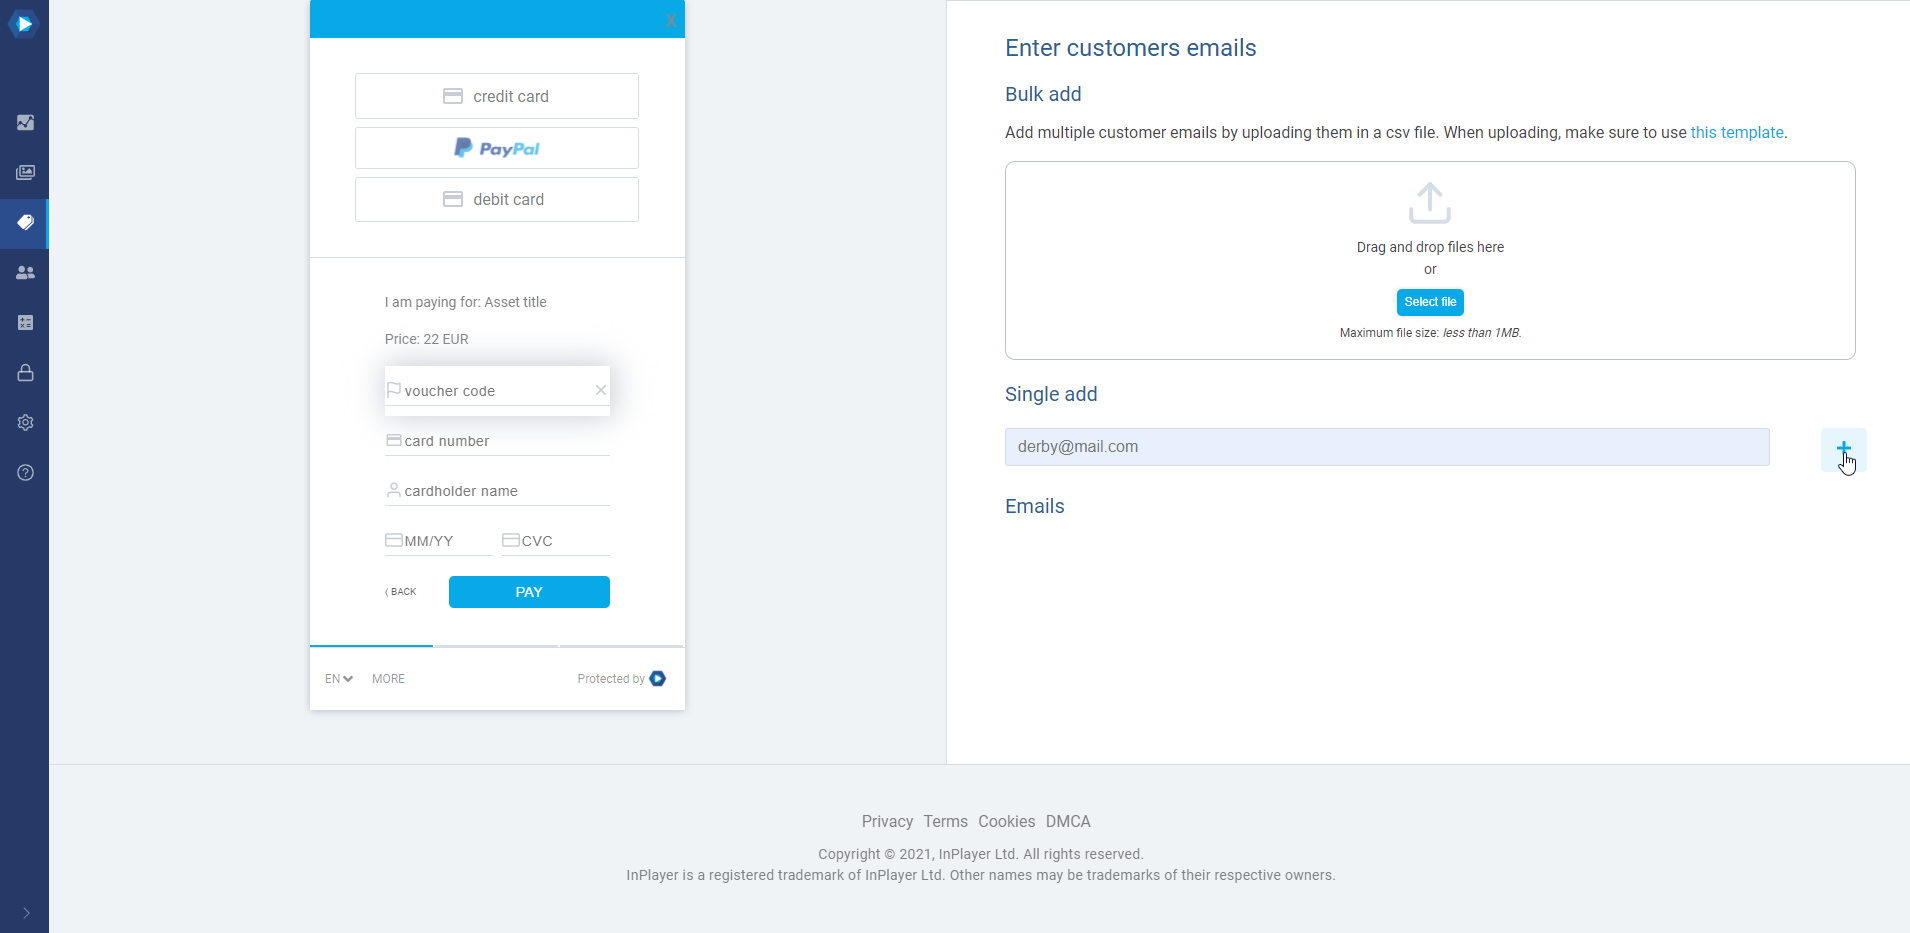
Adding viewer emails individually
To add a single viewer email, simply type in the email and click the + button.
Note that viewers don’t have to exist in the database. You can set up the voucher now, and when the viewer registers with the email you’ve entered, they will still be able to use the code.
To find out which viewers used a particular voucher, you can get a payment report from the Transactions tab. These reports will contain the voucher info for each payment.
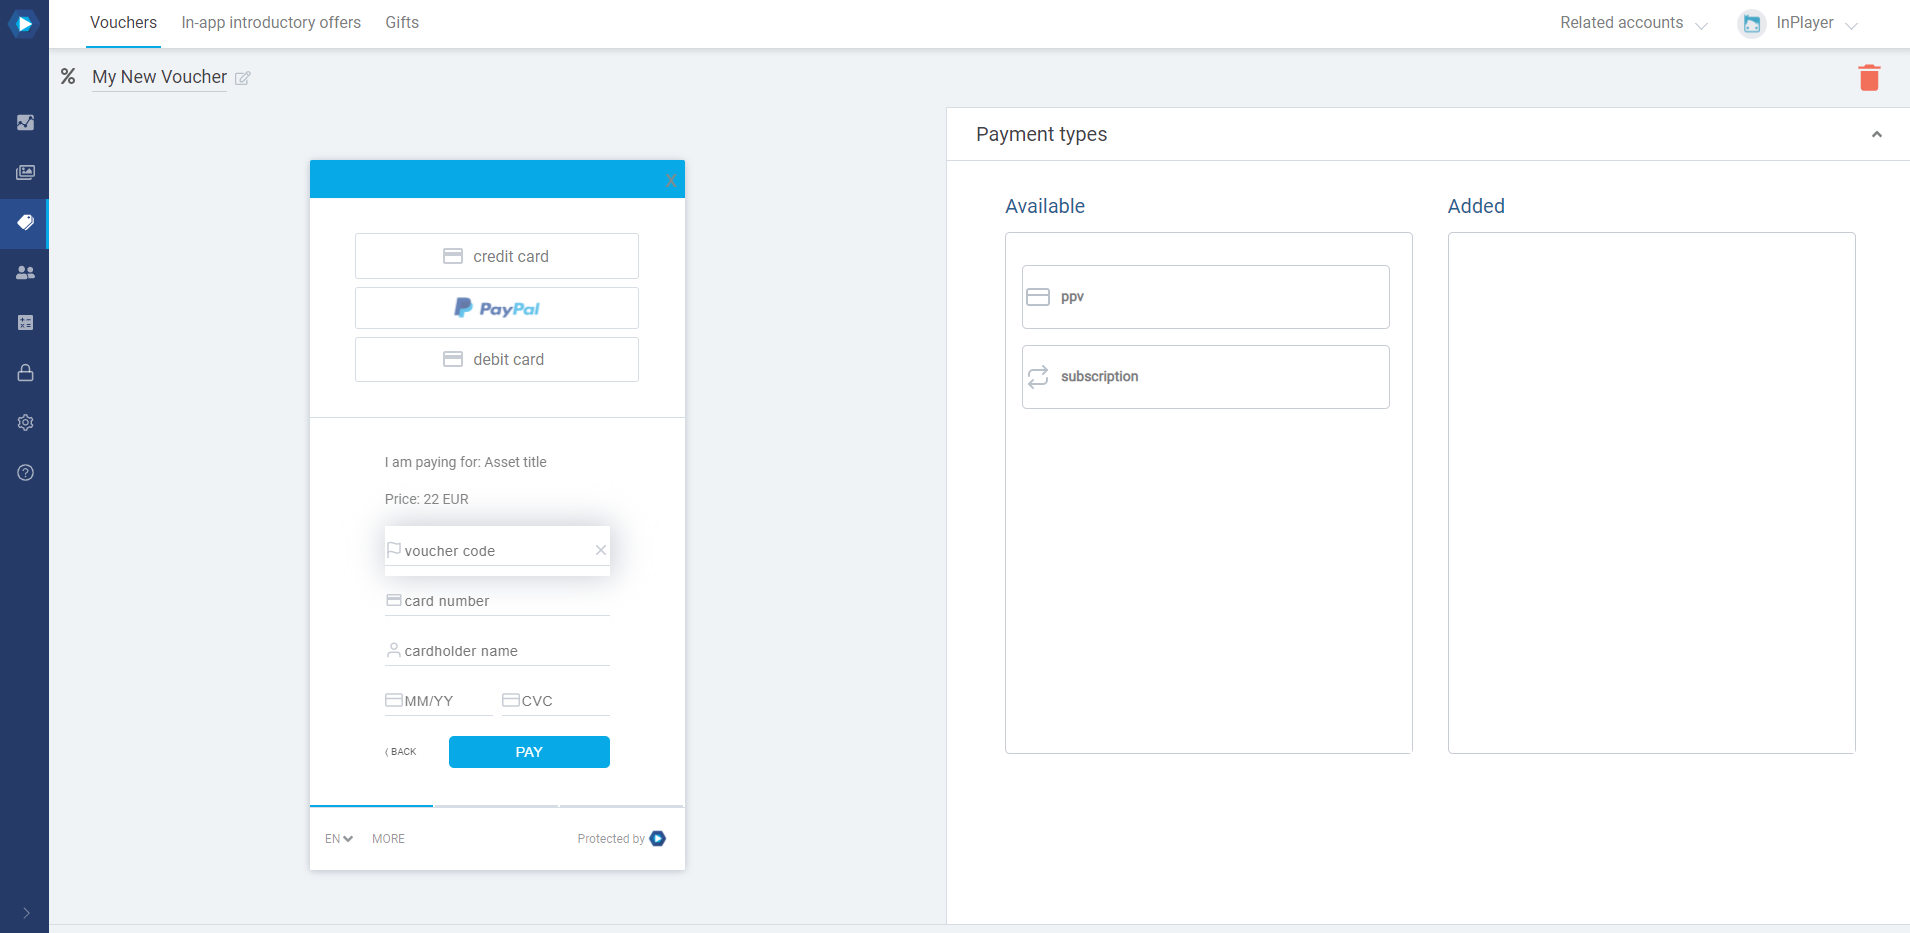
In the Payment types section, you can make the voucher valid for only ppv or subscription price options. Just drag and drop from left to right. If you want the voucher to be valid for both, just leave this option as is, i.e. select neither the ppv or the subscription types, which will make the voucher valid for both.
Discount vouchers can be used for getting discounts on purchases done via a web browser, using a Credit Card, PayPal or Direct Debit as payment methods. It is the most common voucher type.
Note that a 100% Discount voucher cannot be used for a ppv (one-time) payment via PayPal. This is due to a limitation in PayPal’s system. For subscription payments, on the other hand, a 100% voucher can be used via PayPal with no issues.
Enter the voucher name. This isn’t the code the viewer will need to use.
Choose Discount voucher and click Next.
Configure the voucher.
Randomly generated code lets you generate the voucher code automatically, by setting up the voucher length, prefix, and suffix. Note that the Voucher codelength does not include the prefix and suffix. It only refers to the automatically generated part in the middle.
Voucher code lets you enter a custom code, if you are not using the Randomly generated code setting.
Discount percent is the discount the viewer will get by using the voucher. You can set it up to 100 which means a viewer will not have to pay anything. Note that you only need to enter the number of the discount percent, without the % sign after it.
Discount cycles is only applicable for subscription payments. once – gives a one time discount on the first payment for a subscription. forever – gives a permanent discount for all future payments for a subscription. repeating – gives a discount for a set number of payments for a subscription.
Note that when a viewer uses a 100% discount voucher to purchase a subscription, they will still need to enter their credit card. This is so the system knows which card to charge after the discount period expires.
Click Next.
Set the Usage limit. This is how many times the voucher can be used. The default is set as blank, which means a voucher can be used an unlimited number of times.
Set the Validity period and start and endtimes. This sets the voucher validity period. Note that this is different from the content access period, which is controlled by the Payment type setting in the price option of your asset or package.
Click Next.
Your voucher has now been created and is ready for use. In its current state, the voucher can be used by any viewer, for every asset and package you have. If you wish to make it valid for only a certain asset, or package, or price option, or to make it so only a certain viewer can use it, you can proceed to modify the voucher properties.
In the Assets and Packages sections, you can select for which assets and/or packages the voucher can be used. Just drag and drop the asset or package you want to add to the voucher from left to right.
You can even go one step further, and specify for which price options will the voucher be valid, in case your assets or packages have multiple price options set up. To do this, click on Access fees, select the price option you want to enable, and click Save.
In the Customer emails section, you can choose to assign the voucher to only a specific set of viewers, so that only they can use it.
You can either bulk add a list of viewers or add viewers one by one.
Adding viewer emails in bulk
For bulk adding, make sure to download the CSV template provided in the voucher settings.
Once you enter the viewer emails in the CSV file, just upload the file to the voucher.
Adding viewer emails individually
To add a single viewer email, simply type in the email and click the + button.
Note that viewers don’t have to exist in the database. You can set up the voucher now, and when the viewer registers with the email you’ve entered, they will still be able to use the code.
To find out which viewers used a particular voucher, you can get a payment report from the Transactions tab. These reports will contain the voucher info for each payment.
In the Payment types section, you can make the voucher valid for only ppv or subscription price options. Just drag and drop from left to right. If you want the voucher to be valid for both, just leave this option as is, i.e. select neither the ppv or the subscription types, which will make the voucher valid for both.
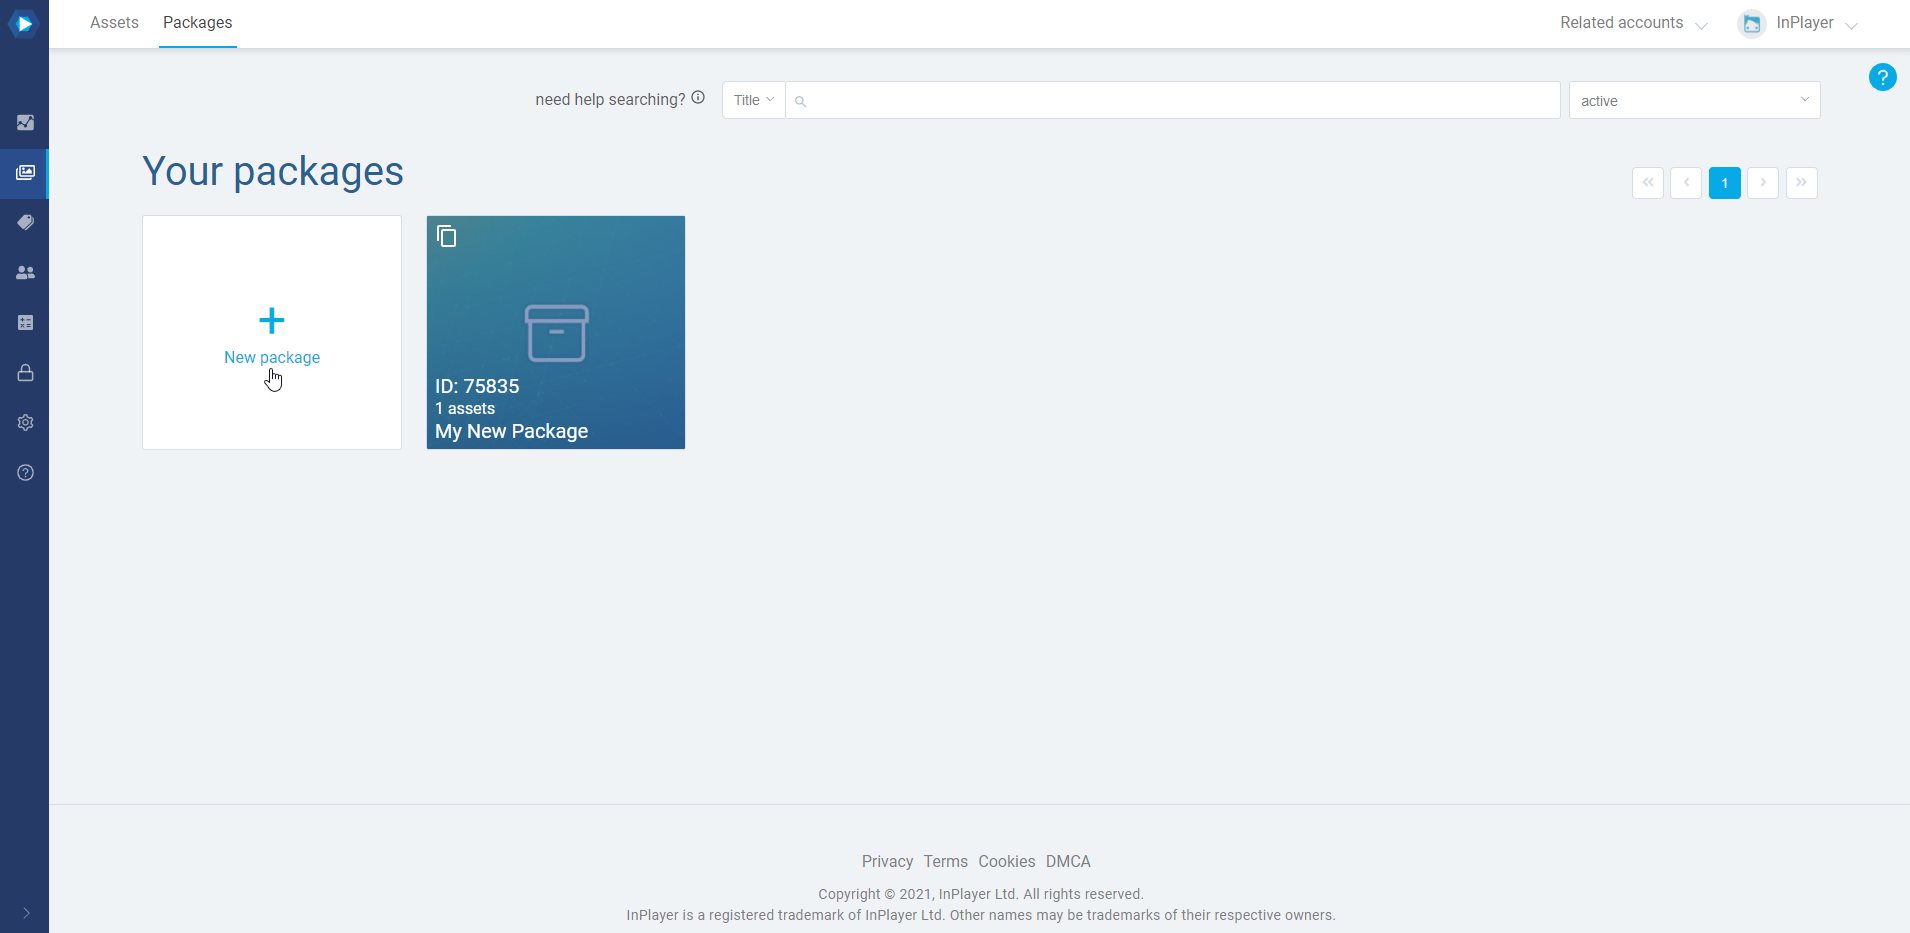
Our platform offers the ability to combine multiple assets into a bundle, which can then be sold under one price. We call these bundles packages. Once the viewer purchases a package, they will automatically have access to all assets that have been placed in that package.
Note that packages themselves are not embedded on a webpage. The asset is still the thing you need to embed on your page because that is where the actual content is located. The package only serves to bundle multiple assets under a single price.
When a viewer clicks on an asset that is a part of a package, the package price will appear in the asset’s price options, and by selecting it, the viewer will get access to all assets that are part of the package they’ve just purchased. To access the assets, the viewer will need to navigate to the place on your website where the assets have been embedded.
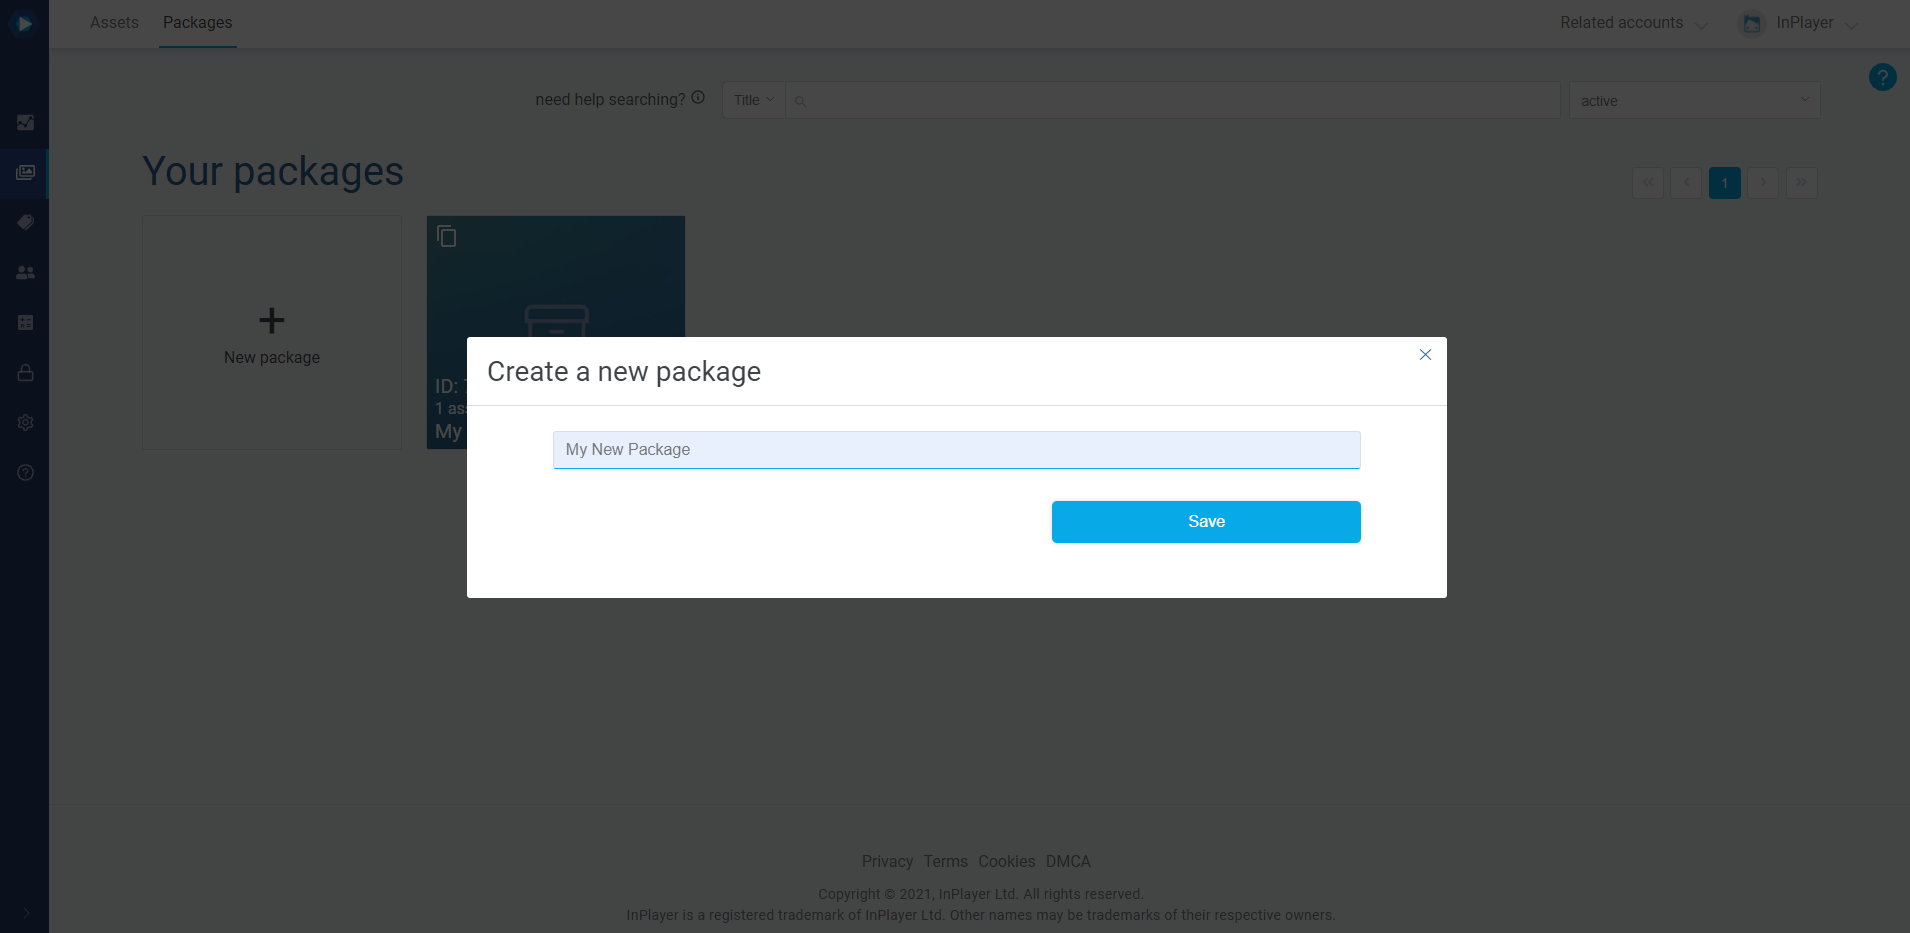
Enter a name for your package. This will appear on the final payment form on the paywall, as well as the notification emails your viewers will receive.
Click Save.
Your package is now created and saved.
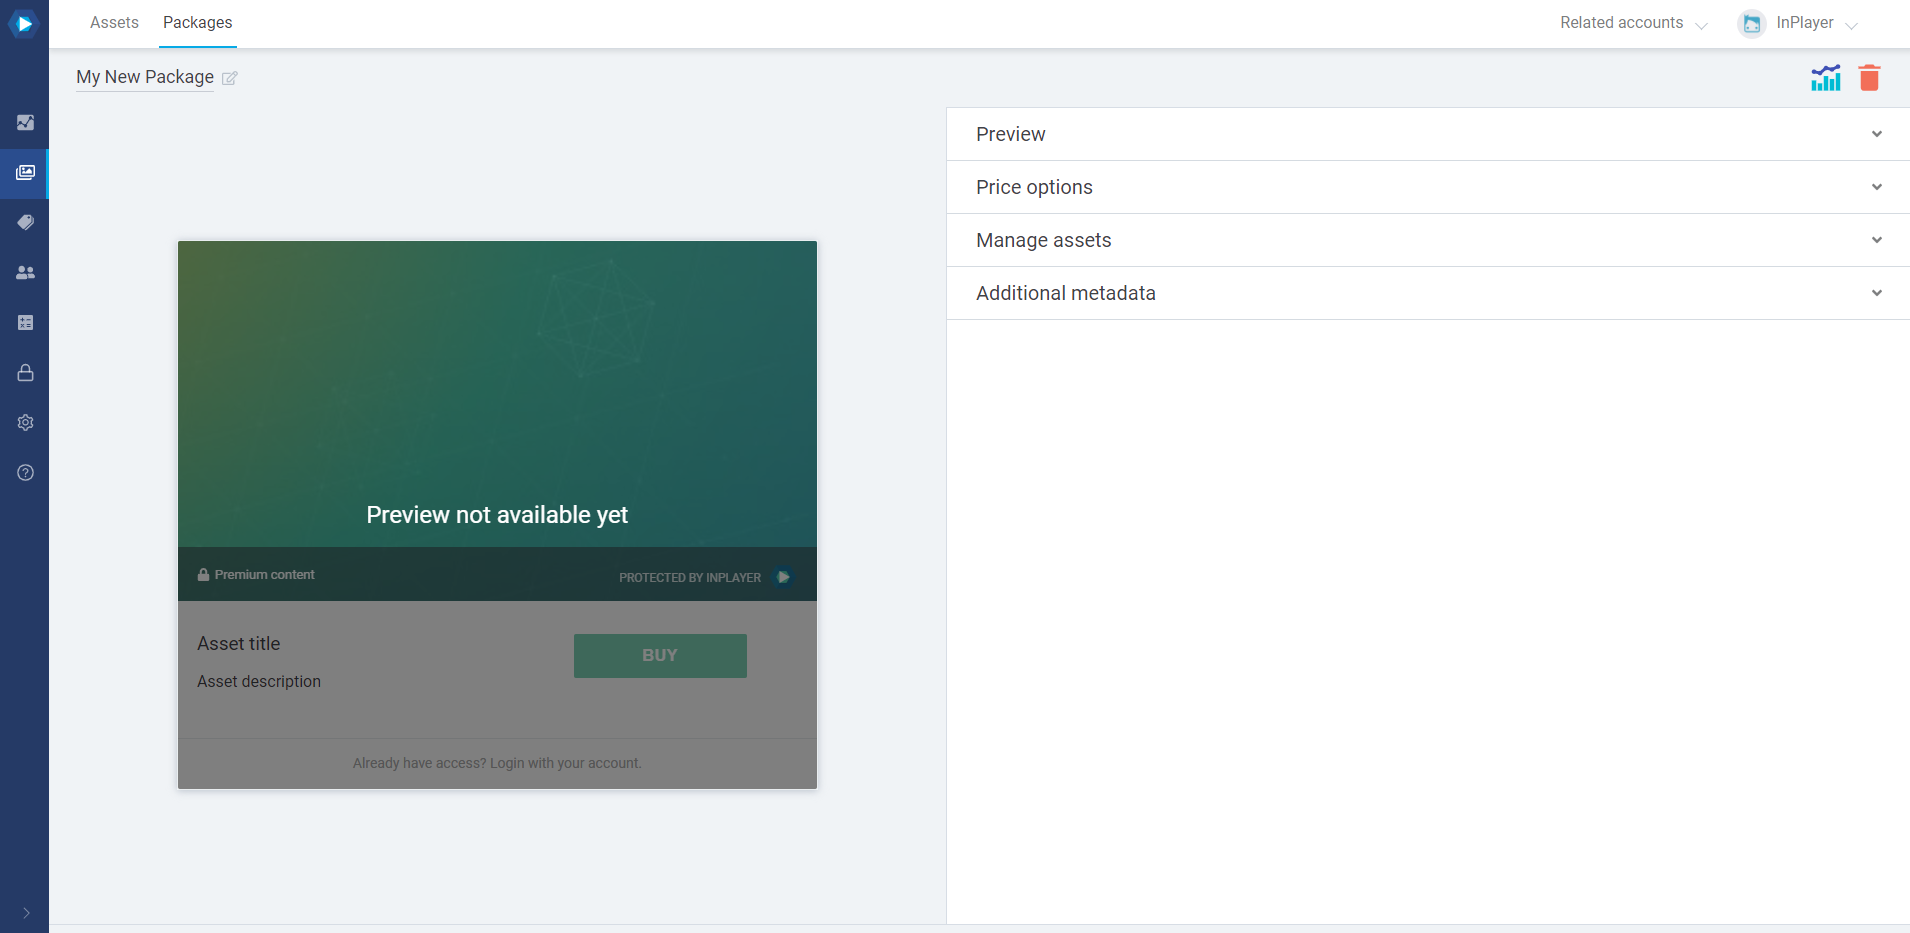
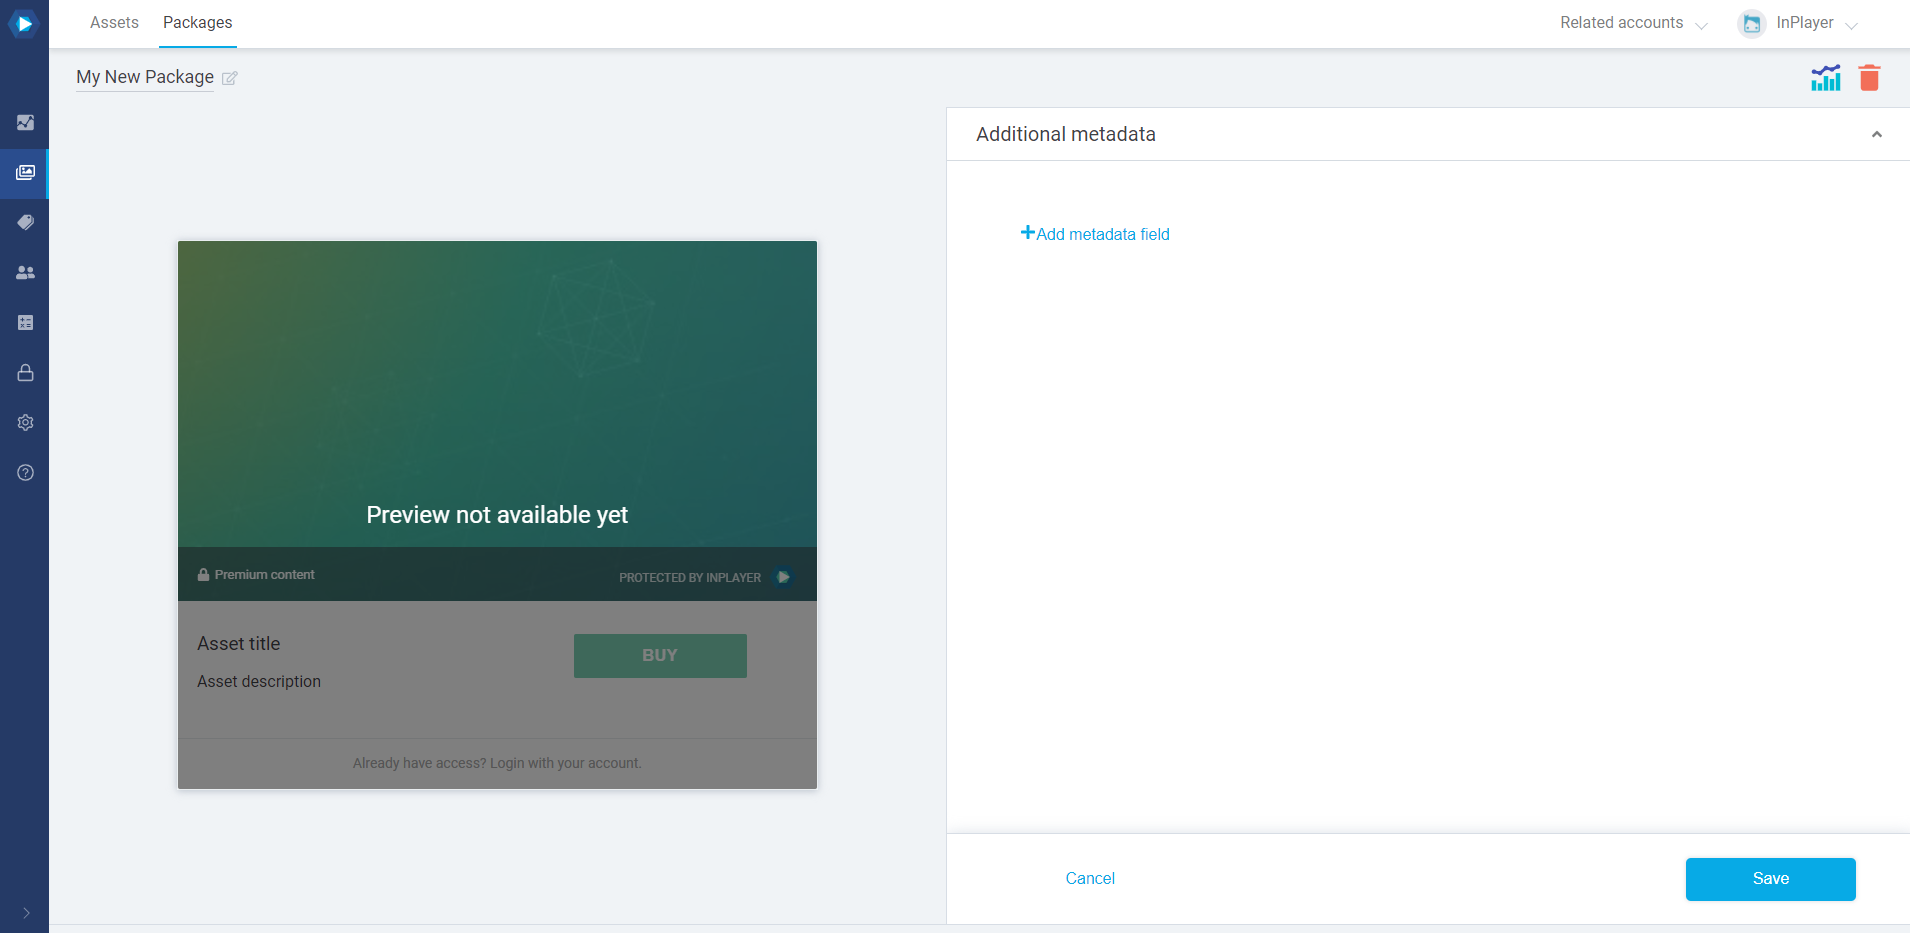
On the new page, you can set up the package properties.
Just like in the asset section, the right side of the screen is where you can set everything up, and the left side provides a preview. However, since the package itself will not be embedded on your webpage, the preview is more for your own convenience.
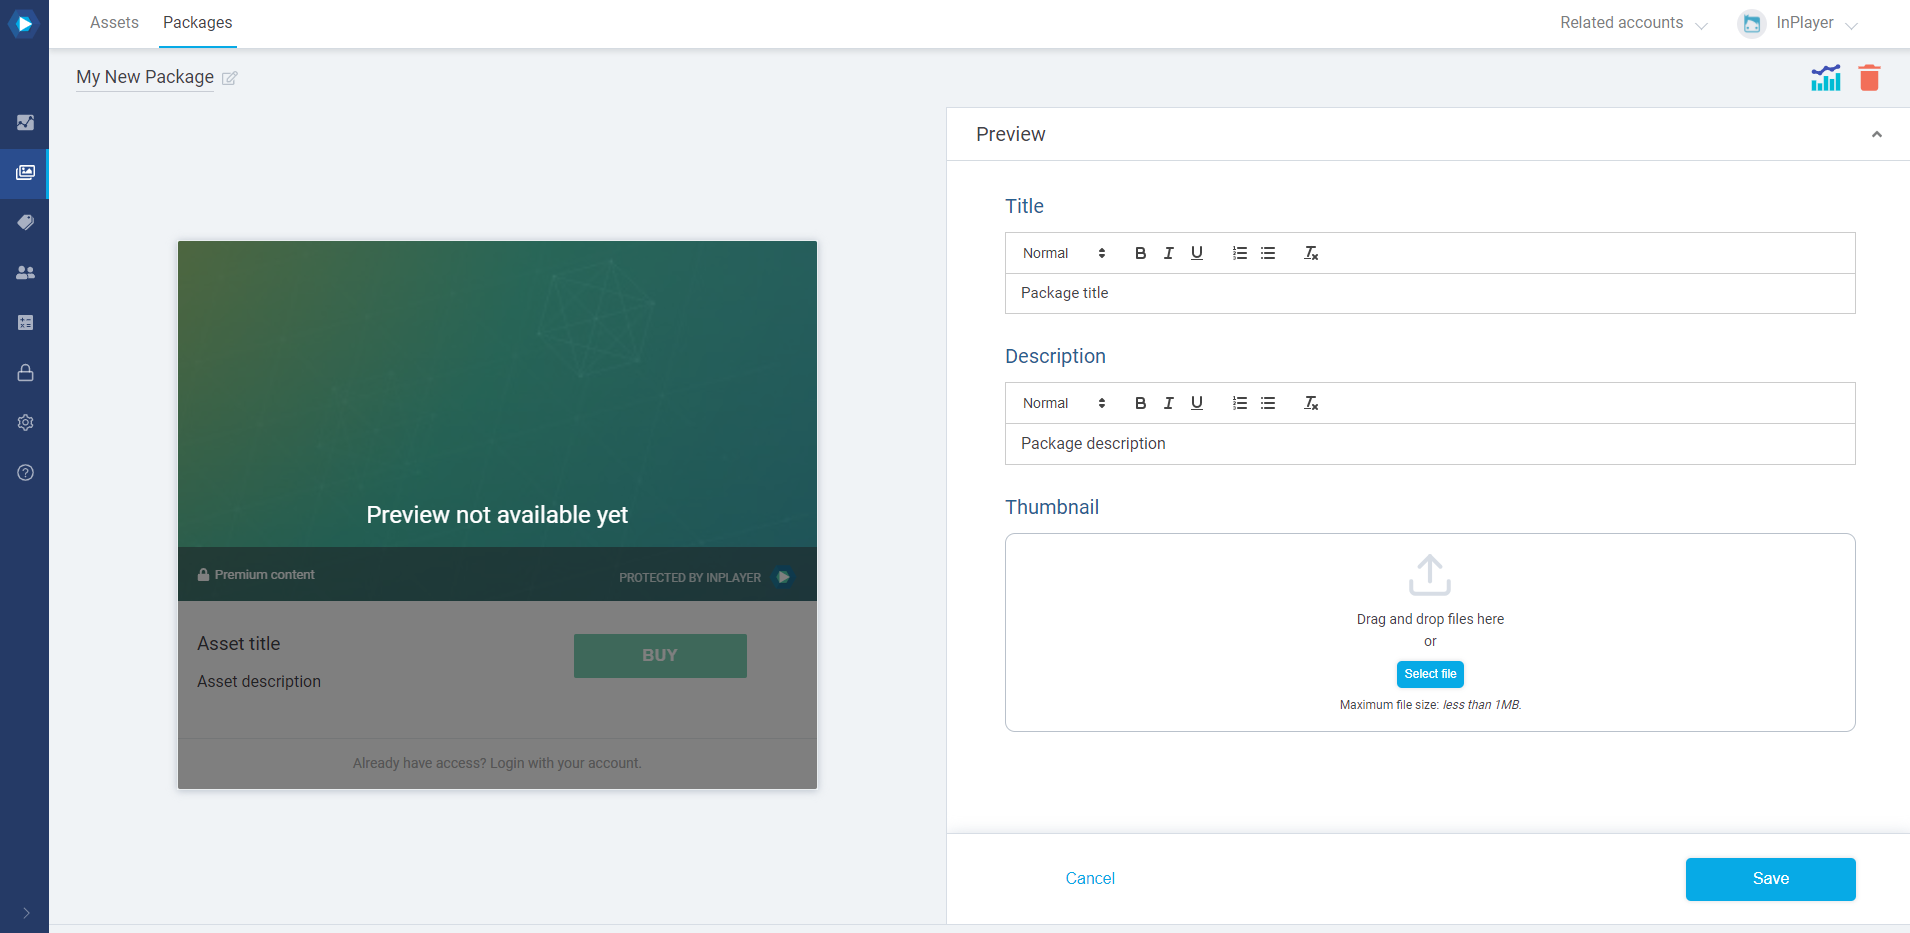
In the Preview section, you can set up the title, description, and thumbnail. Note that the Title, Description and Thumbnail will not appear anywhere on your webpage. They are more for your own use for easier package management.e package Title however, will appear on the final payment form on the paywall, as well as the notification email your viewers will receive.
After setting everything up, make sure to click the Save button in the bottom right corner.
ppv – the viewer makes a one-time payment and gets access for a limited time,
subscription – the viewer accepts a recurrent charge at regular intervals that can be canceled at any time,
season – the viewer makes a payment and gets access for a limited period, but at the same time accepts a recurrent charge for being able to watch during the next period. The date for the upcoming charge is determined by the merchant.
Note that the season price type needs to be activated on your account by our team, so make sure to contact us at clients@inplayer.com for this.
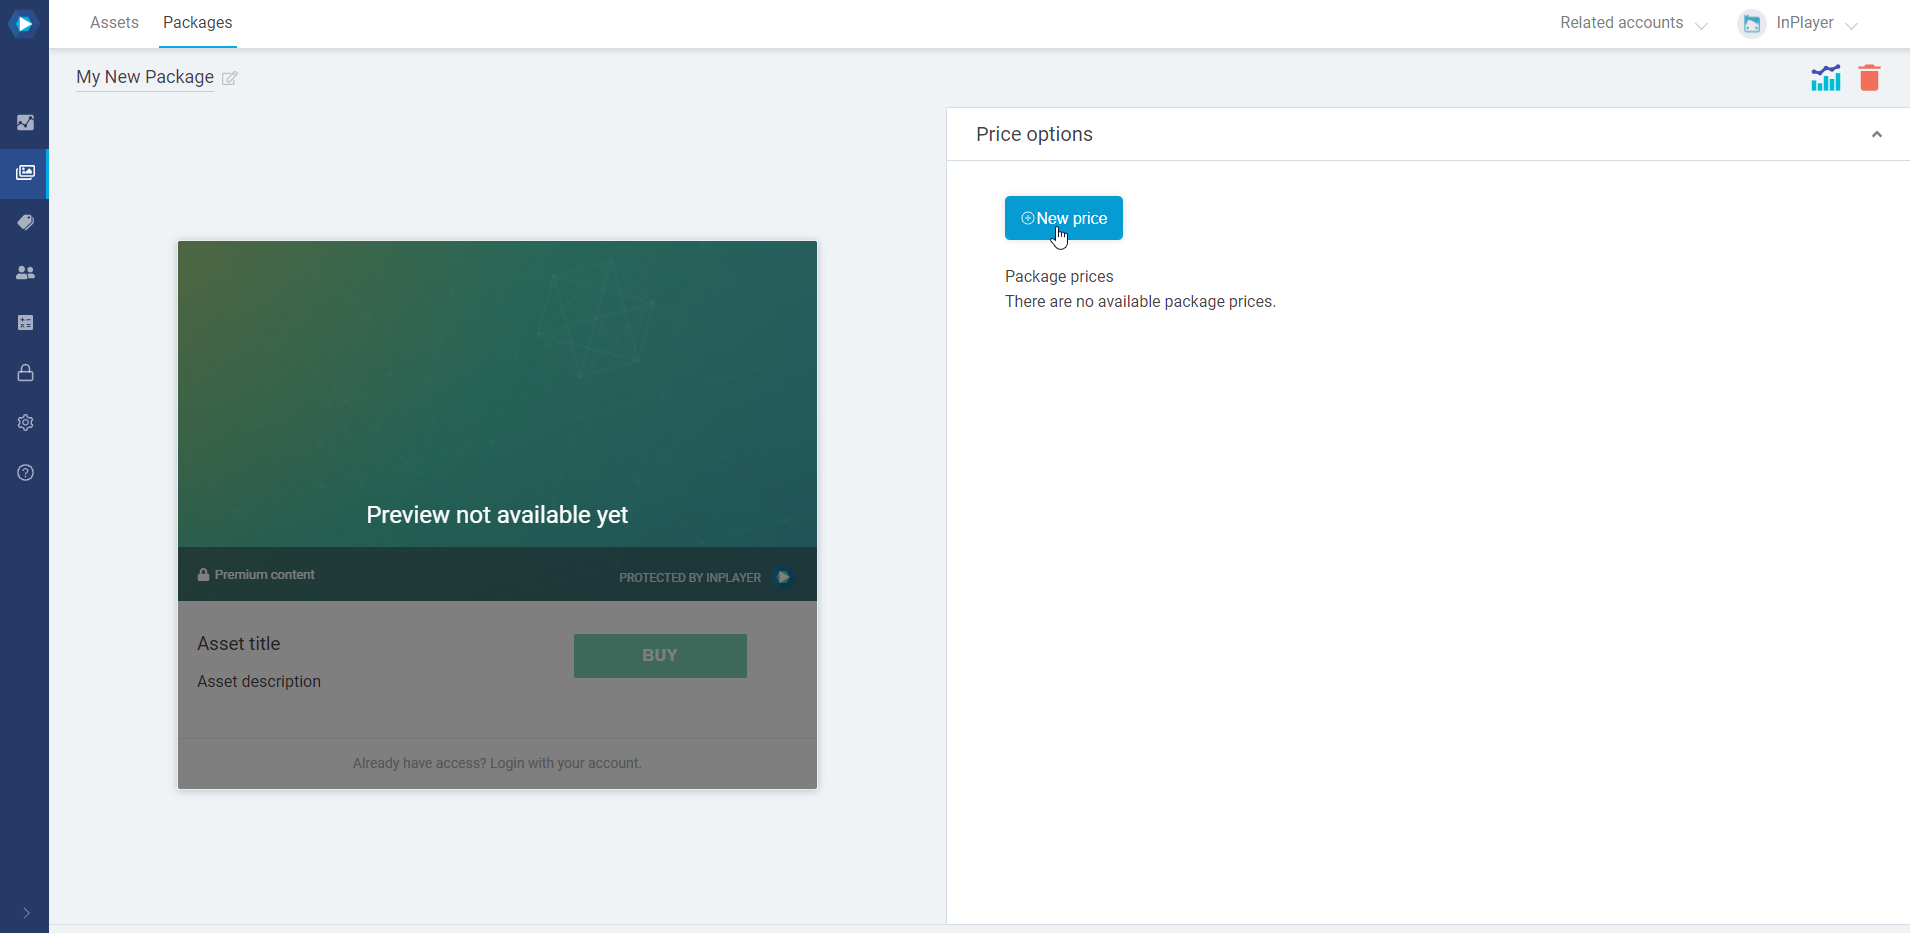
Setting up a PPV price
In the Price options section, click New price.
In the General info tab of the price option, set up the following:
In the Price description field, enter the price description that will appear on the paywall. Make it concise so your viewers know exactly what they are buying.
In the Payment type field, select ppv. This is a one-time payment which grants access that expires after the end of the specified period counter either from the moment of purchase, or if using the Schedule start feature, from the date set in the Schedule start field (more on this below). The access period can be selected from the drop-down menu. You can pick one of the available periods, or use the custom period option. When using the custom period option, you can specify the exact date and time at which the viewers’ access will expire. This is very useful for doing presales since the viewers’ access will expire on the date you’ve set up, regardless of when they’ve purchased their pass. An alternative way to set up presales is by using the Schedule start option from the Additional info tab. More on that below.
In the Amount field, enter the price. The minimum price when using USD, EUR, or GBP is 1. When using all other currencies, the minimum is the equivalent converted amount of 1 USD. The currency can be selected from the drop-down menu. If you wish to use a currency that is not on the list, you can contact us at clients@inplayer.com and we’ll make sure to add the currency for you asap. We support all currencies listed here.
In the Additional info tab, you can set up the following:
Schedule start This is the date and time at which the viewer’s access period will start after they’ve purchased the asset. Until that time, they will see a message informing them to come back on the scheduled date. This is a useful option for setting up presales. You can select the access period from the Payment type section in the General info tab, and then set up when will that access period begin. It works for both the pre-defined access periods (24 hours, 48 hours, etc), and for the custom period. If you leave the Schedule start field blank, the viewers’ access will begin right after purchasing. Note that if you change the scheduled start setting after some viewers have made their purchase, their access start will not change. Always set this according to your own timezone. This will be automatically converted to the viewer’s own timezone, based on the time settings of their device’s operating system. Their IP address location does not play a role here.
Geo-restriction With this option, you can restrict the price option to specific countries. You can choose to either allow (whitelist) or deny (blacklist) a single country, or use a country set you have created previously. You can learn more about setting up country sets here.
After setting everything up, make sure to click the Save button in the bottom right corner.
Note that once you set the payment type for an asset, you cannot change it. You can change the other payment fields (access period duration, price, etc) but not the payment type. If you wish to set a new payment type, you will need to set up a new price option.
If you’d like to have a custom ppv access period added to the list of pre-made periods under Payment type, you can reach out to your account manager or our support team at clients@inplayer.com.
Setting up a Subscription price
In the Price options section, click New price.
In the General info tab of the price option, set up the following:
In the Price description field, enter the price description that will appear on the paywall. Make it concise so your viewers know exactly what they are buying.
In the Payment type field, select subscription. This is a recurring payment that is renewed automatically. Access is granted at each renewal. The renewal period can be selected from the drop-down menu.
In the Amount field, enter the price. The minimum price when using USD, EUR, or GBP is 1. When using all other currencies, the minimum is the equivalent converted amount of 1 USD. The currency can be selected from the drop-down menu. If you wish to use a currency that is not on the list, you can contact us at clients@inplayer.com and we’ll make sure to add the currency for you asap. We support all currencies listed here.
In the Additional info tab, you can set up the following:
Free trial With this, you can set up a free trial period. Free trials are tied to a viewer’s credit card, and not their account. If they open a second account but still use the same card to buy their second subscription, they will not get a second free trial. This is intended to prevent abuse.
Additional fee With this option, you can set up a one-time fee that will be charged when the viewer purchases the subscription, as an addition to the regular subscription fee. The fee will only be charged once, together with the first subscription charge.
Geo-restriction With this option, you can restrict the price option to specific countries. You can choose to either include (whitelist) or exclude (blacklist) a single country, or use a country set you have created previously. You can learn more about setting up country sets here.
After setting everything up, make sure to click the Save button in the bottom right corner.
Note that once you set the payment type for an asset, you cannot change it. You can change the other payment fields (access period duration, price, etc) but not the payment type. If you wish to set a new payment type, you will need to set up a new price option.
If you’d like to have a custom subscription period added to the list of pre-made periods under Payment type, you can reach out to your account manager or our support team at clients@inplayer.com.
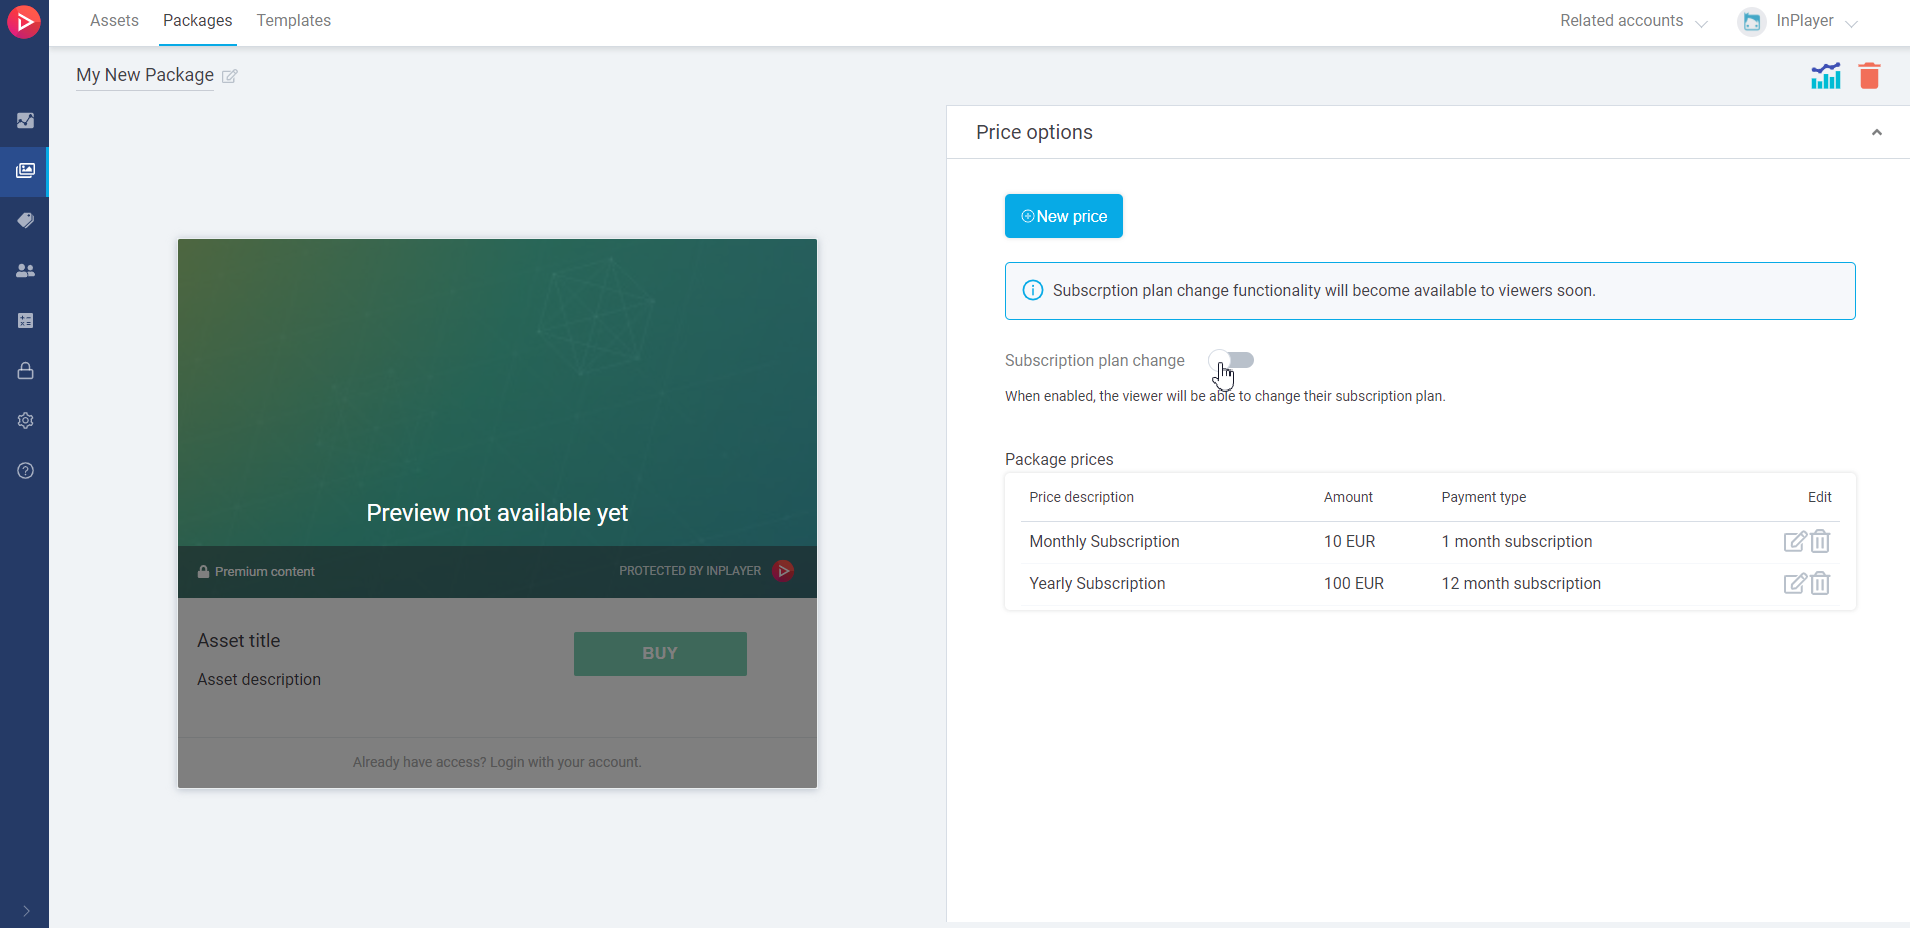
Subscription upgrades & downgrades
If you have multiple subscriptions for a package, the Subscription plan change option will become available in the Price options section.
Enabling this will allow your viewers to upgrade or downgrade their subscription plan.
Upgrades on the viewer’s plan will happen and be billed immediately. A pro rata deduction for the unused portion of their old subscription will be applied to the charge for the new subscription.
Downgrades will happen and be billed after the expiration of their currently ongoing subscription cycle. Note that after choosing to downgrade, viewers cannot change plans while they’re waiting for the downgrade to happen. They can change their plan again once the downgrade has happened.
Note that upgrades/downgrades are only possible on payments made via credit card.
Viewers can upgrade or downgrade their subscriptions by following the instructions here.
Setting up a Season price
In the Price options section, click New price.
In the General info tab of the price option, set up the following:
In the Price description field, enter the price description that will appear on the paywall. Make it concise so your viewers know exactly what they are buying.
In the Payment type field, select season. With this payment type, the viewer purchases a season pass that lasts for a specific period, then expires, and is then renewed for a second period at a certain point in the future, upon which a new charge is taken from the viewer. The payment will continue to renew in the same manner for as long as you keep scheduling upcoming seasons. The season payment type is best suited for seasonal content, like sports, where using standard back-to-back subscription payments might not be suitable, since content is only available during specific parts of the year, and in between there are periods with nothing or nothing new to watch. A basic season cycle is represented here:
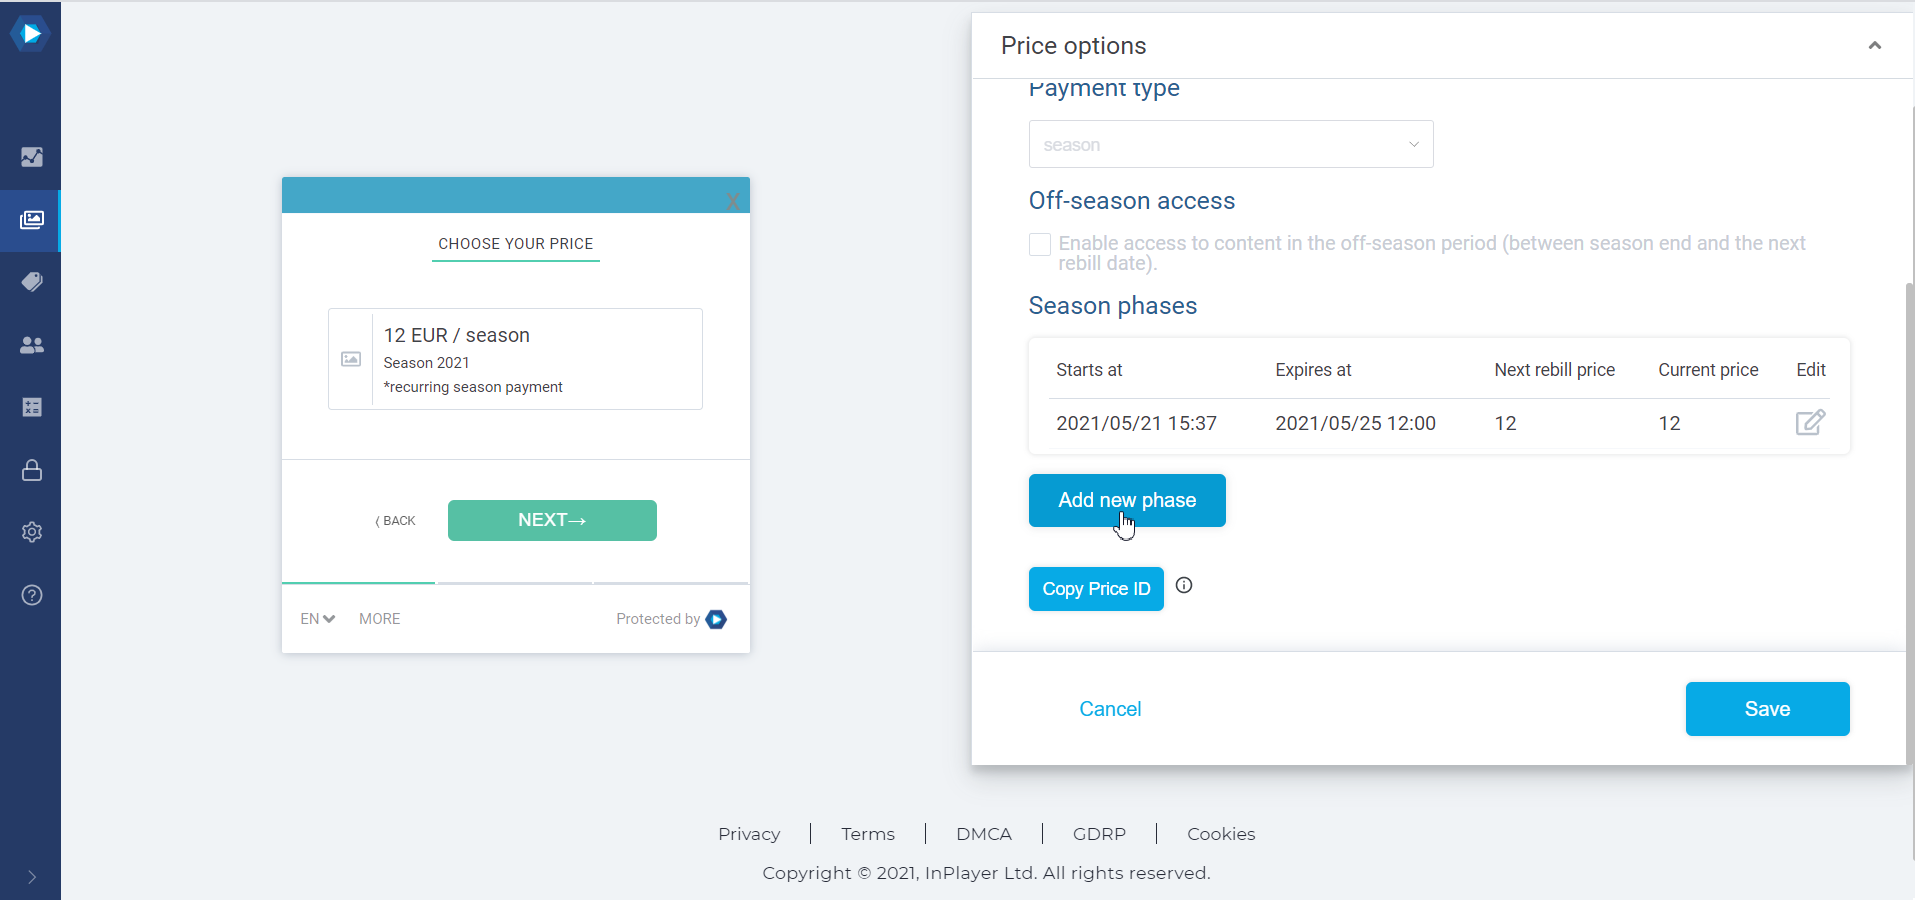
Setting up the first season phase
In the Season start field, enter the start date and time of the season. This determines when the access for viewers who purchase a pass will start. It is also possible for access to be granted to the viewers from the moment of their purchase. This is accomplished with the Off-season access option. We’ll talk about that further below. Also, a season price option will not be available for purchase until the Season start has been set.
In the Season end field, enter the end date and time of the season. This is the access cut-off date for the current season. Access will be re-granted upon the renewal of the payment for the next season. It is also possible for the access to continue beyond the end of the season, i.e. until the moment of renewal of the payment for the next season. This is, again, done with the Off-season access option, which we’ll see below. Also, a season price option will not be available for purchase until the Season end has been set.
In the Next rebill date field, enter the date and time for the renewal of the payment, i.e. the date and time when the payment for next season will be taken. Note that once you set up the first rebill date, the rebill date for the next season will be automatically set to one year after the first date. You can always go back and change it if you wish.
In the Next rebill price field, enter the amount that will be charged upon renewal for the next season, i.e. on the Next rebill date. Note that this is not the price for the current season. The minimum price when using USD, EUR, or GBP is 1. When using all other currencies, the minimum is the equivalent converted amount of 1 USD. The currency can be selected from the drop-down menu. If you wish to use a currency that is not in the list, you can contact us at clients@inplayer.com and we’ll make sure to add the currency for you asap. We support all currencies listed here.
In the Current price field, enter the account that will be charged for the current season. Whenever a viewer goes to your page, they will see this price. You can change this price at any time. For example, you can have it be equal to the New rebill price at the beginning of the season, and then reduce it as the season progresses. The minimum price when using USD, EUR, or GBP is 1. When using all other currencies, the minimum is the equivalent converted amount of 1 USD. The currency can be selected from the drop-down menu. If you wish to use a currency that is not in the list, you can contact us at clients@inplayer.com and we’ll make sure to add the currency for you asap. We support all currencies that are listed here.
With the Off-season access option, you can decide whether the viewers will only have access during a season (between the season start and end date), or also during the off-season period, so they can watch replays, for example.
Note that once you set the Season start, Season end, Next rebill date, and Next rebill price you cannot change them until the current season ends. You can only change the Current price amount.
In the Additional info tab, you can set up the following:
Free trial With this, you can set up a free trial period. If the Off-season access option is enabled, the free trial will begin right after the viewer completes their purchase. If the Off-seasonaccess option is disabled, the free trial will begin on the Season start date.
Additional fee With this option, you can set up a one-time fee that will be charged when the viewer purchases the subscription, as an addition to the regular subscription fee. The fee will only be charged once, together with the first subscription charge.
Geo-restriction With this option, you can restrict the price option to specific countries. You can choose to either allow (whitelist) or deny (blacklist) a single country, or use a country set you have created previously. You can learn more about setting up country sets here.
After setting everything up, make sure to click the Save button in the bottom right corner.
Setting up the next season phase (etc)
Click Add new phase.
The same settings described above will be available, except this time you set them up from the next upcoming season.
Add a new phase for all future seasons.
Note that once you set the payment type for an asset, you cannot change it. You can change the other payment fields (access period duration, price, etc) but not the payment type. If you wish to set a new payment type, you will need to set up a new price option. You also cannot delete a season price option before the current season ends.
Deleting a price option from a package will make that price option unavailable for new purchases. Any viewers that have already purchased it will keep their access, and won’t be affected by this change.
To delete a price option, simply click the bin icon to the right of it.
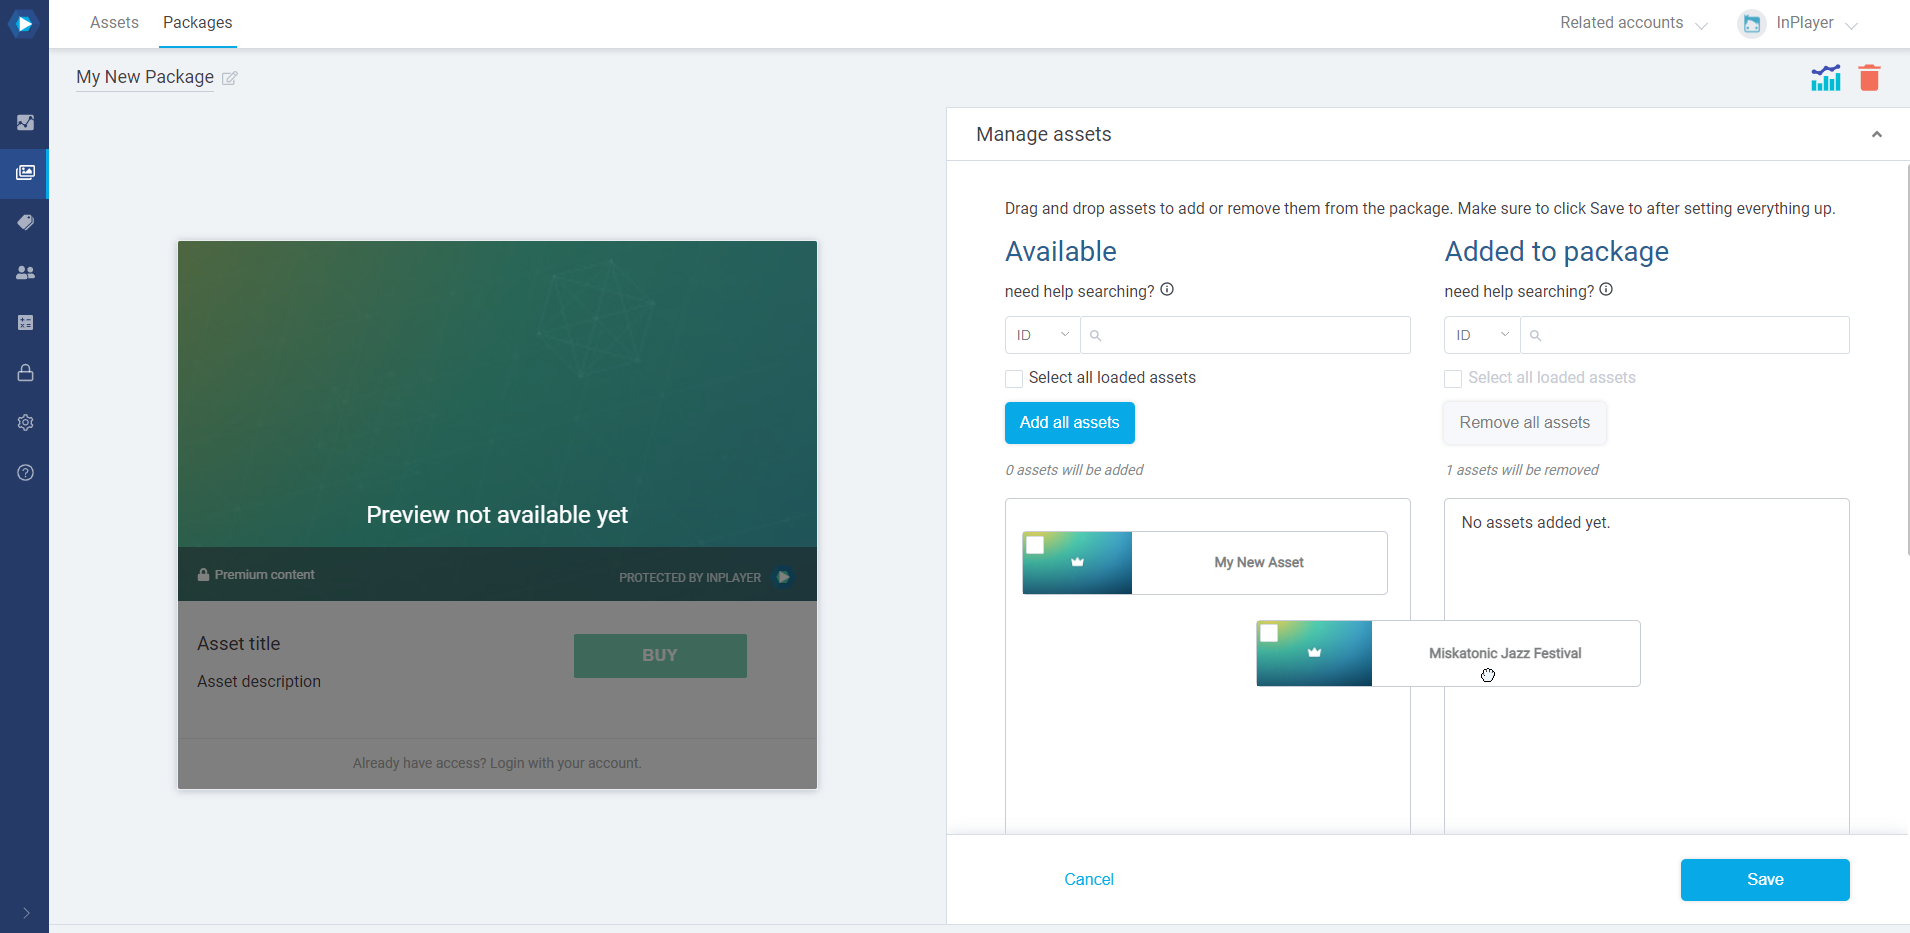
Here you can add the assets you wish to include in the package. You can add as many assets as you want.
To add an asset, just drag and drop it from the left to the right side.
If you wish to add multiple assets at once just tick their checkboxes and drag and drop them to the right. You can also add all your assets at once by clicking Add all assets button, or add only the assets that are loaded in the list on the left by checking Select all loaded assets and then drag and dropping them to the left. Note that this only selects the assets currently loaded in the list on the left, and not all available assets.
Finally, click Save.
With that, the selected assets will be added to the package.
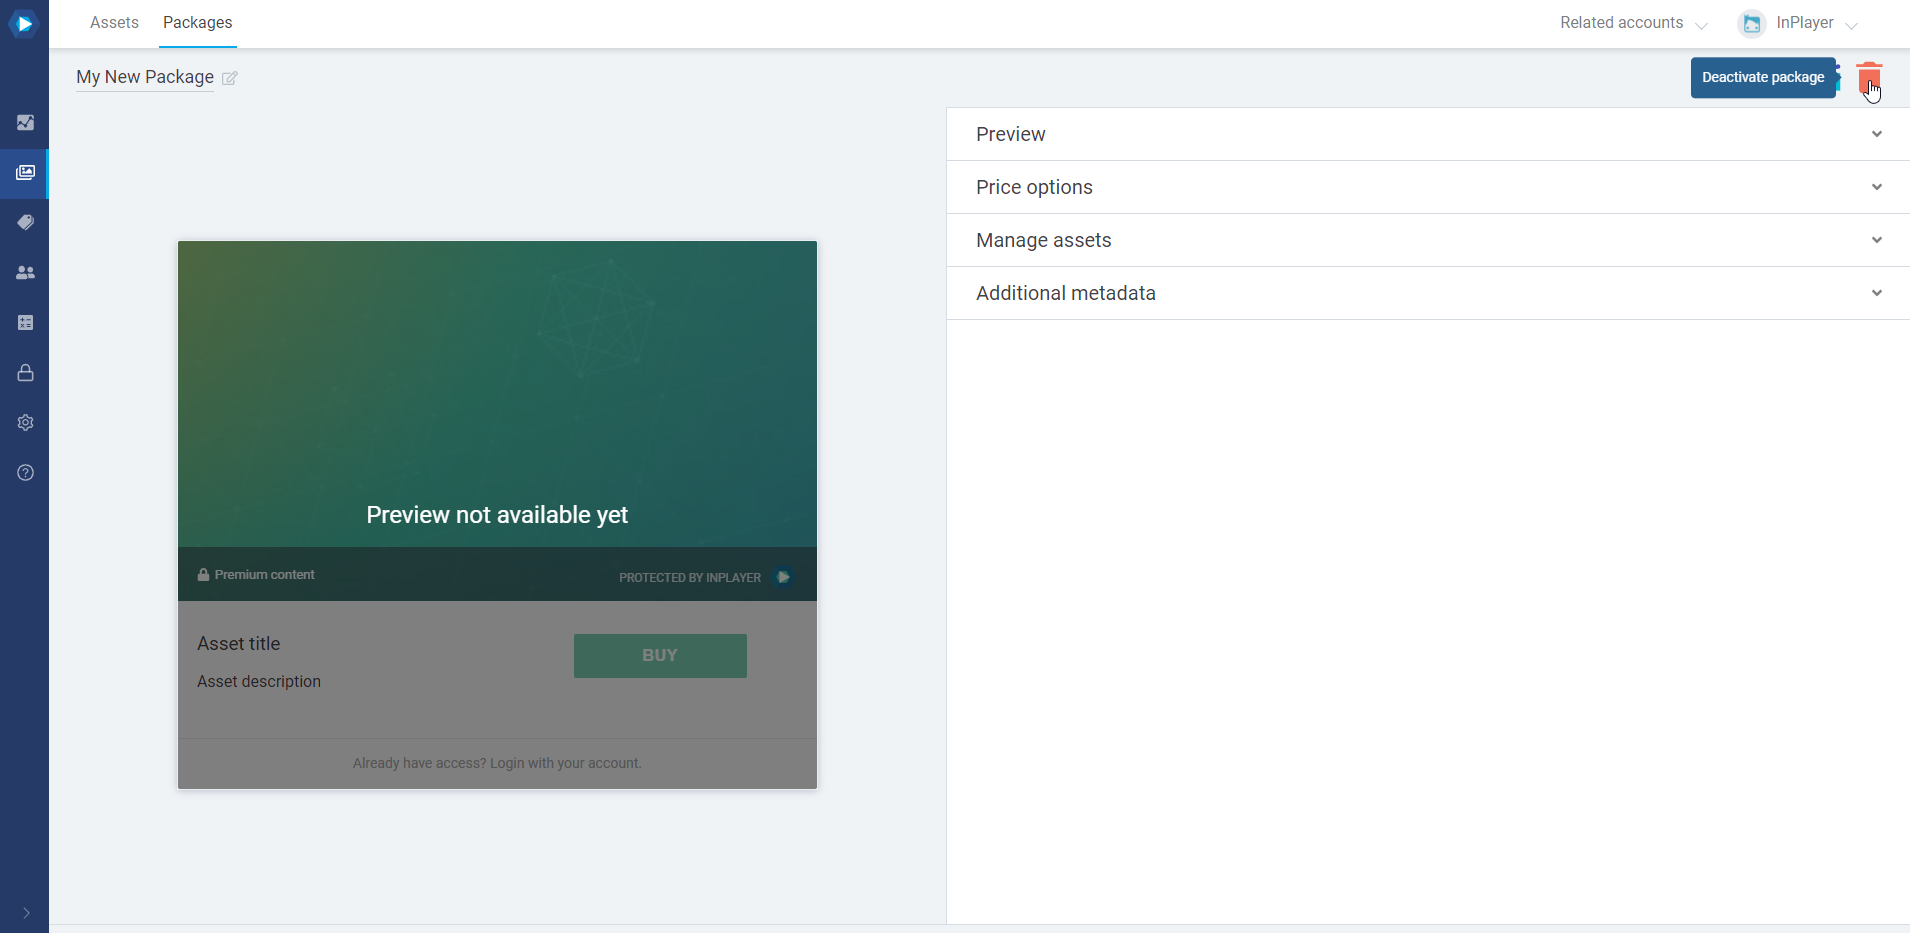
To deactivate a package, just open it and click the button at the top right.
You can always bring a deactivated package back by going to the Packages tab, selecting deactivated from the drop-down menu next to the search field, and just clicking on the package you wish to reactivate.
When you go back to the active packages list, you will find the package there.
This concludes our guide.
If you have any questions, don’t hesitate to contact us at clients@inplayer.com.
The Organization feature is a powerful tool that lets you set up multiple logins to your account, each having different access permissions to your dashboard.
This is a great way of organizing who has access to what.
To learn all about the Organization feature, click here.
InPlayer Relate is another powerful feature that lets you create child accounts to your main InPlayer account.
You will be able to access the child accounts straight from your master account, without requiring a password for them, as well as mirror some of the settings from the master account to the child accounts, like the payment setup and the branded system emails.
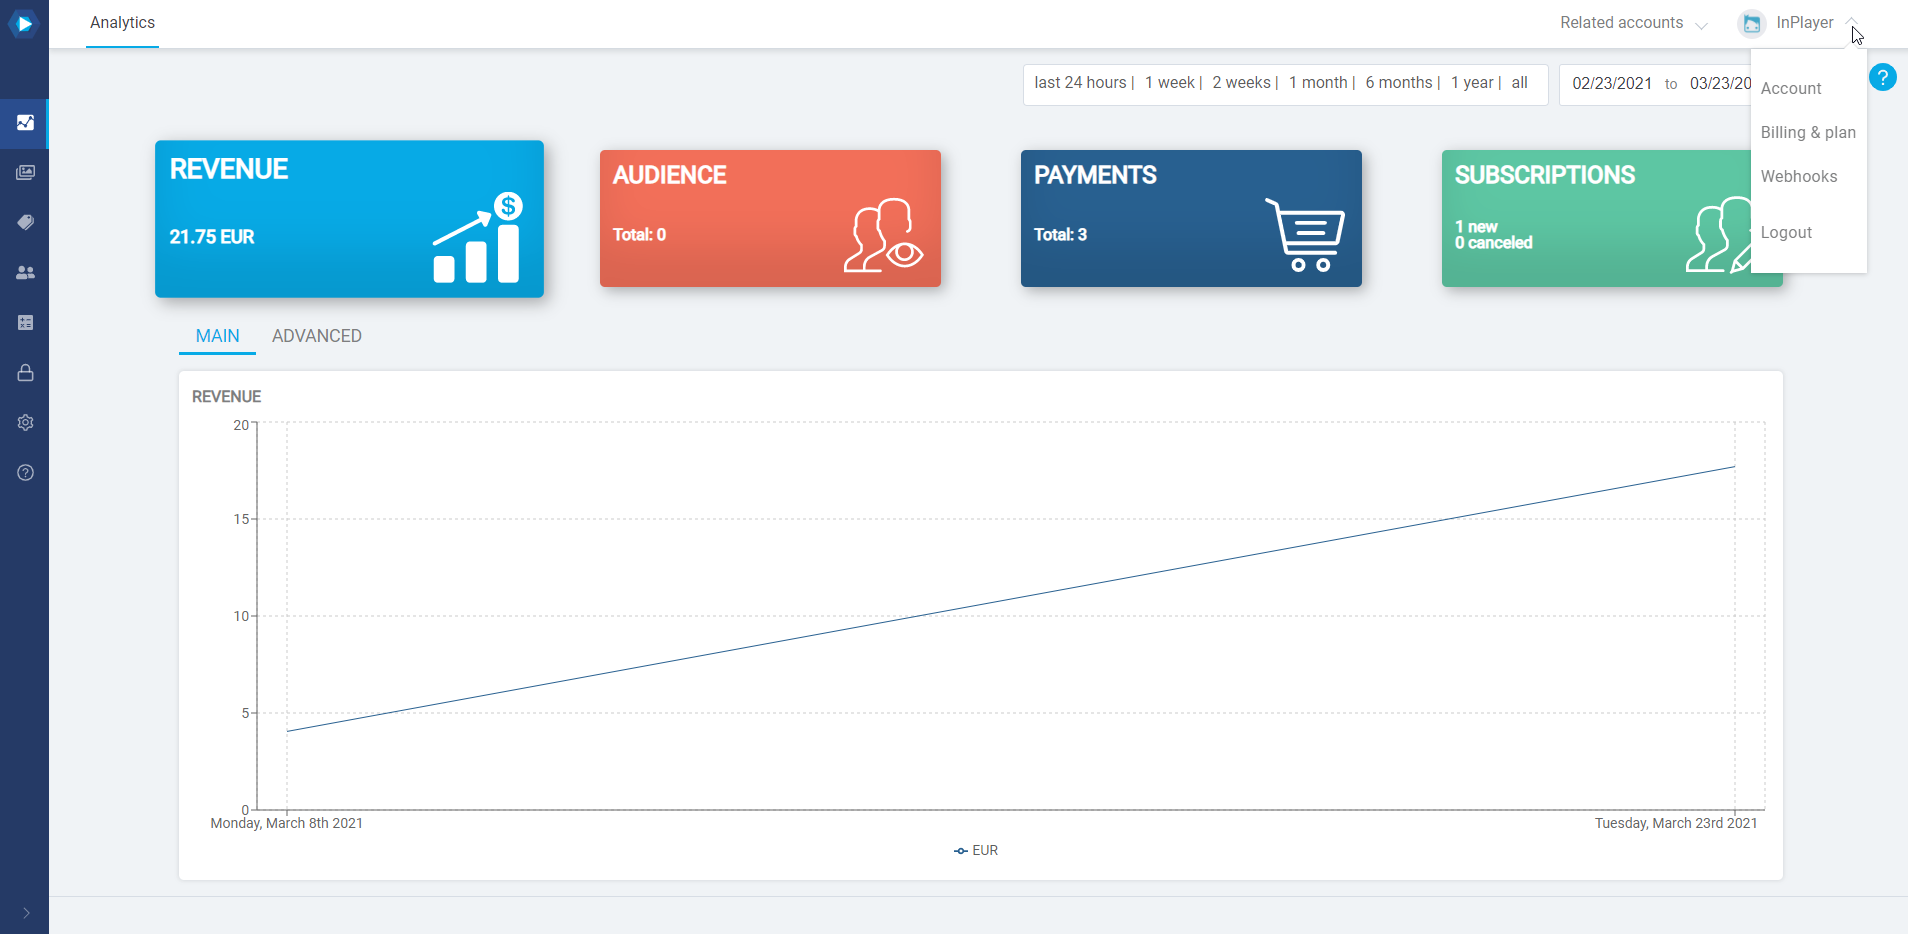
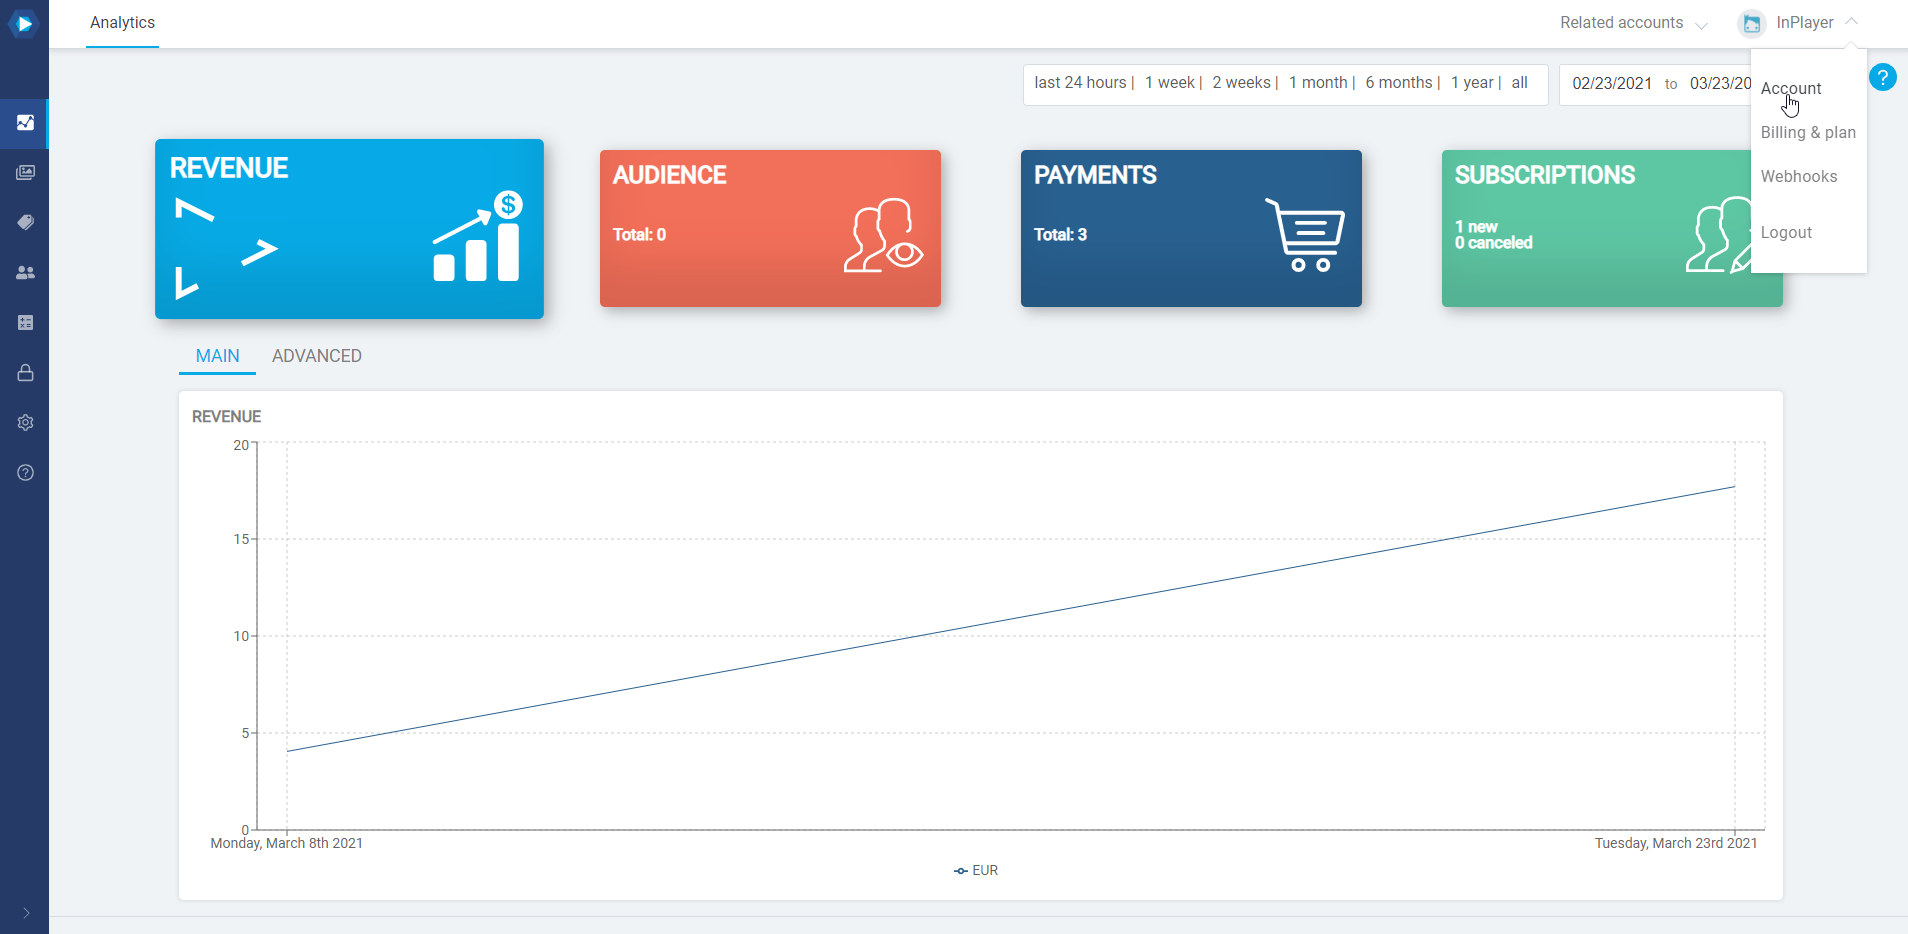
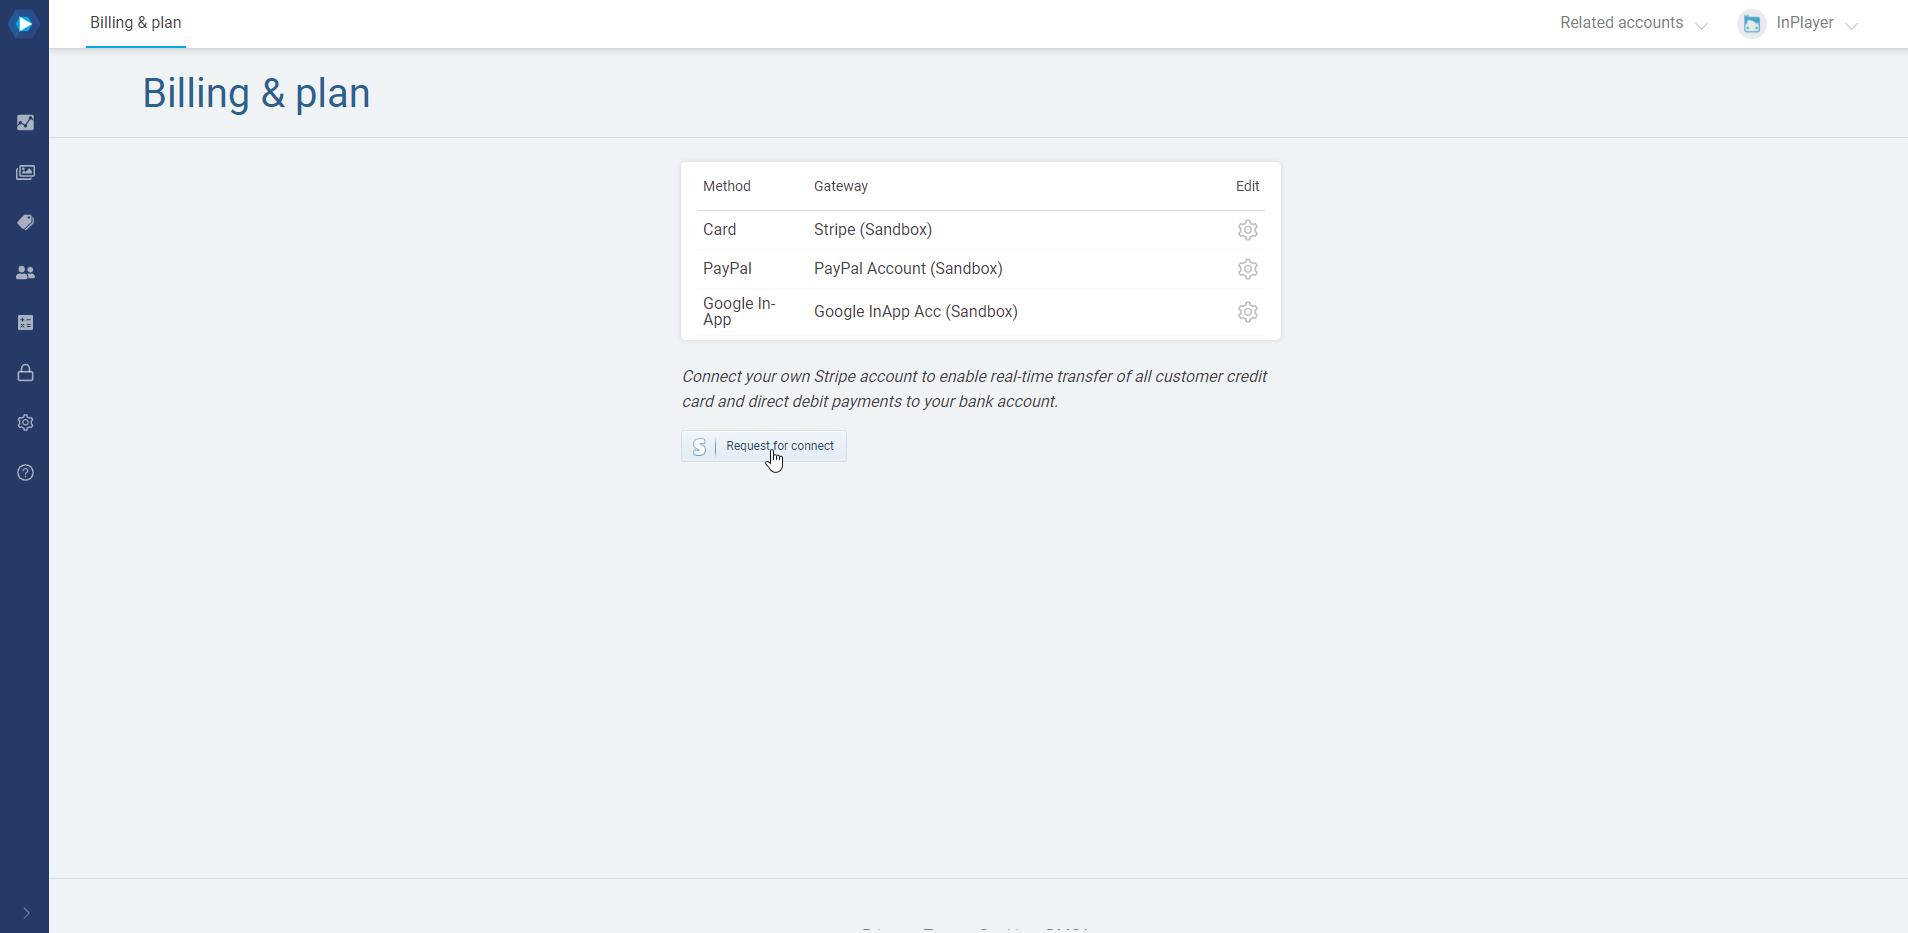
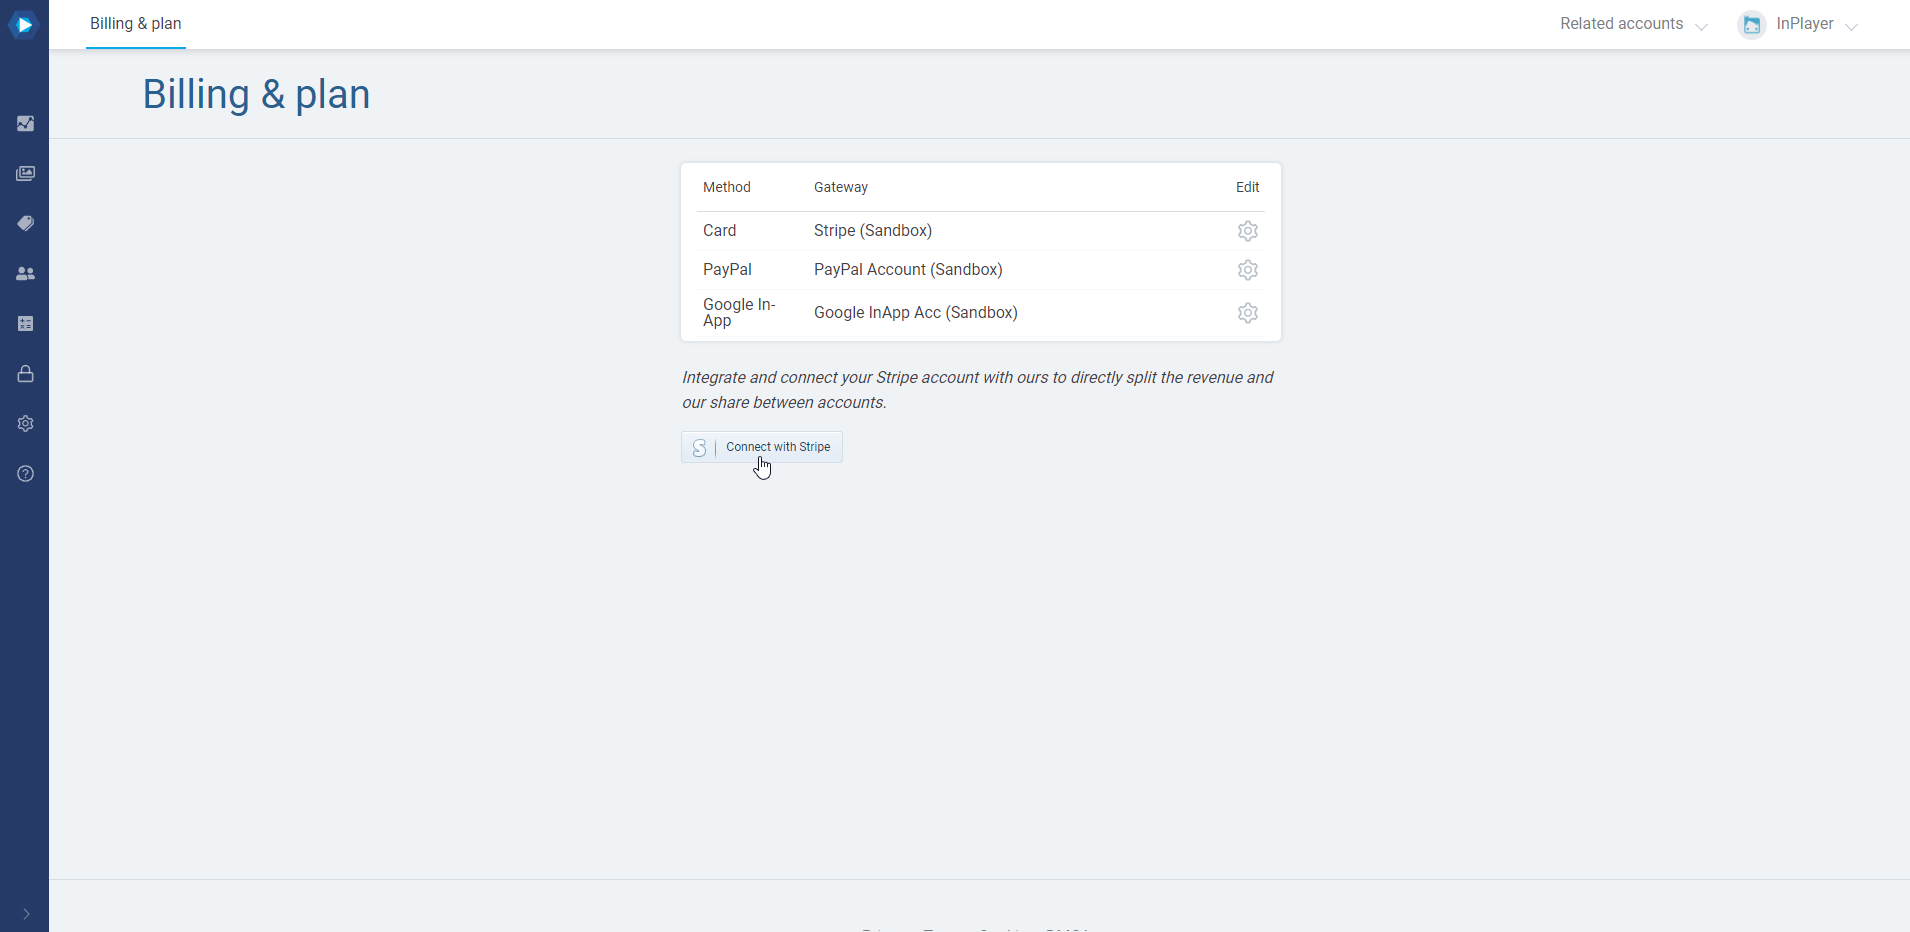
To access the Billing & plan section, click on your avatar at the top right and then on Billing & plan.
Here, you can see things like the payment processors that have been enabled on your account, as well as the revenue share and transaction fee that we, InPlayer, charge for each transaction, as per your contract with us.
This section is where you will also find one of the most useful features of our platform, Stripe Connect.
By default, all viewer credit card payments first go to our own Stripe account. Then, after our finance team has processed the payments, which usually takes one month, the funds are transferred to you, on the bank or PayPal account of your choosing.
With Stripe Connect, however, you can connect your own Stripe account to the InPlayer dashboard and have all viewer credit card payments immediately transferred to your bank account. In this case, we would also waive the credit card transaction fee we would normally charge since you yourself will be handling all such fees from your own Stripe Account and we would also lower the revenue share percentage.
Note that the above does not apply to PayPal viewer payments since those are processed via PayPal, which is a separate payment processor. For them, the default payment processing via our finance team still applies.
Stripe Connect is a great way of getting to your earnings and we always encourage all of our clients to use it.
To do this, just go to Billing & Plan and click the Request for connect button.
This will send us a notification that you wish to use Stripe Connect.
We will then activate this feature from our end, adjust the transaction fee and revenue share, and let you know about it so you can finish the setup.
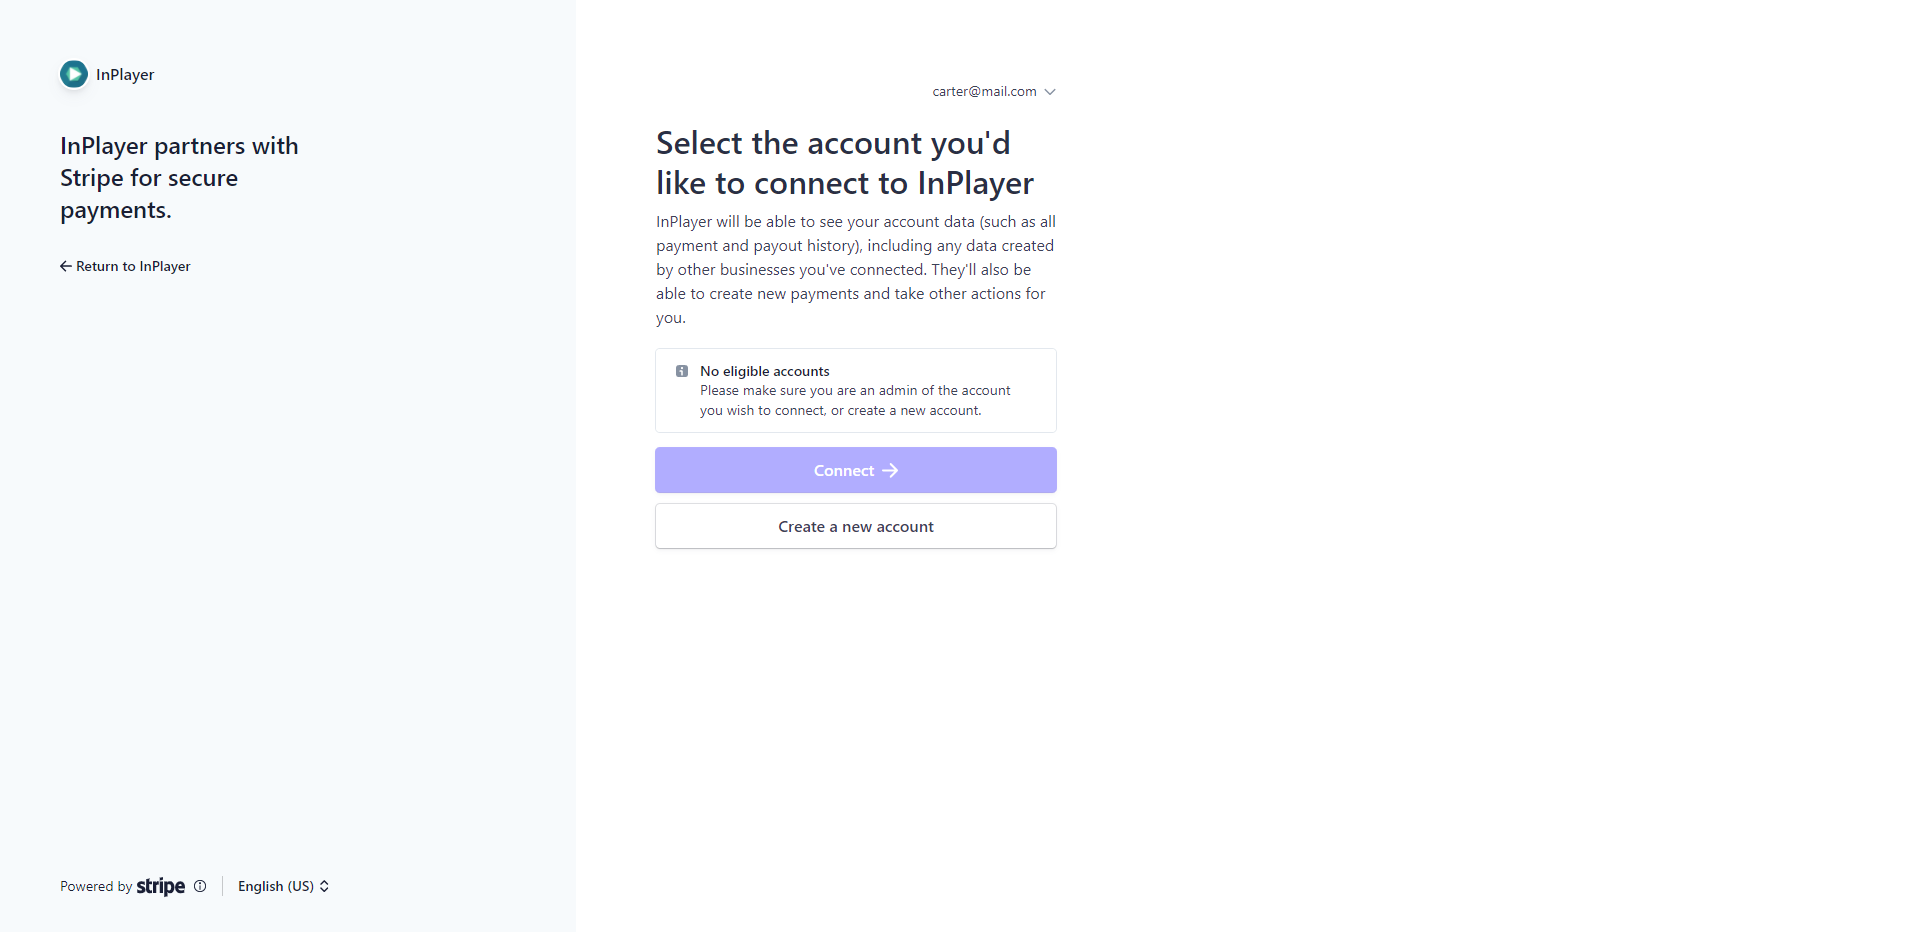
To do that, just go back to Billing & Plan and click the Connect with Stripe button.
The Stripe login form will open in a new tab, and you will be able to connect your Stripe account. To do so, click on Sign in the upper right corner, enter your Stripe account credentials, and select the account profile you want to use, if you have multiple ones.
If you have any questions, don’t hesitate to contact us at clients@inplayer.com.
The last option in the Account Management menu are the Webhooks.
Webhooks are used for creating or updating a platform action/operation tracker, for syncing data between platforms, or for fetching results of backend operations of an application. In simple terms, it is a way you can set up notifications about various events happening on the InPlayer Platform. This includes things like receiving a notification whenever a viewer registers an account, completes a payment, cancels a subscription etc, as long as you have an app ready to receive those notifications.
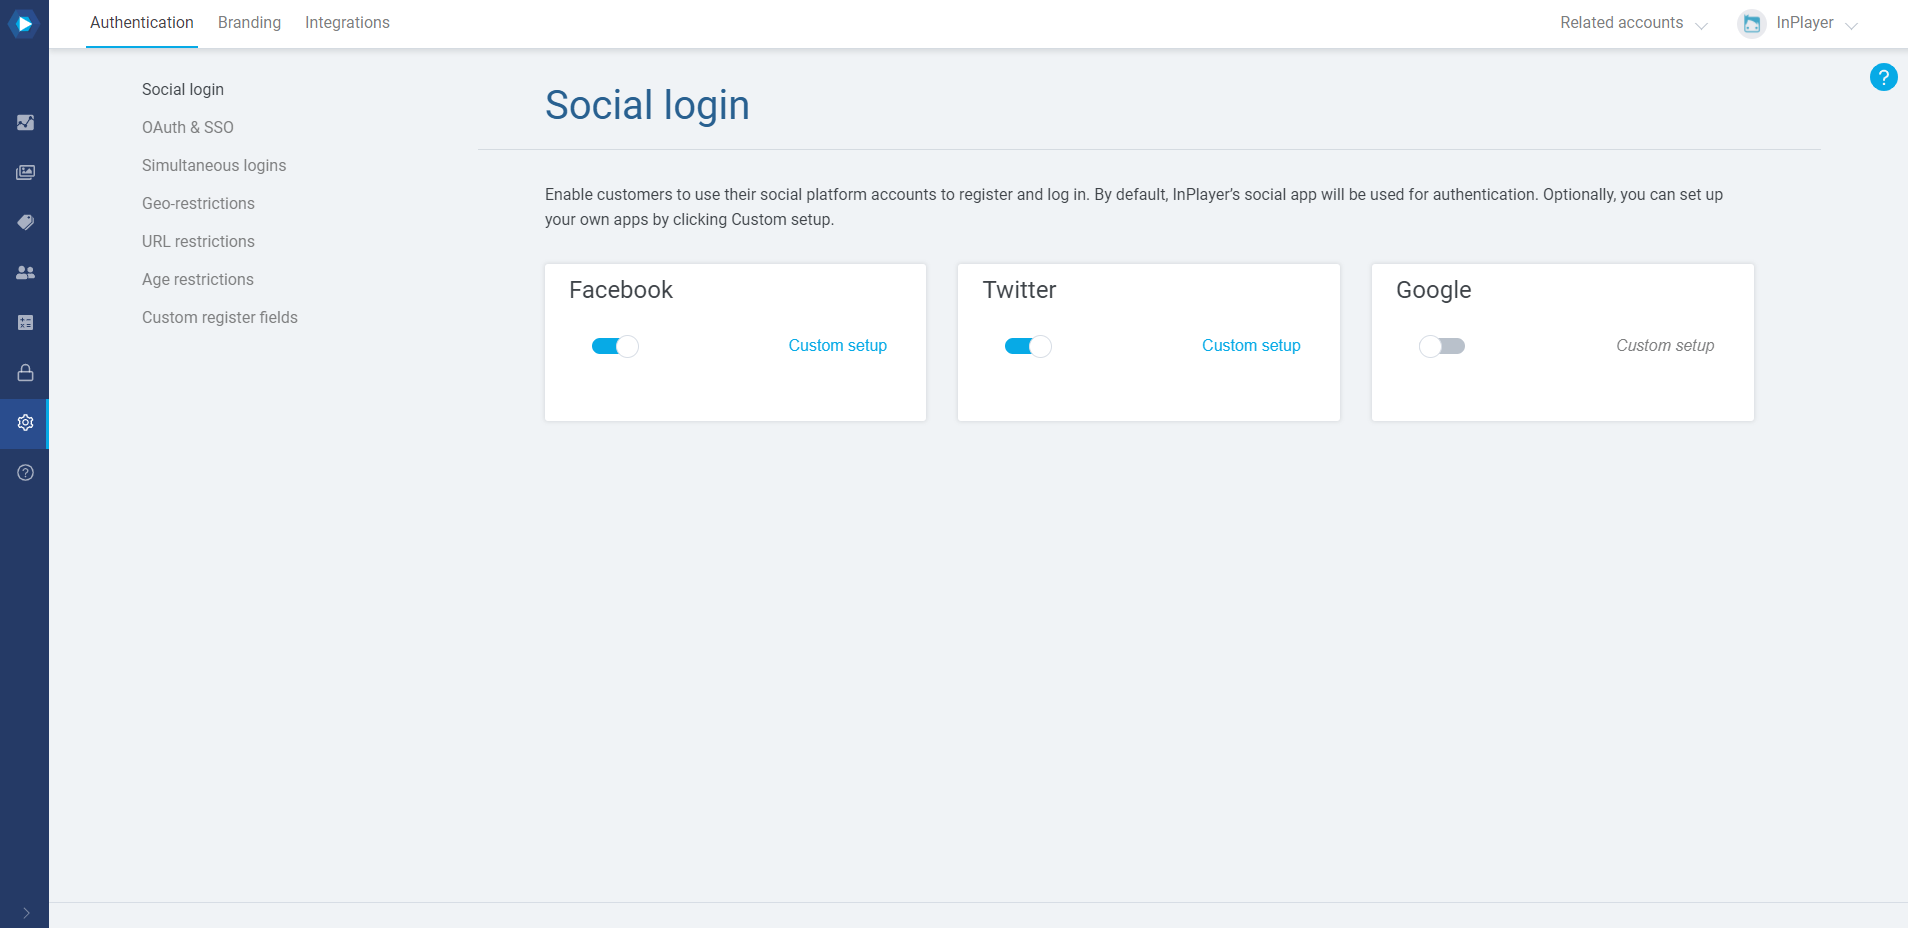
The Authentication tab is where you’ll set up the settings that have to do with how your viewers access your content.
This includes things like enabling your viewers to use their social platform accounts to register and log in, limiting the number of devices they can watch on using the same account, adding geo and domain restrictions, and more.
For in-depth guides of all the settings in the Authentication tab click here.
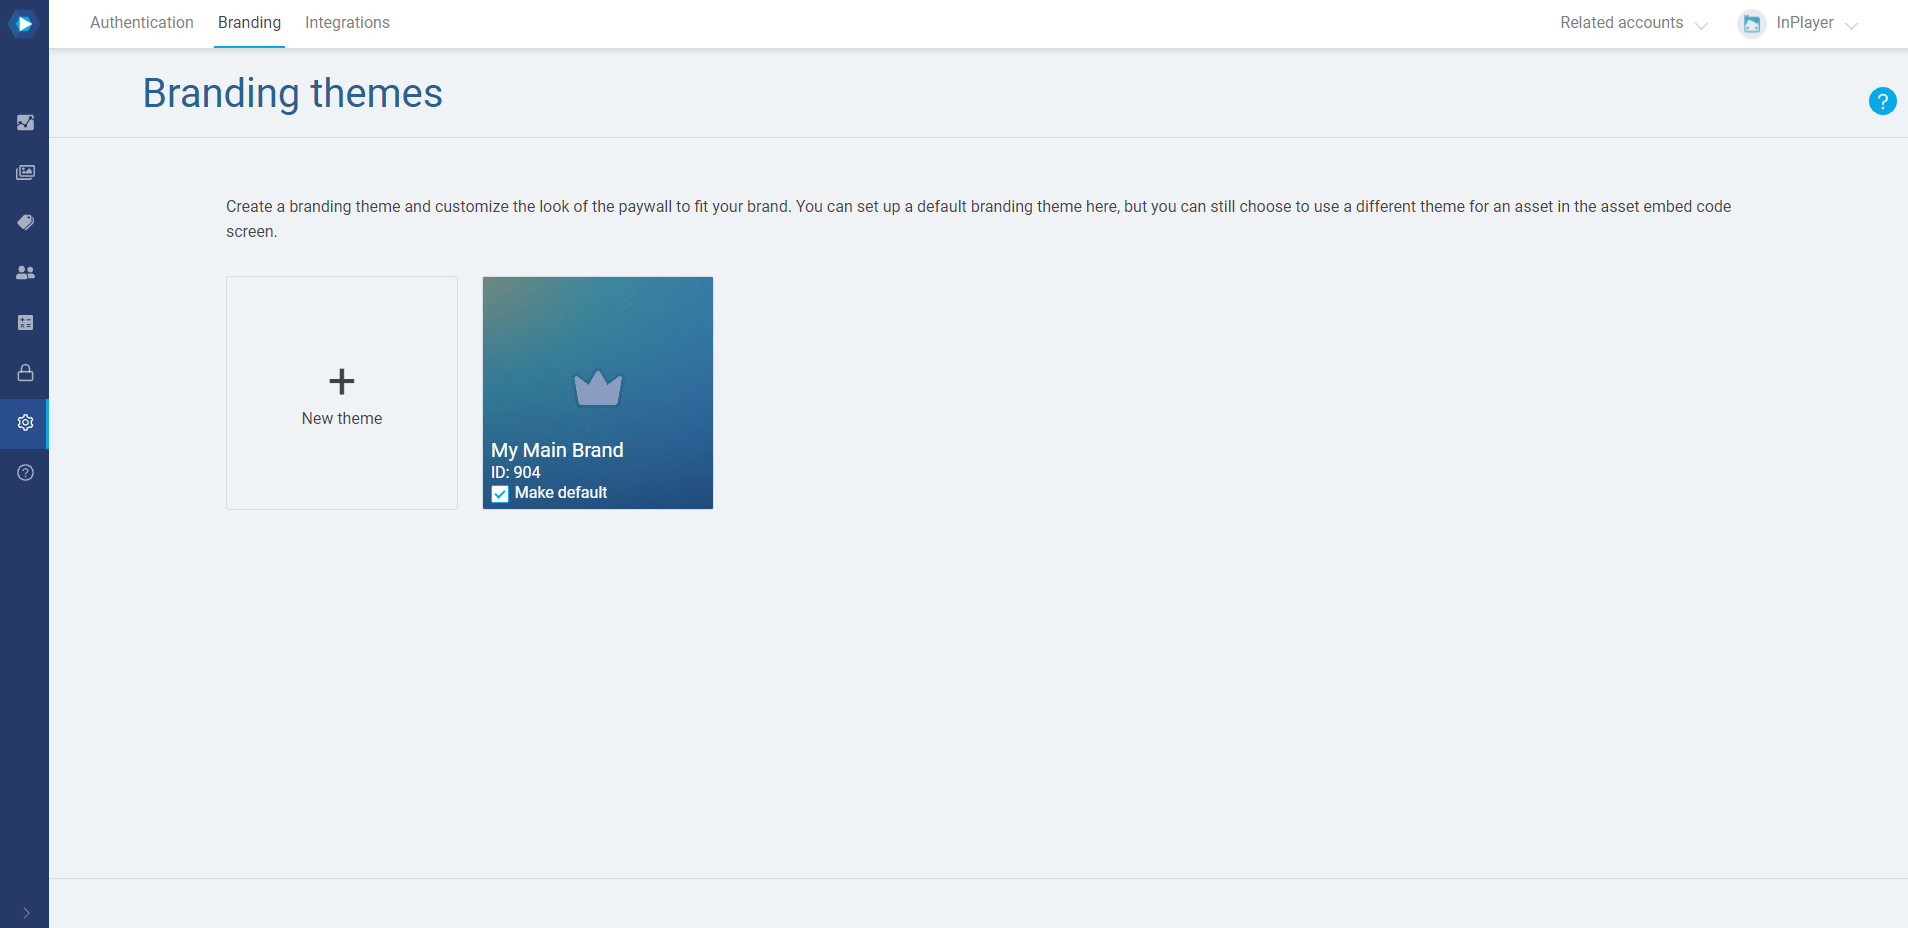
Branding lets you customize the look of the paywall and automated viewer emails to fit your brand.
The look and feel of the paywall can be modified by using the dashboard. The emails can be modified by contacting your dedicated account manager or our support team at clients@inplayer.com.
For in-depth guides on setting up custom branding, click here.
In the Integrations tab you can connect your InPlayer account to third-party platforms such as Online Video Platforms (OVP) where you’ve hosted your content, or In-App platforms which will let you use In-App payments.
For in-depth guides on setting up the various types of integrations, click here.
If you have any questions, don’t hesitate to contact us at clients@inplayer.com.
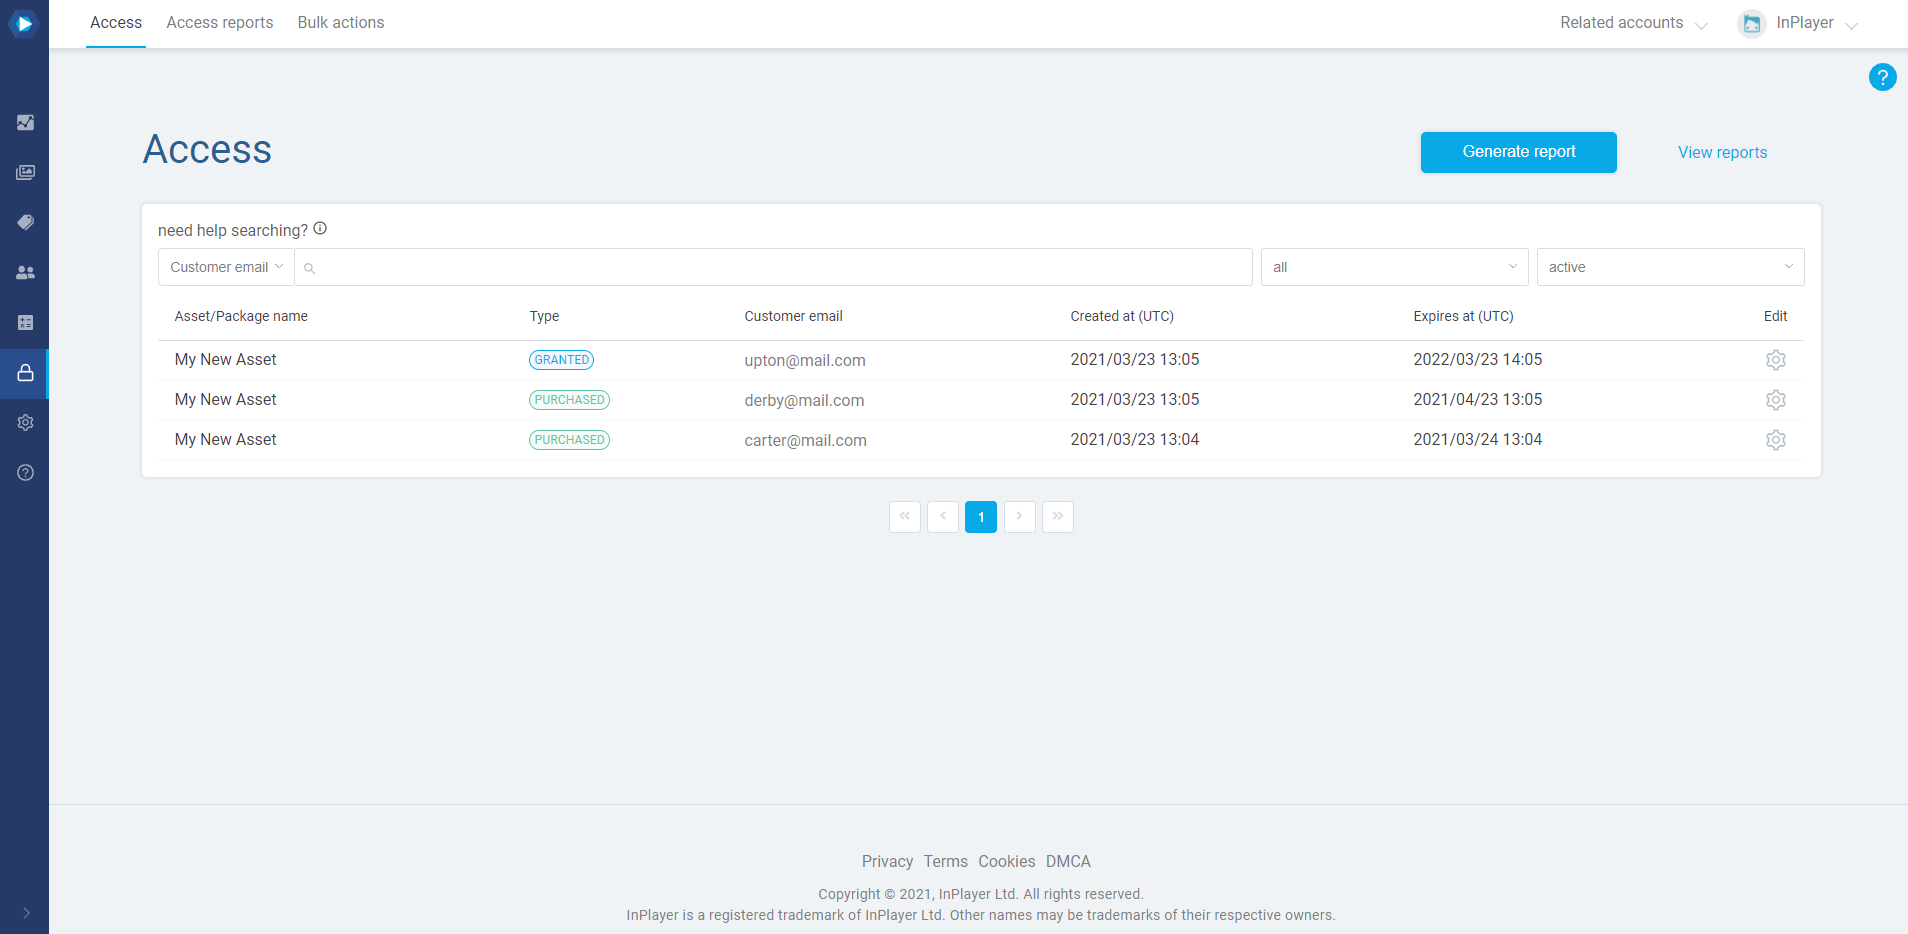
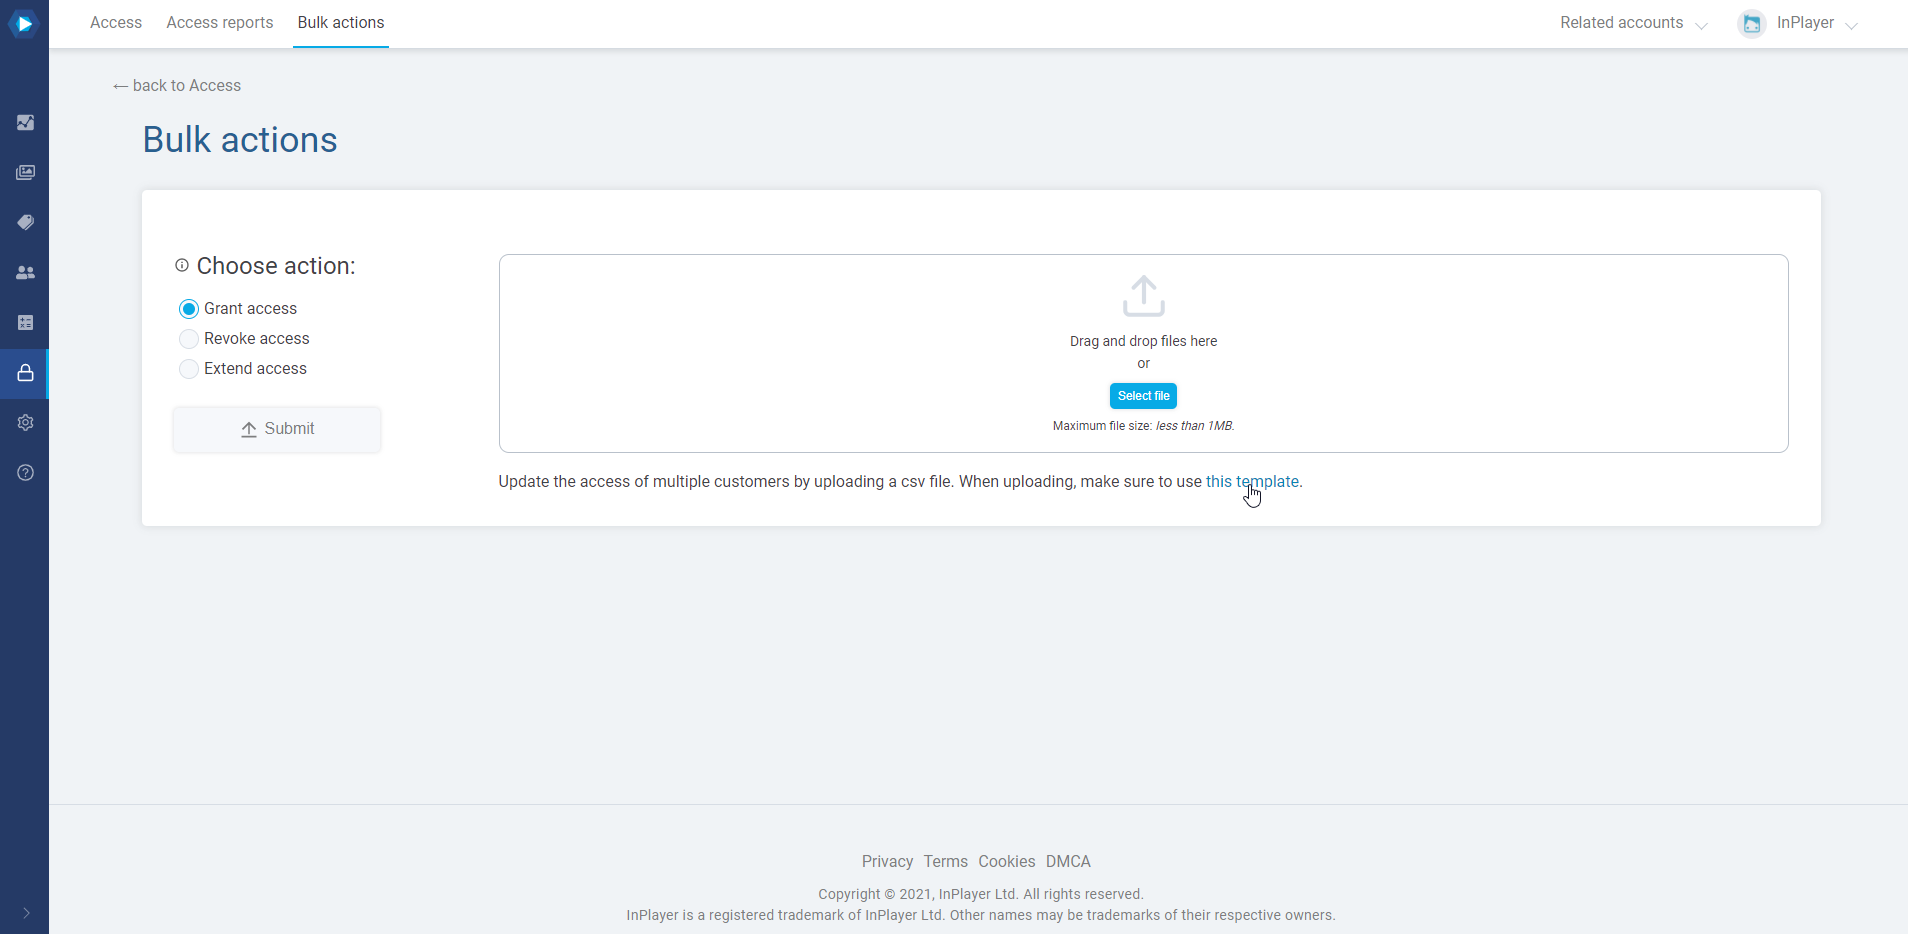
The Access section offers an overview of all of your viewers and their individual access passes, and also lets you perform access-related bulk actions.
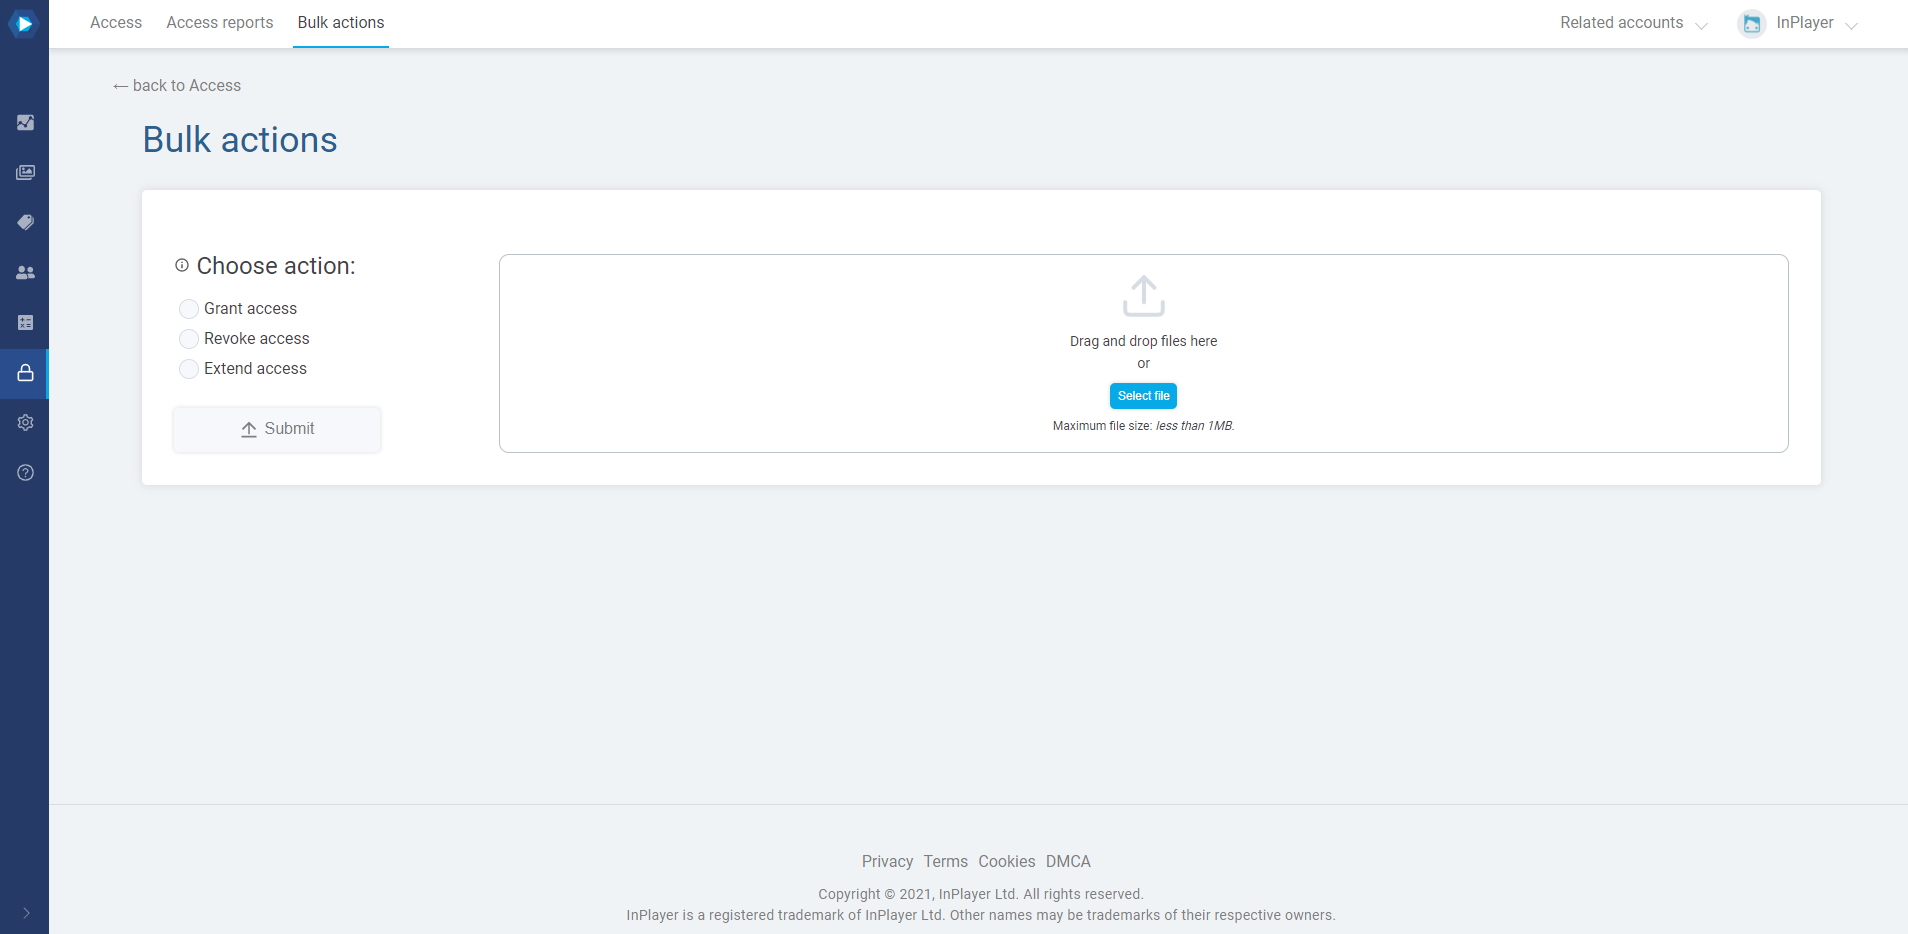
You can also perform bulk actions such as grant, extend and revoke access for multiple viewers at once.
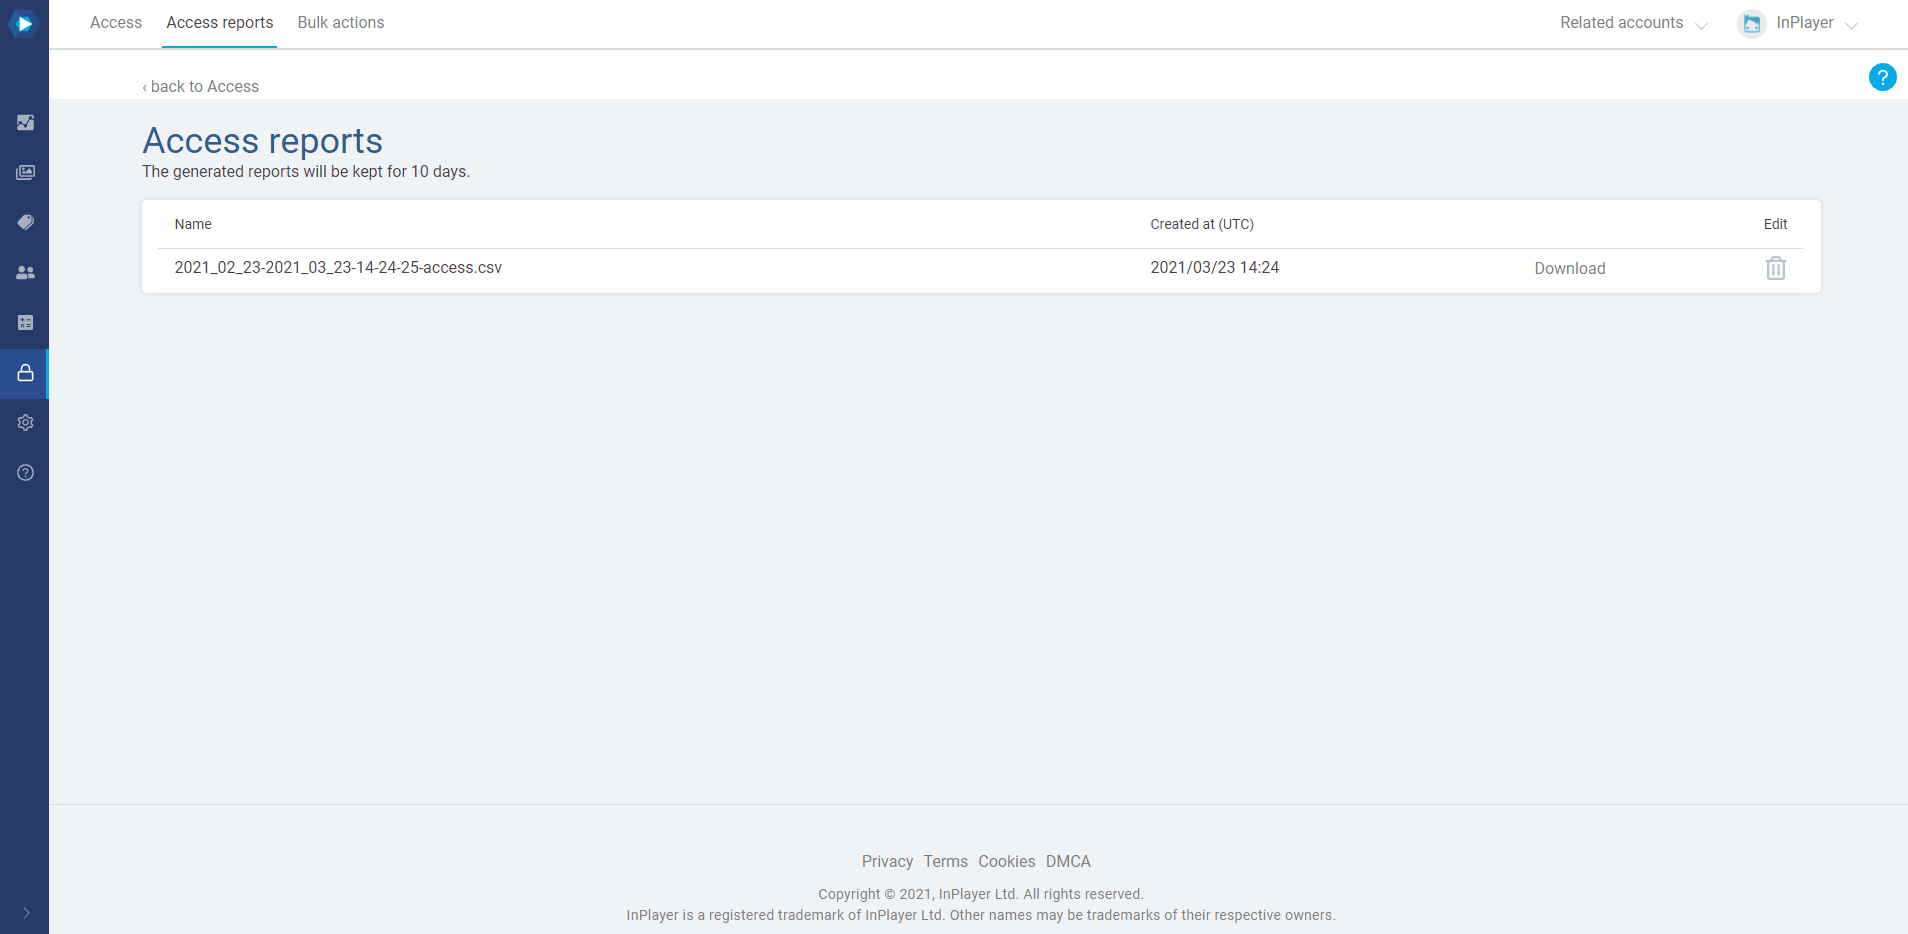
The Access section has a few tabs: Access, Access reports and Bulk actions.
At the upper right of the tab, you have the Generate report, Schedule report, and View reports buttons. You can learn more about making reports in the guides to reporting.
Below that, you have the search bar, along with the option to choose whether to view a list of the active or inactive accesses. To use the search bar, click on it, choose the filter you wish to use for your search, and type in your search.
So, if you wanted to check the access passes for a viewer with the email derby@mail.com, you’d click on the search field, choose the email filter, type in derby@mail.com, and press Enter.
Note that you can search with just the first part of the email address, in this case derby, or the second part, in this case mail.com, however, you cannot search by typing any of the two parts of the email address just partially, in this case, derb or mail.
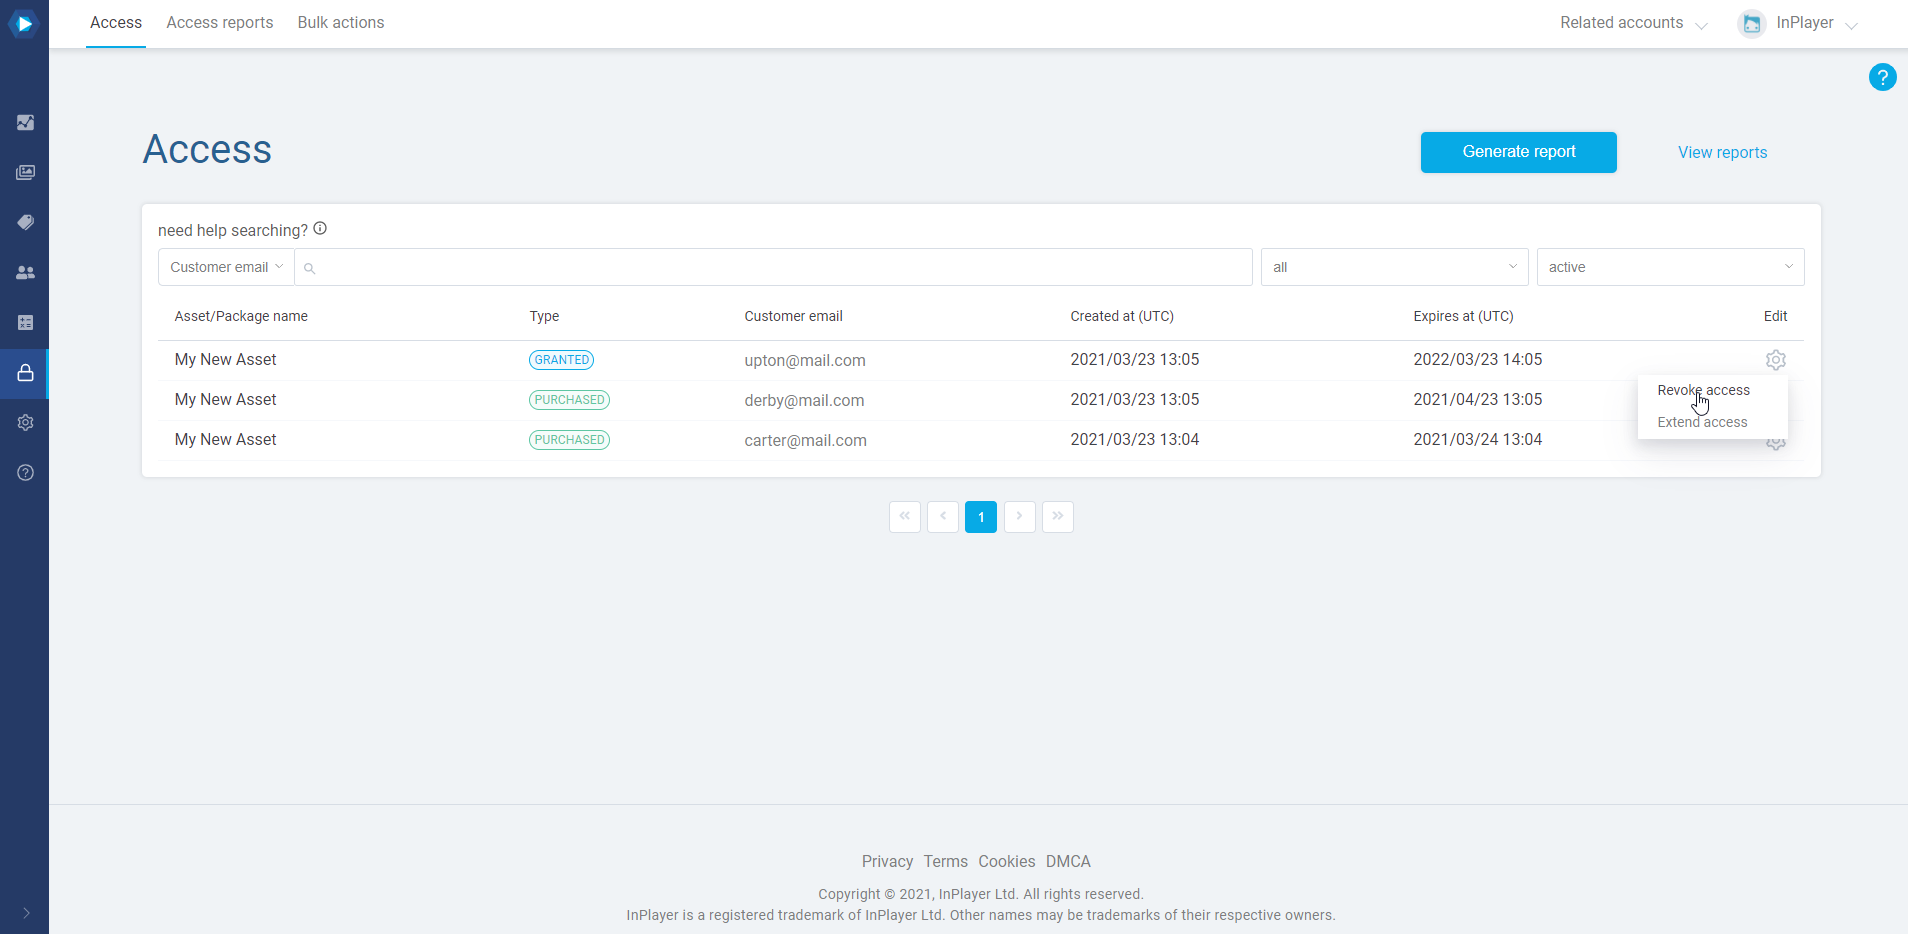
Below that, you have the main part of the Access section, which is the table where you can see the details of the viewer accesses.
Here is a list of the various access statues, along with their meaning:
Purchased – The viewer received access after making a regular payment. Granted – The viewer was granted access manually via the InPlayer Dashboard. Acess-voucher – The viewer received access after purchasing the content using a Free access voucher. Full-discount – The viewer received access after purchasing the content using a 100% discount voucher. Expired – The period of access validity set up for that price option has expired.
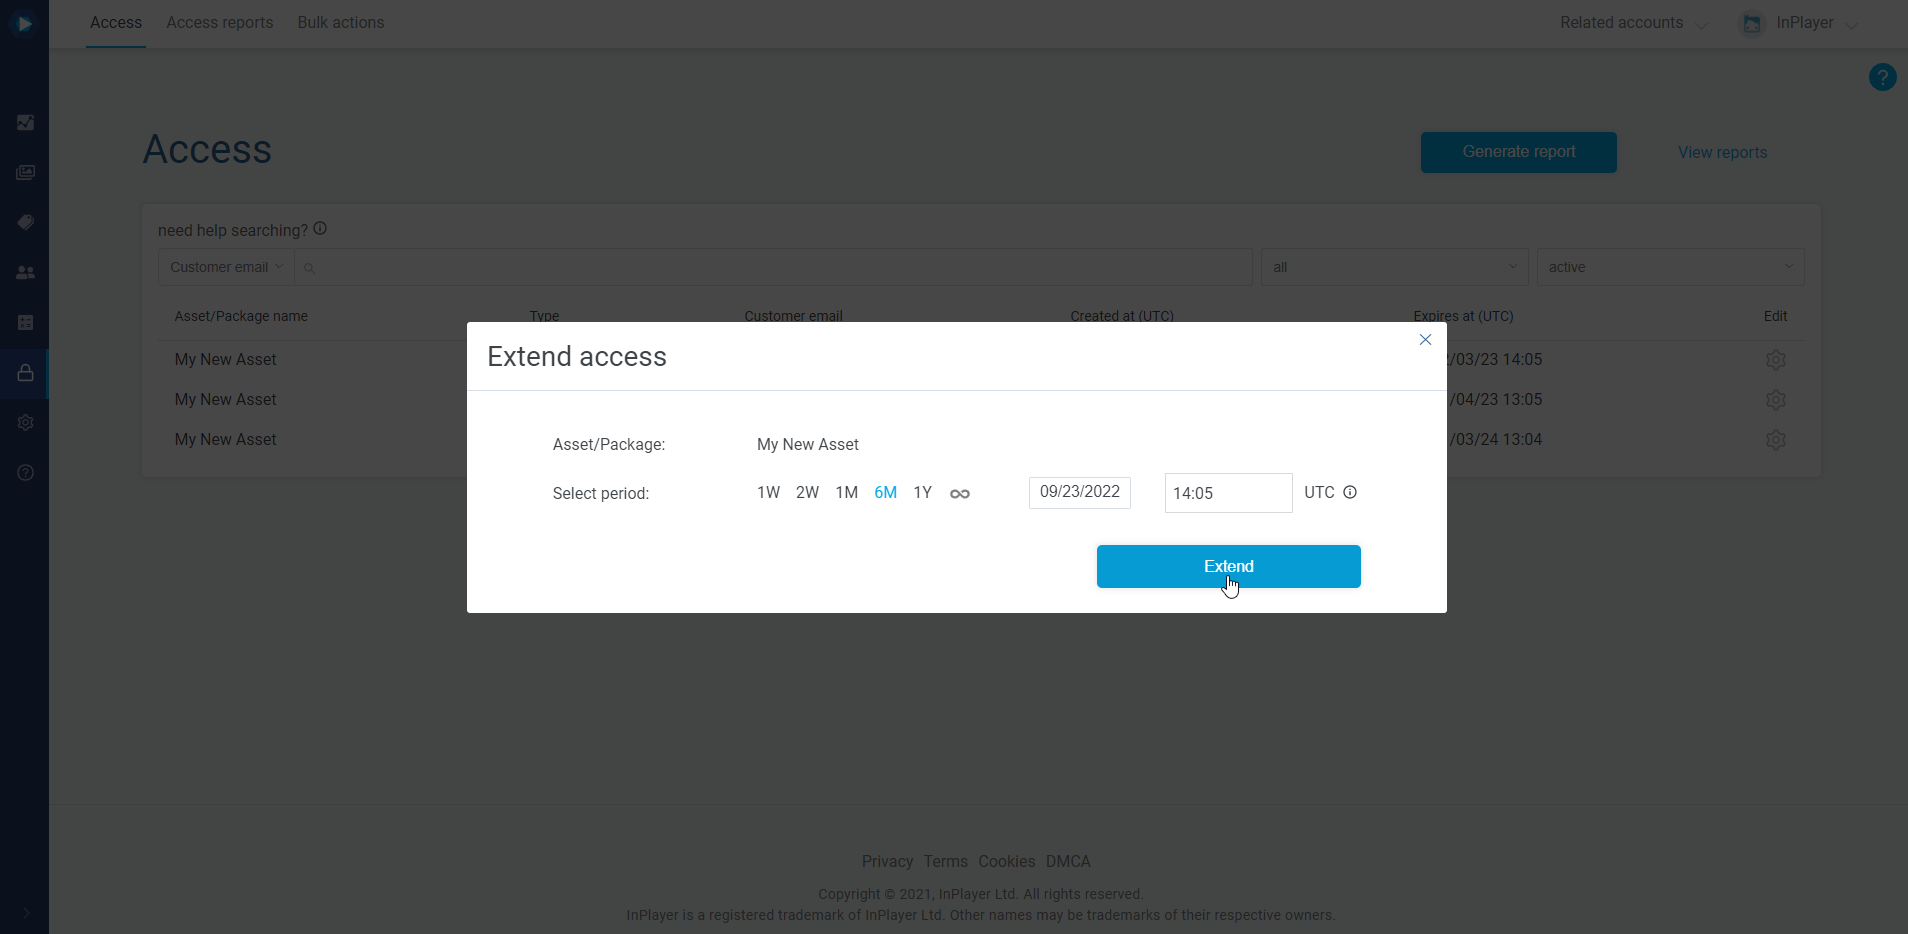
In the Access tab, you can revoke or extend a viewer’s access. Note that the same thing can be done in each viewer’s personal account as well, as described in the Audience management guides.
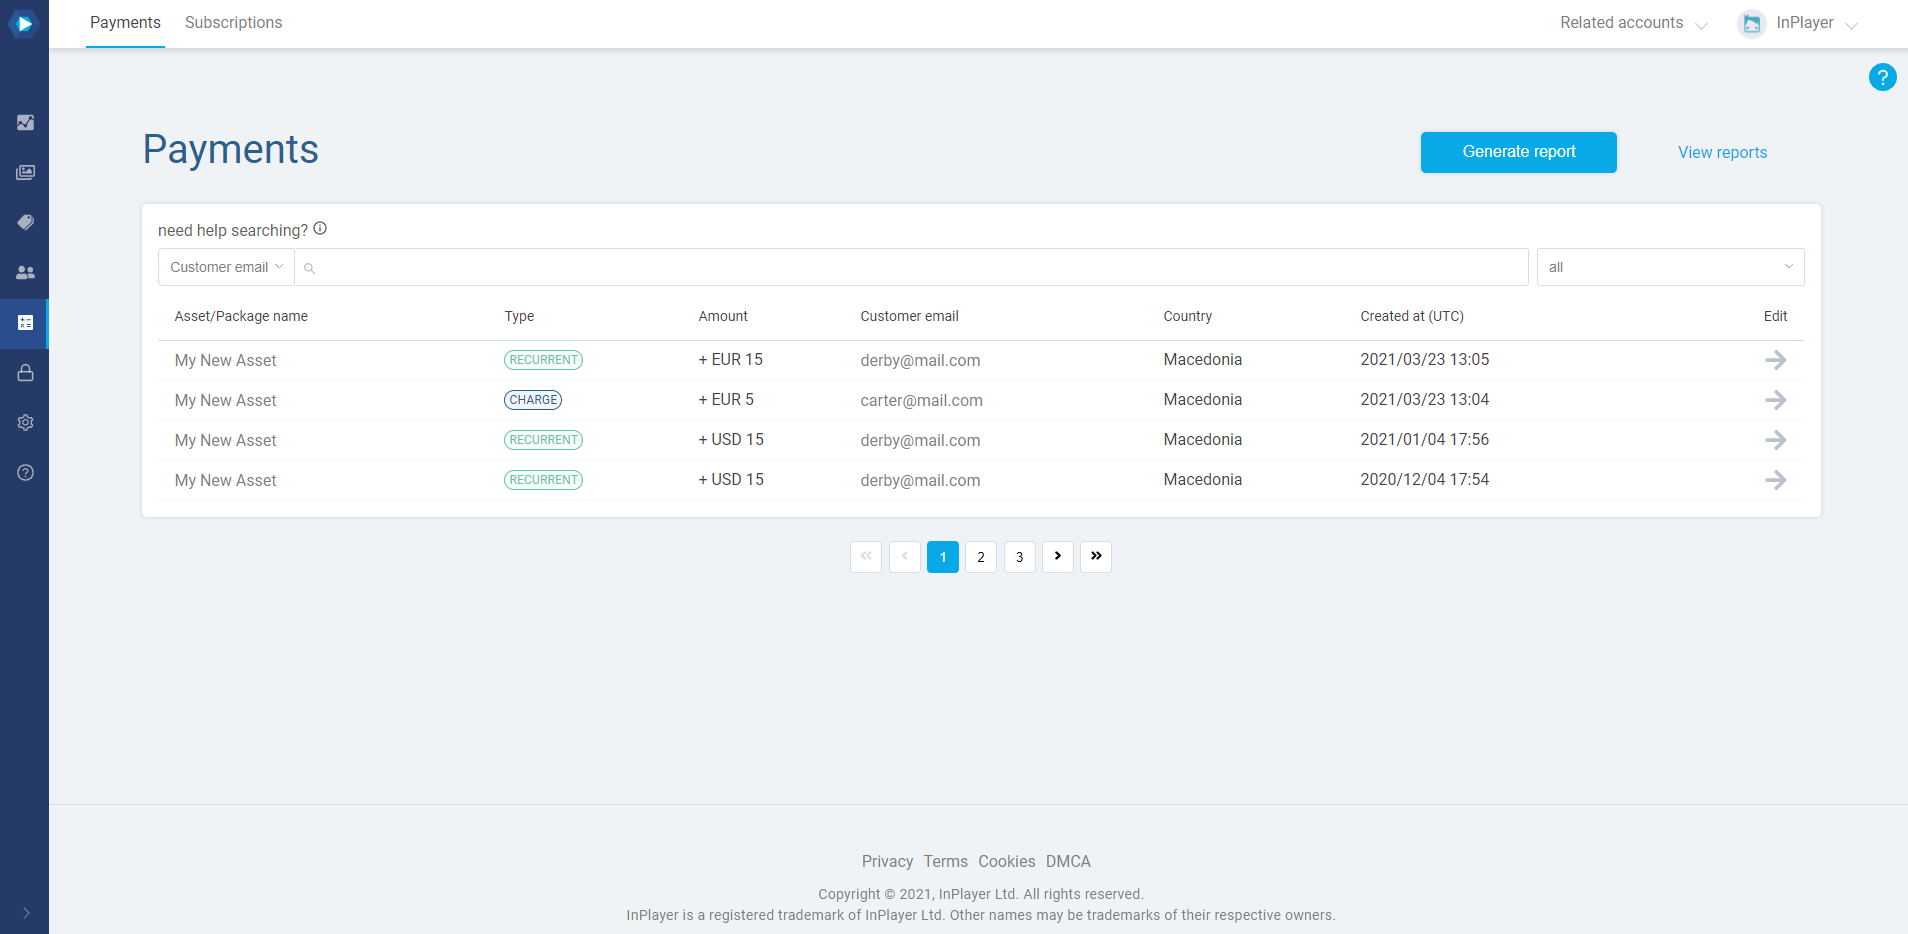
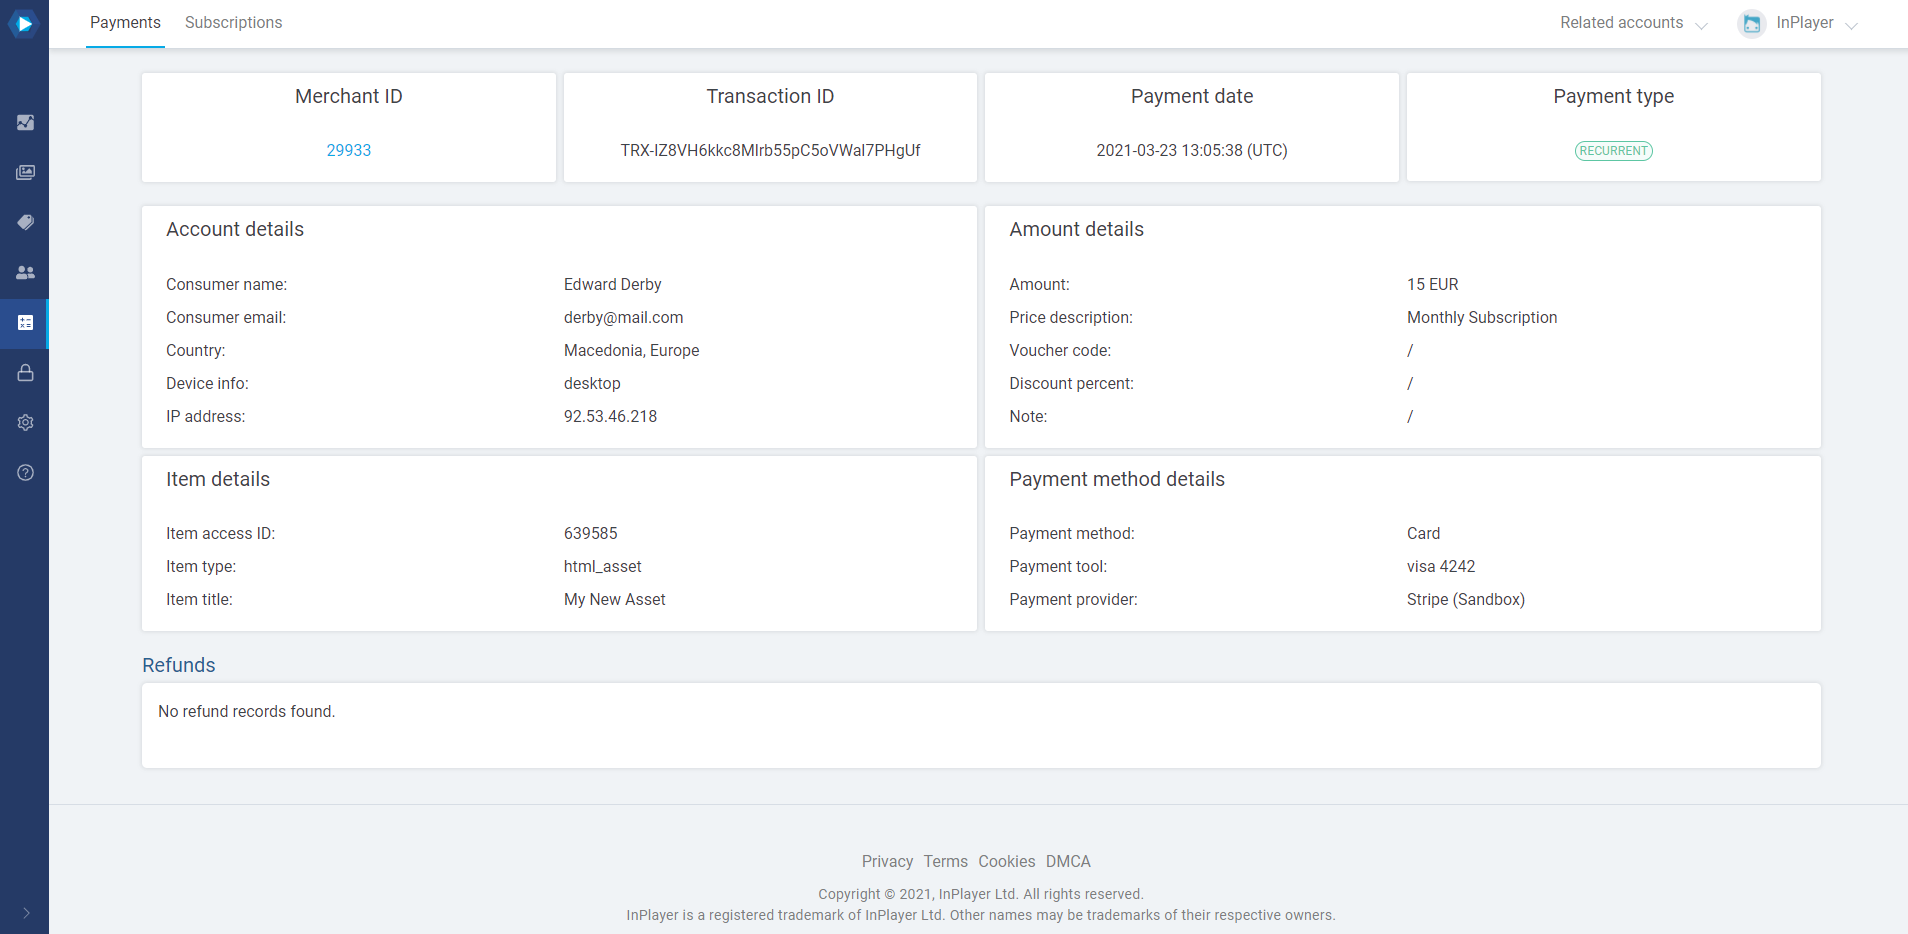
The Payments tab offers a complete overview of your viewers’ payments. This includes both the ppv (one-time), subscription (recurrent), and season price payments.
At the upper right of the tab, you have the Generate report, Schedule report, and View reports buttons. You can learn more about making reports in the guides to reporting.
Below that, you have the search bar, along with the filter to list the payments by status.
Here is a list of the various payment statuses, along with their meaning:
Recurrent
Regular subscription payment.
Charge
Regular ppv (one-time) payment.
Refund
Refund.
Freemium
Regular data capture (free of charge) access.
Pending
There are two possible reasons for this status. 1. Direct Debit payment where we await the bank to confirm the mandate creation. Viewer will have access during this time. 2. Other payments where the bank has not yet released the funds. Viewer has no access. If this status doesn’t change after a while, the viewer might have to contact their bank. These payments are not included in the payment reports as they are still considered incomplete.
Failed
Direct Debit payment that failed due to issues with the viewer’s bank account (ex. lack of funds).
Donation
A viewer donation. No access is granted.
Gift-payment
A purchase that was bought as a gift. The purchaser of the gift has no access.
Chargeback
The viewer has disputed the payment for some reason, and their bank has reversed the charge. Access is revoked immediately after a chargeback has been received. If you are using Stripe Connect with your own Stripe account, you will need to process the chargeback via the Stripe chargeback flow yourself. If you are using InPlayer’s Stripe account, the InPlayer team will do this on your behalf, so you don’t have to do anything.
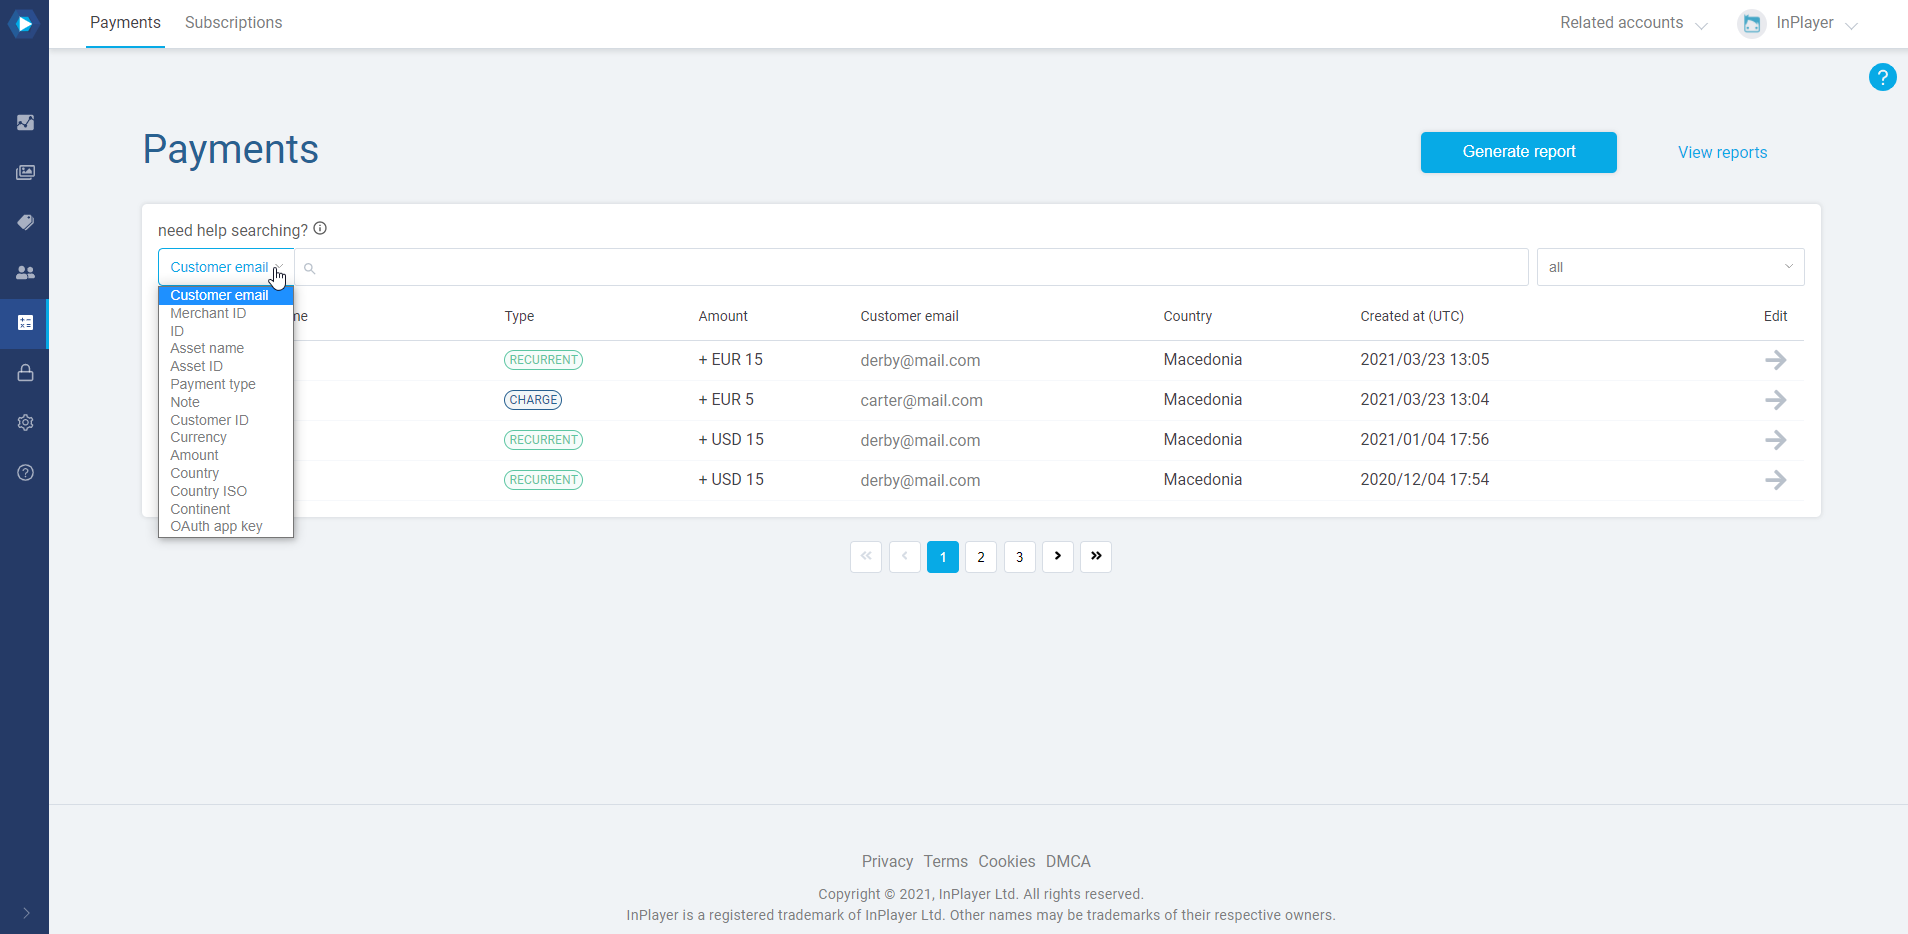
To use the search bar, click on it, choose the filter you wish to use for your search, and type in your search.
So, if you wanted to find the payment that was done by a viewer with the email carter@mail.com, you’d click on the search field, choose the email filter, type in carter@mail.com, and press Enter.
Note that you can search with just the first part of the email address, in this case carter, or the second part, in this case mail.com, however, you cannot search by typing any of the two parts of the email address just partially, in this case, cart or mail.
Below the search bar, you have the main part of the Payments tab, which is the table where you can see a list of the payment records and their basic details.
At the upper right of the tab, you have the Generate report and View reports buttons. You can learn more about making reports in the guides to reporting.
Below that, you have the search bar, along with the option to choose whether to view a list of the subscriptions by status.
Here is a list of the various subscription statuses, along with their meaning:
Recurrent
Regular active subscription. Viewer has access.
Past-Due
Active subscription for which the latest payment has failed due to some issue with the viewer’s payment method, or is pending for SCA approval by the viewer (more on this here). Viewer has no access. Viewer should be advised to either: check/update their payment tool or their bank, check their inbox for the SCA confirmation email, wait for the system to automatically retry the payment (might take up to a month) and re-grant access upon success, or cancel their current subscription and try purchasing a new one.
Unpaid
Inactive subscription for which the time limit of 30 days for the SCA approval has expired, which caused the subscription to be canceled. More on this here. Viewer has no access. Viewer should be advised to check their payment tool or their bank and purchase the subscription again.
Canceled
Regular canceled subscription. Viewer will lose access after the end of their ongoing billing period.
Free trial
There are two possible reasons for this status. 1. The active subscription is still under a free trial. Viewer has access. 2. The first payment after the free trial expiry is still processing in the system. Viewer has access. The status will change to Recurrent as soon as the payment gets processed.
Ended
Inactive subscription that was ended by the system due to some issue with the viewer’s payment. Viewer has no access. Viewer should be advised to check their payment tool or their bank and purchase the subscription again.
Pending
There are two possible reasons for this status. 1. Direct Debit subscription where we await the bank to confirm the mandate creation. Viewer will have access during this time. 2. Subscription paid via another method where the bank has not yet released the funds. Viewer has no access. If this status doesn’t change after a while, the viewer might have to contact their bank. These subscriptions are not included in the reports as they are still considered incomplete.
Paused
Subscription that has been paused. Viewer has access. The subscription can be reactivated at any time. Note that Google In-app subscriptions are the only subscriptions that can be paused by the viewer. Other subscriptions made via a payment method that supports pausing (Credit card, Direct Debit, iDeal, and PayPal) can only be paused from the customer or InPlayer side. Note also that if you’re using Stripe Connect and are checking these subscriptions in Stripe, they will have an active status, but a paused collection.
Incomplete
Subscription for which the first payment has failed due to some issue with the viewer’s payment method, or is pending for SCA approval by the viewer (more on this here). Viewer has no access. Viewer should be advised to check their payment tool or their bank, or to check their inbox for the SCA confirmation email. These subscriptions are not included in the reports as they are still considered incomplete.
Incomplete expired
Subscription for which the first payment has failed due to some issue with the viewer’s payment method or for which the time limit of 23 hours for the SCA approval of the first payment has expired (more on this here). Viewer has no access. Viewer should be advised to check their payment tool or their bank and purchase the subscription again.
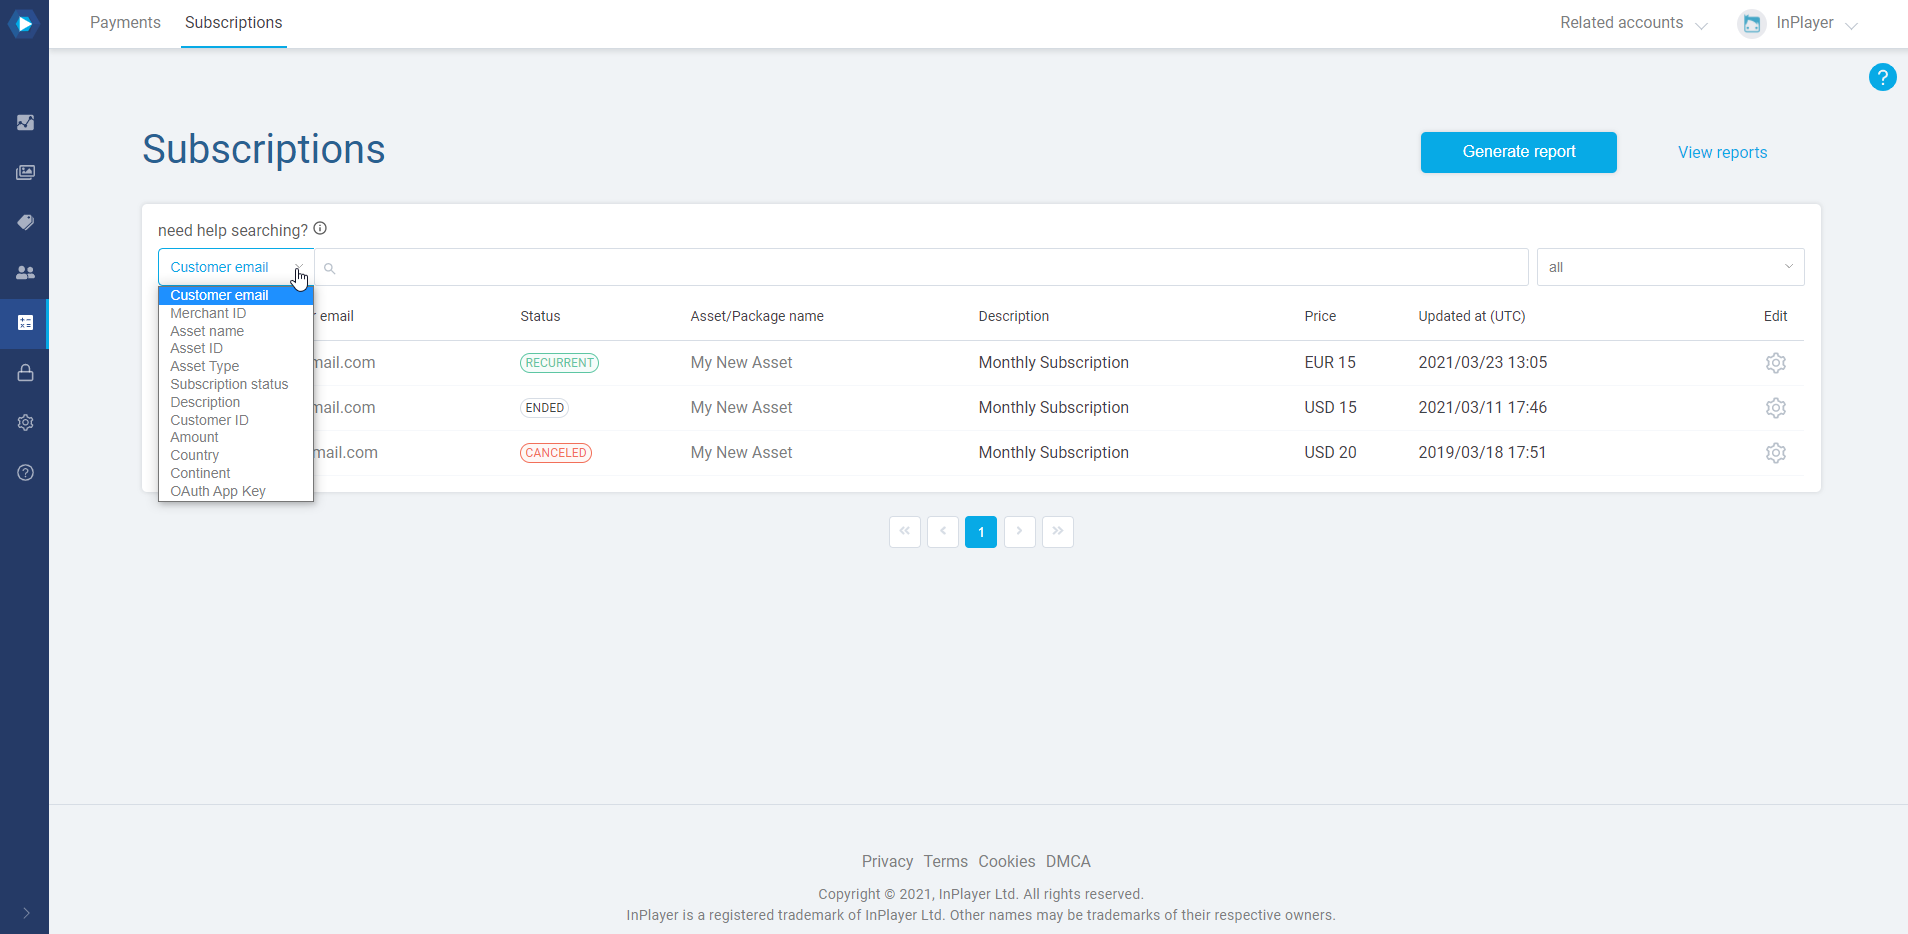
To use the search bar, click on it, choose the filter you wish to use for your search, and type in your search.
So, if you wanted to find a subscription that was purchased by a viewer with the email carter@mail.com, you’d click on the search field, choose the email filter, type in carter@mail.com, and press Enter. Note that you can also search with just the first part of the email address, in this case carter, or the second part, in this case mail.com. However, you cannot search by typing any of the two parts of the email address just partially, in this case, cart or mail.
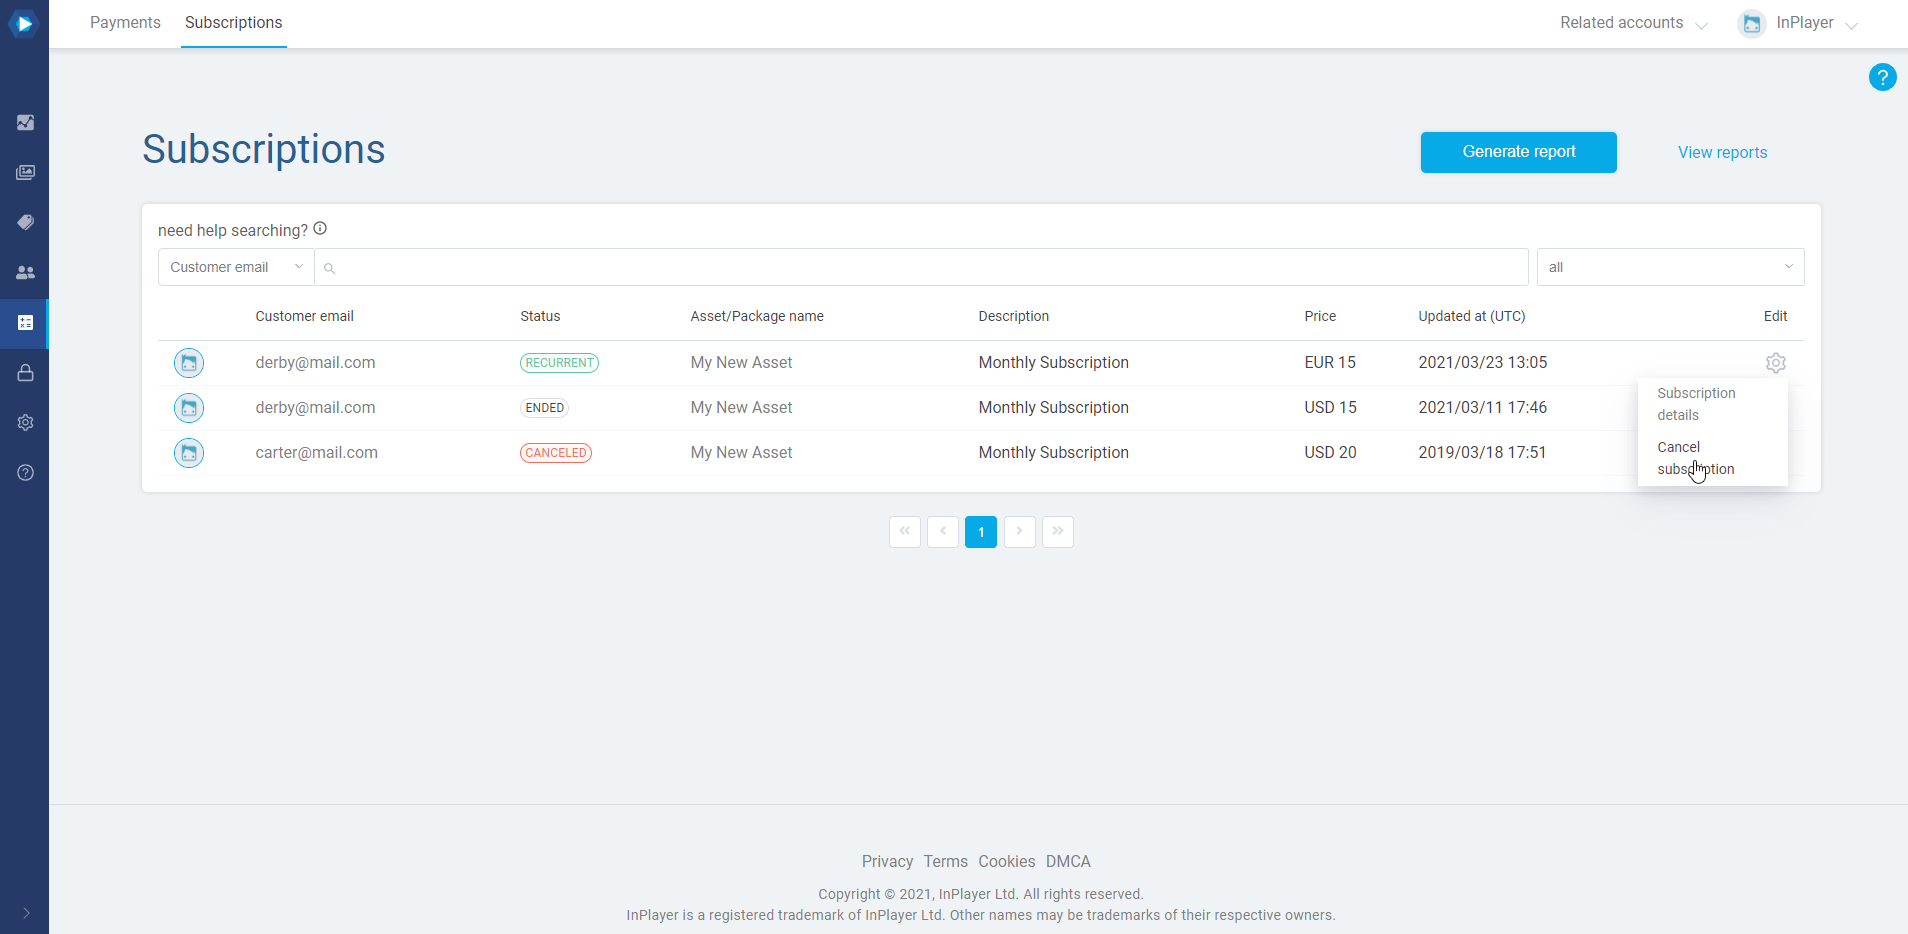
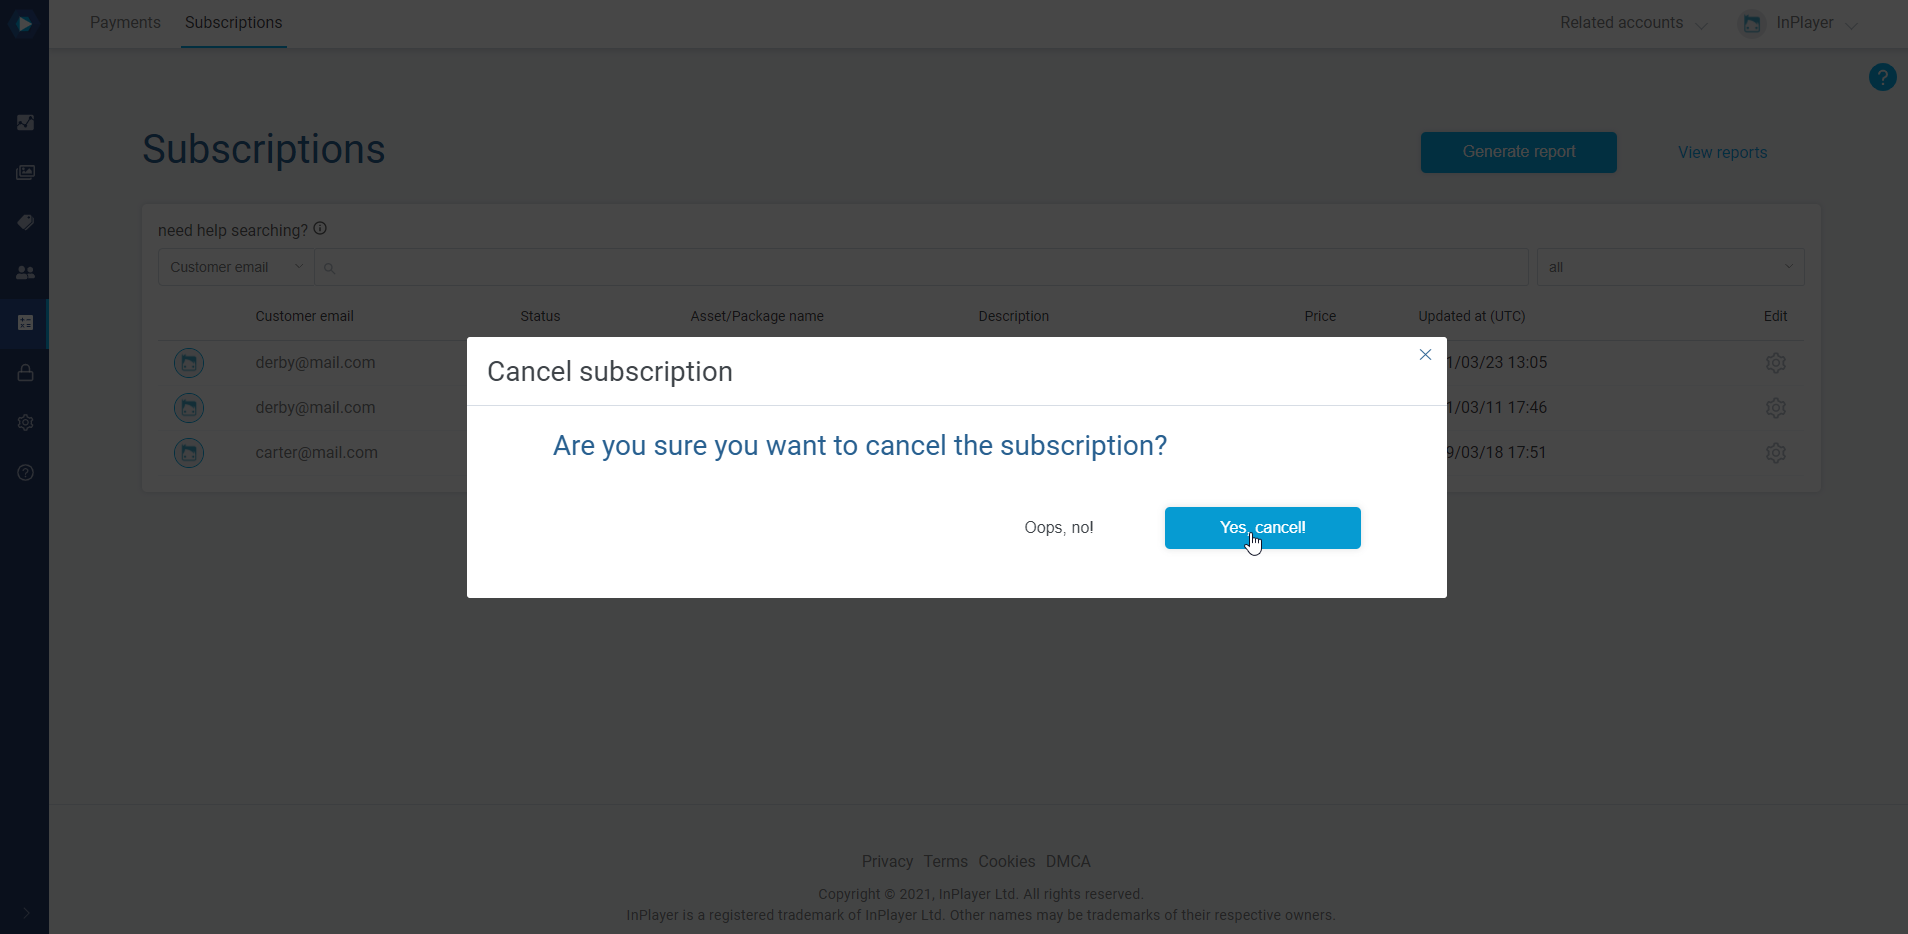
Below that, you have the main part of the Subscriptions tab, which is the table where you can see the details of the viewers’ subscriptions.
In the Subscription tab you can also cancel a viewer’s subscription as well as view their subscription details. Note that the same thing can be done in each viewer’s personal account as well, as described in the Audience management guides.
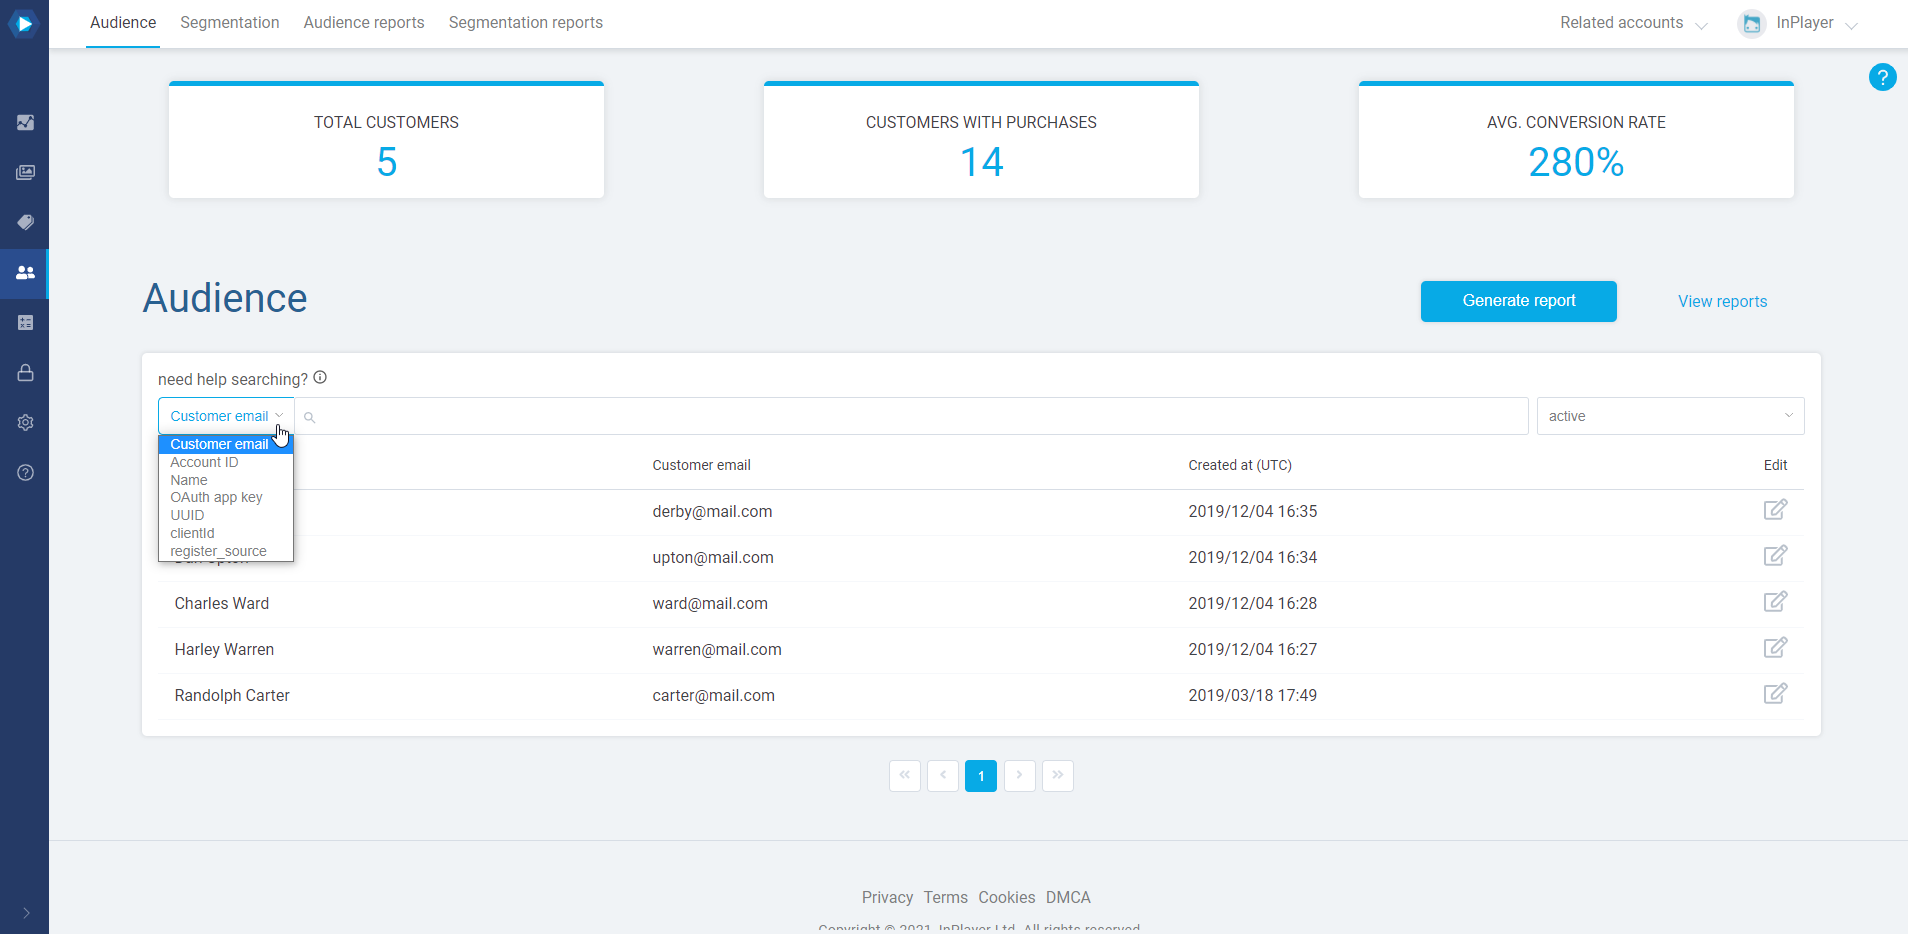
Starting at the top, you can see some basic info about your viewers:
the number of viewers,
the number of viewers with purchases,
the average conversion rate.
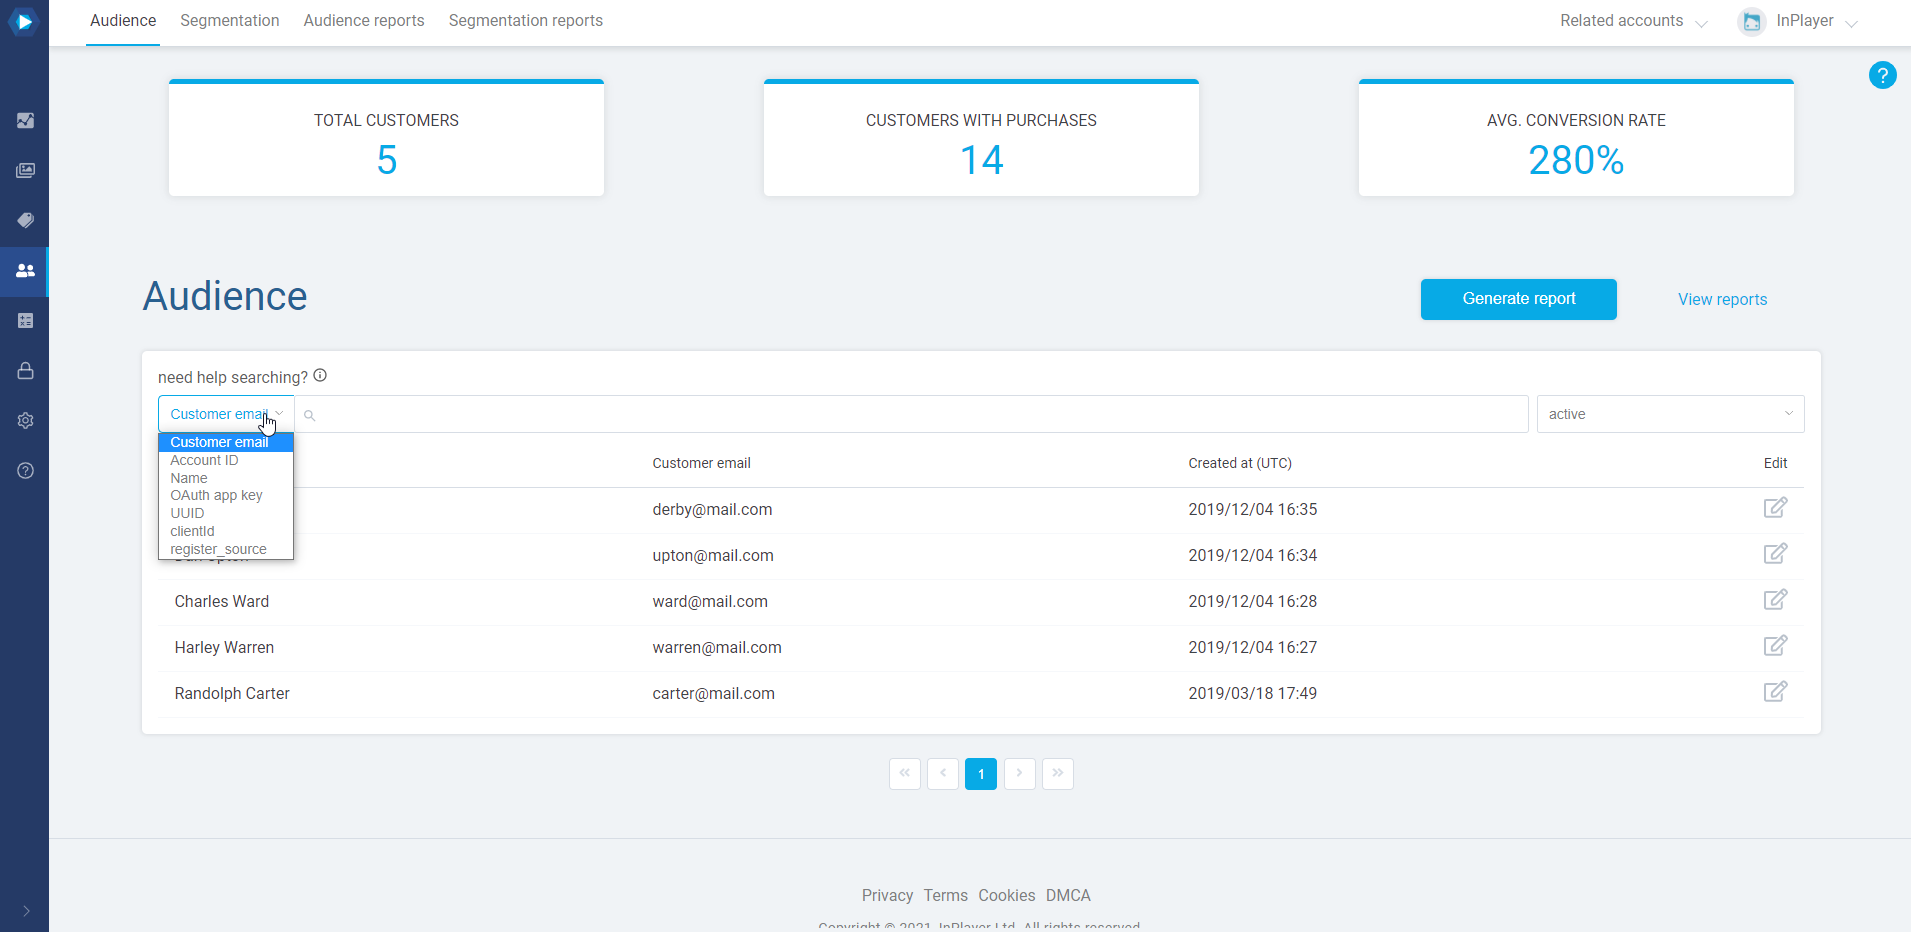
Further down, you have the search bar, along with the option to choose whether to view a list of the active or deactivated viewers. To use the search bar, choose the filter you wish to use for your search from the dropdown menu, and type in your search.
So, if you wanted to find the viewer with the email address carter@mail.com, you’d click on the search field, choose the Customer email filter, type in carter@mail.com, and press Enter.
Note that you can search with just the first part of the email address, in this case carter, or the second part, in this case mail.com, however, you cannot search by typing any of the two parts of the email address just partially, in this case, cart or mail.
Next, you have the Generate report , Schedule report, and View reports buttons. You can learn more about making reports in the guides to reporting.
Finally, you have the main part of the Audience section, which is the list with the viewer accounts and their basic details. To open a viewer account, just click the button on the right, under the Edit column in the viewer’s row.
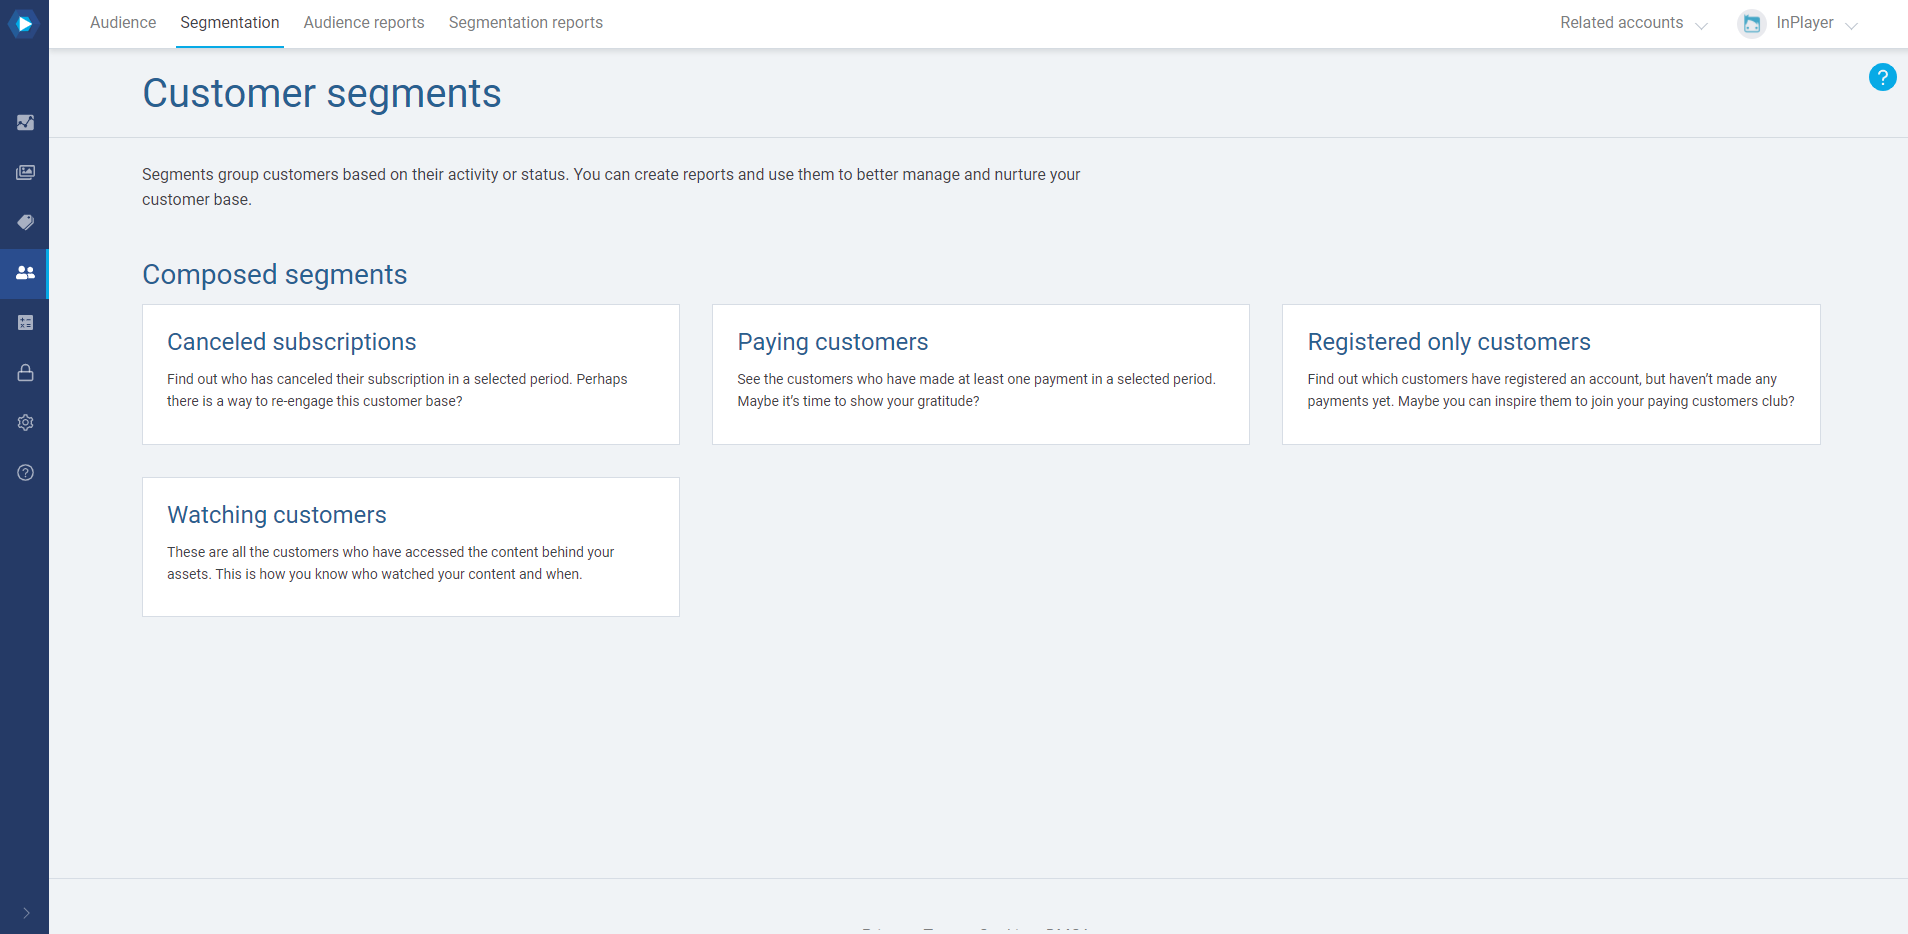
The second tab of the Audience section is the Segmentation tab.
Here, you can see lists (segments) of viewers based upon various characteristics. This is mainly aimed at providing useful data for reducing churn and increasing retention, thereby eliminating the need for creating manual reports for this purpose.
There are a few viewer segments you can use: Cancelled subscriptions, Paying customers, Registered only customers, and Watching customers.
For an in-depth guide on all the segments and how to use them, check out this guide.