Discount vouchers

Discount vouchers can be used for getting discounts on purchases done via a web browser, using a Credit Card, PayPal or Direct Debit as payment methods. It is the most common voucher type.

Note that a 100%  Discount voucher cannot be used for a ppv (one-time) payment via PayPal. This is due to a limitation in PayPal’s system. For subscription payments, on the other hand, a 100% voucher can be used via PayPal with no issues.


Creating a Discount voucher

Log into your InPlayer Dashboard, and go to the Promotions section.
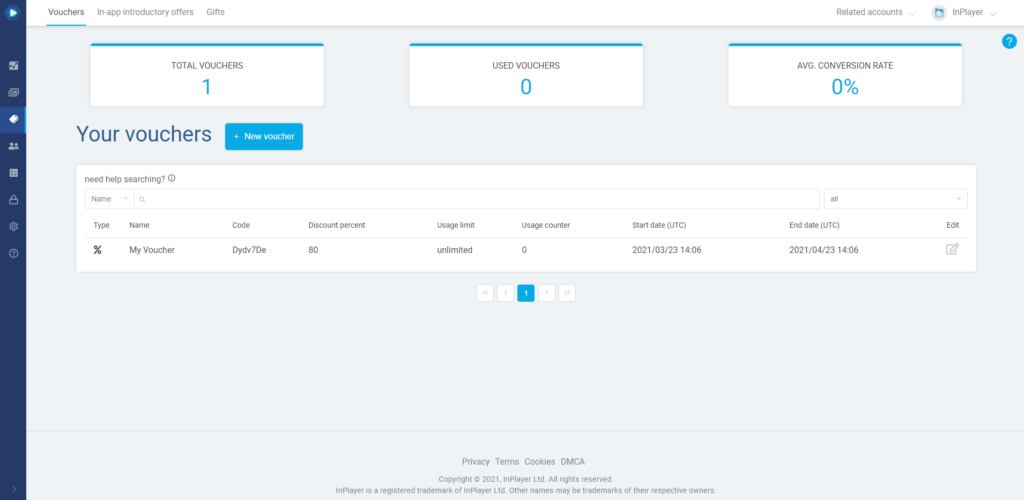
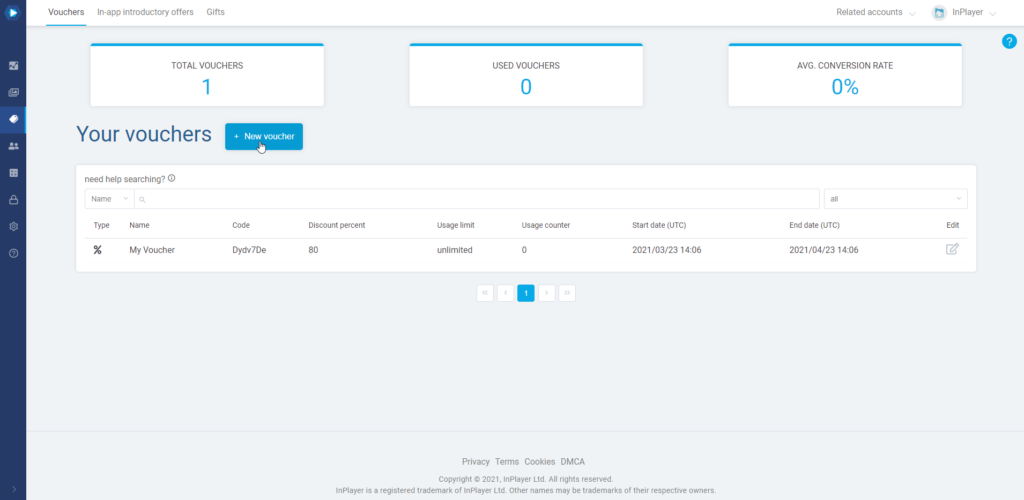
In the Vouchers tab, click New voucher.
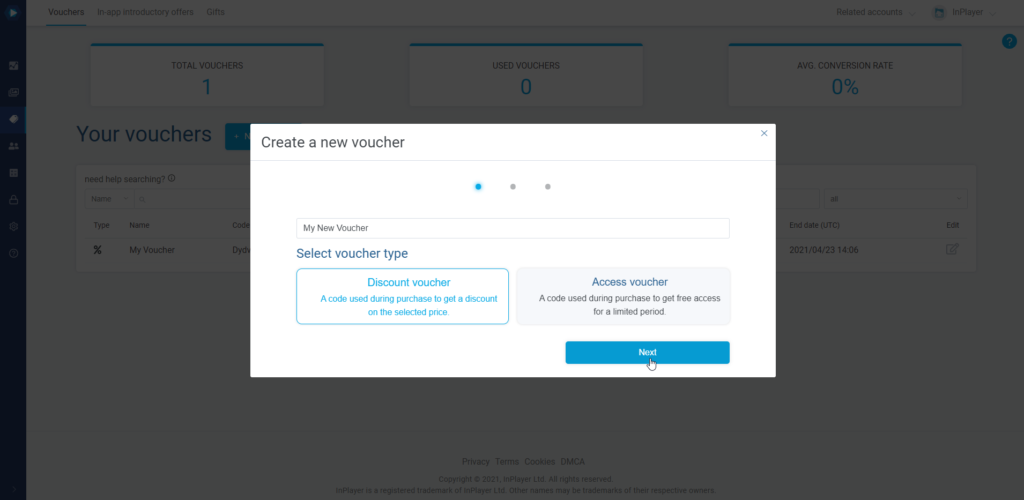
Enter the voucher name. This isn’t the code the viewer will need to use.

Choose Discount voucher and click Next.
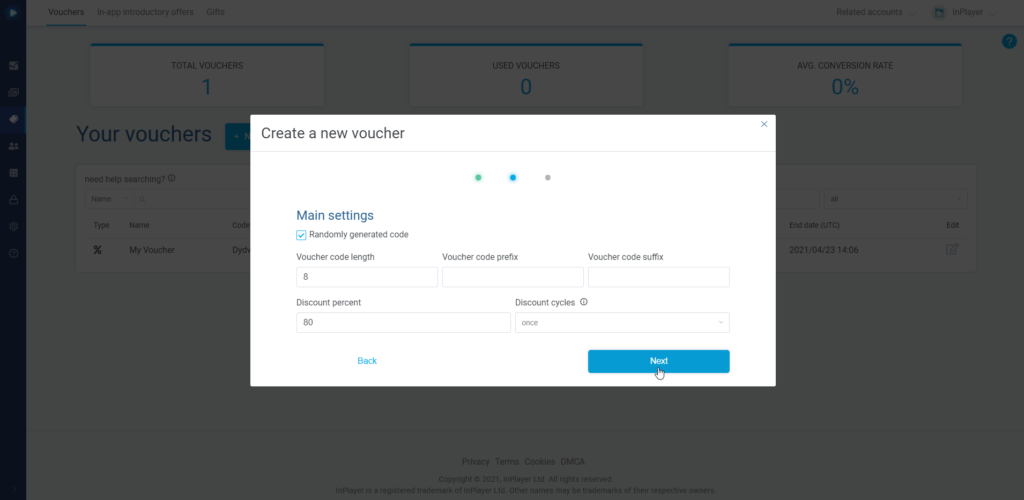
Configure the voucher.
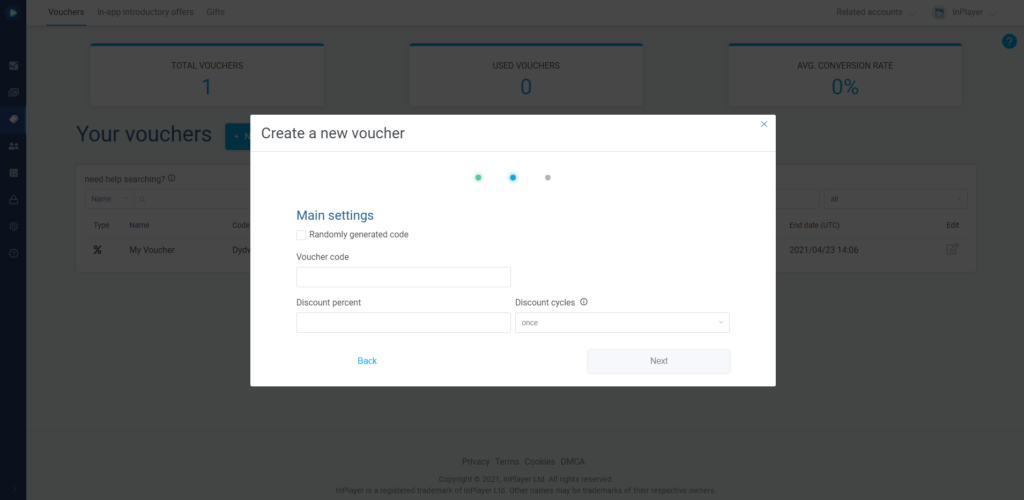
Randomly generated code lets you generate the voucher code automatically, by setting up the voucher length, prefix, and suffix. Note that the Voucher code length does not include the prefix and suffix. It only refers to the automatically generated part in the middle.

Voucher code lets you enter a custom code, if you are not using the Randomly generated code setting.

Discount percent is the discount the viewer will get by using the voucher.
You can set it up to 100 which means a viewer will not have to pay anything.
Note that you only need to enter the number of the discount percent, without the % sign after it.

Discount cycles is only applicable for subscription payments.
once – gives a one time discount on the first payment for a subscription.
forever – gives a permanent discount for all future payments for a subscription.
repeating – gives a discount for a set number of payments for a subscription.

Note that when a viewer uses a 100% discount voucher to purchase a subscription, they will still need to enter their credit card. This is so the system knows which card to charge after the discount period expires.

Click Next.
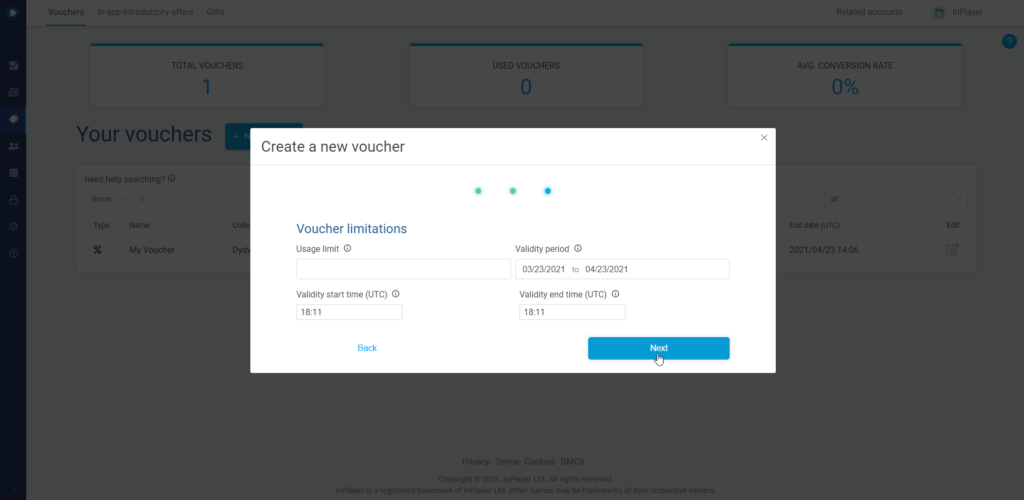
Set the Usage limit.
This is how many times the voucher can be used.
The default is set as blank, which means a voucher can be used an unlimited number of times.

Set the Validity period and start and end times.
This sets the voucher validity period. Note that this is different from the content access period, which is controlled by the Payment type setting in the price option of your asset or package.

Click Next.
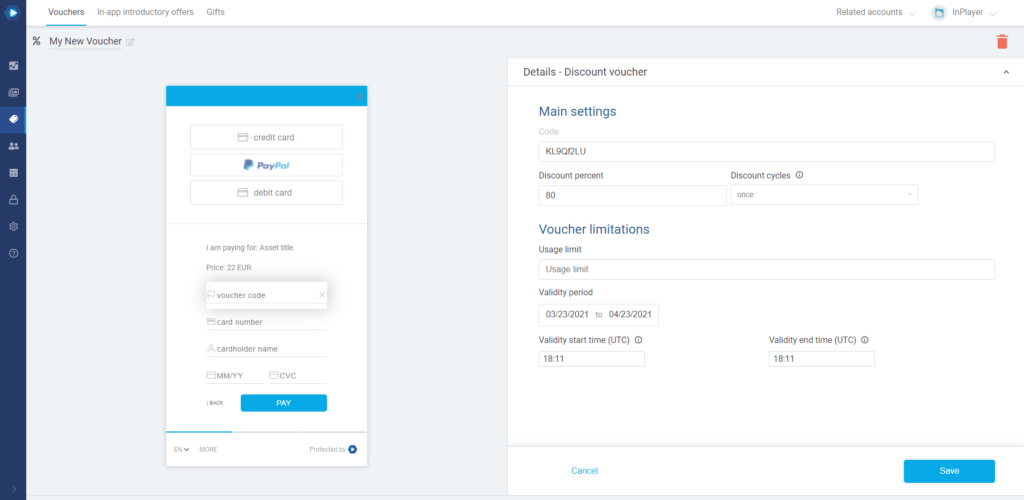
Your voucher has now been created and is ready for use. In its current state, the voucher can be used by any viewer, for every asset and package you have.
If you wish to make it valid for only a certain asset, or package, or price option, or to make it so only a certain viewer can use it, you can proceed to modify the voucher properties.

Details

In Details, you can edit the things you’ve already set up during the first step of the voucher creation. Note that you can’t edit the code.
Assets and Packages

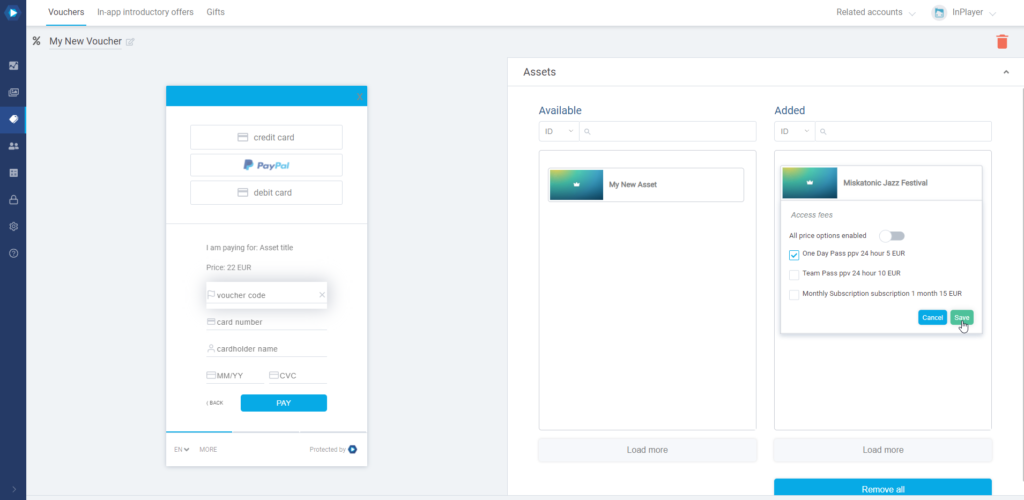
In the Assets and Packages sections, you can select for which assets and/or packages the voucher can be used.
Just drag and drop the asset or package you want to add to the voucher from left to right.
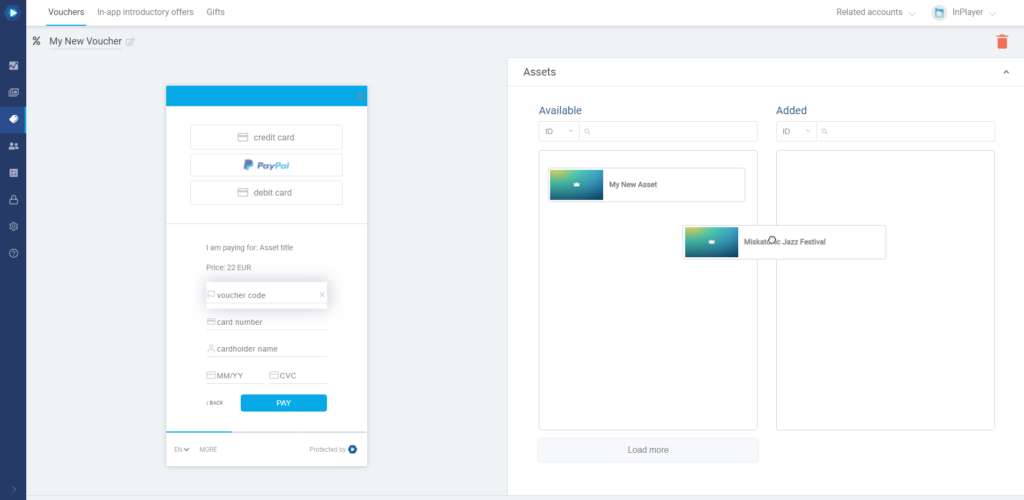
You can even go one step further, and specify for which price options will the voucher be valid, in case your assets or packages have multiple price options set up.
To do this, click on Access fees, select the price option you want to enable, and click Save.
Customer emails

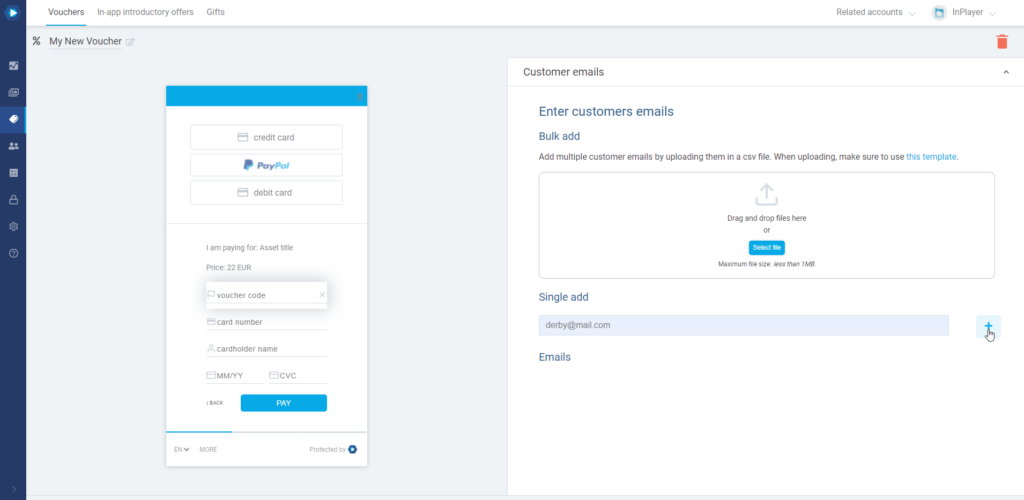
In the Customer emails section, you can choose to assign the voucher to only a specific set of viewers, so that only they can use it.
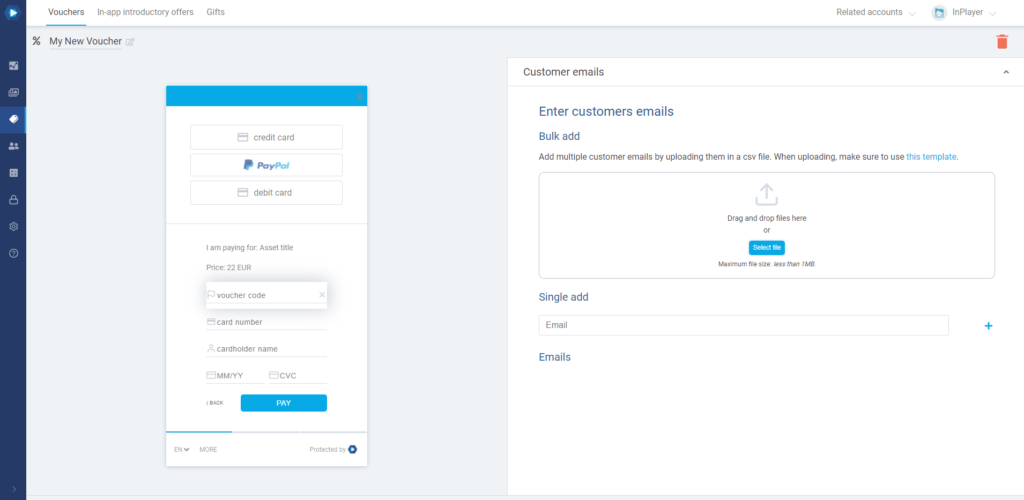
You can either bulk add a list of viewers or add viewers one by one.

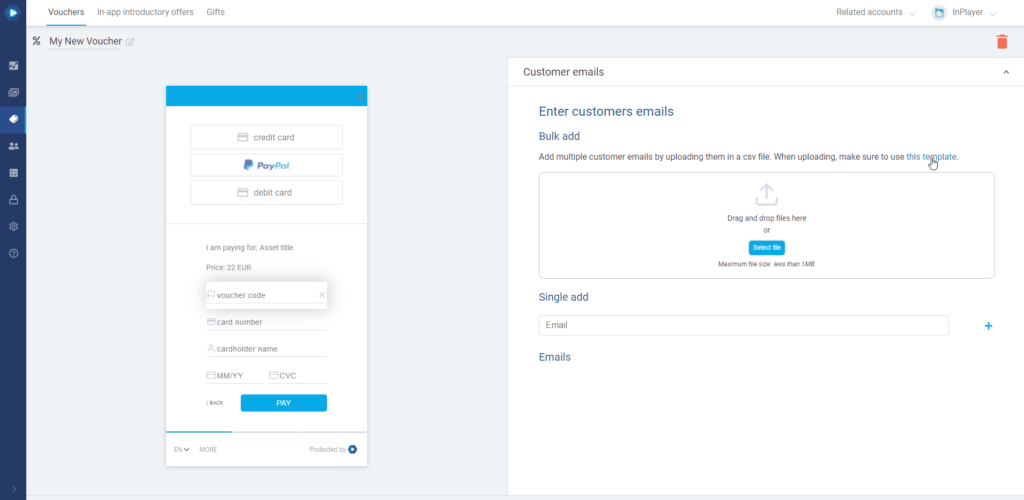
For bulk adding, make sure to download the CSV template provided in the voucher settings.

Once you enter the viewer emails in the CSV file, just upload the file to the voucher.

To add a single viewer email, simply type in the email and click the + button.

Note that viewers don’t have to exist in the database. You can set up the voucher now, and when the viewer registers with the email you’ve entered, they will still be able to use the code.

To find out which viewers used a particular voucher, you can get a payment report from the Transactions tab. These reports will contain the voucher info for each payment.


Payment types

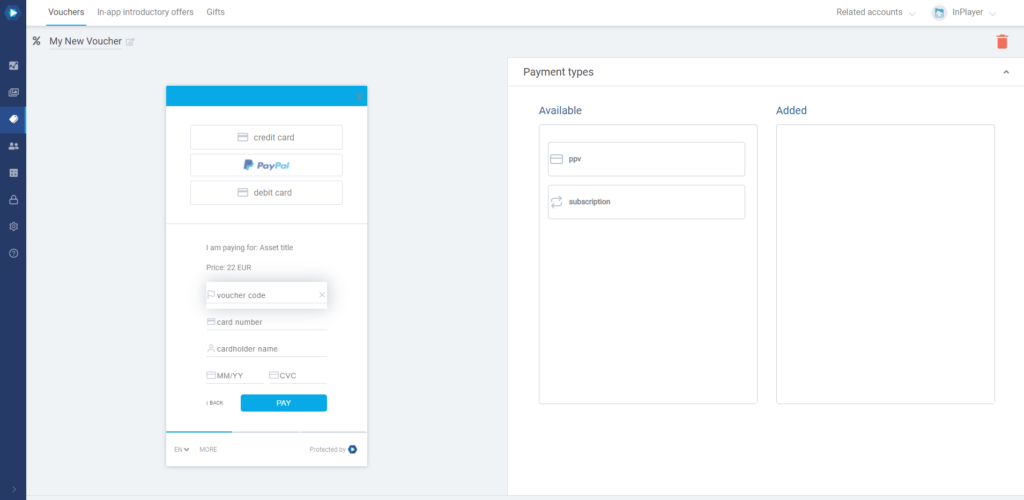
In the Payment types section, you can make the voucher valid for only ppv or subscription price options. Just drag and drop from left to right.
If you want the voucher to be valid for both, just leave this option as is, i.e. select neither the ppv or the subscription types, which will make the voucher valid for both.
Deleting a voucher

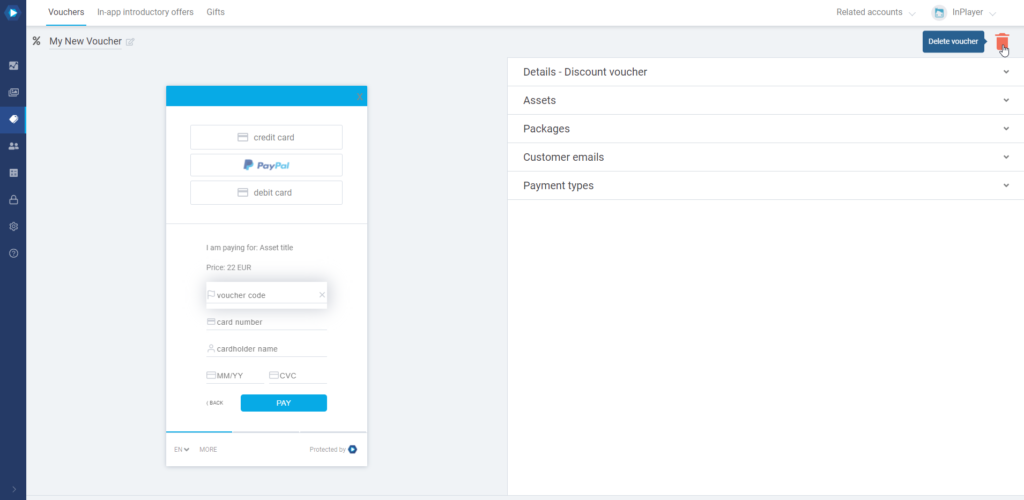
To delete a voucher, just open it, and click on the  button at the top right.

This concludes our guide.

If you have any questions, don’t hesitate to contact us at clients@inplayer.com.
Promotions

In the Promotions section, you can create vouchers and in-app introductory offers that let you give discounts to your viewers.

The section is divided into Vouchers, In-app introductory offers, and Gifts.

The Vouchers tab

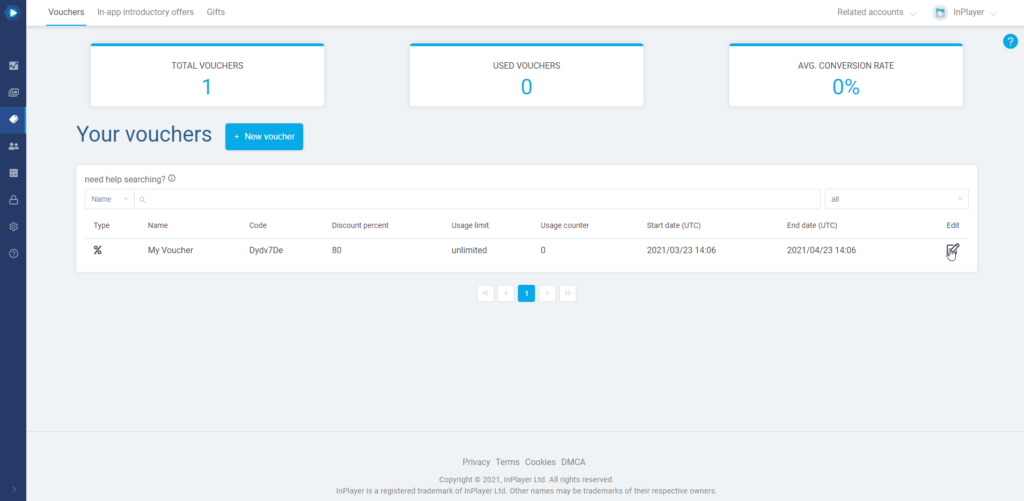
This is where you create and manage your vouchers.

A voucher is a code that, depending on the type of voucher, either allows your viewers to get a discount on a payment, or grants them free access to content for a certain time.

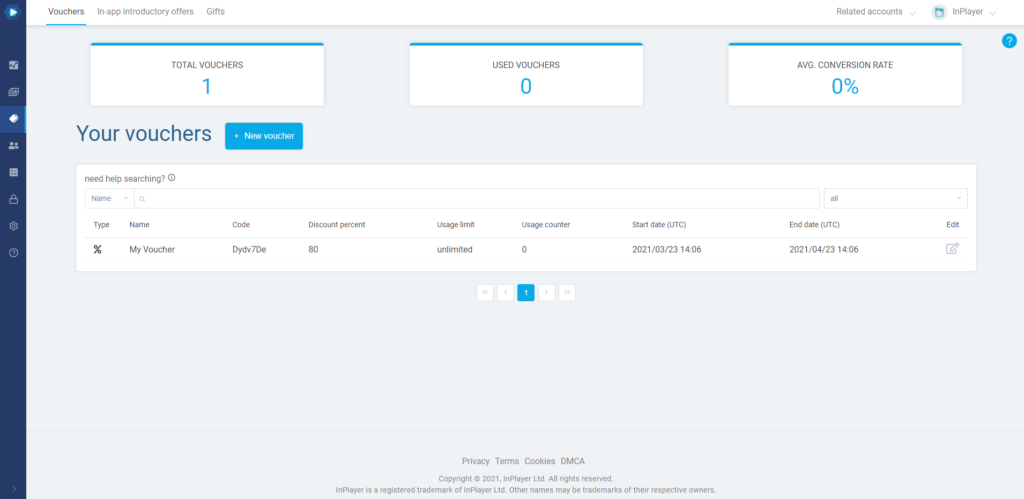
Starting at the top, you can see some basic info about your vouchers:

  • the number of vouchers,
  • the number of used vouchers,
  • the average conversion rate.

Below that, you have the search bar.

To use the search bar, just select the search filter and enter your keyword.

Finally, you have the main part of the Vouchers tab, which is the list with your vouchers and their basic details.
To open a voucher, just click on the  button on the right, under the Edit column in the voucher’s row.

Voucher types

There are two types of vouchers:

  • Discount vouchers.
    Discount vouchers can be used for granting discounts on purchases done via a web browser, using a Credit Card, PayPal or Direct Debit as payment methods. It is the most common voucher type.
    Note that a 100% Discount voucher cannot be used for a ppv (one-time) payment via PayPal, due to a limitation in PayPal’s system. For subscription payments, on the other hand, a 100% voucher can be used via PayPal with no issues.
  • Access vouchers.
    Access vouchers can be used via a web browser, for granting free access to content. In this sense, they are the same as a 100% Discount voucher. However, there is an important difference: By using an Access voucher a viewer will get access for a period that is going to be specified in the voucher itself, while with the Discount voucher they will get the access period that has been specified in the Payment type setting of the price option of the asset the viewer is purchasing.

Creating and managing Vouchers

You will find detailed guides on creating and managing all the various voucher types here.

The In-app introductory offers tab

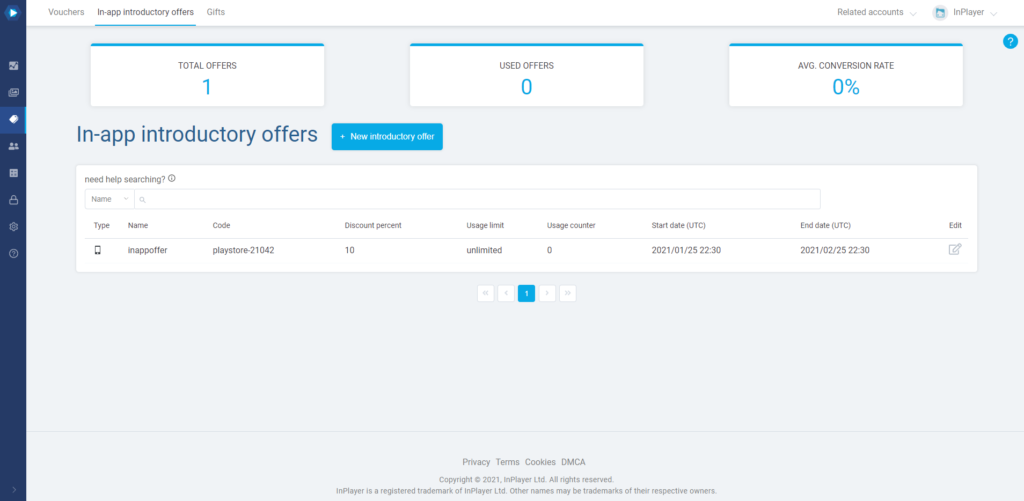
This is where you manage your in-app purchase discounts.

In-app introductory offers are different than vouchers, since there is no “code” the viewer needs to enter to get the discount.
Instead, the discount is in the form of a discounted price that is available to anyone that has access to your app.
This means that you cannot use in-app introductory offers to give a discount to only a specific viewer or a group of viewers. You can only have it as a discounted price that will be available to everyone.

Starting at the top, you can see some basic info about your offers:

  • the number of offers,
  • the number of used offers,
  • the average conversion rate.

Below that, you have the search bar.

To use the search bar, just select the search filter and enter your keyword.

Finally, you have the main part of the In-app introductory offers tab, which is the list with your offers and their basic details.
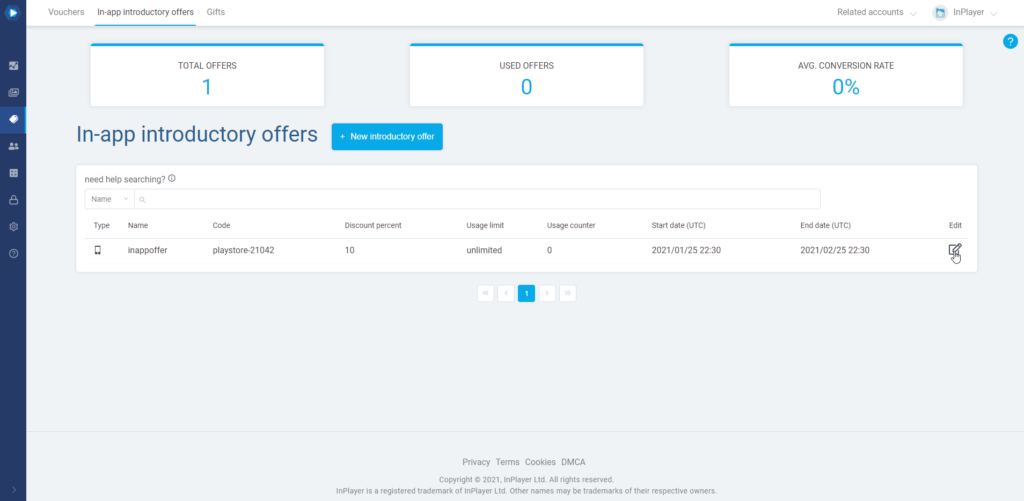
To open an In-app offer, just click on the  button on the right, under the Edit column in the offer’s row.

Creating and managing In-app introductory offers

You will find detailed guides on creating and managing In-app introductory offers here.

The Gifts tab

The Gifts tab will only be available if the Gift feature has been enabled on your account.

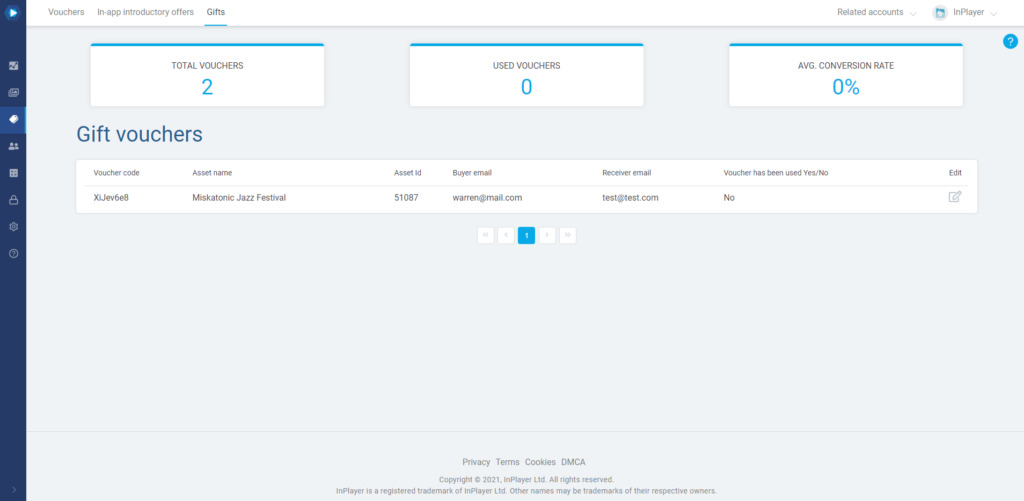
With the Gift feature, your viewers will be able to buy a content pass intended for someone else. The way this works is with gift vouchers.

Whenever a viewer purchases a gift, a voucher will be automatically generated and sent to the gift recipient.
The Gifts tab is where you can keep track of these gift vouchers.
You can’t edit these vouchers, only browse through them.

To learn more about the Gift feature, click here.

This concludes our guide.

If you have any questions, don’t hesitate to contact us at clients@inplayer.com.