This guide describes how to set up InPlayer in-app payments for your Amazon app. When setting things up, please make sure to take your time and follow each step in the below instructions carefully.
If you are planning on using in-app purchases, make sure to let us know so we can enable the proper payment gateway on your account.
Connecting your InPlayer and Amazon accounts
First, log into your InPlayer Dashboard.
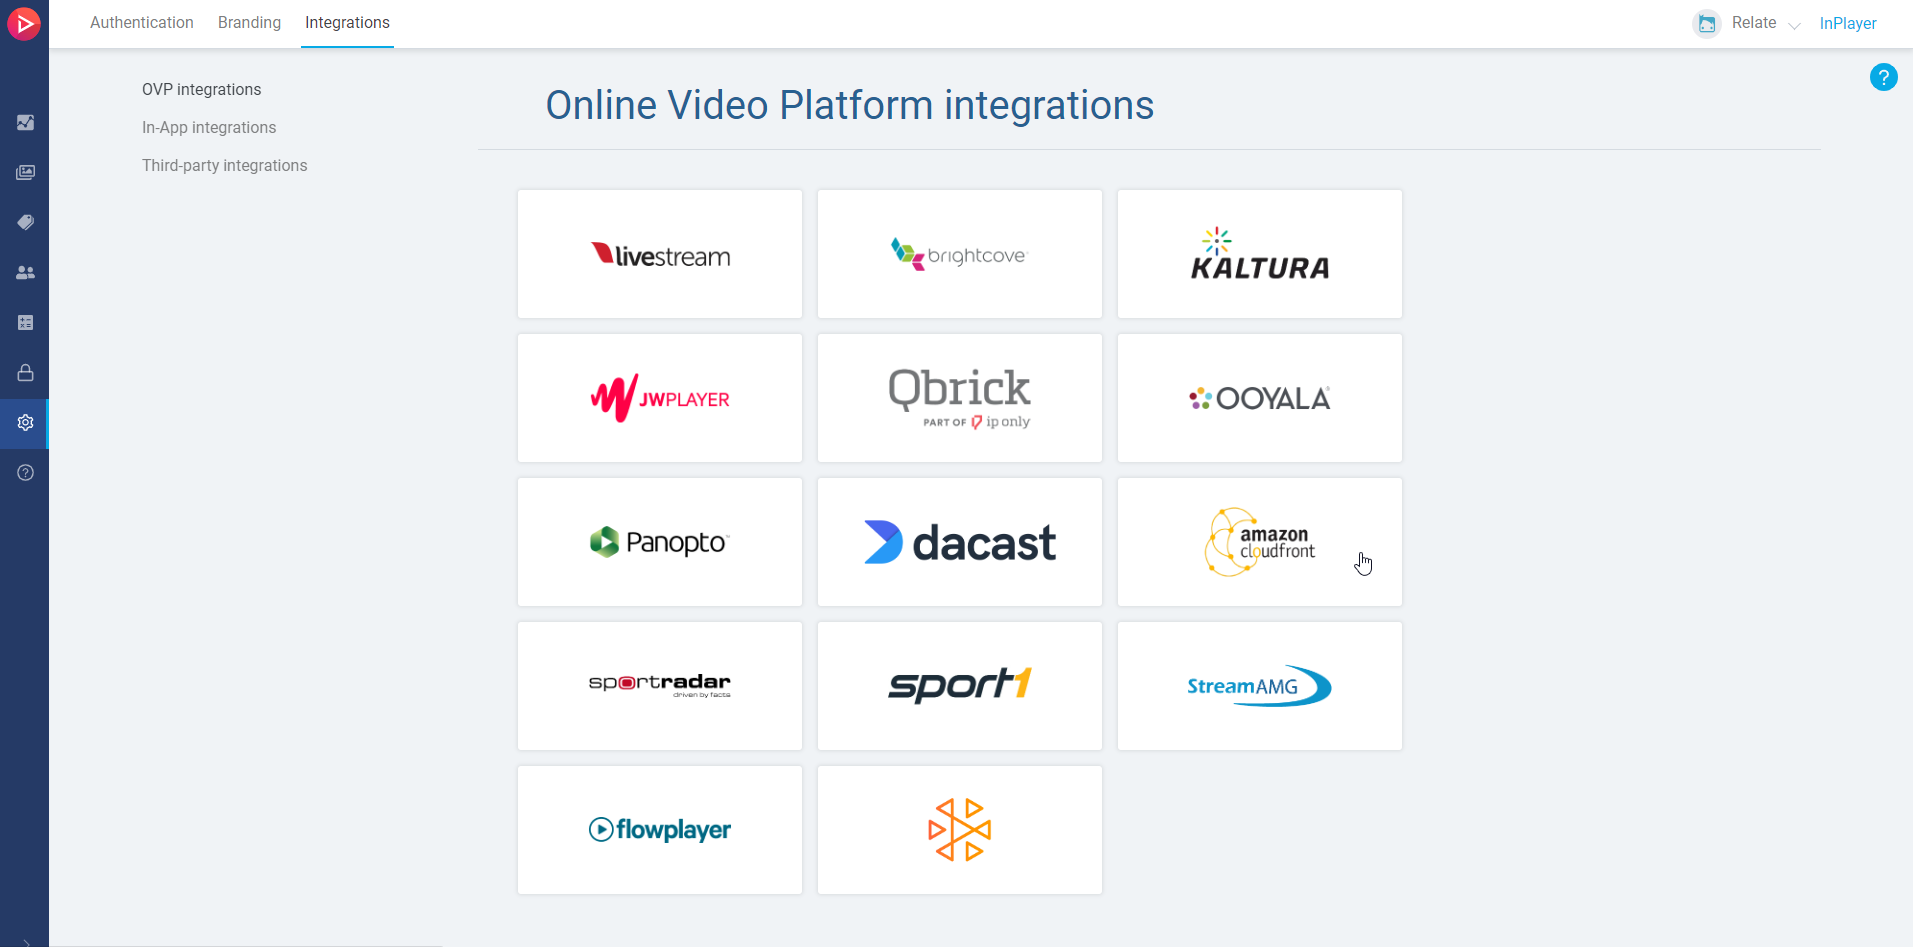
Go to Settings, then Integrations, and finally In-App integrations.
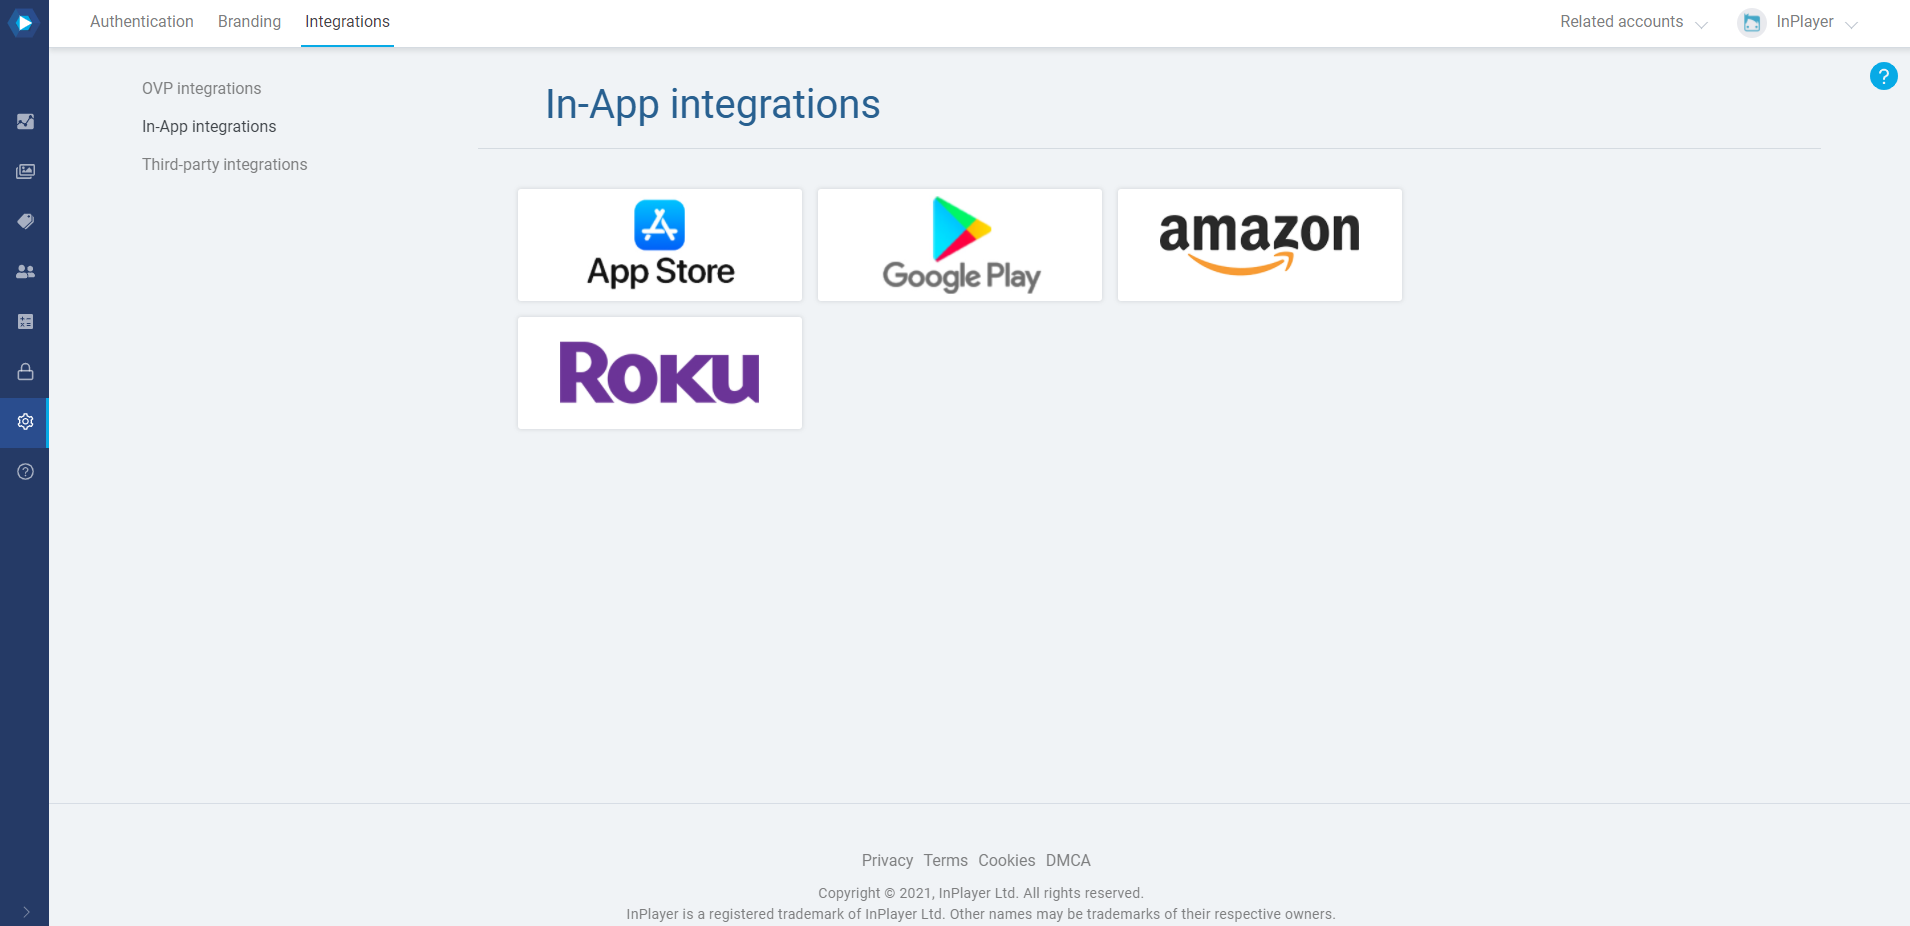
Click on Amazon.
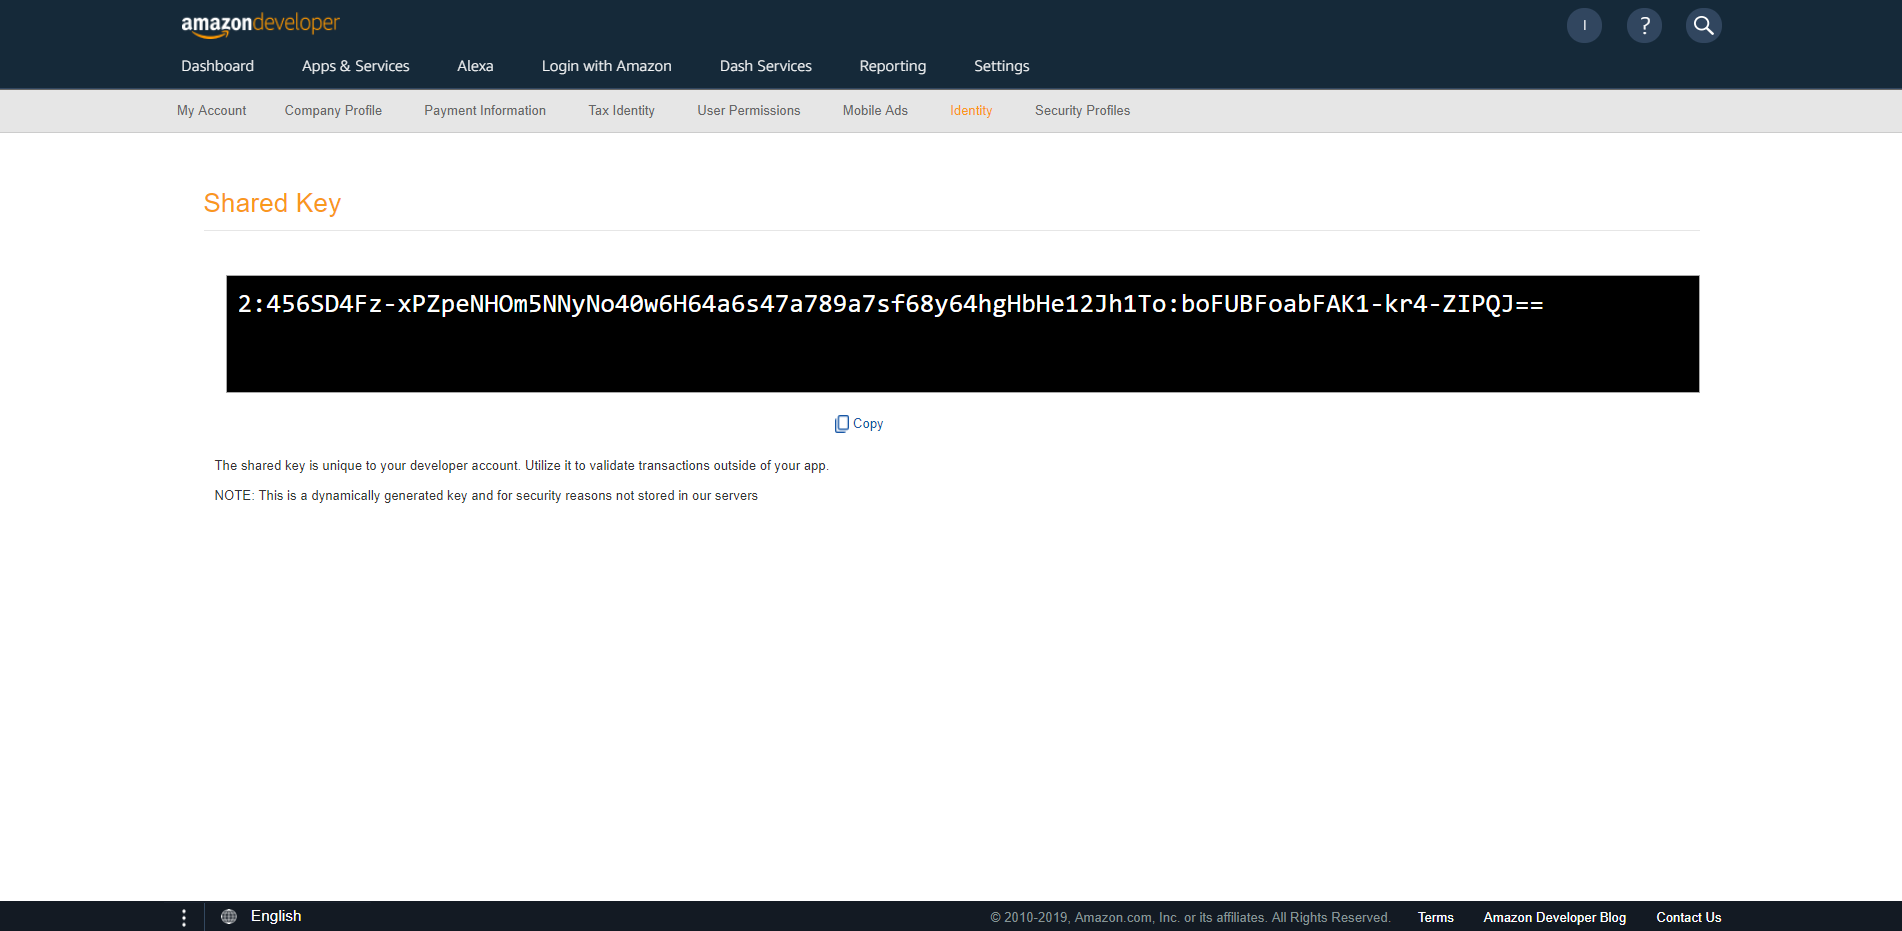
Enter the Shared Key from your Amazon developer account, and click Save.
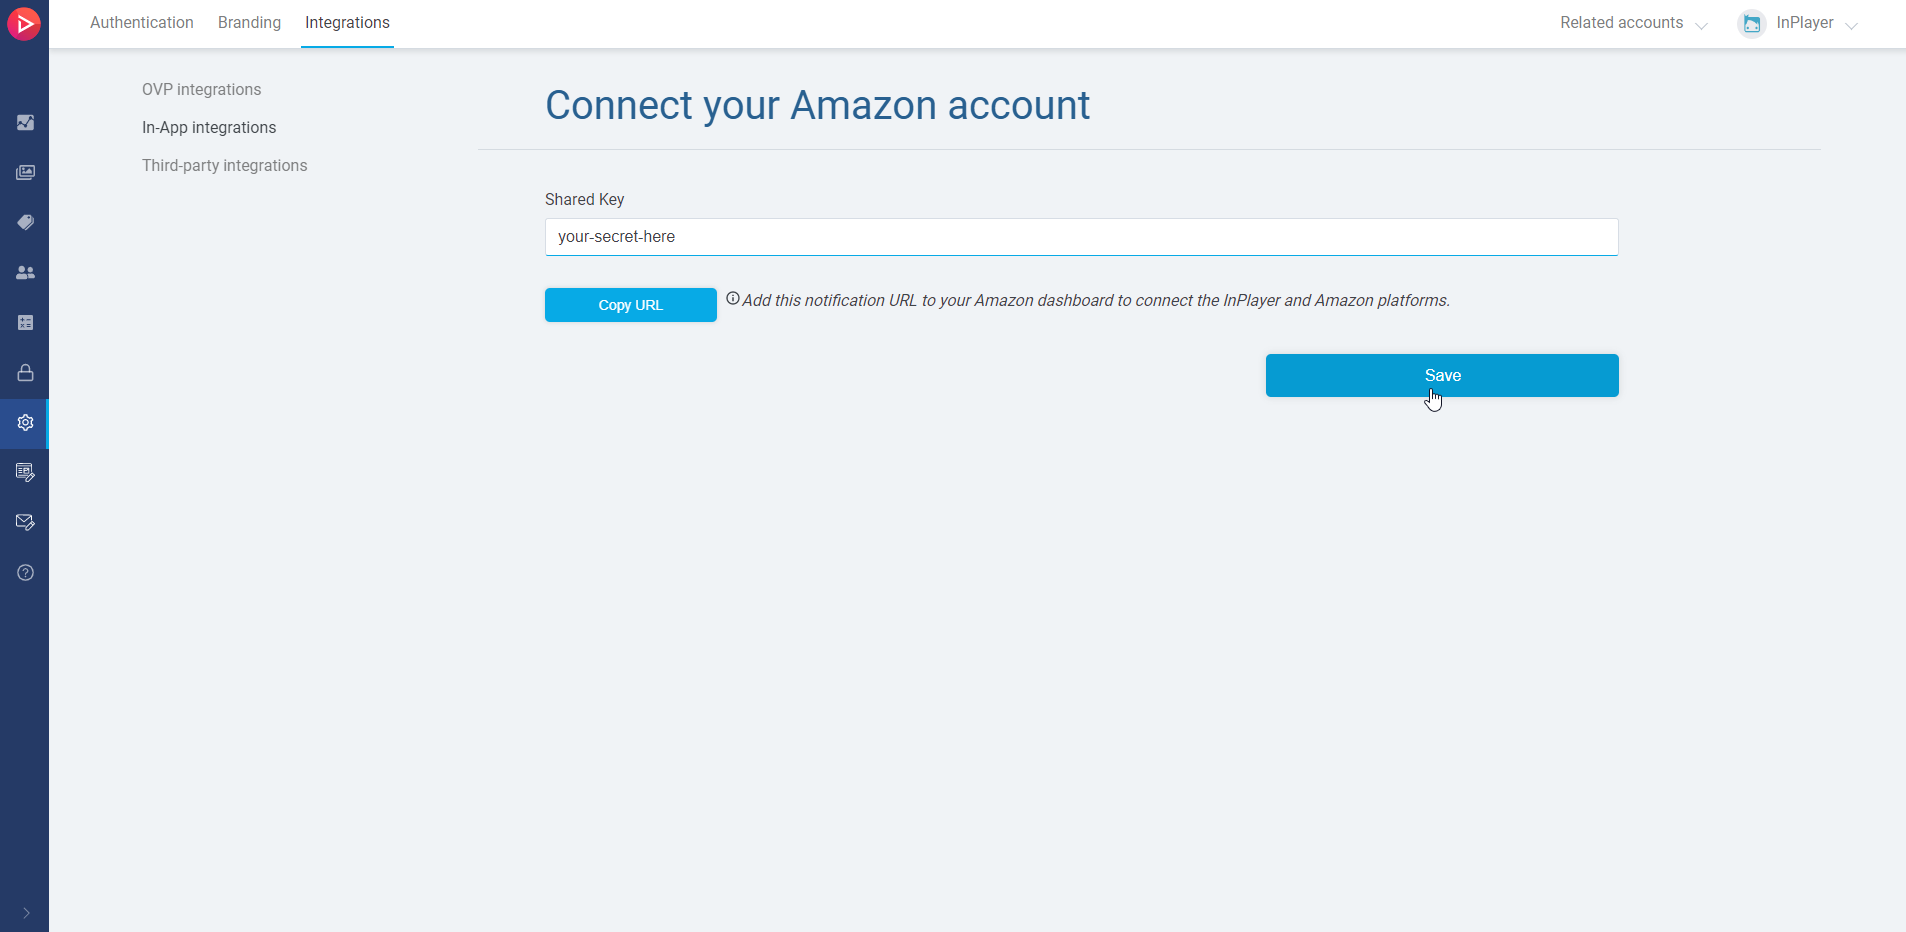
To complete the integration, make sure to follow the Set Up Real-Time Notifications guide here.
To get the HTTP endpoint you need for the URL for Appstore notifications field, do the following:
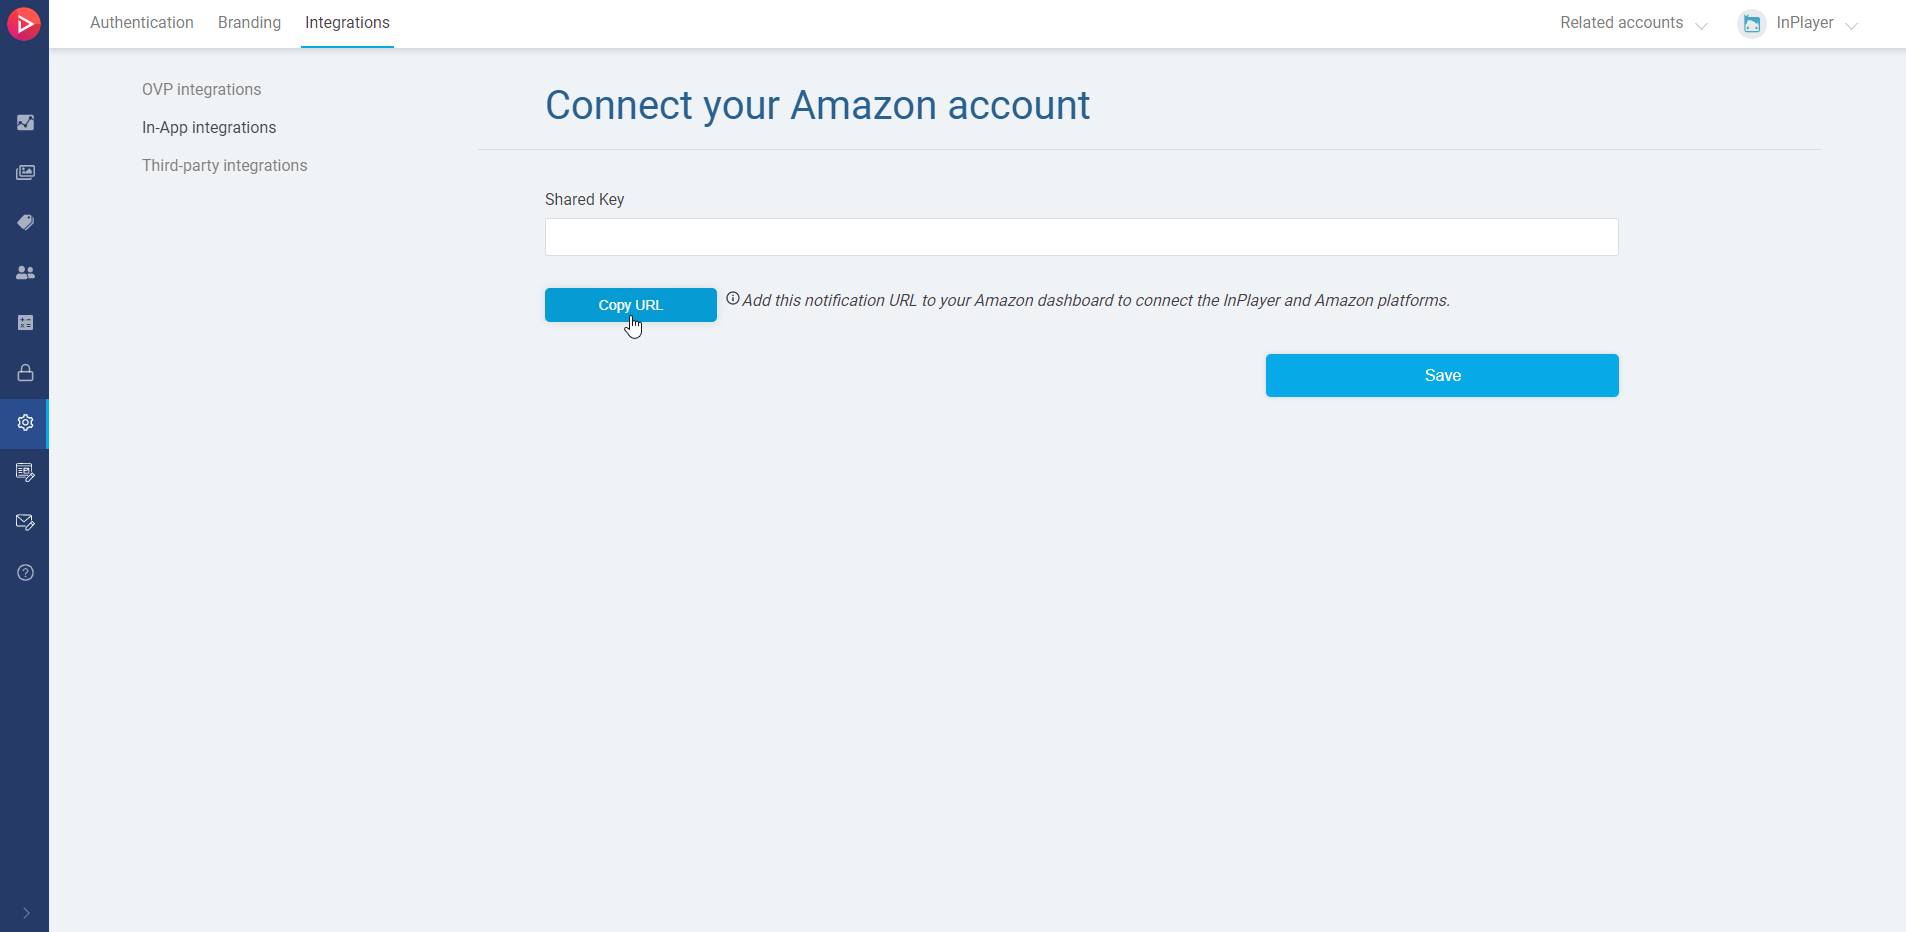
Go back to the Integrations tab of your InPlayer dashboard.
Click Copy URL.
Your InPlayer and Amazon accounts are now integrated.
How to find the Shared Key
Go to the Shared Key page of your Amazon developer account.
Creating your InPlayer asset
The next step is to create your InPlayer asset.
We offer several different types of assets, so make sure to look at this section for instructions on how to create the correct asset type, depending on your content.
After you’ve created your asset, the next step is to create the in-app purchase, i.e. the Amazon item.
Creating the Amazon item
Next, you need to create the in-app purchase. The in-app purchase is going to be the Amazon counterpart to the price option you have previously set up for your InPlayer asset.
When creating Amazon purchases, you can set up either a PPV price, by using the Consumables item, or a Subscription price by using the Subscription item. The Entitlement item is not used.
Setting up a PPV price
Log into your Amazon developer account and go to your app list.
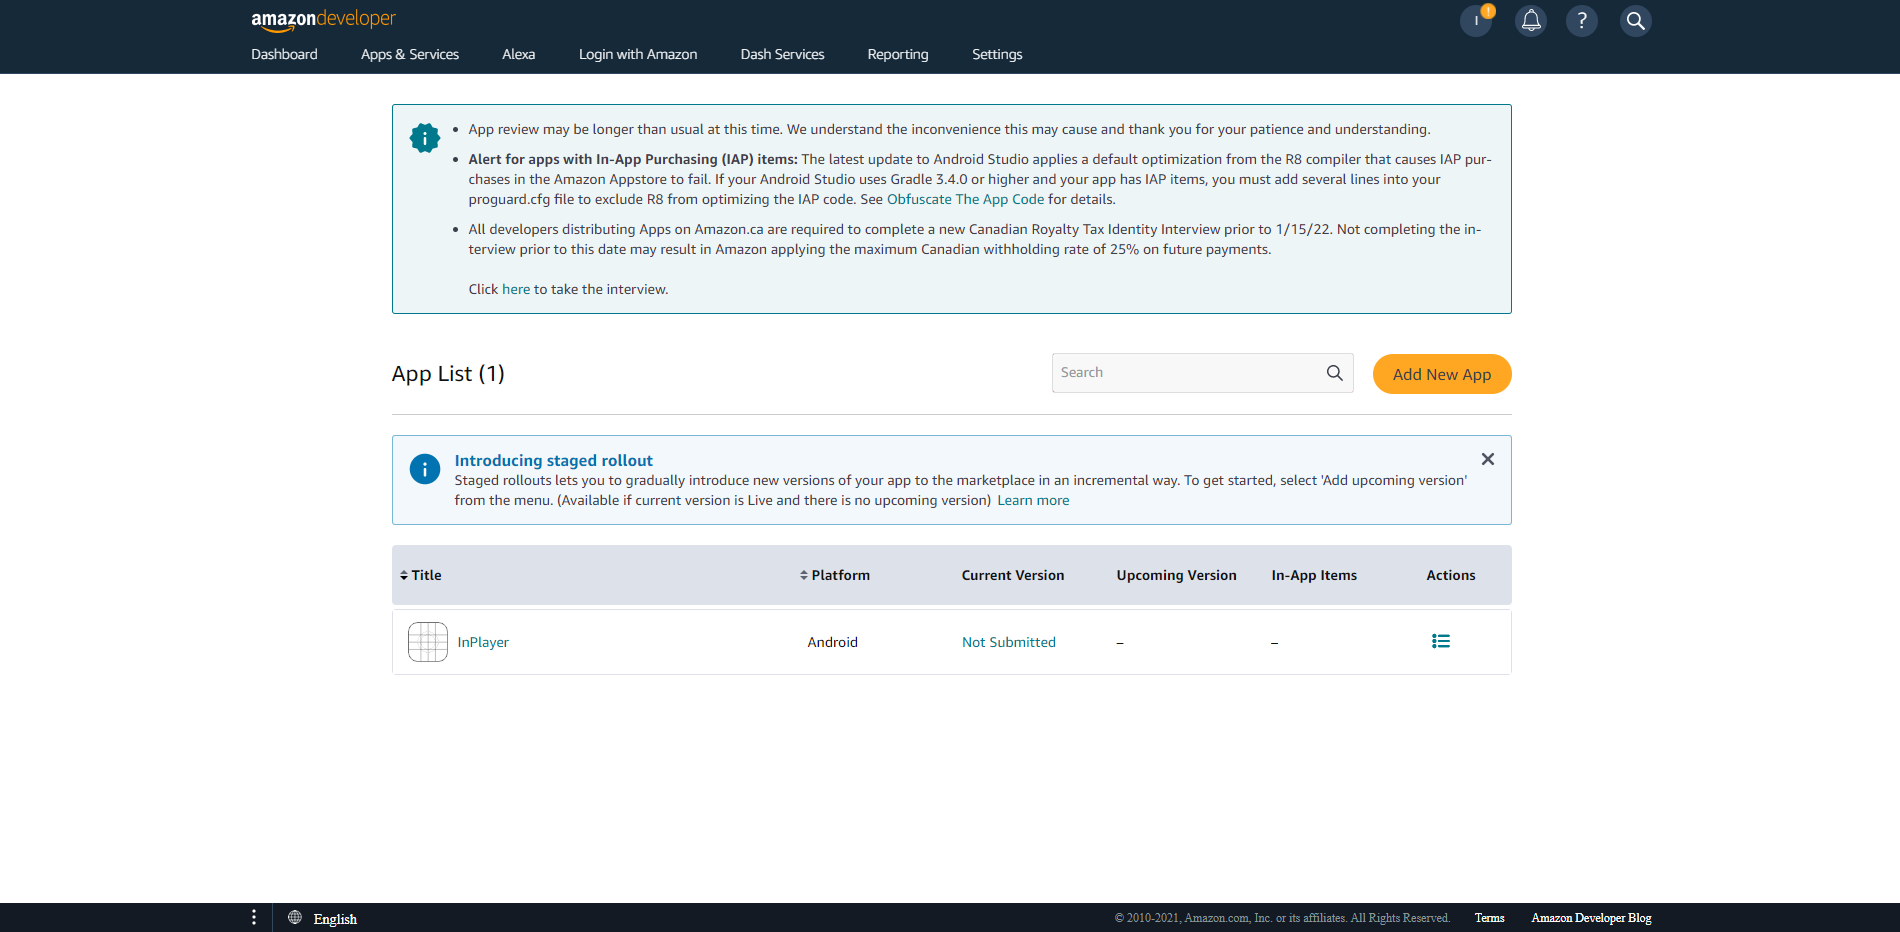
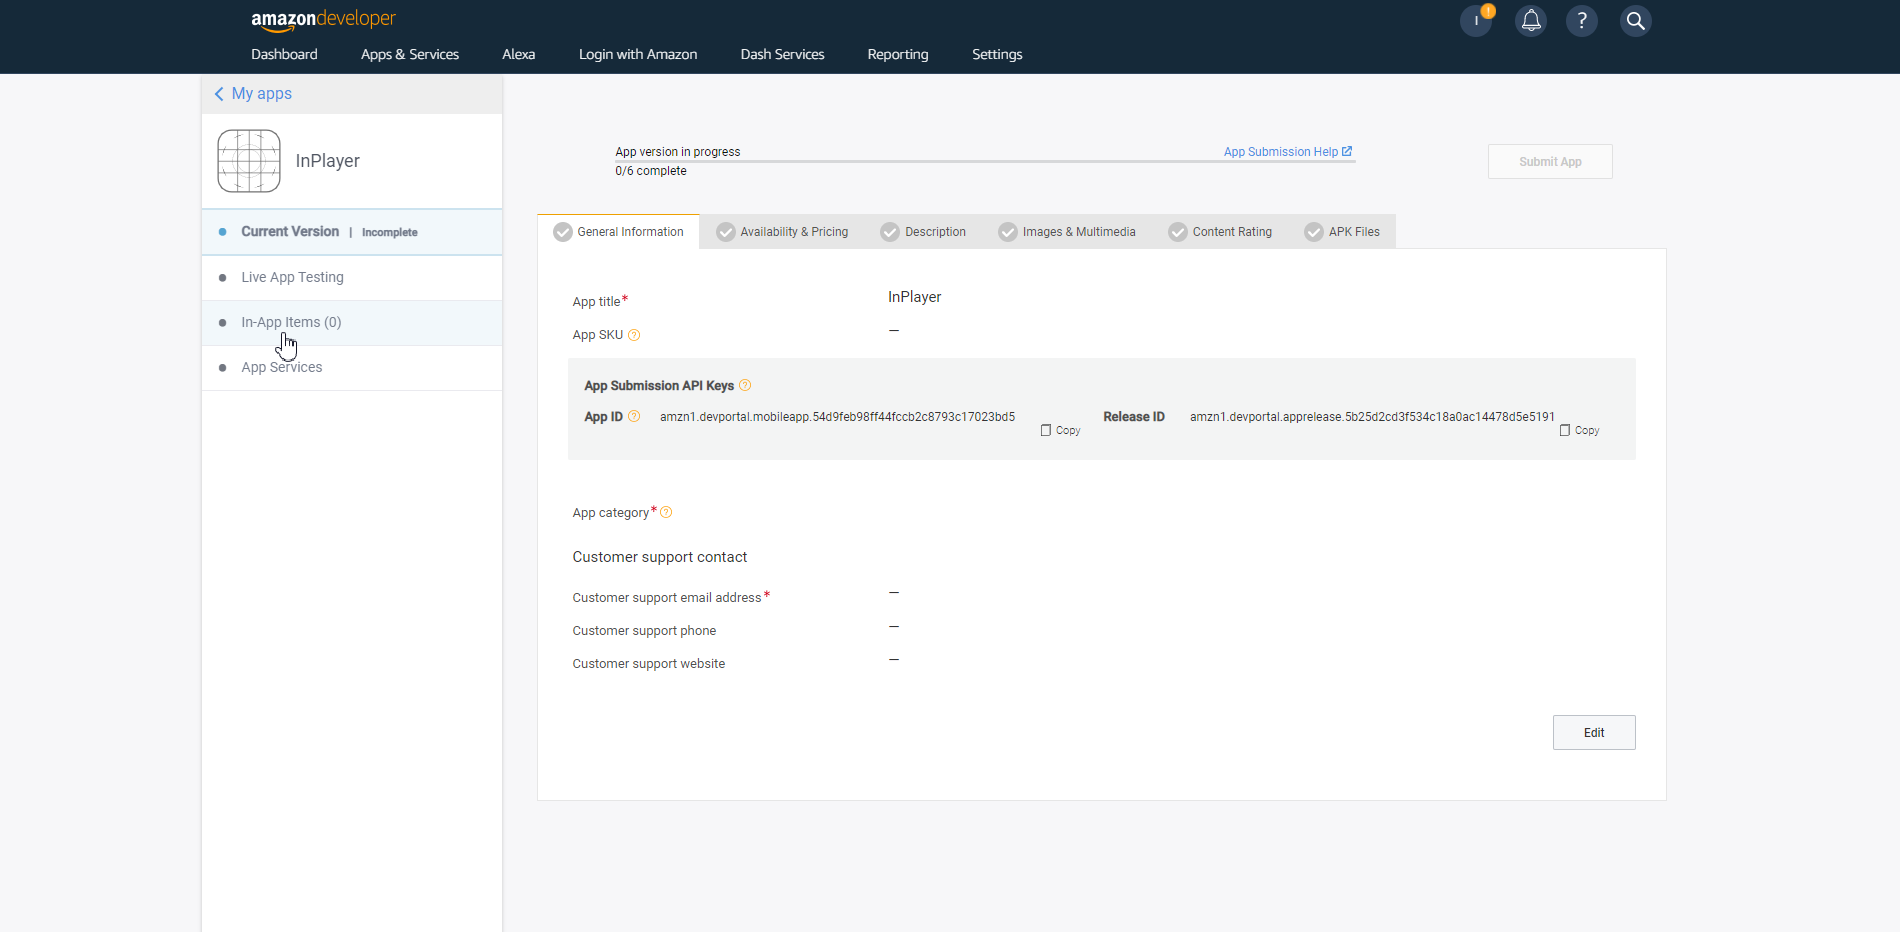
Open the app you use for InPlayer purchases and go to In-App Items.
Click on Add Single IAP and then Add a Consumable.
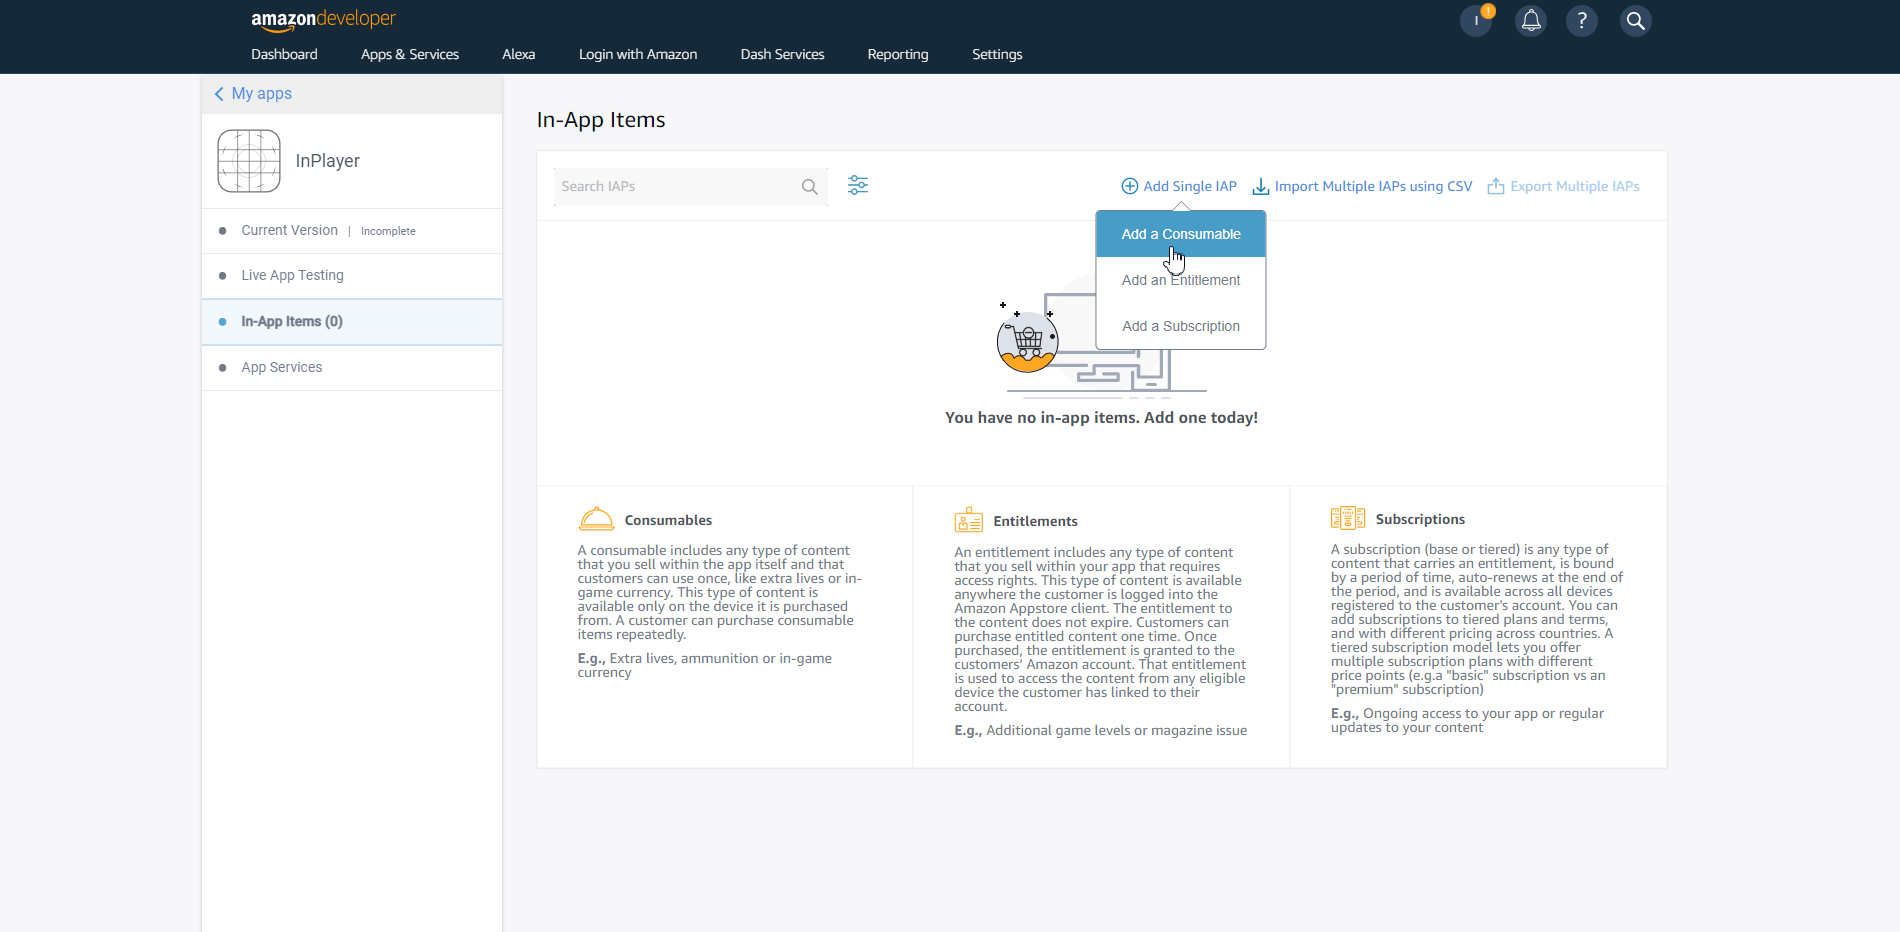
Fill out the consumable details.
In Title, enter the title for the purchase.
In SKU, enter the Product ID of the price option for the InPlayer asset you are monetizing.
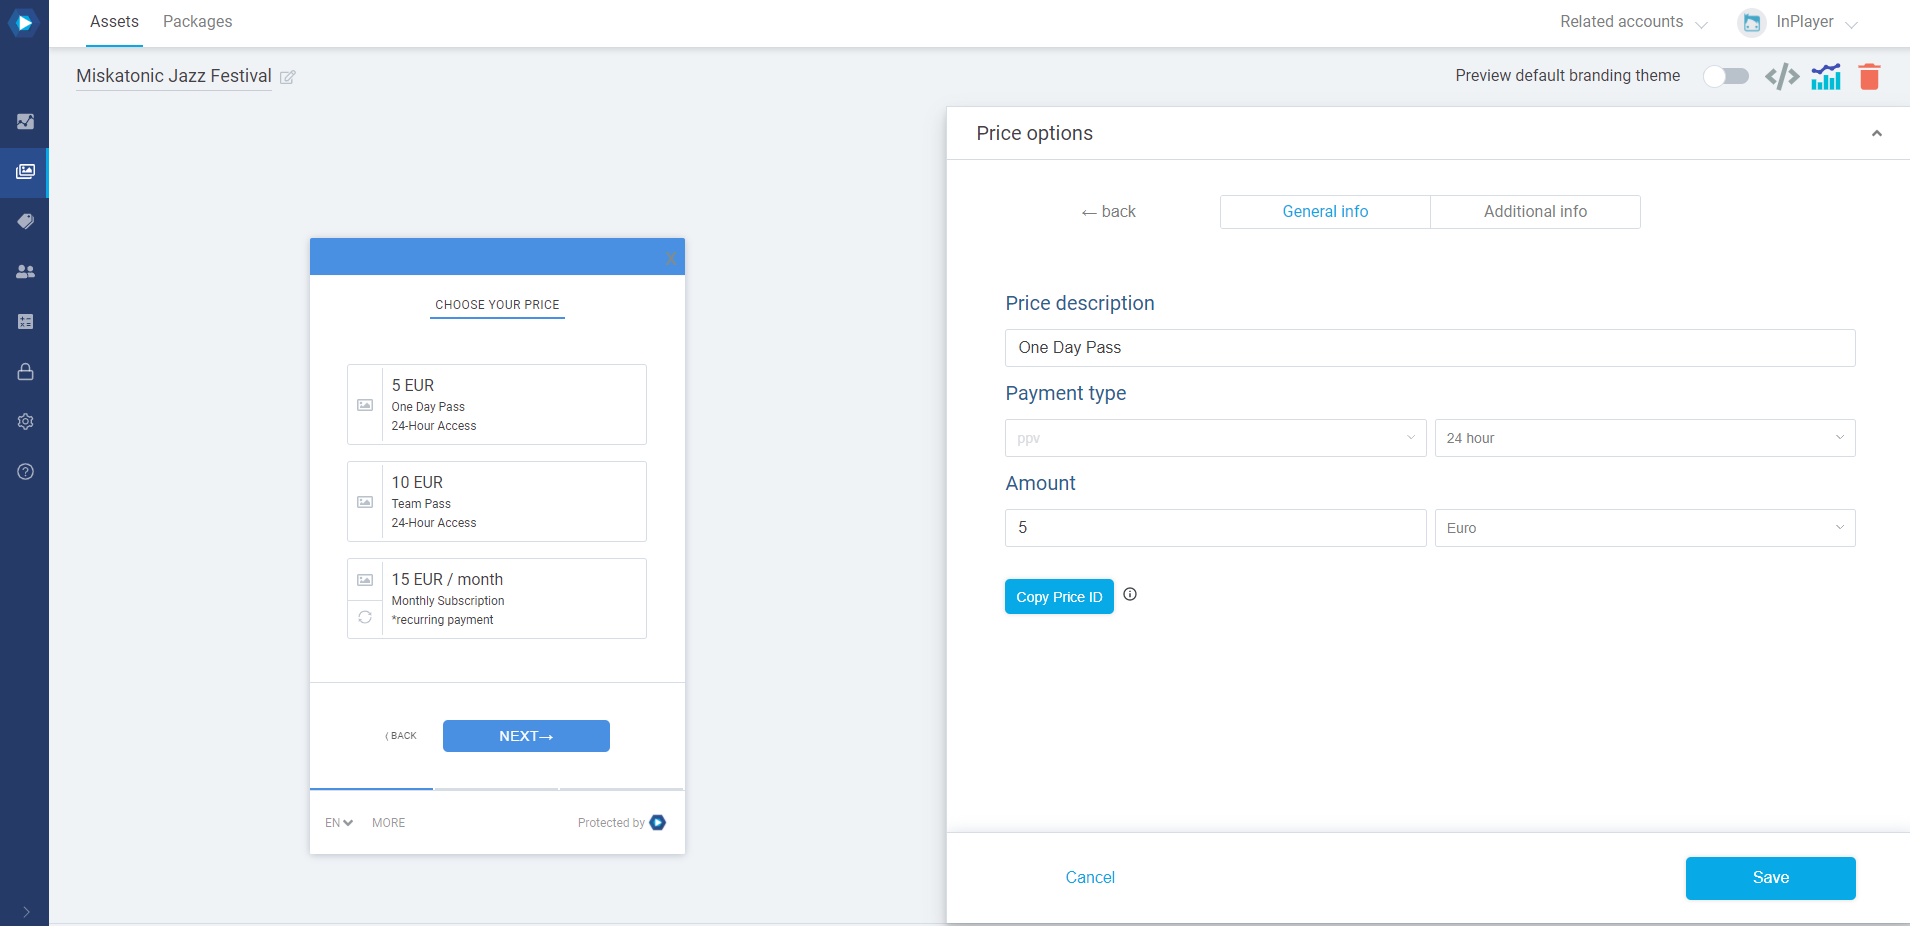
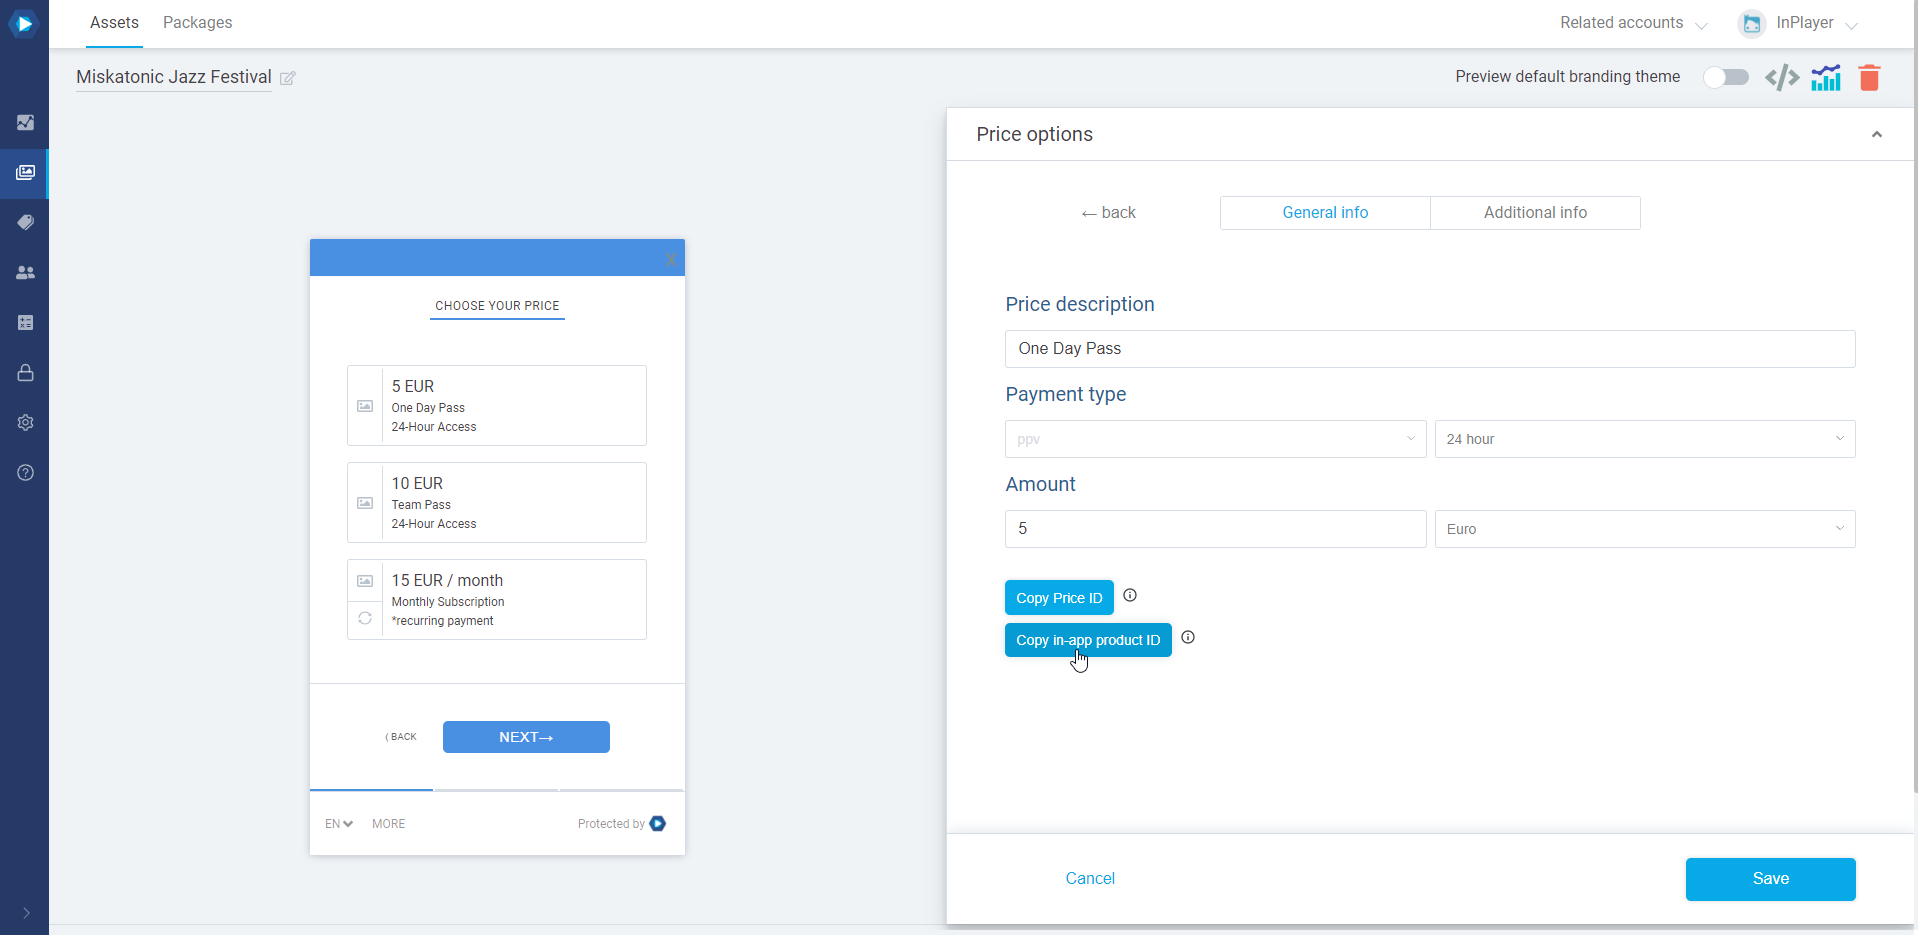
To get the Product ID, go to the Assets tab of your InPlayer dashboard and open the asset you wish to use.
Go to Price Options, open the price option for which you are creating the in-app purchase, and click the Copy in-app product ID button.
Paste the Product ID into the SKU field in the Amazon consumable form.
Click Add consumable.
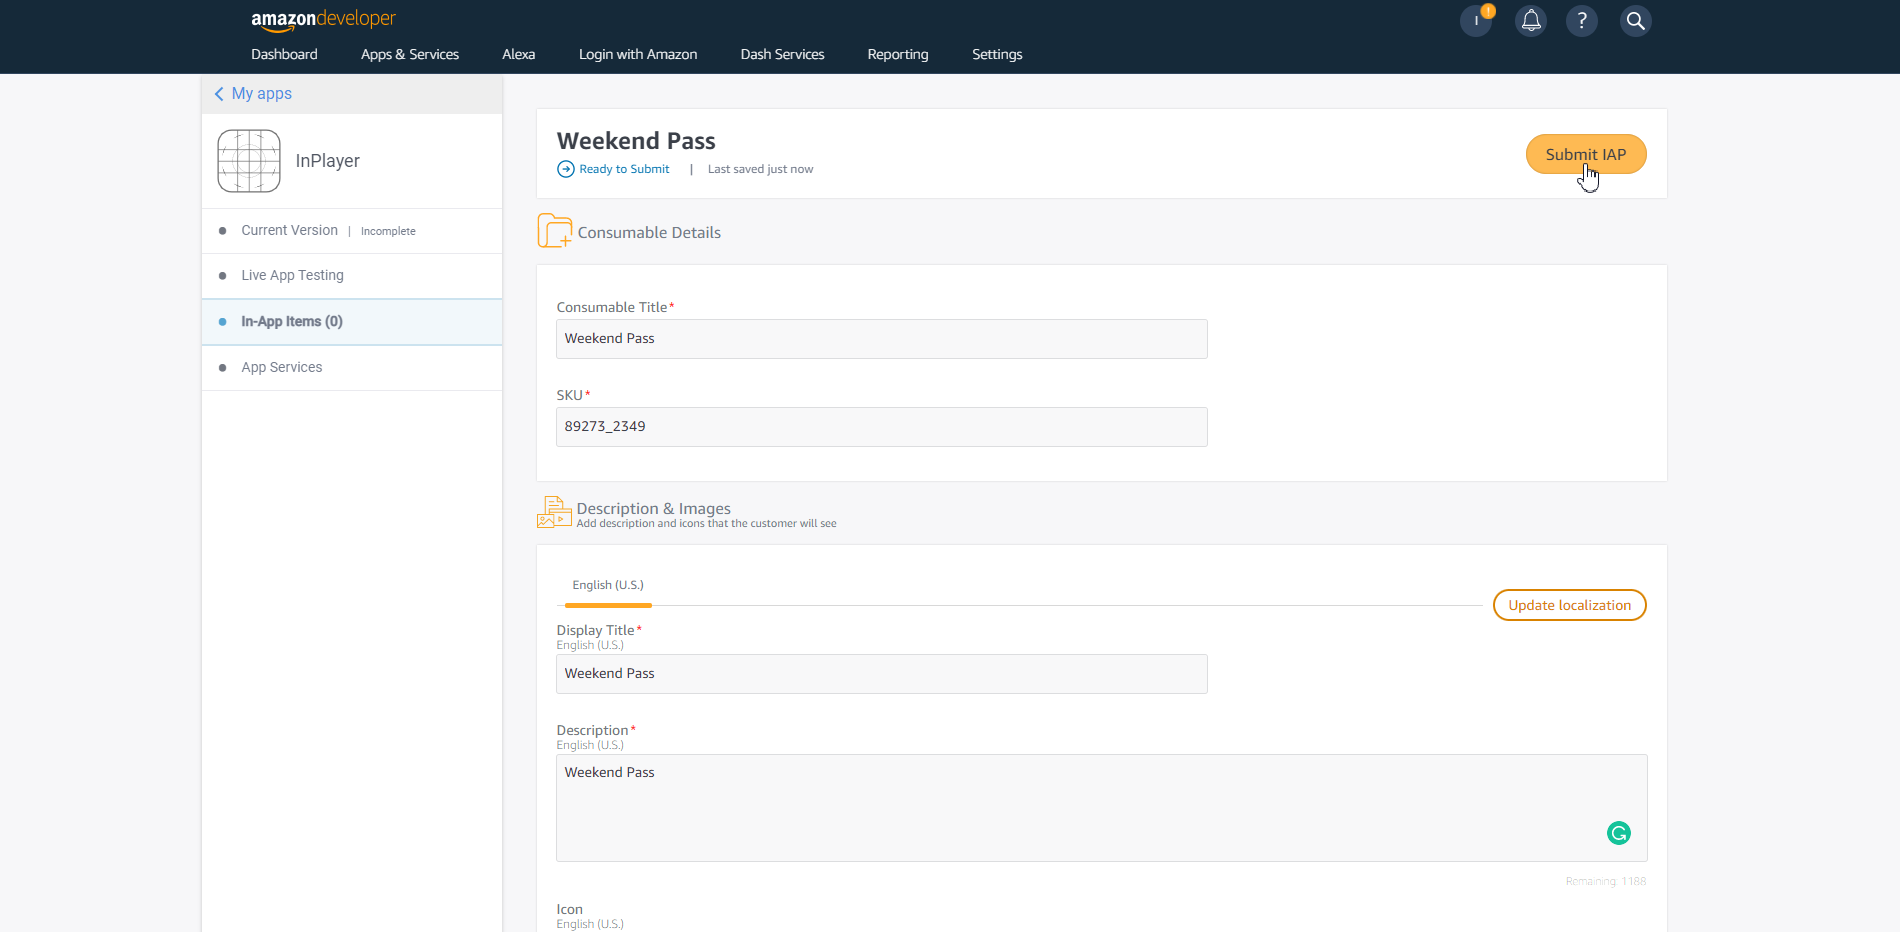
Complete the setup by filling out the rest of the consumable details.

Under Display Title and Description, enter a title and description for the purchase.
Under Pricing, choose Yes for Are you charging for this consumable?.
Click Set price.
In My base price enter a price. Make sure it is the same price and currency as in the InPlayer dashboard. Also, make sure not to modify the automatically generated prices for the other currencies.
Click Save.
Finally, click SUBMIT IAP at the top right.
And with that, you are done.
Setting up a Subscription
Log into your Amazon developer account and go to your app list.
Open the app you use for InPlayer purchases and go to In-App items.
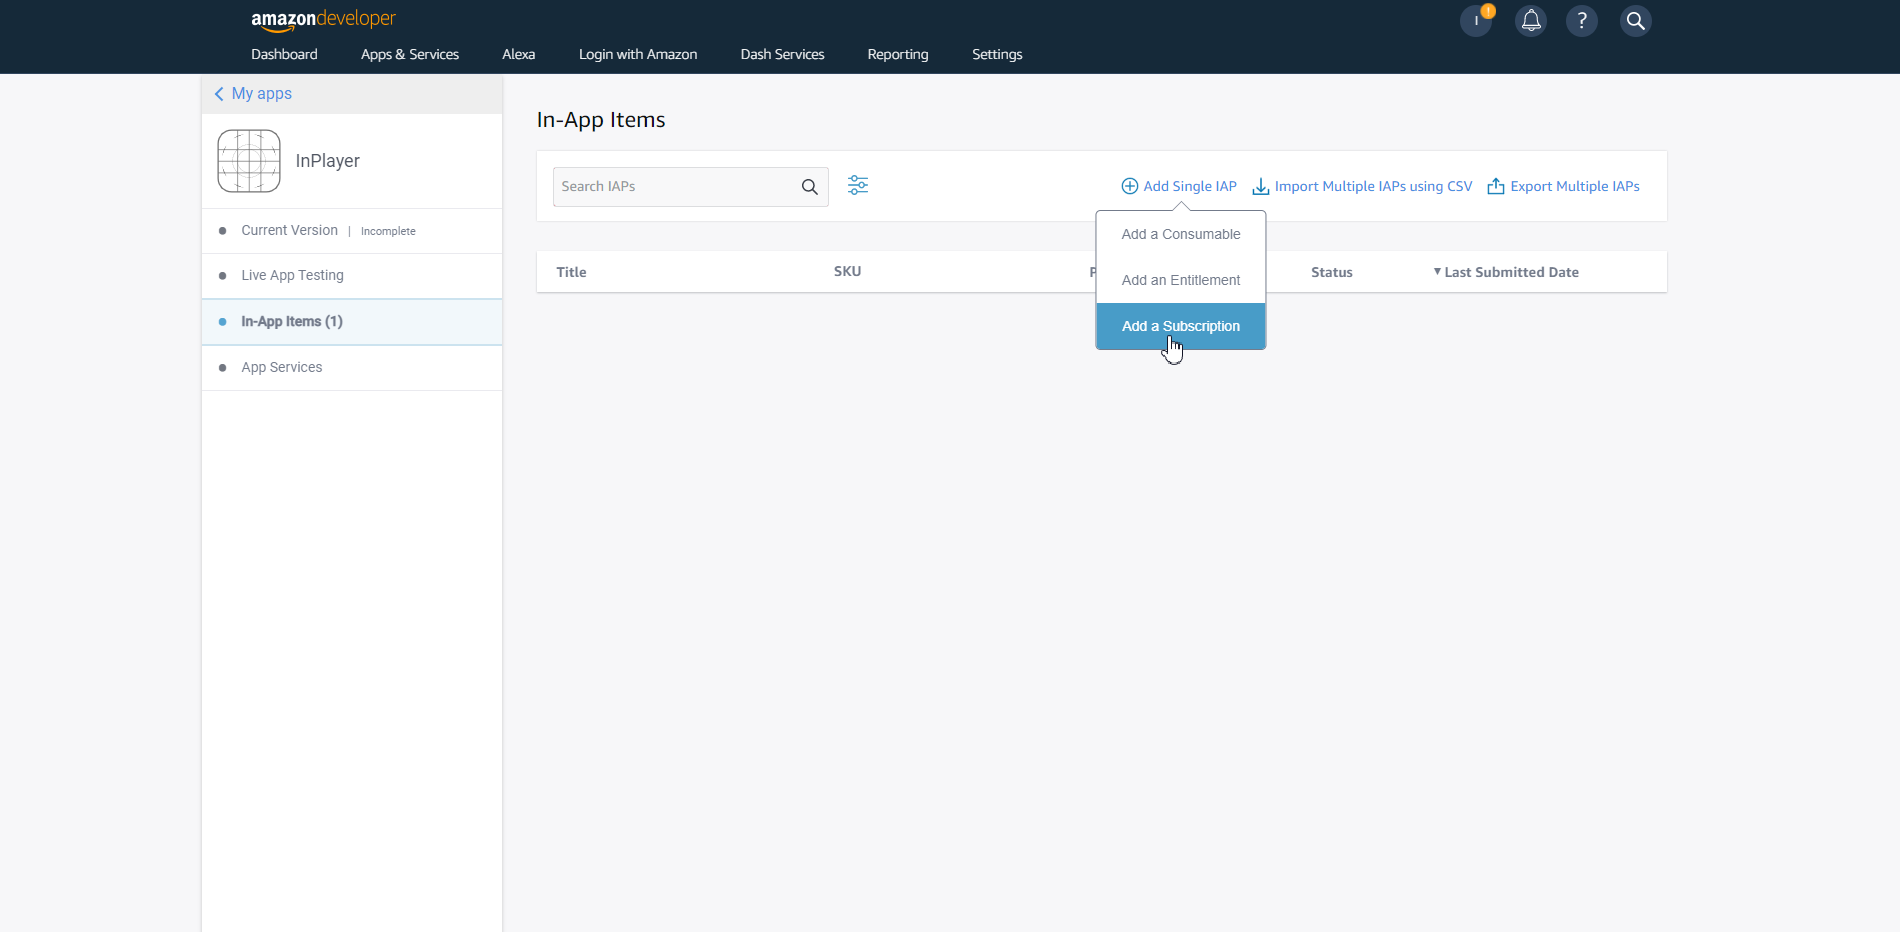
Click on Add Single IAP and then on Add a Subscription.
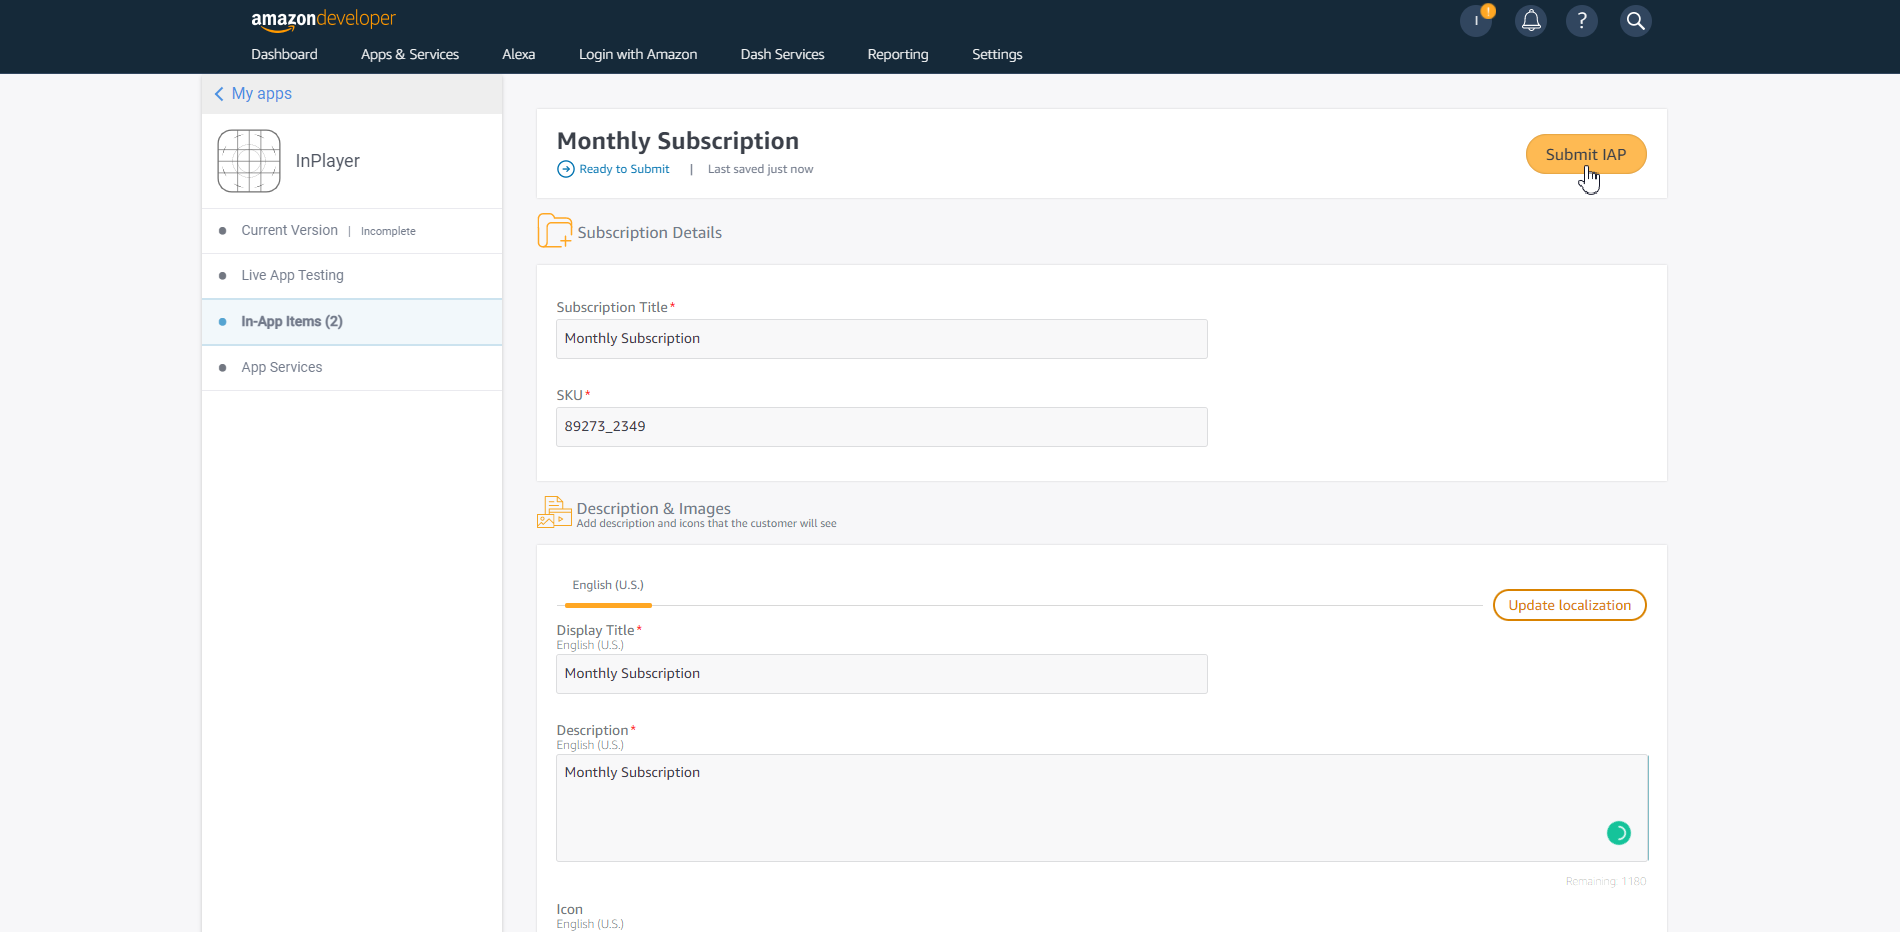
Fill out the details.
In Subscription Title, enter the title for the purchase.
In Subscription SKU, enter the Product ID of the price option for the InPlayer asset you are monetizing.
To get the Product ID, go to the Assets tab of your InPlayer dashboard and open the asset you wish to use.
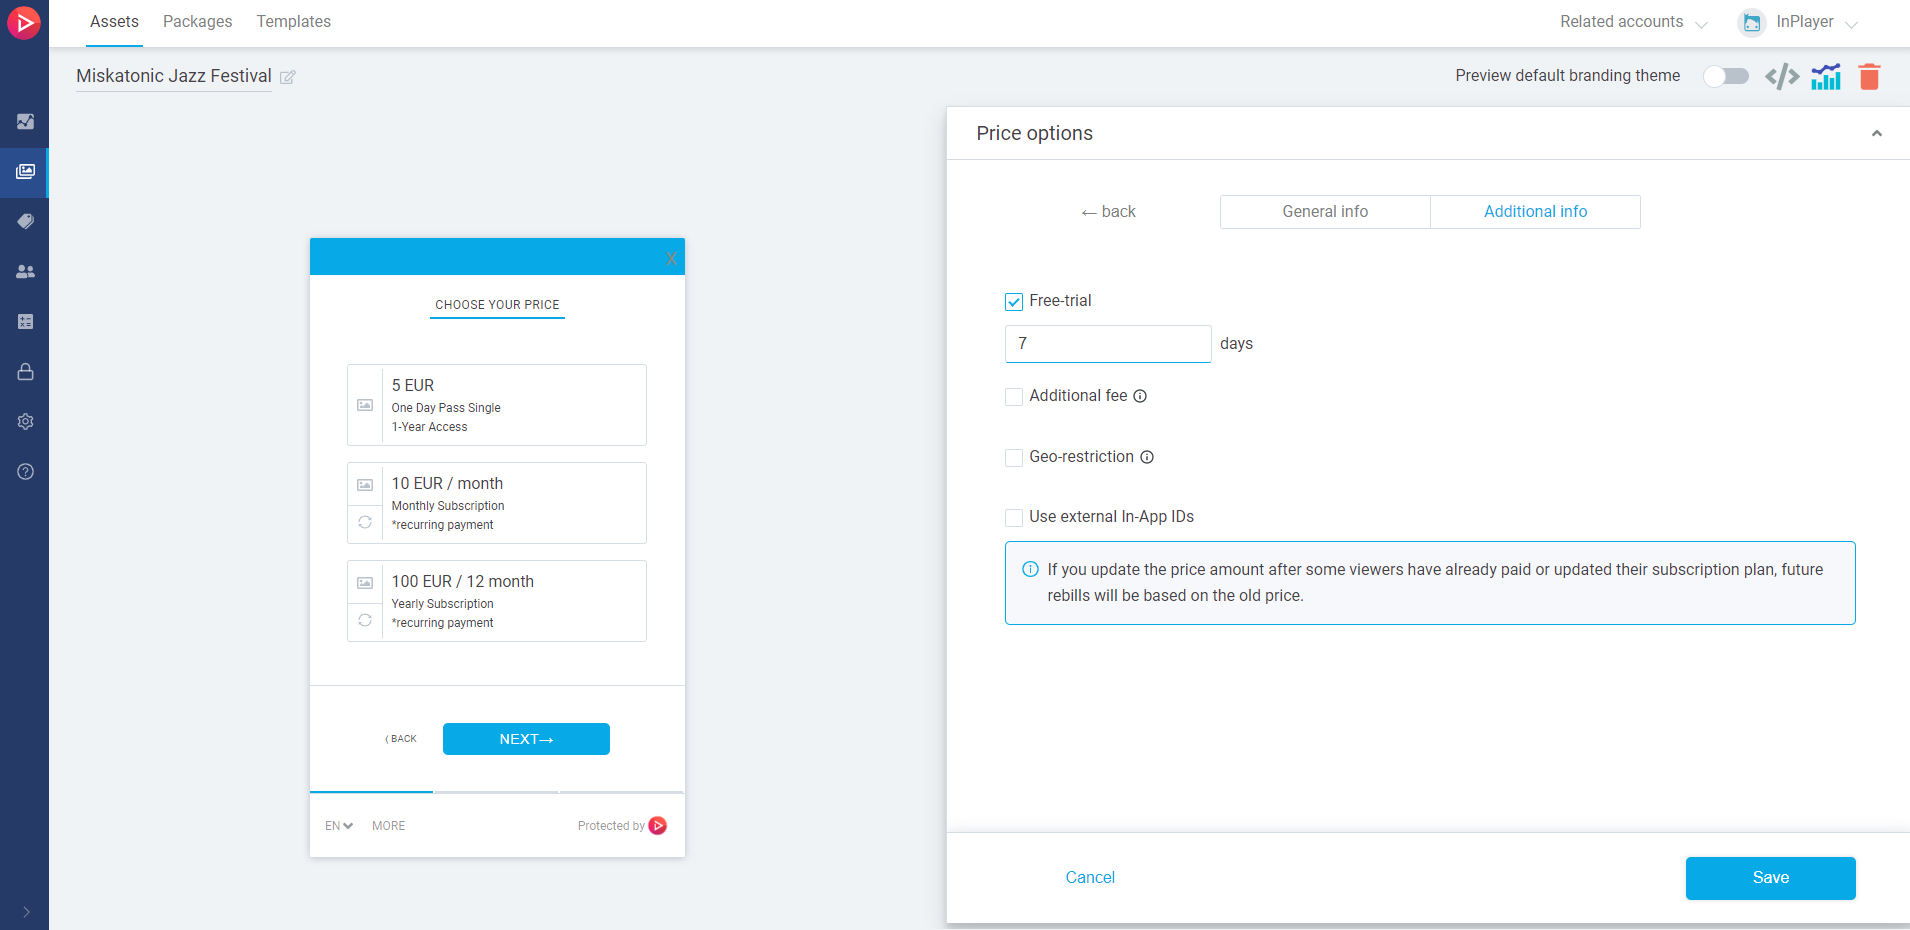
Go to Price Options, open the price option for which you are creating the in-app purchase, and click the Copy in-app product ID button.
Alternatively, if you are creating a price option for a subscription that already exists on your Amazon Dashboard, instead of changing it’s Subscription SKU value to the InPlayer Product ID, you can do the following:
1. Copy the existing Subscription SKU from your Amazon Dashboard.
2. Go to the price option in the InPlayer Dashboard.
3. Go to Additional info.
4. Check Use external In-App IDs.
5. In the Amazon field, input the Subscription SKU.
6. Save the price option.
Click Add Subscription.
Complete the setup by filling out the rest of the subscription details.

Fill out the Subscription period tab.
Under Display Title and Description, enter a title and description for the purchase.
Under Subscription terms click Add New Term.
In Term Period, select the same period as in the InPlayer dashboard.
In Term SKU, enter the Product ID of the price option for the InPlayer asset you are monetizing, plus an extra bit of text, like_parent or _abc. For example, if the Product ID is 47986_6248, here you would enter 47986_6248_parent or 47986_6248_abc.
The reason for these extra characters is that the real Product ID needs to be entered in the subscription SKU field and you cannot have the same value both there and here. Note also that it doesn’t really matter what you put in this field, but it is still a good idea to have the Product ID stated in it.
Click Create Term.
Choose Yes for Is this a paid subscription?.
For Do you offer a free trial for this subscription?, select Yes or No, depending on your wishes. Note that if you enable a free trial here, you also need to do that in the Additional info tab of the price option settings in the InPlayer Dashboard, making sure the length of the trial matches in both dashboards.
Click Set price.
In My base price enter a price. Make sure it is the same price and currency as in the InPlayer dashboard. Also, make sure not to modify the automatically generated prices for the other currencies.
Click Save.
Note that you can only have one subscription term per subscription (in-App item-subscription). If you wish to have more than one subscription option for your product (ex. monthly and yearly), you need to create two separate subscriptions, each with a single subscription term.
Finally, click SUBMIT IAP at the top right.
And with that, you are done.
To learn more about Amazon in-app purchases, you can check out the official Amazon guide.
If you have any questions in regards to any of this, don’t hesitate to contact us at clients@inplayer.com.