Builder Tools
Create and publish an awesome Landing page using our page builder.
Landing page builder
Using the InPlayer Landing page builder, you can quickly and easily create beautiful landing pages for your content.
The landing pages can then either be published directly on InPlayer’s own AWS-powered domain, complete with a custom URL, or exported and hosted on your own domain.
Activating the Landing page builder
To activate this feature, contact your account manager or send us an email at clients@inplayer.com.
Once you get a confirmation that the feature has been activated, you can start setting things up.
Creating a landing page
Before creating your landing page, make sure you have already created the assets and packages you will put on the page. Full guides on creating these can be found here.
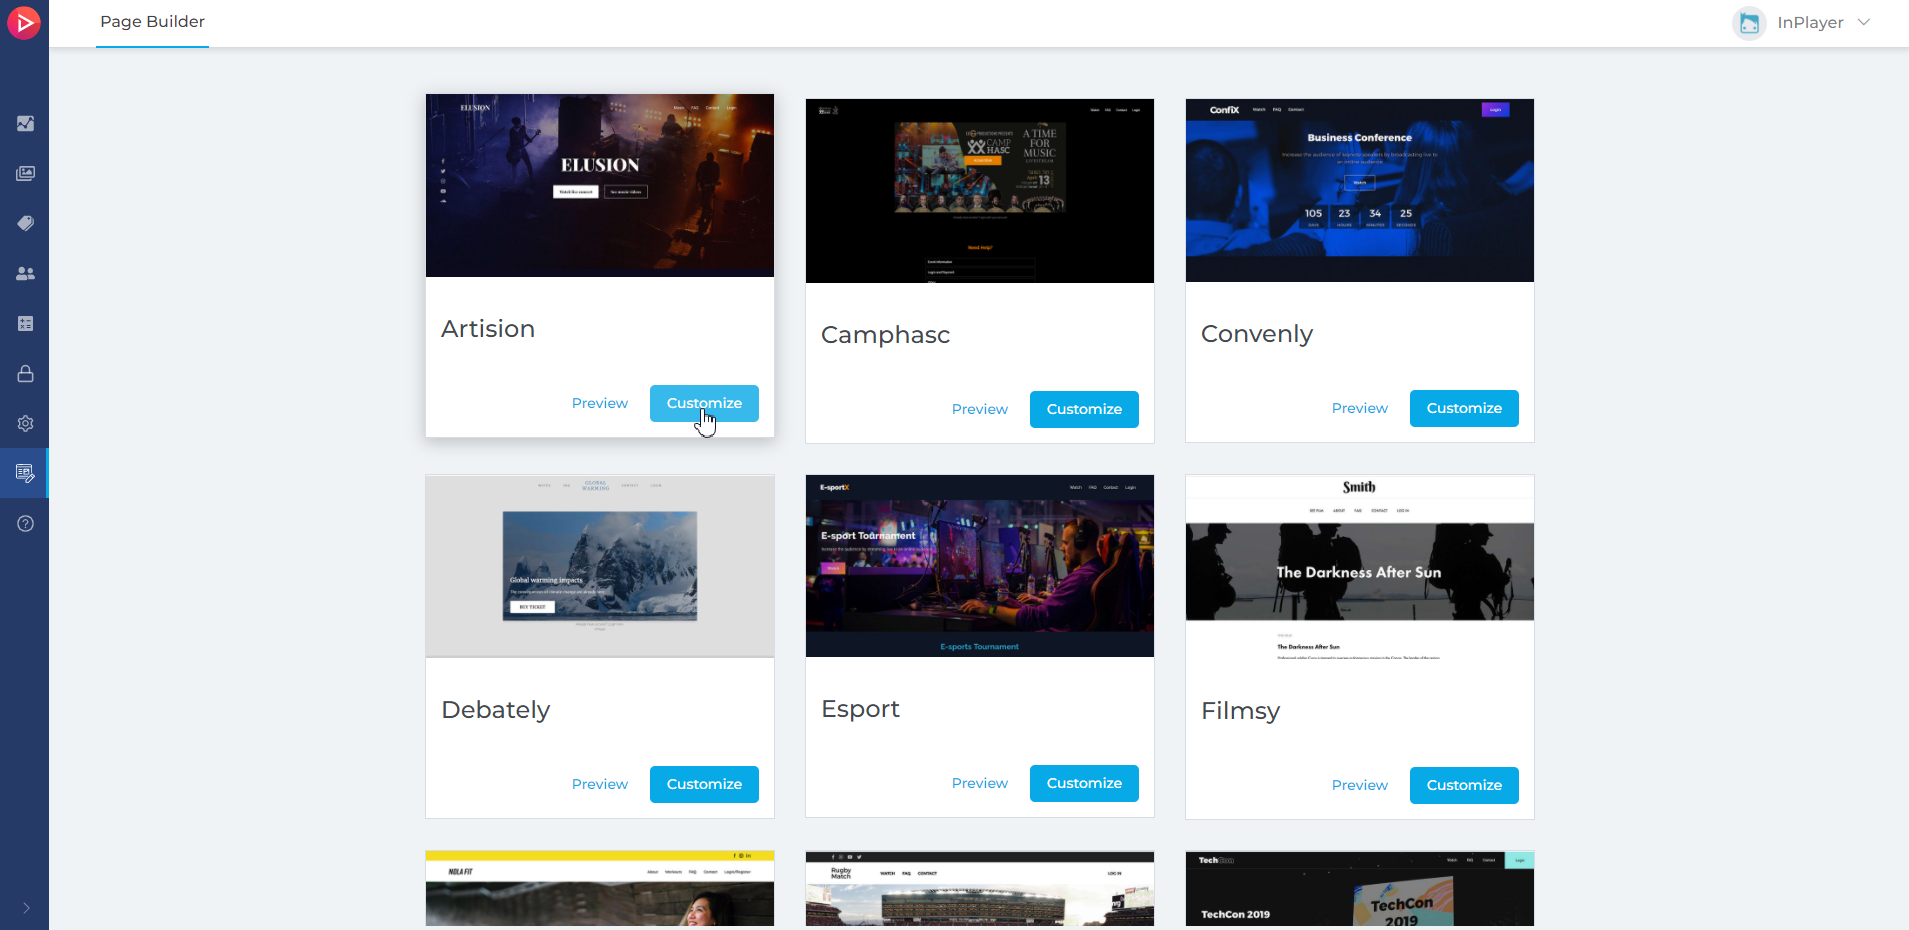
Log into your InPlayer Dashboard, and from the left navigation menu, click on the Page Builder icon.
If you are prompted to log in, use the same credentials as for the InPlayer Dashboard.
Choose the template you wish to use for your page, and click Customize.
Under Domain name, enter the URL you wish to use for the page.
This will only be used in case you wish to publish the page on InPlayer’s domain.
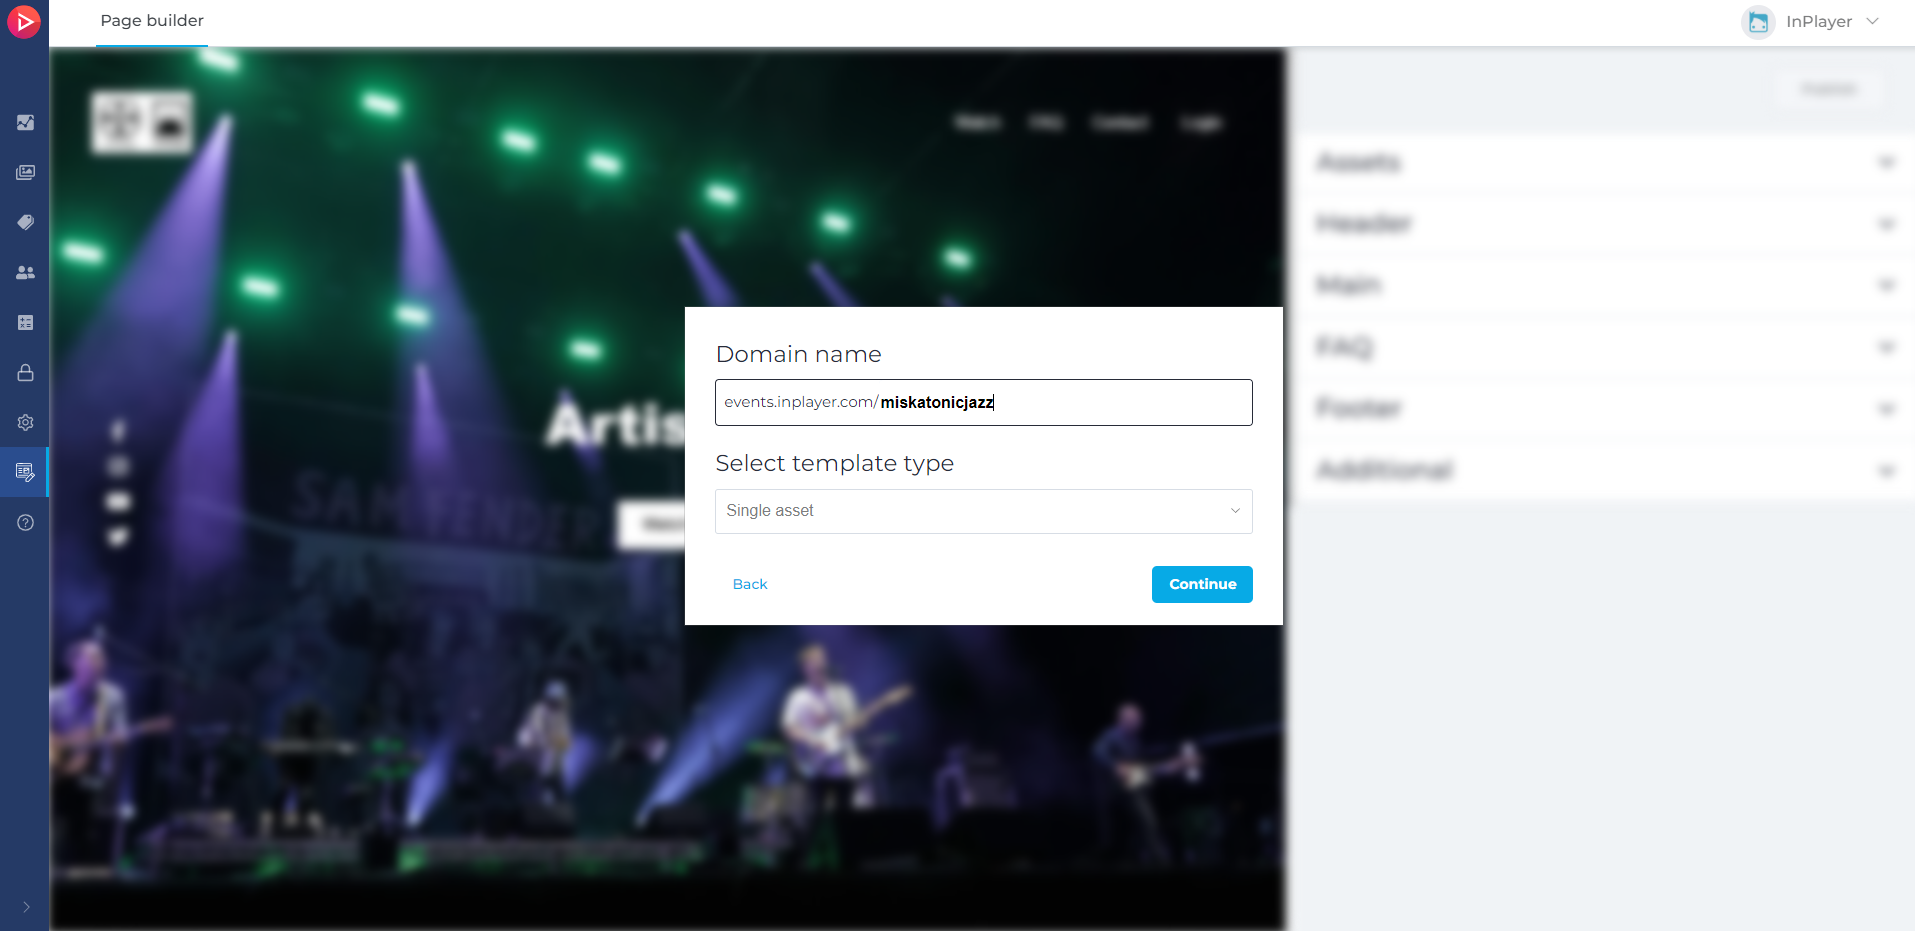
Under Select template type, select the page type based on how many assets you will have on the page.
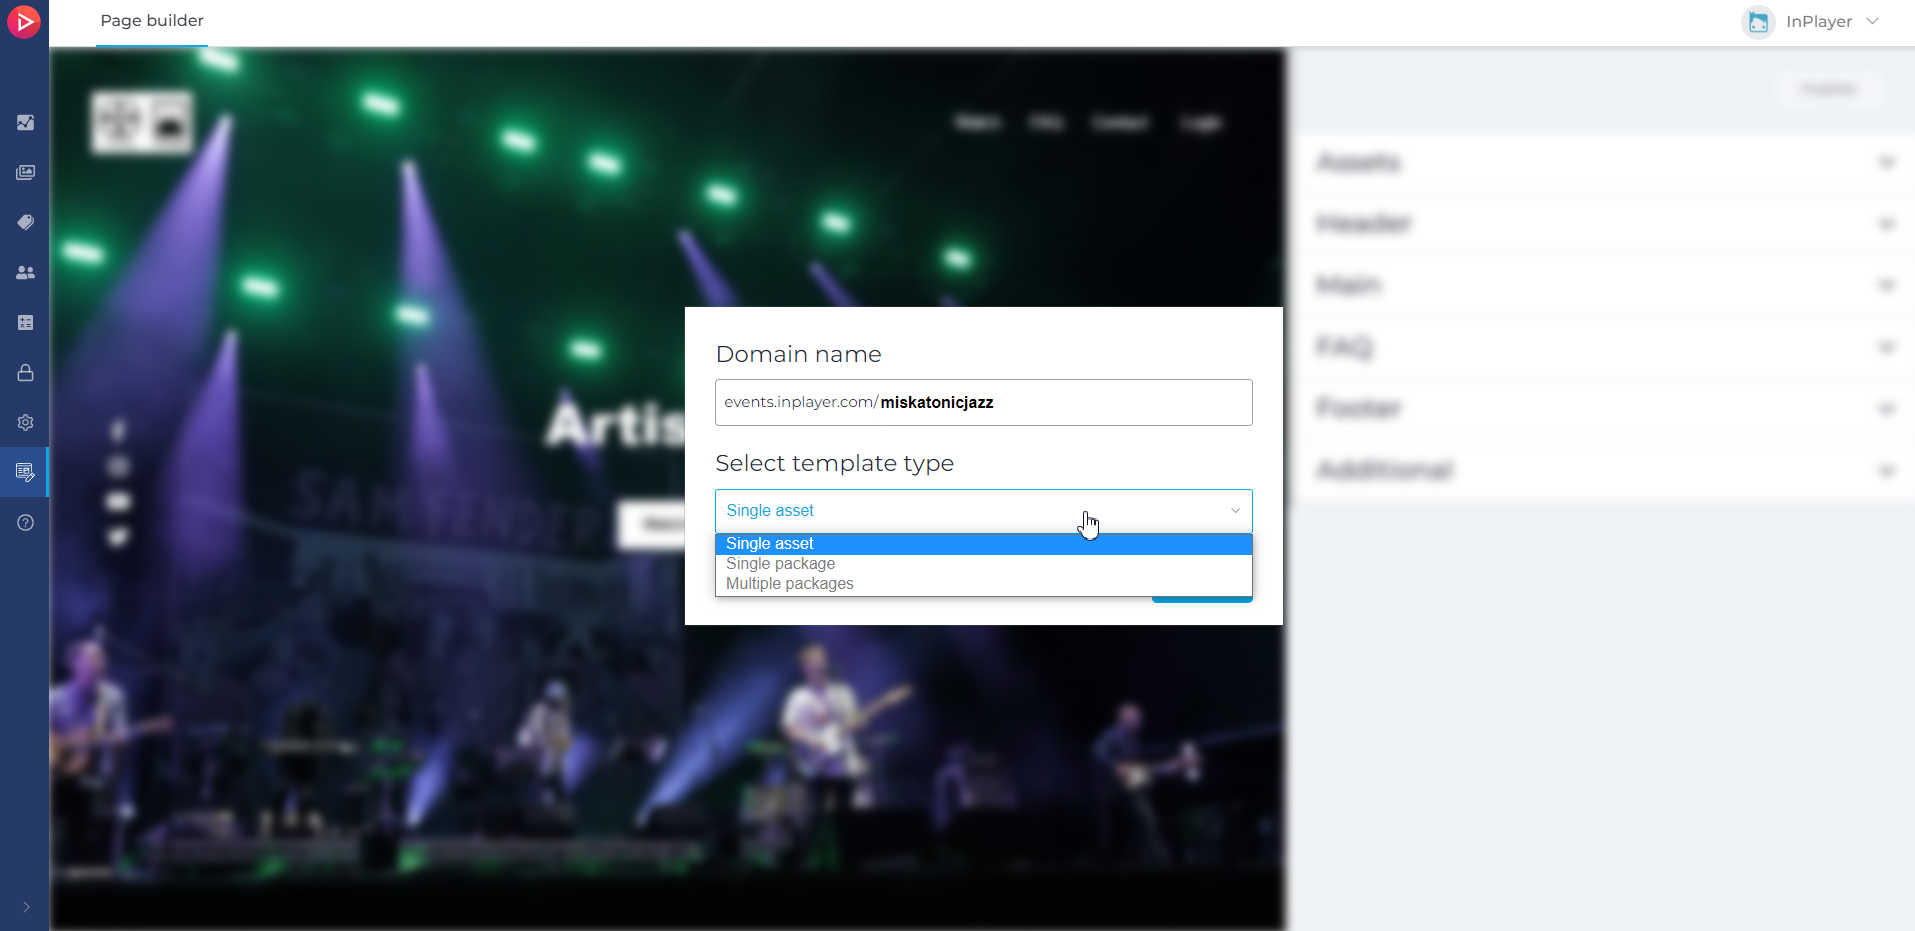
Single asset – for pages that will only contain one asset. Great for single, one-off events.
Single packages – for pages that will contain all the assets of one package from your InPlayer Dashboard. Great for bundles. Managing which assets appear on the page is done by simply adding or removing assets from the related package in the InPlayer Dashboard.
Multiple packages – for pages that will contain all the assets from multiple packages. Great for multiple bundles.
Click Continue.
The landing page template will be generated and you’ll be able to start customizing the various page sections.
Any changes you make in the settings will instantly be reflected in the page preview.
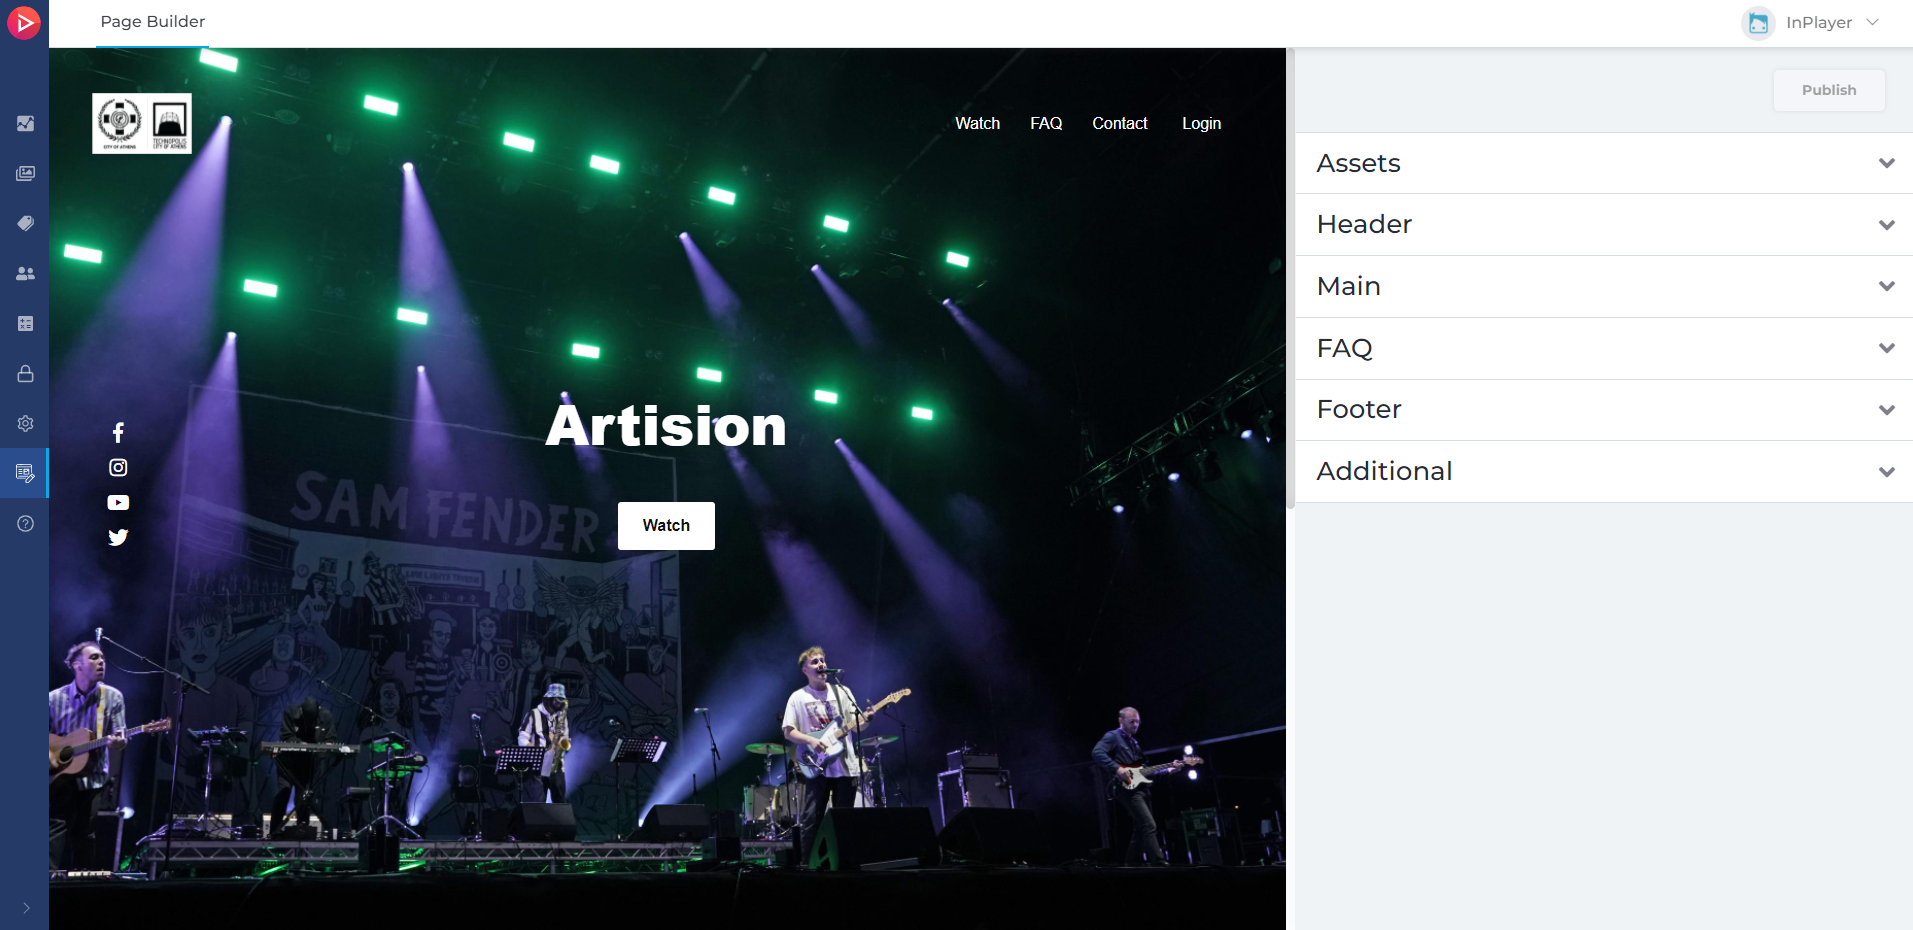
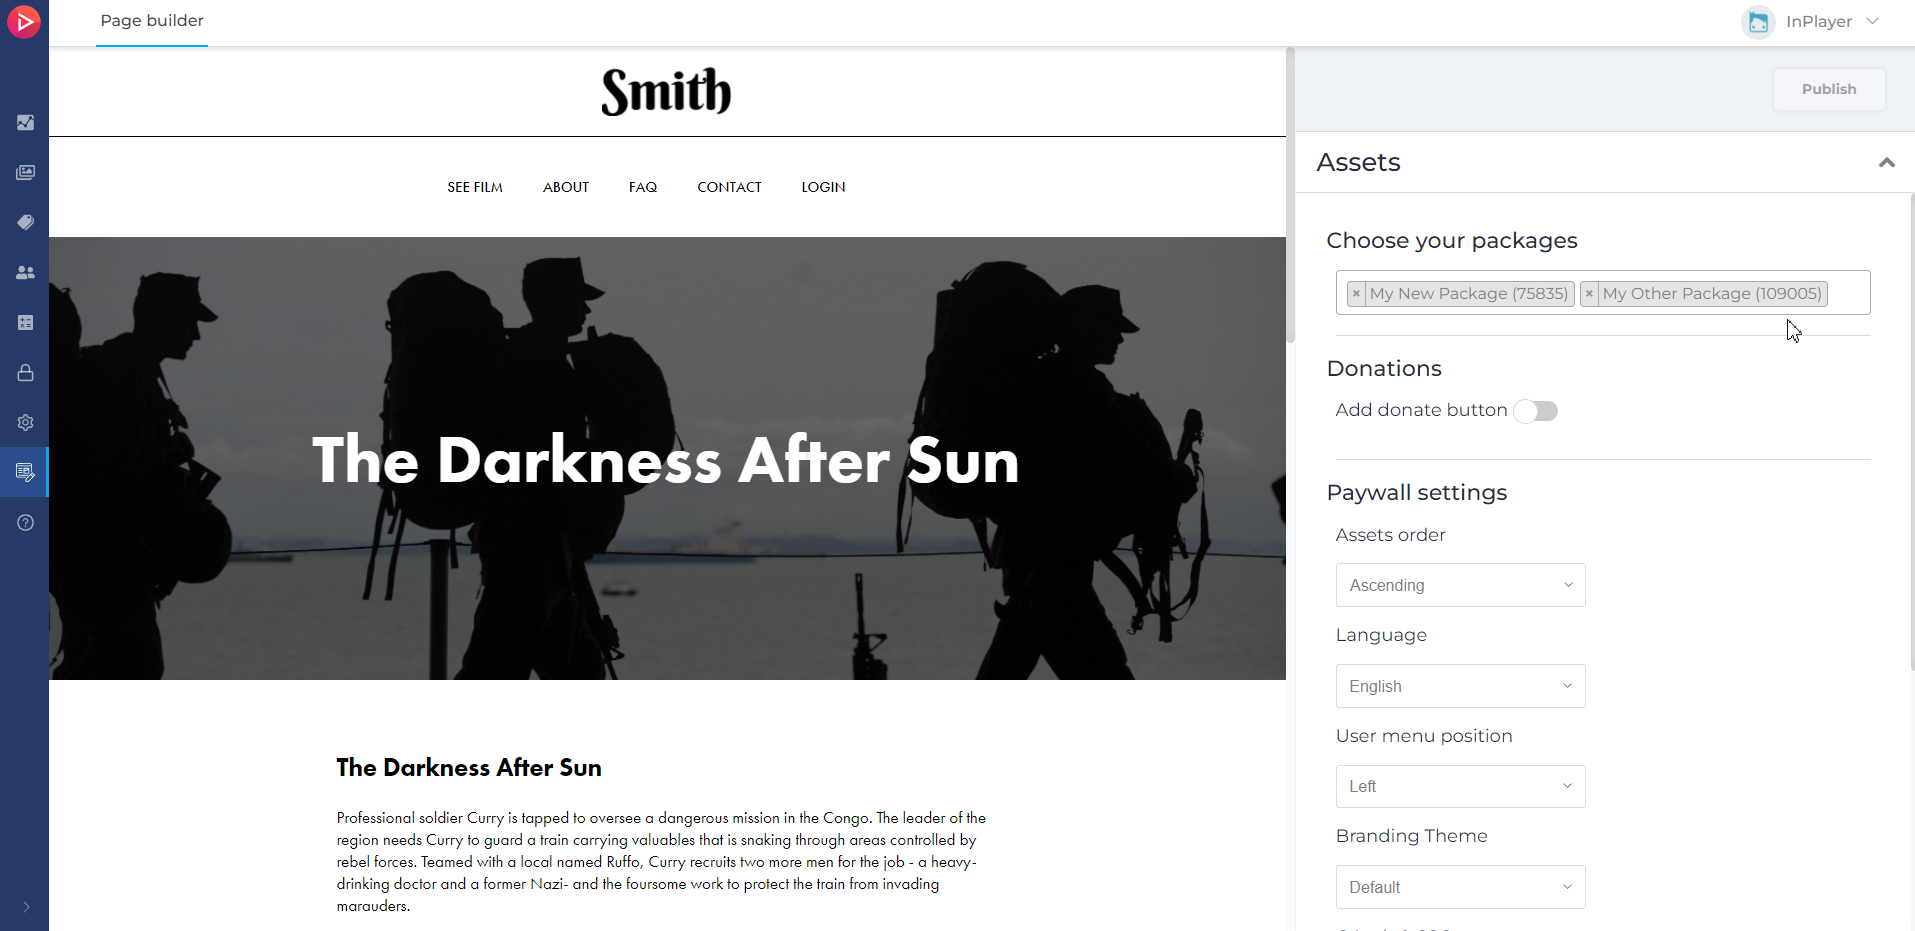
Assets
In this section, you can select the asset or package you will put on the page, and set up its various settings.
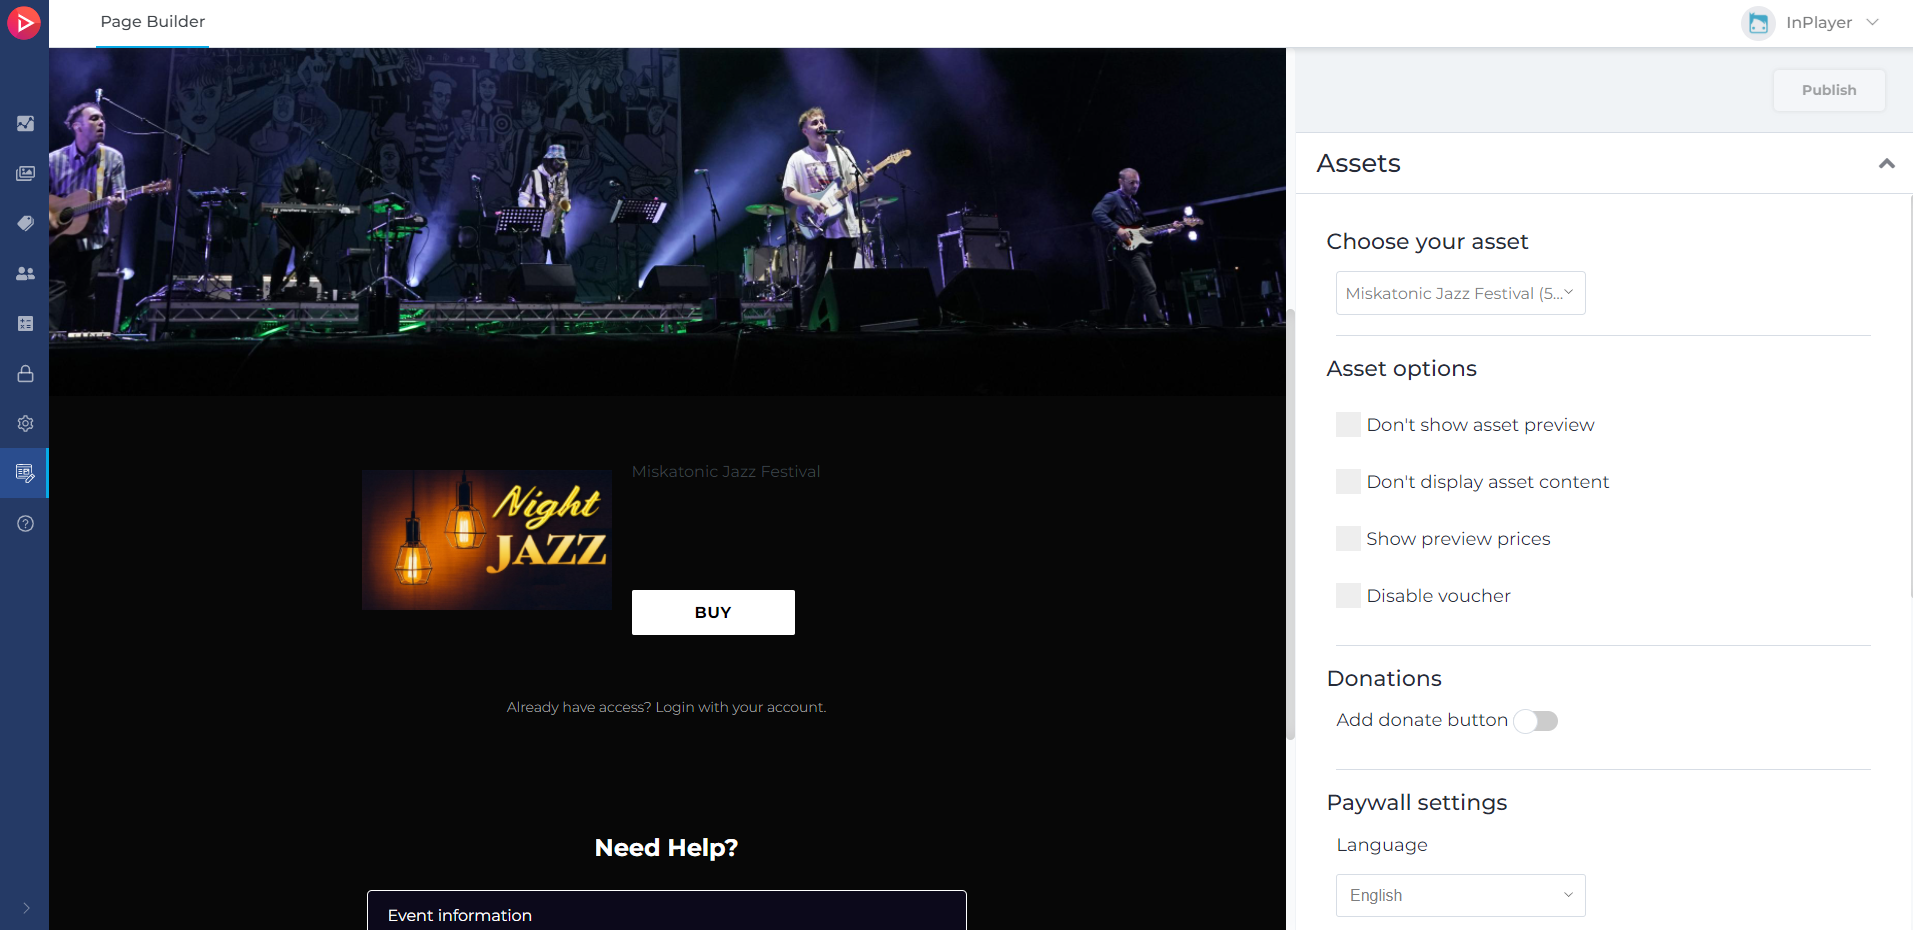
Under Choose your asset (or Choose your package), select the asset or package you wish to have on the landing page.
As already mentioned, for package pages, managing which assets appear on the page is done by simply adding or removing assets from the related package in the InPlayer Dashboard.
Under Asset options and Paywall settings, you can configure the various asset preview and paywall settings. You’ll find lots of useful options here so make sure to go over them.
You can also enable and configure Donations, if this feature has been enabled on your account. More on this here.
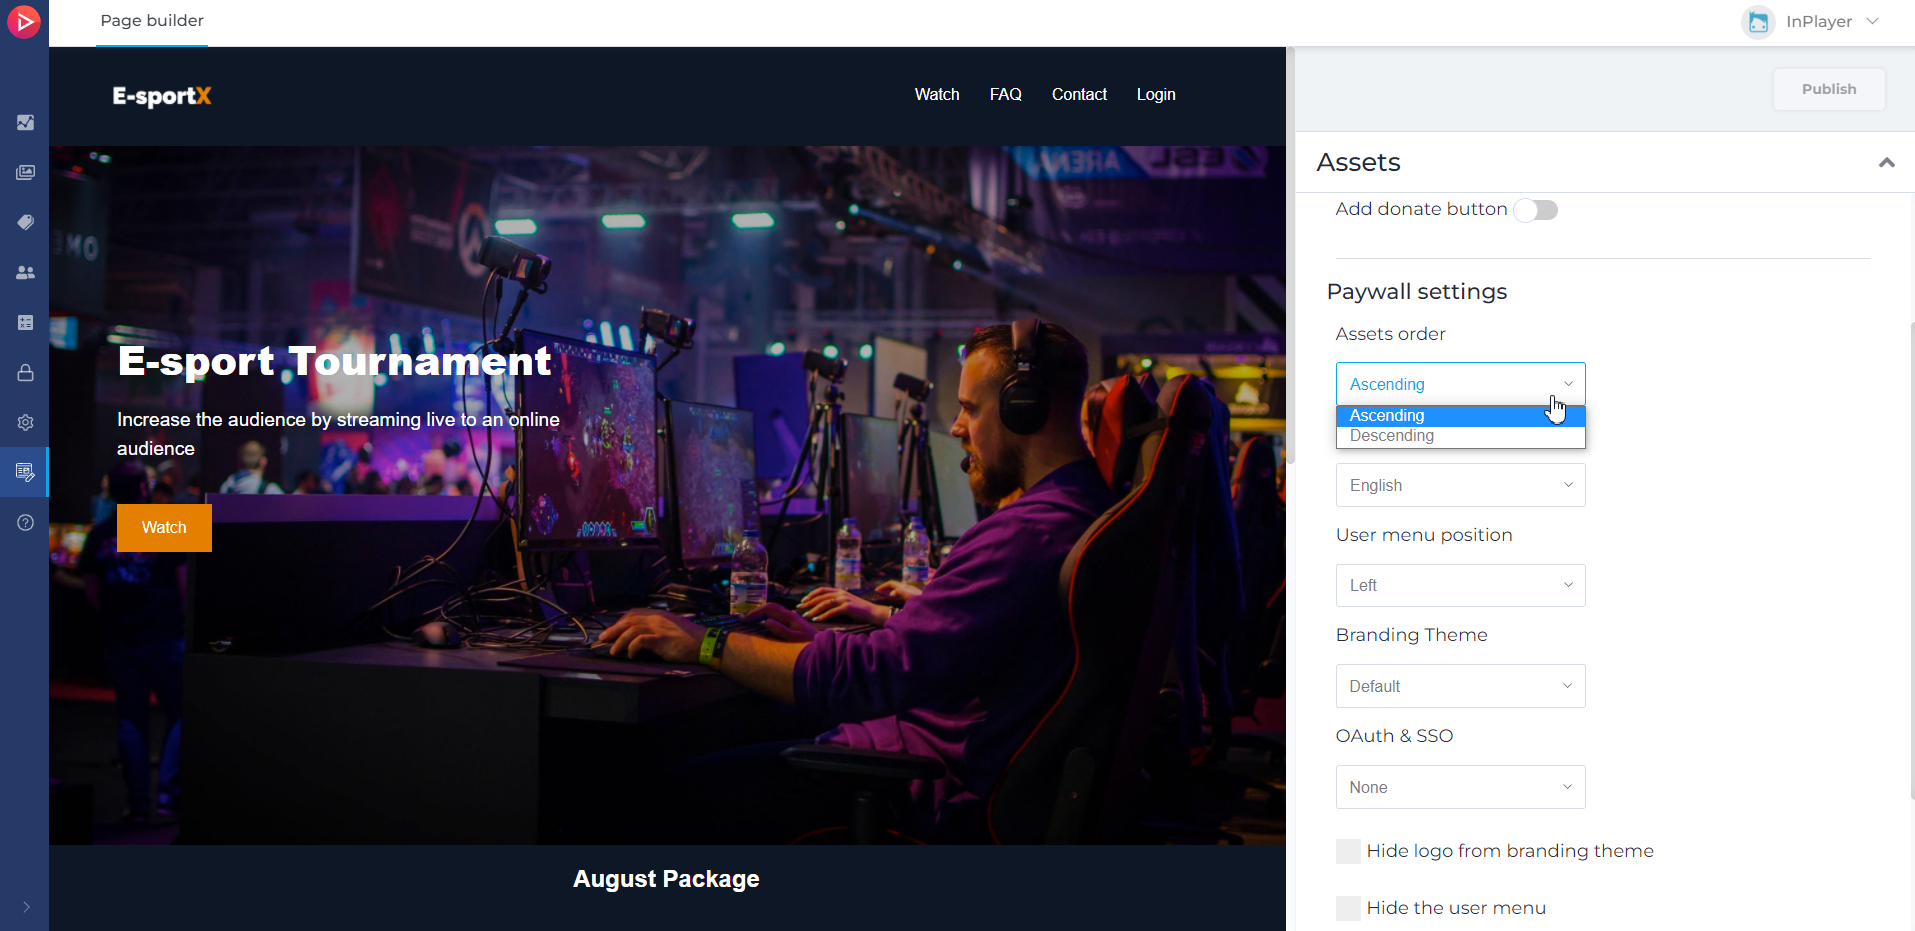
Arranging the assets order for package pages
For pages that contain a package, you can use the Assets order option under Paywall settings in the Main section to determine the order in which the assets appear on the page.
For this, you will need to add a date value in your assets that will be used to determine their order.
To add the date value, do the following:
Open your asset in the InPlayer Dashboard and go to the Additional metadata section.
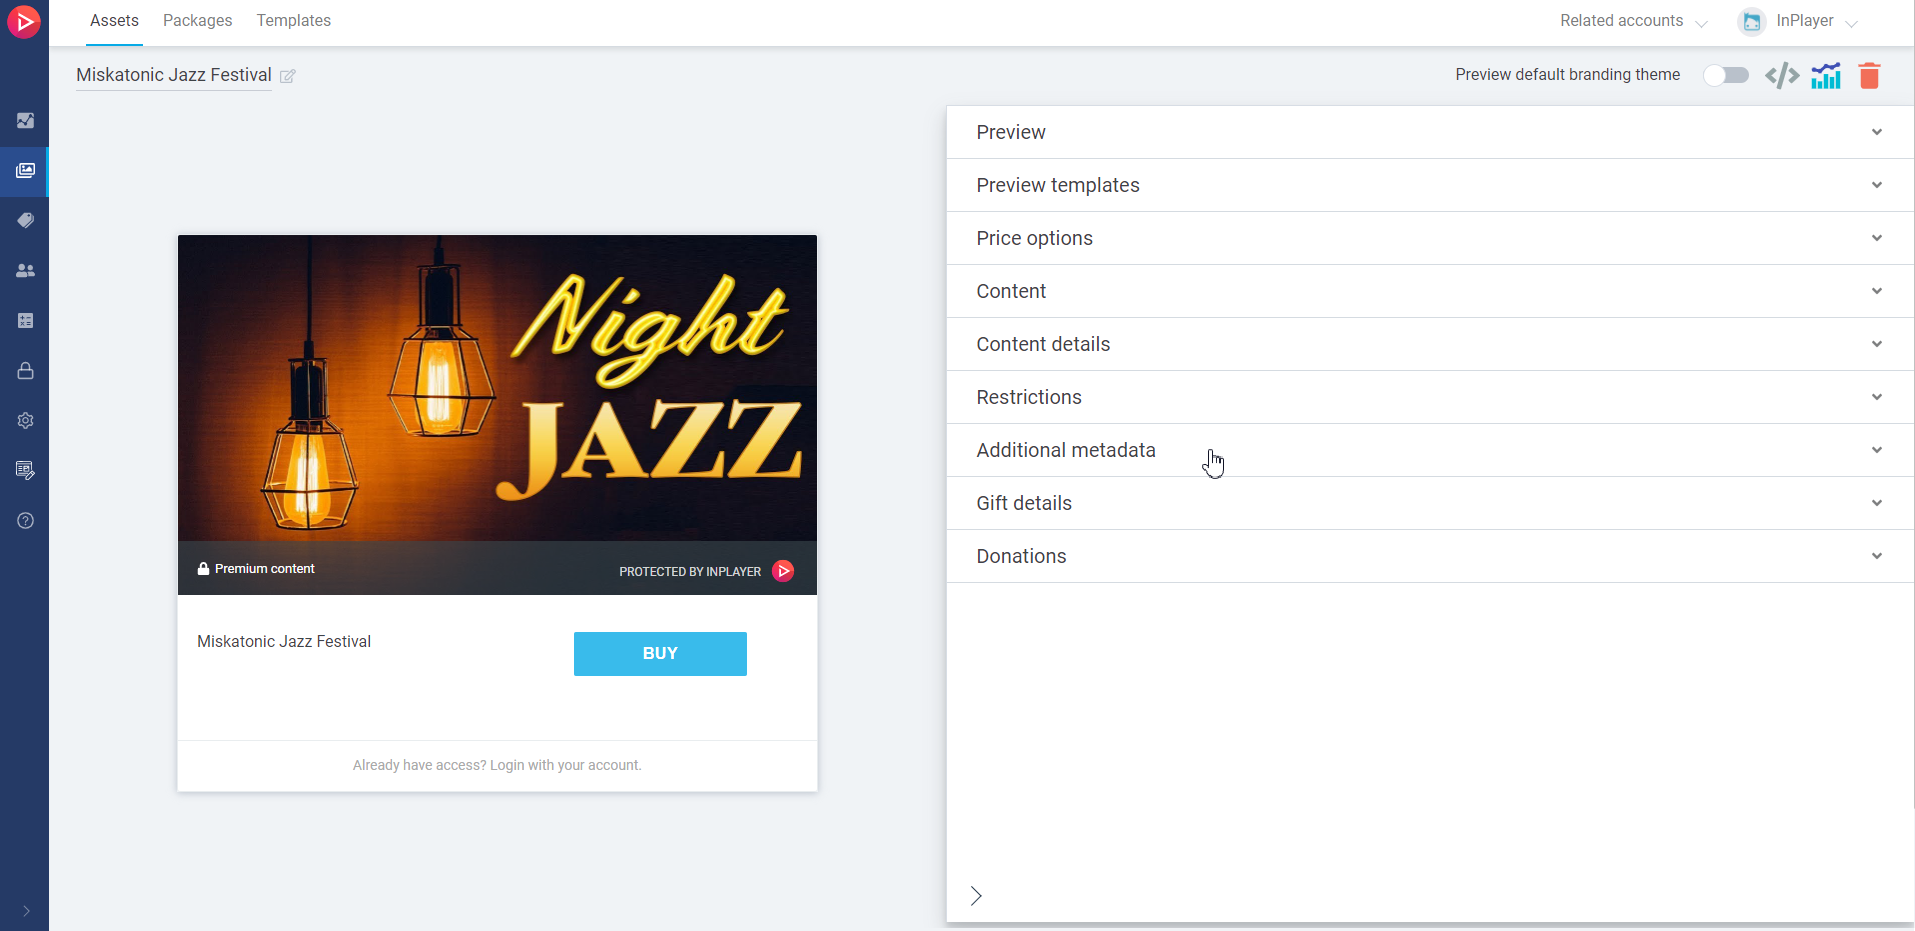
Click Add metadata field.
In Field, enter:order_date
In Value, enter a date in the format mm/dd/yyyy.
The date can be anything you’d like. It could be the date of the event, or another date entirely.
Based on the date you enter here, the assets will appear in either ascending (oldest to newest) or descending (newest to oldest) order, depending on how you’ve set up the Assets order option in the page editor.
Arranging the packages order for pages with multiple packages
For pages that contain multiple packages, you can arrange the packages by adding them in the desired order in the Choose your package field under Paywall settings in the Main section.
The order in which they have been arranged in the Choose your package field is the order in which they will appear on the page.
Header
In this section, you can customize the landing page header.
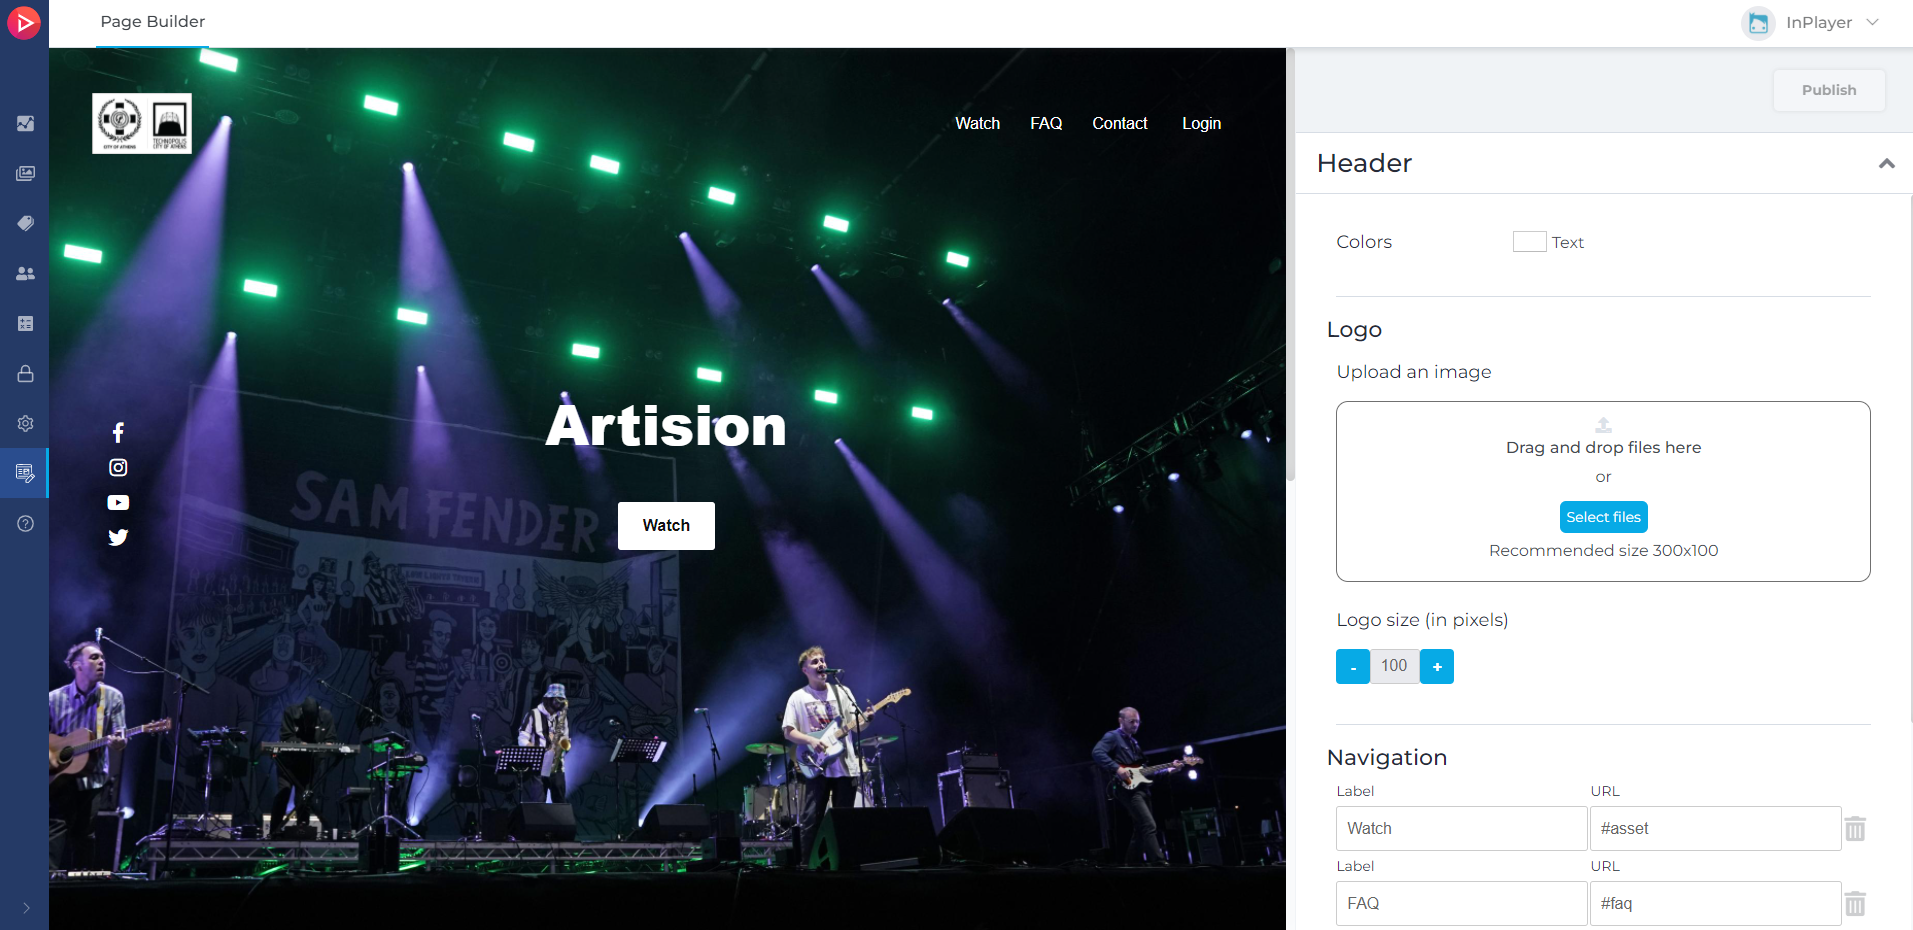
You can add your logo that appears in the header, change the text color of the navigation menu elements, add new navigation menu elements and set up the URL to which they will lead, etc.
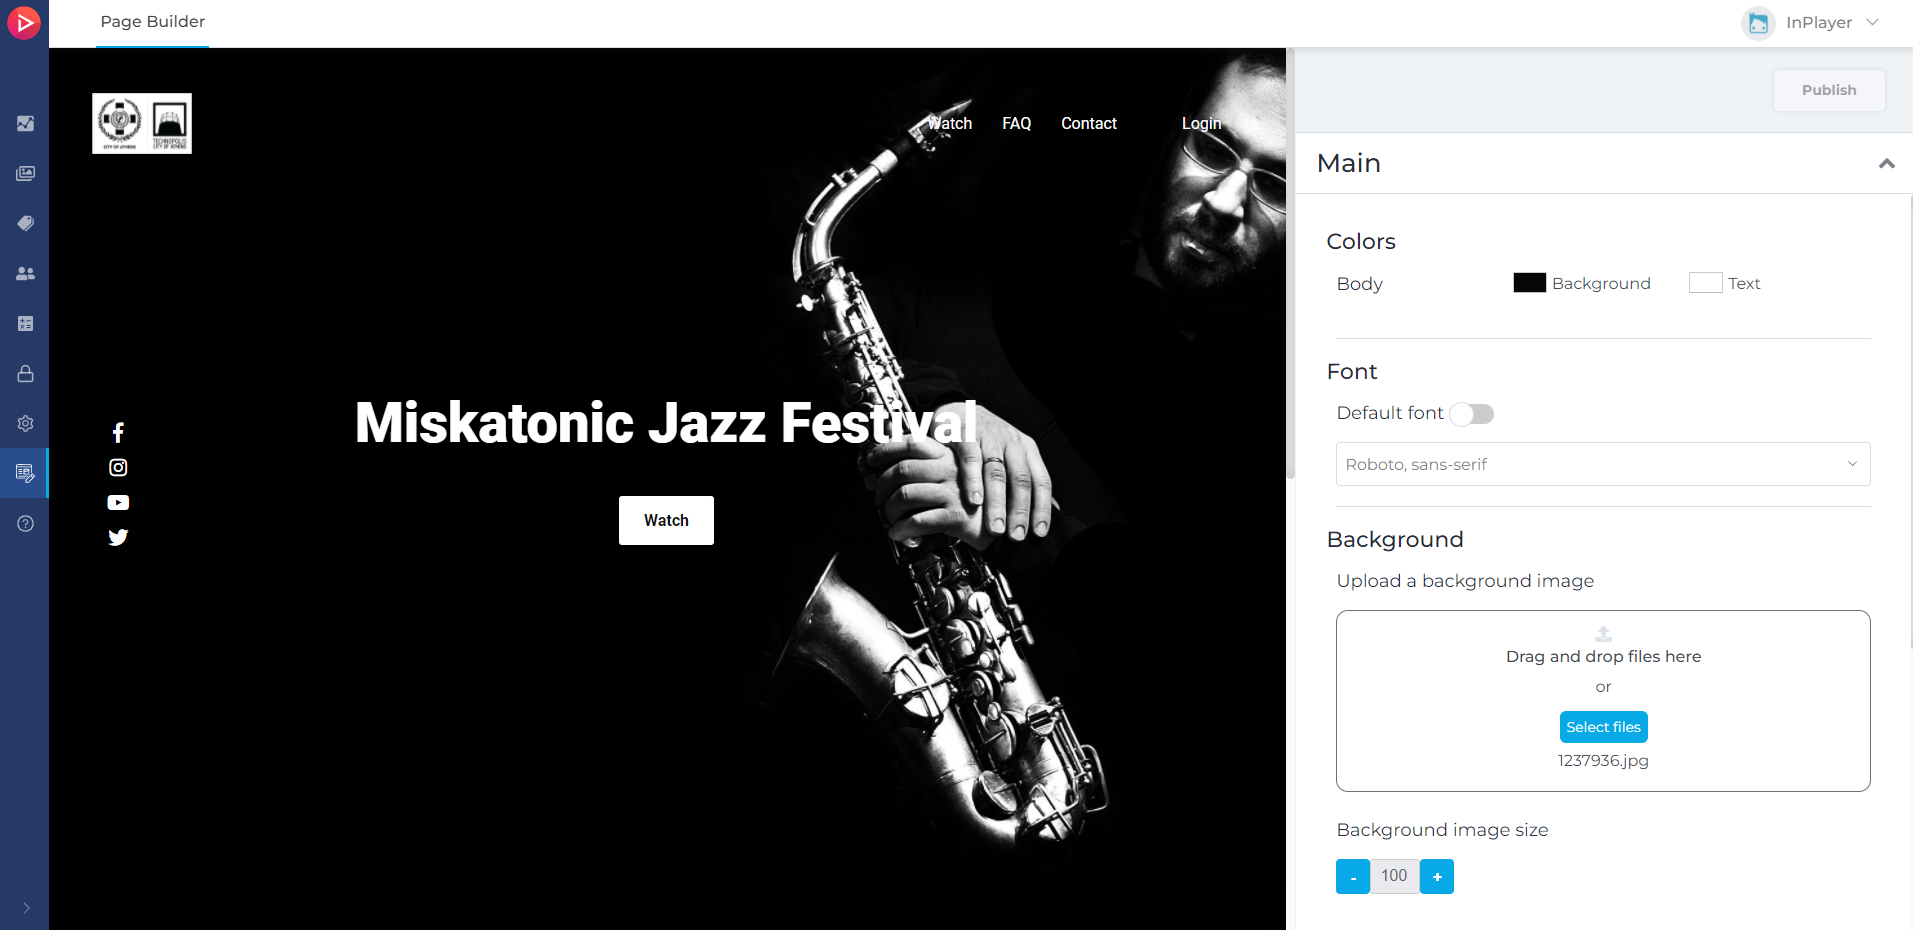
Main
In this section, you can customize the main part of the page. The main background, title, call to action button, etc. can all be changed here.
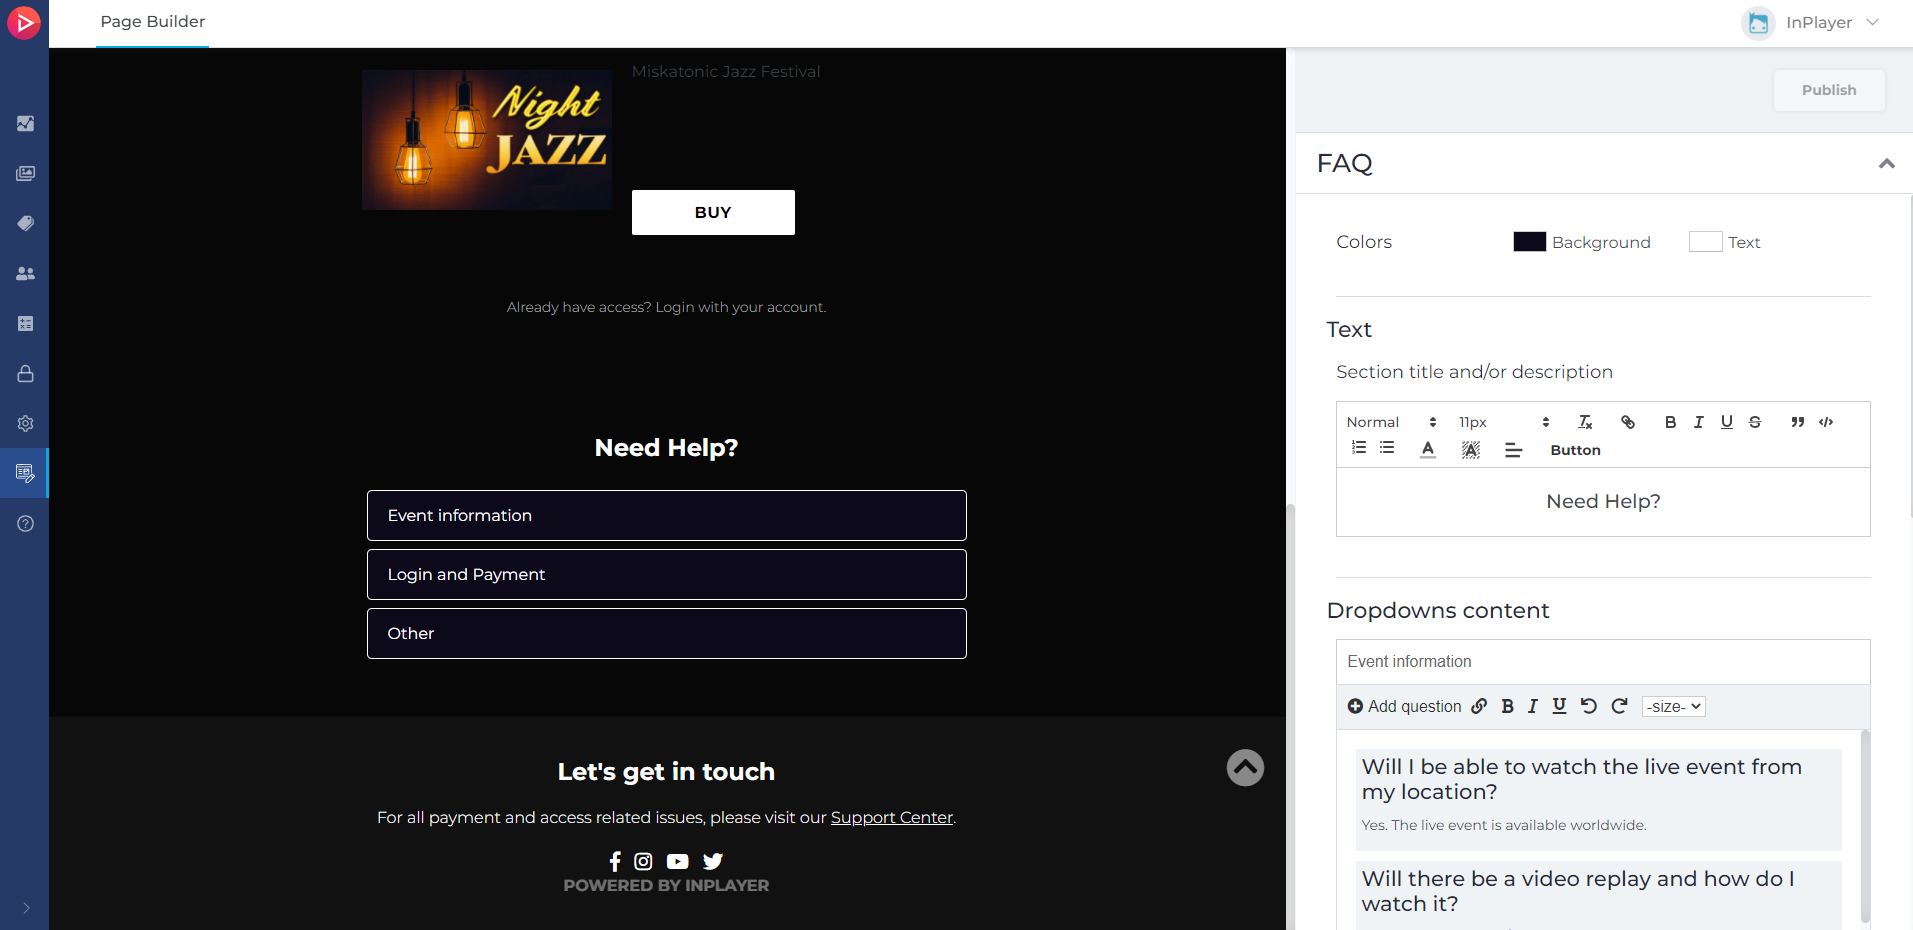
FAQ
In this section, you can fill in the most common questions your viewers are likely to have about the content.
This is a very important part of the viewer experience so make sure you provide all the information viewers would want to know, like an event description, start time, replay availability, etc. Make sure to follow our Viewer Experience Guidelines when setting this up.
To start you off, we’ve already included all the most popular questions viewers have, so just fill in the blanks there!
Footer
In this section, you can customize the page footer.

Things like contact, link to the Access and Payment Support Center and to your social medial pages, etc. can all be configured here.
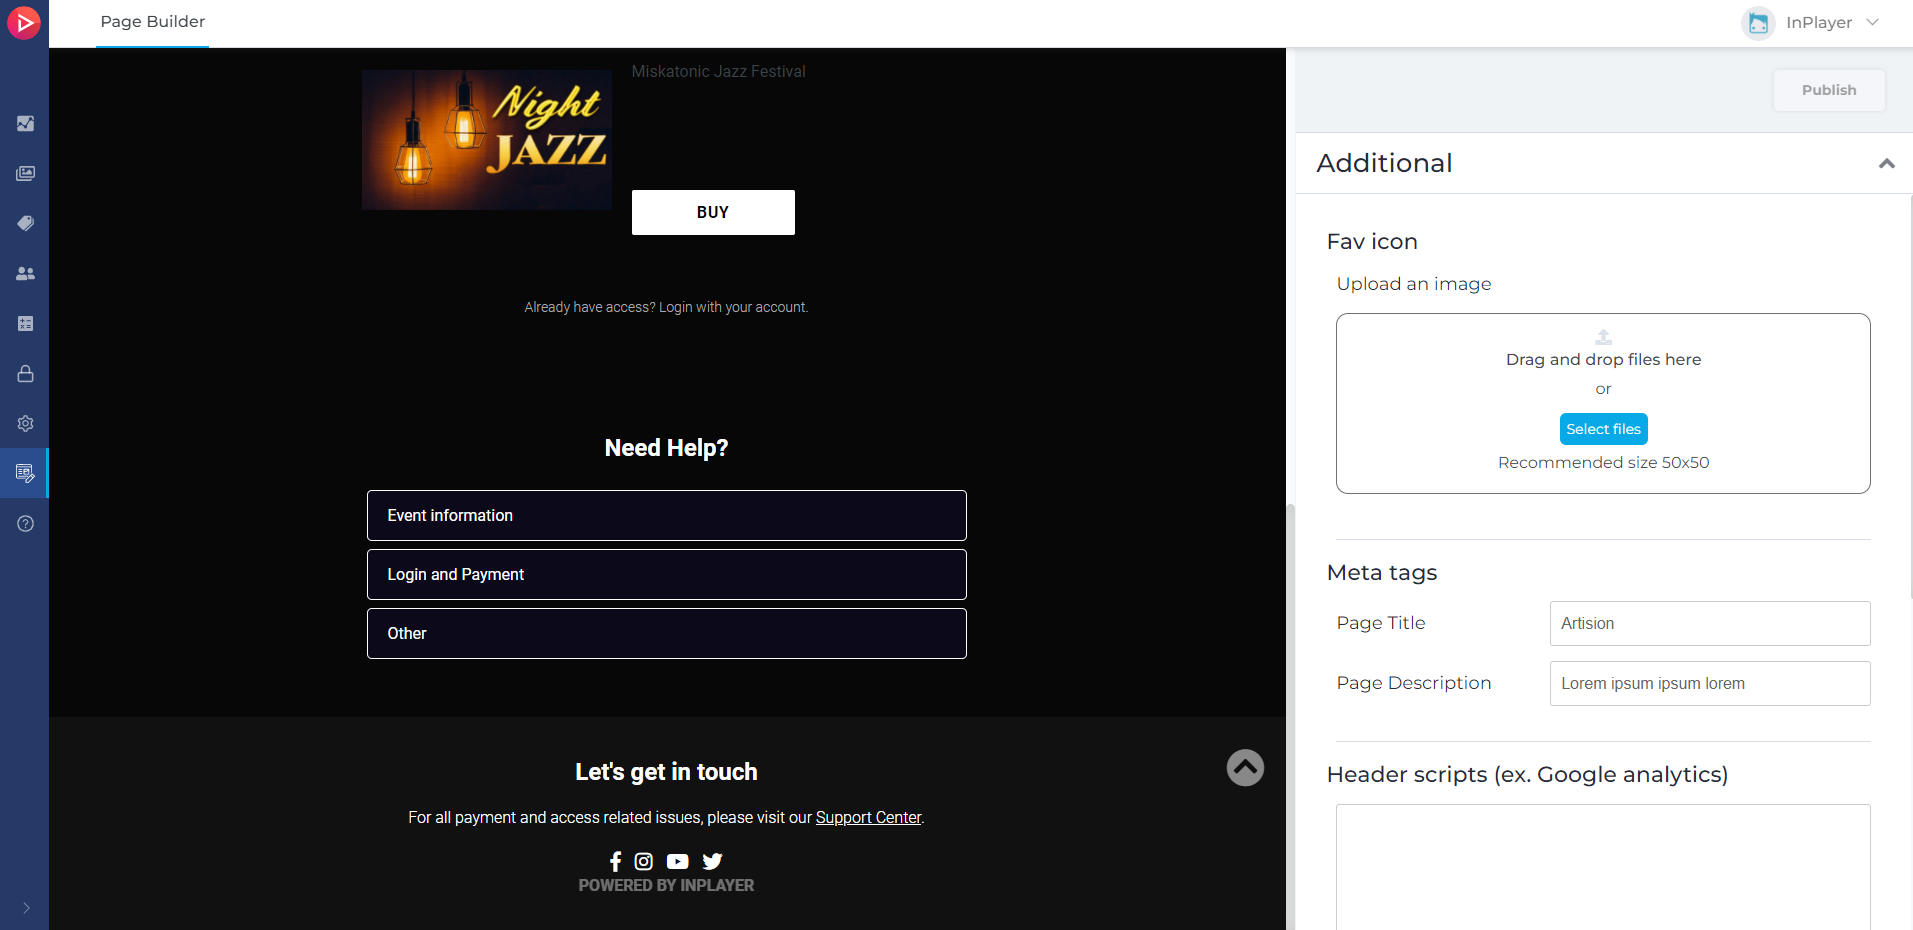
Additional
Finally, in this section, you can customize some additional landing page metadata like the favicon, and the page browser tab title and description.
But you can also add any custom header and footer scripts, that will allow you to take the customization of the page to the next level.
Publishing or exporting a landing page
Once you’ve customized the page to your liking, you can choose to publish it on InPlayer’s AWS-powered domain, or export it so you can publish it later on your own domain.
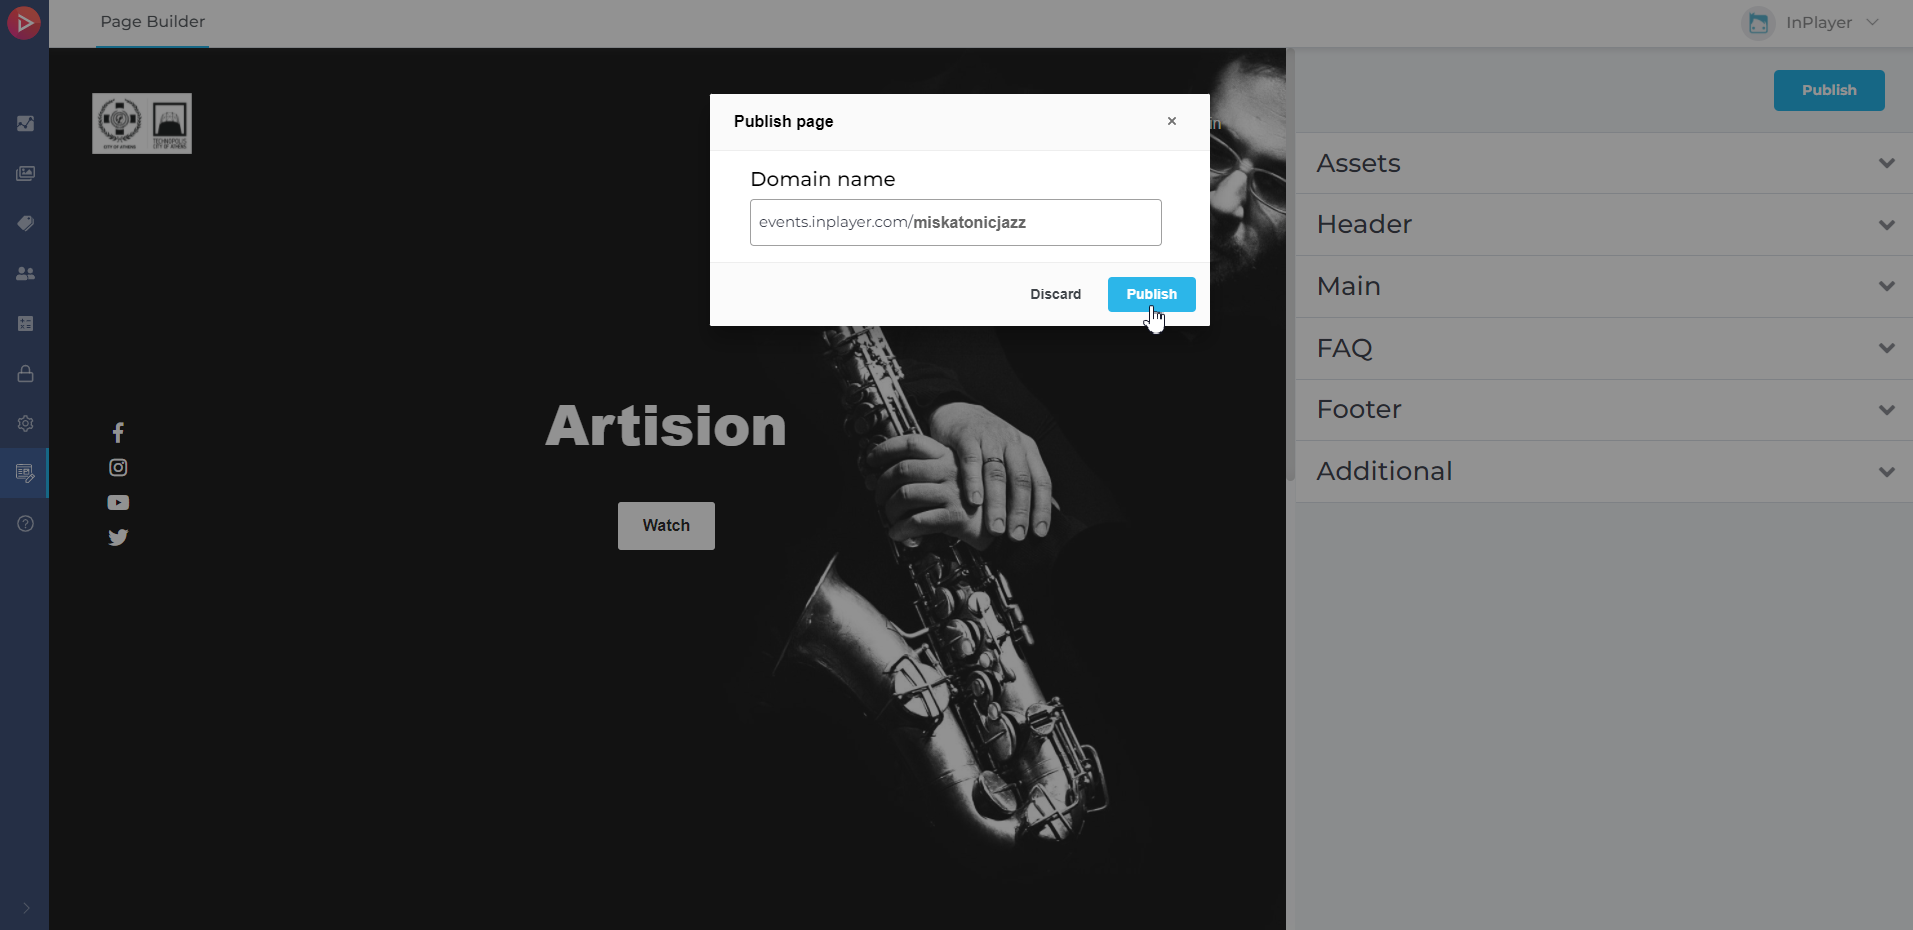
To begin, click the Publish button at the top right and choose what you’d like to do.

Publish – this will publish the page on InPlayer’s domain. When doing so, you will be asked to confirm the page URL. This will be the final URL that your viewers will visit so make you have it right.
The URL will always be in the format: https://events.inplayer.com/{yourpagename}
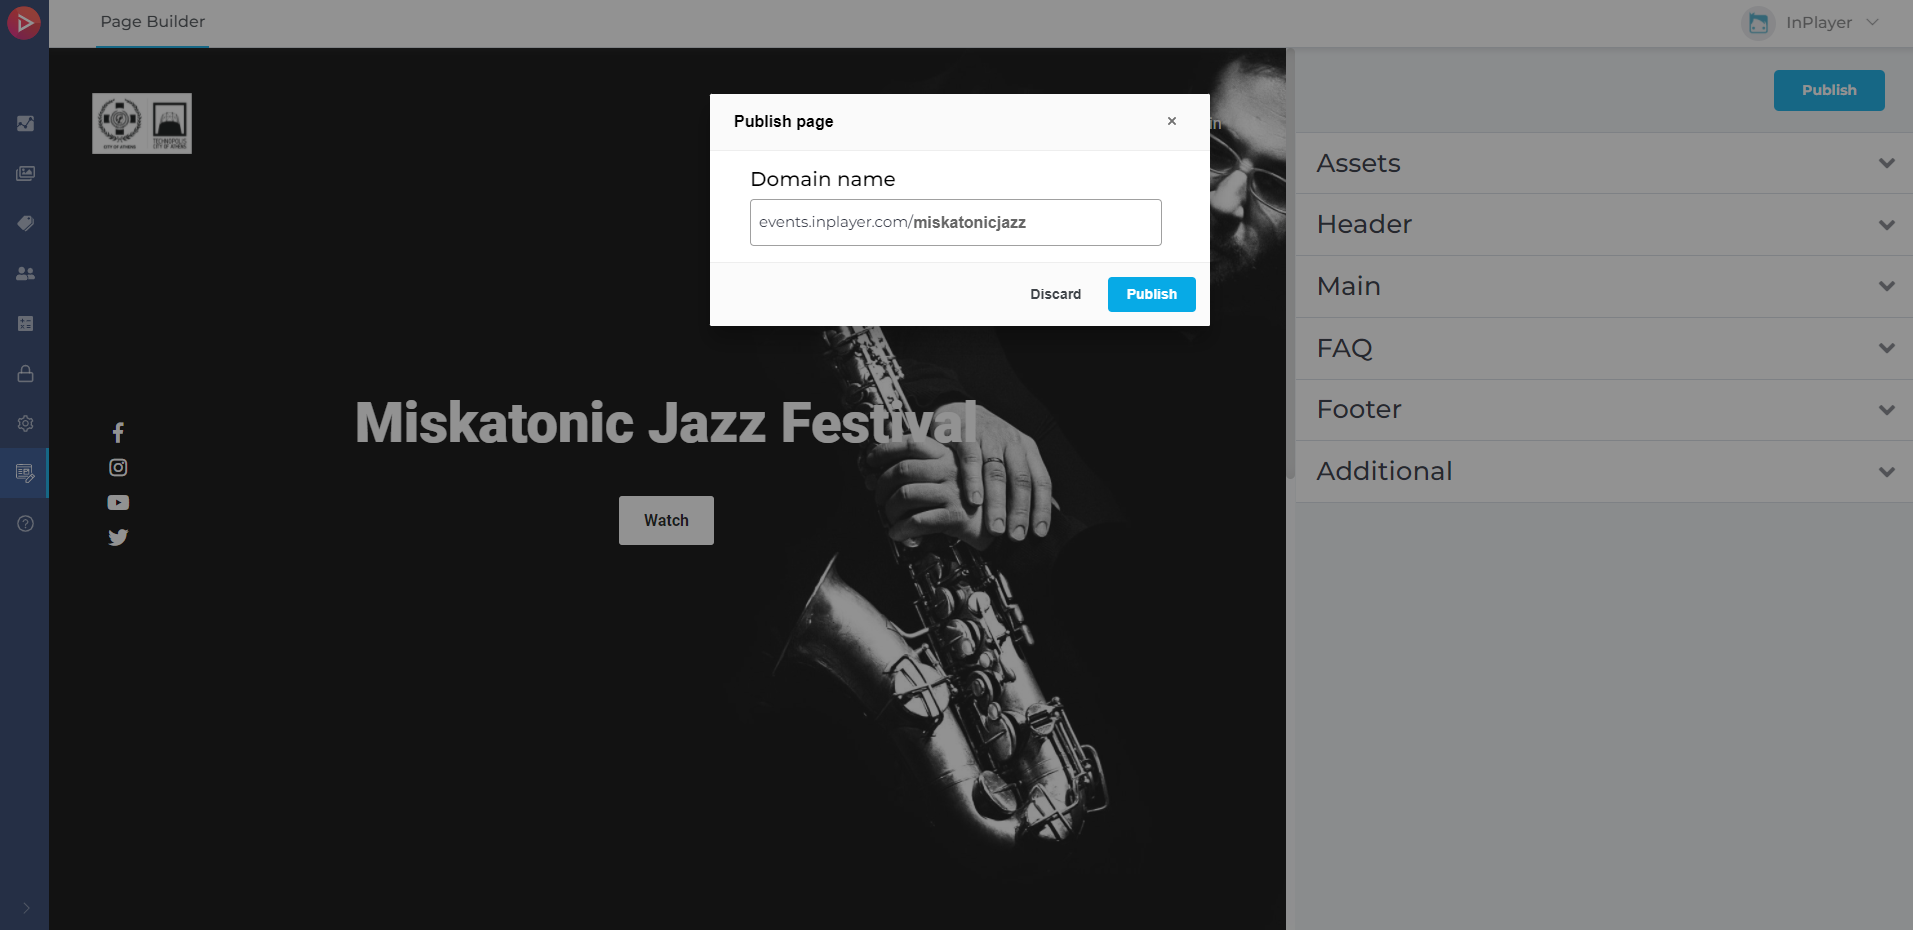
If the URL is already in use, you will be notified upon clicking the final Publish button. In this case, you will need to use a different URL.
Export as zip – this will download the landing page as a zip file that after being unzipped will be ready to be uploaded and hosted on your own domain.
Careful! Clicking Export as zip will take you back to the template selection screen and all your work on the current page will be lost. You will have your zip file, but you will not be able to come back to the page you just customized and continue editing it. You will need to start over if you wish to make any changes.
Editing a published landing page
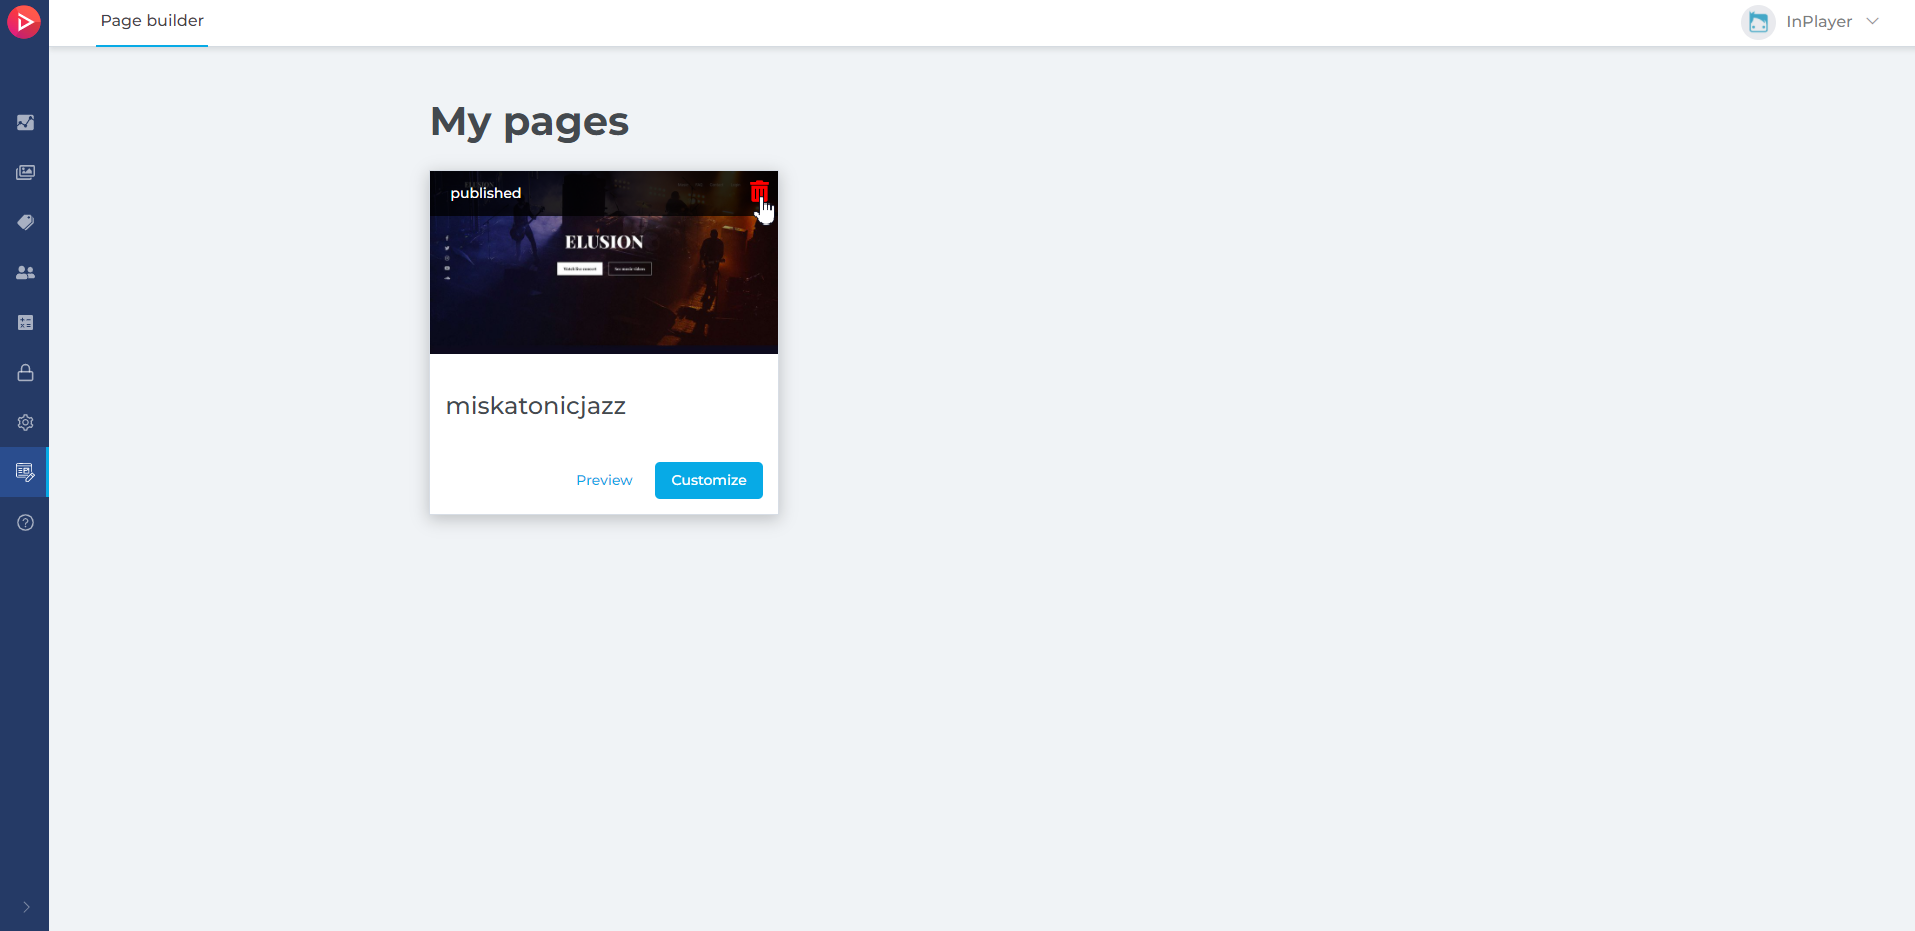
To manage and edit the landing pages that have been published on InPlayer’s domain, go to the Page Builder, and from your account menu in the top right corner, and click on My pages.
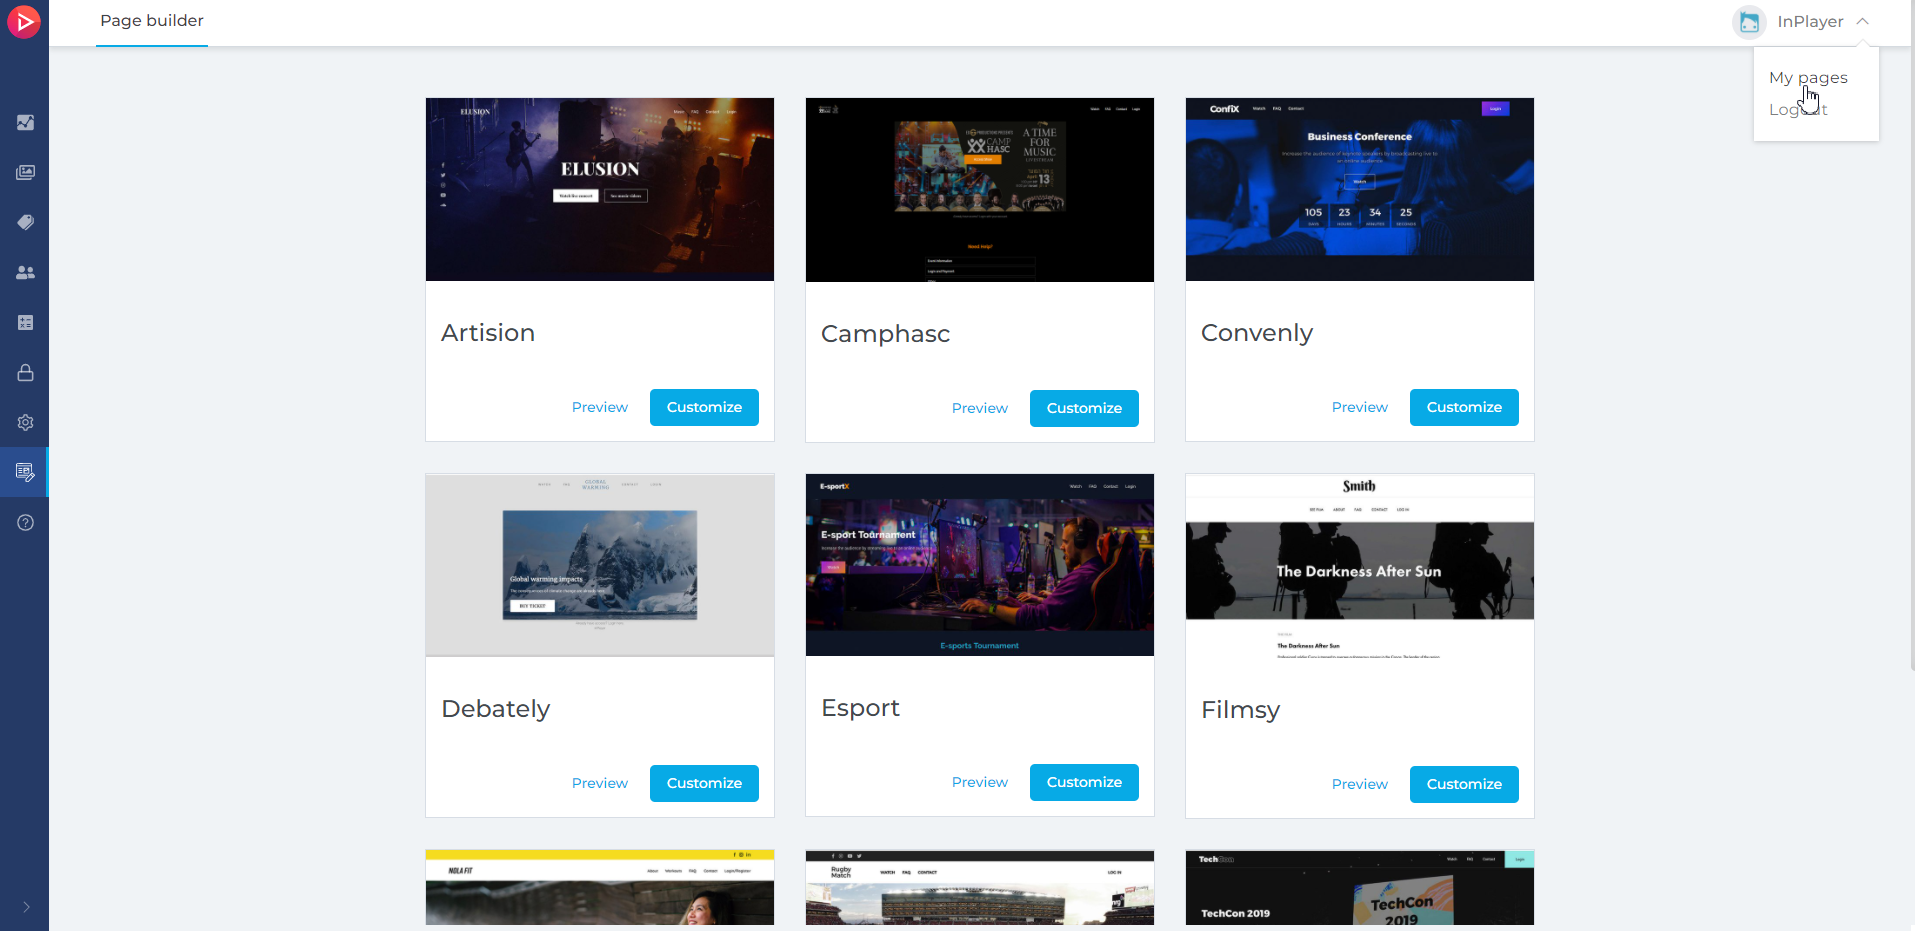
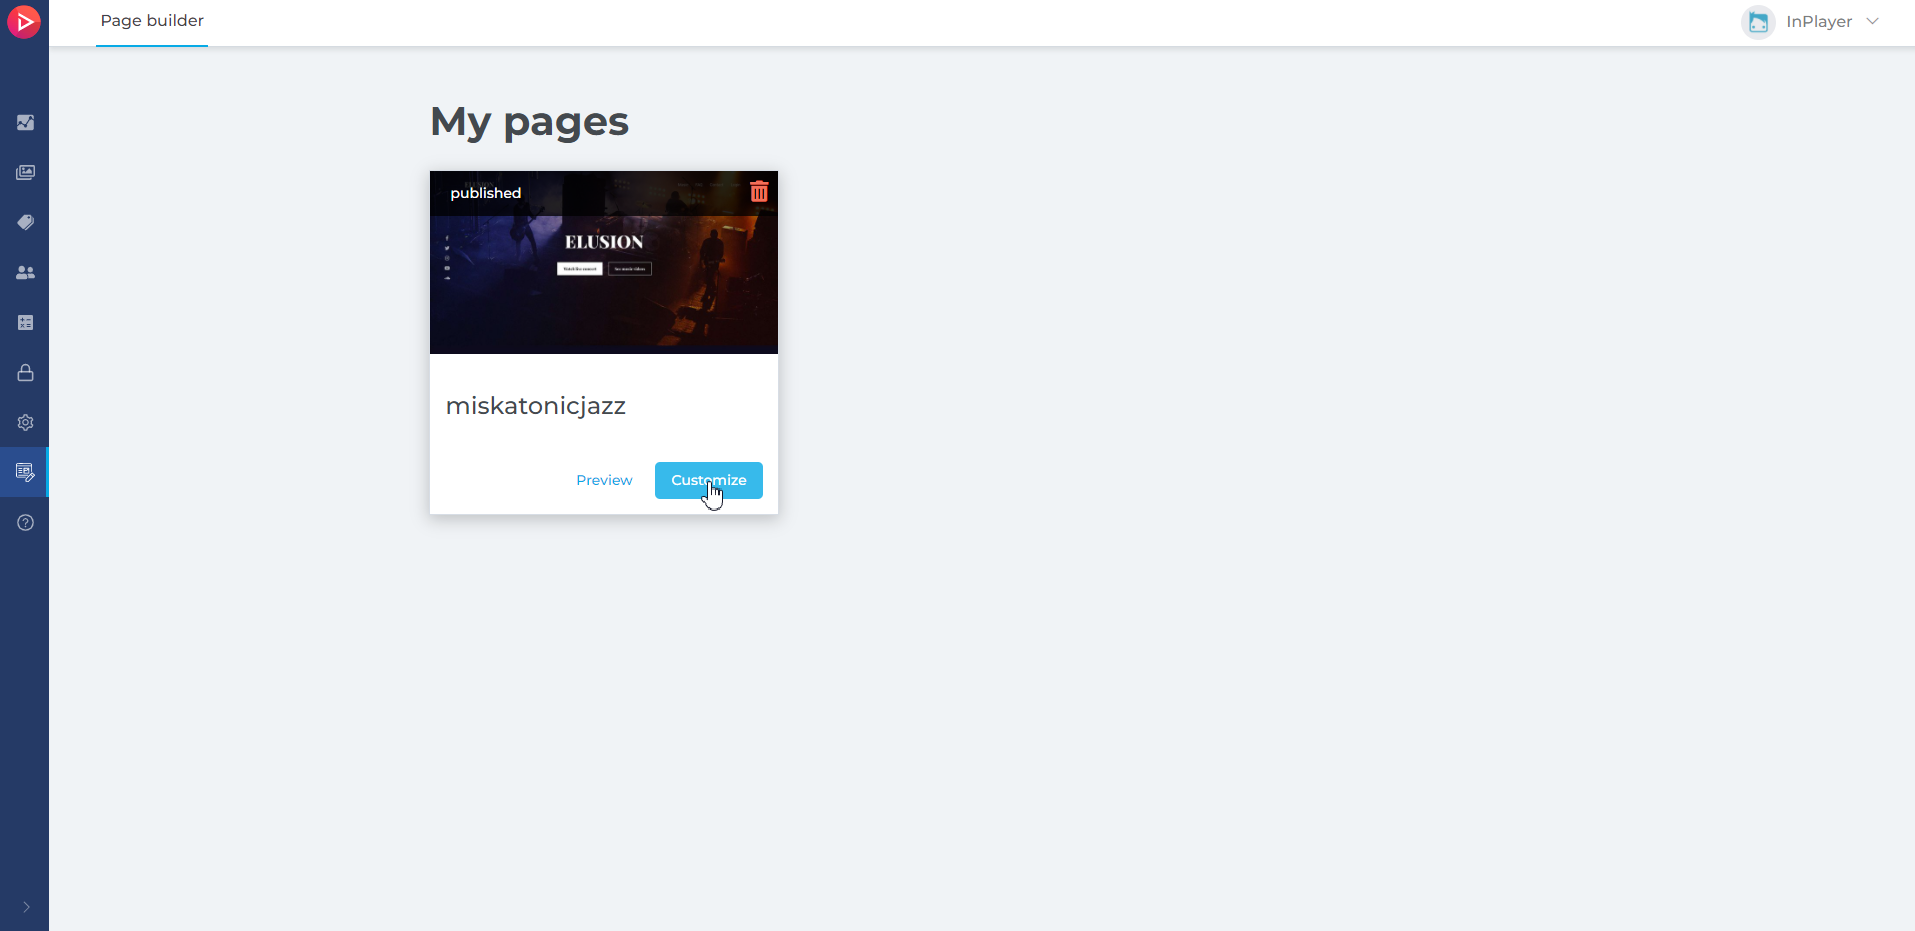
Here, you will find a list of all the pages that have been published on InPlayer’s domain.
To edit any of them, simply click on Customize.
After making the necessary changes, click on Publish at the top right, select Publish, and confirm by clicking on Publish again. Do not change the page URL in the final publishing window or you will generate a new page instead of updating the existing one.
Deleting a published landing page
To delete and unpublish landing pages that have been published on InPlayer’s domain, go to the Page Builder, and from your account menu in the top right corner, and click on My pages.
Here, you will find a list of all the pages that have been published on InPlayer’s domain.
To delete and unpublish any of them, simply click on the bin button. This action cannot be undone.
Cloning a published landing page
In case you wish to create a copy of a published page that you can use as the basis for a new landing page, go to the Page Builder, and from your account menu in the top right corner, and click on My pages.
Here, you will find a list of all the pages that have been published on InPlayer’s domain.
On the page you wish to clone, click Customize.
When the page opens, click on Publish at the top right, and select Publish.
Under Domain name, enter a new URL, and confirm by clicking on Publish again.

This will create a clone from the original page which you can then proceed to edit.
Careful! The new clone page will be published and live from the moment of its creation.
This concludes our guide.
If you have any questions, don’t hesitate to contact us at clients@inplayer.com.