Activating the LiveLike feature
To enable the LiveLike feature, contact your account manager or send us an email at clients@inplayer.com.
Once you get a confirmation that the feature has been activated, you can start setting things up.
If you have your own LiveLike account you can connect it to the InPlayer Dashboard.
If not, you can use our own integrated LiveLike account.
Using your own LiveLike account
First, log into your InPlayer Dashboard.
Go to Settings, then to the Integrations tab, and finally to Third-party integrations.
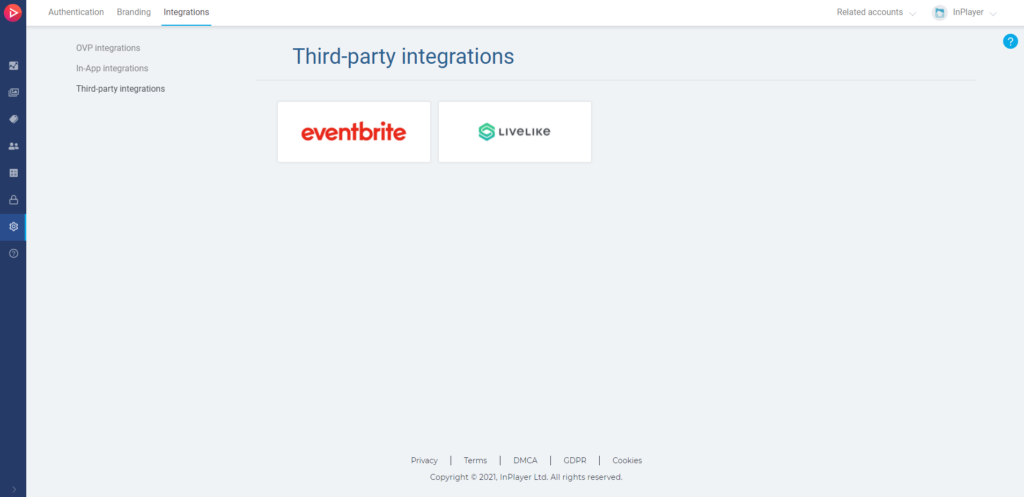
Click on LiveLike.
Click Connect.
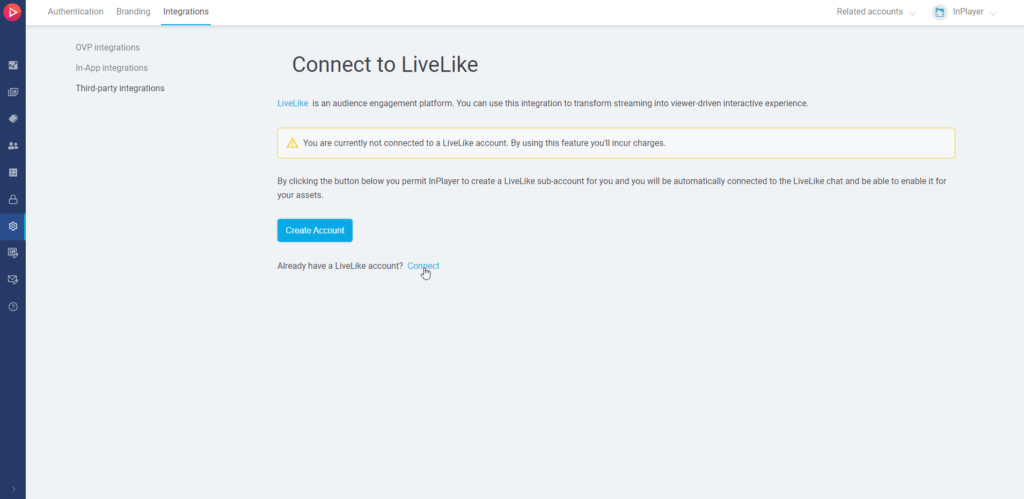
Enter the Client ID and Access Token from your LiveLike account, and click Save.
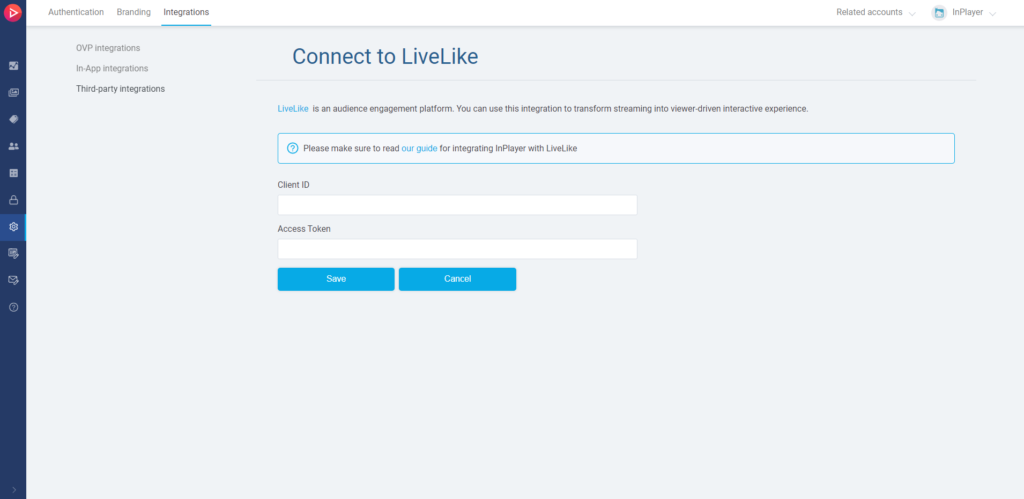
How to find the Client ID and Access Token
Log into your LiveLike Producer Suite.
Click on your account name in the upper right corner, and then click on My Organizations.
You will see the Client ID for the app you’ll be using, under the app’s name, in the Apps section.
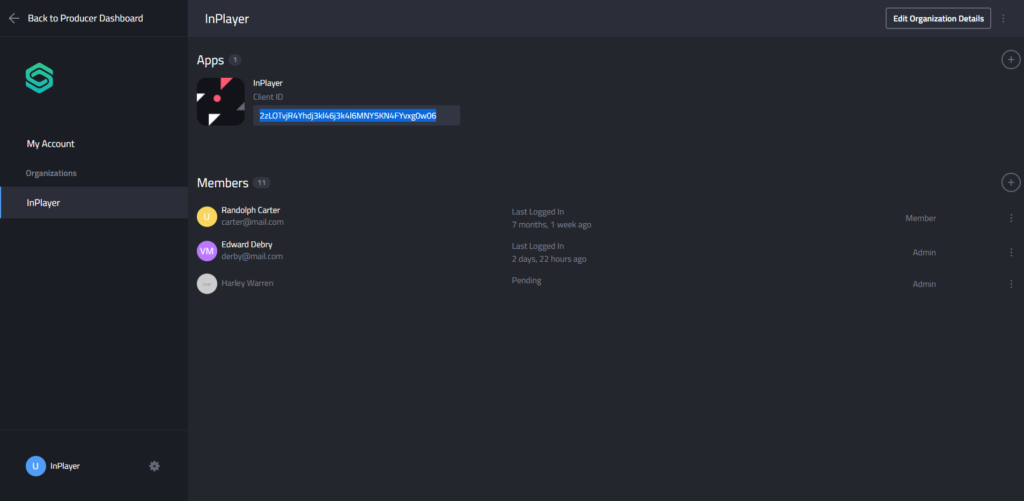
If you don’t have an app yet, you can create one with the + button on the right, and set it up accordingly.
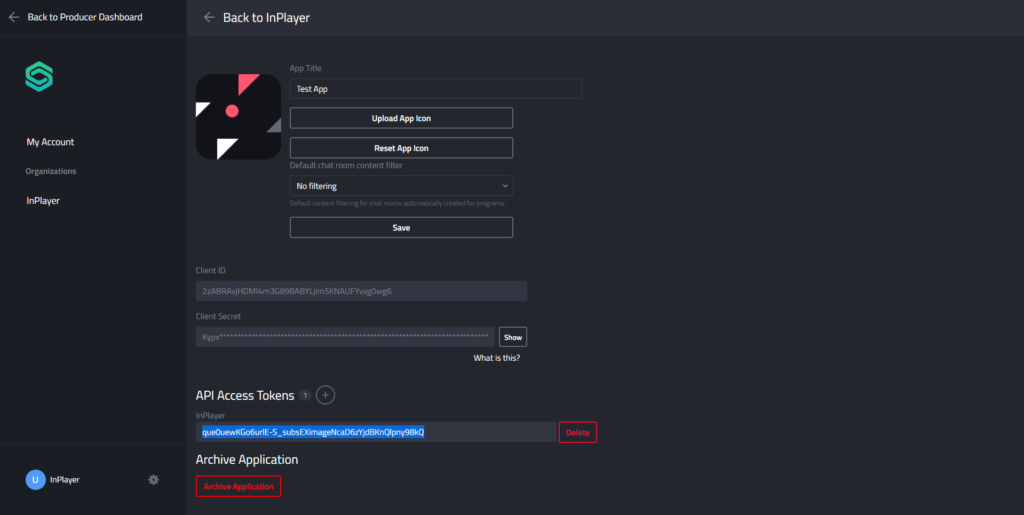
For the Access Token, click on the app you’ll be using from the Apps section.
Scroll down to API Access Tokens. You will find your token there.
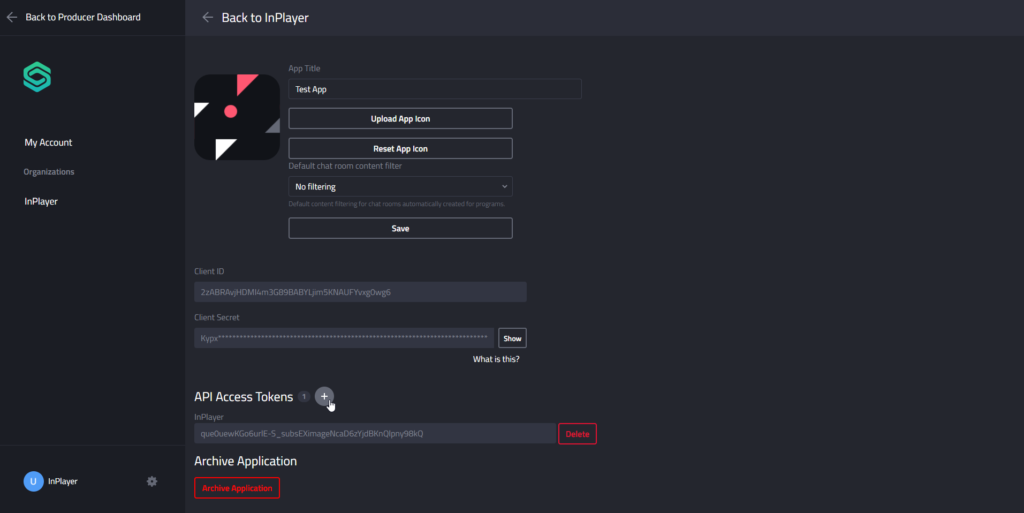
If you need to create a new token, click the + button, positioned next to API Access Tokens.
Once you connect your InPlayer and LiveLike accounts, the next step is to create an InPlayer asset where you’ll set up your content, pricing, and the LiveLike chat settings.
You can learn how to create your asset here, and how to set up the chat here.
Using InPlayer’s LiveLike account
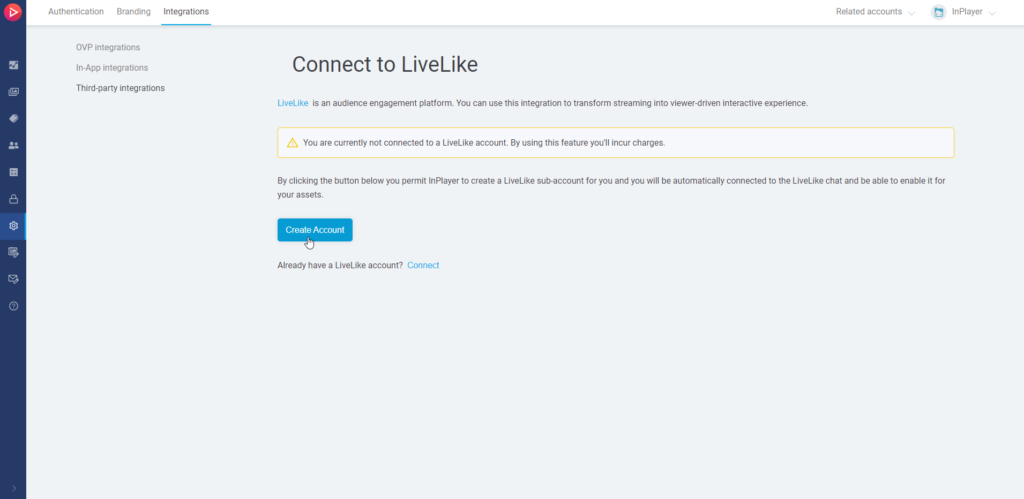
First, log into your InPlayer Dashboard.
Go to Settings, then to the Integrations tab, and finally to Third-party integrations.

Click on LiveLike.
Click Create Account.
That’s it!
The next step is to create an InPlayer asset where you’ll set up your content, pricing, and the LiveLike chat settings.
You can learn how to create your asset here, and how to set up the chat here.
This concludes our guide.
If you have any questions, don’t hesitate to contact us at clients@inplayer.com.
