Branding
Customize the look of the paywall to suit your brand.
Paywall branding
The look of the paywall can be easily modified to better fit your brand.
This is done via branding themes created in the Branding section of the InPlayer Dashboard.
Creating a new branding theme
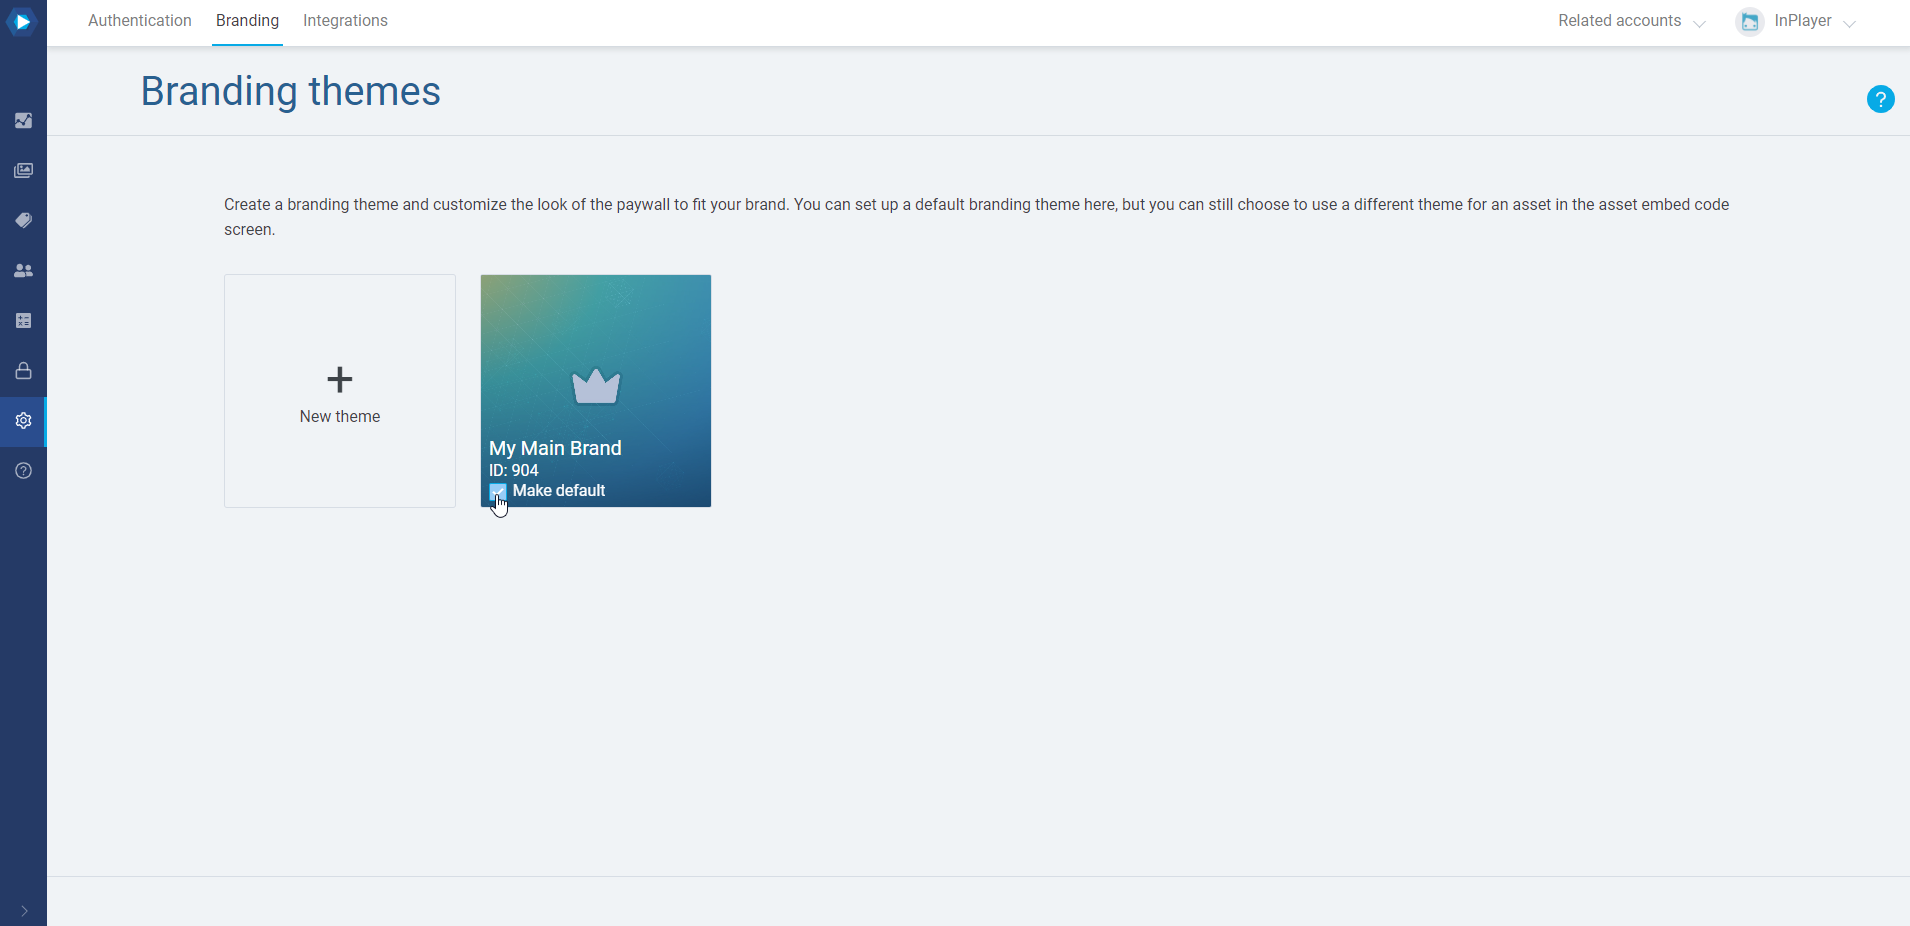
To create a new branding theme, login to your InPlayer Dashboard, and go to Settings.
Go to the Branding tab.
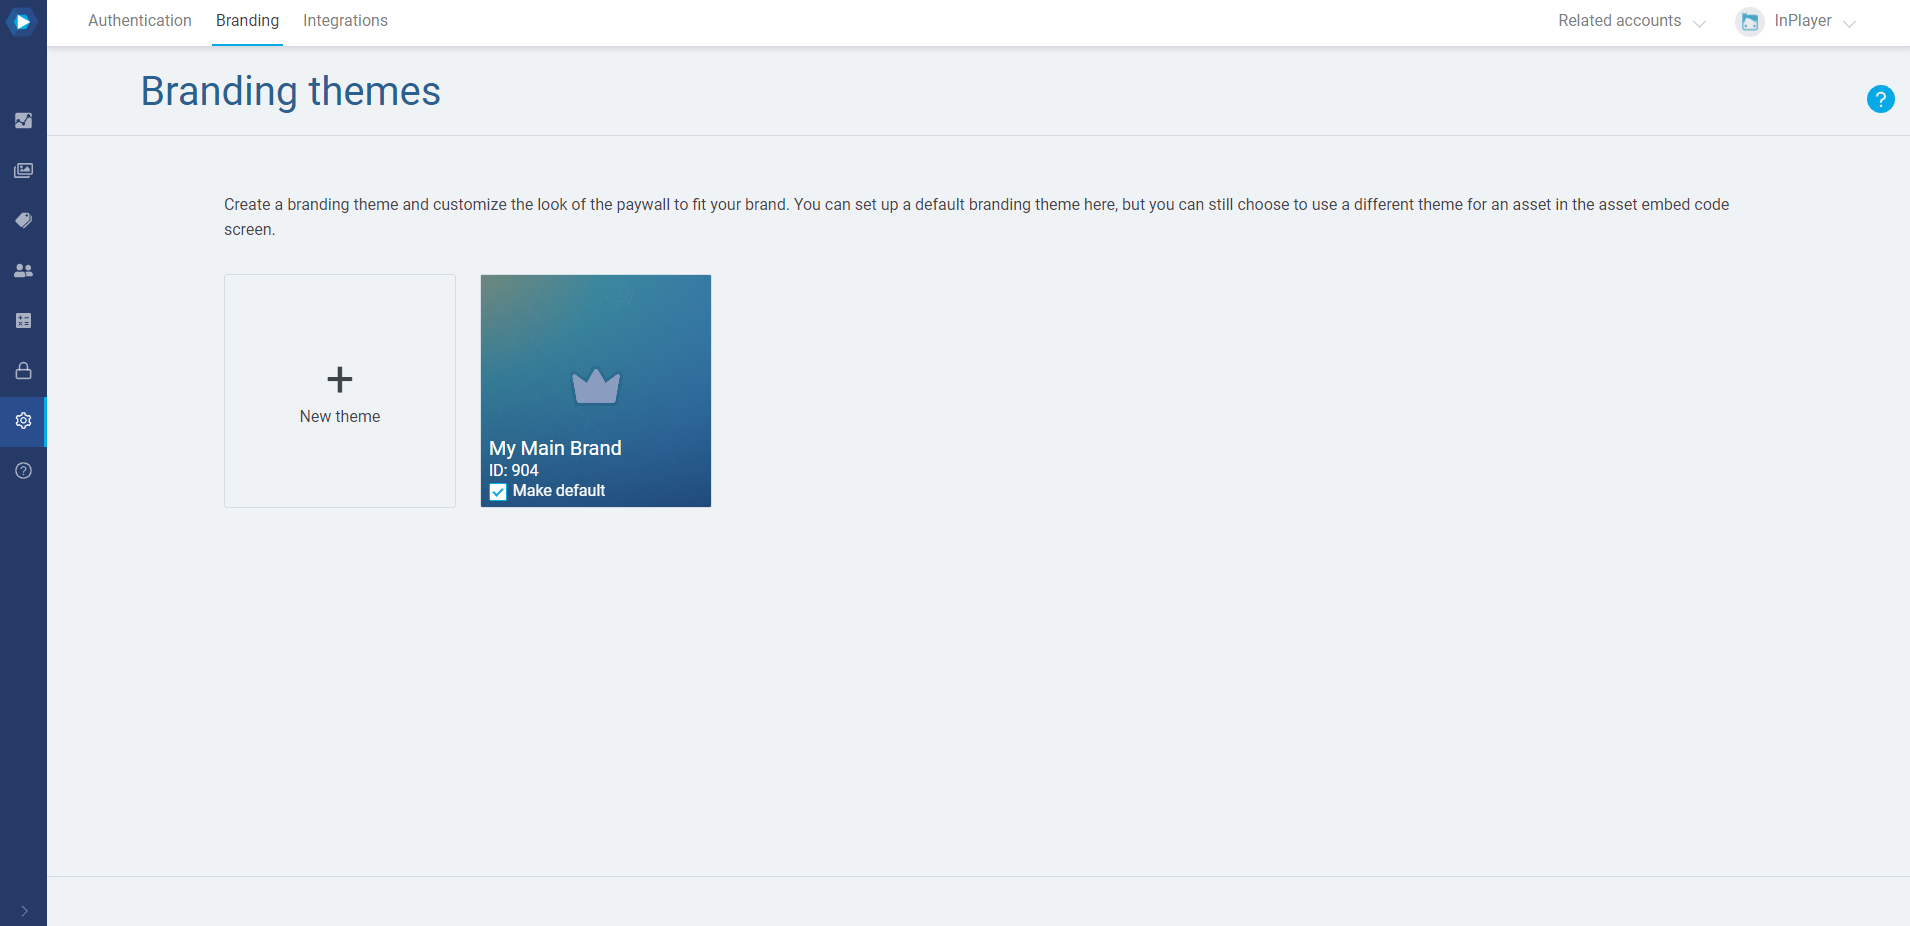
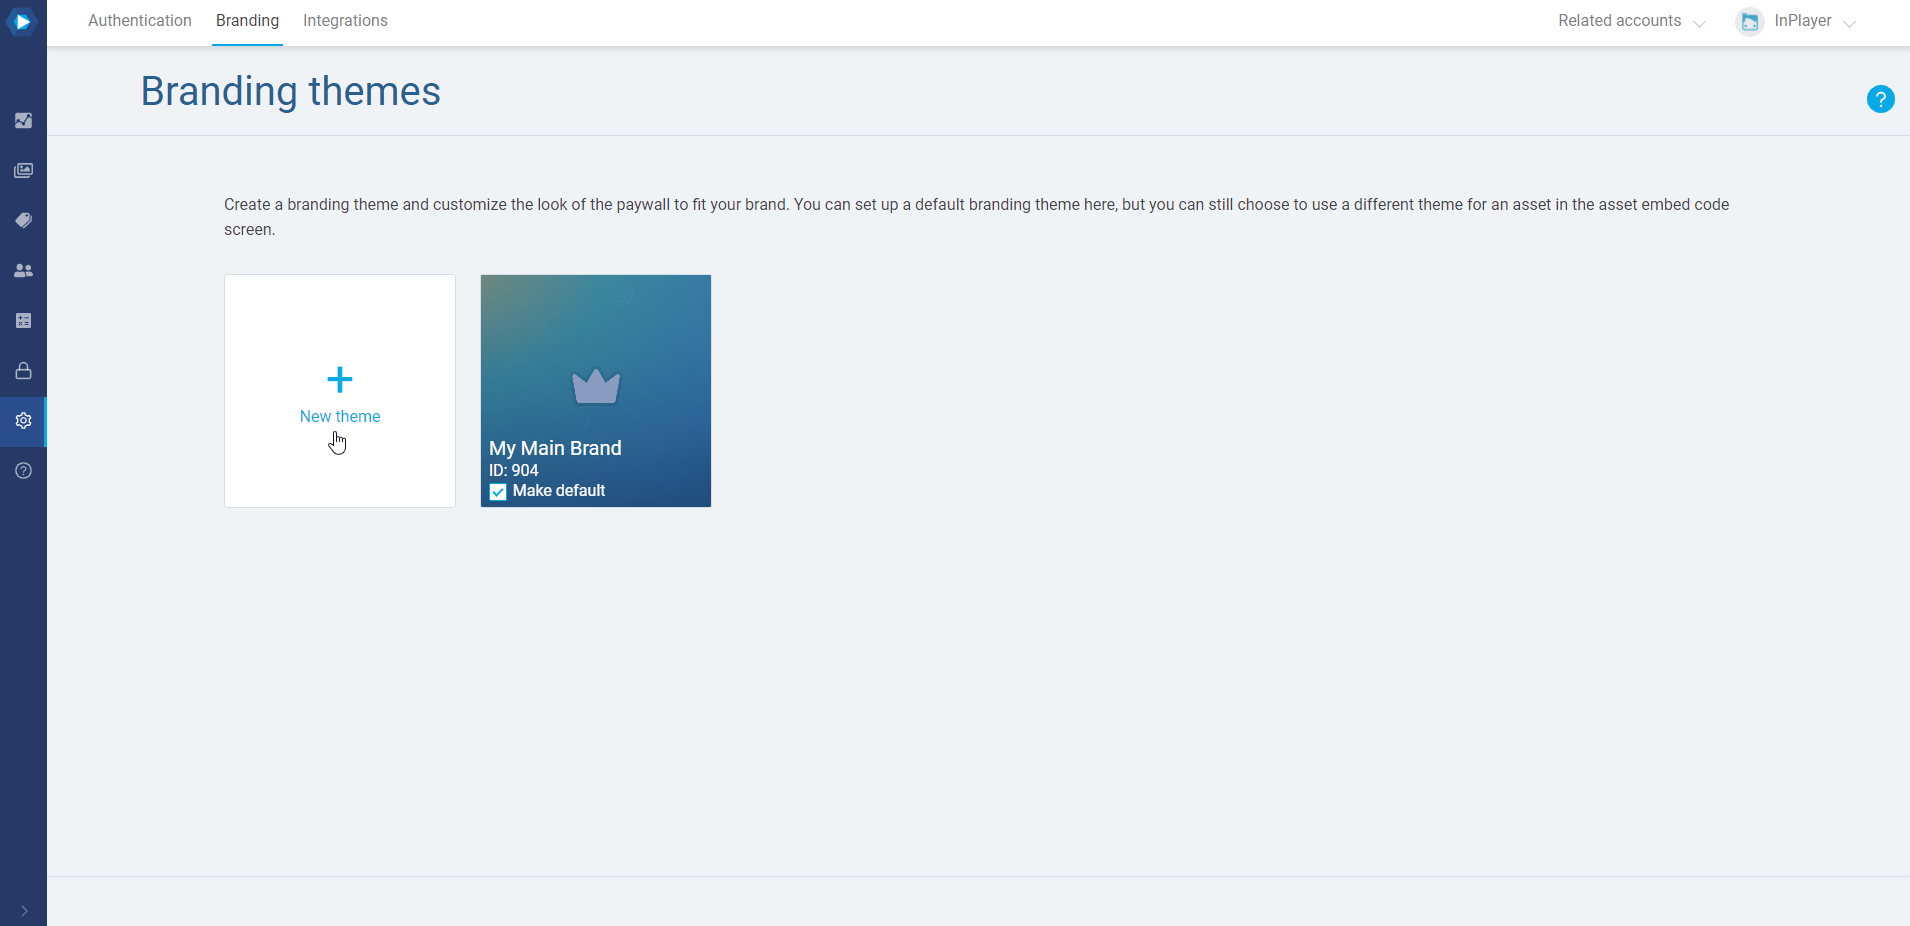
Click on New theme.
You can now start customizing your theme.
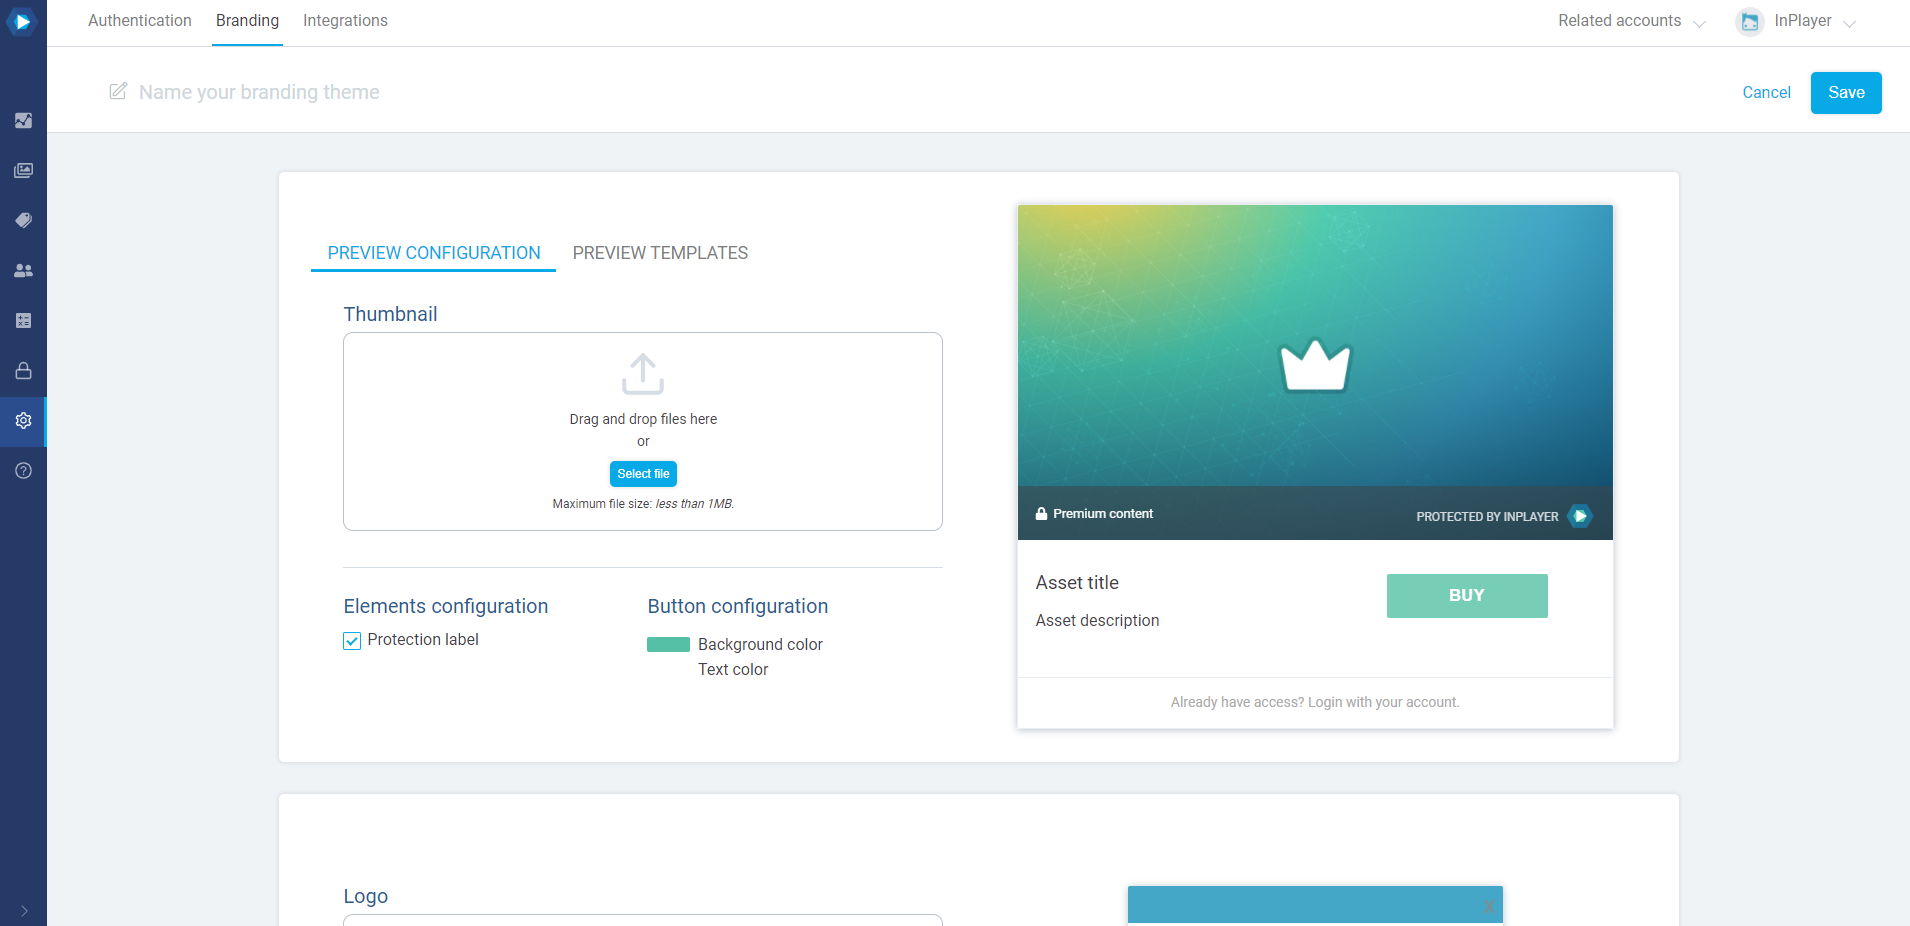
Name
First, name your theme at the top.
A name would usually be your company’s brand name or your current project’s name.
Upload a thumbnail
You can choose to upload a default Thumbnail.
This is going to be the default cover image for your assets, however, you can still set a custom thumbnail for every individual asset.
Elements and Button configuration
Here you can choose to either enable or disable the Top border and Protection label on the assets, as well as pick a background and text color for the Buy button on the assets.
The Button configuration colors under the PREVIEW CONFIGURATION tab will also be applied on the viewer account menu that appears on the page after a viewer logs into their account.
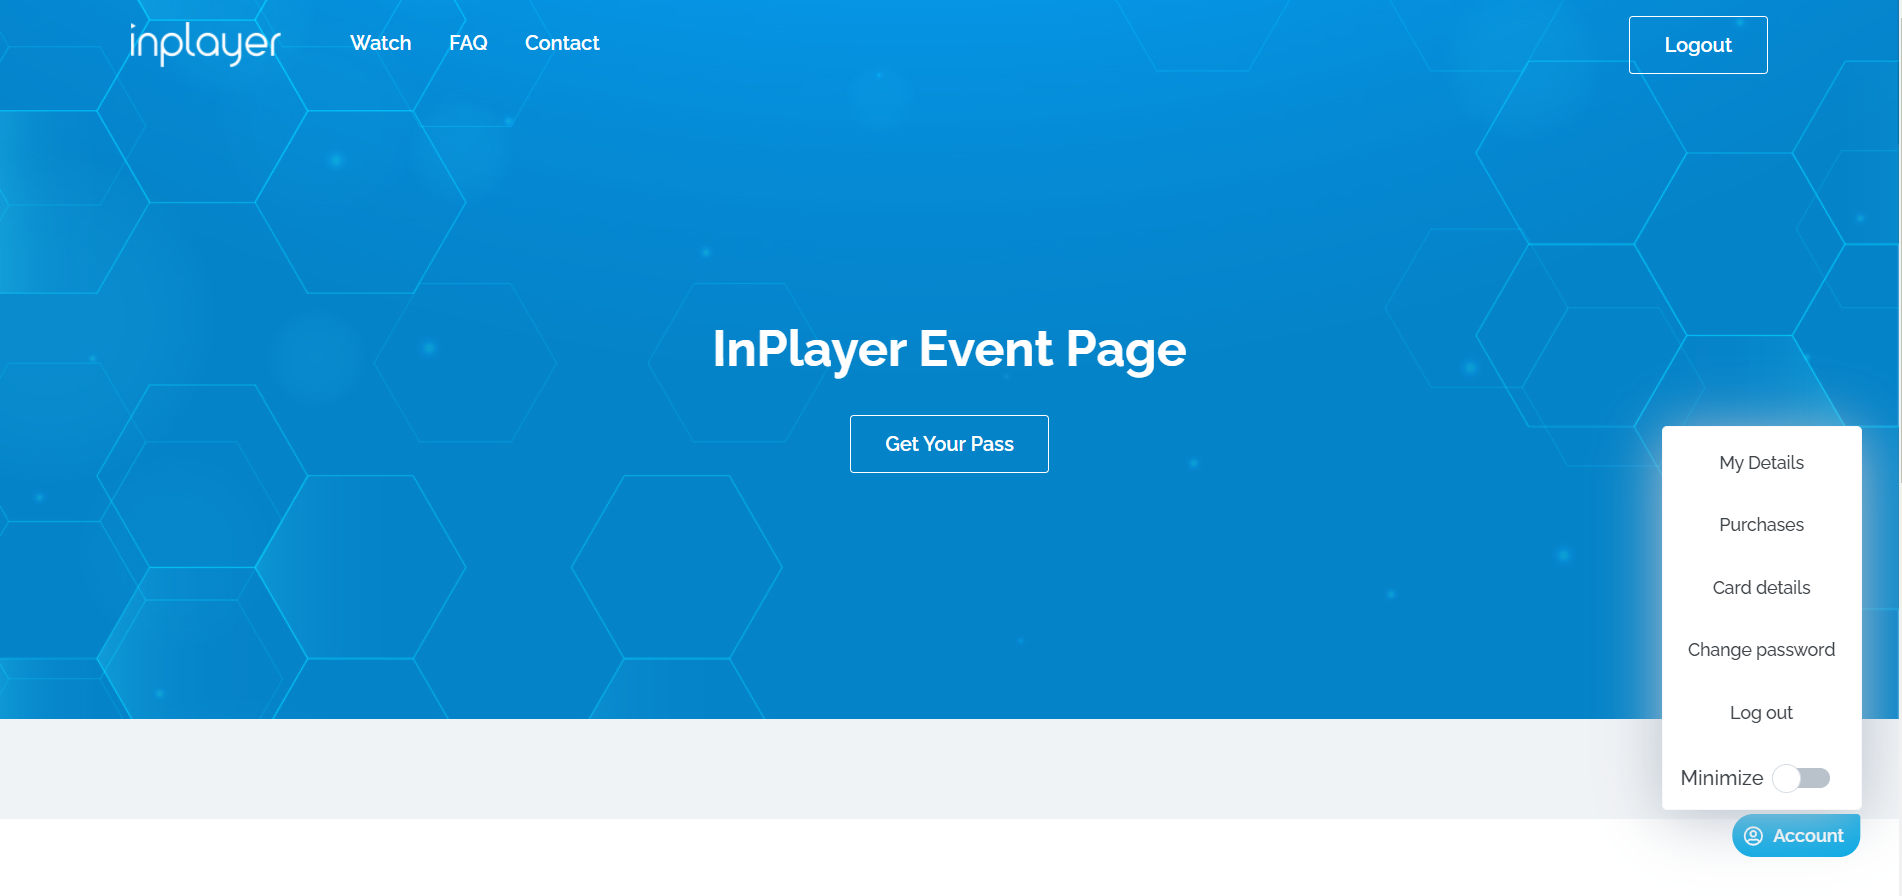
The default position of the viewer account menu is in the bottom right. You can change this to the bottom left in the Advanced embedding section of your asset’s embed code in the InPlayer Dashboard.
Preview templates
Here, you can choose the default preview style for your assets on which this branding theme will be applied.
Note that after you set a preview template here, you will also need to make sure to check the Use default branding preview template option within the Preview template settings of the assets themselves.
You can use a different preview template for an asset, even if you’ve set one up here in the branding.
Similar to the Restriction settings, a preview template that has been set up directly in the settings on the asset itself will overwrite the one that has been set up in the Branding theme settings.
Logo
Here you can upload the logo that will be shown on the paywall.
You can also set the background of the logo banner, as well as see a preview of how the logo will appear on the paywall.
If you upload a logo, but you do not wish the logo to appear on the paywall for some assets, you can disable it via the “Hide logo from branding theme” option in the Advanced embedding section of your asset’s embed code in the InPlayer Dashboard.
Paywall and Button configuration
Here you can set the paywall’s primary color, as well as the color for the buttons.
Terms and Conditions link
This is where you can insert a link to your own Terms and Conditions page that would replace the default InPlayer one on the registration screen.

This feature is not activated by default, so if you wish to use it, make sure to send us an email at clients@inplayer.com, or contact your dedicated account manager.
Enable dark mode
This feature lets you activate a dark theme for the paywall.
Once you are done setting everything up, click Save at the top right.
Editing a theme
To edit an already existing theme, just go to the Branding tab, and click on the theme you wish to edit.
This will open the theme and you will be able to modify it to your liking.
Setting a theme as default
To set a theme as the default theme, just go to the Branding tab, and tick the Make default box on the theme you wish to use as default.
Choosing a theme per asset
In addition to having one default theme, you can also create multiple branding themes, and choose which one to use for which individual asset.
To do this, just select the branding theme you wish to use while you are getting the embed code for the asset.
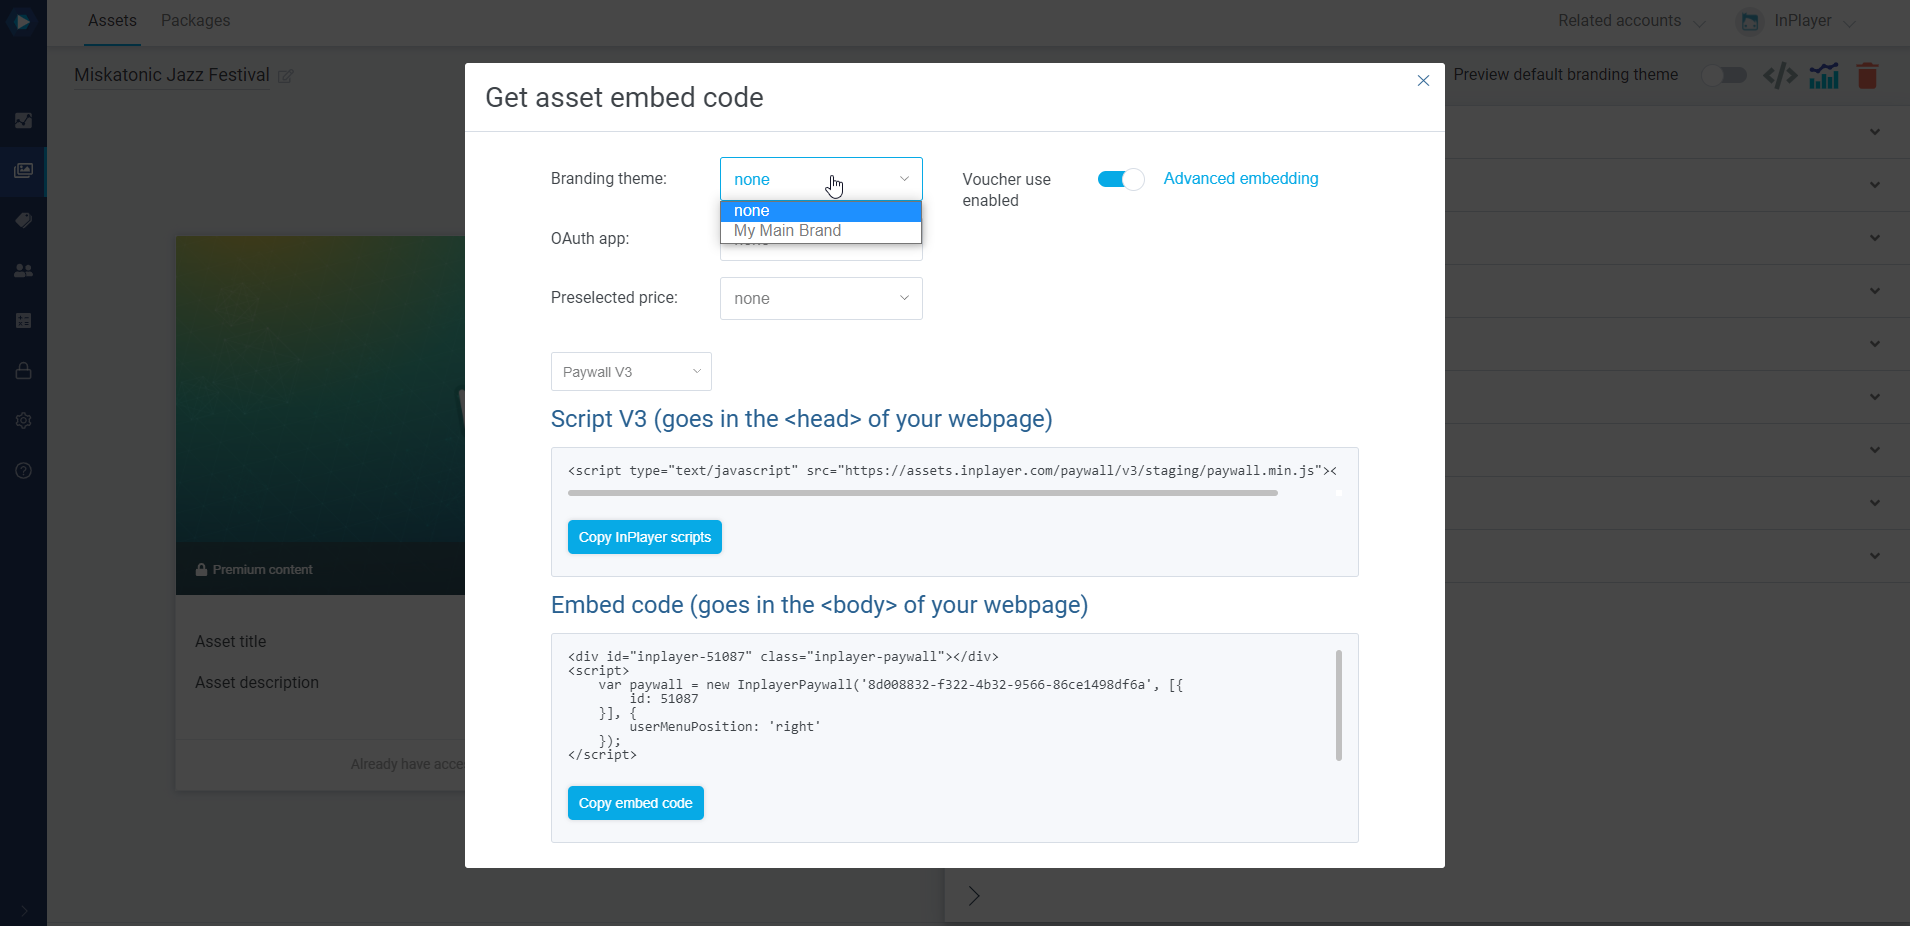
If you’ve decided to use the default theme, just select none in the dropdown menu.
This concludes our guide.
If you have any questions, don’t hesitate to contact us at clients@inplayer.com.